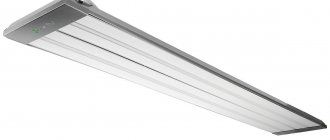
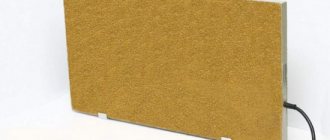
Infrared heating “heating ceiling” is used both as the main source of heat and as an additional source of heat. Ceiling electric heating can compete with any type of heating. For the heating ceiling to operate effectively, it is enough to meet two conditions :
- The distance from floor to ceiling should not exceed five meters.
- The building envelope must be insulated in accordance with the requirements of SNiP 02/23/2003.
The infrared heating system has record efficiency, is economical, requires optimal costs for equipment and installation, is characterized by speed, environmental friendliness and numerous additional advantages.
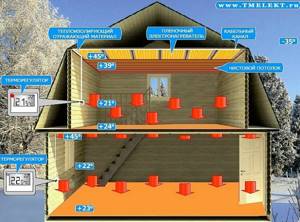
Advantages of infrared heating "heating ceiling"
- High efficiency ( 2–2.5 times ).
- Specific power consumption: 18–20 W/sq. m of heated area (if the insulation of the enclosing structures complies with SNiP 02/23/2003).
- Fire and electrical safety (maximum heating temperature of the heating ceiling is no more than 50 ° C. Connection via a three-wire system with grounding of the ZEBRA EVO-300 housing).
- Does not dry out the air (air humidity corresponds to the normal conditions of the internal microclimate of a living space - 50%).
- High degree of automation (the ability to set your own operating mode in different temperature zones).
- Intelligent and remote control (using Wi-Fi ICS thermostats or other similar ones).
- Does not spoil the interior design of the room (finishing the ceiling can be done from almost any finishing material. No pipes and radiators).
- Quick installation (100 sq. m of heated area in 2–3 days).
Types of film heater
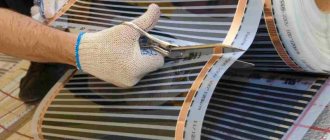
One of the main differences between film-type electric heaters is their format and size. PLENs are produced in the form of tapes of various lengths and widths. Independent correction of the dimensions of such films is impossible, therefore PLENs are produced in a wide range of dimensions, allowing you to choose the best option. The most common sizes of tapes in width are 35, 51 and 65 cm.
Films with a width of 35 and 51 cm have two zones that are free from the location of resistive elements and are intended for installation using a stapler - along the edges. Ribbons 65 cm wide have three such zones - two at the edges and one along the middle (as an option - two at the edges and between them transverse with a certain pitch).
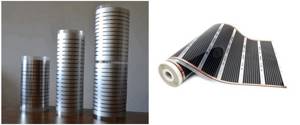
Flexible film IR heaters can be installed on both vertical and horizontal surfaces - the design of film-type electric heaters does not depend on the location of its installation, with the exception of PLEN-pictures, which by definition should be located in places of the best view - on the walls. The classification of a particular film heater as a wall, floor or ceiling device is determined only by its design location - an important factor affecting the efficiency of this IR device. Thus, a film heater on the wall, after being installed on the ceiling, in everyday life turns into a ceiling heater.
Let's consider options for placing PLENs in premises in order of increasing efficiency of their use.
Wall arrangement of film heaters
Placing PLENs on the wall is the least effective due to the limited sector of influence of infrared radiation on the enclosing structures - most of the infrared rays heat the surface of the wall opposite, with almost no effect on the floor and ceiling.
Film devices permanently mounted on the wall are effective as the main means of heating only if the opposite base has a significant area - then the heat transfer from its heated surface into the air will be quite noticeable.
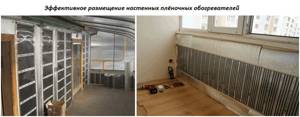
If the area of film heaters installed on the wall is not significant, and the base, on the contrary, also has window openings, then the efficiency of such an IR heater will be low. But small-area stationary wall-mounted film heaters are convenient as an additional means of heating - to increase the comfort of the temperature regime of a certain place or zone in the room.
Operating principle of infrared heating ceiling
The basis of the “heating ceiling” heating system is film electric heaters with the following linear dimensions:
- canvas thickness – up to 1 mm;
- canvas width – 0.5 or 1 m;
- blade length – from 0.25 to 7 m.
Such electric heaters can be freely installed in almost any ceiling configuration. Operating temperatures at maximum load do not exceed 50 °C, and the average specific power of heaters is 150–220 W/sq.m. m .
The operating principle of infrared heating is extremely simple. When electric current is passed through a film heater, the heaters begin to emit thermal radiation. Infrared radiation from the surface of the electric heater affects objects and building envelopes, quickly heating them.
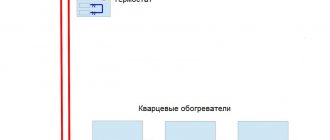
The heating ceiling is controlled by thermostats; they are installed in all rooms that the system heats. The thermostats Orbis Clima ML, Cewal RQ10, and programmable E 51.716 performed well. They react sensitively to temperature changes within one degree, turning off or supplying power to electric heaters.
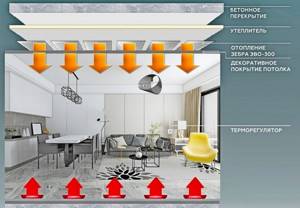
The heating ceiling is absolutely safe and does not require control by the owners, but its most important advantage is different. Traditional heating operates in stages, transferring energy first to the coolant, then to heat exchangers (batteries), after which it heats the air in the room - and only then directly to the object being heated. At each stage, energy is lost, which means you have to pay more. Infrared heating acts directly, using every watt efficiently.
Our company works with several types of film heaters that operate on the same principle. We test in practice the effectiveness and performance of each material, and select the most reliable and profitable from the point of view of operation. We recommend using the following types of film electric heaters.
- Ceiling heater ZEBRA EVO-300 (development, Chelyabinsk).
- Heating film TM (manufactured in South Korea).
Advantages
This heater has a number of advantages:
- It allows you to create a heating scheme for rooms by zones or covering the entire space.
- Has a low price.
- Makes it possible to save up to 40% energy compared to other heating systems.
- An infrared film heater located on the ceiling does not take up any useful space.
- It practically does not reduce the height of the ceilings.
- It features quiet operation and high efficiency, and also heats up instantly.
Experts believe that an IR film heater is the most effective way today to efficiently heat any room for its intended purpose.
Heating a home with electricity is considered the most expensive, but if other types of fuel are not available, it is worth considering the most popular types of heaters powered from an outlet. Infrared ones are considered the most economical. Their efficiency is much higher due to a different operating principle. Unlike conventional electric reflectors or radiators, infrared ones heat not the air, but the surrounding objects: the floor, walls, furniture, people. Heated objects release heat evenly, creating a feeling of comfort and dryness.
Infrared heating “heating ceiling” – ZEBRA EVO-300
The film ceiling heater ZEBRA EVO-300 was developed in Chelyabinsk and is constantly being improved. This is a modular type heater, which gives advantages during installation. The film electric heater is sold in two versions: in a box (50 segments with an area of 15 square meters of material in a single tape) or in sections of standard sizes ranging from 0.6–6 meters in length. The Chelyabinsk heater ZEBRA EVO-300 will require a significantly smaller area of electric heaters - only 60% of the heated area.
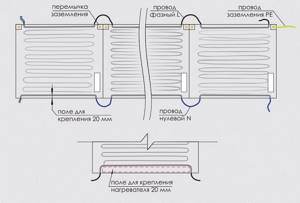
Technical characteristics of ZEBRA EVO-300:
- Rated voltage Un – 220 V, 50 Hz;
- Maximum power – 170 or 220 W/sq.m;
- Max. heating temperature ZEBRA EVO-300 45-50°C;
- The thickness of the canvas is no more than 1 mm;
- Length – from 0.6 to 6 m;
- Width – 0.5 m.
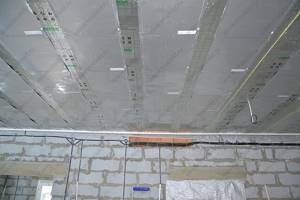
Each EVO-300 segment is a full-fledged heating segment that operates efficiently from a 220 V electrical network. Infrared heating based on ZEBRA EVO-300 can become the main source of heat for any room. Heating is carried out with minimal energy consumption and extremely quickly, which is facilitated by the unidirectionality of the radiation of the heaters . The manufacturer's warranty for ZEBRA EVO-300 is 10 years, the estimated service life is at least 25 years. More details in the product review – ZEBRA EVO-300, ceiling.
What will we need?
To quickly install an infrared heater on the ceiling or wall of a room, we will need:
- a screwdriver, a drill, and in some cases a hammer drill (useful for creating holes for fastenings);
- pliers (to make the wires shorter);
- indicator screwdriver (with its help we will determine zero and phase);
- pencil and tape measure (to mark the places of fastenings on the wall);
- metal detector (this is not necessary, but it is desirable - the detector is needed to quickly find a power line in the wall).
Additional materials that will definitely be useful:
- three-core copper cable with a cross-sectional area of 2.5 square millimeters;
- wall mounts for the heater (since only brackets for the ceiling are included with the device);
- dismountable electrical plug.
Go through the list again and make sure you have everything you need. Is everything in stock? So, let's get down to business.
Infrared heating “heating ceiling” – heating film TM
Structurally, the heating film TM is thin carbon strips connected by copper busbars, laminated on both sides with polyester. This ensures the material is waterproof and protected from electrical damage.
South Korean electric heaters have all the advantages that a heating ceiling has. At the same time, the cost per square meter of material is one of the most favorable on the market, which provides film electric heaters with additional popularity when organizing a heating system. TM film warranty is 10 years. More details in the product review – Heating film TM.
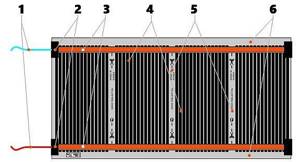
Appearance of the heating film TM:
- Power wires;
- The connecting point for soldering the power wires to the copper bus, which is insulated with bitumen tape;
- Copper busbars;
- Carbon heater strips;
- Special strips in polyester film for cutting the material (in increments of 200 or 250 mm);
- Mounting strips for attaching TM heating film.
Technical characteristics of the heating film TM:
- Rated voltage Un – 220 V, 50 Hz;
- Maximum power – 150 or 220 W/sq.m;
- Max. heating temperature of the heating film TM – 45-50 °C;
- The thickness of the canvas is 0.4 mm;
- Length – from 0.2 or 0.25 to 7 m;
- Width – 0.5 or 1 m.
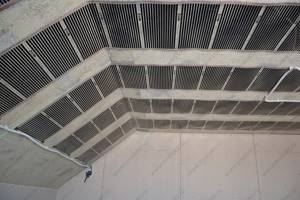
We are often asked which electric heater is better, which one is recommended in a particular case (home, factory, warehouse or office). We answer. All materials that we recommend for use for heated ceilings are equally reliable and effective.
But still, the ZEBRA EVO-300 modular heater has significant advantages (case grounding, directed heat flow, does not support combustion) not only over South Korean film, but also over Russian similar products for heating ceilings!
Film electric heater device (PLEN)
All IR heaters are divided into high-temperature short-wave and low-temperature long-wave. Film-type heaters belong to the second group.
Visually, a film IR electric heater is a flexible sheet or strip of a certain format. If the model is not decorative (a picture heater), then the transparent outer layers allow you to see the location of the component elements.
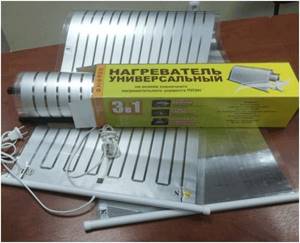
Important! PLEN is an abbreviation meaning “film radiant electric heater”, and not a registered trademark.
Structurally, any type of film-type household heater includes the following components:
- resistive type heating elements - made of carbon-containing materials or metals, tape or plate, capable of heating up to 35-55 degrees when an electric current passes through them;
- heat distributing base - one or two layers of thin aluminum foil on which resistors are mounted to evenly distribute the heat from their heating over the surface of the screen;
- thermostat with temperature sensors;
- two protective layers of laminated film with a melting point of up to 210 degrees, between which there is foil with heating elements;
- cable for connecting PLEN to the network.
The total thickness of the heating sheet does not exceed 1.5 mm.
Schematically, PLEN can be depicted as follows (the thermostat is installed separately):
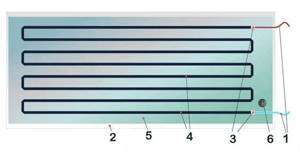
1 – contacts for connecting the device to a 220 V network;
2 – flexible two-layer shell made of polymer film on a supporting lavsan or polyester base;
3 – points of industrial, carefully insulated connection of the supply wire with the contacts of the heaters (independent cable replacement is not provided);
4 – heating resistive elements (tape or separate plates connected by conductors);
5 – aluminum foil;
6 – hologram to protect the heater from counterfeit production.
And finally
- Thermoregulators are either electronic or mechanical. The second option is more accessible and easier to use. The first is modern products with many more options that allow you not only to save on heating, but also to make it fully automatic. What do we recommend choosing? Of course, modern electronic products, with the help of which system management becomes a much more enjoyable and efficient process.
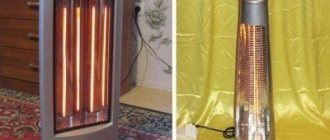
- Infrared heaters have different design variations. This is convenient and aesthetically pleasing, because the buyer will always be able to choose a device that best matches the design of his own home. So you can purchase both a classic white version of the unit (say, for a bathroom), and a device with a “wood” design (for rooms where the walls are decorated with wooden lining).
Traditional heating based on the convection effect, despite its popularity, has many disadvantages. Stratification of air masses, uneven heating of the room by volume, creation of convection currents and drafts, significant heat loss, slow heating are the most typical examples.
It is not surprising that many are beginning to think about how to install an infrared heater on the ceiling, because this particular technique is considered the most advanced, since it is devoid of all the above-mentioned disadvantages and is characterized by economical energy consumption and durability.
Main process
Hanging the case
First you need to determine the installation location of the infrared heater in the house (or apartment). As we said above, the housing can be placed both on the ceiling and on the walls, depending on the individual preferences of the owners.
The first thing you need to do is mark out the mounting locations yourself. To do this, use a tape measure to measure the same distance from the ceiling to the selected area. It is also recommended to use a building level, with which you can level the brackets in a horizontal plane.
After marking, proceed to drilling. If the ceiling (or wall) is made of wood, drill holes with a drill. If you have to deal with concrete, you cannot do without a hammer drill. You need to drive dowels into the created holes and screw in the brackets, after which you can install the infrared heater in its place.
Please note that the design of the unit varies. Some products have guides that are fixed into brackets. A simpler option is chains attached to the ceiling (special holders attach to them). Also on the market you can see infrared heaters on a leg, which are simply placed on the floor.
Required tools and materials
In order to quickly and easily install an infrared heater on the ceiling, you will need the following tools:
- Drill or screwdriver (drill holes for fastenings).
- Pliers (for shortening wires).
- Indicator screwdriver (determine phase and zero).
- Metal detector (optional, used to search for wiring and metal objects in the wall, so as not to accidentally hit these objects when drilling holes. You can do it yourself using improvised means.
- A simple pencil and a construction tape (mark the mounting points on the wall).
As for additional materials, to install and connect an infrared heater you may need:
- Demountable electrical plug.
- Three-core copper cable, cross-section 2.5 mm2.
- Wall mounts (purchased as needed, as only ceiling brackets are included in the kit).
Having collected all the necessary list of materials and tools, you can proceed to mounting and connecting the heater..
