The question of how to repair household heaters of various types is asked quite often, since these devices are used everywhere and are not insured against breakdowns of various kinds.
Modern heaters, whether convectors, infrared or oil, are made according to the same principles, but can differ radically in layout and engineering solutions. Let's consider a certain universal scheme for dealing with problems, focusing on the key features of individual classes of devices.
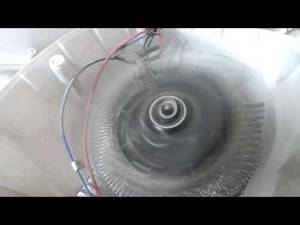
The blades don't spin
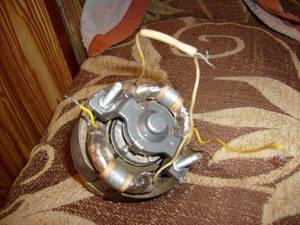
If the fan heater works, but the fan does not spin, the most likely cause of the malfunction is that the motor has stopped working. What to do in this case? Test the part with a multimeter and check its insides. Perhaps the bearings are simply worn out and should be replaced. We talked about how to use a multimeter in the corresponding article!
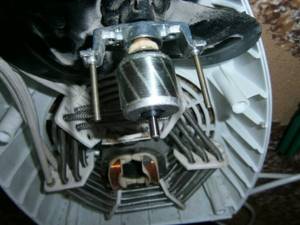
Another possible breakdown is severe dust contamination, as a result of which the fan does not spin or often turns off. Try repairing the motor yourself by wiping it with a rag and dropping a little engine oil between the moving and stationary parts. Did not help? We replace the electric motor that has broken down with a new one with the same characteristics.
Recommendations
Speaking about recommendations for repairing heaters of this type, we should give some useful advice from professionals.
- Under no circumstances should you pour new oil into old oil if a leak in the heater has previously been detected. A number of users often neglect this point, which is why the heater not only fails, but can also cause injury to the people who operate it.
- You should also not carry out repairs while the device is plugged into an outlet. Doing so may result in electric shock or burns due to the device becoming too hot.
- Do not use low-quality components when replacing any parts. It’s better not to save money and buy a part from a well-known brand that will actually last a long time.
- Do not neglect the services of a specialist if you are not sure that you can repair such a device yourself.
To learn how to troubleshoot an oil heater, see the following video.
Features of repairing a heater with ceramic heating elements
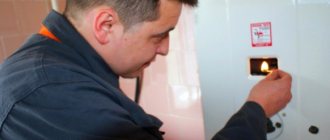
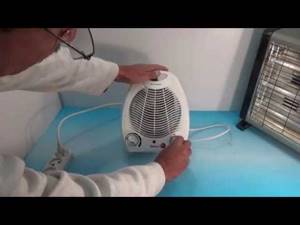
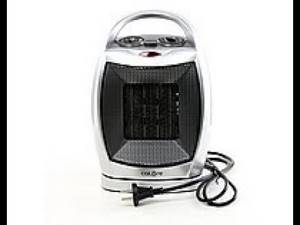
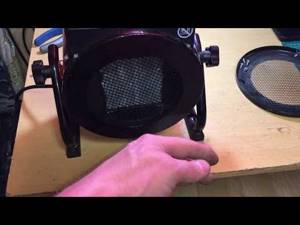
They brought me a seemingly ordinary fan heater, such as Timberk TFH T15DDL, for repair due to a decrease in heating efficiency.
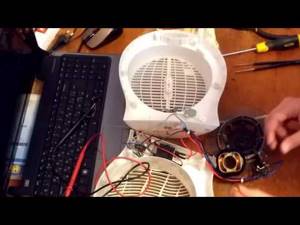
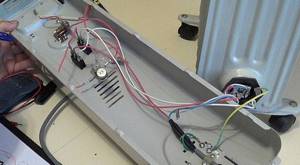
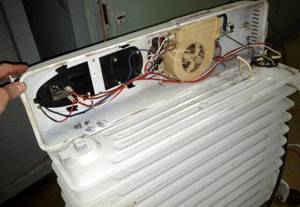
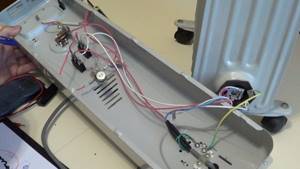
When connecting the heater to the network, it was discovered that the fan was weakly blowing air that was slightly warm. The heating mode switch and temperature controller functioned normally. To find the problem, I had to open the heater. The first step was to remove the dust that had accumulated in the radiator of the heating elements. The fan began to blow harder, but the heating of the air remained weak.
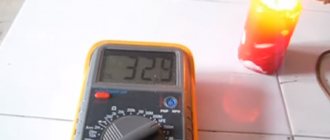
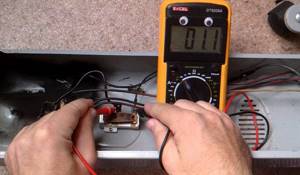
Measuring the voltage at the terminals of the heating elements showed a value of 220 V, which indicated the serviceability of the electrical circuit. The measured current consumption of the fan heater in maximum heating mode was 1.1 A instead of the required 8 A, which indicated a malfunction of the heating elements.
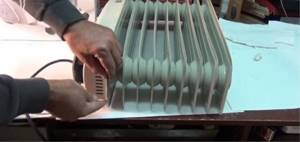
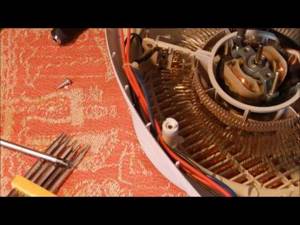
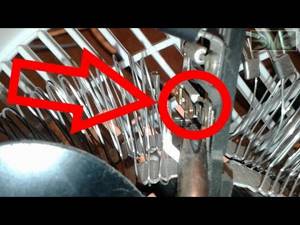
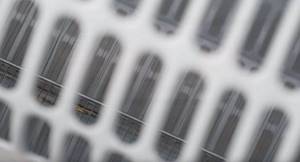
This was my first time encountering such a heating element. It turned out that in this fan heater the heating element consists of 14 metal-ceramic plates sandwiched between eight aluminum radiators. This entire package is inserted into a rectangular frame made of heat-resistant plastic and is held in place by four latches. Aluminum radiators perform several tasks at once - they hold ceramic heaters, remove heat from them and supply power voltage to the metal-ceramic plates.
Attention, due to the fact that the supply voltage is supplied through an aluminum radiator, touching it while the heater plug is inserted into the power outlet is dangerous to life!
For better heat dissipation and electrical contact, the sides of the metal-ceramic plates pressed to the radiator are coated with electrically thermally conductive paste.
Heating metal-ceramic plates are radioelements called posistors. The operating principle of a posistor is that its resistance depends on the temperature at which it is heated. The more the posistor heats up, the higher its resistance, and according to Ohm’s Law, less current will flow, and as a result, the heater will generate less heat.
Thanks to this property, according to the developers of metal-ceramic heating elements, when the temperature reaches 300°C, balance occurs, the resistance of the posistor increases to such a value that the temperature no longer increases. This ensures the safe continuation of operation of the fan heater, even when the fan blowing air is broken and does not rotate or is clogged with dust.
Measuring the resistance of the heater sections with a multimeter showed a resistance of about 1000 Ohms, instead of the proper 112 Ohms. Surprisingly, it turned out that the resistance is not the same for all ceramic-metal plates. This could only happen if the cermet plates overheated, which, based on the principle of their operation, should not happen. The conclusion suggests itself that the ceramic heaters were installed of poor quality and to restore full functionality of the fan heater they will need to be replaced.
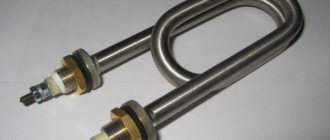
To repair a fan heater, you can buy a ready-made heating block, a ceramic heater type MZFR-J-1800W-220V, designed for repairing fan heaters. Its appearance, overall dimensions and connection diagram are shown in the photograph above. MZFR-J-1800W-220V costs about $10.
Buyer mistakes
When choosing products, buyers make the mistake of not paying attention to the thickness of the anodized coating of the heat-radiating plate, indicated in the accompanying documents.
It becomes covered with a “web” of cracks with a thickness of less than 25 microns, and budget models with layer thicknesses of less than 15 microns last 2–3 years, turning into a regular stove after the layer burns out. It is preferable to choose models with a protective mesh or screen if there is a possibility of subsequent contact with the electrical appliance by children and animals.
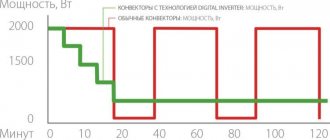
Infrared household appliances have undeniable competitive advantages. While oil radiators and convectors heat up after being plugged in after 30 minutes, the thermal effect from infrared units is felt almost instantly. Despite the higher cost compared to analogues, infrared product items will be a profitable purchase for those buyers who value high efficiency, directivity and speed of heating, and quiet operation.
how to repair a fan heater.
| Fan heater how it works minor repairs |
| How to disassemble and repair a fan heater with your own hands. |
| Tags: |
| Fan heater repair |
| He showed how a fan heater works. |
| Tags: |
| How to repair a fan heater RESANTA TVS-1 |
| I got the fan heater here: . Fan heater RESANTA TVS-1 is an excellent device... |
| Tags: |
| The fan heater only blows cold - REPAIR. |
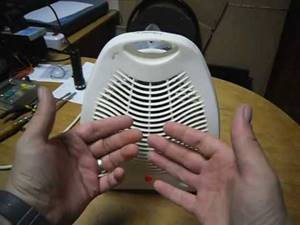
| These are not “bazooka hands”, but fan heater repairs! |
| Tags: |
| Fan heater repair |
| Repairing a fan heater with your own hands is very simple, replacing the thermal fuse, lubricating the electric motor... |
| Tags: |
| Simple fan heater repair. |
| Hi all! In today's video you will see a standard fan heater breakdown and its simple repair |
| Tags: |
| Fan heater does not work - repair |
| We repair heating fan laor. thermal fuses: Useful: ... |
| Tags: |

| NOKASONIC fan heater repair. |
| Repair of NOKASONIC fan heater. |
| Tags: |
| The fan heater "neighed" (treatment) |
| I have, and you also have, such a small household heater with a fan. He will do it for you soon... |
| Tags: |
| Ceramic fan heater Calore FHC 15R Repair does not blow heat |
| Donation support private 4149 4390 0686 1656. |
| Tags: |
| DIY fan heater repair |
| Repair of fan heater malfunctions such as “not spinning”, “spinning but not heating”, “spinning and beeping... |
| Tags: |
| Fan heater repair. |
| A fan heater was brought in for repairs, it worked at half capacity. It turned on and regulated the air flow... |
| Tags: |
| Heater repair (Wild Wind) |
| The video shows the most common and typical breakdown of air heaters (fan heaters... |
| Tags: |
| Fan heater repair |
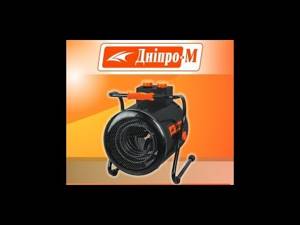
| Review of repairs and diagnostics for a fan heater/heat gun from Dnipro-M. If you are interested... |
| Tags: |
| Fan heater repair / Dnipro-M heat gun repair |
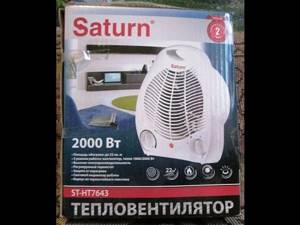
| disassembly, troubleshooting and repair results of the Saturn ST HT7643 fan heater. |
| Tags: |
| Saturn fan heater repair |
| Hi all! My name is Alexander Zhukov, today I will be repairing a fan heater! Subscribe... |
| Tags: |
| Fan heater repair! |
| One of the reasons for poor fan heater performance. In our case, the contacts of the thermal relay were oxidized. |
| Tags: |
| If the fan heater is unstable |
| We brought an Elbee fan heater for repair with the problem that it only blows cold air. After opening... |
| Tags: |
| Repair of Elbee fan heater (blowing cold air) |
| Fan heater Comfort. Technical prevention ka. Cleaned, oiled and painted. |
| Tags: |
| Soviet fan heater “Comfort 4M” Do-it-yourself prevention” rel=”spf-prefetch |
Types of heaters
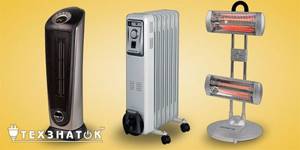
The variety of modern heaters can amaze even a specialist in this field. However, the most popular are:
- oil;
- ceramic;
- infrared.
Oil-based models are considered classic heaters. Sections of these devices are characterized by a ribbed design. Externally, they are very similar to central heating radiators. In addition, they have a similar operating principle. Oil is supplied through the pipe to the heater, which transfers heat to the section. Then the oil flows back to the heating element.
Often the control panel of such a device includes only three keys. The first two are responsible for turning on a separate heating element, the third (wheel) serves as a temperature regulator. These heating elements differ in power, which allows expanding the adjustment possibilities.
The main advantages of an oil heater include:
- heating the air through convection;
- high mechanical strength;
- impeccable environmental cleanliness;
- democratic price.
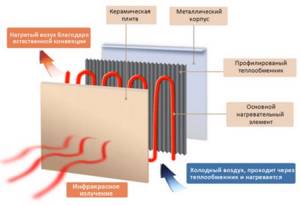
The next type of work - ceramic heaters - is based on the principle of forced convection. The main feature of these devices is the material of the heating element, which is made of ceramic. A ceramic heater consists of many tiny particles through which air passes. Its main elements are the heating element itself, the fan, the blind motor, the control unit (electronic) and the control panel.
The main advantage of ceramic elements lies in the very large heat transfer area. Also, it is worth noting the almost unlimited service life, the ability to maintain the volume of oxygen in the room and high safety. Some models have the ability to ionize air.
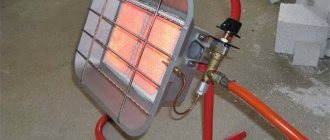
The main component of this equipment is a quartz infrared tube. It is able to heat surrounding objects, which subsequently “throw” heat into the room. Essentially, all objects become sources of heat. Maintaining the required temperature level is carried out using a thermostat. When a specific temperature is reached, the device turns on or off.
Radiator structure
It is possible to carry out a repair that has broken down when its structure is known. It is like this:
- A sealed metal container in the form of a battery or accordion
. In the middle of it there is technical oil. It fills 90% of the capacity. The rest is air. It is necessary to compensate for oil expansion due to heating. If the entire internal space of the radiator were filled with oil, the container would simply burst. - heating element
. It is located in the middle of the main part of the radiator. It is always mounted at the bottom of the container. It heats the oil. During heating, oil circulates through the radiator. Most manufacturers install a double heating element. It has two spirals. The heating element is fixed so that all its contacts are on the outside of the tank. Can be built-in or removable. - Thermal fuse
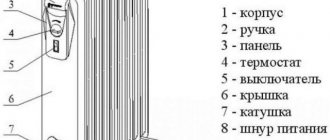
. It is located near the heating element above the heating element. The task of the fuse is to measure the oil temperature and, if it becomes critical or the oil has leaked (then the housing becomes very hot), turn off the heating element. It is an auxiliary safety element, so it very rarely interferes with the operation of the device. There are two types: bimetallic and wire. The first one is more reliable. - . It can be found at the top of the heater. It is designed to regulate the heating of the radiator. The main part of this element - a bimetallic plate - is in the heated air and reacts to changes in its temperature. There are usually ventilation holes above it. There are the same ones at the bottom of the casing, which is attached to the main metal container.
- Two switches
. Each of them is connected by phase, neutral and ground wires, which extend from the heating element. Each of them is connected to a wire from a thermal relay. Near the switches there is a light bulb that lights up when the heating element is operating.
Kinds
Film heaters come in three types:
- floor;
- wall;
- ceiling
Therefore, they are not suitable as the main type of room heating, but as an additional type they are used everywhere.
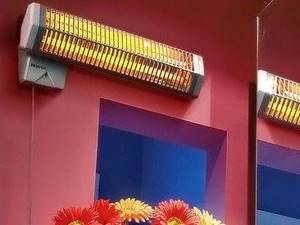
Ceiling film infrared heaters are more efficient. Infrared radiation is directed downward and heats objects, from which the heat spreads evenly throughout the room. They can be mounted on almost any type of ceiling covering and their installation does not cause any additional inconvenience, as it may seem at first. In addition, the undoubted advantage of such a heater is the absence of the risk of accidental damage.
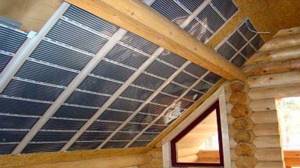
If you are wondering how to choose a film heater for your dacha, then the ceiling option is most suitable for this purpose.
- Firstly, the absence of apartments on top eliminates the possibility of flooding and damage to such equipment.
- Secondly, a large heating area will not require the use of additional heating systems.
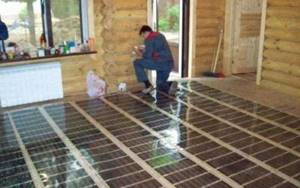
The floor covering can be installed under any final covering. The main advantage is the lack of impact on household appliances. The disadvantage is that it is undesirable to be under heavy furniture due to the possibility of damage.
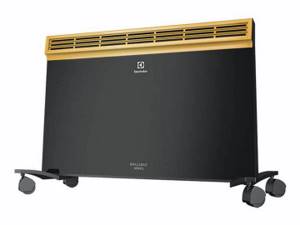
Convector

The operating principle of the convector is based on a simple law of physics.
Cold air naturally enters the device from below. After this, heating occurs inside the housing and, already heated, it exits through the upper grilles (at an angle) into the ceiling. The case itself does not heat up as much as in radiator models. It is the air that heats up.
The truth is that the room does not warm up immediately. Unless there is an additional fan built inside. If you come home from work to a cold apartment and turn on the convector, then the floor of the house will be cold for a very long time.
Moreover, at a small height from the floor there will also be a layer of cold air. The warmest place in this case is the ceiling. If there is even a small draft, it will be quite difficult to warm up the walls and furniture in the room.
Almost all convectors are wall-mounted, but some are also equipped with legs.
Remember the rule that the lower the convector is installed, the more efficiently it will work out its kilowatts.
The wall-mounted installation option looks very aesthetically pleasing, but moving it from the bedroom to the living room or kitchen will no longer work.
The main heating element of a convector is a spiral. Therefore, such devices also burn oxygen.
But recently, heaters with a tube consisting of a large number of fins have increasingly begun to be used.
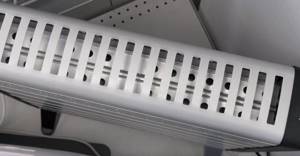
Thanks to this, even during prolonged operation, their body does not heat up more than 90 C. And for many models, the temperature is even less than +55-60 degrees.
Such options will be a good solution for families with small children.
When installing heating in a bathroom, make sure that the model has a minimum degree of protection IP24.
The first digit indicates that the device is protected from the penetration of solid objects larger than 12 mm into it. For example, the fingers of an adult.
The second number (4) indicates that the heater is protected from splashing water from any direction.

How much it will actually cost you to heat your home with convectors as the main source of heat can be found out from this video:
Oil heater malfunctions and repairs
stops heating
Many problems can be easily resolved on your own.
having basic skills in repairing electrical appliances.
An exception may be a faulty heating element.
, most often tightly rolled in the heater body. It is quite possible to remove it, but it will not be possible to put it back in place. Even if the heater is equipped with a removable heating element, it will be difficult to ensure the tightness of the device when replacing it.
Typically, malfunctions that occur when a heater breaks down appear in more accessible places. The most vulnerable point
The device is a cord, so its integrity should be checked first. If the design of the plug allows it to be disassembled, then you need to check the junction of the cord cores with the pins of the plug.
If the plug is working properly
the next step should be to check the condition of the cord itself, as well as its connection to the heater’s power supply. To do this, remove the decorative cover of the device panel and use a tester to check the serviceability of the cord. If it is damaged, the cable is replaced with a new one.
If the cable is OK
, then the fault may be hidden in the state of the power supply contacts. The contacts may be coated with carbon deposits and weakened.
In this case, the contacts are cleaned of carbon deposits with sandpaper.
, and loose contacts are carefully tightened.
The thermostat is located in the same place. If darkening is visible on its contacts, then they also need to be cleaned. The bimetallic plates in the thermostat may be faulty
. If damage is detected, the thermostat is carefully disassembled and the plates are replaced with new ones.
If the oil cooler belongs to the energy-saving
, then its design contains a thermostat that ensures the device is turned on and off at the specified parameters.
In case of excessive heat
heater, or at low temperatures it also needs to be inspected. If a malfunction is detected, this part is replaced with a new thermostat that has similar parameters.
If there is a fan in the oil heater design, it must also be checked
. In this case, not only the contacts of the device are checked, but also the integrity of the winding of its motor. It is possible that it may need to be replaced.
After completing the above-described checks and eliminating the detected faults, the heater is assembled and then connected to the network. If the heating device still does not work
, then you will have to seek advice from a specialist.
Most likely
that he will recommend purchasing a new heater. Some repairs can be so expensive that it's easier to head to the store.
You will find the structure and electrical diagram of the oil radiator in the video:
For instructions on how to repair (replace the heating element) an oil heater with your own hands, watch the video:
The good old oil heater broke down. What to do? Logic dictates: “Take it for repairs,” and ingenuity: “Look on the Internet and do it yourself!”
Well that's right! Repairing oil heaters is no easy feat, but it may only require a little maintenance. Therefore, without checking, do not rush to throw away the device and buy a new one!
In order to correctly determine what is broken and repair it, you must first understand how the heater works. Its design consists of:
- The housings are accordions with technical oil inside. Also, you need to know that most appliances contain some air.
- A heating element is built into the bottom of the device on the side, which heats the oil. Most often it consists of two spirals. This is necessary to make it easier to regulate the power of the device.
- Nearby is a security and control unit. There is a thermal relay at the top, it does not touch the body.
- And a fuse (turns off the device in case of failure, for example, if there is an oil leak). Fuses can be disposable wire type or reusable (bimetallic).
- There are two illuminated switches. Each of them has three wires: phase, neutral from the heating element and ground.
The electrical circuit of heaters is similar to the electrical circuit of other appliances: irons, kettles, etc.
Perhaps everyone knows that a garage needs heating. Some people prefer gas heating as the cheapest option. Review of industrial models and safety precautions during operation.
You may not know everything about IR heaters yet. Read about the dangers of infrared heaters.
The climate in the house depends on the correct calculation of heating batteries. Here you will learn how to correctly calculate the number of radiators based on the area and volume of the room.
Repair process
Every owner, when an additional heating device fails, asks the question of how to get the broken equipment back to work.
The solution to the issue is quite simple and consists of several points: Regardless of the type of work performed, before disassembling the oil radiator, you need to disconnect it from the power supply. Then you need to disassemble the device and examine the oil radiator circuit to understand why it does not work. For this purpose, disconnect the control panel from the main body
In this case, latches, screws and staples may be used as fasteners, so it is important to conduct a thorough visual inspection. After determining the type of fastening, remove the control panel
At the same time, it is very important not to make special efforts so as not to break the plastic elements. Restoring the operation of an oil heater begins with checking the power cord and switch. Sometimes an oil heater does not work due to broken power cord wires. You can check the reliability of this using a tester. As for the switch, the reason here is a broken contact, which is the result of burning of the wires at the connection points. To solve the problem, the wires are disconnected and stripped, and the connection point is also cleaned. Next, the switch is assembled and the restored contact is checked using a tester. At the next stage, all contact connections of the control unit are inspected. At each contact, oxidized or burnt areas are identified, as well as places of weakened fastening. Repairs are carried out using screwdrivers and sandpaper. In some cases, they use a soldering iron to solder the torn wires.
- If the thermal relay or temperature controller turns out to be faulty, you need to carefully remove these elements and disassemble them. The bimetallic plate located inside is pulled out and replaced with a new element. There cannot be any other faults in these parts. A new plate restores the functionality of the relay or thermostat.
- Thermal fuses are checked for operability using a tester; in case of malfunction, they are replaced with new elements. Each of the existing thermostats should be checked.
- If the oil heater does not heat up, the cause may be a faulty heating element. A tester is also used to check the condition of heating elements. It is used to measure resistance, the normal value of which should be equal to 1 KOM. A deviation from this value indicates a malfunction of the heating element and the time for its replacement.
Having gone through all the stages of checking the electrical parts of the oil radiator, you can begin to eliminate mechanical damage.
The most pressing problem is oil leakage from the radiator housing. To solve this problem, you need to disassemble the device and drain the remaining oil.
When inspecting the housing for damage, it is important to accurately determine the location of the leak. Here, with the help of sanding paper, cleaning is carried out, as a result of which the size of the hole is determined
The method of repair depends on this. If the hole size is small and there are no signs of corrosion around, then you can use a small self-tapping screw or screw in the hole.
A hole caused by rust is more difficult to repair. The damaged area is also cleaned with emery cloth, removing rust to the base metal. After this, an inspection is carried out and the size of the hole is determined. A small hole can be soldered using brass solder rather than tin. A patch is applied to more extensive damage and welded using semi-automatic welding equipment. The process is complicated by the fact that it requires special equipment and skills to work with it.
You can repair oil radiators yourself; to do this, you need to have minimal skills in plumbing and electrical engineering. Moreover, repairing a minor breakdown will cost less than buying a new device for heating the premises.
An oil cooler breakdown can happen unexpectedly and at a very inopportune moment. If oil leaks appear on the housing, the device should be immediately unplugged from the network and think about purchasing a new heat source. In case of other malfunctions, the device can be brought back to life with the help of a specialist or independently. It is recommended to undertake the repair of an oil heater with your own hands only if you have basic knowledge in the field of electrical engineering, while not forgetting about compliance with safety precautions.
Want to subscribe?
VIDEO ON THE TOPIC: How to repair a fan heater RESANTA TVS-1
However, the quality of most of them leaves much to be desired. Even taking into account the very low price of this device, you will agree that it’s not fun to constantly run for a new device. Today we will look at one of the frequent breakdowns - the air blower blows cold. In order to understand why the blower stopped heating the air, let’s briefly look at the details of the blower: heating element - 2 pieces, fan, heater switch on, 1 heater on, 2 on, heater off, timer switch, thermal fuse, wiring, housing. The most common reason that the blower starts blowing cold is the failure of the thermal fuse.
I turned it on, and the dog was barely blowing and it was lukewarm. I expected that 3 kW should carry hot air around the garage, but in reality it is similar to the Veterok home appliance.
In which part of the room is it better to install the heater?
It all depends on the available space in the room. Of course, the best place for a ceramic panel is the coldest wall facing the street. Why? Yes, because the back surface of the heater will also heat the wall, creating a so-called “thermal curtain”. The heated wall will prevent heat loss from inside the room. Examples include shopping centers or supermarkets. Have you noticed more than once that during the cold season, when you go inside, you are hit with warm air? This is a thermal curtain.
But this is also an ideal case. Very often, such a wall can be filled with furniture, so feel free to install the heating in any accessible place, but do not block it with large furniture and household appliances. Place the socket away from children's reach.
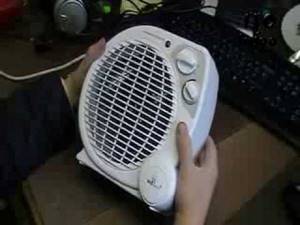
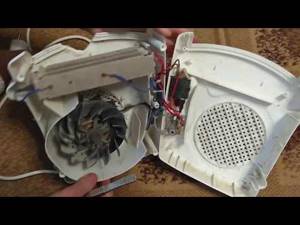
Removing the heater housing
Most modern electric heaters are not difficult to disassemble. The case can be disassembled quickly, after unscrewing several screws. But at the same time you need to carefully monitor the order in which the parts are removed. Many manufacturers use the housing as a supporting structure, attaching parts of the heater engineering solution to it.
If you are not confident in a good memory or have no experience in disassembling electrical appliances, it is worth photographing each action so that after the repair you can correctly assemble the entire working structure.
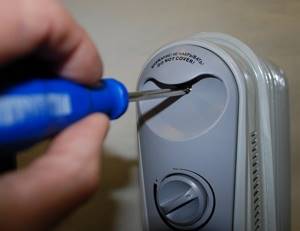
The biggest difficulties arise when disassembling oil heaters. Here the main circuits and sensors are covered with a lid. It can be easily removed: to pry the latch, you need to carefully move a thin metal object (screwdriver, knife) around the perimeter of the lid. This must be done carefully, without scratching the part. After determining the location of the latch, press on it and remove the cover.
Spiral selection
Gynecological intrauterine devices come in different brands, both domestic and foreign. In addition, their cost can vary from 250 rubles to several thousand. This is influenced by many factors.
The Juno Bio spiral is quite popular among Russian women. It attracts, first of all, with its low cost. However, the low efficiency of this device entails a high risk of pregnancy. The Mirena intrauterine device has proven itself well, but it is one of the most expensive in its series. At the same time, the use of an intrauterine device is considered the cheapest and most accessible form of contraception.
This is a hormonal IUD. Its manufacturers promise that the Mirena IUD is less likely to move in the uterus or fall out. Namely, this leads to pregnancy, therefore patients are advised to regularly check the presence of an intrauterine contraceptive in the right place.
The standard voltage in the household electrical network is U=220V. The current strength is limited by fuses in the electrical panel and is usually equal to I = 16A.
- Tables of physical quantities, I.K. Kikoin, 1976
- spiral length formula
An electric soldering iron is a hand-held tool designed for fastening parts together using soft solders, by heating the solder to a liquid state and filling the gap between the parts being soldered with it.
Electric soldering irons are produced designed for mains voltages of 12, 24, 36, 42 and 220 V, and there are reasons for this. The main thing is human safety, the second is the network voltage at the place where the soldering work is performed. In production where all equipment is grounded and there is high humidity, it is allowed to use soldering irons with a voltage of no more than 36 V, and the body of the soldering iron must be grounded. The on-board network of a motorcycle has a DC voltage of 6 V, a passenger car - 12 V, a truck - 24 V. In aviation, a network with a frequency of 400 Hz and a voltage of 27 V is used. There are also design limitations, for example, it is difficult to make a 12 W soldering iron with a supply voltage 220 V, since the spiral will need to be wound from a very thin wire and therefore many layers will be wound, the soldering iron will turn out to be large, not convenient for small work. Since the soldering iron winding is wound from nichrome wire, it can be powered with either alternating or direct voltage. The main thing is that the supply voltage matches the voltage for which the soldering iron is designed.
Electric soldering irons come in power ratings of 12, 20, 40, 60, 100 W and more. And this is also no coincidence. In order for the solder to spread well over the surfaces of the parts being soldered during soldering, they need to be heated to a temperature slightly higher than the melting point of the solder. Upon contact with a part, heat is transferred from the tip to the part and the temperature of the tip drops. If the diameter of the soldering iron tip is not sufficient or the power of the heating element is small, then, having given off heat, the tip will not be able to heat up to the set temperature, and soldering will be impossible. At best, the result will be loose and not strong soldering. A more powerful soldering iron can solder small parts, but there is a problem of inaccessibility to the soldering point. How, for example, can you solder a microcircuit with a leg pitch of 1.25 mm into a printed circuit board with a soldering iron tip measuring 5 mm? True, there is a way out: several turns of copper wire with a diameter of 1 mm are wound around such a sting and the end of this wire is soldered. But the bulkiness of the soldering iron makes the work practically impossible. There is one more limitation. At high power, the soldering iron will quickly heat up the element, and many radio components do not allow heating above 70˚C and therefore the permissible soldering time is no more than 3 seconds. These are diodes, transistors, microcircuits.
Reasons for growing popularity
The popularity of ceramic heating batteries is growing because they are superior to traditional radiators in many consumer characteristics.
- A ceramic heater heats the room completely or partially, for example, near a desk or a crib.
- Drafts do not form due to the absence of intense movements of air masses with different temperatures.
- The batteries consume electricity sparingly and are equipped with electronic thermostats that control the temperature in the room. When heated above the set temperature, the automation turns off the electrical power.
- Battery efficiency is above 90 percent. Electricity is completely spent on heating.
- The ceramic device does not dry out the air.
- Can be used to heat rooms with high humidity.
- The electric heating element is located inside the housing, accidental contact is impossible.
- The outer part does not heat up to a temperature that can burn the skin; the device can be used to heat children's rooms.
- The batteries are made from environmentally friendly materials.
- The heater operates silently.
- Maintenance is easy - just wipe the dust off the surface with a cloth.
- Installation is not difficult. The kit includes the necessary mounting parts.
Device, principle of operation
The main advantages and disadvantages of film infrared heaters
The advantages are as follows:
- Positive health effect. It is especially noticeable in winter, in the absence of the sun, when infrared radiation compensates for the lack of natural light and replenishes all the body’s losses associated with this problem.
- Easy installation. For example, a film wall panel heater is installed quite simply and quickly. Moreover, this can be done independently, without the participation of specialists, but after carefully reading the instructions. The same can be said about ceiling and floor devices.
- Long service life. Ages 25 years and older. Does not require maintenance due to the design features and simplicity of the device.
- Low financial costs. The equipment itself has a low cost; in addition, installation and subsequent operation may not incur any financial burden.
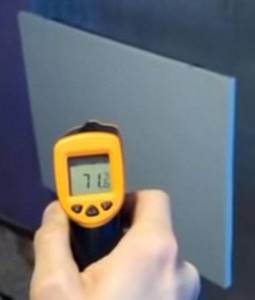
- Fire safety. Typically, the surface of the heater has a temperature of no more than 80 degrees, which is a safe limit.
- No noise and high environmental friendliness. The operation of such a heater does not cause noise; in addition, during the use of infrared film, oxygen does not dry out or burn out.
The main disadvantages of film heaters:
- Fast cooling after switching off. If you read reviews about film heaters, this is one of the main disadvantages voiced by consumers.
- Weak heating. Some buyers note the poor quality of heating. Although this may apply to a small area film hanging on the wall. If you completely cover the ceiling or floor, then this problem is not observed.
- Heating of household appliances. This drawback is typical for ceiling film infrared heaters.
- Impossibility of surface treatment. When using such heaters, there are some restrictions in designing the room as you wish.
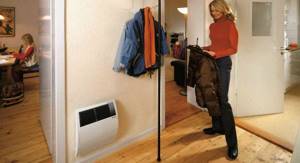
Noirot Royat 2 1200
We have already talked in detail about Noirot electric convectors, now let’s remember one of the most popular Noiro models Royat 2 1200, which is installed on the wall. This model is capable of operating in three modes, so it can be used in rooms of different sizes and ceiling heights. The main feature of this model is the ability to set the impact zone within a radius of 30 degrees. The model is turned on using a convenient switch. There is a practical control unit on the housing.
Noirot Royat 2 1200 – one of the best heaters
Let us highlight several main advantages of this model:
the average price is 8 thousand rubles, due to which it can be called affordable; compact sizes: 45, 12, 11 s; the case is equipped with moisture-proof properties
Therefore, this heater can be installed in bathrooms; Various surge protection systems have been installed; warms up rooms well and works quietly, which is very important, since the sound of a heater is always frightening or annoying; The unique heating element does not dry out the air, so the room always maintains a comfortable temperature and climate. Despite a number of advantages, we also highlight disadvantages that are also worth knowing:
Despite a number of advantages, we also highlight disadvantages that are also worth knowing about:
- It is not always convenient to use a rope to regulate the power of its operation. As a rule, this process will take some time to get used to.
- The cost is quite high, but this is fully compensated by its performance and safety.
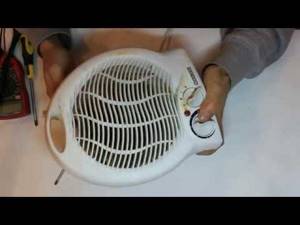
Fan heater repair
» Heating » Heaters » Fan heater repair
Now almost every person uses this device. It is necessary in order to provide additional heating in your home. If your home has not yet had central heating turned on, then you need to use this device. Sometimes it can fail and therefore you need to know how to repair a fan heater.
This process does not take much time and first you need to determine the cause of the breakdown. They can be varied and you should study each breakdown. Our methods for repairing a fan heater can definitely help during repairs.
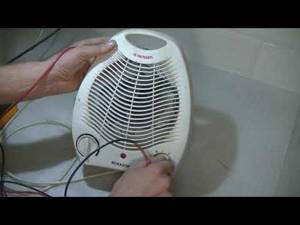
Doesn't turn on
If the device does not turn on when connected to the electrical network, then you may encounter several causes of malfunction. First you need to check the electrical cord.
If this does not help, then you need to take a screwdriver and a multimeter and start repairing the fan heater yourself. The probable cause of the breakdown may be the fuse box, which can burn out if the device overheats.
If you are interested, then you can read about creating an electrode boiler.
Now we have decided to provide you with instructions that will help you repair it. The instructions were based on the Scarlett SC158 fan heater. To perform the repair you need:
Unscrew all the nuts that are located on the back surface of the cover.
Now, using a multimeter, you need to ring the main elements of the network. You can see the first fuse without removing the blades. The second fuse is located on the engine. Now you need to test the circuit using a multimeter. Thanks to this, you will find out which element has failed and replace it.
If the thermal fuses are in working order, then you should check the control unit. It can be found on the diagram that comes with the heater.
It is important to know! If the fuse is broken, then it cannot be replaced using ordinary wire. If you carry out repairs in this way, then it may cause danger.
Turns on but doesn't heat up
The second most popular failure is when the fan turns on but does not heat up. In this case, the main cause of the breakdown is considered to be a heating element that has failed.
Check this device using a multimeter and if the circuit is broken then replace the device. Sometimes a break in a certain part of the spiral may occur. In this case, you need to connect a nichrome spiral.
If necessary, read about the dangers of infrared heaters for humans.
Also, quite often the bimetallic thermostat can fail. To repair it, you need to clean the contacts yourself to a metallic color.
When heating, the thermostat should open the circuit and when cooling, it should close it. If the device does not work correctly, then you need to try to close the temperature regulator yourself.
If it is working, then the coil will heat up.
The blades don't spin
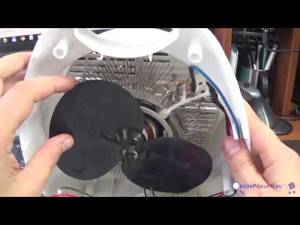
If the fan heater works, but the fan does not spin, then the cause of the malfunction may be its motor. In this case, you should check the motor using a multimeter. If you don't know how to use a multimeter, then you can read the related article.
Another fairly common type of breakdown is dust contamination. To fix the breakdown you need to clean the motor and lubricate it with machine oil. If this does not help, then the device needs to be replaced.
Doesn't work well
If the fan heater does not heat the air well, then this problem is considered the last. Usually this breakdown can be caused by contamination of spare parts. If your heating element is covered in dust, then the heating will be weak. This repair is not considered difficult and you just need to clean the device.
To do this, take a vacuum cleaner and go through all the elements of the chain. Following this process will help resolve the issue. You also need to check that the electrical plug is working properly. Perhaps the cause of the breakdown occurs precisely because of it. If the wire is broken, then you need to replace the plug.
These are all tips for repairing a fan heater yourself. When choosing a fan heater yourself, it is better to give preference to models that have a ceramic heating element. We hope this article will help resolve all problems.
If you are interested, read: electric warm baseboard.
Repair process
Every owner, when an additional heating device fails, asks the question of how to get the broken equipment back to work. The solution to the issue is quite simple and consists of several points:
Regardless of the type of work performed, before disassembling the oil cooler, you must disconnect it from the power supply. Then you need to disassemble the device and examine the oil radiator circuit to understand why it does not work. For this purpose, disconnect the control panel from the main body
In this case, latches, screws and staples may be used as fasteners, so it is important to conduct a thorough visual inspection. After determining the type of fastening, remove the control panel
At the same time, it is very important not to make special efforts so as not to break the plastic elements. Restoring the operation of an oil heater begins with checking the power cord and switch. Sometimes an oil heater does not work due to broken power cord wires. You can check the reliability of this using a tester. As for the switch, the reason here is a broken contact, which is the result of burning of the wires at the connection points. To solve the problem, the wires are disconnected and stripped, and the connection point is also cleaned. Next, the switch is assembled and the restored contact is checked using a tester. At the next stage, all contact connections of the control unit are inspected. At each contact, oxidized or burnt areas are identified, as well as places of weakened fastening. Repairs are carried out using screwdrivers and sandpaper. In some cases, they use a soldering iron to solder the torn wires.
- If the thermal relay or temperature controller turns out to be faulty, you need to carefully remove these elements and disassemble them. The bimetallic plate located inside is pulled out and replaced with a new element. There cannot be any other faults in these parts. A new plate restores the functionality of the relay or thermostat.
- Thermal fuses are checked for operability using a tester; in case of malfunction, they are replaced with new elements. Each of the existing thermostats should be checked.
- If the oil heater does not heat up, the cause may be a faulty heating element. A tester is also used to check the condition of heating elements. It is used to measure resistance, the normal value of which should be equal to 1 KOM. A deviation from this value indicates a malfunction of the heating element and the time for its replacement.
Having gone through all the stages of checking the electrical parts of the oil radiator, you can begin to eliminate mechanical damage.
The most pressing problem is oil leakage from the radiator housing. To solve this problem, you need to disassemble the device and drain the remaining oil.
When inspecting the housing for damage, it is important to accurately determine the location of the leak. Here, with the help of sanding paper, cleaning is carried out, as a result of which the size of the hole is determined
The method of repair depends on this. If the hole size is small and there are no signs of corrosion around, then you can use a small self-tapping screw or screw in the hole.
A hole caused by rust is more difficult to repair. The damaged area is also cleaned with emery cloth, removing rust to the base metal. After this, an inspection is carried out and the size of the hole is determined. A small hole can be soldered using brass solder rather than tin. A patch is applied to more extensive damage and welded using semi-automatic welding equipment. The process is complicated by the fact that it requires special equipment and skills to work with it.
You can repair oil radiators yourself; to do this, you need to have minimal skills in plumbing and electrical engineering. Moreover, repairing a minor breakdown will cost less than buying a new device for heating the premises.