Optimal types of heat treatment for porches and steps
The most effective methods used to combat icing of steps:
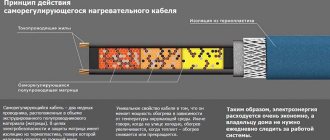
- Installation of a self-regulating, resistant heating cable;
- Installation of a coil with coolant;
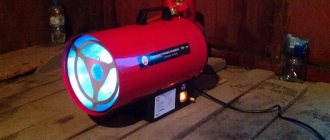
- Installation of infrared heaters.
All options have found their application in heating outdoor objects. However, before choosing the appropriate option in a particular case, you should pay attention to the following criteria:
- Average temperature during the cold period;
- Amount of precipitation;
- Width, height of the heated area;
- The type of material used to cover the surface.
Based on the obtained parameters, you can determine the appropriate type of degree processing and the required power.
Electric heating of the porch
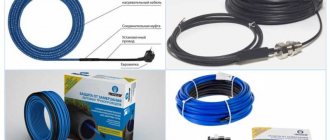
It is distinguished by its simplicity, ease of installation, and availability of components. To equip your porch with electric heating, you need a heating cable with suitable parameters. The cable is installed under the outer surface of the porch, steps, both under a concrete base and tile masonry. The main criteria in choosing the required cable are moisture resistance, mechanical loads and the ability to withstand low temperatures. In addition to the heating cable, a control group (temperature regulators, temperature and humidity sensors) and a distribution group (fastener elements, electrical boxes, control equipment) are required.
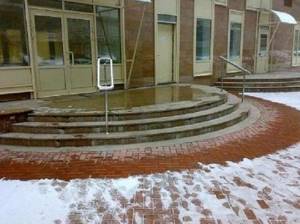
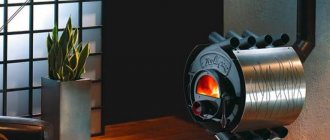
A beautiful porch decorated with tiles or stone is the pride of the owners of the house. But in winter, it causes injuries and sudden surges of adrenaline into the blood when it becomes covered with a layer of ice. The most modern way to solve this problem is to heat the steps.
In this article we will look at what heated floors are like on an outdoor porch and which type is best to choose in a given situation.
Installation, laying and securing the cable
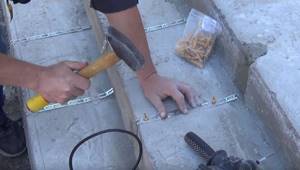
Before direct installation, the surface must be thoroughly cleaned and leveled. Next, the heating cable is laid and secured along this surface.
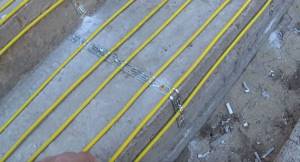
It is attached to a metal mounting tape. The same is used when laying heated floors in houses.
Fastening the porch or steps to the concrete base is done using a hammer drill and dowel nails.
When laying, try to maintain the same step. It will, of course, depend on the selected cable power.
For example, for P=20W/m, the recommended laying step is 5 or 7.5 cm. On large areas, the step is taken larger (porch), and in narrow places (steps) you can slightly reduce it.
When installing heated steps, do not forget about the risers. It often happens that the step platform itself is clean, but its edge is covered in ice.
Therefore, it is often necessary to increase the installed power and also heat the risers with several cable lines.
In this case, all cable transitions from top to bottom are prepared in advance. That is, a recess is knocked out in the concrete where the wire is placed.
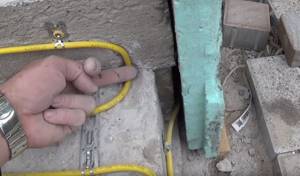
If this is not done, when installing the tiles, their sharp edges can cut the insulation.
If possible, a screed is poured over the laid cable. If it is not there, then the heating cable still needs to be covered with a minimum protective layer of solution.
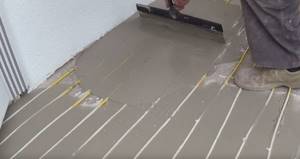
This will prevent further deformation and accidental damage to the insulation. Still, you will constantly move on this surface.
When the mortar or screed has finally set, you can begin decorative finishing with tiles, natural stone or even marble.
By the way, some people on the paths use a sand cushion instead of a screed. Recommended sand thickness is 4cm. Here the cable will be attached to the reinforcing mesh.
However, the sand must be carefully sifted. Otherwise, large fractions of stones with their edges can damage the insulation of the wires.
Also take into account such a moment as thermal resistance. For sand it will be less than for the top layer of the path. Therefore, a very large percentage of heat will go down.
Accordingly, in order to warm the surface to a constant +3C, the cable power will be required significantly more than if you used concrete.
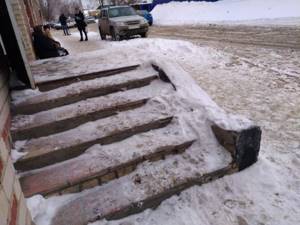
Why do you need to heat your porch?
Ice or a layer of trampled snow on the porch not only interferes with normal movement on it, but also leads to traumatic situations.
To get rid of them, two usual methods are used - chemical and mechanical:
- Chemical treatment consists of sprinkling the surface with salt or other reagents that cause snow to melt.
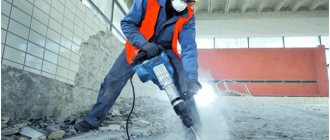
- The mechanical method is regular cleaning using shovels, crowbars, ice axes and hard brooms.
Everyone can imagine what these methods lead to. These include shoes damaged by reagents, and destruction of the lining of the steps, and, as a consequence, the need to restore them. And the price for materials and labor, in this case, is considerable.
For reference. In addition, periodically freezing and thawing water that penetrates the concrete or under the tiles itself destroys the structure, causing the appearance of growing cracks.
But heating the porch and steps during snowfalls and frosts prevents the formation of an ice crust at all, instantly melting the precipitation and preventing it from freezing.
It turns out that once we spend money on insulating the porch of a house, we will receive several advantages:
- First of all, safe movement on stairs in any weather;
- There is no need to monitor the cleanliness of the porch and clean it on time;
- Reducing the cost of its repair.
Of course, no heating method is free, and during operation you will have to pay additional bills for electricity or another energy source. But the safety and health of loved ones is worth it.
Ways to heat an outdoor porch
It is advisable to choose and consider any of the options described below at the stage of designing a house, or at least attaching a porch to it. Because heating a porch on the street will require increasing the power of the input electrical cable, combining the system with internal communications, connecting to them, etc.
Upgrading an existing porch is more difficult, but also possible. The video in this article will tell you and show you how to make a warm porch to your house correctly.
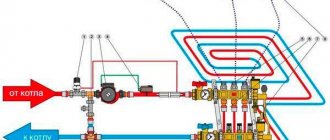
Water heating
Water heating of outdoor areas involves laying thin tubes filled with non-freezing liquid along them, followed by pouring the surface with concrete.
Note. Since the layer of cement-sand screed must be thick enough to ensure the integrity of the pipes, the level of the area in front of the front door increases significantly. And if the door is already installed, this method may not be suitable for you.
Having chosen such a heating system, you will have to take care of purchasing a pump and a heating boiler. Or about replacing it with a more powerful one, if water heating at home already exists and is in use. Plus, it will be necessary to constantly monitor the volume of liquid and pressure in the system.
In general, water heating of porch steps is the most expensive in terms of materials and installation. It only makes sense to choose it if the house itself is also planned to have water heating, and from a gas boiler.
Infrared heating
To quickly and without serious physical effort get an insulated porch, you can lay thermomats on it. These are rubber mats, plates or sections of various shapes with an infrared heater inside. You can buy them ready-made, or order them made to your size.
All sections are connected to each other using special connectors with your own hands, without using any tools. Each element is equipped with two cables with such connectors - one works as an input, the second as an output. They can be placed in boxes or left lying along the edges of the steps.
The advantages of this option include:
- Installation speed;
- Relatively cheap (about 7,000 rubles/sq.m.);
- Economical operation;
- Easy to dismantle for the warm season.
There is also a drawback: rough black coverings hide beautiful steps underneath, depriving the porch of its visual appeal. But they can be kept in reserve to be used in emergency situations for a short time.
Heating cable
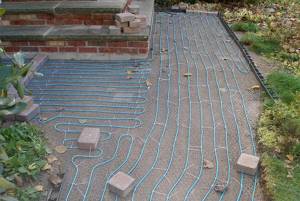
According to experts, this is the most optimal way to create warm steps on the porch. And not just steps: the heating cable can be laid on the area in front of the porch, on the path leading to it, and at the entrance to the garage. The main thing is that there is a power source somewhere nearby.
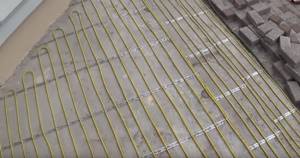
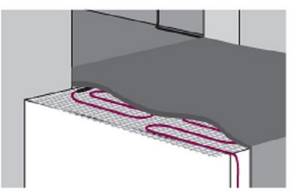
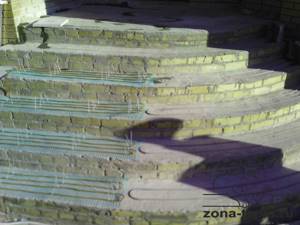
As you can see, the cable is laid on a heated surface like a snake, with a pitch between turns of 4 to 10 cm and secured with metal plates.
Advice. It is much more convenient to use ready-made mesh mats with a heating cord attached to it.
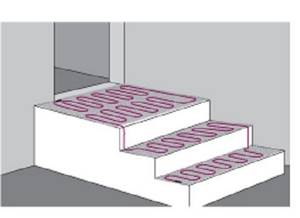
The installation instructions look like this:
| Schematic illustration | Description |
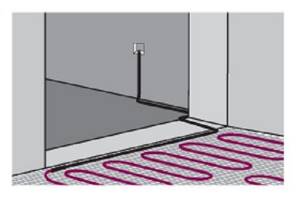
| The heating cable is laid on horizontal surfaces in a continuous wavy line. |
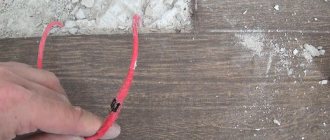
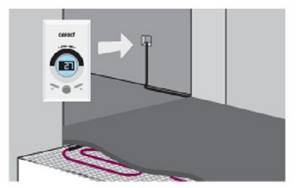
| The end is led outside the porch and connected to the electrical network through a thermostat. After which its performance is checked. |
| After checking the resistance, a tie is poured over the cable, securing it in a given position and protecting it from mechanical damage. It is necessary to ensure that the screed is free of voids. |
| After pouring the solution, you need to wait for it to dry completely, and then make sure again that the system is working. |
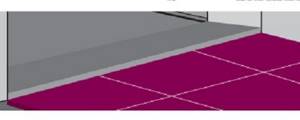
| If everything is in order, you can line the heated porch with porcelain stoneware, clinker tiles or other material. |
It is important. A heating cable intended for purposes such as heating porch steps or other outdoor areas must be resistant to low temperatures, sunlight and precipitation. Another mandatory requirement is high mechanical strength.

Electrical safety is an important condition when choosing a cable
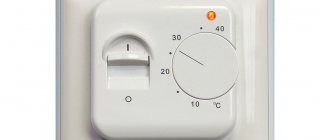
When deciding how to insulate a porch, you can choose two options for adjusting and controlling the system - manual and automatic.
- Manual control means that you will turn the system on and off as needed. This will have to be done after snowfalls and when the air temperature outside is from zero to minus 7-10 degrees - it is in this temperature range that ice forms. In severe frosts, if the porch was initially dry, there is no need to heat it, since snow does not fall at this temperature.
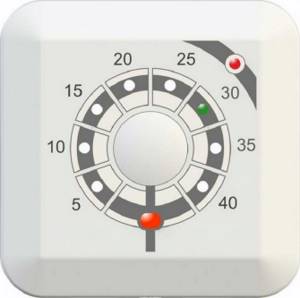
Thermostat for manual control
Advice. If you want to save money, you can plug in the cable only at night, when the air temperature drops. This is especially true for owners of two-tariff meters with a small night tariff.
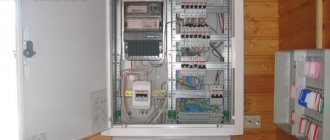
Control in automatic mode is carried out using an anti-icing system, which includes thermostats, temperature and humidity sensors, distribution boxes, protective and distribution fittings.
The heating part of the system can consist of a resistive (with constant power) or self-regulating (with varying power) cable.
Automatic control is much more convenient than manual control. It allows you not to constantly monitor the weather, temperature and humidity. All indicators from the environment are transmitted by sensors to the thermostat, which regulates the heating power and turns the heating system on or off.
The easiest way is to buy a ready-made kit and install it according to the instructions, rather than selecting all the adjustment and control elements yourself.
st. Aurora 114a building 6, office 411, Mon-Fri: 9:00-18:00, Sat-Sun: by call
To heat open areas, self-regulating and resistive heating cables are used. In terms of control: both forced manual activation and autonomous control of the thermostat-weather station depending on the ambient temperature and the presence of precipitation.
So in what cases, when heating open areas, is it best to use a resistive (with constant power), and in what cases is it better to use a self-regulating heating cable? This is determined by their features:
Self-regulating heating cable
- costs more
- It is not able to burn out when the heating cable threads are located too close to each other, or when they intersect themselves, therefore it forgives these errors during installation or subsequent displacement when relaying the coating.
- The heating cable is self-regulating and therefore does not require the use of thermostats and thermostats, but can be effectively used with them
- The matrix of a self-regulating heating cable, although slightly, is still subject to aging during active use.
Read more about the aging of a self-regulating cable
The last point means that if, for example, you heat an open area with a Lavita GWS 40-2CR cable, with a rated power of 40 watts, and load it with work almost the entire cold season (turn it on in the fall and turn it off in the spring), then after 5-10 years the heating the cable will produce less rated power.
Due to the lower power of the heating cable, the time required to get rid of ice may increase, or the heat generated may not be enough at all in the most severe frosts.
However, the depletion of the matrix resource occurs precisely during active work at low temperatures. This means that if we turn on the same cable much less often, periodically, when we need it, then after 15 years its rated power will drop slightly, and this will not affect its operation.
The left side of the porch is constantly heated with a resistive cable through a heated floor thermostat, the right side is heated with a self-regulating cable - forced activation
So, to heat open areas, it is optimal to use a self-regulating heating cable in the following cases:
- Do you want to turn on the heating yourself when you need it, without a thermostat or sensors.
- Do you plan to use it periodically, from time to time?
- You want to save money and not pay for driveway heating when you don't need it.
- You want to make a reliable, simple and safe system using a minimum of elements (no thermostats, sensors, control panel). By the way, you can also connect a self-regulating cable through a thermostat. You can first connect manually, and then, if desired, add heating controls in the form of a thermostat and sensors.
Heating cables for Teplodor systems
Outdoor heating systems use heating cables with a linear power of 25 W/m. p., namely:
- 25TSOE;
- 30MNT;
- 30NSKT;
- 30 and 40TMOE;
- StopIce mats;
- Freezstop Patio;
- 30TSBE;
- 50NT.
Anti-icing system Stopice
The Stopice anti-icing system is a mesh with a heating cable attached to it, the so-called. heating mat. The heating cable is connected to the installation current supply wire. You cannot shorten the heating cable on the mat, but you can cut the mesh to lay out the mat; the “cold” wire can be cut off and extended.
When installing the Stopice anti-icing system on a heated area, the heating mat is cut and laid out according to the geometric shape of the heated area. The heating cable and supporting mesh are quite rigid, so for better fixation it would not hurt to attach the Stopice heating mat to the mounting tape. There should be no kinks or kinks in the heating cable, as well as intersections.
The Stopice anti-icing system is produced based on Russian climatic conditions with a fixed power of 320 W per 1 m 2.
Installation of anti-icing systems Teplodor
Our company provides a full range of services for thermal engineering calculations and installation of Teplodor anti-icing systems. For a detailed calculation, fill out the questionnaire and send it by email or fax +7 (495) 229-39-84.
The photographs below are examples of our work.
Our customers:
- Absolut Bank - installation of Teplodor anti-icing system (2.5 kW).
- Novoperedelkino shopping center - a snow melting system has been installed that heats the main entrance (20 kW) and the side entrance (7 kW).
- Children's clothing store "Vinny's Seasons" - installation of the "Teplodor" system (3.8 kW).
- Cottage village Korobovo - installation of outdoor heated floors on balconies and car tracks (Rsum = 10.5 kW).
- and many more etc.