Do-it-yourself water heated floor repair
The service life of a water heated floor is calculated in decades. However, due to installation errors and improper operation of heated floors, serious problems can arise.
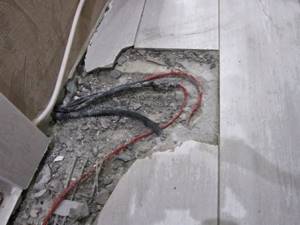
The most common of these is damaged pipes that were filled with screed. This often happens at the finishing stage, when baseboards and flooring materials are installed.
It is impossible to replace a broken heated floor pipe, because to do this you will have to knock down the entire floor screed. You cannot glue it or install a bandage. Repairing a water heated floor with your own hands, in this case, is carried out only by installing a coupling, and for pipes made of different materials, there are couplings of various configurations.
Read about how to repair heated floors and what materials and tools should be used correctly for these purposes in the construction magazine.
Causes of problems
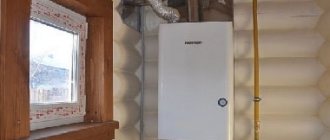
The main factors causing breakdowns of a water heating system are unskilled installation or incorrectly selected materials. The specificity of the installation lies in the correct pairing of the heated floor circuits with the main heating system. It is enough to make a small mistake when calculating hydraulic pressure or in the settings of the water mixing unit for the performance properties to deteriorate.
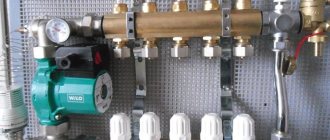
But how to repair a heated floor without knowing its design? Let's look at the main elements of the system and signs of their malfunction.
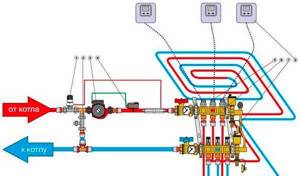
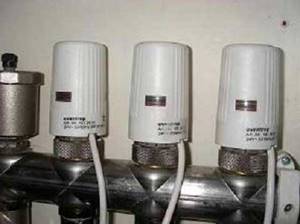
- Thermostat with temperature sensor. Regulates the flow of coolant from the main system. If the servomechanism or sensor breaks down, the water heating or its volume may be critically exceeded.
- Balancing valve. Necessary for mixing hot and cooled coolant until the temperature reaches 55-60°C. Failure will also affect the degree of water heating.
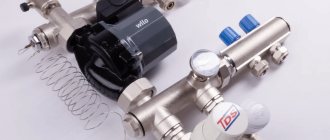
- Circulation pump. With its help, hydraulic pressure is formed in the underfloor heating pipes.
- Safety surface thermostat. A backup device that prevents the flow of water with a temperature above the critical one.
- Electric drives of the collector input group. They regulate the flow intensity in various circuits of the system.
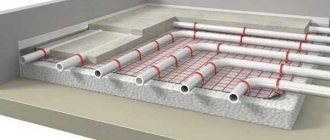
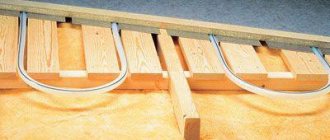
- Pipelines. A branched line that performs the functions of transferring thermal energy from heated water to the floor surface.
- Bypass.
- Remote thermostats. They are connected to electric drives of the input group, making it possible to remotely control the heating temperature.
With proper design and actual implementation, such a system can operate uninterruptedly for up to 40 years. However, external factors or hidden defects in materials cause emergency situations.
How to find a broken floor heating cable
To avoid having to tear off the entire screed and inevitably repeat the process of pouring the floors, you must try to determine where the cable is broken. Finding a break is quite difficult and even professional installation teams do not always succeed, but by using some tips and recommendations, you can increase the chances of success.
The search for a break is carried out as follows:
- Malfunctions of electric heated floors associated with mechanical damage during drilling. After laying the finishing coating, you have to attach some types of furniture to the floor, install a door stop or closer, etc. Professional installation teams always leave the installation diagram to the owners to avoid getting caught in the cable when drilling. If the floor stops working immediately after installing furniture and door stops, finding the break point is usually not difficult.
- It is much more difficult to determine the location of the damage and repair the cable yourself if you do not know where exactly the break is located. First, you need to make sure that the reason for the inoperability of the heating system lies precisely in the heating wires. To do this, use a tester to check resistance indicators. A deviation in values greater than 5% indicates that there is mechanical damage or a cable break. In this case, it is more difficult to repair an electric heated floor, due to the fact that it is quite problematic to determine exactly where the break is located.
Ringing the cable when it breaks using a tester helps to accurately determine the cause of the heating system failure. The exact location of mechanical damage is found using special tools.
In particular, the following equipment is used:
High-voltage generator - the device determines the location of a cable break by creating an arc between the unprotected core or braid of the wire. Where the discharge occurs is where the damage occurs.
Audio detector - the operating principle of the device is similar to a metal detector. When the device is over the rupture site, a corresponding sound is made.
How to repair a heated floor if there is a leak
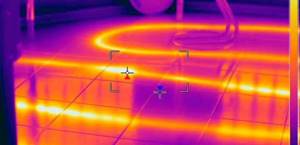
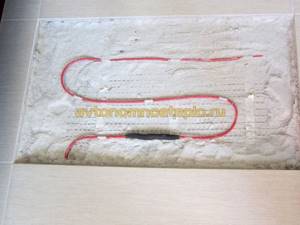
One of the reasons why underfloor heating does not work is damage to the pipeline. If the pressure in the pipeline drops sharply, this is one of the signs of a possible leak. Even if the depressurization of the main line is completely insignificant, the consequences from it can be quite serious. And the point is not only in reducing the efficiency of the heating system, but also in future destruction of the floor. To repair a water-heated floor, you first need to determine the location of the leak. If there are no wet spots on the surface, you can use special devices: thermal imagers or remote moisture indicators. The coolant leak area on the device will appear as a bright light spot.

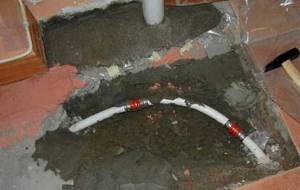
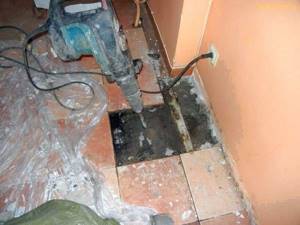
So, how to deal with such a common problem as pipe damage, for example, with a hammer drill. In such a situation, the first thing you need to do is remain calm. The first impulse is to remove the tool, but this should not be done under any circumstances, since the water will “flood” the house, and it actually serves as a plug. First you need to shut off the water supply.
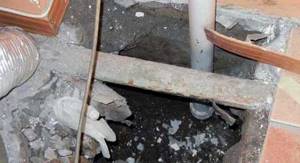
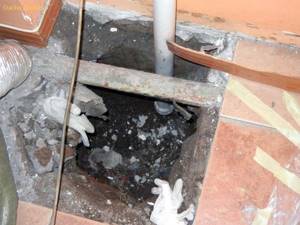
Carefully release access to the damaged area to make it easier to cut out the damaged piece of pipe, leaving as large ends as possible on both sides. At such a moment, sections of the same pipe or fittings may not always be at hand to protect the system from dirt. They can be replaced by covering the loose ends, for example, with plastic bags or rubber gloves.
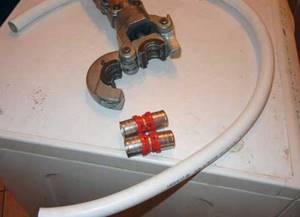
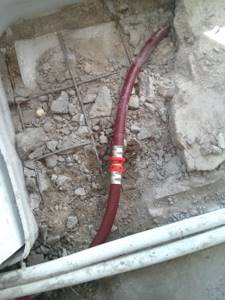
The only reliable connection method is crimping. For repairs, a piece of pipe and fittings are purchased. You need to crimp the edges of the mounting parts with a special crimp wrench.
Important
Threaded fittings cannot be used for walling, as they are not reliable enough and will someday leak.
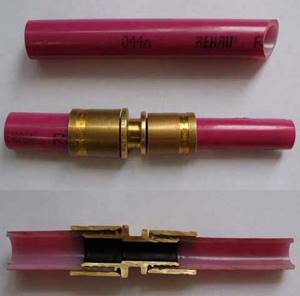
One of the ends of the pipe must be cleaned and flared and a fitting must be put on it. Press it with a double movement. The second end is also crimped in the same way.
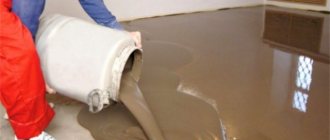
We crimp the fitting at the other end of the water heated floor pipe being repaired. We cut the repair pipe to the required size and press it again, but this time the connections. Turn on the water and test only the repaired area for leaks. Then, if the result is positive, a new screed is poured.
This technology is suitable for pipes made of metal-plastic or cross-linked polyethylene; for PVC products the procedure is somewhat different. Although they are characterized by high mechanical strength, if you choose the wrong drilling location, you can damage the pipeline. For repairs, use a special soldering iron and a repair coupling. First, the coupling cuts are coordinated with the dimensions of the line, then installed using a soldering iron.
Is it possible to extend pipes if they are not long enough?
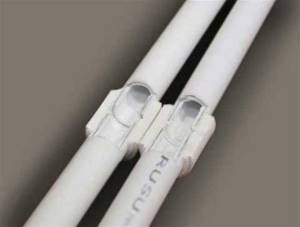
As you know, it is better to make a loop of a warm water floor than a solid one, this gives the system reliability, and connections are made at the points of attachment with the collector. If the heated room is large, it is recommended to divide the area into several branches.
In order not to make a mistake in the size of the loop, you should make the calculation correctly. To do this, you can use an online calculator.
However, if necessary, it is still possible to lengthen the contour of the heated floor by connecting the missing section of pipe to it, which, by the way, is allowed according to GOST. It is possible to extend heated floor loops using various methods; for this, butt joints are used, most often press fittings.
For your information! In such cases, it is recommended to use pipelines and fittings from the same manufacturer.
To summarize, we can say that connecting underfloor heating pipes is acceptable, and there are various ways. But it is more practical and reliable to lay a single loop, especially under the screed, so that in case of leakage you do not have to destroy the concrete layer.
In addition, preference should be given to high-quality pipe products and connecting parts from trusted manufacturers. In such cases, the heating floor will serve you for a long time and will create a comfortable atmosphere in the house.
Why does underfloor heating work poorly?
Let's look at a situation where pressure conditions are met, but the floor does not warm up enough. Why is this happening? One of the possible reasons is the uneven distribution of liquid along its contours. Basically, their length is different, so it is possible that at the same speed of the coolant, passing through a long circuit, it has time to cool. The adjustment is carried out through the manifold cabinet.
The volume of water in the circuit changes approximately as follows. Typically, each circuit is connected to a comb, which is connected to an outdoor thermostat. A signal is sent to the control device of each circuit, according to which the rod extends. In this case, the throughput channel changes the throughput.
To ensure proper operation of the system, it is initially configured, that is, the best level is determined for each circuit.
However, it is possible that all efforts will lead to nothing. Then it makes sense to check the quality of the vapor barrier. Take a piece of polyethylene, meter by meter, and glue it to the working floor using tape. The condition of the film is checked every other day. If condensation has formed on it or the joints have darkened from moisture, this indicates a violation of the technology of the vapor barrier layer, and it will have to be completely redone.
On a note
In such cases, there is no need to resort to additional sources of heating, and not only because it is pointless, it leads to the formation of mold and mildew, accompanied by an unpleasant odor.
How to fix a hole in the floor
As a rule, you can repair a broken heated floor yourself.
To do this, it is not at all necessary to have any serious skills and abilities in the field of construction work. You just need to follow the instructions that will be presented below.
So, to eliminate damage to the floor, you need to follow the following algorithm:
1) The first thing to do before carrying out repairs is to turn off the heating.
2) Then you will need to dismantle the damaged part of the coating. Simply put, just remove the part of the surface that was damaged by the impact.
This procedure must be performed extremely carefully, otherwise it can only worsen the situation.
In this case, destruction of adjacent slabs must not be allowed. If removed incorrectly, they may simply burst, and then the entire floor will have to be replaced.
3) Next you need to remove the grout seams. To do this you will need a very ordinary knife.
4) After completing the above steps, you need to use a chisel. Using this tool, damaged tiles are pulled out of the floor.
5) At this stage, the necessary space around the pipe is cleared. This is done in order to open access to the area that has been damaged. It also doesn't hurt to insulate the ends of the pipes. This will prevent dirt from getting inside the pipeline.
6) We cut the pipe. This procedure can be performed using scissors designed for cutting metal.
7) Then you need to flush the pipe from the inside. Fulfilling this condition will not allow dirt particles to accumulate on the pipe walls.
You need to unroll the ends of the pipe. This is done using a special tool called “Sweep”.
9) Then we put the press coupling on the base of the pipe. Before doing this, you should wipe the entire pipe clean using a damp cloth.
10) At this stage, you will need special metal pliers, with which you will need to clamp the coupling. In order for it to maintain this shape, it is necessary to keep the coupling in this position for several minutes.
11) At the last stage, it is imperative to insulate the coupling. Polyethylene, which can be purchased at any hardware store, is perfect for this.
Do you know how to repair a broken heated floor without much loss? Share your experience in the comments.
Source
How to minimize breakdowns?
You can repair the system yourself, but in order to have to do this as rarely as possible, it is worth knowing some of the features and nuances that lead to breakdowns. Important points:
- When laying a cable, mat or IR film, you need to go around areas under furniture and appliances. If this is not done, the local area will constantly overheat, and sooner or later the entire system will fail.
- During the installation process, it is necessary to avoid cutting the cable - as this will lead to a decrease in heating efficiency, and the electric-type heated floor will break.
- A heating element, regardless of type, cannot be laid on an unprepared base.
- The temperature sensor must be installed so that it can be reached if repairs are necessary.
- After laying the cable or film floor, you need to create a layout of the heating elements - this will prevent damage when replacing the floor covering.
- You can start the system after pouring the screed only when it dries well.
- No voids should be left around the heating element.
- After installing and drying the screed, you need to measure the resistance and compare it with the standard according to the data sheet of the cable or film.
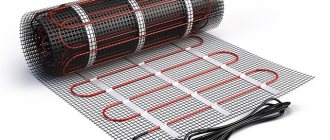
IR floor: repair
Problems with the operation of the infrared floor may arise due to improper preparation of the base and careless handling of the film. It is very thin, so it is easy to damage. If you find that the floor does not heat, then you need to replace the damaged heater element. This must be done in accordance with the installation instructions. The connection areas must be insulated with bitumen.
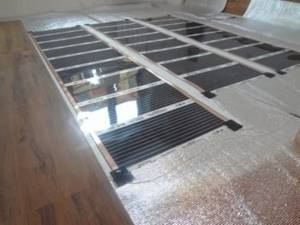
Film heated floors can also be repaired