System elements
Regardless of which one you choose from the variety of heated floors from Teplolux, Profi or another, in any case, the set consists of the same system elements:
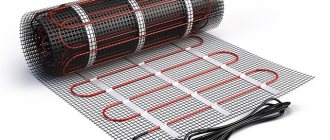
- Heating sections, which are sections of heating cable with special mounting ends through which voltage is applied. The heating cable can be made in one single-core or two-core version, depending on the power and the type of connection to the power supply network.
- Mounting tape, which is sold as a kit and serves to simplify installation of the system.
- A special programmable thermostat, which is necessary to monitor the energy consumption of the system.
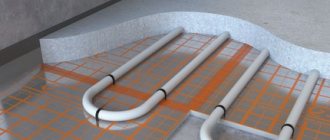
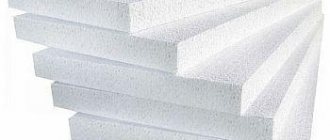
- If the system will be used as the main source of heat in the room, it is recommended to provide additional insulation using polystyrene foam. In case of contact of the working surface with open ground, it is necessary to additionally place slabs of mineral materials or foam plastic in front of the screed.
Characteristics of a programmable thermostat
All types of thermostats for heated floors are designed to maintain a given room temperature. Therefore, their functions include, as the microclimate changes, turning on and off the heat supply to the room. A programmable thermostat differs from its analogues in that it is equipped with a digital processor that can remember several values at once. Thanks to this, it can serve several rooms at the same time, with different set temperature conditions. In addition, programmable thermostats have the following additional functions:
The thermostats are equipped with a grounding contact. Some thermostat models do not turn on without grounding.
- Recording the exact floor temperature. This feature allows you to combine heating systems with decorative floor coverings.
- Ease of use. Data monitoring and mode settings are carried out both on the product and via Wi-Fi or a remote control.
- Safety. The ability to set an exact minimum temperature will prevent the heating system from freezing in the winter if the living space is left unattended.
- Saving. The thermostat independently turns the floor heating on and off, allowing you to save up to 20% on energy consumption.
Location of the device in the room
It is worth noting that programmable thermostats have a long service life. But incorrect connection to the heated floor can negatively affect their functional characteristics.
Source: mr-build.ru
How to properly install a thermostat for a heated floor and other questions
How to turn off a heated Teplolux floor
Heated floors are not new in a modern home, but for the average ordinary user this equipment still raises a lot of questions about installation, maintenance and repair. One of the main elements of an electric heating system is a thermostat, which works in conjunction with a temperature sensor. The sensor takes readings about environmental changes and transmits them to the regulator, which in turn makes adjustments to the operation of the heated floor. It is these two elements of the heating supply system in the house that we will try to consider from the point of view of the average user.
Where to install the thermostat when installing a heated floor?
When choosing a location to install the thermostat, you must be guided by the following considerations. The thermostat must be installed on the wall in a convenient and accessible place
It is also important to take into account the fact that when arranging furniture, you can block access to the device with a large sofa, wardrobe or other piece of furniture. It is unacceptable
The temperature sensor is located in the screed inside the corrugated pipe. Uncured cement or tile adhesive must not come into contact with the sensor. If necessary, the user or repairman must be able to replace equipment that has failed the temperature sensor.
A thermostat designed to regulate the operation of a heated floor in rooms with high humidity (sauna, bathhouse, swimming pool, bathroom) must be located outside the room.
The diagram below provides basic recommendations and dimensions for installing a thermostat and sensor.
Why doesn't the floor heating thermostat turn on?
A popular question from the “why” series is the underfloor heating thermostat does not turn on/does not work. To find out the reasons for such an incident, it is necessary to check whether power is supplied to the regulator terminals. To do this, after first turning off the circuit breakers in the distribution panel, remove the thermostat filling from the mounting box. Turn on the power supply again and use a tester to check the presence of voltage at the supply terminals. If there is no voltage, then the fault should be looked for in the electrical wiring, and not in the underfloor heating system. If during the test it turned out that the phase cable is connected to the zero terminal of the regulator, then it is necessary to perform a phase change, i.e. just swap the wires. If there is power, the wires are correctly phased, but the thermostat display does not light up, then the device itself has failed. To restore system operation, the thermostat should be replaced.
Why doesn't the floor heating thermostat turn off?
Another common problem in the operation of heated floors is that the thermostat does not turn off and, accordingly, the system operates around the clock. In this case, the thermostat does not turn off because it does not reach the specified heating mode. Most likely, the thermostat itself is faulty; to be sure that it is broken, set the maximum heating temperature. If in this case the device does not turn off, it means that it is definitely faulty and requires replacement.
Why does the heated floor heat up with the regulator turned off?
In fact, there may be several reasons for this behavior of the heating system.
The first reason is the inertia of the heated floor. It does not cool down instantly, it takes some time, about 1 hour, so it seems that after turning off the heated floors continue to heat.
The second reason is that the heating system is somehow connected directly, bypassing the thermostat. In this situation, it is necessary to put the electrical wiring in order and everything will work as it should.
Why does the floor heating thermostat click?
Clicking of the thermostat is a sign that the heated floor is on/off. If the thermostat “clicks” frequently, it means that when installing the heating you installed the temperature sensor too close to the heating elements. The floor does not have time to heat up, and the sensor already reacts to temperature changes. The sensor mounting point needs to be changed. Loud clicks of the thermostat are typical for a situation where the conductive contacts are loosely tightened in the corresponding terminals.
How to install heated floors
Every owner wants his home to be comfortable and cozy.
Modern heated floors help achieve comfort and warmth. But it is not at all necessary to involve craftsmen in installing floors. You can do this yourself if you know some subtleties and nuances. There are several designs of underfloor heating. Let's look at the main ones.
Electric floors can include a heating electric cable, special heating elements and film. The peculiarity of this type of floor is that in addition to the entire room, it also heats the floor covering
When choosing a coating, you need to pay attention to some nuances. Certain materials can release very harmful substances
Some systems are not suitable for certain types of coating. For example, such a floor is not laid under linoleum, which has double insulation.
A water-based heated floor can be covered with any floor covering you like. With the exception of high-rise buildings. This type of flooring can disrupt the public heating system. But if you really want to install it, then you need to get permission from the utility service. Heated floors in a private home - reliability, durability and savings.
There are several options for laying heated floors under the laminate. The main rule: uneven temperature distribution can contribute to distortion and cracking of the coating. The heating temperature for laminate should be no higher than 30 degrees and have a power of about 110 W/m2.
Parquet is much more sensitive to high temperatures. It cannot withstand more than 24 degrees. But experts generally do not recommend laying this covering on a warm floor. Installation under coatings with low thermal conductivity - wood and cork - is also not recommended.
The most suitable materials are ceramic tiles, stone and porcelain stoneware. Any type of heated floor is suitable for them, since they conduct heat well.
It is dangerous to cover a heated floor with cheap linoleum. It is capable of releasing very harmful phenolic compounds.
Any heated floor has its drawbacks. Sometimes you simply cannot do without floor insulation, for example, in your home and on the lower floors of high-rise buildings. It is not advisable to install flooring in bedrooms - it may cause headaches.
Warm floors installed in the bathroom have their own specifics. On the one hand, the feeling of discomfort when stepping on an icy floor disappears
On the other hand, there is a room with high humidity and great care is needed during installation:
- Good copper wiring must be used;
- Then grounding is installed;
- An automatic shut-off device is connected.
There are also some requirements for the concrete screed itself. Air cavities should not form near the floor, as this can lead to insulation breakdown and breakdown of the entire system.
Advice from an expert: you cannot place household appliances on a heated floor, and furniture that does not have legs may overheat.
If it is not possible to use the services of professionals, you can do it yourself. Thermal film is best suited for DIY installation.
First you need to position the film, retreating about 70 cm around the entire perimeter. You cannot install baseboards and furniture on thermal film. All strips of thermal film must be mounted in parallel, secured with special clamps. The cable connection points must be insulated with electrical tape.
Any covering can be laid on it without a cement screed. Household linoleum cannot be laid without a screed, as it is very easily damaged. If you plan to lay carpet on a warm floor, then you need to place sheets of MDF or plywood under it to make the base rigid.
If hydronic underfloor heating is required, some additional skills will be required. First you need to remove old flooring, dust and debris.
1. In order for the screed to be of high quality, it is necessary to install beacons using a level. Then concrete is poured and leveled.
2. A heat-insulating layer is laid.
3. The pipeline is laid.
4. The entire system is carefully poured with concrete.
5. Then the selected floor covering is laid.
The time it takes for concrete to dry is about 4 weeks. If you need to speed up the drying of the floor, you can temporarily turn on the water heating with a maximum temperature of 30 degrees.
By following these instructions, you can install any heated floor efficiently. The main thing for this is desire.
Connecting the temperature sensor
Warm floors Teplolux

The temperature sensor is installed in a fire-resistant corrugated pipe, placing it directly inside. This device should generally be located at one end. The other end of the pipe is for electrical wires that connect to the main system.
The corrugated pipe leads from the thermostat directly to the place of its schematic connection. During the installation process, it is recommended to avoid unnecessary bends.
The part of the pipe in which the temperature sensor is directly located must be isolated from the external environment to avoid damage during work with concrete. , maintaining a distance from the wall of about 50–60 cm.
The next step is to check the temperature sensor for mobility. This is done so that later, if it fails, a quick replacement can be made. To check the required mobility, the sensor is simply removed from the pipe and reinserted.
How to turn on Teplolux underfloor heating
What does Teplolux underfloor heating consist of?
Connection procedure
Review of the electric heating field in the apartment
After laying the heating elements and connecting the sensor wires and heat-generating cable to the installation site of the thermostat, as well as the electrical network, it is necessary to connect the Teplolux regulator.
Installation of Teplolux cable systems is carried out in the following order:
The connection is made through an RCD, that is, a residual current device, with a rated current of 30 mA. It is placed in the electrical panel. All work is carried out with the mains power turned off.
A mounting box for the thermostat is installed in the prepared hole. Then the front cover is removed. The housing shows a connection diagram for the Teplolux regulator, in accordance with which the connection is made. More detailed information can be found in the instructions.
The installation wires have different colors that indicate its purpose:
- brown (white, black) – phase (L),
- blue – zero (N),
- yellow-green – grounding.
For Teplolux devices, the connection is made as follows:
- A sensor is connected to terminals 1 and 2. It is not necessary to observe the principle of polarity here. Connections can be made in any order.
- A power cable with a voltage of 220 V is connected to terminals 5 and 6. The phase (an indicator is used to determine it) is supplied to 6, and zero to 5.
- The heating section or mat is connected depending on its type: single-core or double-core. In the first case, the insulated conductors are connected to terminals 3 and 4, the uninsulated conductor, that is, the shielding braid, to 5. In the second case, the phase (core in brown insulation) is supplied to pin 3, zero (blue insulation) is supplied to pin 4, screen output (yellow-green) – 5. If the network is three-wire, then the grounding conductors are connected to the common ground loop through the PE terminal.
Next, the back cover is inserted into the box and secured with two screws. The front panel is returned to its place. After this, the functionality of the system is checked. To do this, first turn on the electricity, and then the thermostat.
It sets the minimum heating level. Then it switches to maximum heating, and a characteristic click of the circuit closing should be heard. Within 1-2 minutes it is checked whether the section is heating up or not. Switching off is carried out in reverse order.
Installation of Teplolux heating mats is carried out in the following order:
What to pay attention to
One of the important points is the correct choice of heating control device. Its main characteristic is power (usually no more than 3 kW), that is, what maximum load the device can withstand. If the power of the heating element is higher than this value, then an additional relay is installed between it and the thermostat. It can be single-phase with the required power.
Installation is carried out in a hidden box or in a distribution panel. Additional wiring and power supply to the electrical floor are laid from the control unit to the relay.
If you plan to use the system as the main heating, then for its correct operation you need two sensors that monitor the temperature of the floor and air.
There are different types of thermostats. The simplest are mechanical types. They are ready for use immediately after installation, but the programmable Teplolux models need to be configured.
Depending on the installation method, they can be overhead or built-in. It is easier to attach overhead ones to the wall; there is no need to make a hole as for built-in models.
For safety reasons, the installation wires of the mat into the wall should be laid in a corrugated pipe. For the same reason, it is not recommended to install the thermostat in rooms with air humidity above 80%. The device is located where direct sunlight will not fall on it. At a height of no more than 150 cm and no lower than 30 cm.
Heat-generating cables with a power of more than 2 kW should be connected using special wiring and a separate circuit breaker, which will remove the load from electric floors during power surges. It is not recommended to connect the regulator to a regular outlet. This may place unnecessary stress on the electrical wiring.
Each room must have its own control unit. This is very convenient, since for each room you can determine its own temperature regime.
Connection diagram for electric heated floor
From an electrical point of view, the “heart” of a heated floor is not the heating element, but the thermostat, and the joy of a heated floor is based precisely on the operation of the thermostat. The great thing is that most thermostats have the same switching circuit.
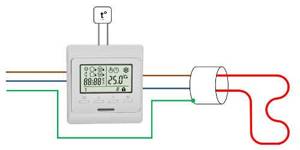
This property is due to the fact that they have a common filling. The differences between the thermostats, which are identical in electrical parameters, lie only in the design of the housing and design elements. Therefore, despite the difference in price, thermostats perform approximately the same functions.
As can be seen from the diagram, on the one hand, two wires of 220 V AC mains voltage are connected to the thermostat, at the improvised “input”. On the other hand, a heating cable is connected to the “output”. A temperature sensor is present as a feedback system that should determine when the heating element is turned on. Sometimes the thermostat may be equipped with a built-in sensor that measures the air temperature. In our case, as in most schemes with heated floors, an external temperature sensor is used as the main one. An external sensor is either a semiconductor sensor or a thermocouple, which changes its resistance depending on the temperature.
Grounding contacts are usually not connected to the thermostat. If the heating cable provides a separate screen, then it must be connected to the PE wire coming from the machine or RCD, separately in the installation box. If possible, it is better to provide a spacious installation box, because, unlike a regular outlet, you have to lay not 2-3 wires, but at least six. Typically, mounting boxes with a diameter of at least 68 mm are used.
Connecting a heated floor to a thermostat
At the stage of connecting the electric heated floor, it has already been installed and the ends of interest to us from the heating cable and thermocouple are routed to the installation box. Let's unpack our thermostat, figure out how to attach the housing to the mounting box, and look at which contacts our wires should be connected to.
The GreenBox heating cable is a two-core cable equipped with a protective shield. The screen is already connected to the PE protective conductor and is not shown in the photographs.
Network wires are connected to contacts 1-2 with strict observance of polarity: 1 contact - phase (L), 2 contact - neutral (N). Next is the heating element: 3 contact – neutral (N) and 4 contact – “phase” (L1). A temperature sensor is connected to pins 7-8; the manufacturer does not provide for polarity here. Usually all contacts are signed directly on the case and there should be no problems.
The design of our thermostat very unusually provides for fastening the housing to the mounting box. First, a black metal frame with protruding hooks is attached to the mounting box, and then, using an elastic wire in the shape of a square, the thermostat itself is fixed to the hooks on the black frame. The photo illustrates this method of fastening, but most thermostats have more conventional methods of fastening to the mounting box. A decorative frame with latches is placed on top, covering the fastening elements.
As you can see, there is nothing wrong with connecting an electric heated floor, everything is very simple. All this is more reminiscent of a construction set that anyone can “play” with, the main thing is that any games are safe. In relation to heated floors, the key to safe use is only careful adherence to the installation instructions, from the first to the last stage.
Easy programming of floor temperature
A programmable controller is a more complex controller model compared to mechanical thermostats.
Setting up a programmable controller during operation is usually intuitive, but at first you may need instructions to learn all the capabilities of the controller and control them correctly. However, this nuance more than compensates for the economical energy consumption, because the heated floor will only work at certain hours of certain days of the week.
To set the operating time of the heated floor, the thermostat has built-in programs, from which the user selects the most suitable one and independently sets the operating hours. The following algorithms are possible from the built-in programs:
- maintaining the same temperature on the floor day and night any day of the week
- automatic reduction of floor temperature day and night
- Automatic lowering of floor temperature only at night
- automatic reduction of floor temperature day and night on weekdays, on weekends only night reduction.
Each day of the week is divided into 4 periods of time: morning, afternoon, evening and night. The start and end times of each part of the day are programmed independently.
In addition to time programming, the user can configure the temperature sensor selection parameters:
- operation of heated floors using a floor temperature sensor in rooms with existing heating
- operation of heated floors according to data from air and floor temperature sensors in rooms where heated floors are used as the main and only source of heating
- operation of a heated floor without a floor sensor using one air sensor.
Additional options for the thermostat include such useful functions as setting the maximum and minimum floor temperatures, child protection with button locking using a hidden button (it must be pressed with a paper clip or a pin), frost protection in rooms that can cool down to street temperature with maintaining a minimum air temperature of +5°C, a hard reboot of the thermostat with a return to factory settings if programming is incorrect, a warning about a malfunction of the regulator (clock failure due to a power outage, overheating of the regulator, break and short circuit of the temperature sensor, overheating of the floor above the set temperature).
User manual

After completing all installation work, you must wait the recommended time of 30 days and only then turn on the system. Now it remains to figure out how to turn on the heated floor and enjoy the cozy and comfortable environment of your room. After completing installation, it is advisable to read the documentation. The operating instructions very clearly outline all aspects of the system’s operation and the procedure that must be performed to enable and further operate the system as a whole. In the future, you will independently make all the settings at your discretion and the level of comfort of your room.
After the concrete screed has completely hardened and then decorated, the first turn-on can be performed. The first step is to turn on the temperature controller and set the maximum temperature.
The maximum temperature is set to quickly warm up your room. After establishing the desired temperature inside the room, you can reduce the operating temperature parameter to the required level.
It is important to note that when turned on for the first time, the floors will take a long time to warm up; the process can take from 8 to 48 hours, depending on the area of the heated room.
Thermostat "Teplolux" tp 520, installation instructions
This model of thermostat allows its installation both in a socket niche inside a wall and on top of a wall in a protective box.
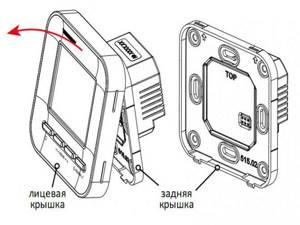
The device is connected to the working network through a machine equipped with a residual current device. The wires of the heating sections and the floor temperature sensor are connected to the terminals of the device using screws. The leads from the protective braiding of the heating cables are connected to the grounding bus through an external terminal block.
The thermostat model 520 is democratic and can work with floor sensors from other manufacturers, the main thing is that its resistance corresponds to the parameters of the original one - 6.8 kOhm. An external temperature sensor is connected to the corresponding terminals of the regulator without determining the polarity.
After installation of the heated floor is completed, its performance is checked using the Teplolux thermostat. The operating instructions for the device describe in detail the options for setting certain parameters of the heater. The front panel of the device contains four main buttons and a liquid crystal screen that displays the current state of the heating system.
Installation
Installation rules are described in detail in the operating instructions. According to statistics, malfunctions in the operation of the system often occur when the manufacturer’s recommendations are not followed when laying the structure with your own hands.
Before installing heated floors, you need to carry out preparatory work. Any selected modification of the heating system must be laid on a level base. To level the surface, it is recommended to use self-leveling self-leveling floors.
During the work, you need to make grooves in the wall. They are necessary for routing wires, sensors and the regulator box. A remote temperature sensor should be connected to the thermostat. The control unit must be installed in the same room with the heating system at a distance of more than 15 cm from the floor. The wires are connected to the temperature sensor according to the connection diagram. After all connections have been made, you need to turn on the system to ensure its functionality. A switched-on lamp in the control panel indicates that the design is working. After checking, the power must be turned off.

In order to improve thermal insulation, thermal insulation material should be laid. You can use polystyrene foam or polystyrene foam. Do not neglect work to improve thermal insulation. In this way, it is possible to increase the efficiency of floor heating and provide maximum protection of the floor surface from heat loss.
The next stage is laying the heating structure. It should be noted that the distance between the cables should not be more than 10 cm. Installation of mats must be carried out taking into account the fact that massive pieces of furniture should not stand on the structure. It is recommended to lay warm floors at a distance of 10-15 centimeters from the wall.
The last stage is the screed. To do this, fix the heating cable with a solution, stretching the composition along the entire length of the structure (height up to 12 mm). Fill the floors with screed (layer thickness should be within 3-5 cm).
In order for the underfloor heating system to function without interruption for a long time, the following rules must be observed:
- do not walk on resistive cables so as not to damage their integrity during installation work;
- make sure there are no air gaps near the heating elements to avoid possible risks of overheating;
- to check the wires after installation, use the resistance measurement method;
- It is not allowed to use the system until the screed is completely dry.
When you first start up heated floors, it may take 48 hours for the structure to warm up.
To ensure that heated floors last as long as possible, follow the manufacturer’s recommendations specified in the instructions:
- After installing the heating structure, the system cannot be started for 28 days. After this period, you are allowed to turn on the thermal regulator. When starting the system for the first time, it is recommended to set the maximum permissible temperature parameters. After the room has warmed up, you need to use programming on the remote control to reduce the temperature to the optimal one.
- Be sure to include a temperature sensor in the circuit. Due to forgetfulness or the desire to save money, the heating system may soon fail.
- Do not use cheap control devices from Chinese manufacturers. The use of “non-native” equipment often leads to malfunctions of the heating system or its complete failure to function.
If any malfunctions are detected in the operation of heated floors, the heating structure must be turned off immediately. The use of faulty equipment is prohibited.
Equipment
There are many modifications of underfloor heating systems on the market (more on this below), but their basic equipment is almost the same. The kit includes:
- Heating element. This is a special mat or a piece of heating cable. It must have a mounting end. With its help, voltage is supplied to the heating system. There are two cable options: single- and double-core. This feature affects the power of the entire heating system.
- Mounting tape. Required to facilitate the installation process.
- TeploLux. He will program the system for the desired mode. In addition, it helps control electrical energy consumption.
This is basic, but for greater efficiency of the entire system, additional purchase of some equipment is required. For example, thermal insulation. It is needed to maintain optimal indoor temperatures and to retain heat. Plus, under the heated floor system you can lay a heat-reflecting film, which directs all the heat energy upwards in the room.
It is especially important to purchase backup equipment for thermal insulation of the floor when the heating installation takes place on the ground floor, and there is soil underneath. .
Installation rules
The installation technology, if briefly stated, boils down to the following operations:
- preparing and cleaning the floor surface;
- leveling its surface (if necessary);
- laying thermal insulation;
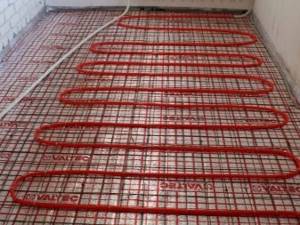
- uniform (according to the project) distribution of mats over the entire floor surface;
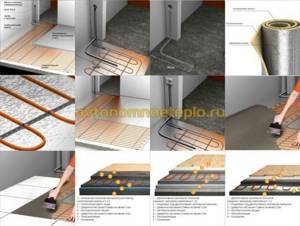
- connecting a temperature sensor;
- installation of a thermostat;
- powering the heated floor with a separate line from the electrical panel to an individual RCD;
- connection of the entire system. Checking the reliability of connections;
- filling the screed.
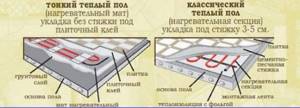
After completing all the work, the system should be turned on at least 30 days later, since the screed must become strong enough. This installation scheme is suitable for almost any type of Teplolux scheme. Preparatory activities include checking all circuit parameters and their compliance with the designated installation location, as well as checking compliance with the following rules:
- installation of heating sections is carried out in places where massive furniture is not located;
- to use the circuit as an additional heating source, its specific power is 110-120 W per square meter. m;
- in case of installation of a basic circuit, the specific heating power should be at the level of 130-150 W per square meter. m, and the area corresponds to approximately 70% of the total heating area;
- To install the devices, grooves are prepared for laying the wiring. The control unit is mounted at a distance of at least 15 cm from the floor. Before starting, the connection diagram is checked by a tester and configured;
- The functionality of the circuit is tested after installing the cable, laying the screed, and installing the floor covering.

The sequence and installation rules are explained in detail in the operating instructions, according to which you can configure the heating system
For uninterrupted operation of the system for a long time, it is important to adhere to the following rules during its installation: . Do not walk on a resistive cable to avoid damaging it; The appearance of air bubbles near the heating conductor is not allowed, as this can lead to its overheating; after installation, test measurements of the system resistance are made; You cannot turn on the circuit until the screed is completely dry.
- Do not walk on a resistive cable to avoid damaging it;
- The appearance of air bubbles near the heating conductor is not allowed, as this can lead to its overheating;
- after installation, test measurements of the system resistance are made;
- You cannot turn on the circuit until the screed is completely dry.
Thermostat installation
If you approach the installation of a programmable thermostat with all responsibility, you can do all the work yourself, without the services of a specialist. Before installation, first of all you need to read the attached instructions, where the manufacturer has indicated all the necessary information. Next, they determine the location of the thermostat, based on its power and the power of the heated floor. The installation site must also be protected from heat sources and direct sunlight. Having decided where the thermostat will be located, proceed to its installation according to the following scheme:
In the chosen location, a niche is made according to the size of the device and its box is installed.
Carefully install the device into the mounting box without damaging the elements.
Wires are connected to the thermostat sockets according to color assignment.
Lastly, connect the temperature sensor to the product and close the lid.
Possible problems with the system
A common mistake in the operation of heated floors of this brand is a violation of the normal functioning of the system. Check if the cable is heating up:
- The system should warm up at a rate of approximately 1-2 hours after startup. When you turn it on for the first time, the surface will warm up for about a day;
- The functionality of the system is checked using resistance measurements at the edges of the cable or thermostat terminals. Deviations from the standards specified in the operating sheet may be a maximum of 5%;
- Do you use consumables and control devices of another brand? The organization "Special Systems and Technologies" produces all the required accessories for the TeploLux floor. If you use equipment from another brand during installation and at the time of use, this will disrupt the operation of the system;
- thermostat and temperature sensor - you can find out about the problem using a tester. When replaced, the functionality of the heating system is completely restored.
To avoid damage to heated floors, you should strictly follow the recommendations regarding installation and use. This is the only way you can count on maintaining the system’s functionality for at least 20 years.
Now you know about all the features of TeploLux heating floors. As you can see, they have different types and their own opposite sides. In addition, you can handle the full installation even if you do not have enough experience. If a malfunction occurs while using the system, do not hesitate - contact specialists who can help resolve your problem. In addition, there is enough information and reviews on TeploLux heated floors on the Internet. Therefore, you can easily find the most objective information regarding the choice of heating system.
Final screeding after installation
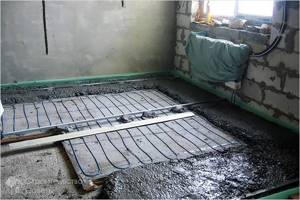
The final stage of installation work on laying a heated floor can be considered a screed with cement-sand mortar. First, fix the heating circuit cable with a small amount of solution, which must be stretched over the entire length of the wire.
This way you will insulate the heating cable and ensure safety during further work to avoid accidental damage during the final screed. You can also use special fastening strips that secure the cable and ensure its uniform laying.
For heated floors Teplolux. When working with concrete, it is recommended to use polymer reinforcing mesh. This will prevent unwanted cracks from appearing as the solution dries.
After the completed screed has completely dried, you can begin decorating and laying the floor covering.
Types of Teplolux heating systems

Warm electric floors Teplolux are divided into types according to such cable parameters as its location in the heating mat and how many cores are in it, what is the thickness of the mat.
Let us highlight separately the most popular models of this brand.
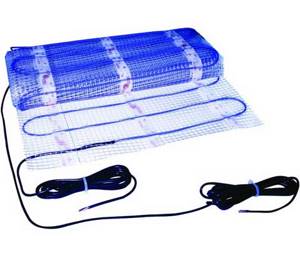
- Teplolux heated floor Mini . This is an ideal solution for warming up rooms with low ceilings, where every centimeter counts. The extremely thin thickness of the mat makes it possible to significantly reduce the height of the screed. Installation comes down to “assembling a puzzle”: cut the mats into pieces and assemble them according to plan, without any additional cable pulling.
- Teplolux Tropix. The system is similar in purpose and size to the Mini model, but more modernized, and instead of a single-core cable, it is provided with a two-core cable.
On a note
Both of these models are considered ultra-thin because they take up virtually no space in the room. When installing heated floors under tiles, you don’t have to use a cement-sand screed at all; the floor is laid in a tile solution.
- Warm floor Teplolux Pro. It incorporates the best innovative developments, and the modern technologies used in production ensure high quality. All this became the basis for a lifetime warranty on these products.
Peculiarities
Warm floor "Teplolux" is a system consisting of cables. Depending on the design variation, the device can use single- or double-core sections with different lengths, power and other technical characteristics. All types of heated floors have one configuration. In the box you will find:
- Heating sections. They are sections of cables. They are equipped with mounting rings through which electricity is supplied. The cable can be either single-circuit or double-circuit.
- Styling tape.
- Installation instructions.

The main element of the system is the cable. Its task is to convert electric current into thermal energy. This conversion is carried out by shielded heating cores protected by an insulating layer. During long-term operation, the temperature of the section can reach 70°C. The insulating shell can withstand temperatures of 100°C, which ensures the reliability and safety of the entire system.
Design features
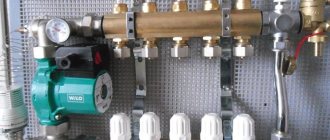
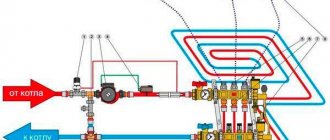
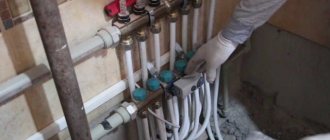
It is necessary to take into account in advance the details that distinguish certain equipment. So, in some situations, a built-in boiler pump is used to circulate coolant throughout all circuits. For a large facility, its performance may not be enough, so you will need to install a separate power unit.
When using radiator heating, routes are created with a minimum number of turns, without sharp corners. By adding tilts towards the boiler, natural circulation can be ensured under the influence of gravity.
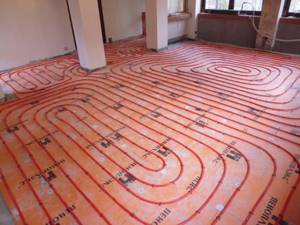
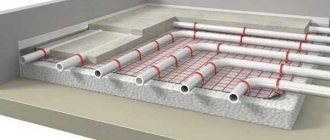
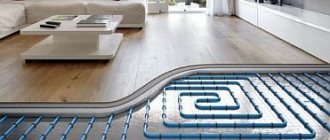
In heated floors, long pipelines with a large number of bends are installed
It is more difficult to pump water through such a system. Only coercive methods are used here. If there are errors in the calculations, the power of a separate pump will not be enough for distant circuits. In this case, their poor heating cannot be eliminated by removing air plugs. The system will need to be modernized.
The comb regulators must first be correctly adjusted. In addition to mechanical flow meters, valves with electric drives are installed. Such devices change the coolant supply rate taking into account the readings of temperature sensors.
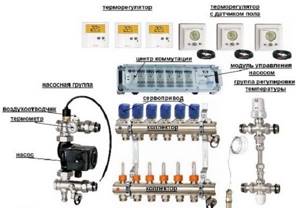
Automated adjustment system

