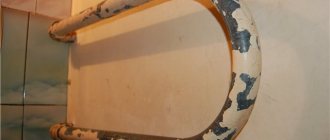
The appearance of water on the floor under the bathroom after bathing or taking a shower is an unpleasant problem that causes unnecessary trouble for residents and poses a threat to the budget and relations with neighbors below in the event of flooding. In addition, constant moisture under the bathtub promotes the formation of mold and mildew, which is unsafe for the health of residents. You can get rid of the problem by finding out the cause of its occurrence. Most often, leaks occur due to the following factors.
A siphon is leaking in the bathroom: ways to eliminate the leak
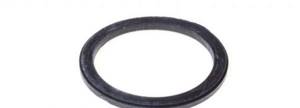
1. If the ring has burst or stretched, then replace it with a new one.
2. If the overflow pipe bursts, replace it by installing a new one. You can also read about how to remove the siphon from the bathtub and replace its parts with new ones in the article on our website “Installing and replacing a bathtub siphon.”
3. If the ring has moved, then correct it and tighten the nut well.
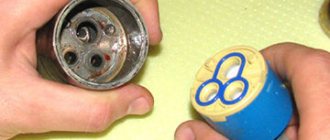
4. If the siphon is dirty, do the following:
5. If the O-rings have changed shape, this may be due to cleaning the siphon. And you will not be able to return the siphon to its place as it was long before its current form. Therefore, it is better to change the siphon when cleaning it.
Perhaps the siphon under your bathtub is leaking because you chose it incorrectly? The article on our website “Types of bath siphons” will tell you about the different types and models of these devices
Let the instructions on our website on how to choose a bath siphon become your guide to the world of plumbing. Read it here: https://remontspravka.com/siphon-selection/
How to install or replace a siphon with your own hands? Refer to the advice of experienced people on our website!
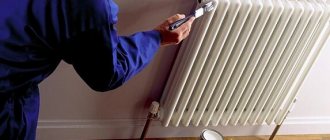
Often replacing the rings does not help. Then - seal the joint between the siphon and the bottom cover with silicone sealant.
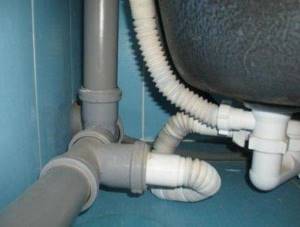
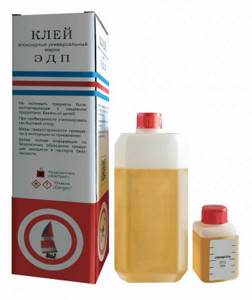
6. If the siphon is leaking under the bathtub at the junction of the drain and overflow pipes, then seal the entire circumference of the joint over cement sealing using liquid glass, i.e. office silicate glue. This way, you will reliably seal the cracks in the cement.
7. If the siphon connections are not tight, apply sealant to them. Also, additionally “wind up” the thread with tow or special silicone tape if it does not fit tightly. And then coat the thread with paste and screw the part.
Siphon repair completed
Source
Precautionary measures
Fecal water and sludge are very toxic and chemically aggressive substances; Sewer gases are also explosive. The danger is compounded by the fact that toxic substances can enter the body through intact skin.
Mains plumbers are well aware of this and do not neglect safety precautions.
Domestic plumbers rarely have to deal with large masses of toxic substances or gas emissions from a pipe, but in each such case the consequences are severe precisely because of the neglect of safety precautions
Apartment residents have nothing to fear: the water seal in the siphon elbow reliably locks the pipe outlet. But when replacing the siphon, its pipe will be open, and you will have to work with your hands in the immediate vicinity of the sludge deposits and clean it off. Therefore, stock up on latex gloves, a plastic apron and a petal respirator. If suddenly you experience that same 1 in 10,000 cases, it will do no harm.
Where to start fixing a leak
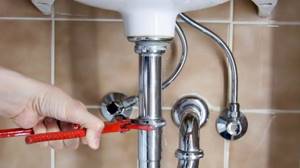
Standard situation - it was discovered that a pipe is leaking: what to do in such cases? The first step is to determine exactly where the pipe is leaking. If a sink, washbasin or bathtub drain is leaking, the cause of this phenomenon is usually a poor-quality connection of the drain hole, siphon and entrance to the pipe.
In this case, to fix the problem, you will need to tighten all the threaded connections through which the sewer pipe flows. Sometimes it helps to replace the gaskets at these joints.
Localization of leaks
The most vulnerable places for leaks are:
- areas of additional tie-ins for branches;
- areas continuously under mechanical load;
- places where electric welding was carried out;
- heating radiator connection areas;
- threaded connection areas;
- straight sections of metal lines.
The listed communication nodes must be checked regularly, and you should be alert if there is a drop in water pressure. If you cannot visually detect a leak, you need to take napkins or toilet paper and completely wipe the pipes. When moisture appears, the problem must be identified and corrected immediately.
If a pipe leaks at the connection
Using the caulking method for cast iron pipelines
If leaks are detected at the junction of cast-iron sewer pipes, you should prepare for a rather complex procedure for eliminating the problem (read: “How to repair a crack in a cast-iron sewer pipe - reliable and proven methods”). In this case, much depends on the quality of the docking work.
If caulking is carried out with lead, the procedure is as follows:
What to do if the pipe in the toilet is leaking:
Polyurethane foam
You don’t want to mix cement mortar - polyurethane foam is used.
The algorithm of actions is as follows:
- the joint is prepared - cleaned of dirt and dust, the surfaces are treated with degreasing liquids, then dried;
- The foam container is thoroughly shaken before use;
- the gap is filled with foam. As the foam gains hardness, it increases in volume by 30 times;
- excess foam, after it has completely dried, is cut off;
- the surface treated with foam can also be refined with ceramic tiles or paint.
Sealing a seam in a bathroom with foam
Installing the bandage
If a pipe in the bathroom is leaking, a temporary solution to the problem is to install a bandage. Before this, you need to determine what type of damage you will have to deal with (fistula or leakage), and where exactly it is located.
The rubber band is applied as follows:
You can easily purchase a clamp in a store, but it happens that you don’t have it at hand at the right time. In this case, you can make the clamp yourself, or use wire, a harness, rope or hose instead.
The bandage rubber can be an old rubber boot, from which the boot is cut off. The same goes for a rubber hose and a bicycle tube. The width of the bandage is made depending on the diameter of the pipe being repaired.
Carrying out repairs
Do not rush to throw away this product, even if its damage seems catastrophic. In any pantry you can find supplies to quickly close gaps in the shortest possible time.
Depending on the nature of the damage to the drain system, the following actions can be performed:
- Restoring the tightness of gaskets. The best option is to replace them completely. As a rule, such products can be purchased at any plumbing store. It is recommended to lubricate new gaskets with Vaseline or liquid soap to make them easier to fit into place. If for some reason there is no opportunity to purchase new linings, then this is not a problem. Old gaskets can be generously lubricated with sealant, silicone glue or liquid nails. After this they are installed in place. You can use the drain after polymerization of the sealed material. Such repairs are guaranteed to last for several years of operation of the siphon.

When the integrity of the edges is damaged, you can use cold welding. However, this method is not reliable as the plastic may crumble further. There is only one way out: purchase a new siphon and install it according to all the rules specified in the instructions.
Using a wooden wedge in the bathroom
There are situations when a high-pressure leak occurs, but there is no possibility of shutting off the water: how can you prevent the pipe from leaking? A bandage usually doesn’t help in such a situation either.
If the leak is caused by a fistula, it can be eliminated using a small wooden peg in the form of a wedge. The size of its tip is made the same as the resulting hole in the pipeline.
The peg with its sharp end is inserted into the fistula, after which it is hammered in with a hammer. This temporary measure allows you to gain time needed to call emergency services.
Sealing a pipe in a toilet
A leak in a pipe can also be eliminated with an adhesive bandage.
The procedure in this case is as follows:
When using fiberglass, the cut piece should be enough to wrap the pipe at least 5-6 times. The width of the bandage should exceed the diameter of the pipe by at least one and a half times. It is more convenient to apply glue to the bandage with a brush or spatula.
After wrapping the bandage fabric around the pipeline, it is secured with a tie or clamp until it dries completely. The glue usually dries within 24-72 hours. The air temperature must be at least + 15 degrees.
How to fill large gaps
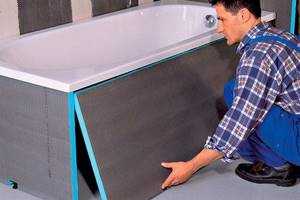
Major work is required to close gaps wider than 5 cm. You can build a plasterboard structure, which will require metal profiles and moisture-resistant drywall. The work is similar to the construction of a plasterboard partition, box or decor.
First, the frame is assembled, the fastening elements of which are dowels and screws. After installing the profiles, a sheet of plasterboard is cut to the required size and attached to the frame. The cladding is done at the discretion of the owners. You can apply waterproof decorative plaster, lay tiles or install wall panels.
In this case, you need to pay attention that the installation of the plasterboard box should be carried out taking into account the thickness of the tiles and the adhesive layer. The finish looks beautiful when the tiles are laid flush with the sides of the bathtub. After this, the tile joints are covered with a fugue, as described above.
If a metal pipe is leaking
It often happens that a pipe in the bathroom leaks: what should you do to avoid flooding the apartment and the neighbors below?
In this case, proceed as follows:
Before screwing on the coupling, it is necessary to seal the threaded sections of the section using flax, sealing putty, or a special tape-fuser. In addition to repairing metal pipelines, leaks on pipes made of other materials can be repaired in the same way. If it is not clear what to do if a pipe is leaking, it is best to turn to professional plumbers for help.
Source
Matching the sealing material to the style of the bathroom
When carrying out construction work, one should not forget about the aesthetic side - the interior design of the bathroom. Wall decoration should look harmonious, which means that the material for sealing joints must be correctly combined with wall cladding, plumbing fixtures and the general furnishings.

If you are doing a budget renovation, both curb tape and plastic baseboard will do. To seal a very narrow gap, one strip of sealant is enough.

And finally, a few more tips on using sealant:
Features of diagnosing a faulty siphon
Most often, the cause of the leak is determined after disassembly. By the way, it is highly desirable to disassemble and assemble the siphon without the use of special tools. After disassembly, each part must be inspected and, if necessary, cleaned of dirt. It is better not to use wrenches when assembling and disassembling the siphon, even if we are talking about a metal element, and even more so if it is a plastic one. The plastic is quite fragile and a wrench can damage it.
Before disassembling a faulty siphon, it is recommended to take the following measures. Buy a special product for cleaning drain pipes and pour the mixture into the drain, then rinse with boiling water after a while. This will slightly clear the siphon of contaminants and simplify the disassembly process in the future.
After determining the location where the malfunction occurred, the water supply is shut off and the siphon can be removed. It is better to disassemble the plastic version exclusively by hand, but when disassembling the metal version, you can use power tools. In a metal siphon, the nuts can stick tightly to the metal, so it is better to cut off their caps with a grinder so as not to damage the structure, and simply drill out the remaining fragments. When the drain is disassembled, it is advisable to wash each part in hot water and soap. No foreign chemicals should be used as there is a risk of damaging the equipment. The cleaned parts are wiped and dried, and then repairs can begin.
Methods for eliminating leaks
As a rule, repairing a siphon is not a difficult task. And the materials necessary for this can be found in the pantry of almost any home. Below are some recommendations on what to do if the siphon is leaking.
Required Tools
Plastic siphons can be disassembled by hand, so no special tools are needed. Although in some cases a screwdriver, a cable for cleaning drain pipes may still be useful (a metal brush with a long handle or even an ordinary wire brush will also work), and it is advisable to stock up on a rag and a container for water. To restore the tightness of spare parts and their joints, silicone glue or sealant, a “liquid nails” type composition, and sometimes even a regular medical bandage are useful.
Siphon leaks can be eliminated using “liquid nails”
If you have to disassemble a metal siphon, especially one that has been in use for a long time, you may need tools such as a grinder and a drill. With their power, it will be possible to disassemble the siphon by sawing off the caps of the bolts, and then drilling out what is left. In order not to damage the metal siphon during disassembly, it is recommended to use power tools.
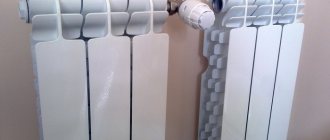
Restoring the tightness of gaskets
Abrasion or other changes in the condition of the gaskets can cause the siphon to begin to leak. Rubber parts that have hardened during use are best replaced. Usually they are available in any specialty store. In order for the purchased parts to last longer, they are lubricated with liquid soap or Vaseline, which facilitates the installation process.
However, there is not always the desire or opportunity to purchase new gaskets. In this case, you can try to restore the old ones. To restore them, they must be lubricated with silicone glue, sealant, or a compound called liquid nails, and then put in place. When the applied composition dries, the plumbing fixtures can be used. This measure will extend the life of the rubber gaskets for several more years.
Repairing cracks
If the pipe is cracked at the seam, then repairing it is quite simple. To begin with, the split site is cleaned with sandpaper and then lubricated with pre-diluted epoxy glue. If desired, dyes can be added to the composition used.
To repair cracks you will need epoxy glue
When the surface is lubricated, it is wrapped with a medical bandage. This event is performed two or three times. This creates several layers of epoxy glue and bandages on the pipe. The drying time for this design is about six hours. After drying, the siphon can be put back in place and the plumbing can be used. A pipe reinforced in this way becomes much stronger than the one originally purchased.
Sealing connections
Sealing of connections may be necessary due to manufacturing defects or during operation. Sometimes it becomes necessary to additionally seal the joints of the siphon parts. For example, a worn thread prevents the rubber gasket from being pressed tightly against the hole. In this case, tow or silicone tape is used for compaction. It is important to remove excess sealant after securing the nut. In some cases, if the thread is seriously damaged, cold welding can be used, however, this will extend the service life for only a short time, since the fragile plastic will soon continue to crumble. In this case, it is better to take care of purchasing a new siphon.
Possible causes of leakage
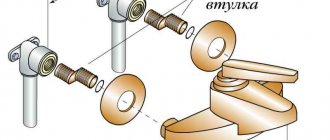
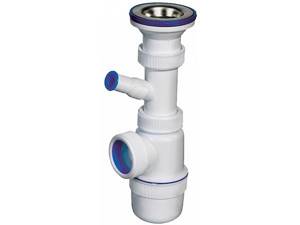
Today, siphons made of plastic and metal are used in the sewer system. Plastic devices consist of several parts. Their connection is made using union nuts, rubber gaskets and cuffs. There is no need to use tools for assembly; all actions are performed by hand.
Steel siphons can be found quite rarely today, except in old houses. They are durable and reliable. The steel pipe in the bathroom is attached to them with bolts, and sheet rubber gaskets are installed between the drain fragments.
If the drainage system is leaking, the reasons for this may be the following:
- Mechanical damage. These may be cracks and chips. This happens from impacts, sudden movements or strong lateral loads. As a rule, flasks crack when a loose shell moves to the side under accidental pressure.
- Incorrect assembly. Quite often, novice home craftsmen make mistakes when installing a sink with drain. Most often, they distort the threads on the connection or do not tighten the union nuts to the end. Sometimes the gaskets do not match the diameter of the pipes. In some cases, the connections are made incorrectly.
- Factory defect. This happens if you buy goods from unverified retail outlets. Poor-quality siphons may have cracks in the body, incorrect geometry, sagging and dents. It is through them that the drained liquid can flow.
- Dry gaskets. The rubber used to make them has a limited service life. Over time, due to the effects of cold and hot water, it becomes hard, loses its shape and decreases in volume. This leads to the formation of cracks and leaks.
If the siphon is leaking, it can be completely replaced or repaired. Installing a new device does not always give the desired results. You can acquire a defect or make mistakes during assembly. Fixing an emergency can take much less time than getting ready and going to the hardware store. In addition, working with your own hands allows you to save a certain amount of money, which can be spent on other purposes.
Recommendations for the operation and prevention of siphon leaks
The siphon, like many other household items, needs maintenance. It must be disassembled and cleaned at least once a year. At the same time as cleaning, it is recommended to check the parts for scuffs and other damage. Also at this moment it is worth changing the gaskets or lubricating the old ones with sealant.
It is important to remember that to prevent contamination of the siphon, you should not pour food waste, tea leaves, or even just dirty water into the sink, as the water will go away, and all other impurities will remain on the walls of the structure and, at best, will lead to the need for quick cleaning. Before you pour anything with foreign particles into the sink (everything except water, including even ordinary soup), you need to install a special strainer that will protect the siphon from waste. The stuck particles are removed from the strainer and thrown into the trash.
By the way, when pouring out a fatty liquid, it is worth considering that fat can also settle and accumulate on the walls of the siphon. This can be partly saved by special chemical mixtures for cleaning drain pipes. They, of course, will not replace a full cleaning procedure, but they will allow you to perform it a little less often. The main thing when using such household chemicals is to carefully read and follow the instructions on the packaging, otherwise the procedure may not have any effect.
Source
Ceramic skirting boards - a beautiful solution
- ideal if there are tiles on the wall;
- attractive appearance;
- reliable protection against leakage;
- durability.
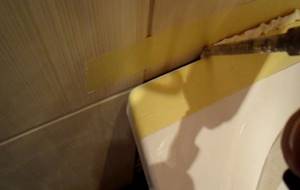
- Traditionally, we prepare the junction area with the wall, clean it from dust, and degrease it;
- seal the gap with cement mortar;
- laying ceramic plinth;
- We seal the seams with white sealant (to match the color of the bathtub).