A little about the heat transfer of radiators
There are often cases when new aluminum or bimetallic radiators are knocked out of the interior, disrupting its harmony. The issue of finishing is quite relevant and requires a special approach, since installing a decorative casing on a heating radiator ensures its pleasant appearance, but disrupts the process of heat transfer from the device to the room. Let’s try to figure out why this happens and whether it can be avoided before we start making the screen.
The thermal energy released into the room by a heating radiator has 2 components: radiant and convective. The first is characterized by direct infrared radiation entering the room from the hot surfaces of the battery. At low coolant temperatures (up to 50 ºС), the share of radiant energy is small, but at 60 ºС and above it increases significantly. When a decorative box for a battery is installed, the path to the flow of this radiation is inevitably blocked, which means that part of the thermal energy does not enter the house.
The exception is convector-type water heaters; their front surfaces are not hot and there is practically no radiant component. But such heaters are rare.
The convective component is the transfer of thermal energy to the air environment. Battery panels also have an impact on it, as they create an obstacle to the air passing through the fins and other elements of the heating device. And in the case when the design of the screen is unsuccessful, part of the hot air simply accumulates inside the box, unable to escape outside.
The short conclusion is this: by installing decorative screens for radiators, we disrupt the heat exchange process and part of the energy is returned to the heating network through the return pipeline. This is not so scary in a private house, where the system is located throughout the house and this heat will not leave it anywhere, but will simply be transferred to another room. But in the case of an apartment, we simply give away the heat we paid for to our neighbors on the riser, this must be understood.
Depending on how the batteries are decorated, losses range from 3 to 7%. They cannot be completely avoided, but they can be reduced with the help of a successful screen design.
How does the screen affect the heating process?
In pursuit of the external beauty of the product, one should not forget about its functionality - the screen should not interfere with effective heat exchange in the room. Do not be afraid that after installing the grille on the radiator, heat will be retained, which will provoke an increase in home heating costs. If you select the right design, such problems will not arise. Moreover, with the help of a special layout and configuration of the screen elements, you can even increase the amount of incoming heat.
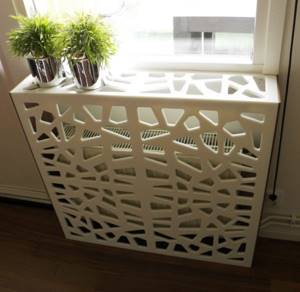
The larger the holes, the more efficient the heat transfer
If you understand the operating principle of a standard heating radiator, then there will be no problems with choosing the correct design of a decorative screen.
Operating principle of a heating battery
When heated, the heating radiator transfers heat into the room as a result of the movement of heated air masses (convection process) and through direct thermal (infrared) radiation.
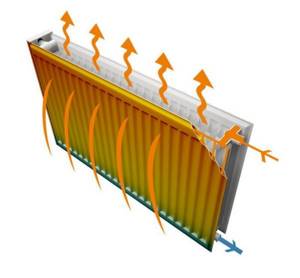
The principle of operation of the radiator
The effectiveness and priority of each of the two thermal energy transfer options may vary. This is influenced by the design of the radiator, the temperature of the coolant and air in the room, and the presence of obstacles in the path of heat flow.
So, at not too low temperatures, cast iron batteries give off heat according to the principle of convection, but after the coolant temperature rises to 70 degrees and above, heat is transferred using infrared radiation.
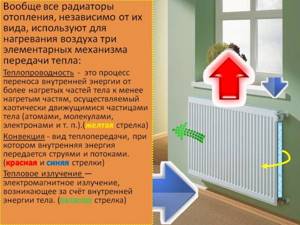
Main methods of heat transfer
So, in order to ensure free air circulation, the converter radiator is equipped with a grille that does not have an upper horizontal panel.
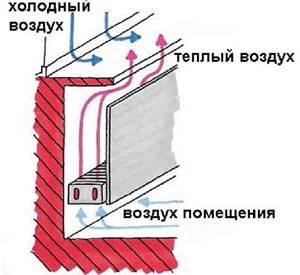
Warm air distribution
What to consider when choosing a grate
The main rule that must be observed when choosing a grille is that its design should not interfere with the free circulation of heated air and the passage of infrared radiation. This is possible if the front panel of the grille is equipped with a sufficient number of holes, amounting to at least 50% of the total area, and the free passage of warm air is ensured above the battery.
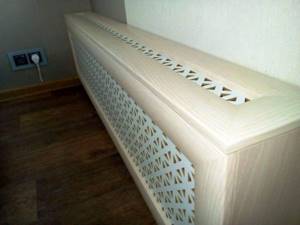
The holes at the top should not interfere with convection
It is also recommended that the material used has excellent thermal conductivity and allows air to flow freely into the room. If the inner surface of the screen is painted black or dark brown, the heat absorption will be better.
Choosing material
First you need to choose the right material from which the screen for the radiator will be made.
heating. The options are as follows:
- plastic;
- metal;
- tree;
- MDF panels;
- drywall.
Plastic is of little use for our purpose. Not only does it conduct heat poorly, but over time it warps under its influence. In addition, the cost of plastic panels is quite high. The only advantage - ease of processing - is completely negated by significant disadvantages.
From the point of view of heat transfer, metal screens on radiators are the best option; by installing such a casing, you can easily keep the losses within 3%, which is almost imperceptible. To do this, you can purchase thin sheet metal with a polymer coating of the desired color and fix it, for example, on profiles for plasterboard systems. However, metal processing is not an easy task and at home, and even without the skills, it is unlikely that you will be able to assemble a decent product.
A good option is battery screens made of wood. Even though wood does not conduct heat well and requires maintenance, there is still room for imagination and the opportunity to create a simple and successful design. It is quite possible to assemble it yourself, and it will serve for a long time.
The same should be said about such material as laminated MDF panels. They are easy to process, strong and durable, and the external pattern can be successfully matched to the interior of the room. Another advantage is that MDF screens do not require maintenance like wooden ones. The cost of the material is quite affordable, so wood and MDF products are the most common options for upgrading heating devices.
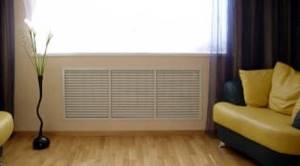
A little about plasterboard sheets as one of the most popular finishing materials. It is also quite suitable for our purpose, but making a homemade screen from plasterboard is more difficult, it requires initial skills in working with this material, and the cost will be more expensive.
How does the heating system work?
If you are afraid that covering the heating devices with screens will make the room cooler, then this is not so. A correctly chosen design that takes into account the operating principles of the radiator does not reduce the degree of its heat transfer.
Heating devices transfer heat in two ways - convection (mixing cold and warm air masses) and radiant energy (the higher the radiator temperature, the higher the radiation power).
The batteries begin to heat the air first due to convection, but as the temperature rises, infrared radiation becomes more intense. Heating devices made with the latest technology are able to capture changing external conditions, redistributing energy flows to increase its transfer.
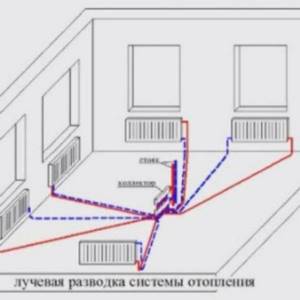
Let's say air circulation is hampered by a curtain or decorative shield. A modern radiator will begin to increase the temperature of the front panels so that heat transfer begins to occur not by convection, but by infrared radiation. This property significantly increases the efficiency of radiators.
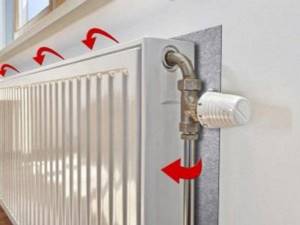
For any type of radiator, it is necessary that the front panel of the decorative screen has many holes , and there is enough space between the panel and the radiator to form an air gap. This way, heat transfer through convection will not be disrupted.
If you place a substrate with heat-reflecting properties behind the heater, and make the back surface of the screen black, this will increase heat transfer due to infrared radiation.
How to do it yourself?
Making a panel for a heating device begins with choosing the desired design. You need to proceed from the location of the radiator, existing skills in processing various materials, the availability of working tools and available materials. At home, the easiest way would be to make either a screen-box or a shield-grid. Let's look at how to make such screens yourself.
"Box"
The most popular among home craftsmen is a box-shaped screen. There are a lot of options for making panels for such a box, as well as the materials used. Let's consider the most affordable and easy-to-create box made of mesh framed with a frame. First we need to prepare what we will make from and with what.
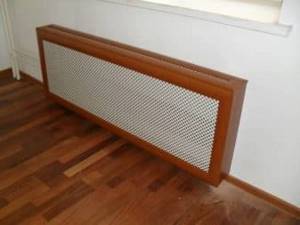
Decorative lattice
If there is no need for a screen-box, you can completely get by with a screen in the form of a facade panel. Such a panel can correspond to the size of the radiator or, in its size and shape, correspond to the owner’s wishes. The grille panel can be made in the form of a frame with a metal mesh or a perforated MDF panel. The process of manufacturing such a grille is similar to the process of manufacturing the front part of the camouflage box, discussed above.
What are gratings for?
Most often, grilles are installed on radiators for decoration purposes - sometimes they can be very beautiful. You can even decorate a room with their help.
The second task they often perform is covering sharp and hard edges. This is especially true in families with children or in rooms where unattractive, traumatic old-style cast iron radiators (“accordion”) are installed - they can only fit into rooms decorated in a loft style.
In addition, by installing decorative grilles, you can:
- Protect radiators from dirt and dust.
- Ensure uniform distribution of warm air masses throughout the room - when installed correctly, they do not impede air circulation.
- Protect small children from burns and bruises in case of contact with heating devices - the surface temperature of the grilles is much lower than that of radiators.
If the radiator is not located in a niche, then you can cover it with a case with a lid - and a shelf will appear in the room. Another plus is that such gratings do not require periodic painting.
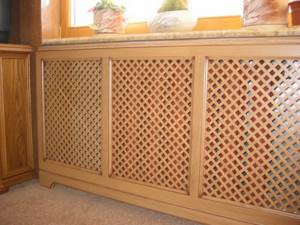
Do they reduce heat transfer?
Radiator grilles are needed not only for decoration - the radiators must heat the room.
The principle of heat transfer from a heating radiator without a grille is that air comes from below, passes along the radiator, heats up and goes up - this is how heating works.
This should be kept in mind when choosing a grate:
- for air to circulate normally, there must be a gap at the bottom of the decorative screen, and the lid at the top must have a large perforation area;
- box-shaped gratings with walls on all sides must be very openwork; if they are made of solid wood, have almost no perforation or the holes are too small, heating will be ineffective.
Any grille on heating radiators reduces heat transfer, even the most delicate and thin one. But depending on the material of manufacture, in one case the amount of heat transferred can decrease by 10-15%, and in another - by 60% or even more.
The use of heat-conducting material (for example, wood) in the manufacture of gratings can, on the contrary, increase heat transfer.
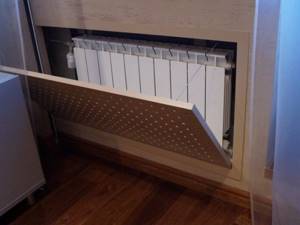
Types of structures and materials
The main element of the screen is a facade in the form of a flat decorative panel with holes that provide natural air convection. The top and side panels are not always used - it depends on the location where the battery is installed. For example, the presence of a wide window sill and a niche make them optional.
The following screen mounting methods can be distinguished.
1. Mounted. The screen, alone or together with the box, is hung with emphasis on the battery or on the wall with hooks.
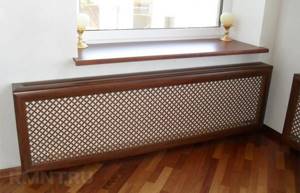
2. Floor. The screen acts as a facade on the box in the form of a kind of narrow bedside table.
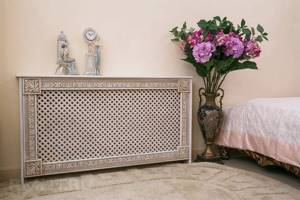
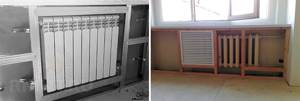
3. Installed. The battery is hidden inside a niche, and the screen is a decorative part of the overall surface of the wall.
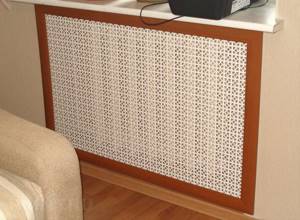
The supporting structure of the box can be made of wooden beams or aluminum corners - it depends on the materials of the decorative panel and its frame. The panel itself can be made from different materials: wooden slats, plywood, laminated fiberboard or chipboard, metal mesh.
During installation, a frame made of galvanized steel profile or wooden beams is usually used as a supporting structure (similar to the technology for installing plasterboard partitions).
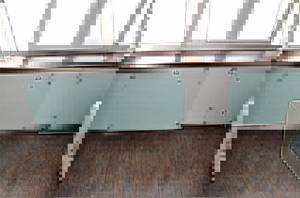
Decorative glass screens can be distinguished as a separate type. This is the only type of material that is used in pure sheet form, without holes. And in order not to disrupt convection, the panel is installed without the top and side walls. Installation takes place using special fastenings on load-bearing elements made of cold-rolled decorative pipe, which provide the necessary ventilation gap between the battery and the panel.
Conclusions and useful video on the topic
From the following video you can learn how to decorate a radiator yourself:
Protective and decorative screens are in great demand among consumers. They are used to hide an unaesthetic heating device and improve the interior.
When choosing a grille for a heating radiator, it is necessary to take into account environmental friendliness, safety and thermal conductivity. To improve air circulation, it is recommended to leave a gap of 2-3 cm from the floor covering when installing it.
Which decorative radiator grilles did you choose? Please share your photos and tell us if you are happy with your choice? Write your comments in the block below the article.
Wooden screens
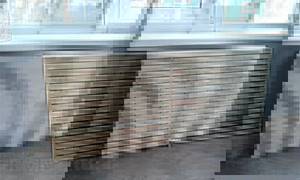
The simplest screen to make is a panel in the form of a lattice made of wooden slats mounted on a wooden frame. The position of the slats can be any - vertical, horizontal, diagonal.
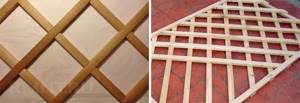
If desired, you can make a cellular lattice by placing the slats at an angle to each other, and using two opposite directions of the layout. Moreover, the angle between them does not have to be right. But in order for the lattice to be flat, you will have to make grooves at the connection points, and, given the thickness of the slats and the manual manufacturing method, it will definitely not be easy to do everything.
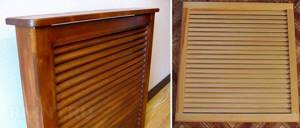
Another type is a screen-blind. This screen is reminiscent of classic wooden window shutters. In order for the slats in the frame to be at the same angle to the plane, identical parallel cuts are made on the side posts using a miter box. Since the thickness of the wood hacksaw blade is less than the thickness of the slats, two cuts are needed for each of them, and the excess must be removed with a narrow chisel.
Both the timber for the frame and the slats must be dry. Considering the proximity of the screen to the battery, it is necessary that their own humidity should not exceed 12% (these are general requirements for wood intended for carpentry). There is a simple home way to check - if you try to tie thin shavings into a knot, it should break.
When making both types of screens, each rail must be carefully sanded before attaching it to the frame. After they are fixed in place, the grille is primed and coated with two layers of varnish, paint or enamel.
As a decorative finish, you can attach platbands made of wood or MDF around the perimeter of the frame. If these are wooden platbands, then they must be treated in the same way as the grille, but their finishing coating does not have to be the same - the perimeter may be of a different shade.
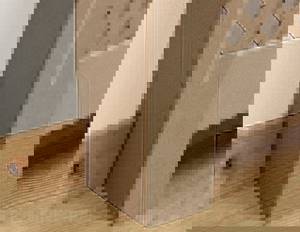
When the battery is in a niche, the screen can either completely cover it or hang on hooks, leaving small gaps at the top, bottom and sides.
When attaching the screen to the frame, the side surfaces are sheathed with laminated fiberboard or chipboard. The ends of the sheathing do not need to be trimmed with a decorative edge if the screen trims will cover them.
Another common type of wooden screen is using plywood as a panel. If you know how to work with a jigsaw, you can cut out an openwork lattice with any pattern transferred to the surface of the plywood using a stencil. The finishing process for such a panel is no different from a grille: sanding, priming and painting.
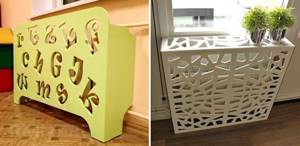
Important! When choosing chipboard or plywood for a screen, you need to pay attention to their class. For plywood it should be E1, for chipboard - E0.
Some subtleties when making a screen
If the building material for the shield is wood, you need to be very careful about its quality. The timber for the box and the slats must be well dried. It is required that the internal moisture content of the material be in the range of 10-12%. This rule corresponds to the general requirements for working with wooden materials specified for carpentry work. There is a household express method for testing the moisture content of wood - thin shavings are placed in a cloth and a knot is tightened; if the wood is dry, it will crumble.
There are also requirements for a metal shield. For its frame, you need to find the right duralumin corner, and for the front covering of the structure, you need an aluminum sheet or decorative mesh. Not only is it easier to install with them, but also such a ready-made design will increase the efficiency of the installation, due to the fact that aluminum’s thermal conductivity is almost 5 times greater than that of iron.
For a transparent glass screen, it is more reliable to use a cold-rolled chrome-plated pipe as the supporting system of the shield. Such structures with fastenings are sold in large quantities in furniture stores. Typically, such pipes of different diameters and fasteners are made chrome-plated, but it is possible to place an order for them to be painted in the desired shade.
Errors when making a screen for a radiator
Placing screen shields on a radiator has many important nuances and rules, and if they are not followed, the entire protection and heat transfer system will not function properly. Such work will bring nothing to the owner except a waste of money, time and personal effort.
Common mistakes when installing a decorative screen:
- The most popular mistake is the presence of a very small number of holes on the front panel of the shield, which reduce the convective process.
- In poor modifications, hot air masses accumulate at the top of the structure, which interferes with the favorable convective process. Under such conditions, approximately 25% of the heat flux is lost, and the radiator can actually transfer energy only by radiation.
- It is required to select the layout of the front panel holes with special care. The lathing cannot be very frequent, and the space between the slats must be less than the width of the slats itself, since all this takes up an additional 6% of heat transfer.
- In order to protect the box from free movement of the upper section, it is necessary to strengthen the slats so that they are located inside the structure and do not allow it to move.
- It is recommended to provide for the installation of covers: top and 2 side, which can be opened or removed in the autumn-winter period when coolant is supplied to the heating device. This will increase the rate of air heat transfer.
DIY metal screen
You can use a perforated metal sheet or expanded mesh as a panel for the screen. There are ready-made expanded metal mesh with anti-corrosion treatment (for steel) and enamel decorative coating. Such a mesh can be fixed to a wooden frame and used in the structures described above.
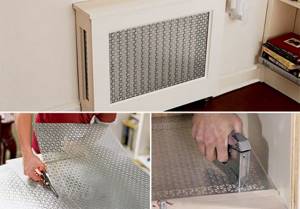
But metal has a serious advantage over wood - a high thermal conductivity coefficient. This property allows you to make screens that rest directly on the battery. They even increase its heat transfer by increasing the surface area. Moreover, a battery with such a screen works better not only for radiation, but also for convection - just look at the ribbed heating elements of convectors.
Alternative option
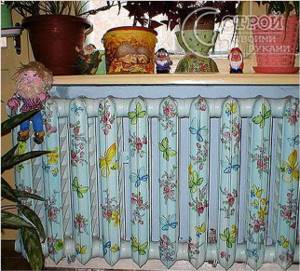
If you do not have the opportunity to purchase or make a screen, you can use an alternative option - apply a design with oil paints to the battery.
Note!
For the best effect, the pattern is applied not only to the battery, but also to part of the wall near it in such a way as to create the effect of the absence of volume (that is, the front part of the battery and the surface of the wall are conditionally one plane).
Glass screen
If wooden screens are well suited for traditional and rustic styles, and metal ones for industrial ones, then glass ones look great in modern interiors, such as hi-tech, minimalism, fusion, pop art. It all depends on the decorative processing of the glass.
In principle, you can order self-adhesive film with large format printing for a glass screen. You can also make a design on a matte or transparent surface using sandblasting or paste for chemical etching of glass.

If you don’t want to bother with decorative processing, then glass with a matte surface or painted in bulk is available for sale - you just need to order the desired size, and you can process the edge yourself. The only condition is that the glass must be tempered.
The simplest option for installing a screen is to point-mount the glass to the wall in four places. To do this, use special fittings with remote fastening.
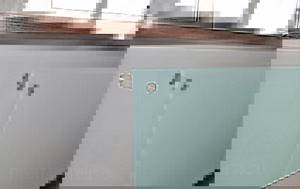
But there is one drawback - you need to drill holes in tempered glass, and this is difficult to do at home.
Therefore, it is better to use a cold-rolled thin-walled pipe as the supporting structure of the screen. It (and fastenings for it and glass) are sold in stores that sell everything necessary for making furniture. As a rule, such pipes and fasteners are made chrome, but you can order them to be painted in any shade from the RAL palette. The screen stands are attached to the floor.
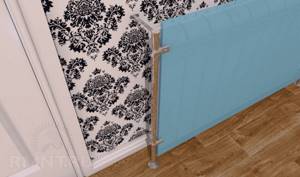
As an additional support for the racks, two remote adjustable fasteners of a closed type (with a plug for the pipe) can be attached to the wall. The glass is secured between the posts using clamps.
Step-by-step instruction
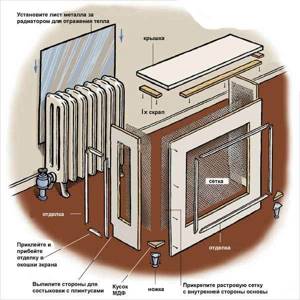
Photo 3 Layout of screen parts for the battery
Let's start by preparing tools and materials.
So, you will need:
- fiberboard sheet of suitable colors
Chipboard is easy to paint and, due to its structure, “holds” paint well. You can either paint the entire sheet in advance, or apply paint to the finished product.
- sheet mesh that will be installed on the front and side panels;
- reflective sheet - metal or foil sheets are most often used;
- connecting elements - staples, screws and nails.
- wood glue.
Screen mounting diagram
In general, the radiator grille is a three-sided box with a top cover and mounts at the bottom. A circuit is used to cut and assemble all the parts; at the very end, the legs are attached and the screen is mounted on the radiator.
Video 1 Guide and secrets of installing drywall
Marking
To make the front part of the screen, measure both sides of the radiator, after which you add 50 mm to the height and 100 to the width, respectively. First, cut out the front panel from a metal sheet, which you then decorate with MDF.
Next, measure the depth of the radiator taking into account the distance to the wall and add another 25 mm. This parameter corresponds to the width of the sidewalls, and the height is determined by the pancake of the radiator itself, taking into account the inlet.
The screen cover corresponds to the depth of the radiator plus 35 mm.
Trimming parts
After all the measurements are plotted on the diagram, you begin cutting each part. Cut out the front and side panels from a sheet of chipboard. In order to cut the front profile, use an MDF sheet, from which rectangles with a width of 110 mm should be cut. Using a hacksaw, apply a 450 angle in the place where the elements will be connected.
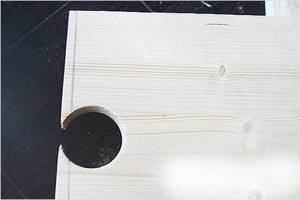
Photo 4 Trimming screen elements
On one rectangle, cut corners in different directions. This way you can connect all the parts using nails and/or wood glue.
Use the mesh for the front window. Due to the soft structure of the material, it is easy to cut with a regular hacksaw. The dimensions of the grid must match the dimensions of the front panel of the screen.
Self-assembly of the screen
Make a screen frame from a wooden block according to its size. Such a frame will allow you to securely fasten all the parts and will not allow the screen to “float” from side to side. In the frame itself, cut out a hole for the pipe (pipe), the center of which should be at a distance of 75 mm from the side planks.
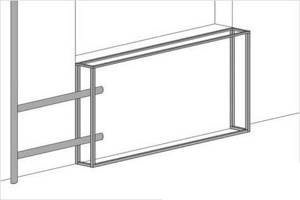
Photo 5 Assembling the screen facade for the battery
Initially, install a metal sheet the size of the screen on the radiator along the rear wall. This way you will reduce heat loss and direct the movement of warm air into the room.
After the screen is assembled and placed on the frame, decorate the edges of the MDF with a profile. All other parts of the screen are assembled using the same principle.
If you have chosen a wooden frame made from a block, no additional fastening to the wall is required. If there is no frame, use anchor collets to secure the box.
The easiest option would be to put the screen on legs. It cannot be said that the decor will be monolithic, since in general the structure is quite fragile, but this will reduce the costs and time for its production.
A wooden frame will be optimal in terms of strength. Due to the fact that it does not affect the movement and circulation of air, this is the option we recommend for installation.
Video 2 Assembling a screen for a radiator from a ready-made kit
Mounting features
Grilles on heating radiators must be mounted in such a way that you can easily and quickly access heating appliances and pipes. Periodically, at least twice a year, the heating system elements must be cleaned of dirt and dust, so access is necessary. In addition, emergencies arise from time to time. In this case, a quick reaction is required and there is no time to unscrew the fasteners. Therefore, try to come up with a fastening system that allows you to remove the screen in one motion.
Attached and mounted
The easiest way is with mounted or attached screens. They are removed/retracted in seconds. But flat, covering radiators in niches and box screens that are attached to the wall are the most problematic. But even here everything is solved simply. You can secure the box to the wall using two strips: one on the box, the second on the wall. The whole secret is that the top edge of the planks is beveled (you can see it in the picture). The one that is nailed to the wall has a slope towards the wall, the one on the frame has a slope towards the grating. When the box is installed in place, it turns out something like a lock.
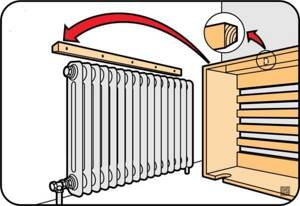
How to fix a screen box for a heating radiator on the wall
Another option is to attach metal plates to one of the strips and magnets to the other. Or attach not a wooden plank to the wall, but a metal corner, for example.
In the case of flat screens, the solution may be the same - metal plates and magnets. Another option is hooks and loops. It is easy to implement, but not very convenient to use: while you get into loops, you have to suffer. There is also a difficult-to-install but convenient way: make a screen like a sliding door.
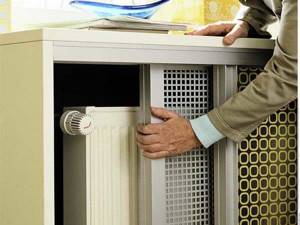
Sliding screens for radiators
You can take the guides that are sold for furniture doors, install them, and insert the screens into the corresponding grooves. If you do not plan to actively use the niche near the battery, you can not install roller mechanisms, but it will be difficult to move them away. This method, by the way, can also be used for the box lattice. It can then be nailed “tightly” to the wall, and the front wall can be made movable.
Types and forms
In addition to different materials, radiator grilles come in different designs. All this together creates a huge number of options.
- Flat screens. Most often used if the radiator is installed in a niche. In this case, the flat panel is attached to bars fixed around the perimeter of the niche. In addition, glass screens for batteries also have this shape, but are attached to special pins embedded in the wall. This type of decorative grille for heating radiators is also called “facades”.
- Hanging screens. There are two types: With a top cover. They are usually used on accordion-type batteries if the radiator protrudes beyond the window sill. The shape of the cover is made so that the grille holds onto the radiator without any problems.
- Without cover. Clings to the upper battery collector using hooks that are attached to the front panel.
These are only the main types of screens and grilles covering heating radiators. Fantasy is limitless, there are very interesting models, but they are most often made by craftsmen with their own hands.
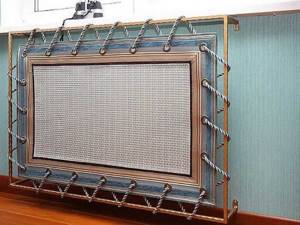
Homemade screen - an original idea
Price often plays an important role when choosing a screen for a radiator. The range of prices in this segment is more than significant - from 230 rubles for a metal hinged screen, to 8,000 rubles for a glass one. Some prices are shown in the table.
| Radiator grille material | View of the grille on the heating radiator | Dimensions (height*width*depth) | Price | Color |
| Sheet metal, thickness 0.7-0.8 mm | Hinged screen for a cast iron battery | 27 cm * 29 cm * 15 cm | 230 rub. | White |
| Sheet metal, thickness 0.7-0.8 mm | Hinged screen for steel radiator | 44 cm * 39 cm * 15 cm | 250 rub. | White |
| Sheet metal, thickness 0.7-0.8 mm | Hinged screen for a cast iron battery | 61 cm * 49 cm * 15 cm | 280 rub. | White |
| Sheet metal, thickness 0.7-0.8 mm | Hinged screen for steel radiator | 53 cm * 49 cm * 10 cm | 350 rub. | Beige |
| MDF | Facade (flat screen) | from 1500 rub | 7 shades of lamination | |
| MDF | Box | from 2300 rub | 7 shades of lamination | |
| Glass | Screen | from 8000 rub | matte, no pattern | |
| Powder coated metal | Wall mounted with one side | 60 cm * 40 cm * 15 cm | 1790 RUR | colors upon request |
| Powder coated metal | Wall mounted with one side | 70 cm * 60 cm * 15 cm | 2050 rub. | colors upon request |
| Powder coated metal | Wall mounted with two walls | 60 cm * 40 cm * 15 cm | 2340 rub. | colors upon request |
| Powder coated metal | Wall mounted with two walls | 70 cm * 60 cm * 15 cm | 2600 rub. | colors upon request |
| Natural wood | Pristavnoy | from 6200 rub |
Interesting design options for battery screens: photo ideas
In addition to the technical side of the issue, the aesthetic side is no less important. There are grille and screen options that are more of a design element rather than a technical detail. Some of them are in the photo.
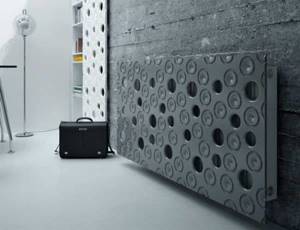
The decorative panel that covers the radiator itself looks like the work of an avant-garde sculptor
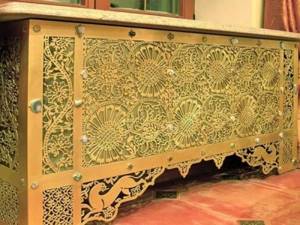
Looks like a chest from a fairy tale. This is made using laser cutting
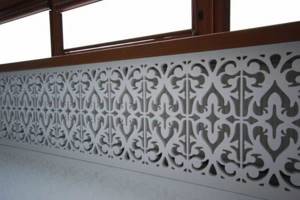
Openwork always looks attractive
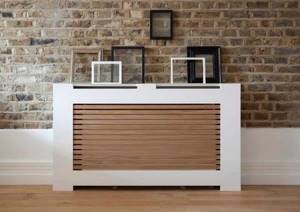
Option for designing grilles for heating radiators in a modern style
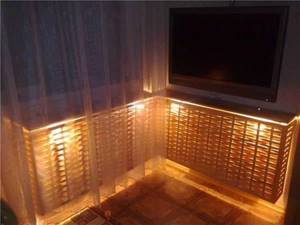
Making a backlight is an original idea
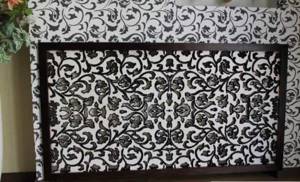
Repeating the pattern on the wallpaper is a stylish solution
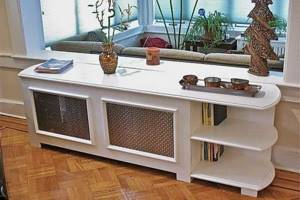
Make not just an attached box, but a functional thing
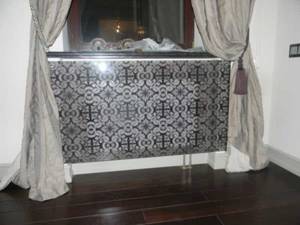
Glass screens can have any design, be it a landscape, an ornament, even your personal photo
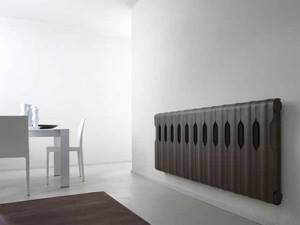
A stylish version of a metal screen for rooms in minimalist and high-tech styles
