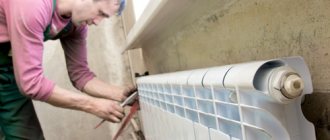
Any repair without the involvement of specialists is a troublesome and unpleasant task, requiring both financial expenses and time investment.
Repairing bimetallic radiators with your own hands can be done quickly and without problems if three conditions are met: adhere to the sequence of actions, have the necessary tools for this, and be able to independently determine the cause of the breakdown.
Knowing how to disassemble bimetallic radiators, the rest of the work will be easy to do. They can be soldered, cracks sealed and washed, like other sectional structures, for example, made of cast iron, steel or aluminum.
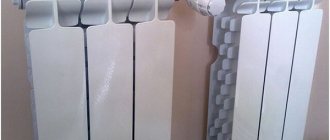
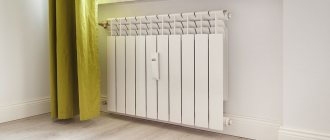
Bimetal battery design
The uniqueness of this type of heaters lies in their design. Combining two types of metals in one design is an opportunity to take the best from each of them, while replacing their weaknesses.
On sale are:
- Combination of stainless steel core with aluminum casing. In this case, these metals complement each other in the following:
- Steel has a thermal conductivity of only 47 W, which is quite a bit for high-quality heating of a room. Aluminum has a heat output of 190 W. Heated by the core, the casing effectively transfers heat to the room.
- Aluminum is “afraid” of water, namely high acidity, as it causes corrosion. Stainless steel is so named because it is not afraid of any coolant. The installation of steel collectors inside the aluminum body protected it from interaction with water. Thanks to this, the service life of bimetallic radiators is 20-25 years, while for models consisting exclusively of aluminum, it rarely exceeds 10 years.
- The strength of steel allows batteries of this type to withstand any water hammer, which gives consumers the opportunity to install them in houses with a centralized and unstable heating system.
Thus, the combination of two such different metals created a strong and reliable structure, although its heat transfer is slightly lower than that of its aluminum counterparts.
- The combination of a copper core with an aluminum top is a real breakthrough, since these metals cannot even be kept close together, but together they create a device with the highest heat output. The separation of copper and aluminum ensures their durability and the strength of the entire structure.
- Semi-bimetallic radiators are equipped only with vertical steel collectors, while the horizontal ones are made of aluminum. They are cheaper, but less durable, although their strength and heat transfer are high.
This is how a bimetallic heating radiator works. If such a reliable design fails, it means that errors were made during its installation.
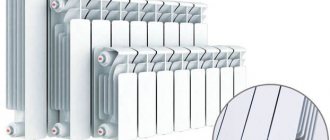
Types of heating batteries
If you plan to repair heating radiators yourself, then the type of work performed depends on the type of battery.
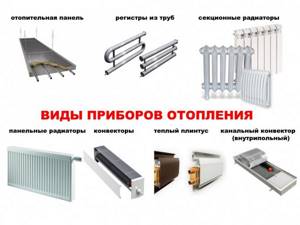
Depending on the materials, all heating devices are divided into the following types:
- Aluminum units weigh little, are very attractive in appearance and have high heat transfer. However, they do not tolerate water hammer well, so they are installed only in autonomous heating systems with low pressure. Also important for them is the purity and composition of the coolant. If deposits appear on the internal walls, the radiator cannot be repaired, so the cleanliness of the coolant must be constantly monitored.
- Sectional cast iron batteries have a high heat capacity. They are durable and strong and are not subject to corrosion. Due to the impressive weight of the device, installation and maintenance pose certain difficulties. Such radiators often leak due to wear of the gaskets between the sections.
- Radiators made of steel weigh little and have good heat transfer. However, they are not installed in buildings with centralized heating due to susceptibility to corrosion after draining the coolant from the system.
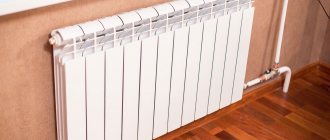
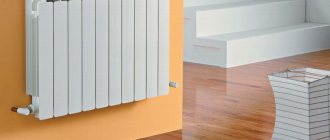
- Bimetallic batteries have a steel core and an aluminum body. They are very beautiful in appearance, resistant to corrosion and high pressure in the system, so they can be used in houses with centralized heating. The heat output of a bimetallic radiator is quite high. Repairing heating in an apartment with bimetallic appliances is easy to do yourself if you know how to replace and adjust thermostats, eliminate leaks, clean pipes and change gaskets.

To select the appropriate type of heating device, you need to take into account the wiring diagram, pipeline material, installation features, coolant temperature, room layout and number of floors of the house, as well as the climatic features of the region.
When choosing a battery, pay attention to its dimensions. Be sure to set the shut-off and control temperatures. To correctly calculate the number of sections, use the following rule - for every two squares of a room with a height of no more than three meters, you need to install one section.
In multi-storey buildings, bimetallic or cast iron radiators are usually installed, which can easily withstand water hammer and increased pressure in the network. That is why we will tell you in detail how to repair heating radiators made of bimetal and cast iron.
Main causes of malfunction
Before you begin repairing the radiator, you should understand the cause of the malfunction. As practice shows, there are several main reasons for the breakdown of a bimetallic battery:
- Incorrect model selected. If you do not correlate the performance of the heating system with the technical characteristics of the battery, it may turn out that they do not suit each other.
- Incorrect connection to the system. For example, if the pipes or adapters to them are copper, and the radiator body is aluminum, then the contact of these metals will provoke the formation of corrosion.
- Too dirty a coolant can damage even the most expensive and high-quality heating devices, leaving deposits in the form of suspensions and debris on their walls for many years. When bimetallic heating radiators do not warm up completely, the most common reason for this is their clogging.
- “Looseness” of nipples and gaskets is often caused not only by temperature changes, but also by water hammer. The former need to be periodically checked and tightened, and the latter need to be changed.
- When noise is heard in the batteries, the cause may be airiness, but when asked why bimetallic radiators click, it is better to answer the question from specialists. The reason may be caused by internal damage, which can only be determined by heating network workers using special equipment.
Repair of bimetallic heating radiators during the heating season is possible only if the following symptoms appear:
- The battery does not heat or only heats up in one part.
- A leak has appeared at the joints of the connections or in the battery itself.
- Loud noises and crackling sounds in the heating system.
If there are no visible reasons why bimetallic radiators do not heat, then you should call specialists who, using special instruments, will detect the breakdown. Only if the cause of poor battery performance has been established, you can begin to dismantle and repair it.
Features of repair of bimetallic radiators
Replacing or restoring old batteries should be done before the start of the heating season, when the heating system is tested.
The algorithm of actions looks like this:
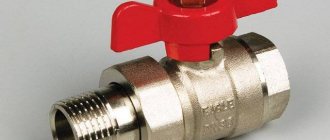
- Shut off the coolant supply.
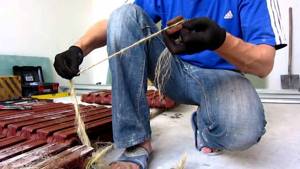
- Remove the aluminum casing from the bimetal structure, if possible, exposing the tubular steel distributor to better see the problem areas.
- If possible, drain the remaining water from the radiator and dry the seams with a hairdryer.
- In the problem area, seal with a suitable means - silicone sealant, cold welding, liquid nails, tow with grease, a bandage with epoxy resin, or another first aid.
- Follow the polymerization schedule if required by the instructions for use (solid oil does not harden).
- Rewind the joint to be processed with bandage rubber and install the clamp, tightening it as much as possible with screws.
- Connect the battery to the general heating, making sure that the leak is fixed.
Sometimes it is visually difficult to determine where the pipes are clogged. It is difficult to immediately say why this or that radiator in the apartment - steel, cast iron or aluminum - does not heat. In this case, specialists with diagnostic equipment are needed. Needing a radiator flush or blowing out the pipes is a messy process. You must be prepared for the fact that the radiator casings will have to be removed, after which you will have to do general cleaning or even cosmetic repairs.
How to wash batteries
Not a single heating system, even the most reliable, is immune from breakdowns. It is difficult to expect that with the quality of the coolant that is in the city heating network, radiators will work flawlessly for years. As a rule, the first sign of why bimetallic radiators do not heat well is their clogging.
To correct the situation, it is enough to clean the system. To do this, you need to know how to wash bimetallic radiators at home. In this simple work, the main thing is to follow the sequence of actions.
- Before removing the battery, you should disconnect it from the system and prepare the area. You need to lay a waterproof cloth on the floor, move the furniture away and remove the curtains from the window. If there is no shut-off valve on the radiator, you will have to drain the water from the entire system.
- Using a pipe wrench, disconnect the battery from the heating network pipe and bend it over the container so that water flows out of it. Only after completely draining the water can you move the radiator or its sections to the bathroom to continue cleaning. The bathroom should first be covered with a cloth; it is even more reliable if you place a wooden pallet in it. This will protect its coating from possible scratches and chips.
- The plugs are removed, into which water is supplied under strong pressure until a clean stream flows from the radiator.
- In the event that there is so much scale that water cannot break through it, you will have to use special chemical solutions intended for such work, for example, “Mole”. The product (you can even use ordinary table vinegar) is poured into the battery and left for several hours. If the scale layer is very dense, then you can leave the radiator to settle overnight.
- After the chemistry dissolves the scale, the “insides” of the battery are thoroughly washed under pressure of water until it becomes clear at the outlet.
- All plugs are put in place, and the reassembly of the bimetallic heating radiators begins. It is not difficult to do such work with your own hands.
By performing all the steps sequentially, any beginner can cope with such a simple job as cleaning batteries. It’s more difficult if they leak, which will have to be fixed either by soldering, or glue, or cold welding.
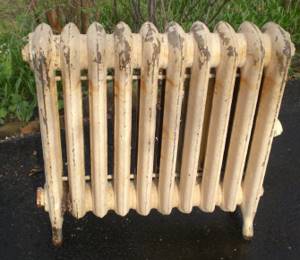
Disassembling a cast iron battery
At first glance, disassembling a cast iron battery with your own hands is quite simple, but it is not so. So, first you need to heat the plugs on the battery, for this I use a blowtorch. Once the plugs are heated, they can be unscrewed much easier than without heating. (See also: Cast iron heating radiators)
Using a grinder, the battery is cut extremely carefully between sections. After cutting, the radiator sections are disconnected
Cast iron batteries have a nipple that must be carefully knocked out of the battery using a chisel. This is required if you decide to clean the radiator or replace a separate section
When completely replacing the radiator, there is naturally no need to clean anything. It is enough to cut it with a grinder and take it out.
The nipple must be removed so that the thread is not damaged. It is subsequently thoroughly cleaned of rust. Next, grouping and collection of individual sections is performed. In order for the battery to have a good seal between the sections, you need to install gaskets and coat all joints with silicone. A little later, when everything is dry, the battery can be carefully washed using a hose.
Repairing cracks in bimetal batteries
A crack in a bimetallic radiator is an extremely unpleasant event, since repairing aluminum products is always accompanied by difficulty.
This metal tends to oxidize when it comes into contact with oxygen, which causes it to form an oxide film. It appears immediately as soon as a section of metal is “exposed.” This is why it is difficult for a beginner without proper experience to repair a bimetallic radiator. Professionals know how to solder an aluminum frame, but this does not mean that this work cannot be done independently.
The main thing that the master will need is a flux, with which you can solve the problem with the appearance of an oxide film. Special products for soldering aluminum can be bought at the store, or you can prepare it yourself.
After the issue of eliminating the oxide has been resolved, you can carry out regular soldering using an iron-rosin mixture as solder.
This method will pay off in case of a small crack or hole. When urgent repairs are required, epoxy glue can be used as a temporary solution to the problem. The principle of cold welding is considered one of the best ways to eliminate cracks and holes in aluminum products, and a bimetallic radiator is no exception. Tools for this work are sold in building materials stores.
As practice shows, if a section of a bimetallic radiator is badly damaged, it is easier to replace it with a new one than to try to repair it and be afraid that a new leak will occur at any moment.
To summarize, we can draw the following conclusions:
- Expensive bimetallic radiators also break.
- You can repair them yourself, provided that the cause of the breakdown is correctly determined.
- The collectors of these batteries become clogged with dirt in the same way as heaters made of other types of metals.
- Flushing the batteries every 2-3 years is a good preventative measure that allows you to keep the heating system clean and extends the “life” of all its elements.
Thus, repairing bimetallic radiators is not difficult if you follow the sequence of actions.
Joint repair
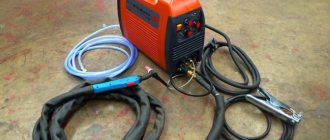
To carry out repairs you will need:
- special radiator key;
- gas key No. 2 or No. 3.
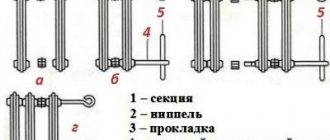
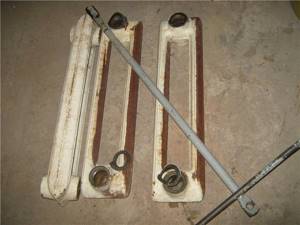
We will assume that the radiator has been removed. It must be laid on a flat surface. Then remove the plugs and fittings (plugs with holes for pipes) using a gas wrench.
The radiator sections are connected to each other by nipples. This is a short cast iron pipe with an external pipe thread (half right-handed, half left-handed) and an internal hole in which there are two protrusions.
These protrusions are where the edges of the radiator key will rest. Essentially, these are stops.
At this stage, you will need an assistant who will fix the heating device in a stationary position. The key is inserted into the hole of the section so that the edges of the tool rest against the protrusions of the nipple. Now you need to forcefully turn the key at least a quarter of a turn.
The thing is that long-term operation of cast iron batteries, where a high-temperature coolant is used, creates conditions under which the nipple and section of the device are soldered together. The result is a monolith.
Therefore, great efforts will have to be made to break these ties. As soon as the nipple moves a little from the dead center, move on to the second parallel element. You cannot untwist the sections on one side only, otherwise a skew will occur, which will complicate subsequent operations.
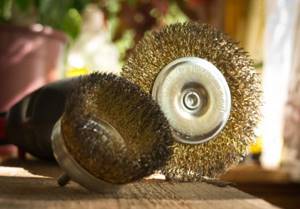
This way all sections are disassembled. Now you need to clean the joint surfaces with a wire brush and sandpaper. All you need to do is remove the rust.
Be sure to inspect the nipples; if their condition is in doubt, it is better to replace them with new ones
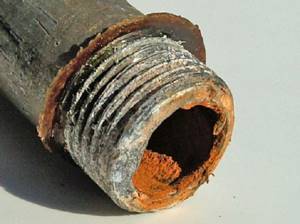
Focus on the thread
At this stage it is best to wash the battery sections. A hose stream and a pin (wooden or metal) will do the job perfectly.
After which you can proceed to assembly, having previously prepared the gaskets. You can make them yourself from heat-resistant paranit or rubber 1 mm thick. Currently, craftsmen suggest using silicone sealant, which can withstand high temperatures.
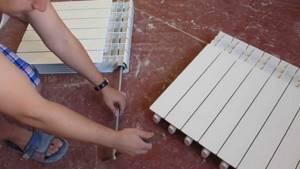
Reassembling the battery is carried out in the reverse order. Be careful when tightening nipples
It is important here not to twist, so as not to compress the gasket to a critical level. It just might break
As with disassembly, the two nipples must be screwed in alternately.
Situations often occur when the stops inside the nipple become covered with rust due to prolonged contact with the coolant. And under pressure from the radiator key, these stops are cut off. What to do in this case, because the sections simply cannot be untwisted. Option one is to break the section where the fistula appeared.
This can be done in two ways:
- Just break the battery section with a sledgehammer. Do this carefully so as not to break the good elements.
- You can cut it with a grinder. But the connection point will still have to be broken with a hammer.