After installing new bimetal batteries, the room may not be warm enough. This means that the calculation of sections and power was carried out incorrectly. This happens when the calculation was carried out only on the area of the room, and possible heat losses were not taken into account.
It is necessary to determine the number of sections before installation. Errors can be corrected by adding additional compartments to the structure.
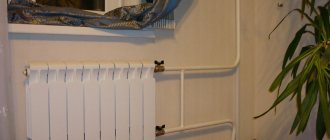
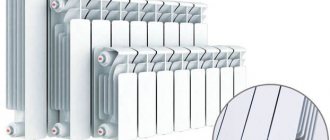
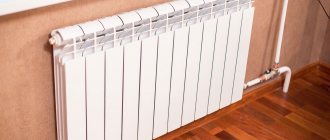
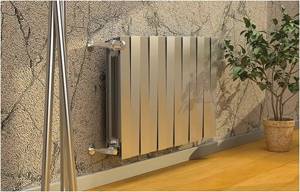
Bimetallic radiators
Design features
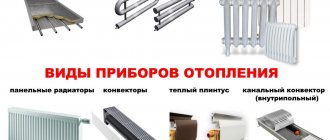
There are several types of bimetal batteries on the market for space heating equipment:
- Models with sections are suitable for high-rise buildings with centralized heating. With the correct connection, you can design any length of the device and provide the necessary heating.
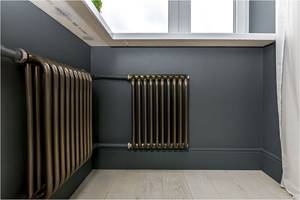
- Cast models are used for systems with pressure instability. Radiators are tested under pressure of 100 atmospheres, and are considered the best with frequent surges of 30-40 atmospheres.
Molded batteries
You need to take a closer look at the disadvantages of molded batteries:
- High price.
- Impossibility of expansion; you need to immediately calculate the number of compartments and the power of the device.
To reliably connect bimetallic batteries, it is important to prepare tools and fittings.
Checking the assembled structure
After completing the assembly of the heating device, a visual inspection is carried out for possible errors. If they are absent, a test filling of the heating system with water is carried out. The first start-up of the coolant is carried out without pressure in order to identify areas of poor connection between the radiator and the pipe. If such defects exist, they are eliminated immediately. Refilling the heating system is carried out at normal coolant pressure.
After connecting additional sections to the main radiator, it is necessary to conduct a test test of the system. To do this, leave the heating on for several hours. Then check the condition of the pipe parts, fittings and heating devices. If there are no defects or leaks, they move on to the question of how to connect the heating radiators to each other.
How to calculate?
To calculate the number of sections, it is necessary to take into account the materials, type of radiator, condition of the walls, location of the apartment, etc. For example, let’s take the option where the section power is 100-150 W. The exact figures can be found in the data sheet.
Let's make a calculation for a one-room apartment with an area of 18 square meters. m. with a standard ceiling height of 2.5 m. Plastic windows, corner apartment, weather conditions of the central strip. The radiators are connected through the top wiring.
The area is multiplied by 100. The result is 1800 W. The resulting value is multiplied by coefficients, taking into account the height of the ceiling, the corner placement of the apartment, the number of windows and their materials - 0.8, 1.8, 1.8, 0.8 (plastic double-glazed windows). This turns out to be 3732 W. Divide the value by 150. Round the total to 24.8. This means that it is necessary to increase 25 sections for full heating.
Calculation
This is only an approximate calculation, the number of compartments depends on the temperature of the coolant, insulation of walls, ceilings, materials, window area, radiator fences, etc.
Preparatory work
Before expanding the battery, you should not only make calculations, but also purchase the necessary tools. This is especially important if you have to do all the work yourself. For quality work you will need:
- pipe wrench;
- radiator key;
- special nipples (must be included with the battery section);
- plugs with left and right threads;
- gaskets installed between sections;
- emery cloth;
- paronite gaskets.
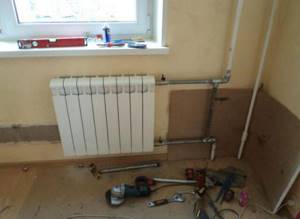
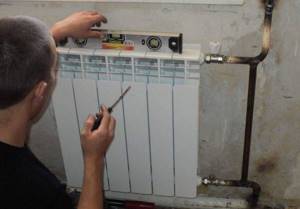
When the tools are at hand, you can begin the preparatory work.
- First of all, the radiator is removed, to which the section will be built up. To do this, the coolant supply to the system is closed and the battery is disconnected from the pipe.
- The removed radiator must be thoroughly washed to remove dust and checked for contamination inside. Although stainless steel is not afraid of water acidity, the core is “not immune” from the deposition of debris and scale on its walls. They should be removed by flushing the radiator with a special product.
- Check the connections for integrity and thread quality. It happens that growths form at the joints, so you need to sand each threaded hole with sandpaper.
- After the old battery has been cleaned, it must be placed on a previously prepared, flat surface. This is important, since bimetallic radiators need to be connected to each other without distortions, even the slightest ones. Unnoticeable at first, they can lead to a serious accident in the future.
Only after preparation has been completed can you begin to build up new sections.
Connection diagrams
The batteries must be connected to the heating circuit according to the selected circuit. Violation of the sequence and rules of expansion will provoke a leakage of almost 50% of the heat.
Violation of the connection technique will cause uneven heating, leading to a breakthrough or leakage. It is important to choose the right system and connect it correctly to the radiators. Installation will require concentration and accuracy of calculation.
Connection methods
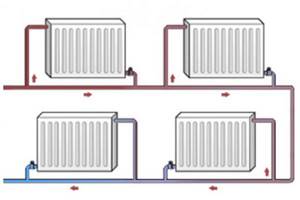
Radiators are connected in several ways:
- Sequentially - one heating circuit pipe is needed.
- In parallel - 2 pipes are required, connected using an upper and lower outlet.
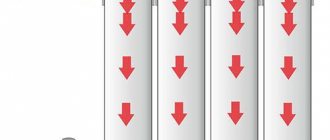
- Through - the water in the system passes through the heating device.
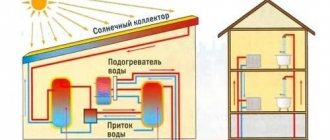
Purpose of the heating system
In a private house or apartment, the optimal temperature must always be set.
which varies from 18 to 25 degrees. In winter, this figure can only be achieved with a high-quality heating system. Its efficiency must correspond to the area of the building, and the radiator connection diagram must also be selected correctly. It is heating devices that compensate for heat loss, which is mandatory in any room, since heat escapes through windows, doors and even communication elements.
You especially need to pay attention to what heating radiator connection diagrams exist and choose the best option. It is advisable to make a choice at the stage of building a house or apartment, but often you have to change a low-quality system, so you can work on a ready-made private house or apartment
But in this case, the installation will be more complex and specific.
It is considered the most optimal to connect heating radiators to a central heating system, since in this case an effective and reliable system is obtained that provides uniform and constant heating in the winter. However, many private houses are located at a certain distance from the city, so using a connection to centralized heating is not always possible.
https://youtube.com/watch?v=olrD9qxCAhM
This is why you have to create your own autonomous systems in a private home. which:
- must have high efficiency;
- if you want to do everything on your own, you can watch a training video to avoid mistakes;
- numerous nodes must be correctly formed and adjusted;
- installation must be carried out in accordance with all requirements and conditions;
- Reliable and correct piping of the system must be provided.
What factors influence the efficiency of a heating system?
To ensure uniform and high-quality heating of rooms in the house, it is important to know what elements affect it. These include:
- correct network wiring, which affects the heating efficiency and how evenly the rooms will be heated, and the cost of heating depends on this;
- competently selected equipment for the system, for which it is necessary to make certain calculations that will determine what efficiency, power and other parameters the main elements should have, and even fuel consumption depends on this;
- correct installation of the main components and elements of the heating system, which include pipelines, radiators, fittings and even a boiler with a pump, since if any actions are performed incorrectly, the heating will either not work at all or function poorly, so it is advisable to view the training manual in advance video.
Therefore, before installation of all heating elements is carried out, you need to concentrate on calculations and selection of the heating radiator connection diagram. It is necessary to select the batteries themselves, which will have the required efficiency and other characteristics. Other types of products intended for installation must be purchased and they must be of high quality. The work itself should be done by hand only after carefully studying the instructions and videos with sequential actions.
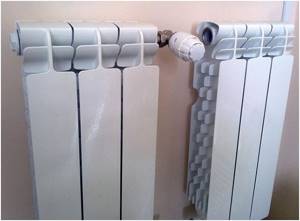
Connecting sections
Before installing new compartments, you need to consider the quality of the gaskets. Usually they use paronite (durable, long-lasting). It is necessary to check the nipples: threads, integrity, absence of chips.
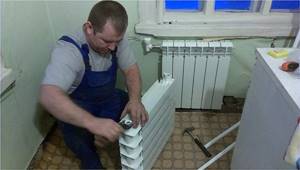
For assembly you need:
- Lay out the radiator and prepared sections on the floor.
- Between the compartments, according to the fastening sequence, place nipples and gaskets.
- Start tightening the nipple. On one side there is a left thread, on the other there is a right thread; when twisted, the two parts are pulled together. Even an inexperienced technician will quickly understand the installation technology. Make a tie with a key.
- After lightly gripping all the nipples, you can begin to tighten them tightly, making the exact number of turns to prevent distortions.
Intersectional connections
After identifying the cause of the cold temperature in the apartment, you need to choose a store to purchase heating equipment components. It is necessary to find sections, like those of a house battery - aluminum, cast iron, bimetallic. If an error occurs, repairs are not possible.
Device
In the process of adding compartments, you need to unscrew the fitting with a radiator wrench from the side where the extension is planned. After unwinding, a nipple is placed in the docking area. The right part is directed towards the connection with the new part.
To prevent leaks, you need to carefully attach intersection gaskets made of rubber, gel materials, or paronite to the nipple. Tighten the thread without sudden movements, gradually.
Assembly and disassembly
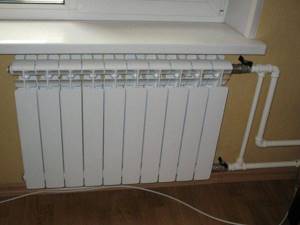
After lengthening the radiator, it is put back, restoring the connection with the pipe. You will need: a wrench, tow for winding the threads.
Pipes, radiators
The standard parameters of the heating system fit into small requirements. Pressure no more than 6 kgf/cm2, temperature 95 degrees. In the event of active, sudden filling of the reset system, a shock occurs when the valve is separated from the valve. The pressure reaches 20-25 units.
Types of heating devices:
- made of aluminum - for autonomous circuits;
- made of steel, cast iron - for centralized heating.
Aluminum radiators are connected by affordable and universal polypropylene and metal-polymer pipes.
Bimetallic radiators can be combined with steel pipes. Black steel after welding or steel with galvanized edges is more suitable.
Shut-off and control valves
A simple version of the fittings is several valves on connections. You can turn off the device during a prolonged thaw or during repairs. A convenient option is ball valves; no additional maintenance is required compared to screws or plug valves.
In the central heating system, from the riser side to the valves, a jumper is required. It helps water circulate through the riser when the system is turned off.
Throttle and ball valve allow you to manually regulate heat transfer. Two throttles on a two-pipe design share the balancing of the system and regulate power.
Instead of a throttle, it is permissible to install a thermostatic valve equipped with a thermal head. The device automatically controls the permeability based on the air temperature in the room. The cost of the kit reaches 1500 rubles.
Installation
The radiator is connected using American connectors - quickly disassembled connections with union nuts. Compared to conventional squeegees, they allow you to dismantle the device in a minute.
For sealing, it is better to use a polymer thread - a type of sealant, sanitary flax with the addition of silicone impregnations.
Step-by-step installation instructions
Now let's figure out how to properly install bimetallic radiators. Typically, a mounting kit is sold complete with the unit, which includes:
- brackets for hanging the device on the wall;
- one plug;
- two plugs with internal one and a half inch threads;
- air vent.
As for the cost of installing a bimetallic radiator, it is $32 (2100 rubles). You will have to pay separately for installing a bypass - $15 (1000 rubles), and for threading pipes you will have to pay an additional $1.5 (65 rubles).
Tools and materials
Installation of bimetallic radiators is carried out using the following materials and tools:
- perforator;
- building level;
- drill;
- pencil;
- ruler;
- roulette;
- open-end and adjustable wrenches;
- battery;
- butt key;
- radiator wrench with a blade at the end measuring 24 mm;
- brackets;
- installation kit;
- radiator gaskets;
- tow;
- sealing paste;
- fum tape;
- dowels and screws.
Fittings for connecting a bimetal device
In addition to the installation kit that comes with the battery, purchase a pair of ½-inch ball valves, which will allow you to repair and remove the heating device without stopping the operation of the network. They must have internal and external threads. It is better to immediately take control valves, which additionally allow you to regulate the heat transfer of the unit, increasing or decreasing the flow of circulating coolant. Mounting cast iron heating radiators and how much installation costs
In addition to shut-off and control valves, in some cases Mayevsky taps are installed. Moreover, you can purchase a traditional needle valve or install an automatic air vent.
Connection diagrams
As a rule, the connection diagram of the heating device to the network depends on the characteristics of the pipeline layout.
There are three connection options:
- saddle;
- unilateral;
- diagonal.
The saddle connection diagram for bimetallic radiators involves installing shut-off valves on both sides of the device in the two lower pipes. A Mayevsky valve is installed in the upper pipe, which is the most distant along the coolant flow.
One-way connection is used for single-pipe vertical wiring, which is most often used in an apartment building. In this case, shut-off valves are installed on the upper and lower pipes on one side of the device. The supply pipeline is connected at the top, and the return pipeline at the bottom.
With a diagonal connection, the most efficient and optimal heat transfer of the heating device is achieved. The supply is connected to the upper branch pipe on one side, and the outlet is made from the lower branch pipe, located diagonally to the supply branch.
Briefly about installing bimetal heating radiators in a private house or apartment
So, you have decided to go through all the stages of organizing heating in your apartment. There is nothing particularly complicated about this, just follow certain rules:
- Before starting installation, be sure to make sure that there is no coolant in the system.
- Check the contents and build quality of the battery.
- The fitting connection unit requires a gasket, which is used as flax with sealant or special-purpose threads.
- According to the basic rules for installing bimetallic heating radiators in an apartment or private house, it is important that the window sill does not cover them completely. Those who are concerned about the aesthetic side of the issue should look at the material on how and with what to cover radiators.
- When designing a system, you need to know all possible connection diagrams for heating devices (diagonal, bottom, side). Decide which design is acceptable in your conditions, given that for bimetallic batteries, a diagonal circuit gives the most optimal result.
- When starting the heating system, the taps must be opened smoothly, avoiding sudden twisting. Otherwise, clogging or water hammer may occur.
- Air is removed from the system through a Mayevsky valve or other air vent.