Reconstruction or installation of a new heating system is always accompanied by the mandatory installation of heating radiators in the apartment, which, if all the requirements are met and certain rules are followed, can be done with your own hands. We will tell you how to do this and some of the features of a particular type of heating system in this article.
Installation of heating batteries in an apartment
Types of heating radiator:
Distribution of heating batteries by material of manufacture:
- Cast iron.
- Steel.
- Aluminum.
- Bimetallic.
Next, we will describe each type in more detail.
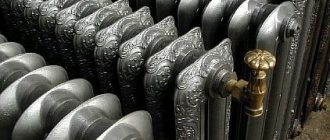
Cast iron radiators: technical data; pros/cons; life time; price
Not so long ago, it was difficult to imagine an apartment where there would not be cast iron heating radiators, but now they have become more of a luxury item, since such products are very expensive. Despite this, if possible, homeowners try to install cast iron batteries. Today, such products have undergone some changes - both technically and externally.

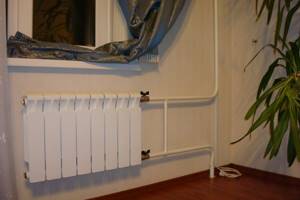
Cast iron heating radiator in an apartment
Advantages of cast iron batteries:
- Long service life.
- Long-lasting heat retention.
- Resistant to pressure changes.
Flaws:
- Heavy weight.
- Replacing radiators is complicated by the large weight of the product.
- Unattractive appearance.
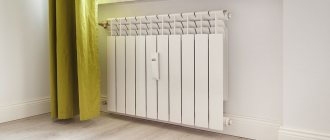
Steel radiators: technical data; pros/cons
Models of steel heating radiators are divided into two subtypes:
- Panel. A distinctive feature is high heat transfer, high level of heat saving and efficiency. A panel radiator consists of two parallel welded plates with internal voids for filling with coolant. Depending on the type of heating system, in stores you can purchase one of 2 types of connection structures: bottom and side. The first is typical for those rooms where the water supply is carried out through the “warm floor” system. Panel heating radiators are lightweight, making radiator replacements easy. The warranty period is up to 10 years.
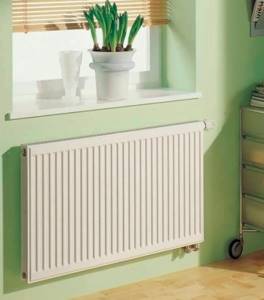
Steel heating radiators in the apartment
- Tubular batteries consist of several sections paired using a welding machine. When purchasing a tubular version of heating radiators, you need to pay attention to the power and size of the finished product. For large residential premises, batteries with high power are purchased. Tubular models are characterized by good heat dissipation, a high level of performance characteristics and an affordable price.
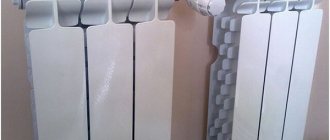
Aluminum radiators: technical data; pros/cons; life time; price
Heating radiators are made of aluminum alloy painted with powder enamel. A fairly common option for installing room heating systems. Heating batteries made of aluminum alloy can be replaced independently.
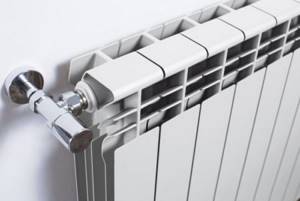
Aluminum radiators in the apartment
Aluminum radiators have several advantages:
- High level of heat transfer. Thanks to this feature of heating batteries, heating occurs several times faster and heat is distributed efficiently throughout the room.
- Attractive appearance. The glossy surface and aesthetically correctly designed radiators attract the attention of buyers.
- Ease of installation. The light weight of heating radiators simplifies the installation process.
Important! If it is necessary to build up several sections, a coupling connection is purchased that can be easily screwed into both halves of the structure. In the same way, heating batteries are replaced if any part is leaky.
It is necessary to note one significant drawback of aluminum radiators:
- They cannot withstand high pressure. This type of radiator is not suitable for installation in apartment buildings where annual water hammer blowing of pipes is used.
Bimetallic radiators: technical data; pros/cons; life time; price
A popular type of heating radiators. They are made by assembling a core from alloys that are resistant to corrosion and water hammer, and an outer skin made of aluminum. Thus, the model combines two important qualities - visual appeal and high heat transfer. But we cannot fail to mention the high cost of the product, which pays off during the process of using the heating device.
For example, the bimetallic radiator Rifar monolit, characterized by durability, resistance to high temperatures, high strength properties and ease of installation, costs around 950 rubles per section. As a result, a 10-section Rifar monolit radiator will cost around 9,500 thousand. But Italian-made Sira rs batteries are offered by stores for 1,200 rubles per section.
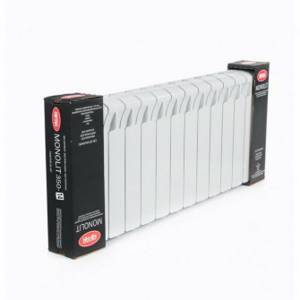
Rifar monolit
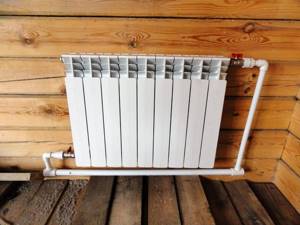
Hanging the radiator and fixing it to the wall
Next, you need to figure out how to hang a heating radiator and how to secure it to the walls. The process itself is simple, but even before hanging the battery, you should make sure that the wall surface behind it is level.
Next, on the wall, 10-12 centimeters below the window sill, a horizontal line is drawn, which serves as a location guide for the upper edge of the radiator. After this, in accordance with the intended position of the heating device, fastening devices are installed.
The radiator location must be strictly horizontal for heating systems with forced (pump) coolant circulation. If the system operates through natural circulation, then a minimum slope is provided for the battery - approximately 1-1.5°. The reason is simple - at the end of the heating season, the operation of the radiator stops and the water is drained. In this case, it is very important that the draining is complete and that the battery subsequently remains dry.
If the slope exceeds the recommended value of 1-1.5°, then stagnation that occurs during operation will interfere with the normal operation of the device. All these nuances should be foreseen and taken into account before hanging up the radiator and installing a heating system in the home.
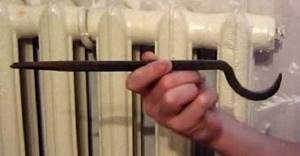
To install the hooks, holes are drilled in the wall into which plastic dowels are mounted. Next, the hooks are screwed into them enough to ensure a distance of 3-5 centimeters between the radiator and the wall. In a typical case, the heating device is suspended so that the hooks are located between the sections.
If you use brackets to fix the battery, the installation process is slightly different from that described above. Before hanging the heating radiator, you should attach it to the wall and mark the locations for the fasteners. Next, holes are drilled in these places. Plastic dowels for screws are mounted in them, through which the mounting brackets are screwed.
Another important point regarding how to hang radiators on the wall. Although lower fasteners are also installed along with the upper ones, their role is rather auxiliary - they serve mainly to more reliably fix the radiator in a given position, including during the installation process. Their installation level should be 1-1.5 centimeters below the lower collector. Most of the weight load of the radiator falls on the upper fasteners.
Of course, the heavier the heating device, the thickness and strength of the fastening devices should be greater. For example, if the question is how to hang an aluminum radiator, you can get by with hooks that are not very thick. If a heavy cast iron battery is suspended from the wall, the brackets and hooks should be much thicker and stronger.
Calculation of the required number of sections
For calculations we will use the standard formula - Q=Sx100, where:
- Q – Heat transfer of the radiator, declared by the manufacturer.
- S – Room area.
- 100 is 100 watts, which is enough to heat 1 square. m of premises.
By calculating using the formula, you can determine the power of the radiator required for installation in one room. The calculation is correct if the structure is non-demountable.
For extended radiators, it is necessary to use a different calculation formula - N=Q/Qyc, where:
- N – Number of sections.
- Qyc – Specific thermal power.
- Q – Heat transfer of the radiator, declared by the manufacturer.
The formula is suitable for rooms with a standardized ceiling level of 2.7 meters. Higher ceilings in the apartment require an increase in the number of heating radiator sections.
Installation sequence
Very often, consumers ask questions about how and at what distance to hang heating radiators so that the system functions correctly.
Here is the sequence of work to make it clear when and what needs to be done:
- First you need to prepare the workplace - drain the water from the system and, if necessary, remove old batteries.
- Next, they begin marking the wall for attaching brackets for radiators.
- The next step is to fix the brackets in the wall.
- Now you can hang the radiator.
- Next, they proceed to connecting heating pipes and fittings to the battery. This work should be performed especially carefully to avoid depressurization of seams and possible coolant leaks.
- At the final stage, the heating system is filled with water and the connections are checked for tightness. To do this, it is better to invite an assistant.
Installation features - wiring system: single-pipe/two-pipe
After determining the installation locations for heating radiators in the apartment, we proceed to planning the pipe layout
Installation of heating radiators in an apartment can be carried out according to the following schemes:
- Single-pipe. It is a looped single-pipe heating system. A feature of this scheme is the sequential passage of the path.
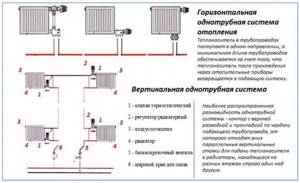
One-pipe connection system
- Two-pipe. A 2-pipe heating system is represented by a parallel connection of pipes. The movement of the coolant begins from the upper pipe, passes through a cyclic circle and returns through the lower pipe back to the boiler. The installation is more complex and therefore raises a lot of questions for an inexperienced worker.
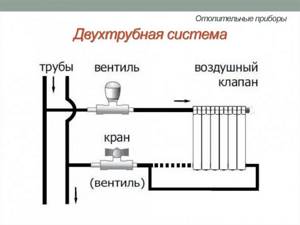
Two-pipe installation
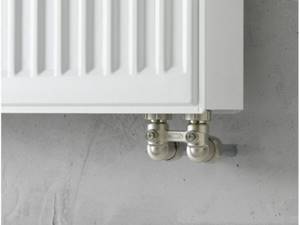
Select the correct type of connection: side (one-pipe/two-pipe; bottom; diagonal)
The type of heating connection in the apartment is also important.
He can be:
- Lateral. A common connection option. This type is convenient if radiator heating is the only source of heating in an apartment or house.
Lateral connection of heating radiators
- Lower. Used when pipes are placed under the floor covering or when the heating system passes through a heated floor. Characterized by heat loss up to 15%.
Bottom connection
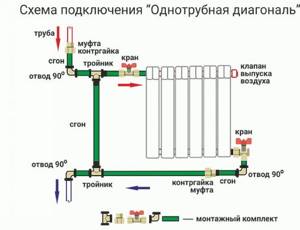
- Diagonal. Takes advantage when connecting radiators whose length exceeds 12 sections. In this case, the heated coolant is launched from above and, passing through the entire structure, exits through the lower pipe. Heat loss is insignificant - up to 5%.
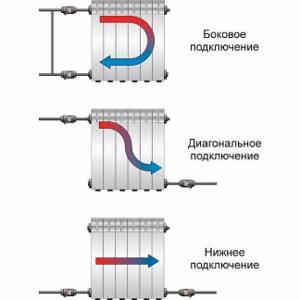
Three connection types
An expert answers your questions
What is the best way to install batteries in a niche or on a wall?
If you want to hide the radiator, it is better to install it in a niche. But keep in mind that it must be made according to the rules; it is best to install a heat-reflecting screen in it.
When you make a niche in an exterior wall, you will reduce its thickness. If a house or apartment is poorly insulated from the outside, this will lead to heat loss. In addition, a thin wall will not support a heavy battery.
Do you need a niche for heating radiators? Do you need a niche for the battery?
There is no need for a niche as such. With its help you can hide the radiator and put a decorative grille on top.
Where to put the batteries if the house has large windows?
If you mean windows that start from the floor, then you need to place it directly in front of the window (see photo). If the windows are of normal height, but wide, panoramic, you need to install radiators under them. There will simply be more of them. Calculate so that there is one radiator for every 2 linear meters of window.

How to properly position heating radiators in a private house?
The installation rules are the same for both a private house and an apartment. The only difference is the large number of external walls. Try to make the wiring so that all the batteries stand along them.
Most heat loss occurs in the corners where two exterior walls meet. You should definitely install a radiator there. It may be small, 3-4 sections, but it is necessary.
Why do they put batteries in the corner?
This is done only in those corners where two outer walls meet. It turns out that in a small area there is a large area of walls through which heat escapes. And these losses need to be compensated somehow.
How to properly install batteries under plastic windows?
It makes no difference whether you place them under plastic or wooden windows. You just need to correctly calculate the number of sections. The smaller the window area and the greater the number of chambers, the less heat escapes through it.
Do heating radiators need to be placed flush with the edge of the window sill?
If your window sill does not extend beyond the edge of the wall, this can be done. But imagine how ugly such an arrangement will look? In addition, the lower the radiator is located, the more evenly the room warms up.
If you want to ask your question, do so in the comments.
Removing old radiators before replacing them
The connection of old heating devices was made using metal pipes. Based on this, in order to dismantle the radiator, you will need to perform a number of actions:
- Drain the coolant from the system. If radiators are provided with a drain, it is recommended to carry out the operation of removing residual liquid individually in each product.
- Unscrew the locknuts installed on the sides of the coupling.
- Unscrew the connecting couplings.
- Remove the radiator from the brackets.
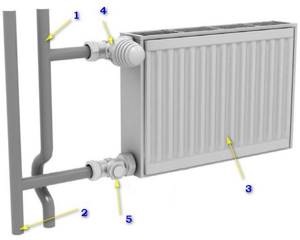
Radiator connection diagrams
Before installing heating batteries, you need to understand how to connect them:
- Lateral (one-sided) connection . In this scheme, the pipe that supplies the heated coolant is connected to the upper radiator pipe, and the return pipe is connected to the lower pipe. Due to this connection, it is possible to achieve high heat transfer. Sometimes the direction of the connected pipes is reversed, but in this case the efficiency of the system is significantly reduced. When using a side connection in a single-pipe system, you need to use a jumper that will ensure heating operation.
- Diagonal connection . This connection diagram involves connecting a hot pipe to the upper radiator pipe, and the return is connected from below, but on the other side of the heating device. The most relevant diagonal connection is if the battery has many sections and a large length. When using this scheme, it is possible to achieve maximum heating efficiency.
- Bottom connection (“Leningradka”) . Most often, the bottom method of connecting radiators is used if you want to hide heating pipes in a wall or floor. Both pipes are connected to the bottom of the radiator, but from different sides. The main advantage of this design is the ability to camouflage pipes, but the disadvantage is low efficiency (the level of heat loss can reach 15%).
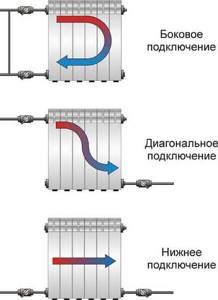
When choosing the most suitable connection method, you need to carefully consider the future design and take into account all the nuances. It would not be superfluous to consult with specialists, and if you have a budget, it is best to order the installation of radiators from them.
Installation of bimetallic heating radiators in an apartment
Let's consider detailed instructions for connecting bimetallic heating radiators.
What is needed for installation
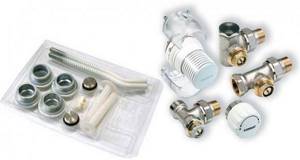
Materials required for installing radiators:
- Radiators.
- Brackets for hanging the radiator. For 6-8 sections, 2 fastenings are enough.
- Valves, Mayevsky taps, thermostats, couplings, turns and tees.
- Plastic pipes.
- Tow or fumka.
Set of tools for work:
- Soldering iron for plastic pipes.
- Adjustable wrench.
- Metal brush for cleaning threaded connections.
- Scissors for cutting pipes.
- Level.
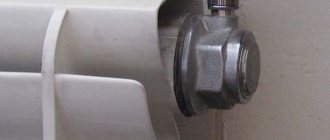
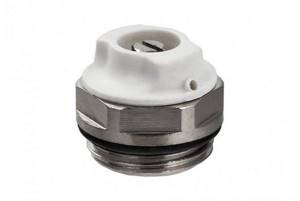
Mayevsky crane or automatic air vent
A small device necessary for periodically bleeding air from heating radiators. Installation is carried out in the upper part, free from the passage of coolant. This device must be installed on all aluminum and bimetallic radiators. To eliminate the need to periodically release accumulated air, you can use the installation of an automatic air vent. Such models, in a nickel-plated or brass body, are less popular due to their incongruous appearance with the enameled surface of the radiators.
Mayevsky crane
Stub
The design of the heating radiator includes four outputs. Depending on the type of passage and connection, the radiator may require the installation of plugs. So, with a single-pipe diagonal connection type, the rear lower entrance is locked in relation to the movement of the coolant. When installing a serial connection system, the plug is installed in the rear upper part.
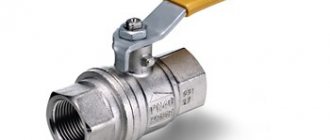
Shut-off valves
To facilitate the replacement of radiators or dismantling for the purpose of preventive inspection, it is recommended to install ball valves on the coolant inlet and outlet sides. The main task of shut-off valves is to regulate the supply of coolant to the radiator. To ensure that the heating of the room is not interrupted during repair work, a bypass system is installed in front of the radiators. In this case, when the taps are closed, the coolant will circulate through the spare pipeline.
Complete set and assembly of a purchased battery
Most thermal equipment is sold ready-made or factory assembled. They are distinguished by high-quality soldering and fully assembled assembly. And everything that is necessary for installation - fittings for connecting to pipes - is included with them. Most often there is a description with all the recommendations for connection. For an open top hole, a Mayevsky tap is recommended to release the air accumulated in the coolant. It will not be superfluous instead of a plug, which is still installed on collectors that are not occupied by pipes.
Accessories for installing a heating battery
If a room heating device is sold without additional equipment, it will need:
- plugs (1 blind, 2 straight through the diameter of the pipes) and gaskets for them;
- Mayevsky tap with thread (possibly with fitting);
- reinforced pipes made of polypropylene (metal-plastic, other polymer);
- “American” (stop valves);
- limit switch for connecting to neighboring batteries.
For “Leningradka” and other schemes, mortise valves are also recommended, distributing the coolant for more uniform heating. In houses where payment is made based on the room temperature level, a heat energy meter is installed near the riser.
When everything is in place, all that remains is to collect the tools:
- pencil, square and tape measure for marking;
- universal building level;
- dowels and brackets;
- a special soldering iron for polymer pipes (many companies and stores rent them out);
- adjustable and torque wrench (prevention of thread displacement and leakage);
- electric drill or universal tool for attaching brackets to the wall;
- grinder with a metal disc (for dismantling old batteries).
Attention! Some models can be expanded in the number of sections, and this may be a priority when choosing new batteries. Most often, consultants from specialized stores suggest what additional parts and shut-off control valves are needed to shut off part of the system in the event of an accident.
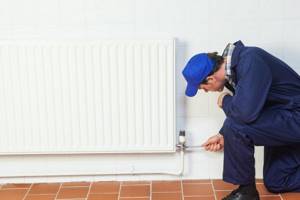
After installing the radiator, you need to check all connections and tighten the nuts if necessary.
Correct installation of heating radiators in an apartment
Before starting work, pay attention to the walls where the radiator will be hung. It must have a flat surface so that bulges do not interfere with installation. If you plan to leave the batteries open, then it is advisable to decorate the back with finishing materials.
Wall mount
Installation of heating radiators:
- Take measurements from the window sill 10-12 cm on each side and leave marks.
- Set the level to the preliminary marks and try to determine the optimal level position.
- Place marks with a marker at the intended locations of the brackets.
- We drill holes.
- We install the brackets.
- We hang the radiator.
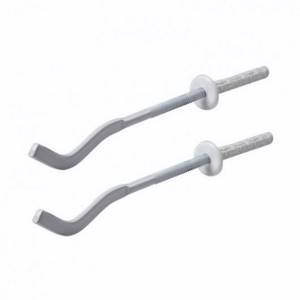
Bracket for hanging batteries
Floor fixing
It is not always possible to mount heating devices on walls due to the softness of the material used in construction. Some models require special legs. If these are aluminum or bimetallic radiators, then special brackets are purchased for them. Fastening is carried out to the floor with preliminary marking of the locations of the legs. To make it easier to adjust the height of radiators, purchase adjustable legs.
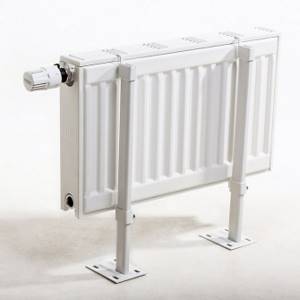
Battery feet
How to properly install a battery under a window
The greatest heat loss occurs through windows. Therefore, correct installation of the battery under the window is especially important.
- The radiator must be located exactly in the middle of the window - this way it will cut off cold air. The main task of the radiator located under the window is to create a thermal curtain. It will not allow cooled air from the window to enter the room. and will not allow it to spread throughout the apartment.
- The installation height of the radiator from the floor should be 5-10 cm. If the gap is larger, a layer of cold air will form. If less, it will be difficult to clean under the battery.
- The distance from the wall should be at least 5 cm so as not to impede air convection. Otherwise, the battery will heat the wall of the building and not the room.
Important
If the radiator is equipped with air cutoffs (see photo), the distance from it to the window sill should be more than 5 cm. If the window sill is wide and protrudes beyond the radiator, for every 1 cm of this difference you need to add 2 cm to the gap between it and the battery.
Such a radiator will remove warm air so that the window sill does not interfere with its circulation
For radiators without an air cutter, the minimum distance to the window sill is 10 cm plus 3 cm for every 1 cm of protrusion. Installing heating radiators under the window close to the window sill will interfere with air convection. And this will lead to a decrease in heat transfer.
If the distance between the window and the floor is too small and it is not possible to comply with the standards described above, it is better to install a low radiator with a large number of sections. This way you can avoid excessive heat loss and heat the room more efficiently.
You can read more about the issue of arranging a niche in the article “How to properly recess batteries into the wall without heat loss”
Options for piping heating radiators
The strapping options and their features were discussed above. Next, we will familiarize ourselves with the principle of connecting each of them separately.
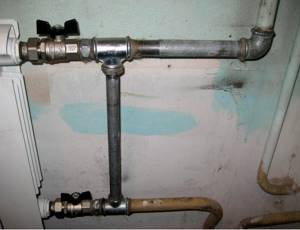
Strapping with one-sided connection
This method is most often used in apartments. The majority of apartment buildings still use a metal heating system, and therefore we will consider the connection using the example of one radiator with metal pipes:
- Prepare two ball valves, two tees and two fittings.
- Assemble the parts sequentially. The tee and ball valve are assembled using a drive, which has external threads on both sides.
- A bypass system is mounted from the tee.
- At the top, a similar assembly of the tap and tee is carried out using a drive.
- Pipes with threaded connections are installed from the upper and lower tees and the radiator is connected to them.

Options for one-way heating connection in an apartment
Important! If a two-pipe connection system is used, then the bypass is not used.
Strapping with diagonal connection
The diagonal connection method is the most optimal in terms of heat transfer. To install plastic pipes using the example of a two-pipe connection system, you will need to perform the following steps:
- Install the heating pipes in the apartment. If they are already installed, proceed to the next step.
- Assemble the tee and threaded connection for the faucet into one element using a soldering iron and a small bend. It will be installed in the lower part at the radiator outlet.
- Connect the corner valve to the assembled element. Connect to the battery.
- Assemble a combination element from an angle valve, a threaded connection, a transition to a tee and a tee. The transition is calculated individually based on the height of the radiator.
- Connect the tap to the radiator inlet.
Diagonal installation of heating radiators
Strapping with saddle connection
Saddle or series connections are carried out according to the following principle. All connections are made at the bottom. Therefore, heat loss with this installation method is significant. But still, they are popular due to ease of installation, aesthetically correct arrangement of pipes and minimal costs for the purchase of material.

Sedelnoe
Tests
If until now everything was done with your own hands, at this stage it is better to invite a housing and maintenance mechanic. By turning off the American taps, you can open the connecting tap. It is better to leave the opening of the return pipe to a mechanic.
If there are no leaks at the connection points, it will be possible to open the valve on the batteries and close the bypass valve. The coolant will begin to flow into the heating system. To bleed air, you should use the Mayevsky tap.
Once the heating circuit in all rooms has warmed up, the plumber will open the straight pipe. This will restore pressure in the system. The control tests can be considered completed. If the installation was done correctly, the apartment will be comfortable at minimal cost.
Preparing to install cast iron batteries
The basis of the preparatory work before installing cast iron batteries includes leveling the walls. First, determine whether the area is suitable for installing heavy structures. Once the issue has been sorted out and the conditions for its solution have been chosen, you can proceed to further actions.
Installation of heating radiators made of cast iron:
- Measure the window sill, and set marks on the right and left to a length equal to half the radiator. Determine the installation locations for the brackets.
- When installing heating devices in a room with low window sills, you must understand that the lower border of the radiator should not fall below 14 cm from the floor.
- Also, pay attention to the distance from the window sill to the top of the battery. It is at least 12 cm.
Technique for connecting sections of cast iron batteries
To combine several sections of cast iron radiators, you will need to prepare a 5/4-inch wrench and a double-sided threaded fitting.
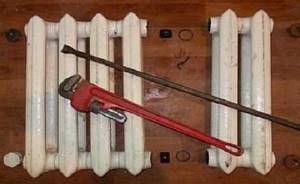
Cast iron battery connection
Connecting correctly:
- Measure the seating depth of the squeegee and leave a mark on the tool.
- Determine which thread is by testing. If it doesn’t fit, turn the barrel the other way around and thread it onto the thread.
- Install the paronite gasket.
- Place the other half of the battery side by side and align the threads.
- Use a special wrench to tighten both ends several times, alternating the lower and upper connections.
- We install the plugs and the assembly is complete.
Materials and tools for performing work
Before starting work, prepare a set of necessary tools and materials:
- Plugs. We purchase at the rate of 1 piece per radiator.
- Brackets. Due to the heavy weight, 4 pcs per battery are required.
- Mayevsky crane. Shut-off valves are designed to bleed air.
- Adapters.
- Shut-off valves. Ball valves fall into this category.
Consumables you will need are fum tape or tow, paste for sealing seams, and a puncher.
Mounting the radiator to the wall
- Determine the installation locations for the brackets.
- Make sure they are perfectly positioned in relation to the horizon.
- Drill holes using a hammer drill and install the brackets.
- Hang the radiator on the mounting elements and connect to the heating system.
If the wall is not designed to support the weight of a cast iron radiator, then purchase special stands, work with which is carried out according to the instructions provided by the manufacturer.
We attach it to the wall
Rules for tying cast iron radiators
Types of strapping and connection rules were discussed earlier, but to everything said above I would like to add the following:
- Bypass installation. This addition to the design of the heating system is used only for single-pipe wiring. The bypass does not provide for the installation of a tap, since when connected in apartments, this will lead to blocking of the common riser.
Bypass
- The radiator is connected according to the principle - the coolant is supplied to the upper outlet, the lower one is intended for the return outlet.
- It is more convenient to connect the drives using tow and sealing paste.
- Radiators can be replaced by closing two taps located at the inlet and outlet.
Procedure for crimping and testing the system
Pressure testing is work associated with filling the heating system with liquid coolant under pressure and then taking pressure gauge readings. If the indicators change, there is a possibility that the system is not sealed and is leaking. When the coolant is filled, the valve opens to bleed air. If no leaks are detected, then you can start the pump and use the batteries.
Specifics of connecting and installing different systems
Redevelopment of old houses or simple renovation of an apartment with the replacement of old heating radiators is always associated with the need to study the peculiarities of laying pipelines and methods of connecting batteries. With the open installation method, it is enough to select the correct parameters of the device and shut-off valves, calculate the mounting locations for the brackets and install the battery.
When installing hidden, work is carried out on laying communications, equipping the installation site, and adjusting the decorative grille. It must be remembered that hidden installation requires more space than the size of the convector. For air movement, it is necessary that there is at least 3-5 cm of free space around the radiator around the perimeter and the same amount below it.
In addition, the decorative grille should have an inclined arrangement of the blinds. This element plays an important role in shaping the direction of the flow of warm air. If the sashes are turned towards the frames, then a heat shield will be created effectively. And if the blinds are turned in the opposite direction, then the flow of heated air will be used ineffectively.
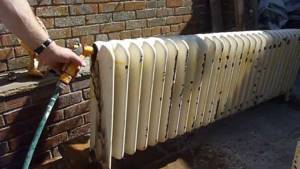
Cleaning a cast iron radiator when a blockage is detected
The work must be done together with a partner, in the summer, when water can be drained from the system. To remove blockages, dilute a solution of soda ash in warm water. The prepared liquid is poured into a previously removed radiator. After tightening the plugs on both sides, shake the device. After 1.5-2 hours, tap the radiator with a stick, which will cause internal rust and other impurities to peel off. Remove the plugs, drain the water and rinse with clean water from a hose. At this point, the cleaning work is completed and the radiator can be installed in place.
Flushing
What tools will you need?
To correctly install heating radiators, you will need the following set of tools:
- a set of open-end wrenches or an adjustable wrench;
- pliers;
- impact drill and drill bits with pobedit tips;
- screwdriver;
- hydraulic level;
- pencil and tape measure.
Please note that cleaning the joining surfaces should not be done with sandpaper or files, as this will reduce the tightness of the joint.
Selection of heating devices by type and power
If you have not yet purchased batteries, then before installation you need to select heating radiators from 4 varieties available for sale:
- Sectional aluminum. They are made from a light alloy - silumin (aluminum + silicon) in the form of ribbed sections, painted with a heat-resistant polymer composition.
- Bimetallic heaters are made in two types - sectional and monolithic, although outwardly the finished batteries look the same. Construction: a frame made of steel pipes is embedded inside each silumin section.
- Cast iron heating devices - designer and Soviet-style - are only available in sections.
- Steel radiators are welded from stamped metal (panel) or made by casting (tubular).
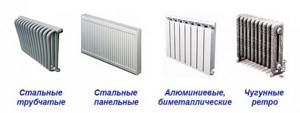
Note. In addition to the heaters shown in the photo, there are copper and baseboard convectors. They are rarely used in water systems.
Select the type of heating devices according to two criteria: price and appearance that matches the interior of the rooms. One caveat: for the autonomous heating system of a private house, any batteries are suitable, and for an apartment with centralized heating - radiators that can withstand a pressure of 12 bar. How to choose heaters is described in detail in a separate instruction.
The heat dissipation of batteries and registers is specified in the manufacturer's technical documentation. According to current standards, the power of radiator sections is indicated when the temperature difference between the coolant and room air is 70 °C.
For example, the room temperature is 20 degrees, the water in the pipes is 90 °C, then the section will give off approximately 180 W of heat. Since the coolant rarely heats up to 80-90 °C, the actual heat transfer will be much lower. Hence the conclusion: take radiators with a margin of 80-100%. Simplified methods for calculating power are described in our material and in the video:
Almost all types of batteries are offered in 2 versions - with side or bottom connection. Here the choice depends on the method of laying the pipes and the arrangement of the connections. This means that before installation you need to consider the question...