What do you need to do before starting work?
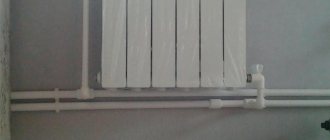
You need to start decorating the heating risers in your apartment only after preliminary preparation has been completed. If the communications in your apartment are old, then before installation they must be replaced with new ones. Sheathing involves an insulation device. It is necessary to put a layer of polyethylene on the pipe or a special sleeve instead. Regardless of the chosen decoration method, the pipeline must be washed before decoration. If you decide to paint heating pipes, then serious preparation will be required.
- It is necessary to remove traces of previous finishing from the surface of the pipe.
- The surface must be cleaned with a wire brush.
- It is also necessary to perform priming.
By deciding to decorate the pipes in your home in an original way and using your imagination, you can get an original interior element and achieve an incredible effect in the room.
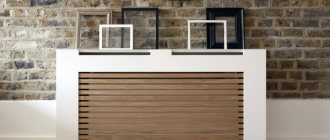
Covering heating risers
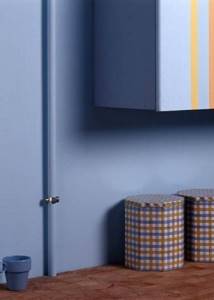
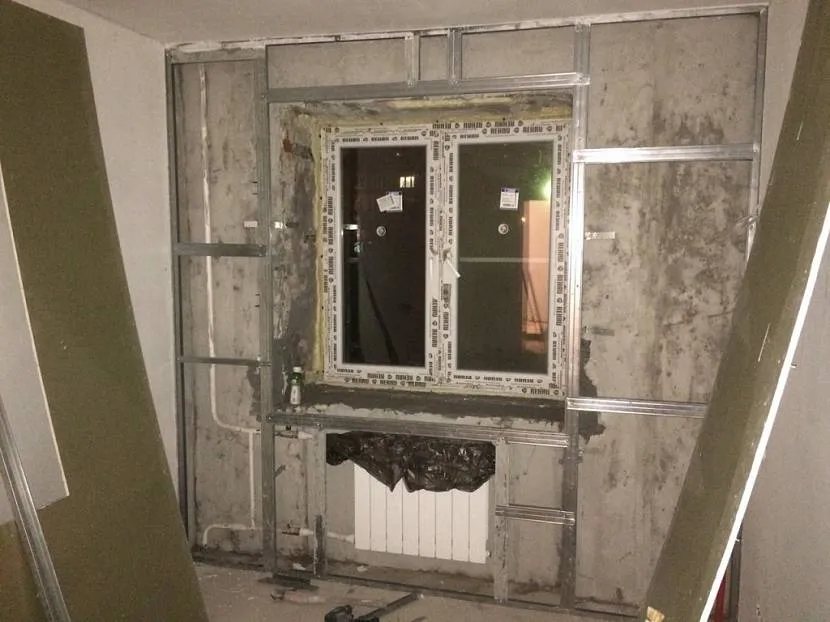
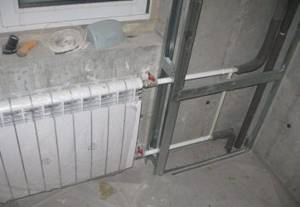
Typical apartments in panel houses are characterized by the location of heating risers in the corners of the room. This solution is not aesthetically pleasing from a design point of view.
And because of this, apartment owners often decide to sew these pipes into a decorative box. The installation of boxes is a redevelopment , and like any change in the configuration of the room requires approval.
And if earlier (until 2021) the housing inspectorate approved the sealing of heating risers either with plasterboard, or even the laying of foam blocks, with the installation of an inspection hatch, then starting from 2018, the sealing of heating risers is not approved in principle.
How the situation stood until 2021 and what decisions were made and agreed upon:
Examples of sketches of redevelopments with sewing up boxes:
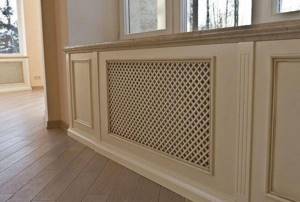
It is worth considering that when constructing a decorative box, it was mandatory to install removable decorative lattice panels.
Functions of removable grid panels:
- Quick access to the riser for necessary inspection (in case of leaks).
- Circulation of warm air throughout the apartment.
Examples of sheathing heating risers in redevelopment projects:
If your redevelopment has already been completed, it must be coordinated taking into account the development of a technical report on the admissibility and safety of previously performed work.
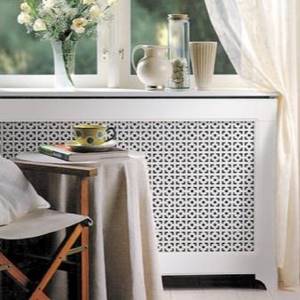
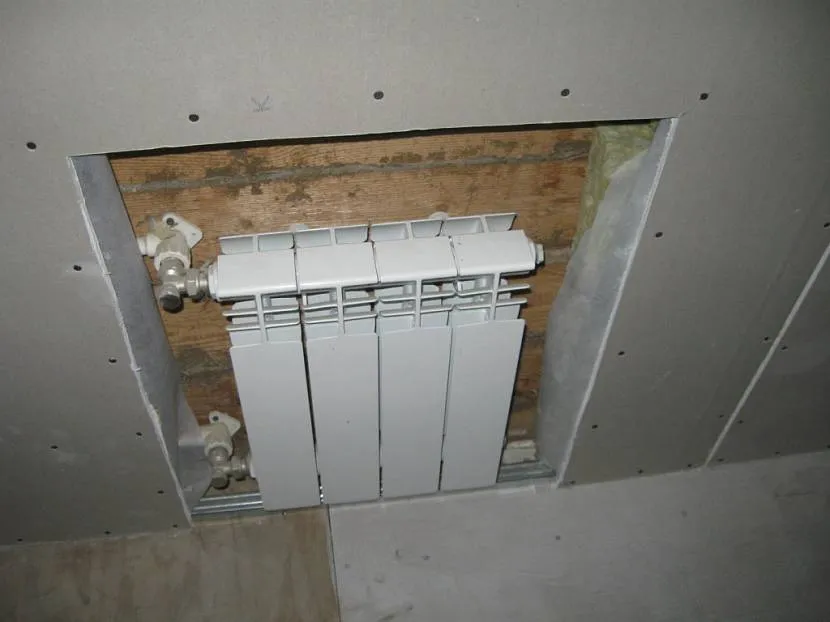
Sheathing of heating risers with access hatch:
Sheathing of risers without access hatch:
The photographs above show options for correct and incorrect lining of heating risers. In fact, there is only one violation in the “bottom incorrect photos” - the absence of removable blank panels.
We have not yet encountered a situation where the lining of heating risers was a separate event; over the years of work, we have not had any requests to coordinate only this event separately. Typically, such work is carried out in conjunction with another package of approvals, that is, this is one of several redevelopment activities.
What is the situation with the approval of pipe sewing after 2018?
Starting from 2021, the housing inspectorate will not approve objects according to the options described above. Now the only option that can be agreed upon is the installation of decorative removable panels with magnets. Below you can see an example of these panels.
How to hide heating pipes in a private house by decorating
Hiding pipes in a wall or box significantly reduces the heat transfer of heating elements. Sometimes these activities are contraindicated. This is why pipe decor is widely used to cover communications.
In this version, you can safely listen to your imagination. The main thing is that the original effect fits harmoniously into the interior of the room. You can simply paint the pipes to match the color scheme of the room.
Requirements for paints:
- Mechanical resistance;
- Thermal strength;
- Non-toxic.
You can use jute or hemp rope as decoration. But this will reduce the heat transfer of the pipes. You can also try split bamboo. You can additionally decorate it with branches and leaves, creating a branch. Highly located pipes can be covered with curtains.
It is easier to hide pipes at the stage of laying communications. Then it becomes possible to install the system as discreetly as possible. Also in this case, it becomes possible to make a warm floor.
Kinds
In order to decorate pipes in a room and hide them from those present, you can use several options, these are:
Recessing heating structures directly into the wall, which in itself is very convenient and not so difficult to implement, but in case of any problems the consequences will be very bad
When installing a pipeline, it is important to completely replace it and carefully check all fastening points, soldering points and any joints that may leak. Disguise using furniture, which is most often typical for the kitchen, but can sometimes be found in other rooms. Using a special box where the pipes are placed. You can make such a structure from different materials, these are: plastic lining, brick, plasterboard, wood.
The box for heating pipes can have a varied appearance, which depends on the room in which it is installed.
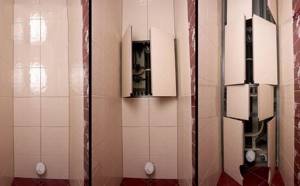
- A box-cabinet that forms a closed space where you can not only hide pipes, but also place little things you need in everyday life. It is very convenient to use it in the toilet, where space is significantly limited.
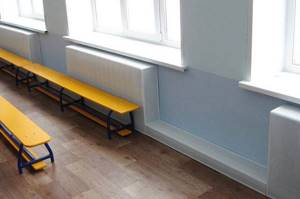
- A plinth box is needed to hide pipes with a small diameter; it is very convenient to install sockets near them, especially for the bathroom, where the humidity level is high and you need to choose the right place to turn on electrical appliances.
- A shelf box with a horizontal arrangement. This is convenient for proper installation of heating structures in the room. You can effectively, but at the same time effectively hide all communications, making the area useful.
- A screen box that helps cover large structures. Screens can be very diverse in design and size, but they will have one thing in common: a mesh structure, which allows you to minimize heat loss without depriving the room of its aesthetics.
- Decorative vertical structures are installed in places of common building communications, most often these are risers.
When planning the construction of any of the above options, you need to know that you can build two types of structures that will have radically opposite characteristics:
- Collapsible structures, their installation allows you to easily monitor the condition of the pipeline in any part of the room and control problem areas, if any.
- Stationary structures that are installed for the longest possible service life and are not planned to be disassembled for a long time. Most often, such boxes are made for gas pipes; they would not be the best option for heating.
Any type of structure can be purchased or made independently, which requires an understanding of what exactly will be built and the use of the correct structural elements. If you need to hide the battery, then you cannot do without a screen, and it must be perforated, otherwise it will not be able to cope with the task and the box itself will overheat, while the room will remain cold. The gratings can be either plastic or wooden, but if desired, you can even order forged products.
Any pipes that are in a house or apartment have an entry point and exit point from the room, which obliges them to decorate these areas as well. The best way to deal with this is overlays or plugs. Externally, they can have a varied appearance and even be made of different materials, but they have one task, to hide the pipe and make the interior of the room stylish and beautiful. Most often, it is the rings that are found, but you can also find square and oval options; in addition, they can be designed for one or two pipes.
Modern technologies also require new approaches to the use of materials; for example, when installing suspended ceilings, pipes need to be bypassed, which, in turn, requires making holes in the canvas that need to be closed. Decorative rings are now used for such purposes.
Their design is extremely simple, but still effective, these are two identical halves that have a special lock at the junction that snaps into place and is securely held in place
It is important to choose the right material and color of such plugs so that they fulfill their role
In the event that you cannot hide the entire pipe, but you need to decorate it beautifully, cups are great for this. They can be made in different sizes, shapes and materials. Chrome is most often used, but plastic can also be used, which has a split design.
If the design has valves or other moving elements that need to be used from time to time, then you can hide them under a cap that matches the decor of the room, so as to blend in with it and not be noticeable, but if necessary, make it possible to use everything you need.
Six different ways to hide pipes
Heating communications spoil the appearance of the room, they do not fit well into the decor of the room, therefore, if possible, many try to hide or disguise them. This can be done in different ways.
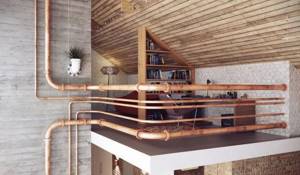
The loft style allows for display of utilities Source pinterest.com
Hidden broach
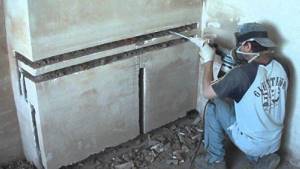
If you ask a builder or a craftsman specializing in apartment renovations how to cover a pipe in a room beautifully, he will definitely advise you to make a hidden broach. Its implementation becomes justified when a major overhaul is carried out and communications are assembled from scratch using new modern materials.
The groove is cut with a grinder Source sevparitet.ru
To do this, first, horizontal and vertical channels (grooves) are cut out in the wall with a grinder, then the plumber lays pipes directly into them, brings them to the heating devices and completely connects the entire system. The entire wiring remains deep in the wall; it is covered with plaster on top, so the technical filling becomes completely invisible.
When pipes are laid hidden, they are hidden in the wall Source uyut-remont.ru
Note! Before hiding communications in the wall, the pipes must be covered with insulation. If this is not done in the presence of coolant, condensation will accumulate on the surface of the wiring. It will cause wet spots to appear on an already repaired wall.
Thermal insulation of utilities in front of a hidden screed Source trubservice.ru
This option for masking heating pipes has its pros and cons. When the pipes are completely hidden, the appearance of the room is transformed and becomes more beautiful. Nothing prevents you from placing furniture close to the walls and building an even line with the furniture. But the practice of operating such premises shows that in the event of an accident it will be impossible to eliminate the leak. It will be difficult to discover where it formed. If this happens in an apartment building, there is a risk of flooding the neighbors. This threatens a scandal and large expenses for compensation for damage to other people's property.
The absence of heating pipes streamlines the interior Source www.stroykat.com
The risks of accidents are high even when polypropylene pipes are used to assemble the pipeline. In this case, fittings are used to connect two joints. Over time, they lose their tightness. Therefore, leaks form, which can only be detected using a water sensor. There are cases when plastic pipe joints leak due to poor soldering. In order to eliminate damage, you will have to re-open the grooves and replace the damaged area. And this is, at the very least, another major overhaul.

Water pressure sensor for heating system Source luvateknoloji.com
Floor screed
Sometimes the lower distribution of heating pipes is completely hidden in the floor screed. This technology is no different from the technology of hidden broaching in the wall. Only one thing: to save money, all pipes are laid in one large wide groove. Separate branches then run off from it in the required directions.
Laying the piping system in the floor Source logo-term.ru
This method of disguise is good if the apartment or house has not yet been screeded. Then it will be easier to create a plan indicating the location of the pipes on the floor, lay the pipes according to it, and then pour the screed. After the concrete has dried, the floor will be perfectly level. Experts advise maintaining the communication plan. It will later be useful for repairing the heating system.
The screed completely hides the wiring Source rousset-yves.fr
When the floor in a house or apartment is made of planks, it will be much easier to lay pipes along the bottom and then maintain them. After laying the finishing coating, it is important to leave one or two boards loose where you can quickly gain access to the main technical components of the pipe distribution.
Installation of heating pipes under a plank floor Source teplomir-nsk.ru
See also: Catalog of companies that specialize in insulating country houses.
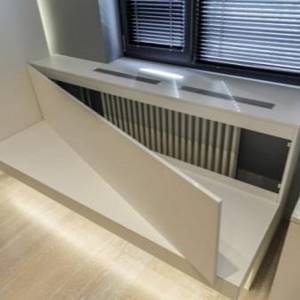
False wall
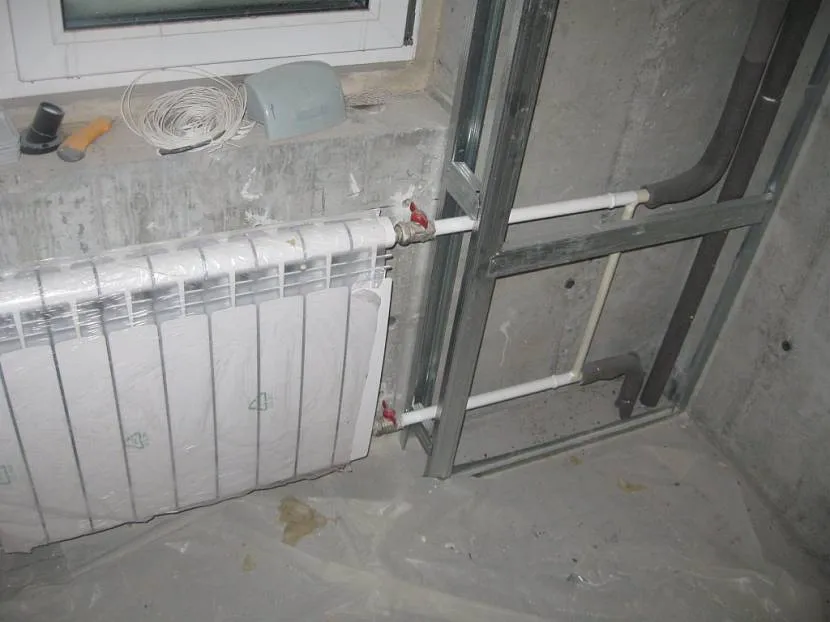
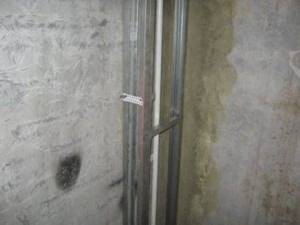
Any decoration of heating pipes should not impede access to areas of possible accidents. Therefore, it is worth giving preference to those designs that meet these requirements. One of them is a false wall, erected using metal profiles. You can then cover them with anything: plasterboard, plastic, plywood. The main thing is to leave access in the form of opening hatches to the places where pipes connect with the heating device, to the locations of couplings and tees. Before assembling the box, it is important to inspect the pipeline and perform the following steps.
To disguise risers, it is better to erect a false wall Source otoplenie-gid.ru
- If the heating risers are assembled using metal-plastic pipes connected by dismountable fittings, the latter should be removed and replaced with press fittings.
- If the wiring is old, you will have to completely change it.
- It is advisable to first cover pipes made of copper or steel with any plastic heat insulator.
After covering, the frame will completely cover all technical components Source www.remontnik.ru
Please note! Experts, when talking about how to decorate a heating pipe in a room, do not recommend using the box where polypropylene pipes are used for laying utilities. When heated, they expand; the high temperature of the coolant makes them plastic. In such a situation, before choosing pipe decor, it is necessary to make a preliminary calculation of the thermal expansion of the pipeline. Only an experienced engineer can do this.
The box is closed with plasterboard Source cosmo.actorz.ru
The finished false wall can then be decorated with anything: you can paste wallpaper on it or lay ceramic tiles. It is important to remember that its construction will take away useful space from the room. For small rooms, this decor of heating pipes is not suitable. Here you can use another method.
The box can become part of the overall decor of the apartment Source master-st.pro
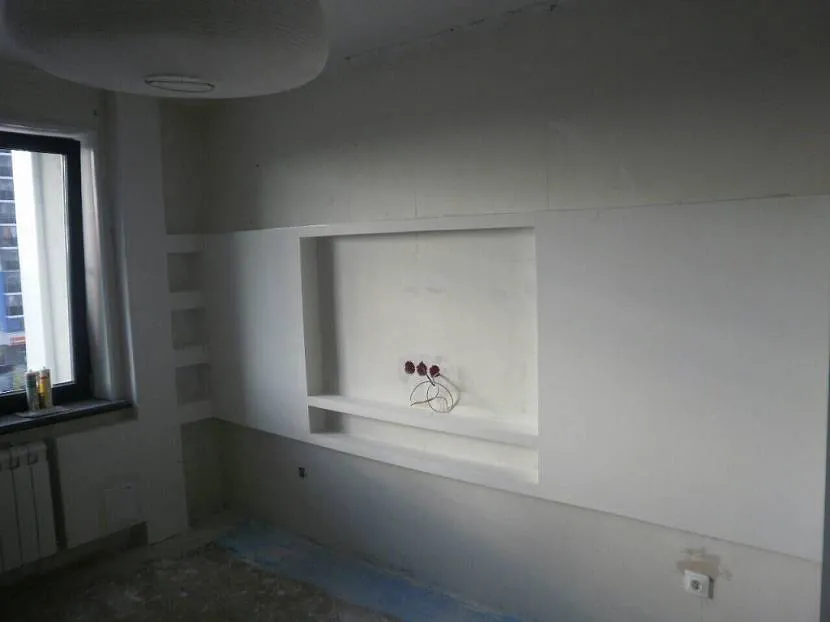
DIY plasterboard box
The easiest way to hide the heating system is in structures made of plasterboard. This material is attractive due to its combination of ease of processing, excellent performance properties, and relatively low cost.
You will find instructions for assembling protective and decorative structures in bathrooms in the article, the contents of which we recommend that you familiarize yourself with.
Another important advantage is the compatibility of plasterboard boxes with various finishing methods, which allows the structure to fit perfectly into any interior.
To make a plasterboard box you will need the following materials and tools:
- screwdriver;
- scissors (cutter, hacksaw) and drywall plane;
- sheets of plasterboard (for the bathroom and kitchen it is better to take moisture resistant, for other rooms - standard);
- wooden beams (metal profile);
- dowels, self-tapping screws for fastening the structure;
- building materials for filling, priming, finishing;
- skirting boards.
Decorative accessories will also help improve the appearance of the structure, with the help of which you can disguise the joints of the box with the walls/floor (sockets, overlays, rings, plugs). The work is carried out in several stages.
Step 1: preparation for work
First of all, you need to determine the dimensions of the structure, for which precise measurements of the heating pipes are carried out
When calculating the parameters of the device being manufactured, it is important to add a few centimeters to the depth and width indicators for a free fit: heating pipes should not touch the walls and frame components
In accordance with certain dimensions, wooden planks or metal profiles for the frame are cut, as well as sheets of drywall are cut (in this case, a minimum number of seams should be allowed).
Step 2: assembly of the structure
The starting profile, which will serve as the basis for assembling the frame, is fixed to the floor. Other parts of the structure are attached to it, creating a sheathing.
If the structure of the plasterboard box turns out to be too massive, it is recommended to strengthen it with guides, which will allow more reliable fastening of the slab sheathing
The edges of the cut plasterboard parts are processed with a special plane for this material, after which they are applied to the frame base and fixed with self-tapping screws. To protect the edges of the slabs from damage, the corners of the device can be glued with special overlays, which are made of perforated metal.
Step 3: Shutdown
Finally, finishing work is carried out. The joints between the slabs of the structure, as well as the entry point, are covered with putty.
After this, the surface of the box is primed, and then the finishing is done (painting, wallpapering, decorative plaster coating). The final touch for a neat look is to install skirting boards at the junction of the boxes with the wall and/or floor.
Is it legal to cover heating pipes with plasterboard?
Technical components that stand out against the general background introduce aesthetic dissonance into the overall concept of finishing the bathroom interior. A natural question arises - how to cover the riser in the bathroom with plasterboard. How to install a box so that it hides communications, is practical and maintains access to the main wiring nodes.
material
Design features of communication risers
In every house there are places where communications are concentrated: water, heating and sewer pipes. Some of these elements can be hidden in the walls by making grooves in them. For this purpose, crimped pipes are used. But there are wiring elements that, due to technical parameters, cannot or cannot be hidden in the wall.
These include:
- sewer risers with a cross-sectional diameter of 100;
- water pipes with meters;
- built-in installation for the toilet;
- comb (distribution unit) of heated floors;
- gas meter;
- technical points with supply valves, compensators, pressure reducers, compensators.
The best option for decorating these technical corners would be a plasterboard box with access revisions and hatches. If you take into account all the features, then in a closed niche there will be space for storing household chemicals, or for a convenient shelf. The structure covers communications and serves as a decorative element.
How to cover a riser with plasterboard
When starting to install a pipe box, analyze the technical features of the unit. Rate it according to the following parameters:
- Complexity of design. It is enough to cover vertically or horizontally located pipes (with or without meters) with a rectangular box. An inspection window is left in it. In the case of a built-in installation, it will be a structure consisting of several elements.
- Type of finishing. Washable wallpaper and sheets of plastic are cut to the required length according to the box. In the case of tiles and plastic lining, it is more correct to fit the box to the material so as not to saw it into small pieces or trim it. This way the design will look neater.
- Think about how to design the boxes from an aesthetic point of view, take a design approach. For example, when covering an installation, raise the height of the box to the ceiling, and make niches with lighting inside.
- Determine the size of the inspection windows. Design them in such a way that there is access to technical components for taking readings and for emergency dismantling and repairs.
The installation process will be described using the example of a vertical riser; the principle of assembling a plasterboard box for a horizontal structure is identical.
Marking
Work on making a box in a plasterboard bathroom begins with marking. It should be taken into account that up to 5 cm are removed from the pipes. Since plastic has a certain expansion coefficient, slight condensation may form on them. In places of contact, wet spots may appear on the plasterboard.
For complex adjacent elements (for sewerage and installation ducts), it is better to use a laser level. It gives markings in several planes at once and their intersection
For planning, it is recommended to use a building level and a corner. Subsequence:
- Mark the vertical guides. To do this, make an indent of 3-5 cm from the extreme point of communications and put a mark.
- Using a level, mark vertical lines on the walls and draw them.
Marking the floor and walls
- The outer corner of the box is drawn along the floor. The walls in the bathroom may be slightly turned out, so the outer angle is not always 90⁰. It is displayed along the vertical mark set for the guides. Take a construction square and apply it to the line. A mark is placed on the floor at a distance of up to 5 cm from the pipes. Draw perpendiculars. The angle of contact with the wall may not be perfectly straight - this is not significant. Visually, small deviations will not be noticeable.
- Transfer the markings to the ceiling using a plumb line or laser level.
After marking the walls, floor and ceiling, we proceed to the installation of the frame
For a wall-mounted, non-corner structure, both outer corners must be exactly 90⁰. Double-check the marks, as correct assembly depends on them.
Photos in the interior of the rooms
Kitchen
The kitchen is the ideal room in which all ways to hide batteries will become practical and convenient. If the room is small, then you can hide the radiator with the help of a beautiful tabletop or make a folding table, which will fold out when convenient.
Factories of metal-plastic structures offer a large selection of beautiful large-sized window sills that imitate stone, wood and other materials. A modern window sill does not break under weight, is not afraid of external factors, is easy to care for, wipe clean, is not afraid of scratches, and so on. You can hide any type of battery in this way, including cast iron.
In the photo, wooden boxes are used to disguise the radiators.
Living room
If the radiator is in a niche, then a wide window sill will help create a work area.
You can place souvenirs, vases or potted flowers on the constructed wooden box. You can also cover unsightly radiators in the living room with thick curtains.
The photo shows a modern living room. In order to hide the radiators, a wooden structure was installed, which also serves as a place for rest, storage and decoration.
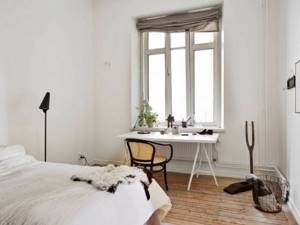
Bedroom and children's room
In the interior of a bedroom and children's room, batteries can be used as another place to relax, a tabletop for decorative elements or a workplace.
Bathroom
You can hide the pipes in the bathroom using a louvered door, plastic grilles or a cabinet with opening doors.
We hide heating radiators using wooden, glass or plastic screens.
In the photo, the radiators in the bathroom are hidden using a wooden box.
Hallway
For radiators in hallways, glass screens or wooden boxes are suitable. In a small room, covering the battery is only necessary from a practicality point of view. This could be a locker for storing shoes, or the battery will become a small coffee table where keys and other necessary items will be stored.
Water supply
- Is it possible to sew up the water supply pipes in the toilet??
If you have a centralized hot water supply, then the same restrictions apply to the DHW riser as in the case of central heating. Under no circumstances should steel risers for hot water supply and cold water be sewn up: after the first leak, you will have to make repeated repairs.

All areas of possible leaks must remain accessible for repairs.
Let me clarify: in cold water, to replace the riser, which will be retracted into a niche, you can safely use any pipes with maintenance-free connections. Due to the specific configuration of the hot water supply system, water hammer is impossible in it: the air in the risers and connections plays the role of a damper when filling, while the hot water supply system is often released to discharge when starting up.
If, in this case, the permeability of the vent is lower than that of the shut-off valve element through which the circuit is filled, then a water hammer occurs at the moment when the remaining air is forced out of the circuit.
- And the pipes in the bathroom should be put away in a box?
Again, in the event that all connections of the cold water and hot water supply lines are maintenance-free. Steel pipes cannot be sewn up with a permanent box.
Maintenance-free connections are recessed into the wall and the threads are located outside of the wall.
- How to sew up toilet pipes to prevent condensation from collecting on them?
Install ventilation grilles above the floor and below the ceiling. Convection through them will be ensured by heating the air by the hot water riser.
Some interesting ideas
Let's take a closer look at some design techniques that may be useful when carrying out work on “hiding” or giving a more aesthetic appearance to heating pipes. Examples can be seen in detail in the photo.
Coloring
Here are some examples of ready-made solutions:
- You can try making the pipe part of the interior, for example, a children's room.
If you deviate from the generally accepted white color in which heating system pipes are traditionally painted, you can “turn” the vertical pipe in the corner of the room into wood. And from this trunk, move on to painting the adjacent walls, drawing branches on them. Even a non-professional artist can do this kind of work.
And since there are already branches on the “tree”, then leaves are also needed. The process of “growing” leaves on a tree can be entrusted to your child if he has already learned to hold a brush in his hands. It is very easy to interest your child in this process if you periodically change the color of the leaves on your home tree according to the seasons. This “seasonal” decoration of heating pipes will be an excellent game that combines not only unobtrusive teaching of the child to be careful in work, but also a way to develop observation and love for nature.
- You can approach the issue of painting heating pipes in the bedroom or living room in a completely different way than in the nursery.
Here, a noble golden tint or a discreet silver tint would be appropriate for decoration. A muted bronze color will also look good. The main thing is that this color is in harmony with the overall style of the room.
Decoration
You don’t have to limit your imagination or use one of the ideas in your own way:
An interesting technique for decorating a heating pipe is simply wrapping it with hemp or jute rope. If you are not bothered by a slight decrease in the heat transfer of the pipes, then this option can be considered.
- An interesting option would be to use bamboo trunks split along the length. Such halves can be glued together into an original casing for a vertical pipe.
- And if artificial flowers are used instead of bamboo (or together with it), such a decoration will not go unnoticed by your guests, completely hiding its “base” - the heating pipe.
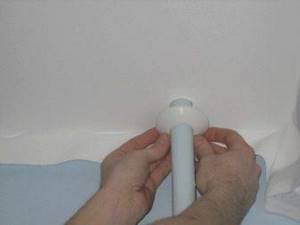
- In those places where the pipes enter the floor or ceiling of the room, as well as in the places where the pipes go from the riser to the radiators, you can install nice decorative covers on the heating pipes. By choosing the color and texture of such decoration, you can logically complete the image that was intended.
- One option for ceiling linings can be rings, which usually hide the inevitable cuts that are made around risers in suspended ceilings.
- Using a fabric drapery similar to window curtains will add some charm to the room.
Stained glass
A once fashionable way to decorate a home - stained glass - is returning to modern design developments. It is worth thinking about using this unusual way of decorating a room, combining an original decorative element with a very ordinary heating pipe. An elegant partition with stained glass elements can change beyond recognition that corner of the room that previously did not look very elegant.
Before decorating heating pipes with stained glass, you can also provide a supply of lighting to the composition. In this case, in addition to its decorative function, the stained glass cover of heating pipes can serve as a night light or simply create a romantic coziness in the room.
We hope that the ideas proposed in the article will allow you not only to hide unsightly heating pipes, but also to create an interesting interior feature in the room you are decorating.
Masking heating pipes in the wall
Pipes, risers and radiators can be disguised in several ways. A fairly popular option is to hide communications in a wall or in a field.
At the same time, it is important to replace old pipes with new ones in the apartment before such work. It is better to choose plastic communications. Otherwise, leaks will occur, which are quite expensive to fix.
Otherwise, leaks will occur, which are quite expensive to fix.
You can disguise a heating pipe in the wall using drywall
The sequence of installing pipes in the wall:
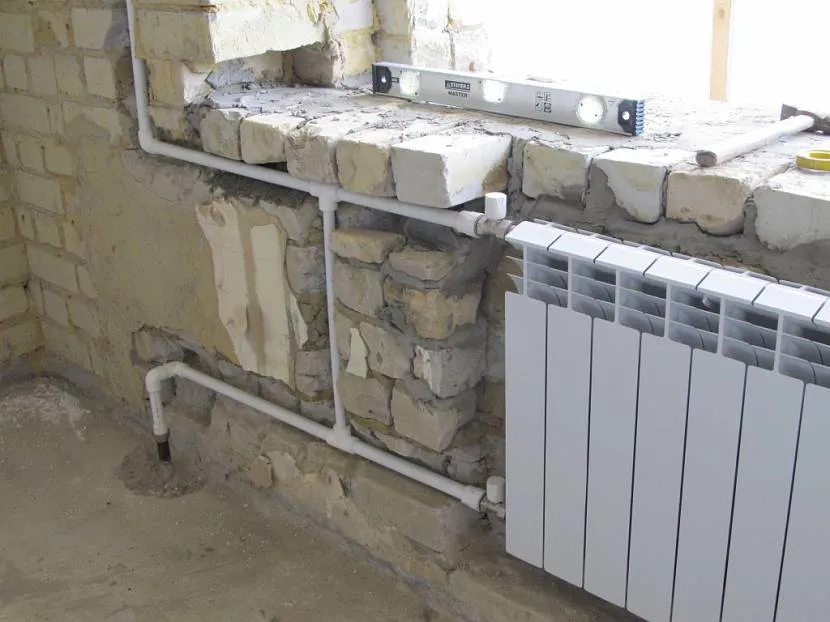
- First, a communication layout is created. This takes into account the cross-section of the pipes, thermal insulation and the thickness of the wall layer that needs to be sealed.
- Next you need to make a hole in the wall. This is a special recess in which communications will be placed. Provides space for bends and tees.
- Then insulation is put on the pipe and mounted in the provided niche. Communications should be well secured, ensuring reliable fixation.
- The pipes are secured using brackets. To do this, holes are made in the wall with dowels. They are the ones who will fix the device.
- Next you should check the functionality of the pipes. Only after this the niche is sealed.
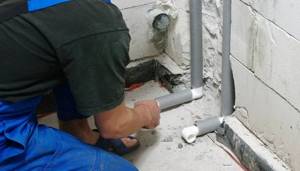
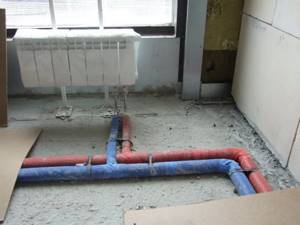
The second method involves sealing pipes in the floor. First, think through the laying scheme. A groove is made in the floor. The top of the pipe should be slightly below floor level. Next comes pipe insulation, inspection and installation. Communications are closed with concrete mortar. For normal water circulation, a pump is installed.
But if you hide the pipes this way, you should be prepared that in case of a leak, you will have to completely dismantle the floor or wall
That is why it is important to reduce all risks to a minimum. One-piece pipes or those with a minimum number of joints should be selected. This option can be called a warm floor
This option can be called a warm floor.
How to hide a heating system in an apartment - let's look at the methods
Heating pipes can be hidden in panel walls in several ways. And for this room there are not so many of them. The first option in panel houses is the use of grooves, and the second way is the construction of false walls. Each of the options has pros and cons, and you need to make a decision for yourself after studying these methods in detail.
A heating pipe can be hidden in the wall of a panel house when a new circuit is being assembled, or repair work is being carried out in an already functioning structure. As a rule, the wall of a panel house and the heating main are placed in different planes.
And when it is necessary to bring them into one plane, recesses are cut in the panel walls and the heating line is placed there. When doing this, you need to pay attention to the following points:
- Before starting work in a panel house, the riser is blocked. There is no need to rush when performing these actions. And you should definitely make sure that the work is planned on the right riser.
- If the depth of the canal exceeds half the septal thickness, then the best option would be to abandon the planned actions. So, for example, a bathroom in a panel house is a separate concrete block system. And the thickness of such panel walls will not be enough for this task.
- The dimensions of the grooves in panel walls should not run end to end, and they should not infringe on the contour. The recesses must be made taking into account the system fasteners, its volume and the insulating layer.
- Before covering the system in the wall of a panel house, it should be covered with insulation, otherwise condensation will form on the surface of the pipe.
- Before fastening the structure to the wall of a panel house, you need to determine its main locations. These include joints and zones of change in direction of the coolant.
To facilitate the work of chiselling a wall in a panel house, it is recommended to use a grinder. First, markings should be made, and then along the corresponding lines, indentations are made to a certain level of depth.
ADVICE! When working with an angle grinder, not only a lot of noise arises, but also dust. Modern tools have a big plus - the function of connecting to a construction vacuum cleaner, and this prevents the appearance of dust.
According to existing rules, the communication network in the wall of a panel house must be located in an area of unobstructed access. Only those areas where the possibility of an accident is zero are left directly closed.
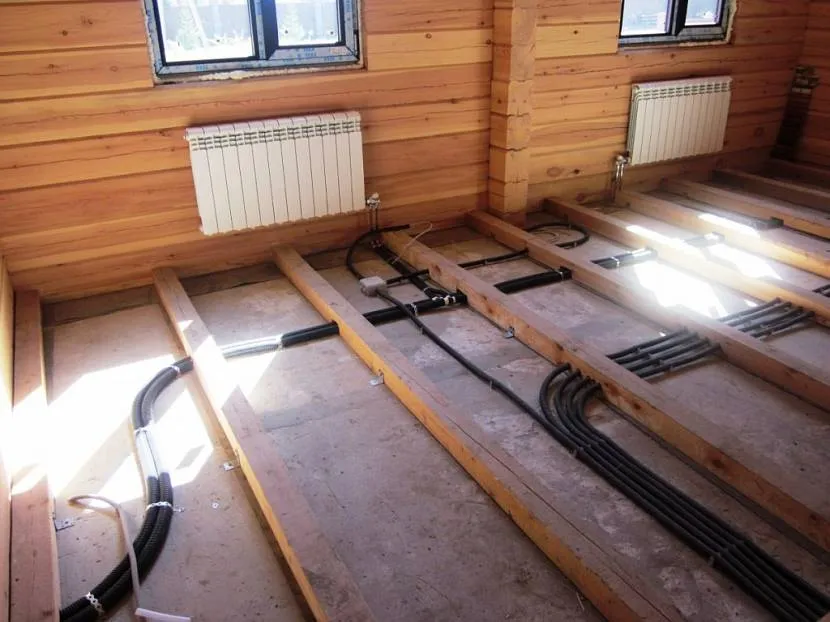
How to hide pipes in a private house
The arrangement of a hidden pipeline in private houses directly depends on the characteristics of the building itself. For example, if the floor is poured with concrete, then it makes sense to connect the pipeline to its heating system
In this case, special attention should be paid to the quality of the screed and insulation of the base. During the installation process, it is imperative to use a damper tape. If there is no need to heat the floor, the pipes can be covered with a heat-insulating layer and arranged in grooves made in the floor
This method of laying the pipeline will ensure maximum efficiency of the heating system. When creating grooves, you need to make a 10-mm margin so that thermal insulation and mortar can fit into the structure.
If there is no need to heat the floor, the pipes can be covered with a heat-insulating layer and arranged in grooves made in the floor. This method of laying the pipeline will ensure maximum efficiency of the heating system. When creating grooves, you need to make a 10-mm margin so that thermal insulation and mortar can fit into the structure.
Fastening the pipes to the floor itself is best done using staples or clips. When the pipeline is installed, it must be connected to the heating equipment and checked for leaks. If everything works correctly, then you can safely start pouring the screed.
Is the plasterboard partition that covers the riser considered a redevelopment?
So in Article 25 of the RF Housing Code, part 2 it is written:
Redevelopment of a residential premises is a change in its configuration, requiring changes to the technical passport of the residential premises.
Here the question arises whether a change in the form of a plasterboard wall is a change that must be made to the technical passport of the room. We look at the resolution of the State Construction Committee of the Russian Federation dated September 27, 2003 N 170 “On approval of rules and standards for the technical operation of the housing stock” (RG. 2003. October 23) provides approximate types of changes to the premises for these groups, in part 1.7.1.
Redevelopment of residential premises may include: moving and dismantling partitions, moving and installing doorways, disaggregating or enlarging multi-room apartments, installing additional kitchens and bathrooms, expanding living space through auxiliary premises, eliminating dark kitchens and entrances to kitchens through apartments or residential premises, installation or refurbishment of existing vestibules.
That is, our plasterboard wall is not subject to redevelopment. As a result, such a change will not require inclusion in the technical passport.
Examples in the interior
Decorating or hiding radiators in a room beautifully so that they are not a “fly in the ointment” and do not spoil the entire appearance of the room is not such a difficult task. Modern materials make it possible to solve this issue at minimal cost.
Vertical, horizontal, sectional, copper, cast iron - the modern market offers a wide variety of radiators for every taste.
A battery with a bright, cheerful color, for example, yellow, will look good in a children's room - it has a positive effect on the nervous system and emotional state of a person.
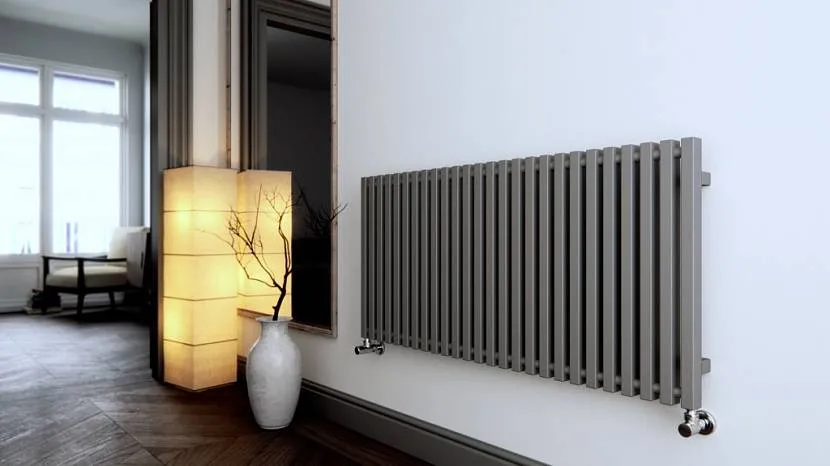
New models, unusual for the eyes - vertical radiators. They are located vertically on the wall and can occupy the entire height from floor to ceiling. This element looks quite stylish and does an excellent job of maintaining a comfortable temperature in the room.
In the bathroom you can place a wide radiator of small height (resembling a bench). It will be able to perform not only its direct task, but will also serve as a clothes dryer or towel dryer. By the way, the dryer can be connected to a battery - you get an interesting combination, again performing several functions. Efficient use of space and objects never hurts.
An interesting finish - with the help of chrome - brings to the interior some note of freedom, emancipation, inherent in bikers. These are the ones that come to mind when looking at these sparkling structures.
Designer radiators will also decorate any interior. Unusual designs, shapes, when looking at which you don’t immediately understand that this is an element of the heating system, they become a bright accent, like a picture on the wall. Such batteries should not be hidden; on the contrary, they are put on public display, emphasized with a contrasting background, placed in the center of the wall without any addition, so that nothing distracts attention from the unusual object.
Copper radiators - both vertical and horizontal - can also serve as an effective room decor.
Their design is not complicated, but they have such advantages as:
- High heat dissipation.
- Attractive color.
- Ease.
Pleasant to the eye, the discreet color of copper will be a worthy addition to any interior style.
Laconic black elements of the heating system will look good against the background of brickwork - white or gray. They can also be vertical or horizontal; in any case, they will be an attractive, effective, but at the same time, discreet element of decor.
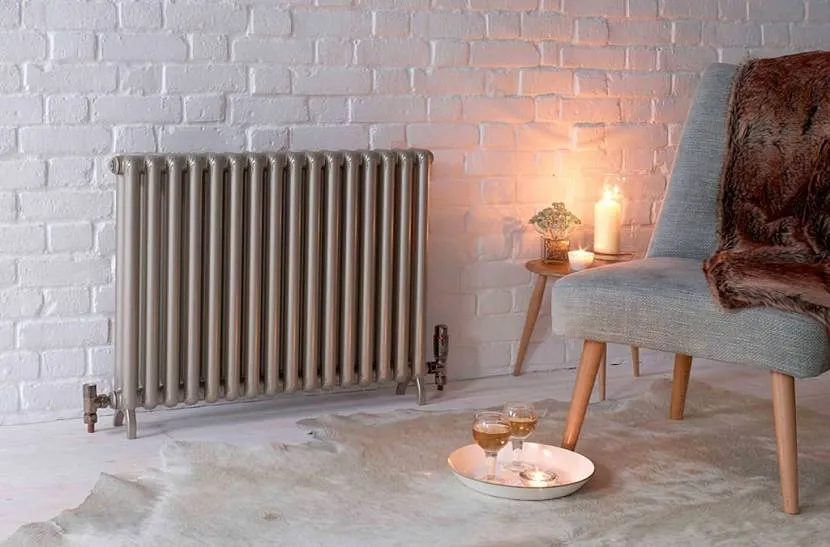
In modern interiors, you can often find heating radiators displayed on display as an independent decorative element rather than hidden in boxes or covered with screens. Even cast iron batteries, which evoke memories of the Soviet Union for many, are now distinguished by an interesting design, unusual color schemes and high decorativeness.
The radiators left open cope better with the task of heating the room; nothing interferes with either air circulation or the emission of infrared rays. This means that the temperature in the room remains comfortable, objects and air are heated evenly, the heat does not remain inside the box or niche, but is distributed throughout the room. And this is the main function of the heating system
To learn how to hide a heating radiator, see the following video.
How to decorate pipes with your own hands?
The easiest way is to paint the pipes to match the wall
Dye
The correct selection of decor colors can easily revive even the most unsightly thing; set the mood for a living room, bedroom or nursery. By the way, if communications run through the children's room, you simply need to involve your child in the creative process: it will be interesting for him, and it will be handy for you. If you have drawing skills, then the batteries can be easily painted to look like different animals. For example: a boa constrictor or a giraffe. All sorts of decoration attributes will add greater originality.

Giraffe pipe or birch tree pipe - suitable decor for a children's room
Hide under twine
The freshly painted heating system must be braided in a circle with a rigid rope (colored cord), thus simulating a tree trunk (palm tree). Artificial leaves, real tree branches, and wooden rings will help complete the picture. Also, you can bring in original decorative elements that are already present in other rooms, thereby highlighting the commonality of style.

Lemon tree from a heating pipe
Imitation shelf
Perfectly implemented on a horizontal heating system. Use hemp cables, twine ropes - you can attach a neat decorative shelf to them for storing trinkets and other light things. If the room is still under renovation, the shelf can be made more solid. Then it will be able to fully function and still be useful for everyday use.
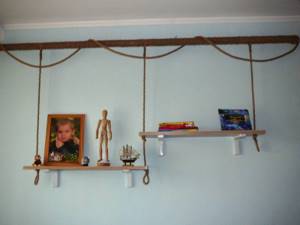
Decorative shelves suspended on a horizontal pipe
Hide in a box
An original solution that will suit adherents of minimalism and geometric shapes. You can build a box without much difficulty: you only need a sheet of metal, fiberboard; at worst, ordinary plywood (plasterboard) will do. But the result is a neat appearance of the wall without unnecessary clutter of heating pipes, as well as other heating communications.
A simple box made of planks with a small shelf
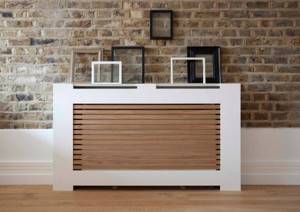
Stylish box made of sheet material and wooden slats, painted to match the brick wall
Masking a pipe using a galvanized profile
Hide in a locker
Convenient, simple, concise. Installing this element is not difficult, especially if you are not the one doing the repairs. You can ask a specialist - he will offer the most optimal options, and at the same time tell you how to fit the wardrobe into the interior. In addition, the secret locker is very convenient. Especially when suddenly you urgently need access to the battery (for example, adjust the pressure, fix a leak).
Cool cabinet in the bathroom
Access to the riser
The risers in the house are being replaced. Access to them is limited by the toilet. A plumber can remove it for an additional fee. But if the toilet is damaged, I will have to buy a new one myself. Tell me, if the Criminal Code leaves an order to provide access to the risers (which are covered with tiles) simply so that they can inspect them, in the absence of any accidents and leaks according to the statements neighbors, for example.
Are we obligated to break down the wall?) I have a question! The neighbor does not have cold water, she asks me to provide access to the riser, I provided it, the plumbers told me to break the tiled wall and remove the toilet! Who will pay for my damage? She refuses to pay! What is the right thing to do? Hello, Renata.
This is how you need to proceed according to the flooding algorithm. Call the management specialists and draw up a flooding report. A specialist will find the culprit in the flood.
And in court, recover decent compensation from this smart guy. When the cold water riser broke (the insert was rotten), but there was no access to the riser to make repairs or see the leak. The riser is closed in a groove.