What parts do polypropylene products fit into?
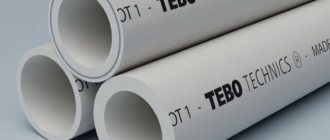
If you don’t know how to connect polypropylene pipes, our explanations will come in handy. This type of pipe is in demand when preparing water supply, heating and irrigation mains. Due to the long service life of polypropylene pipes in the water supply network, which is about half a century, this type is increasingly preferred as a replacement for worn lines. And also these pipes are perfectly combined with auxiliary elements made of steel and polyethylene.
All polypropylene pipes, according to the scope of application, are classified into types:
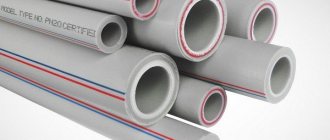
- Conventional pipes for installation of cold water pipelines (PN 10, 16).
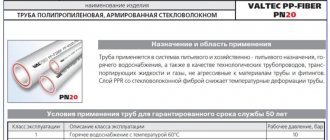
- Universal thick-walled pipes for heating systems that can withstand hot water with a temperature of +80ºC (PN 20).
- Composite pipes having a layer of metal or nylon that is peeled off during soldering. They are used for installation of heating systems, where the maximum temperature of hot water can reach +95ºC (PN 25).
Polypropylene pipe connections are distinguished by the absence of seams between the components of the pipeline.
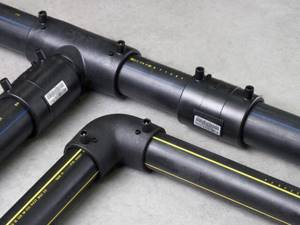
If their diameter is less than 50 millimeters, you can use all kinds of fittings:
- couplings for connecting sections of the same transverse size;
- crosses to form branches;
- plugs for sealing the ends of the pipe;
- adapters for joining pipe products of various diameters;
- union fittings for connecting pipes with flexible hoses.
If you decide to install propylene pipes yourself, then, first of all, you need to buy or rent a special soldering iron with nozzles.
In addition to it you will need:
- plastic pipe scissors;
- tape measure, marker for marking work;
- cleaning for pipe surfaces.
Classification of fittings
Polypropylene pipes and connecting elements are created from materials with different compositions. Therefore, they are characterized by thermal stability. This material property affects the classification and labeling of fittings and pipes.
Marking
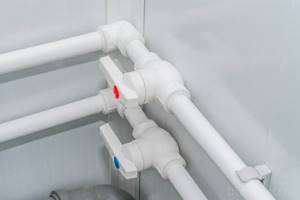
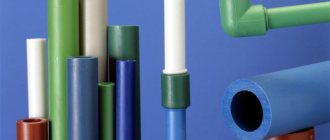
PP pipeline parts are made from the following raw materials:
- Homopropylene is designated by the abbreviation PPG, and products made from it are marked PRN or PP-1.
- Random copolymer or static copolymer of polypropylene - abbreviated as PPR; when marking pipes and fittings the following designations are used: PP-3, PPRC, PPCR.
- Block copolymer (PPV) - for marking PP pipeline elements, the following abbreviations are used: RRV, RR-S, RR-2.
- Polyphenyl sulfide (PPS) - pipe parts made from it are marked (PPS).
The composition of the PPG material includes modifying additives that increase the impact strength of PP products. In addition, nucleators, fire retardants and substances that reduce static electricity.
Homopropylene is used to make pipes and fittings for external cold water supply networks, drainage and ventilation systems. The products are not used to create heating circuits for buildings because they have a low melting point.
Pipe parts made from PPG are often manufactured with large diameters. Therefore, they are used in drainage and sewer systems for industrial purposes.
Structure
The PPR material is distinguished by the crystalline structure of its molecules. Products made from random copolymer can withstand impacts and temperatures from -170°C to +1400°C.
Pipe products from this raw material are produced with a diameter of 16-110 mm. It is used for installation of heating, sewer and water supply systems in households and industrial facilities.
The PPV material is distinguished by its structure, consisting of precisely ordered homopolymer micromolecules forming blocks. Block copolymer products are characterized by high resistance to impact and high temperatures.
Therefore, heating systems in private houses and apartments are made from it. DHW and cold water circuits.
Polyphenyl sulfide has a different molecular structure and is a high-class polymer. As a result, they are characterized by excellent wear resistance, resistance to heat and heavy loads.
PPS pipes and fittings are created with a diameter of 20-1200 mm for water supply, ventilation and heating. PP products also differ from each other in their MRS characteristic - minimum duration of strength.
The indicator takes into account the wall thickness and allows you to select products based on the highest pressure in the network. Consequently, it will ensure reliable operation of the system for 50 years when moving water at a temperature of 20°C.
The maximum permissible pressure is indicated by the letters PN along with numbers. Thus, PN10 pipe elements can withstand the highest pressure load of 10 bar, and PN16 - 16 bar.
Pipe welding
The joining of the components of the pipeline consists of their mandatory heating and prompt connection of the parts. For welding pipes, household devices with a power of up to a kilowatt are used, which is quite enough for prompt and flawless heating of the material. In industrial production, stronger and more expensive devices are used. By purchasing a special soldering iron for these purposes, you additionally receive attachments for pipes of various diameters. The polypropylene pipe needs to be heated from the outside, and the fittings from the inside.
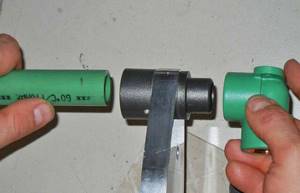
How to use a soldering iron? Firstly, it needs to be connected to the electrical network and set to the temperature required for heating, which depends on the size of the cross-sections of the plastic pipes to be welded. The average temperature varies from +250̊ to +270̊C.
Secondly, it is imperative to wear protective gloves to avoid burns even at the slightest touch to hot parts. When welding pipes at home, it is important to observe caution and basic safety requirements.
Alternative to welding
In some cases, for example, in hard-to-reach places in the bathroom or other rooms, it is not possible to carry out welding work. The soldering process can be replaced by gluing the pipe to the fitting using an organic solvent. It has a very strong softening effect, but is also highly volatile.
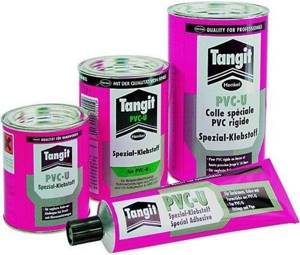
After lubricating the end of the pipe and the internal cavity of the coupling, the plastic softens for a short period of time, and the connection can be made. Reverse polymerization begins after a few seconds.
However, this method is more suitable for PVC pipes that are less prone to thermoplasticity.
If for some reason this option is not suitable, for pipes NOT UNDER PRESSURE it is permissible to use a supercharged lighter instead of a soldering iron. This connection method is shown in the video tutorial below. It is important to understand: uniform soldering cannot be achieved precisely because of the alternating heating of parts, therefore the technology cannot be used for critical connections.
Pipe soldering
Let's consider connecting pipes using the soldering method:
- Using a hacksaw or sharp scissors that do not deform the plastic, cut the pipes at an angle of 90°. If you don't know how to cut a pipe at an angle, you need to read more information.
- If there are burrs on the end, carefully clean them off.
- Mark the depth of the soldering, i.e. measure a section of a certain length on the pipe to fit into the coupling or tee and draw a line with a marker. Remember that the length of immersion into the connecting element is directly dependent on the diameter of the products. The larger the pipes, the greater the soldering depth.
The algorithm of actions will change slightly if the pipes are reinforced. Then, before the soldering process, it is necessary to process the top layer of the tubular product, including aluminum foil, basalt or nylon fiber. Using a special tool, the required layer size can be easily removed. You need to pay special attention to carefully remove the foil. Even a slight excess of it on the pipe will negatively affect the tightness of the solder joint.
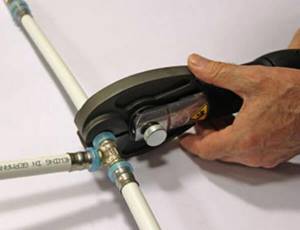
Further steps in the soldering process:
- Place a soldering iron with nozzles that are pre-selected according to the diameter of the pipes on a smooth and reliable surface.
- At the same time, a pipe and fitting are placed on the hot nozzle on both sides, moving it to the marking made with a marker.
- Heat the plastic for a certain time, which depends on the diametrical size of the pipes. For example, if the cross-section of the product is 20 mm, then 6 seconds are enough to heat up; if 32 mm - 8 sec.
- Then the elements are removed from the nozzle and ensure a strong fixation into each other. Never make any turning movements.
- To ensure strong adhesion of the joint, you need to wait 4-10 seconds. This time will be enough for the polypropylene to harden properly and obtain a permanent connection.
Please note that it is very important to adhere to the required heating time. If heating is insufficient, leaks may form. Excessive overheating will lead to sealing of the space inside the pipe and the occurrence of meltdown. You shouldn’t delete it right away, because... heated plastic will begin to deform even more. It is better to wait until the product has completely cooled down and then remove the excess.
Ways to join metal-plastic pipes and PEX pipes
Metal-plastic elements and PEX pipes are often joined using the same method. Here we will describe in detail the technology for installing heat pipes from the above materials.
The connection of metal-plastic pipes is carried out in two ways:
- using compression fittings;
- using press fittings (pressure testing of heating pipes).
Joining pipes with compression fittings
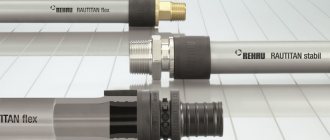
This type of fitting is more convenient to use. Compression fittings can also be used to assemble cold water supply systems. Installation of a pipeline carrying hot water is also carried out by builders using the mentioned fittings.
When assembling the above-mentioned pipelines, there is no need for special equipment for stitching metal-plastic and polypropylene. In order to connect the pipe parts together, you only need a pair of wrenches and pruning shears.
The heating elements are connected according to the following algorithm:
- Initially, a crimp nut is placed on the end of the pipe on the joining side.
- Next, a split-type ring should be put on behind the nut, and the edge of the ring should be placed at a distance of 1 mm relative to the pipe cut.
- Then the pipe is pushed all the way and secured to the fitting fitting. In this case, chamfering the pipe is not required.
- The crimp nut is installed using wrenches.
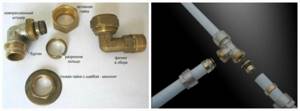
Compression Fitting Parts and Assembly Procedure
When tightening the nut, it is not recommended to use excessive force, as there is a high probability of cutting through the pipe.
Joining pipes using press fittings
Press-type fittings for metal-plastic pipes, as well as cross-linked polypropylene, make it possible to reliably connect parts of the heating system. Unfortunately, this design cannot be separated in the future. To perform installation in this way, you will need to use a special press tool.
In order to connect the previously mentioned heating elements using fittings, you should follow the following instructions:
- A clamping threaded sleeve must be placed on the end of the pipe.
- Then an expander with the required cross-section is placed into the pipe until it stops.
- The expander handles are slowly connected to each other and fixed in this position for a short time.
- The fitting is inserted into the pipe. Due to its unique molecular composition, the pipes undergo shrinkage, which will help tightly fix the fitting to the pipe.
- The pipe is securely pressed onto the fitting using a manual or hydraulic press.
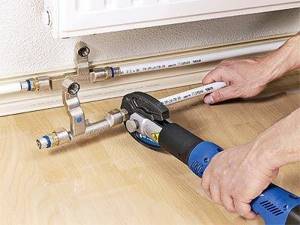
Crimping using a special tool
Our advice
Before you begin the process of soldering pipes, it is better to perform a couple of practice joints. It is easier to work with small joints by installing the welding machine directly on the table. This way you can check how correctly the pipe soldering is performed.
But attaching elements to a partially finished pipeline will be more difficult:
- Place a soldering iron nozzle on the polypropylene pipe, insert a tee into the other part, holding the welding machine suspended.
- When preparing the main water supply, it is necessary to alternate subsequent connections. In hard-to-reach areas, it is better to avoid joining work due to the difficulty of using a soldering iron.
- The material must be dry and clean, because the presence of dirt and water will reduce the quality of the joint. It is known that the material, if wet, can deform when heated.
- Purchase all products (pipes, fittings) from the same manufacturer, because the chemical composition of elements from different manufacturers may differ, which will ultimately lead to a leaky connection.
- The temperature in the room where work with polypropylene is carried out must be optimal and not lower than +5̊C.
Stages of installation work
The low cost of polypropylene systems is more than offset by the complexity of welding PPR products. The only thing more difficult to install is plumbing made of steel and copper pipes, which need to be cooked with a gas torch. Wiring with metal-plastic and polyethylene materials is easier, but more expensive.
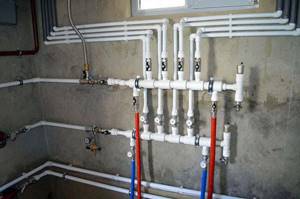
To reliably and beautifully solder water supply and heating pipelines made of polypropylene, we recommend working in the following sequence:
- Draw a plumbing and heating diagram, transfer the projections of the mains to the walls of the premises.
- Prepare the necessary tools and equipment. It is better to rent a professional welding machine (also known as a soldering iron or “iron”) with a set of attachments rather than buy it.
- Cut the workpieces and weld sections of the system in convenient conditions - on the table.
- Secure the finished sections in place and connect them together. Connect plumbing and heating fixtures.
Note. Drawing up a diagram and marking routes on the walls will allow you to clearly select components - tees, bends, couplings and determine the number of pipes to purchase.
Drawing a wiring diagram
At the stage of laying pipelines and connecting plumbing equipment, you need to have a heating and water supply project on hand. If the wiring diagram has not yet been developed and the diameters of the mains have not been determined, we recommend that you first read the guide to choosing a heating system for a private home.
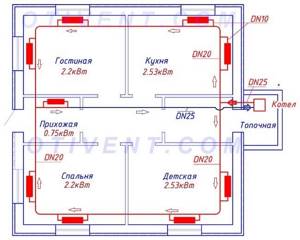
An example of a single-pipe heating system for a one-story house
Before purchasing and welding polypropylene elements, transfer the diagram to real conditions:
- Mark the contours of the radiators or install all heating devices in advance.
- Using a pencil or marker, mark the installation points of water outlets, taps, distribution manifolds and other fittings on the inner surfaces of the walls.
- Using a long strip and a building level, connect the marked points with lines, then lay plastic pipes along them.
- Based on the number of branches and turns of pipelines, find out the need for fittings - tees, couplings and bends.
An important nuance. Mud collectors must be placed in the correct position - horizontally, with the “nose” down. Choose suitable straight areas for installing water filters.
After drawing the projections on the walls, it is easy to calculate how many polypropylene pipes are needed; just measure the length of the lines with a tape measure. Don't forget about the plastic clips for attaching the pipework.
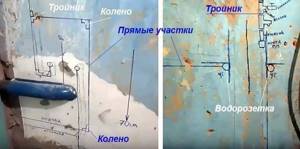
Markings on the wall help you see the real contours of the future system
When purchasing fittings and pipes, take note of a number of recommendations:
- soldering of plastic pipes is carried out by immersing each end inside the shaped element to a depth of 14-22 mm (depending on the diameter), which means that the length of each straight section increases by 3-5 cm;
- in heating and hot water systems, polypropylene expands due to heating, therefore, in order to avoid bending of the lines, you need to purchase special fittings - compensation loops;
- to cross other pipelines, use bypass elements made from PPR;
- For hot water supply and coolant supply, take pipes reinforced with aluminum foil, basalt or fiberglass.
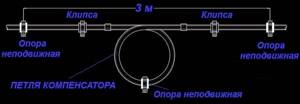
Compensation loops are installed on long lines or risers fixed by fixed supports (for example, a jumper between 2 metal pipes of neighboring apartments). Without compensation for elongation, the PPR pipe will saber bend in both cases due to heat.
Useful advice. If you are planning to weld polypropylene for the first time, buy an extra 2-3 meters of pipe and several spare couplings. Straight connectors make it easier to control the quality of the joints, so practice and solder a few joints.
Soldering iron for polypropylene and other tools
Small-sized welding machines are designed for joining polypropylene with dimensions of 20-63 mm (external). Larger diameter pipelines are used extremely rarely in home communications. A soldering iron for polypropylene pipes of any design is suitable for you - with a round or flat wide mandrel in the form of an iron.
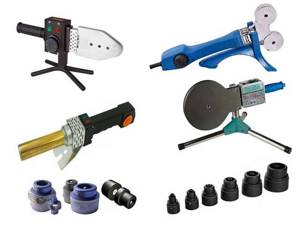
Types of welding machines and Teflon nozzles
Reference. The easiest way is to rent a heater with a set of attachments. Rental cost per day is from 4 to 8 USD. e. depending on the region of residence and the original price of the device.
In addition to the soldering iron, to mark and weld PPR pipes you will need a set of tools and accessories:
- stopwatch;
- scissors for cutting are a must, hacksaws and grinders are not suitable;
- shaver - a device for trimming pipes reinforced with aluminum;
- measuring instruments – tape measure, square, ruler;
- marker or simple pencil;
- degreasing composition - white spirit, galosh gasoline, nefras, alcohol (acetone is not suitable);
- rags;
- protective gloves.
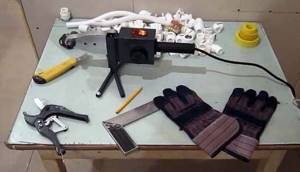
Listed here are the tools required specifically for soldering PPR pipes. To attach the wiring to the walls and connect to the batteries, you will need a set of wrenches, a drill, a hammer and screwdrivers.
All welding machines have an unpleasant feature - the soldering iron dangles in the socket of the stand and moves freely along with it on the table. Advice from an experienced craftsman: attach the stand to the tabletop with two self-tapping screws, and secure the heater with a screw, as shown in the photo.
Connecting pipes using the crimp method
Often, repairs will require disassembling the pipeline. If the connection of the main components is made by soldering, which is reliable and durable, then disassembling it is almost impossible. Let's look at how to connect polypropylene pipes without a soldering iron, which cannot always be bought or rented from friends. In this case, you will need threaded fittings with a pressure ring, which are called collet fittings (crimp). And for good reason, because this kind of connection can withstand loads of up to 16 atmospheres.
In order to connect the pipeline components together using the crimping method, additional parts will be needed:
- tees;
- soldered and combined couplings with internal and external threads;
- squares;
- adapters with external thread;
- plugs;
- Ball Valves;
- tees with union nut;
- all kinds of threaded fittings;
- sealing rings for socket joints of polypropylene pipes, etc.
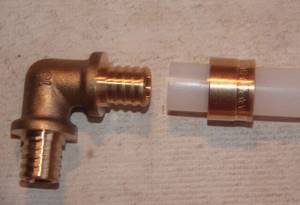
You need to pay attention to one nuance: to ensure reliable tightness, all seals and joints are generously treated with silicone.
Further actions:
- Cut off part of the polypropylene pipe.
- Insert it securely into the fitting.
- Wrap the threads of the part with thread to seal.
- Pull the ferrule and nut on top.
- Use a crimp wrench, which you need to take care of in advance, to completely tighten the pipe elements.
Compared to welding, this method takes much more time, but it is very convenient for connecting polypropylene pipes and radiators.
Necessary tool for soldering small diameter polypropylene pipes
The thermal diffusion method used for welding polypropylene elements is realized by heating them with special devices, usually called soldering irons or irons. Structurally, the unit is a steel body with a built-in heating element, to which cylindrical heaters (nozzles) are screwed, the dimensions corresponding to the standard outer diameters of polypropylene pipes.
The temperature is set by a mechanical thermostat and two switches; in more modern devices, an electronic temperature indicator with processor-controlled heating is installed. The majority of irons have a flat shape; a less common variety has a round heating element, the nozzles on which are fixed with double-sided clamping screws.
In addition to the iron, the following tool is required for welded installation of a polypropylene line:
- Scissors. Designed for cutting polypropylene pipes, they are often supplied with a soldering device.
- Pencil and tape measure. The tool, as well as a corner and a knife, are used to accurately measure and control the location of the cut areas and remove the internal chamfer.
- Set of connecting fittings. Includes straight and angle couplings, tees, taps, threaded fittings and other fittings used to change the direction or connect plumbing fixtures to the main line.
- Household chemicals. Substances may be needed to degrease the welded surface and clean it from dirt.
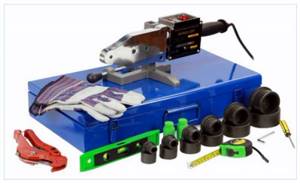
Rice. 3 Tools for working with PPR
Docking combination of metal and polypropylene
When installing plumbing and heating systems, there are places where it is necessary to connect steel and plastic pipes. For such cases, you will need special adapter fittings, which have a smooth hole for a plastic pipe on one side, and a threaded metal insert on the other. Therefore, the polypropylene pipe is joined by welding, and the steel pipe is tightened with a crimp wrench. As a result, the resulting connection is inferior in strength to a welded one, but will still last for many years.
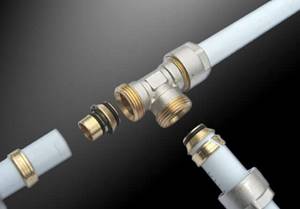
Please note that upon completion of installation work, it is necessary to conduct a test run of water in the system. This way you can check the tightness of the joints of pipes and pipeline components. Threaded connections may leak and must be immediately tightened with a wrench.
As you can see, you can independently install a plumbing or heating system from polypropylene pipes. The main thing is to impeccably comply with the requirements of the instructions for using the welding machine and the installation technology. Watching a video on this topic will be very useful.
Precautions to be observed
The entire set of pipes must be purchased from one supplier, because The composition of pipes from different suppliers may differ; when heated, such pipes will behave differently, which is fraught with loss of tightness and negatively affects the reliability of the entire pipeline system.
Installation must be carried out by specialists. This not only makes life easier for the customer and preserves his nervous system, but also guarantees reliability, safety and a longer life of the pipeline.
The specialist requires experience, special skills and abilities, the availability of special tools and equipment, regardless of the chosen method of connecting pipes. In our company, all specialists have been trained, have work experience, and constantly improve their skills. All work is carried out in compliance with all technical requirements and standards. By contacting our company, you will receive high-quality and fast pipe installation, performed by highly qualified specialists in accordance with all rules and technologies.
Compound of polyethylene and polypropylene
This option of the line involves the purchase of special fittings. They will be needed if water enters the building through HDPE pipes and is subsequently diluted using polypropylene pipes. In such cases, soldering of HDPE pipes with a soldering iron for polypropylene is quite often carried out, which is quite acceptable.
Let's consider two cases of how to connect polypropylene pipes without welding with polyethylene pipes:
- A threaded coupling is attached to the HDPE product, on one side of which there is a clamp connection. A similar threaded coupling is also mounted on the end of the polypropylene pipe, with a solder joint on one end and a threaded joint on the opposite end. To avoid leaks and achieve high-quality joining, tow or FUM tape is applied to the threads.
- Using a flange connection. The rubber seal is located between the flanges, which are bolted together.
Using flanges
This connection is made using adapter bushings welded to the ends, or slip-on steel flanges (profiled and smooth) with threads on one side. They are installed without welding. Among the advantages, the high reliability of the joints is noted, withstanding high temperatures and pressures of up to 16 atm. The connection can be made on pipelines of different diameters from 2 to 120 cm.
Docking begins by pulling the flange onto the pipe and putting on the rubber gasket. It is installed at a distance of no more than 10 mm from the end. The flange is moved towards the gasket, and another pipe is prepared in the same way.
The bolts are tightened carefully so as not to crack the plastic.
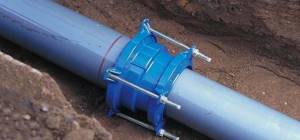
Flange connection of plastic pipes
Instructions for connecting a water meter to a pipe
Utilities increase annually, increasing family expenses, including water supply. There is only one way out in this situation - installing a water consumption meter.
The state program for installing metering devices leaves every consumer no choice and makes them think about the possibility of carrying out the work themselves.
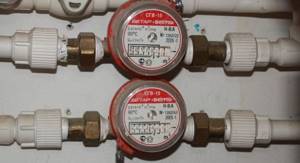
Necessary components and tools
According to existing standards, to install a water meter on a pipe, you will need components that must be purchased in advance:
- Water filter - can have a different volume, diameter and material of manufacture, the main condition is the presence of a metal mesh to retain small particles. After installation, depending on the water quality, it requires regular inspection and cleaning.
- Shut-off valve - the most convenient for use, is considered to be equipped with ball fittings and made of brass. Plastic pipelines may be equipped with a polypropylene tap. You should not save money; you should only buy a high-quality product that can help out and reliably shut off the water from the supply pipe in the event of an emergency.
- Non-return valve - in the event of a lack of water, it will prevent reverse rotation of the meter readings due to low pressure in the pipe.
- The water meter has a working seal from the manufacturer.
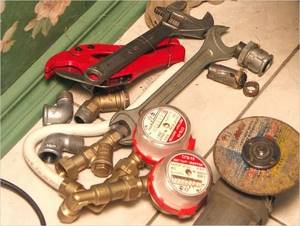
Meter Installation Tool
Lay out the components and the meter in the order of installation, take measurements and make sure that there are no obstacles for installation work. Check the diameter of the pipe to install water meters and purchase the necessary adapters.
Methods
There are several ways to connect polypropylene communications. Choosing which method to use depends on the type of PP pipes and their purpose.
Cold welding is based on gluing elements together with a special adhesive composition. It is applied to the parts that need to be connected. First, the surfaces to be bonded must be degreased. After applying the glue, wait a while and connect the pipe to the desired element. After a short period of time (approximately 20 minutes), the connection will stabilize and be reliable.
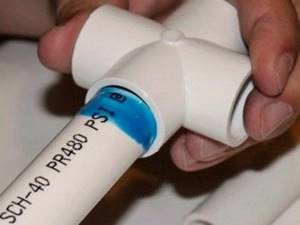
Connection using steel or cast iron fittings. This method is suitable for pipelines with a small diameter. Typically, fittings are installed on bends and branches of communications. The fitting includes elements such as a cover, a sleeve and a clamping ring, which is located in the socket of the product. The pipe is fixed using the seam ring included in the fitting design.
When connecting with fittings, you must follow a step-by-step action plan:
- the pipe cut must be made at a right angle;
- it is necessary to remove all burrs on the surface to be joined;
- then you need to install the nut from the fitting onto the pipe and put the clamping ring on it;
- After this, you need to insert the pipe into the fitting and secure the connection with a clamping ring and nut.
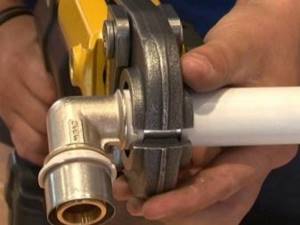
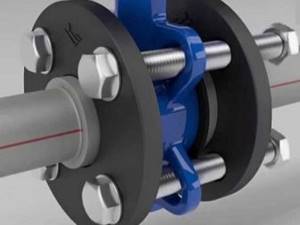
Connections using flanges are considered very reliable and can withstand high temperatures and high pressures. This method is used when it is necessary to connect polypropylene pipes without resorting to welding. For connection, bolts are used that are screwed into the flange thread.
When connecting with flanges, the following installation rules must be observed:
- at the pipe connection it is necessary to make a cut, avoiding the appearance of burrs;
- the gasket that is installed on the cut must have a protrusion of 15 cm;
- a gasket is placed on the flange and connected to another flange installed on another pipe to be connected;
- The gaskets must be installed in such a way that their cross-section does not touch the bolts;
- More than one gasket cannot be installed on a flange, as this will reduce the tightness.
Connection using couplings. To connect with couplings, you need to make a thread on the pipes for their subsequent installation and, to make the connection tight, wrap a little tow around it. The edges to be joined should be cut evenly and the location of the coupling should be marked with a marker. Then you need to apply lubricant to the coupling and install it on the pipe in the previously marked place.
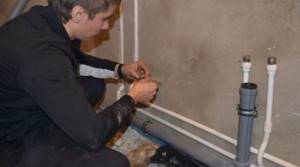
Welding refers to the hot joining method. This type of connection is one of the most reliable, and its essence lies in the melting of polypropylene with a special apparatus under the influence of a temperature of 260 C. The elements heated to the required temperature are pressed tightly against each other, and after they cool, a reliable connection is formed. The time after joining until the final polymerization of polypropylene will take 20 minutes.
Before proceeding with the connection by welding, it is necessary to remove all irregularities and burrs, and if the pipe has a layer of foil, then it must be treated with a trimmer.
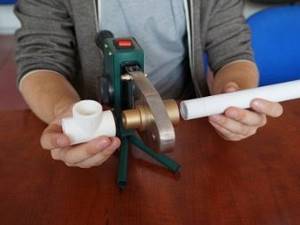
When connecting by welding, the following sequence of actions should be observed:
- turn on the welding machine and heat it to a temperature of 260 C;
- you need to put the device nozzles on the propylene pipes to be connected - this needs to be done very quickly;
- when the elements to be welded begin to melt, they are removed from the apparatus;
- connect the molten elements to each other by pressing firmly for 15 seconds;
- The connected elements must be allowed to polymerize to fully set - this usually takes about 20 seconds.
Selection criteria and verification deadlines
The simplicity of the meter design made it possible to automate the process of their assembly on an industrial scale. This contributed to the emergence of a whole host of manufacturers, and in each region of the country, in stores it is the regional players in this segment of the plumbing market that prevail. Therefore, it makes no sense to recommend any manufacturer as a leader. Often, even in neighboring regions of the Russian Federation, the assortment is presented by different companies.
But for other signs, we can give some advice.
The meters still have a gradation based on water temperature:
According to objective estimates of many experts, in a few years only universal models that can be installed without regard to temperature will remain on the market. But for now, the choice should start with this parameter.
