The cast iron tee is one of the main elements of the sewer system.
It is an adapter that connects three pipes; by the way, one of them has a smaller diameter than the others.
This device is installed in places where the pipeline acquires several directions.
Many people wonder whether it is possible to replace a cast iron sewer tee? Practice shows that this can be done, but it is quite difficult with your own hands. Firstly, the technical process itself is quite complicated, and secondly, this type of repair of sewer pipes will require expensive tools. Well, in general, it is quite possible to replace this part of the system, because it is not cast together with the pipe.
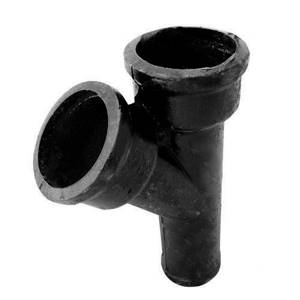
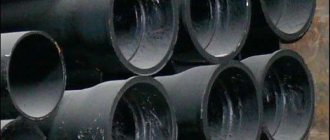
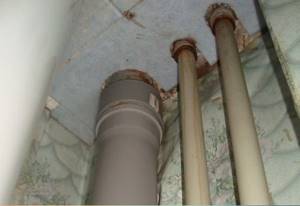
This is what a cast iron tee looks like
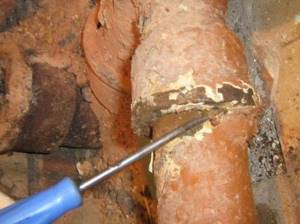
Replacing a tee using an angle grinder
Dismantling cast iron sewer
Replacing an old pipeline is not an easy task, especially when it comes to cast iron. The method of connecting the pipes plays a decisive role in the labor intensity of the process. The set of tools that will be used also depends on this. So, in order to carry out a more or less accurate repair of the sewer system, or more precisely, its complete replacement, you will need:
- grinder with cutting and grinding discs included;
- blowtorch;
- hammer and screwdrivers of various lengths, thicknesses, crosspiece;
- pipe wrench and chisel.
To completely dismantle a cast iron sewer, you will also need a hammer drill, a knife, a steel wedge, a chisel, a pipe cutter, and a crowbar. Do not forget that the first step is to determine how to connect the elements of the sewer system.
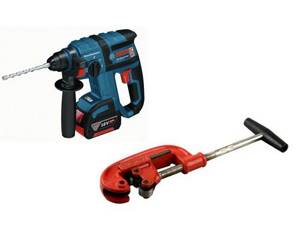
Hammer and pipe cutter
Dismantling the crosspiece when the joint is sealed with sulfur
The connecting part itself is not cut, but its extension with a diameter of 100 mm must be removed. Now you can work with a blowtorch in the pipe, providing the necessary heating of the structure. An asbestos or metal shield must be installed on top of the product to adjust the draft in the riser.
If there are holes at the bottom near the socket, for example, obtained during the installation of water pipes, through them hot sulfur can penetrate into the plumbing unit of the neighbor below. To prevent this from happening, the holes must be covered with plaster or cement. Mineral wool can be used to repair small cracks. The riser itself is sealed with a lump of fire-resistant materials to prevent the ingress of molten sulfur.
Warming up is carried out evenly, only the angle of inclination and direction of movement of the fire change. This process must be controlled, otherwise the bell may crack, as evidenced by a powerful bang. However, this rarely happens. Usually pipes made of low quality cast iron burst.
One way or another, if the clearance of the groove allows, before starting work it is recommended to clean out as much sulfur as possible using a drill with an extended drill or a hammer drill, but without a pobedite tip. It must be taken into account that heated liquid sulfur can flow inside or splash out. However, when cooled, it quickly takes on a solid state. It is better to put the frozen pieces at some distance from the burner flame.
It is not necessary to use a gas mask or special masks before the sulfur begins to burn. However, do not forget that from strong fire the liquid substance can boil and begin to splash out. To protect your face and eyes, it is recommended to wear special goggles when working with heating elements.
Periodically you need to check the mobility of the cross by shaking or hitting with a hammer from different sides. As soon as you notice that play appears, you need to stop heating and begin removing the part using two adjustable wrenches. You need to carefully swing the element in different directions, then lift it up.
You need to be extremely careful, because the edges of the crosspiece are quite fragile and can crumble when grabbed by keys.
If drops of burning sulfur remain on the surface of the pipeline connecting piece, it can be lowered into a metal bucket filled with cold liquid. Next, you need to clean the remaining sulfur and soot inside the bell using an old chisel or a sharp pocket knife. Only after the funnel-shaped expansion has completely cooled can you begin to install the plastic riser.
What to do if cast iron pipes are connected with sulfur
You can determine with what substance the pipeline was built using a blowtorch. If, when it is brought to the junction, the substance begins to melt, then it is definitely sulfur. The destruction process itself is divided into several stages:
- The pipe that is located farthest from the riser is the first to break. This is done with a hammer and continues until a crosspiece is found that needs to be loosened.
- At this time, you need to connect a blowtorch or gas heating pad. Under the influence of high temperatures, sulfur melts, and accordingly, it is possible to loosen the pipe. Before carrying out this procedure, you need to wear gloves to avoid burning your hands.
- After the sulfur has been removed, you can try to remove the cross from the riser.
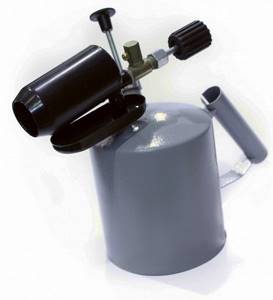
This is what a blowtorch looks like
What material should the sewer tee be made of?
Most often, situations occur when the tee that connects the riser to the internal wiring cracks or rots. Then you cannot do without replacing it. As a result, the question arises, what material should you choose?
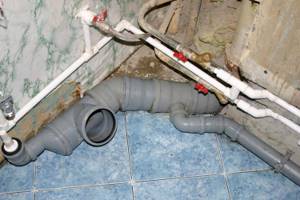
connection of plastic pipes with cast iron
To choose the right part, it is important to familiarize yourself with the range available:
- Cast iron tees have good mechanical strength. Despite this, such elements are afraid of shock loads. As for the compression and tension load, there is no need to worry that this will cause deformation or chipping. The average service life of the product is about 25 years;
- Polyvinyl chloride is considered to be a modern material for the manufacture of tees. Most plastic sewage systems are made from this material. The service life in this case will be at least 50 years. The advantages include plasticity, and the disadvantages include splitting under heavy loads and impacts;
- The best material is polypropylene, which is lighter than PVC products, but has good rigidity, wear resistance and resistance to temperature changes. In this case, the service life will be the same as in the previous option.
Now on sale there is a silent plastic sewer system that has a multilayer structure and is thicker. If there is a need to open a cast iron riser, then it is more advisable to give preference to a silent product.
For some, the ratio of the cost of materials is of considerable importance, since it can vary greatly, which affects the family budget. Using an example, we will consider the need to replace a straight tee, the diameter of which is 110 mm, which has all the necessary bends. The cost of such an element can be increased by one and a half times due to the use of a multilayer structure and increased surface thickness. Of course, such parameters turn out to be attractive, so many do not mind overpaying 100-200 rubles.
When deciding on your choice, you should know that a durable tee is more needed when the area located above it settles, since it is because of this that the tees often crack. Please note that a cast iron product does not prevent subsidence, it only prevents it from splitting quickly.
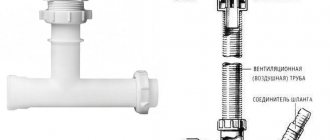
Laying plastic sewer pipes in the bathroom
In this case, it is advisable to give preference to lighter, more durable and inexpensive plastic. What the material is, PVC or PP, does not really matter, since the performance characteristics of plastics are almost the same.
Replacing a tee
Sooner or later, the time comes when it is necessary to replace a sewer tee mounted under a bathtub or other plumbing fixture. To perform the replacement yourself, you need to follow certain instructions. In addition, it is important to prepare the following items in advance:
- the tee itself;
- you need to buy a compensating pipe of the same diameter;
- To transition from a cast iron socket to a plastic pipe, you will need a rubber cuff.
Work should begin with securing the pipe above the sewer tee. If this condition is not met, subsidence may occur, which can lead to leakage and collapse of the mounting hole.
So, the process should be performed in the following sequence:
- you need to turn off the water along the riser, warning neighbors in advance about the plumbing work;
- the toilet is dismantled and the apartment sewage system is disconnected;
- a hole should be drilled in the wall behind the riser using a drill with a diameter of 9.5 mm, and the level of this hole should be about one and a half meters from the floor;
- then a 10 mm piece of smooth reinforcement is driven in;
- the riser needs to be tied together with wire at a level slightly below the reinforcement;
- such a clamp should not be allowed to slip along the pipe;
- the same clamp must be placed over the tee, lifting the pipe with a crowbar until it stops;
- The clamp located above must be securely pulled to the reinforcement.
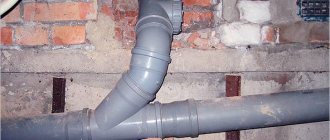
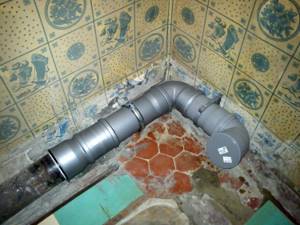
installation of sewer pipes and connecting them to the riser
Dismantling works
- Using a chisel or hammer drill, you need to beat off the concrete seal for easy removal of the tee and socket that are located under it.
- During this work, it is important to be extremely careful, since pieces of concrete that fall into the riser can clog the sewer.
- Using a screwdriver and a light hammer, you need to remove the cement seal and heel from the tee socket, if possible.
- The riser is cut at a distance slightly greater than the length of the compensating pipe, namely under the tee from the socket. The next cut should be about 10 cm lower. After this, the piece of pipe can be safely removed.
- The tee can be removed with a gas wrench or manually, but it is important to turn it. After removing the part, clean the bell located under it.
Description of the procedure for removing a cast iron sewer tee
A shaped piece of piping called a tee is located at the very bottom of the main riser. There are several ways to extract it. And it’s better to involve a professional in this. All cast iron tees for sewerage can be dismantled in three ways:
Breaking apart a cast iron tee with a screwdriver
- using a screwdriver and milk;
- by heating;
- using a grinder.
In the first case, you need to follow a certain order. First, you gently tap the tee. A gap should form between the pipe and the cross, into which a screwdriver can then be inserted and the tee removed.

Screwdriver and hammer
The second method is faster, but is accompanied by the release of an unpleasant odor. Most often, a gas heating pad or blowtorch is used when it is necessary to disassemble a connection with small diameter pipes. You can do this yourself, but if you don’t have experience, it’s better to hire a gas welder.
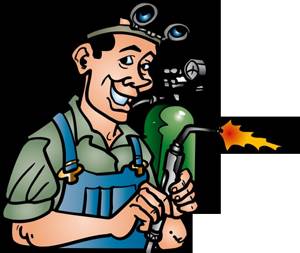
Gas welder services
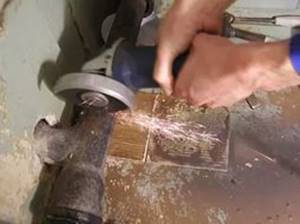
The last method is to use an angle grinder. With its help, you need to cut off some parts of the tee and leave a small piece of pipe. After the remains of the product are cut, the socket is closed with a plug. The cut part of the cross is knocked out with a hammer. Finally, the treatment area is cleared of cast iron residues. It is worth noting that it is the last method of disassembling the tee that is the most practical and reliable, and does not require much time.
If after dismantling there is burning sulfur left on the crosspiece, then it must be lowered into a bucket of cold water, preferably made of iron. After the socket has cooled, you can begin installing a new riser made of plastic.
Installation of a plastic tee
Tee installation
After removing the old elements, begin installing a new tee. To do this you need to do the following:
- thoroughly clean the lower bell of the riser from any remaining sealant and other deposits;
- apply a layer of sealant to the walls of the socket and insert a new assembly into it;
- Place a coupling on the top of the riser and push it up so that the end of the pipe protrudes;
- Insert a piece of straight pipe of the same diameter into the socket of the installed element using the same method. It must be adjusted in length so that after installation in the socket both ends are as close to each other as possible;
- slide the straight coupling down and connect the top of the riser to the bottom.
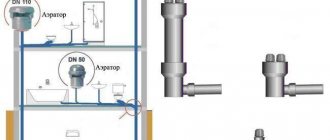
After this, the horizontal part of the system is connected to the new outlet - a 110 mm tee and a pipe with a diameter of 50 mm. Connect the toilet, seal all connections and check the system for functionality. If all steps are performed correctly, there should be no leaks or other problems. Periodically it is necessary to carry out maintenance of the cast iron tee in the sewer riser. This will remove any buildup or fatty deposits that are causing blockages. For maintenance, it is recommended to install an inspection - an element with an inspection hatch. It is placed on top of the main unit and used for various repair work.
Price issue
Replacing a sewer tee that will meet the requirements of GOST is a service that is in demand in the Russian Federation, and accordingly, it has its price. It is difficult to answer the question of price with utmost precision, because it depends on many factors. We are talking about the material used to make the new adapter that is planned to be installed. Just so you know, a propylene tee costs several times less.
The price of the service reflects:
- tee location;
- its diameter;
- current condition of pipes, etc.

The cost of the service is approximately 4000 rubles
Today, the cost of replacing a riser sewer pipe with a tee with a diameter of 110 mm is approximately 4 thousand rubles. Moreover, the price is not fixed and may vary depending on conditions.
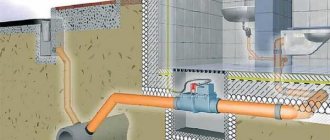
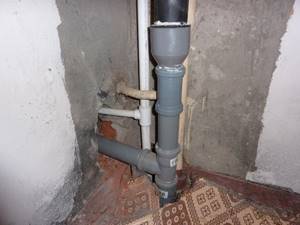
Installation of a sewer riser
replacing a cast iron riser with a plastic one
Most often, a plastic riser needs to be connected to a cast iron one. The fact is that often, either the neighbors still do not dare to part with their cast-iron riser, or a piece of the riser between floors is not removed due to the complexity of the work. Therefore, plastic is connected to cast iron using adapters and rubber cuffs, as well as sealant.
1. The rubber cuff is placed on a part of the cast iron pipe under the ceiling. To do this, it is treated with a grinding machine and lubricated with liquid soap. After fixing the cuff to the pipe, fix a plastic adapter to which the plastic sewer pipe will be mounted.
2. At the bottom, the cast-iron socket is cleaned of dirt and rust, and a rubber cuff lubricated with sealant is inserted into it. A tee or elbow is inserted into the cuff, and the compression pipe and pipes are finally connected to each other.
3. Fix the sewer riser to the wall. This is done using clamps.
4. At the final stage of work, turn on the water and check all connections for leaks; the cast iron riser has been replaced with a plastic one. Good luck!
Advantages of plastic sewerage
A sewer system with a cast iron pipe becomes completely unusable after 40-50 years of use. It is optimal to replace it with practical pipes made of polypropylene or PVC. These materials have quite a few advantages:
- light weight compared to metal ones;
- smooth inner surface (reduces the risk of blockages and simplifies the cleaning process);
- plastic is not afraid of corrosion;
- No special equipment is required for installation.
The only disadvantage of plastic is the high noise level when draining water or wind noise (in a private house). A noise protection box made of soundproofing materials will help solve this problem.
How to remove the lower parts of an old pipe when it is secured with concrete in the floor and the joint is not treated with sulfur
The lower sections of risers are usually made of component parts. They may include a coupling, an expansion pipe, and more. The first thing to do is check all joints for strength. Why, swing the pipe in the upper part, only very carefully so as not to harm the lower bell
If you're lucky, if it gets a little loose, carefully remove all the wobbling parts. When the crosspiece is even slightly loose at the joint, remove it using a nail puller
In the case where the cross is firmly fixed, you will first need to clean the joint deeper. If its clearance allows, then you can use a hammer drill with a narrow drill. Do not use a pobedit drill. The solution filling the joint crumbles around the perimeter and is removed using a chisel.
It’s bad when there is practically no seam, and the cross is fixed tightly. Here you can try to clean the seam with a metal file. But, if these manipulations do not help, and you confidently want to replace the crosspiece, then you will have to cut it down 2-3 centimeters above the bell. The riser hole must be covered with a rag and secured with a rope; this is done so that cast iron scraps do not fall into it. Then, using an angle grinder without protection, carefully cut out the rest of the pipe from the socket. Do not spoil the socket itself remaining in the ceiling. Use a special wedge to remove the remaining pipe fragments from the socket.