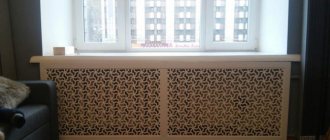
Today, few people can be surprised by design solutions for the design of heating radiators. Much less common are ordinary, unadorned and undesigned radiators. The main decorative techniques are creative painting or a screen - an aesthetic coating that does not interfere with the movement of warm air. And if you learned about painting radiators and choosing odorless paint in our previous article, then here we will talk about how to make a screen for a heating radiator with your own hands, with detailed photos and video instructions. How? Read on.
In addition to the fact that the screen performs a decorative function, one cannot fail to mention its rich functionality. On the one hand, it prevents dust from accumulating in sections of the radiator, where it is very difficult to reach. On the other hand, it protects children from injuries and burns. Some craftsmen manage to turn ordinary screens into transforming tables that recline when necessary. Often small hooks are installed on such screens, which allows you to dry clothes in winter.
Important! A properly made screen does not interfere with the movement of warm air from the radiator.
It is noteworthy that such a decorative element can cover any type of radiator. Although some of them, for example, design radiators, are exclusive in themselves, so they do not need additional decor. You can learn about such radiators in our article “Steel heating radiators”.
Types of battery screens
According to the installation method, there are only 3 types:
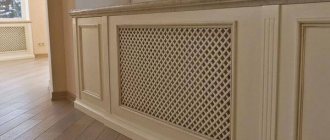
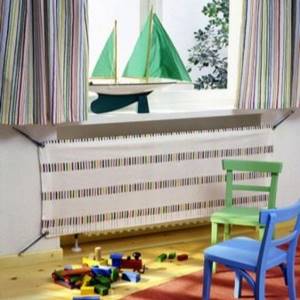
Flat screens are installed in cases where the radiator is located in a niche or under a window sill, which connects it with the overall concept of the interior, but keeps the room warm.
Photo 1 Flat version of the screen for the battery
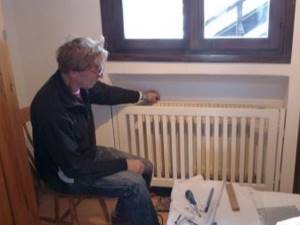
The hinged cover is mounted on protruding radiators. It is this option that in some cases is expanded and a miniature table is obtained, suitable for a morning or evening coffee break.
Photo 2 Hinged cover - ideal for a protruding radiator
The box completely covers the radiator, so it is very important that the ventilation holes are in the right quantity and made in certain places.
As for the manufacturing material, absolutely everything is suitable for screens - from tempered fireproof glass to wood, including chipboard, MDF, plastic and even metal.
Advantages and disadvantages of individual options
Since we are talking about making a screen yourself, you should choose a material that is easy to work with.
The undisputed leader is the tree. Natural structure, beauty, aroma and aesthetics make this material eternal. After the screen is made, be sure to cover it with special compounds. If this is not done, even industrially dried wood will begin to deform and lose its original shape from prolonged contact with a hot battery.
Chipboard, fiberboard and plastic are a godsend for beginning craftsmen. This material is easy to cut and process. You can cut out parts either “by eye” or using a stencil. Although such screens are short-lived, they can significantly decorate the interior in general and radiators in particular.
It is very difficult to make a glass screen yourself, so they are purchased ready-made or made to order. This is a real highlight of the interior, which can even be framed as a painting.
The metal screen is most often made either in the form of decorative lace or in the form of a flap. This is also a specific material that can only be manufactured by an appropriate specialist.
Since fiberboard (chipboard or plastic) are the simplest materials, using their example we will tell you how you can make a screen for radiators with your own hands.
Step-by-step instruction
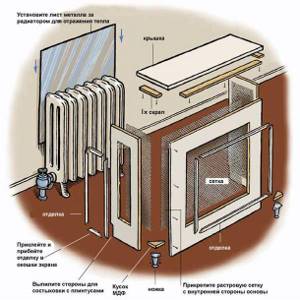
Photo 3 Layout of screen parts for the battery
Let's start by preparing tools and materials.
So, you will need:
- fiberboard sheet of suitable colors
Chipboard is easy to paint and, due to its structure, “holds” paint well. You can either paint the entire sheet in advance, or apply paint to the finished product.
- sheet mesh that will be installed on the front and side panels;
- reflective sheet - metal or foil sheets are most often used;
- connecting elements - staples, screws and nails.
- wood glue.
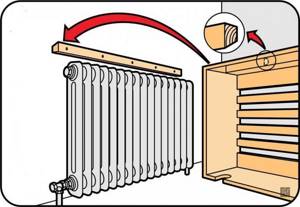
Screen mounting diagram
In general, the radiator grille is a three-sided box with a top cover and mounts at the bottom. A circuit is used to cut and assemble all the parts; at the very end, the legs are attached and the screen is mounted on the radiator.
Video 1 Guide and secrets of installing drywall
Marking
To make the front part of the screen, measure both sides of the radiator, after which you add 50 mm to the height and 100 to the width, respectively. First, cut out the front panel from a metal sheet, which you then decorate with MDF.
Next, measure the depth of the radiator taking into account the distance to the wall and add another 25 mm. This parameter corresponds to the width of the sidewalls, and the height is determined by the pancake of the radiator itself, taking into account the inlet.
The screen cover corresponds to the depth of the radiator plus 35 mm.
Trimming parts
After all the measurements are plotted on the diagram, you begin cutting each part. Cut out the front and side panels from a sheet of chipboard. In order to cut the front profile, use an MDF sheet, from which rectangles with a width of 110 mm should be cut. Using a hacksaw, apply a 450 angle in the place where the elements will be connected.
Photo 4 Trimming screen elements
On one rectangle, cut corners in different directions. This way you can connect all the parts using nails and/or wood glue.
Use the mesh for the front window. Due to the soft structure of the material, it is easy to cut with a regular hacksaw. The dimensions of the grid must match the dimensions of the front panel of the screen.
Self-assembly of the screen
Make a screen frame from a wooden block according to its size. Such a frame will allow you to securely fasten all the parts and will not allow the screen to “float” from side to side. In the frame itself, cut out a hole for the pipe (pipe), the center of which should be at a distance of 75 mm from the side planks.
Ways to disguise radiators
Modern designers offer many original ideas for decorating radiators. Having familiarized yourself with the most popular and sought-after options, you can easily choose the ideal solution for almost any interior.
Coloring
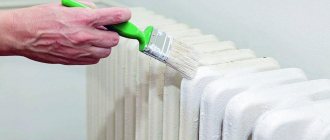
One of the most popular and budget-friendly methods of camouflage is simple dyeing. Most often, heating devices are coated with white paint. If the wallpaper has a non-standard dark shade, then in this case the paint is matched to the color of the walls.
There are also more original solutions. For example, to prevent radiators in the room from attracting undue attention, their front surface is covered with wallpaper that matches the interior.
Another non-standard idea is to decorate the batteries with artistic decorative painting or drawing using the decoupage technique. It is most convenient to create beautiful patterns on modern flat aluminum or bimetallic radiators, but if desired, you can also decorate old cast iron batteries using a similar method.
It is best to decorate radiators before the start of the heating season, when there is no hot water in the pipes. On cold surfaces the paint applies more evenly, so its service life will be longer. If you plan to paint in the dead of winter, be sure to turn off the water supply tap from the central heating system before starting work.
Masking with fabric
This method of decoration can be classified as budget. Traditional blackout curtains are an integral part of many classic interiors, so they are often used to mask heating systems.
In some cases, heating devices are not covered with a curtain, but with a kind of textile screen made of exactly the same fabric. Such products are made to order in specialized salons for sewing curtains, but if desired, such a decorative element can be created with your own hands.
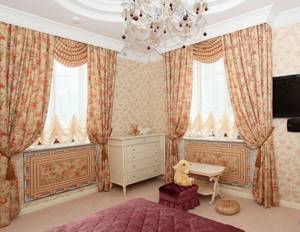
Screen installation
Decorative rigid screens can be made from a variety of materials.
Most often used:
- metal;
- natural wood;
- glass;
- drywall.
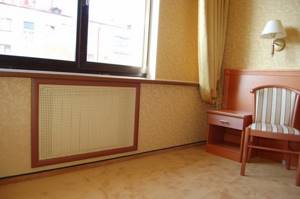
Metal models are similar in design to conventional mesh grilles with a height of 200 to 600 mm. Their main advantages are reasonable cost and good thermal conductivity. The disadvantages include a modest and unassuming appearance. The only exceptions are expensive luxury models made to order.
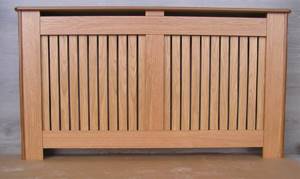
Decorative screens made of wood are always in great demand. These products are a simple grille with horizontal or vertical slats.
Since there is significant free space between the wooden planks, there are no obstacles to natural heat exchange, so such structures are a completely reasonable solution.
Spectacular glass products are sold in specialized design workshops and are not cheap at all. For their production, thick fire-resistant glass is used, decorated with various stained glass patterns or decorative photo printing.
Depending on the design features, screens can be made of solid glass or of individual lamellas located at some distance from each other. Of course, the second option is more preferable, since in this case the air circulation will be much better.
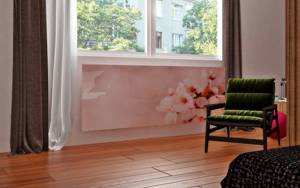
Drywall is a versatile material and is often used to create protective decorative structures. They can be very diverse in appearance, it all depends solely on the imagination of the designers.
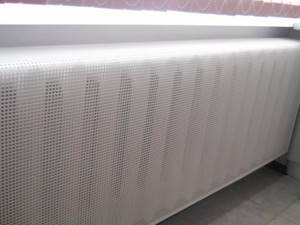
If desired, plasterboard screens can be made independently. The material is fragile, but with careful handling it allows you to bring very original ideas to life. When heated, drywall does not emit harmful substances and, thanks to the high-quality perforated surface, does not interfere with the spread of warm air indoors.
Prices for screens for heating radiators
Screens for heating radiators
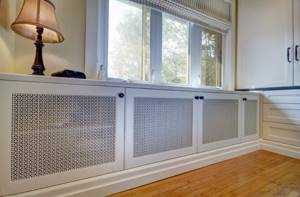
Decorative grilles
In essence, they are a type of hard screens; they are simple hanging structures for masking batteries located in a niche or under a window sill.
The gratings are made from:
- plastic;
- wood;
- metal;
- glass
Due to the variety of materials used in production, these products differ in both design and some performance characteristics. It is necessary to select a suitable model in accordance with the overall style of the room.
Box
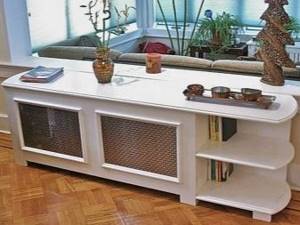
Decorative boxes come in a wide variety of shapes and designs; for example, sometimes they are made in the form of a small console or shelving unit. Materials for manufacturing can be: plywood, MDF or chipboard, less often natural wood is used.
The main quality that this design must have is good resistance to elevated temperatures. In terms of cost, a plasterboard box is one of the most budget options.
Its other advantages include:
- high resistance to heat;
- good ability to accumulate heat;
- environmental safety.
Among the disadvantages, it is worth highlighting the low impact resistance and the tendency to severe deformation under the influence of water.
Plasterboard structures are usually assembled on frames made of a special thin-walled metal profile. Wooden slats are practically not used due to their high cost and labor-intensive assembly process. For finishing, traditional painting or wallpapering is most often used.
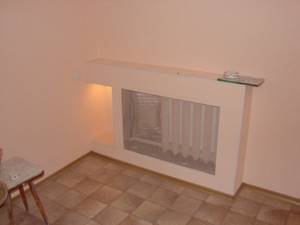
Decorative boxes made of particle boards are made using the same technology as plasterboard structures.
Products made from chipboard have the following advantages:
- affordable price;
- high strength;
- ease of installation (the material lends itself well to sawing and cutting).
Disadvantages include questionable environmental friendliness (formaldehyde resins that are hazardous to health are often used in production) and low resistance to high humidity.
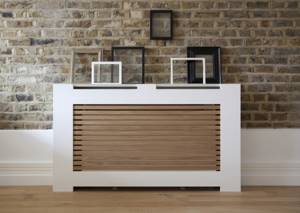
Decorative structures made from MDF are in high demand among consumers.
Their main advantages:
- low cost;
- good resistance to temperature fluctuations;
- high aesthetic properties;
- practicality.
Although MDF boxes have many positive qualities, it is worth noting one important drawback - in the event of a fire, fiberboards can easily ignite.
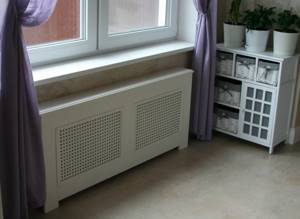
Products made from plywood are characterized by good wear resistance and quite affordable cost. Their advantages also include relatively low weight and very good environmental friendliness. In terms of its environmental performance, plywood is in many ways superior to other wood-tile materials.
The structures have a good appearance and quite decent performance characteristics. To make a box with your own hands, it is best to purchase FK brand plywood. This type of material has less moisture resistance, but its production practically does not use components hazardous to health.
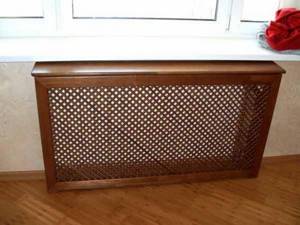
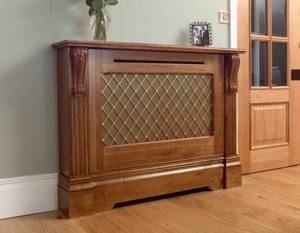
Decorative boxes made of natural wood always stand out for their noble appearance. Such designs look most harmonious in classic interiors, especially if there are any other wooden elements in the room.
When choosing a wooden box to disguise batteries, you must take into account that over time it may begin to dry out and become deformed. This is primarily due to constant exposure to high temperatures. To maximize the life of a wooden product, it is recommended to install the decorative structure at least 5–6 cm from the radiator.
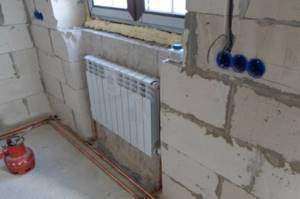
Installing radiators in walls
This method can be called, without exaggeration, one of the most difficult to implement. Most often, it is chosen at the stage of building a house or during a major renovation.
There are two different methods for concealed installation of a radiator:
- In a specially created niche. As practice shows, this solution is best implemented only in houses under construction.
- Place inside the false wall. Its construction is carried out in a fully rebuilt house. In this case, the false wall completely hides behind its surface not only heating radiators, but also many other utilities.
When installing a heating system inside a wall, you must remember that subsequently certain difficulties may arise during its repair and maintenance. In addition, this heating method requires mandatory thermal insulation of the external walls of the house, since otherwise the heat may escape outside the living space.
Features of installing batteries in the bathroom and kitchen
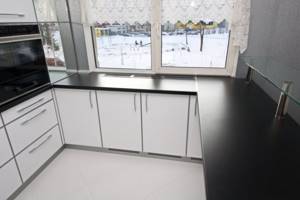
Due to high humidity and limited space, it is recommended to hide radiators in small rooms in wall cabinets. It is not advisable to use decorative hanging boxes and screens, since they will not look very attractive in this room.
When choosing a wall cabinet, you need to focus on models that have a special moisture-repellent coating.
If the radiator in the kitchen is located under the window, then it can be covered on top with a wide countertop, and below with a regular floor cabinet. To ensure normal heat exchange in the room, furniture facades must have special ventilation holes.
Advantages
The battery box has undoubted advantages. First of all, it has an aesthetic function. Open pipes do not spoil the design of the room and are not noticeable.
The second function is protective. Residents and visitors to the premises will not be able to get burned by touching a hot radiator. Often boxes for this purpose are placed in apartments where there are small children. In addition, the battery will be protected from dust and other contaminants, and warm air will circulate evenly.
If the battery box is selected correctly, this will help ensure an excellent microclimate and warmth in the room.
And it's also a great way to decorate. The modern market offers a huge variety of products that can satisfy the requirements of the most demanding consumers.
Features and Requirements
Decorative work in relation to heating radiators has its own characteristics. It is not so easy to hide these devices without compromising their functionality, since it is assumed that less heat will flow from such batteries. In addition, access to the heating elements themselves is difficult. Therefore, when decorating, it is very important to understand exactly how to deal with this with the least losses.
To preserve the functionality of the batteries, it is optimal to use removable and attached screens that are not firmly attached to the wall.
Convenience is also expressed in the fact that, if necessary, the element can be removed as quickly as possible , which helps save time in case of emergency situations, and also preserves the integrity of the box itself. If there are solid fastenings, it is not possible to dismantle the structure quickly and without damage.
And also an important point is heat transfer. Heating is influenced by infrared radiation, which heats objects, and convection, which warms the air itself. If there are no gaps on the box, this will become an obstacle to these actions. It is better if the screen does not cover the radiator from above and below, since for uniform heating, cold air must enter from below the heating element, pass through it and exit from above already heated. If this is not possible, the heating of the room will be worse, and the temperature in the room will accordingly be lower.
How to properly seal batteries
There are different ways to close heating radiators, but not all of them allow you to maintain high heat transfer. As you know, the operating principle of many heating devices is based on convection, that is, on the continuous and uniform movement of air throughout the room. If this process is disrupted, the temperature in the room may drop noticeably. Therefore, when choosing a method for decorating radiators, it is necessary to take into account certain nuances, which will subsequently help to significantly reduce heat loss.
What requirements must be met?
First of all, it is strictly forbidden to completely cover heating devices with solid overhead structures. Otherwise, convection air currents will not be able to move freely and the room will remain cold.
The use of “blind” structures with a solid upper part is unacceptable. The convection flow of warm air must be able to rise freely and circulate freely throughout the surrounding space.
Maintaining physical access to heating devices and pipes connected to them is another important task. Even the newest and best-made heating system can fail over time as a result of some unforeseen circumstance (for example, due to strong water hammer or improper installation).
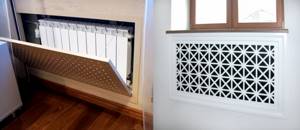
When decorating radiators, you should listen to the opinion of experienced plumbers and be sure to provide free access to the riser and the main adjustment parts - taps and valves, as well as threaded connections. To do this, when creating a decorative design, it is necessary to provide for the installation of a small removable window or door on hinges in the right places.
Other options
Boxes for heating batteries can be made not only from the above materials. For example, in some models the basis is textiles. This is a good solution, since heat transfer remains at a high level due to the free passage of air through the fabric.
Plastic boxes have a fairly low price, but heat transfer when used is significantly reduced. Their use will be advisable in rooms with high humidity, as well as exposure to steam and chemicals, such as bathrooms, where, due to the adverse effects of moisture, you should not use wooden and metal products, as they will quickly fail. For the kitchen, on the contrary, more traditional materials are suitable.
DIY plasterboard box
If you have certain skills and desire, you can make a box from a material such as drywall yourself. This will not only save money, but also bring to life the most daring design ideas and your own fantasies. Making such a box is not difficult, but you need to know certain nuances that will help you do the job efficiently.
First of all, the heating device itself is measured. This is necessary to calculate how much material will be required during work. Depending on these indicators, the drywall itself is purchased. It must be properly processed first.
To maximize heat transfer, the material should be rolled with a special needle roller, and to protect it from drying out, the surface should be treated with an aqueous PVA emulsion.
Next comes the stage of design development. It is necessary to consider the methods of heat generation. To prevent it from going into the wall, which is often cold, it would be advisable to seal the surface directly behind the radiator with foil that reflects heat. It is recommended to apply black paint to the inside of the manufactured box; it will absorb heat and transfer it to the room.
It is necessary to leave gaps in the lower part of the box that will help ensure thermal convection and will not interfere with the flow of cool air from below. It is recommended to make the main part located in the front in the form of a lattice; make special openings for air circulation that can be decorated.
In addition, it must be taken into account that any heating device requires periodic maintenance. For convenience, the front part can be made in the form of a door leaf. But you can also equip the box with panels that are easy to remove. If you plan to place it under a window sill, it would be useful to install an aerodynamic canopy that will direct air flows upward.
Installation
The final step is to install the radiator box on the wall. During installation, certain conditions must be taken into account. The product must not be placed close to the radiator; the most protruding point should be 3 centimeters from the most protruding point of the heating device. Next, the width of the front panel is determined and the necessary parts are prepared.
The next important step is to install the support elements. Depending on the type of structure, they can be attached to the wall or floor, after which a frame is installed, onto which the drywall will be screwed. If you plan to paint the material, it is better to do this before installation. The places where the fastenings are located can be hidden by placing decorative panels on top.
You can see how to assemble a decorative box for a radiator in the video below.
Beautiful radiator box against the background of a brick wall
The solution to the problem of how to close batteries, which do not always have an elegant, decorative and attractive appearance, must take into account not only the aesthetic component. What looks good in a photo can actually lead to a significant decrease in the temperature in the house. It is important to take into account that in addition to a purely decorative function, the panel (screen, box), which helps to decorate heating appliances, also serves an important functional purpose in families with small children, protecting the child both from burns and the sharp corners of the radiator. Therefore, we will consider the decor of the radiator in the room from the perspective of three specialists at once - a designer, a heating engineer and a plumber
Box installation
After you have chosen the materials and design, you need to install it on the wall.
USEFUL INFORMATION: Wooden bathroom design: 20 photos
- The drywall should be located 3 cm from the most protruding point of the battery (usually a tap). Find this point and measure the distance from it to the wall. This distance plus 3 cm is the width of the side parts of the box.
- Also measure the distance from the floor to the top point. Determine the width of the front wall of the box.
- After all measurements, prepare the necessary plasterboard parts.
- To assemble them together, you can install supports made of metal guides. They are fixed to the wall and to the floor (this depends on the chosen design).
- Drywall is screwed to the frame with self-tapping screws. A grille is inserted into the front part.
It is best to paint drywall before installation, and the fastening points can be covered with decorative panels.
How to decorate heating radiators: designer tips
The problem of how to hide a heating radiator and a pipe supplying coolant in an apartment can be considered in two aspects. The first is on the eve of a major overhaul, when it is possible (and necessary) to replace the battery. In this case, you can select and install designer batteries and then the issue will disappear by itself, and the heating efficiency will not decrease (more on this below). For example, if we are talking about a room in a classic Victorian style, then you cannot do without cast iron radiators, powerful, massive, on a stand, with casting in sections - such radiators will become a stylish detail of the overall interior.
Combining the battery box and shelves into a single structure
Beautiful decorative box
Hanging wooden screen for a heating radiator in a modern interior
Another thing is when the repair does not involve replacing the plumbing, in this case there are several options for how and with what to close the battery.
Hanging screens
A battery screen is the most affordable way to hide a radiator, although it is far from the most aesthetically pleasing. There is no need to install them specially; they can be installed simply by hanging them on the heating device. True, by closing the radiator itself, they do not solve the problem with the supply pipes. The hinged panel, allowing you to hide the radiator itself, very slightly reduces the level of convection and heat transfer, plus - they are mostly metal (although if you catch them, they do not ring very pleasantly).
Hanging screens are cheap and easy to install
Tips and tricks for using radiator grilles
- Before installing the screen, the wall behind the radiator must be covered with foil material to increase heat transfer.
- It is better to decorate the radiators of children's rooms and bedrooms for adults with grilles made of natural material.
- It is not recommended to cover convector-type radiators with decor or furniture at all due to the disruption of air outflow.
- When choosing a design, you need to pay attention not only to its reliability, but also to the speed of disassembly. In the event of a leak, the guard should be easy to remove.
- The screen model should fit organically into the overall interior, and not stand out against the background of the environment.
- Rooms with plastic decor on heating devices must be ventilated more often due to the toxicity of the material.
- The decorative grille must not be covered with furniture. The heat exchange regime will be disrupted, and the unique view will go unnoticed.
- The body and façade of the screen must have perforations or holes for air circulation.
- When installing the grille, it is necessary to maintain a distance from the heating device. It must be at least 3 cm.
- The structure cannot be used as a dryer.
The radiator grille is a decorative element and not a mandatory application. This finishing element must be used only for its intended purpose.
Heating batteries perform the function of heating the room. But their appearance does not always correspond to the general style of the interior of the room. To improve attractiveness, special screens are used, which you can make yourself.
In addition to their decorative function, they protect devices from dirt and dust. Also, a high-quality decorative element can reduce infrared radiation and improve heating efficiency.
Flat screens
Such screens are used to hide the heating radiator, which is built into a niche. They are quite popular because they have many options - lattice (the simplest), with a pattern (geometric or floral), with carvings; specimens with various forgings are perfect for the Baroque style.
Advice! If the battery is installed in a niche, then by installing a wide window sill, you can organize a workplace near the window.
If the battery is in a niche, it can be covered with a flat screen
Types and forms
In addition to different materials, radiator grilles come in different designs. All this together creates a huge number of options.
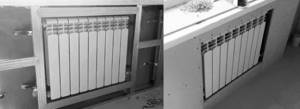
- Flat screens. Most often used if the radiator is installed in a niche. In this case, the flat panel is attached to bars fixed around the perimeter of the niche. In addition, glass screens for batteries also have this shape, but are attached to special pins embedded in the wall. This type of decorative grille for heating radiators is also called “facades”.
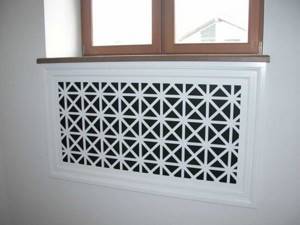
Flat screens are installed if the radiator is hidden in a niche
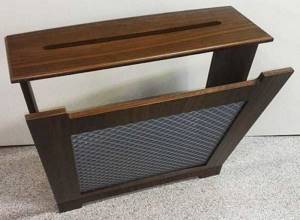
Attached grille-box for radiator
These are only the main types of screens and grilles covering heating radiators. Fantasy is limitless, there are very interesting models, but they are most often made by craftsmen with their own hands.
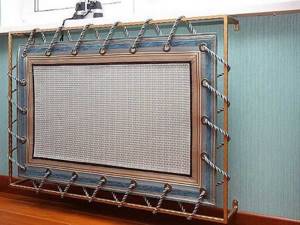
Homemade screen - an original idea
Price often plays an important role when choosing a screen for a radiator. The range of prices in this segment is more than significant - from 230 rubles for a metal hinged screen, to 8,000 rubles for a glass one. Some prices are shown in the table.
| Radiator grille material | View of the grille on the heating radiator | Dimensions (height*width*depth) | Price | Color |
| Sheet metal, thickness 0.7-0.8 mm | Hinged screen for a cast iron battery | 27 cm * 29 cm * 15 cm | 230 rub. | White |
| Sheet metal, thickness 0.7-0.8 mm | Hinged screen for steel radiator | 44 cm * 39 cm * 15 cm | 250 rub. | White |
| Sheet metal, thickness 0.7-0.8 mm | Hinged screen for a cast iron battery | 61 cm * 49 cm * 15 cm | 280 rub. | White |
| Sheet metal, thickness 0.7-0.8 mm | Hinged screen for steel radiator | 53 cm * 49 cm * 10 cm | 350 rub. | Beige |
| MDF | Facade (flat screen) | from 1500 rub | 7 shades of lamination | |
| MDF | Box | from 2300 rub | 7 shades of lamination | |
| Glass | Screen | from 8000 rub | matte, no pattern | |
| Powder coated metal | Wall mounted with one side | 60 cm * 40 cm * 15 cm | 1790 RUR | colors upon request |
| Powder coated metal | Wall mounted with one side | 70 cm * 60 cm * 15 cm | 2050 rub. | colors upon request |
| Powder coated metal | Wall mounted with two walls | 60 cm * 40 cm * 15 cm | 2340 rub. | colors upon request |
| Powder coated metal | Wall mounted with two walls | 70 cm * 60 cm * 15 cm | 2600 rub. | colors upon request |
| Natural wood | Pristavnoy | from 6200 rub |
Screen box
Allows you to completely decorate the entire heating radiator, while you can simply make such a screen for the battery yourself from wood, the diagram is shown in Fig. 1.
Fig 1. Screen assembly diagram - box
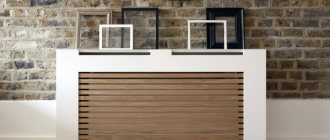
In this case, the box can not only hide an aesthetically unsightly radiator, but also act as an additional element of furniture, for example, a stand for vases, shelves, or can become part of a rack or console. A decorative wooden box can be made so that it fully matches the style and decor of the room. Its main disadvantage is the closed top, which significantly reduces the efficiency of convection. In addition, the tree dries out when the temperature changes. In this regard, screens (boxes) made of MDF, which are both cheaper and more durable, look preferable.
A decorative wooden box is perhaps the most aesthetic solution
Wooden box in a modern style interior
Advice! If the radiator is located far enough from the wall, then by combining a window sill and a frame, you can make a bench for romantic gatherings by the window.
Radiator box with seating bench
Manufacturing technology
Before you start making a fence for the battery, you should choose a suitable design: hanging or resting on the floor in the room.
Then a drawing is made, and tools and materials are selected.
Materials and tools
For manufacturing you will need the following materials and tools:
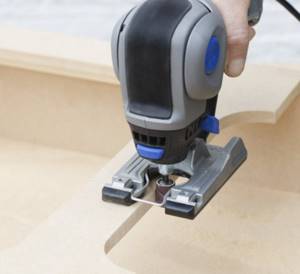
- Chipboard sheet.
- Special edge for finishing with a thermal adhesive layer on the back side.
- Metal screws and angles.
- A stapler with staples or small nails with a hammer.
- Iron.
- Knife.
- Sandpaper.
Marking and measurements
First you need to mark the location on the wall and take the necessary measurements. We mark the mounting points for placing the panel. We make a simple schematic drawing with important dimensions.
Lattice
We make four walls for the frame from chipboard. You can purchase already manufactured parts. We connect the walls together using metal corners.
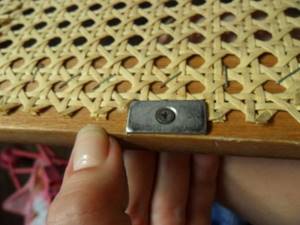
We make a lattice from the edge and fix its parts on the frame using small nails and a furniture stapler. The length of the edging material is calculated by the formula L(edge length)=(a (product length)*b(width)*1.3)/c(edge width).
The holes on the grill must be the same size; for this you need to make preliminary markings on the frame or a special template. The front side of the grate must be heated with an iron at high temperature. As a result of this procedure, the heated glue will connect the lattice elements at the intersection points and give it greater rigidity.
The same edge must be used to finish the end parts of the frame. We apply the edge to the end and smooth it with an iron. Using a knife, cut off the protruding edges of the edge. Protruding edges are sanded with sandpaper.
Consolidation
If the screen is supposed to be located close to the wall, then we simply insert it. If a hanging option is planned, then you need to perform a few more manipulations.
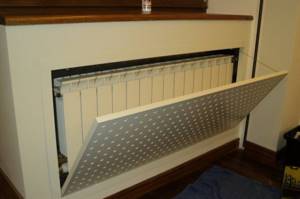
- We make recesses in the frame at the junction points with the heating pipes. Then the decorative fence is placed on the pipes using special grooves.
- You need to attach metal corners in the marked places.
- Then we bend the edges of the corners 10 mm upward and hang the made panel on the resulting hooks.
The enclosing screen is an excellent solution for various heating devices. If you do everything correctly and choose high-quality material, you can create a wonderful decorative element yourself.
Glass screen
A glass panel, as a rule, is a rectangular sheet made of translucent thick glass, which is attached to the wall with steel holders. Making it possible to decorate the heating device from the front, it leaves open space below and above and does not interfere with free air convection. A popular solution is a glass panel with photo printing.
Glass screen with fireplace image
Glass screen with mirror surface in the bathroom
How to hide a pipe and heating radiators: tips from a heating engineer
The main task of a heating radiator is to heat the room, which it does by a combination of two methods. The first is infrared radiation, in which heat is transferred directly to objects located in the room. It is this thermal energy that we feel when we bring our hands close to the battery. The second method is convection, by heating the air, which, rising upward, displaces the cold air, thus organizing air circulation in the room, which leads to a more or less uniform distribution of temperature.
If you hide the batteries nicely in the house, this will not affect the efficiency of heating devices.
Excellent combination of radiator shield and interior style
Therefore, you should immediately decide on the main thing - no matter what method is chosen to hide pipes and radiators in the apartment, any decoration of the radiator will definitely lead to a loss of heater power. A simple example is installing a glass screen that almost completely blocks infrared radiation. And the larger the solid (without holes) area of the cover (screen) on the battery, the “deeper” the battery is hidden, the more significant the losses will be. Solid (solid, without holes) boxes on top of the radiator are especially unacceptable - because they block the warm air rising upward. The photo below shows a particularly unfortunate design designed to decorate the battery.
An example of unsuccessful battery decoration
On the one hand, it never fully fulfills its role - the supply pipe is very clearly visible. On the other hand, there are very small holes that significantly reduce the movement (convection) of warm air, and a solid screen (even a metal one) blocked thermal radiation. That is why, from the point of view of thermal engineering, the ideal choice is a panel made as a coarse mesh.
In Fig. Figure 2 shows a cross-section of an almost optimal grille model for a heating radiator.
Rice. 2. Installation diagram of the grille (panel) on the radiator.
Infrared (also known as direct thermal) radiation, indicated by red arrows (3), passes through the grating (D) with minimal losses. It is worth paying attention to the thermal insulation screen (A), which reflects heat (part of the infrared radiation) and, instead of aimlessly heating the walls, returns it back to the room.
Cold air (indicated by blue arrow 1), entering from below, heats up and rises. To prevent heated air from stagnating under the window sill, forming a thermal cushion that blocks convection, install a visor (B) that directs the air flow outward. It is also worth installing an injector (two metal plates) in the upper part, which allows heated air to be removed from the front side of the radiator. It is especially effective at high temperatures, due to the narrowing at the top, the draft increases significantly and the volume of exhaust air increases significantly. Despite the installed grille, the overall energy efficiency of such a design will be significantly higher than with simply installing the battery near the wall.
A long box will allow you to hide not only the battery, but also the pipes
A beautiful radiator box can become a decorative element
A battery with a bench is perfect for a living room
How to recess heating pipes into the wall
Many people believe that recessing pipes into the wall is too dangerous. But if everything is done correctly, problems can be avoided.
Use only high-quality and durable materials, and do not trust installation to just anyone. If the main is located inside a wall, it is not so easy to get to.
All materials tend to expand and contract with temperature fluctuations. Therefore, heating pipes cannot be cemented or covered with plaster - they will quickly wear out, and joints and connections will break.
Pipes must be covered with high-quality thermal insulation to avoid heat loss. It is preferable to use materials with a top heat-reflecting screen made of metal foil.
It is best to cover the gate with plasterboard so that, if necessary, you can easily reach the highway.
by Alexander Kulikov in Finishing | 1 comment
Aesthetics and once again aesthetics - this is precisely the goal that any person pursues when making home renovations. For this reason, it is very important to pay attention to the various little things that make up the overall perception of the room - even carefully laid heating pipes can ruin the appearance of the room. By and large, this is the main reason why a battery in a niche is found in almost every second modern apartment or house. As a matter of fact, we will talk about it in this article, in which, together with the site stroisovety.org, we will talk about how to make a battery in a niche with your own hands.
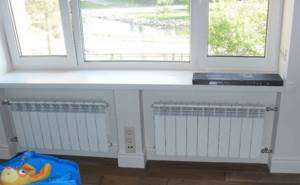
Niche for battery photo
