Drill a hole
This air bleed option will require additional tools. The advantage will be the guarantee of successful completion of the event and the absence of the risk of thread failure. The essence of the method is as follows:
- Take a drill or screwdriver, as well as a metal drill with a diameter of 2-4 mm.

Using a drill with a metal drill, drill a through hole in the battery plug. Wait until air comes out of the formed hole. After the water begins to drip, screw in the self-tapping screw prepared in advance. This will prevent further coolant leakage. For greater reliability, the surface of the rubber ring adjacent to the plug can be coated with sealant.
The second way to bleed air from cast iron radiators is effective and reliable. However, the most optimal solution would be to install a special tap that will allow you to bleed air at any time and without unnecessary effort.
The procedure for installing a cast iron radiator
- First, the number of brackets is determined. For 1 sq.m. 1 bracket is installed on the heating surface.
- Mark the wall for the brackets, drill holes according to the marks, insert dowels into them, screw in the fasteners.
- Now you need to shut off the heating circuit and remove water from it.
- The battery is hung on brackets.
- Connect to the system with threaded connectors.
- The joints are sealed with tow or other sealing materials. You can weld the joints.
- The final stage is crimping.
General recommendations
Experienced craftsmen and professionals recommend taking into account the following points:
When using a cast iron radiator plug on heating appliances, caution should be exercised. The fact is that cast iron is easily compressible, but is considered a rather fragile material
Therefore, even a slight mechanical impact or impact on a hard surface can cause the formation of microcracks. As for steel products, they are more reliable in this regard.
When studying materials for the assembly and installation of heating devices, there are recommendations for using ordinary paint for more airtight connections. To some extent, these statements are true, but it should be noted that such connections do not have a very attractive appearance, and when disassembling them you may encounter certain difficulties
It is important to understand that modern heating devices and their additional accessories do not require painting
Selecting and installing radiator plugs is not difficult, but you need to approach this process quite responsibly
It is very important to select matching materials, correctly determine the type of thread and size of the plug, as well as its purpose. By following the recommendations of professional technicians, you can avoid many problems during the operation of the heating system, including batteries and radiators.
Dismantling the heating system in the house
When dismantling sections of pipelines to be repaired, the pipes should be protected from damage, especially when caulking sockets. Dismantling of heating system pipelines is carried out after removing all heating devices and disconnecting the equipment from the network.
Pipelines made of heavily corroded steel pipes that are unsuitable for further use are dismantled in large sections.
In places where pipes are drawn, you should first burn the paint on the threads with a blowtorch or clean it off with a knife and an awl, and unroll and remove the remaining seal at the ends of the coupling. Depending on the diameter of the pipe, it will take from 15-20 minutes to 1 hour to warm up the junction of the fitting and the pipe.
ATTENTION! When heating, it is necessary to periodically turn the pipe so that the seal burns out between the fitting and the pipe on all sides. Then you should hit the fitting and pipe with a hammer several times, separating scale and burnt seal particles.
If the pipe is bent, you can lay it on the ground and unscrew the fitting with a pipe wrench. If the pipe is straight and there is no clamp or vice, then you can use a second pipe wrench. But in this case you will need an assistant.
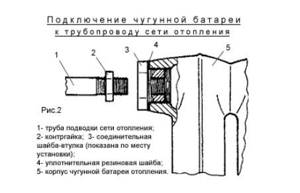
Dismantling the heating system includes work on dismantling the pipeline system, pipes supplying and discharging to the batteries, disassembling and ungrouping (if necessary, replacing seals) radiator sections (Fig. 2).
If leaks are detected in the threaded connections, the seals must be replaced. Individual cracks, holes and fistulas in pipes are sealed using electric arc or gas welding.
During repairs, all pipe deflections must be eliminated (by straightening them or by reinstalling and strengthening the fasteners). Straightening pipes dia. up to 32 mm are produced cold, more than 32 mm - hot.
Dismountable connections on pipelines should be made in minimal quantities at the locations where the fittings are installed and where this is necessary according to the assembly conditions. Such pipeline connections, as well as fittings, must be located in places accessible for maintenance.
ATTENTION! When dismantling pipes that are not suitable for further use, the pipes are cut.
Dismantling an old radiator
In the case of old batteries, some problems may arise - for example, the threads in such devices may become stuck, so before disassembling they will need to be heated with a blowtorch or autogen. When the joints are heated, you need to quickly tear off the nipples on both sides of the battery. Using the same method, any elements stuck to the battery are removed.
After prolonged use of the battery, the nipple may completely rust. In this case, it will be impossible to hook it with a key, so to disassemble the battery you will need a hacksaw or grinder. The remains of the nipples are unscrewed from their places, and the threads are cleaned with a brush.
If none of the described methods helps, the last resort option is to smash the battery with a sledgehammer. Before breaking a cast iron battery, it must be placed on a horizontal surface and hit along the center line with a sledgehammer until part of the section falls off. After this, the battery must be turned over and the operation repeated to break the entire section.
All that remains is to place the radiator vertically, apply several blows to the surviving sections and untwist them. Of course, in this case there is no need to talk about the integrity of the entire radiator - in most cases, half of the sections are lost.
How to solder an aluminum car radiator with your own hands
Let's move on to the soldering process. First, the problem area is thoroughly cleaned with a file and sandpaper. Before you start replacing the Peugeot 307 timing belt with your own hands, you need to prepare the tools that we will need for this operation on the nfu engine. If there are lamellas on it, they must be carefully removed with pliers. Aluminum radiator with your own hands, a car that, as already. Next, the repair area is degreased with acetone.
When preparation for soldering is completed, flux can be applied. After this, we begin to warm up the joint. If you use a gas torch or blowtorch, make sure that the flux does not burn out prematurely. It is easier to apply it with a soldering iron. It is enough to dip its working element in the mixture and transfer it to the surface to be treated.
Now it's time to apply the solder. How to repair a Toyota radiator It is better if it is in the form of a rod or wire. Solder is applied to the joint and thoroughly heated with a soldering iron (torch). When it spreads evenly, you need to let it cool, after which it is advisable to apply a second (safety) layer. At the end of the work, the resulting sagging can be removed using sandpaper.
Tips for choosing components
First, let's look at what specific criteria to pay attention to when choosing components for assembling a heating system; these tips will apply not only to footers, but also to all other necessary elements:
Compliance in size If you do not understand the parameters of the equipment, then it is unlikely that you will be able to buy components; in extreme cases, if you decide to do the work yourself for the first time, take documentation for radiators and other equipment included in the system so that the seller has the opportunity to understand what you need Having a plan for the heating system This is much more serious than you think, based on this, you must make a sketch; you don’t need to be completely careful. The main thing is a clear definition of the placement of all nodes in the system and the features of their placement relative to each other. This will greatly help in determining the correct quantity of certain components; you will not miss important nuances. Thread matching Another serious factor, since the type of connection and its stroke may vary. Moreover, differences can be both in the measurement system (inch or metric) and in the thread pitch
It goes without saying that most manufacturers try to produce products according to certain standards, but some features are still visible, and it is fundamentally important to know about them in advance (the instructions included with the equipment will help again) Level of product quality Find out how well it is done or another product can be made by eye - the threads inside and outside must be smooth without imperfections or damage, other surfaces must be smooth and properly processed. When it comes to components for aluminum and bimetallic radiators, the products are much more often painted white, since most radiators have just this color. Material of manufacture The liner for a cast iron radiator must be made of the same material as the main element, As for bimetallic and aluminum radiators, products made of galvanized steel are a good solution for them; they are quite reliable and durable, along with this their price is affordable. Checking the elements is best to check how well the element is screwed onto the thread if you receive a large number of units, then make sure that there are at least a couple of them to choose from
The parts should screw on fairly easily without any effort on your part. If resistance is felt, then the thread on one of the elements is damaged
How to avoid air locks
The sequence of preventive measures depends on the type of heating system.
Open circuit
This type of system fills itself with hot water. All valves on radiators must be open, allowing unobstructed water access. It is necessary to monitor the pressure and prevent too strong and rapid filling. When filling the free space of the batteries, close the drain valve.
Filling closed systems
The steps to fill this type of system differ from the standards. First of all, the valves are closed. Only the one through which water is poured into the system is left open. Then a pump is connected to ensure stable pressure in the pipes. The air from the batteries is released using taps only after the entire system is filled with water.
You see, if you follow the rules and carry out preventive measures, it is quite possible to minimize the likelihood of air pockets appearing in the heating system, reducing the temperature in the apartment.
vote
Article rating
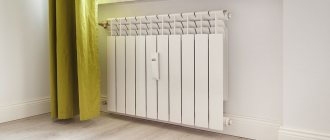
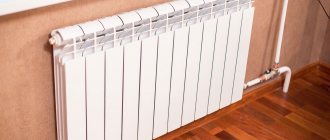
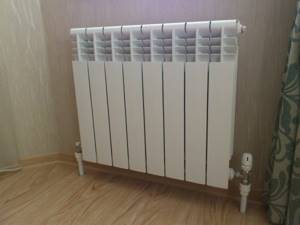
Features of installation of heating radiators
According to industry SNiP, the following standards must be adhered to:
- between the radiator and the floor you need to maintain a distance of 10 cm, between the heating device and the window sill - from 5 cm, to the nearest wall - 3-5 cm;
- the length of the device fixed under the window should be no more than 50-75% of the width of the opening;
- the vertical axis of the battery (it is determined by eye in the middle) should continue with a similar parameter of the window. Here a deviation of no more than 2 cm is possible;
- installation of radiators is most appropriate in areas where there is intense air circulation - near doorways, under windows.
If you apply a heat-reflecting screen to the wall (in particular, attach foil material), the battery can be placed closer - at a distance of 2.5 cm. An additional finishing layer helps to reflect heat from the wall, which leads to energy savings and faster heating of the room.
The assembly technology is determined by the type of system being used and the selected equipment connection diagram.
Advice from professionals
A few tips will help you carry out an effective repair:
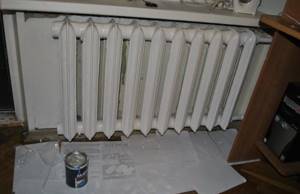
- After repair, the radiator will have to be painted. If it is hidden behind a decorative screen, it is advisable to choose dark paint. A cast iron battery will transfer heat better.
- The hanging brackets are positioned so that the gap between the radiator and the window sill is 10 cm, and the gap between the floor is 12-15 cm.
- To reflect heat, the wall behind the cast iron radiator is sealed with foil material.
Heating efficiency depends on the number of sections on each radiator. This requires competent calculations, which experienced specialists will help you perform.
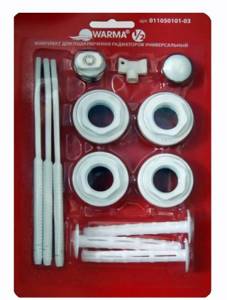
Basic elements for radiator installation
In most cases, radiators are sold assembled; to operate, the device only needs to be fixed on the wall and connected to the heating system. However, in addition to this, you will need to purchase additional devices. These include the following:
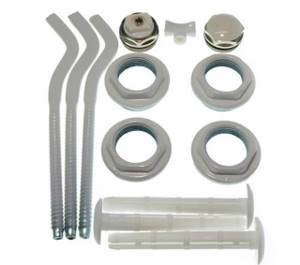
- Pass-through plug for a cast iron radiator in an amount of at least 2 pieces. The device has holes on both sides in which threads are cut.
- Plugs that are screwed into the radiator body to prevent coolant leakage.
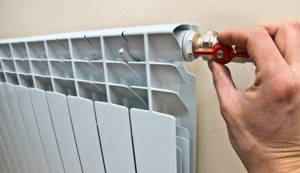
- Mayevsky taps for bleeding air from a heating device.
- Devices for installing radiators, these can be metal anchors or special brackets.
The number of radiator sections is determined by the need for thermal energy, so the length of the heating device is increased or shortened.
Modern specialized stores offer radiators and a full set of accessories for their installation. This allows you to select elements of the same color in accordance with the color of the heating device. In addition, in this case it is possible to select the most compatible materials. For example, if the battery is made of cast iron, then the plugs should also be cast iron. It is not recommended to use a plug for a cast iron radiator on copper heating appliances.
Dismantling cast iron radiators
To dismantle cast iron heating radiators, the following set of tools is required:
- Pipe wrench number 3 (needed to unscrew the locknut and fitting);
- Pipe cutter or grinder;
- Hacksaw for metal;
- Chisel;
- Hammer and sledgehammer;
- Brush.
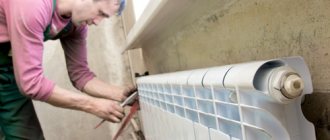
It is best to dismantle cast iron radiators (and any other heating devices) in the summer, when the heating system is turned off. Before disassembling the cast iron heating radiator into sections, it is necessary to drain all the coolant from the heating circuit.
The first step is to unscrew the locknuts that are located on the connections to the radiators. Next, the flaps are turned away, and the radiator can be removed. If it is not possible to unscrew the locknuts, then the connections are simply cut off, after which the radiator can be easily removed from the supports.
Differences between left-handed and right-handed threads
One of the main characteristics of a screw connection is the direction of the thread when the parts rotate. The full operation of the mechanism and the integrity of any structure depend on the quality of the connections, which are considered a responsible and important element.
In mechanics, there are two main types of fastening products. With standard threads, the lines of threads are removed clockwise towards the viewer. With a left-hand thread, the protrusions on the screw approach it from the left, moving counterclockwise.
Thus, the direction of rotation of the turns (helix) on the screw makes it possible to distinguish a right-handed thread from a left-handed one. On hexagon bolts, studs, nuts and fittings, left-hand threads are marked with the letter L.
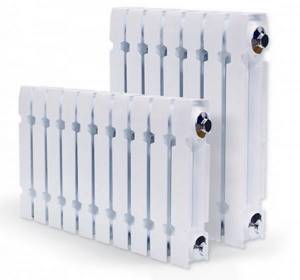
Product design
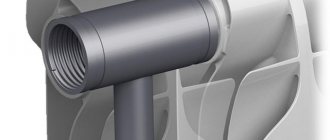
The aluminum radiator is a structure of separate sections connected to each other using nipple nuts. Essentially, this connecting element is a cylinder with an external thread on each side. The cylinder is empty inside. Radiator sections are screwed onto each nipple nut on both sides.
The connecting elements are located at both the top and bottom of the battery. Thus, each radiator section is attached to the adjacent one at four points. The nipple nut is made in such a way that it is completely invisible in the assembled product.
Inside each connecting element there are protrusions that serve for the installation procedure. A special tool clings to them, with the help of which the nut is unscrewed and tightened. In this case, you should take into account the direction of the thread - on some elements it is right-handed, on others it is left-handed.
To avoid playing the guessing game, just pay attention to the markings in the appropriate areas. If the letter D is indicated there, this means that the thread is right-handed
The letter S indicates left
It is very important not to mix it up, since trying to unscrew the nut in the opposite direction can lead to thread breakage and, consequently, damage to the element
How to properly disassemble a cast iron battery into sections and reassemble it
- Working with a new radiator
- Dismantling an old radiator
From the author: Hello, dear readers! When the market was flooded with heating radiators made from various modern materials, cast iron radiators began to lose ground.
Which, in general, is not surprising, because they used to be made in the same design (if you can even call it that), and were bulky and ugly.
However, cast iron has not given up, and now more and more people are starting to purchase such radiators. By itself, this material has excellent characteristics, and modern technologies make it possible to obtain a beautiful and functional product.
For example, now these radiators can be expanded. But to do this, you need to know how to disassemble a cast-iron heating radiator into sections and then reassemble it.
However, this information will be useful to you not only if you want to strengthen the heating system, but also for repair procedures from which no radiator is immune. Fortunately, the disassembly process is not that complicated, and even an inexperienced home DIYer can handle it.
Working with a new radiator
The easiest way to disassemble, of course, is equipment recently produced by the factory. The joints have not yet turned into a single whole; everything unwinds and twists perfectly. If this is your case, then you are incredibly lucky.
In order to disassemble the radiator, you will need an adjustable wrench, as well as a special radiator tool. There will be no problems with the first one, but the second one is a unique and homemade product, it is usually not available in stores.
To get a plumbing radial wrench, you need to contact some workshop of the appropriate type and ask to rent the tool. Or try your luck with one of your familiar plumbers.
So, you need to follow a few simple steps.
- The first step is to turn off and drain the water in the heating system.
If you live in a private house, you can do this yourself. If in an apartment building, you will have to first submit an application to the management company. A specialist will come from there who can turn off the riser. It is worth noting that this procedure can only be carried out outside the heating season, since turning off the coolant supply will affect not only your apartment, but also those of your neighbors. - After the riser is closed, disconnect the radiator from the pipes connected to it (you will need an adjustable wrench for this) and remove it from the fasteners with which it was held on the wall.
- Then you need to open a special plug on the side of the battery, tilt the radiator and drain the remaining water from it.
Of course, this needs to be done over some container. Before taking on this work, remember the considerable weight of cast iron and invite an assistant. - Using a plumber's radial wrench, unscrew the bushings that connect the radiator sections. This is not so easy to do. First try to determine the direction of the thread. However, with modern radiators this is not difficult to do, since the bushings usually have corresponding markings.
If you need to disconnect one of the extreme sections, then simply feel it with a tool. If we are talking about the middle segment, then make a mark on the key showing the passage of the required distance. Then insert the tool into the battery to the desired level and begin unscrewing. This must be done with great care, slowly - remember that cast iron, despite its impressive appearance, is a rather fragile material. You need to work alternately with both nuts, upper and lower.First, unscrew one of them half a turn, then the second one, then return to the first one again, and so on. This will help avoid skewing the radiator.
- Once the nuts are completely unscrewed, the section can be removed.
How to remove a section from a radiator
Sections of any type of stacked radiators are connected by a nipple nut. It needs to be unscrewed to remove the section from an aluminum, bimetallic or cast iron radiator. To do this, you need a nipple wrench of the appropriate size.
The standard nut diameter is 3/4 inch (but there may be variations). On the outside there is a thread that is screwed into individual sections of the radiator. On the inside there are two small latches that need to be secured with a key. Next, strictly follow the technology for dismantling the radiator section:
- Place the nipple wrench on top of the radiator so that its head is opposite the place that needs to be unscrewed;
- Insert it into the upper channel of the section to the measured depth;
- Turn counterclockwise two turns;
- Insert it into the lower channel at the same distance and unscrew the nut two turns;
- Alternately move from one part of the radiator to another until you completely unscrew the nuts.
It happens that the nipple nut does not budge (this often happens with old cast iron radiators). In this case, wipe the joint with acetone, solvent or White Spirit. Remove any remaining paint.
Treat the joint with WD-40 rust converter or equivalent. Tap the joint lightly with a hammer (remember that cast iron is strong but brittle). You may have to process the joint several times and wait an hour and a half.
If the nipple nut is stuck tightly, you will have to work hard. The detailed process of separating sections is described in the article “How to properly disassemble a heating radiator: aluminum, bimetallic, cast iron”
What is the secret of popularity
Important: there is an opinion that the cast iron radiator now is worse than in Soviet times. This is only partly true
It all depends on the quality of the product and the manufacturer. If the battery is cast in accordance with domestic or European GOST standards, then there is nothing to be afraid of. But when purchasing units from Chinese or Turkish “masters”, a person is essentially taking a pig in a poke.
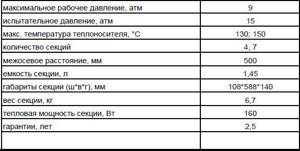
Standard MS 140.
- Although cast iron is a brittle metal, it is still quite durable. The working pressure for such a battery is 8 – 12 atmospheres, plus during short-term surges or water hammer, it can withstand a load of up to 20 atmospheres. If we take into account the fact that in the urban network the pressure rarely exceeds 6 - 8 atmospheres, and the average water hammer force is 15 - 20 atmospheres, then the safety margin is obvious;
- Such batteries are present both in the budget segment of the market and in luxury goods. The fact is that the price of the classic MS-140 is perhaps the lowest. At the same time, the cost of artistic thick-walled casting can sometimes be several times higher than the price of good bimetal;
- Adherents of modern materials forget about the quality of the coolant in our urban networks. This harsh “cocktail” can destroy many newfangled models. While cast iron is completely resistant to all chemical attacks and neutral to corrosion, it simply does not rust;
Design of modern cast iron batteries.
- Thanks to the large diameter of the battery channels, any debris slips through it, practically without stopping. which is very important for urban high-rise buildings with old pipework;
- As you know, cast iron has a high heat capacity. The battery takes a long time to gain temperature, but also maintains it for a long time. In case of interruptions in heating, this unit will give off heat for several hours after switching off;
Battery connection options.
- Technically, installing a cast iron heating radiator with your own hands is not very difficult. With a tool and a couple of assistants for support, the job can be completed within a day;
- Another important advantage is the fact that components for cast iron heating radiators can be found in any hardware store and the price for them is quite reasonable;
Characteristics of modern cast iron radiators.
We seem to have figured out the reasons for the nationwide popularity.
Now let's talk about the pitfalls of these heating devices:
- The first reason why many people refuse cast iron is the serious weight of the structure. Judge for yourself, a standard section weighs about 7 kg; on average, 7 – 10 sections are installed per room. As a result, we have from 50 to 70 kg of empty structure; when filling, another 1 - 1.5 kg is added to each section. In addition to installation problems, not every wall can support such a unit;
- The minimum volume of coolant in one cell is about 1 liter. For modern competitors this figure is 3–5 times less. And as you know, the more liquid, the more energy is required to heat it and maintain temperature. Plus, you can quickly regulate the temperature in such systems. due to high inertia, it is very difficult;
Data of the classic cast iron radiator MS 140.
- The area of such structures, compared to modern analogues, is somewhat smaller, and accordingly the heat transfer is lower;
- Reproaches regarding the unattractive design are unfounded; to some extent they can be addressed to the widespread MS-140. As for figured casting, their beauty leaves them far behind their modern counterparts;
Battery assembly
In principle, with the necessary tools at hand, even a beginner can assemble or disassemble an aluminum radiator with his own hands.
To install an aluminum radiator heater with your own hands, you need to:
Place the battery on a flat surface. This is necessary in order to inspect the device before installing it and check all joints for possible cracks or chips.
Before connecting the heater elements, the threads at the joints are cleaned not only of debris, but also of factory paint. This is done using fine-grained sandpaper.
This is important, since in the future the paint layer may crack, which will lead to leakage. For the sake of presentation, manufacturers paint not only sections of radiators, but also their joints.
When cleaning the battery from paint, you need to make sure that the sandpaper does not leave scratches on it, which could also cause a leak in the future.
All gaskets should be washed in soapy water. and if antifreeze is supposed to be used in the heating system, then they need to be degreased, since this carrier is capable of penetrating into any, even the most minor, irregularities.
Before connecting the sections, it is advisable to study the drawing of the key for assembling an aluminum radiator so that you know how to use it. This metal is very soft, so any too much force can damage the threads and then you will have to buy a new section.
A paronite seal is placed on the nipple nut on both sides. The key is placed on top and easily turned a couple of times, the same is done with the bottom hole. Only after the joints have been tacked can you use a lever to tighten them more tightly.
The hole that will not be used is closed with a plug, and the Mayevsky tap is attached to the other and the assembly of the aluminum radiator is ready.
Once all sections of the radiator have been assembled, it can be connected to the heating system and checked for possible leaks. Since aluminum batteries are quite lightweight, you can easily connect them yourself, even without the appropriate skills.
Radiator nipple: functions, replacement, sealing
What specific functions does the nipple for heating radiators perform? How is it built? How to replace a broken nipple and how to ensure the tightness of the connection after its replacement is completed? In this article we will try to answer these questions.
Nipple rupture
The consequences of a nipple rupture are much more unpleasant. If in the first case the bad thing that threatens you is a small puddle under the battery, then disconnecting one of the collectors is fraught with flooding of your and neighboring apartments with warm water with a huge amount of silt and sand.
What could be the reason for the rupture of a sufficiently strong nipple?
- Connection overtightened during assembly. As already mentioned, sections of steam expand when heated; As soon as the coolant temperature rises, the barely visible crack will expand and turn into a source of significant trouble.
- Water hammer. This is the name of a wave propagating in a virtually incompressible medium, created by an abrupt stop in flow when the valve of a screw valve is torn off, the cheek of a valve falls, or simply the shut-off valve is suddenly closed. The pressure at the flow front during water hammer can be about 20 – 25 atmospheres.
Reference: cast iron radiators are designed for a working pressure of 9-12 atmospheres, aluminum radiators - 6-16.
Sealing
How is the tightness of intersection connections ensured?
- Until the mid-20th century, plumbing flax with red lead was used for this purpose. The paint prevented natural fiber from burning out at high temperatures and rotting when moistened. The winding was placed near the nipple in a tight bundle and was securely pulled together when connecting the sections.
- For the next couple of decades, during the factory assembly of cast iron heating devices, gaskets made of paronite (hard heat-resistant rubber) were used. The solid resource of this material is combined with low elasticity, requiring enormous tightening force.
At the moment, silicone gaskets are used along with paronite for sectional aluminum, cast iron, steel and bimetallic batteries. They are distinguished by their toroidal cross-section (to put it simply, they look like a narrow donut from the outside). Silicone remains elastic for a long time and does not require enormous tightening force.
But: when assembling an intersection joint with your own hands, it is quite difficult to center the gasket so that it does not squeeze out beyond the boundaries of the sections. It is more ergonomic to use silicone rings with sections that have annular grooves on the collector planes.
Replacement
How to replace the gasket between sections or the intersection nipple?
Here are replacement instructions for the case when the problematic connection is close to the end of the radiator:
- Once the coolant has been discharged, the blind plugs are unscrewed.
- On the radiator key, a marker marks the distance to the problematic connection.
- The key is inserted into the radiator and turned until it engages with the ribs of the nipple.
- The nipple is turned clockwise (from the side of the blind plug the thread is invariably left-handed) one turn.
- The operation is repeated with the second nipple. Then they turn away one by one: the distortion can jam the connection or nipple.
After replacing the defective part, assembly is carried out in the reverse order. If the problematic connection is close to the supply line, the radiator is dismantled and disassembled on the floor.
When repairing sectional radiators, it is useful to know a few subtleties.
- If the connection does not respond to the key, warm up the section collector with a blowtorch or a hair dryer. Due to thermal expansion, the force required for disassembly will become fully feasible.
- If you don’t have ready-made radiator gaskets on hand, you can make them yourself. Cut the unnecessary inner tube, trace the outline of the old gasket on it with a ballpoint pen and cut out a new gasket with simple scissors.
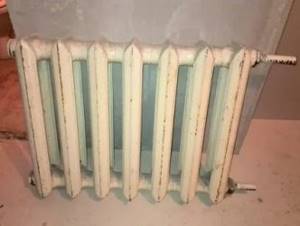
Maintenance of cast iron modifications
In old residential premises there are often cast iron batteries of the MS-140 type. Their assembly is also carried out using gasket seals and nipple nuts. It is quite difficult to disassemble old models, since during long-term use the sections on the joints become stuck due to rust. In such situations, the key slots are corroded by the coolant.
In addition, when dismantling sections of cast iron heating radiators, you should remember the impressive mass of the material used. One 12-cell battery will weigh at least 90 kilograms; it is very difficult to handle such a device alone. To perform the work you will need the following tools:
- special nipple key;
- a device for unscrewing plugs and fittings;
- small sledgehammer, chisel;
- blowtorch;
- brush with steel base;
- blocks of wood used to lay the radiator on the surface.
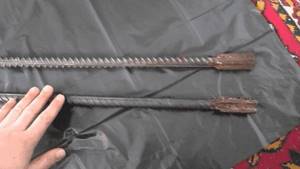
The key is a metal rod that has a round configuration and is flattened on one side. The diameter of the device is 18-20 millimeters. The flattened part has a thickness of 6 mm, its dimensions are 28x40 mm. A ring is welded on the opposite side of the rod, intended for threading the lever. The length of the radiator key is equal to half the length of the 12-section radiator plus 300 millimeters.
Date: September 25, 2021
Sgons and Americans
What it is
Let's start with a short excursion into history.
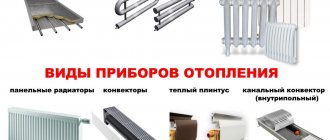
Quite recently, by historical standards - some twenty to twenty-five years ago - only three types of heating devices were massively sold and used in our country:
Convectors, which were a coil made of a steel pipe with steel plates pressed onto it to increase heat transfer.
Domestic design, meaningless and merciless.
Let us clarify: optionally, their design could include a decorative screen and blinds to regulate heat transfer.
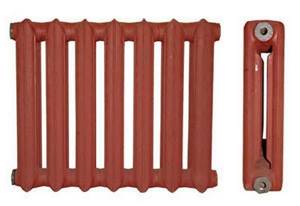
- Plate radiators are two stamped steel plates welded around the perimeter. The coolant moved through a labyrinth of grooves between them.
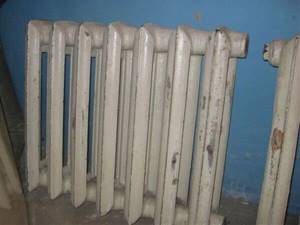
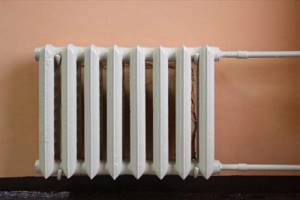
- Cast iron sectional radiators. They, it seems, do not need any introduction, since they are now installed in most apartments.
There were only two methods of fastening:
- Welding. They were welded to the convector connections exclusively: their mechanical strength and service life, at least not inferior to the service life of the risers and connections, did not require dismantling for repair or replacement.
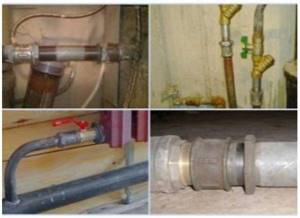
- Sgony. The coupling (in the case of a convector or plate-type device) or the radiator plug (in the case of a sectional radiator) was driven along the long thread on the connection, simultaneously screwing onto the thread of the device or screwing into it. The connection was then sealed with a wound locknut.
The first aluminum radiators were mounted the old fashioned way - on saddles. However, after a few years, simple fittings - American ones, which included detachable connections with a union nut and a rubber seal - became widespread. Their main advantage was the simple and quick dismantling of the device: an operation that previously took up to half an hour now took no more than a minute and did not require much effort.
The aluminum heating device is connected with modern fittings.
Help: a cast iron radiator cap from a new radiator can be unscrewed with a gas wrench number 2. To deal with an old stuck cap, you have to lengthen it with a lever or use a wrench number 4. In this case, the cap often does not unscrew, but is literally torn in half, losing the thread .
Does the American woman have any disadvantages? In essence, there is only one drawback: the strength of the connection is limited by the quality of the rubber seal and the tightness of its pressure. With high pressure in the circuit (for example, during water hammer), it is the seal and the relatively thin American union nut that turn out to be the weak link.
Recommendations
The conclusions that the author made for himself will certainly be challenged by many other experts; however, they are quite unambiguous.
In central heating systems with a high probability of exceeding the standard pressure, it is better to use the usual threaded fittings.
The cast-iron radiator in the central heating system is connected via leads.
It is advisable to use American ones in autonomous systems.
Characteristics and features of cast iron material
Few people know that the very first cast iron radiator is now much more than 100 years old. What he has not experienced are revolutions and wars. However, despite this, it still successfully performs its functions.
Cast iron heating radiators are manufactured using the casting method. The characteristics that define the particularity of a cast iron alloy relate to its homogeneity. Cast iron radiators are used for both centralized and autonomous heating.
What are the advantages of cast iron heating systems?
Anti-corrosion properties. Cast iron can be classified as a material that practically does not corrode, due to which its service life can reach 50-100 years. Radiators can withstand temperatures up to 50 degrees, so they can even be used in steam heating systems.
Unpretentious to the coolant, that is, its quality. Even the presence of various debris, such as rust or pebbles, does not cause any harm to the battery.
Thick battery walls. These characteristics mainly determine the durability of a cast iron radiator. Cast iron radiators are an ideal option for open-type heating systems, as well as those that empty out after some time. When compared with cast iron radiators, the characteristics of steel ones are significantly inferior, since they will rust in literally 2 years, plus they can also burst at the moment when you least expect it.
Excellent heat storage capacity. After turning off the radiator, even after an hour, its heat transfer is about 30%. As for other batteries, it is usually half as much.

Characteristics of a heating radiator made of cast iron
The internal cross-section is quite large, which allows you to clean the radiator very rarely.
Characteristics regarding service life. As a rule, manufacturers indicate on cast iron heating radiators a service life of a maximum of 30 years, but in reality the radiator can last much longer (more than 50 years). And if it is filled only with clean water, the service life of cast iron radiators can reach 100 years.
Disadvantages of cast iron batteries:
- Heavy weight. It's no secret that batteries made of cast iron are quite heavy; it is for this indicator that they are inferior to steel, bimetallic and other types of batteries.
- Strength. The pressure that is considered optimal for them is no more than 15 atm, in contrast to the same bimetallic ones, which can withstand all 40.
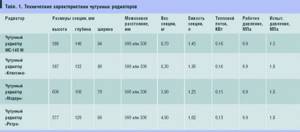
Dimensions of cast iron batteries and power calculation

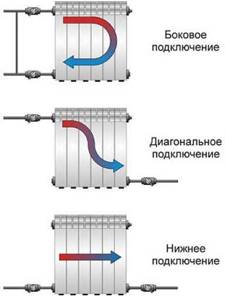
Connection diagram of heating batteries to the system
As for standard radiators, they have an interaxal distance of about 300-500 mm. However, you can also find taller batteries, for which this value can be 800 mm. The width of the cast iron radiator section, as a rule, ranges from 35 to 60 mm. As for the depth, it can be 92 mm, 99 or 110 mm.
Under normal conditions, the power of a cast iron radiator per 1 sq. m is 120 watts. However, what conditions qualify as such? Rooms with a height of 3 meters, in which there is one window (wooden) and one door, are considered standard. The radiator temperature in this case is 70 degrees.
As the height of the room increases, the power increases accordingly. If PVC windows are installed in the room, then 15% must be subtracted from the amount of power. At a coolant temperature other than 70 degrees, it is necessary to either add or subtract 15% of the power.
Installation of squeegees
The main advantages of installing squeegees are:
- ease of installation. Connecting pipes with a bend does not require a welding machine or skills to work with it. The work can be done by a novice craftsman;
- low cost;
- obtaining a detachable connection;
- the ability to carry out repairs without shutting down the entire pipeline.
Fitting locations
It is recommended to install the drives:
- after taps and/or valves, which will allow the subsequent section of the pipeline system to be disconnected for repair or maintenance work;
- on the central risers of any system;
- when connecting equipment (heating radiators, boilers, individual metering devices, and so on);
- on stationary type connections.
Places where installation of the squeegee is required
Tools you will need to get the job done
First of all, to work, you should find out the exact dimensions of aluminum radiators.
To measure them you will need a construction tape or a special folding meter. Also, if both types of instruments are not available, you can use a standard student ruler. It should be noted that most rulers are only 30 centimeters long, so you will have to make marks on the radiator (it is better to use a pencil, which is easily washed off the surface). Each new mark will be the end of the previous measurement and the beginning of a new one. The resulting dimensions are added to form the true size. Disassembling aluminum radiators also requires other tools that it is advisable to use for dismantling work, namely:
- A complete set of wrenches (socket and ring).
- Radiator key.
- Pliers.
- Screwdriver.
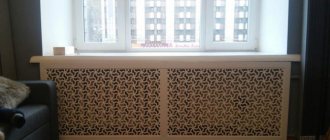
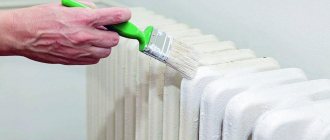
How to make old batteries look aesthetically pleasing
Once you have cleaned the inside of the batteries and replaced any worn gaskets, the job of upgrading the functionality is complete. It's time to take care of the appearance so that the heating devices fit well into the interior. To do this, just paint them. If desired, the batteries are decorated with original painting, images using the decoupage technique, or simply covered with special screens. But you will have to paint it anyway. It is important to choose the right paint composition and follow the application technology.
Subtleties of choosing radiator paints
Radiator paints are subject to increased requirements. They must be resistant to high temperatures, wear-resistant, and safe. It is also important that the coating does not reduce thermal conductivity. Manufacturers offer the following compositions:
- Acrylic enamels
These are organic based paints. With their help it is easy to create a beautiful coating with a glossy shine. Disadvantage: pungent odor. Until the paint dries, a specific aroma will be felt in the room.
- Alkyd enamels
Advantages: large selection of shades, good performance characteristics, durability. The drawback is the same - the smell. Moreover, it can appear when the batteries are very hot during the heating season.
- Water-dispersed compositions
They are often chosen due to their lack of odor and quick drying. When purchasing, pay attention to the manufacturer. There must be a mark on the can that the paint is intended specifically for heating radiators.
- Oil paints
They are sometimes bought for batteries, but this is the worst choice. Oil formulations have many disadvantages. They take a long time to dry, smell strongly, change color, and reduce the heat transfer of radiators.
Make sure that the paint you choose is marked “For heating radiators” and “Heat resistant”
Radiator paint application technology
The coating must be removed before painting. Stores sell special paint removers, you can use them. In theory, washes help clean batteries, but in practice their effectiveness leaves much to be desired, because the paint literally sticks to surfaces under the influence of high temperatures. It is better to heat the coating with a blowtorch or a hair dryer, clean it with a spatula and a brush with metal bristles. After this, sand the surface with sandpaper and degrease.
You need to paint it like this:
- First, the internal surfaces are painted to prevent drips from appearing on the front of the battery.
- The brush or roller is applied from bottom to top.
- Drips are removed immediately before the paint thickens.
- The coating is applied to the entire surface of the radiator; there is no need to leave unpainted areas.
- You can make a single layer coating, but it is better to paint in two layers to achieve greater durability.
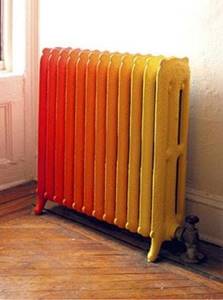
Floor-standing cast iron battery, painted in ombre style
An old cast iron radiator can create comfort in your home for several decades. Do not throw away the device if it has lost its presentable appearance and began to heat worse. All problems can be solved. Restore the battery, show your imagination - and the heating device will work and look no worse than new.
Required Tools
It is impossible to disassemble the cast-iron case with bare hands; without a tool, the battery can be broken with a sledgehammer or split if handled carelessly and dropped on the floor. To work, you will need at least four types of equipment:
- A special key with a square head for unscrewing nipples;
- Socket wrench for turning out plugs;
- Grinder with cutting wheels;
- Gas burner with reducer and cylinder.
Nipple keys
In addition, you will need a heavy plumber's hammer, chisel, tow, kerosene or brake fluid. All this will be needed in order to try to disassemble the sections with minimal damage. When rebuilding old batteries, the plugs and nipples still need to be replaced, so sometimes it's easier to cut them out than to try to unscrew them.
Rules for the selection and installation of plugs
The simplest element used when installing and assembling radiators is an aluminum plug for heating radiators. But even the simplest device requires special attention, otherwise big problems may arise during operation.
The process of installing a radiator plug cannot be called complicated, since almost all of them are made of the same type; the dimensions or type of thread may be different. Such devices also work on the same principle.
When choosing a radiator cap, it is important to consider the following points:
- The materials of the radiator and plug must be combined.
- The thread of the plug must be of a certain type. For example, for installation on the left side of the battery, it is recommended to use a left-hand thread, and on the right side, install a radiator plug with a right-hand thread.
- The hole in the radiator can be closed with a blind or through plug.
- The device must have an aesthetic appearance and match the color of the heating device.
- The diameter of the threads in a cast iron battery at the inlet and outlet is of great importance; plugs can be used as transition elements.
Most often, the battery is equipped with the following devices:
- Pass-through plugs for radiators in the amount of 4 pieces.
- Brackets for installing the heating device and plastic anchors for installing the fasteners themselves. For a standard size radiator, 2 brackets and anchors are required.
- Mayevsky plug and tap. Sometimes the second element is replaced with another plug.
According to the principle of operation, plugs are divided into two types. In the first case, they simply block the path of the coolant, in other words, they act as a plug. The second type is an adapter from one diameter to another. In this case, the plug has an external thread on one side and an internal thread on the other.
What to do if the nipple is broken
In the case of homemade keys, haste, or applying too much force, you can break the nipple antennae. Then you can try to unscrew the next section of the radiator along with the one that cannot be removed, or use a hacksaw. You need to cut at the junction of two sections. Most likely, both sections will be damaged and you will no longer be able to connect them.
You can also saw the section with the broken nipple in half. Make another cut to leave a gap of about 5 cm between the halves. After this, using a pry bar or crowbar, rotate not the internal nipple, but the halves of the section itself, and thus get rid of the section with the broken nipple.
An extreme measure in analyzing problem areas of the radiator may be their destruction. You can use a sledgehammer for this. We recommend that you take your time and take each step gradually. Then you will successfully complete disassembly without resorting to extreme measures.
You can learn how to wash heating radiators at home without removing or dismantling them from the article at the link.
We suggest watching a video on the topic of disassembling the battery:
Preparatory work
In order to disassemble the cast iron body, it must first be removed from its mounting on the wall. The hooks on which the battery is suspended are removed, then you need to disassemble the taps or couplings with which the radiator is connected to the heating pipes.
The weight of one assembly of 8-10 sections can easily exceed a hundred kilograms, so the battery is lifted to its end and in small “steps” it is moved to the place where it is planned to repair the radiator or simply disassemble it.
If the cast iron battery is relatively new, then a platform with an impact-resistant coating will be sufficient, for example, a sheet of chipboard can be laid on the floor. To disassemble an old cast iron heater, you will need a place where you can work with a torch and a heavy crowbar.