Metal-plastic pipes for any purpose are characterized by durability and a high degree of reliability; therefore, repair of metal-plastic pipes is required only if the connection of the pipeline components was performed poorly.
Leak from pipe body
Repairing leaks near fittings
As a rule, leaks in metal-plastic pipes appear due to problems with connecting devices, namely fittings. To eliminate water leakage, sometimes it is enough to tighten the nut more tightly, since compression fittings tend to weaken the strength of the connection over time (frequency - once every 2-3 years).
The nuts need to be tightened periodically
If after this water continues to leak, you need to perform a thorough inspection of the system. To do this, drain the water from the pipeline and proceed according to the instructions:
- check the rubber sealing ring inserted between the fitting and the fitting body for damage;
- assess the degree of wear of the rubber gaskets on the fitting;
- inspect how smooth the pipe cut is.
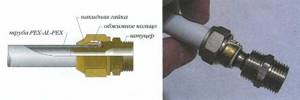
Layout of the ferrule ring in the fitting
After fixing the problem, reassemble the pipeline, treating the joints with silicone grease and wrapping the threads with sealing material (for example, FUM tape).
Eliminating leaks in pipelines installed using press fittings
When using brass press fittings to assemble metal-plastic pipelines, an adjustable wrench is required. Installation of this connection involves tightening the nuts with slight force to a certain point.
Sometimes the nuts are tightened too tightly, which leads to the formation of defects in the soft ring located inside the press fitting, and, as a result, leaks.
If this is exactly what happened to you, repairing metal-plastic pipes with your own hands is done as follows:
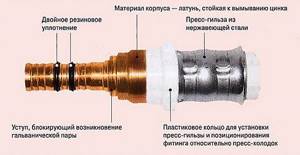
Press fitting diagram
- dismantle the leaking connection: unscrew the cap nut, remove the end of the pipe from the fitting;
- remove the old soft ring from the fitting using a hacksaw, sand the pipe cut with a fine-grained sanding mesh (you can use a regular wire sponge), put the new ring on the pipe;
- reassemble the connection; tighten the cap nut located on the body of the connecting device with a wrench, making one full turn;
- check the waterproofing of the joint - if the leak is not eliminated, tighten the nut another 1/4 turn with a wrench.
Installation methods
There are practically two installation methods:
- one-piece - by welding (soldering, push fittings);
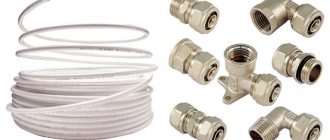
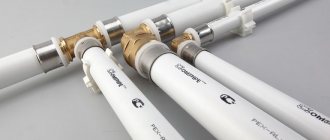
- detachable - connection using fittings (compression and press fittings - see photo).
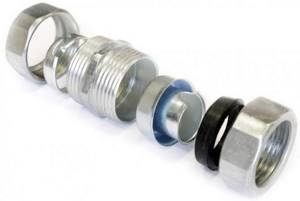
Which way is better
The reliability of the methods is approximately the same, but soldering fittings are cheaper. When pouring a “warm floor” system, welding or press fittings are used.
Not too long ago, push fittings appeared on the market. They are positioned as a means for quickly assembling plumbing systems with your own hands without the use of tools. The connection to the pipe is permanent, but not very reliable (the workpiece rotates in the fitting, which already raises doubts about reliability). Push fittings cannot be used for closed pipeline installations, and even when installing an open system, the question immediately arises: why make a permanent connection if you can use detachable compression couplings?
Push fittings are more expensive than conventional compression, press and welding ones.
The choice of pipe connection method is made mainly based on aesthetic considerations. For large systems (large houses or public buildings, underfloor heating systems), financial possibilities can also be important: soldering couplings cost pennies, compression and press fittings are much more expensive.
Causes and types of problems
The metal-plastic pipe is made of aluminum and protected by several layers of polyethylene inside and out, welds are made with a laser. This structure guarantees the strength of the product and resistance to corrosion. Therefore, if your metal-plastic pipes are leaking, this may be due to the following problems:
- When laying pipes, the installation technology was violated (for example, the bending radius was exceeded);
- during operation, a serious mechanical impact occurred, resulting in a violation of the integrity of the pipes;
- water leaks from poorly executed joints.
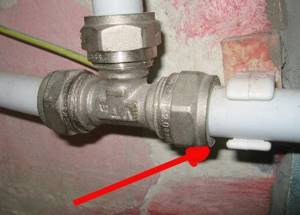
Most common leak location
Possible failure of the pipeline can be prevented even at the time of its installation. When laying metal-plastic pipes, bends are made using springs specially designed for this purpose. The maximum bending angle is 45, otherwise the pipe may burst during operation.
Expert advice
How to bend a metal-plastic pipe
There are many bending methods. Any of them gives a large bending radius and slightly reduces the strength of the pipe. It’s easier and more beautiful to cut and solder two pieces using a corner.
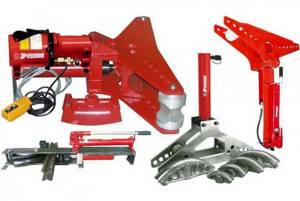
Ideal bends are obtained using a pipe bender or a Volnov machine.
How to attach to walls
Any store sells ready-made inexpensive fasteners for pipes of any running diameter - so-called clips, attached to the wall with dowels (6x40 for concrete walls, 6x60 for plastered brick or cinder block; gas and foam concrete). Clips can be double or single. You can also use homemade metal brackets (for those who like extra work).
The fasteners should be placed no further than 1 m from each other (even more often for hot water and heating).
Main types of pipe leaks
If moisture appears on the pipes, droplets of water form at the joints, or pressure drops sharply in the hidden pipeline system, then these are the first signs of a leak.
Finding leaks in metal-plastic pipes or any other types when the pipeline is open is not a problem. What to do if a leak occurs in a closed pipeline? You can find a leak using a special device - a thermal imager. In places where moisture accumulates, the thermal conductivity of the finishing material increases, which is immediately detected by the device.
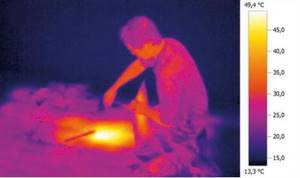
Leak detection using special equipment
So, a leak in a polypropylene pipe (plastic or metal-plastic pipe) can be located:
at the pipe connection. The reasons may be incorrect connection of pipes, a defective fitting, incorrect temperature conditions chosen when forming the joint, incorrectly selected adhesive composition, and so on;
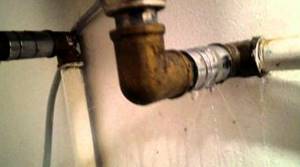
Leakage at the pipe connection
on a flat section of the pipeline. The causes of leakage may be water hammer caused by a pressure difference in the pipes, natural wear or mechanical damage.
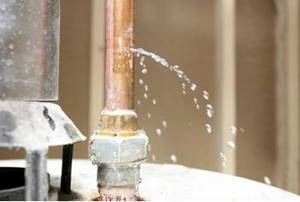
Break in a flat section of pipe
The method for repairing a leak depends on the location where the leak occurred.
Repair of damaged metal-plastic pipes
If the metal-plastic pipe itself fails, for example, if it ruptures, it is necessary to immediately replace the damaged part of the pipeline with a new one. Although if this is not possible, there are measures to temporarily eliminate the leak.
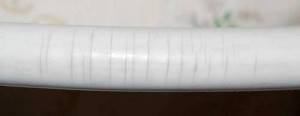
Damaged part of the pipe
Most often in this case a bandage is used. This is a very reliable and long-lasting method for repairing small cracks. In practice, pipes with bandages installed on them can be used for a long period, until the integrity is damaged in another place.
How to repair a metal-plastic pipe using a bandage is described below:
- prepare a bandage - you can buy it in a store or make it yourself (metal clamps with the required diameter are suitable for this);
- measure the required length of the bandage, allowing for allowances of 2 cm or more on both sides of the fault;
- Wrap the damage on the pipe with a piece of rubber 2-5 mm thick, apply the bandage itself on top, and secure firmly.
The bandage is indispensable for repairing not only cracks and fistulas in metal-plastic pipes, but also some other small damage. It is impossible to “patch” only long, extensive cracks with its help.
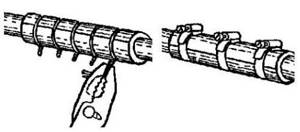
Scheme for creating a bandage
You can understand whether it is advisable to repair a metal-plastic pipe, or whether it is better to replace it, by assessing the size of the damage. If the damage (or fistula) is small, try cold welding. For this:
- drain the water from the pipeline and release it from pressure;
- dry the tear area, treat it with sandpaper;
- Use cold welding solution to seal the fistula.
The final drying of the weld occurs in about a day, after which the pipeline is ready for use. However, keep in mind that cold welding is not always suitable for repairs: it is destructively affected by high internal pressure in the system and temperature changes.
I would especially like to note that metal-plastic pipelines, with qualified installation using high-quality materials and with periodic measures to prevent leaks, serve for many years without causing problems for their owners.
Repair of pipe joints
First, let's look at how to eliminate a leak in a plastic pipe at the junction. The algorithm of actions should be as follows:
- First of all, it is necessary to shut off the flow of water into the pipe. If a plastic pipe, which is part of the wiring in the apartment, is leaking, then it is enough to turn off the tap located next to the water meters. If a leak has formed on a common building riser, then it is necessary to shut off the water in the basement. To do this, you can call the plumber on duty from the organization serving the house or use the key kept by the person in charge of the house;
- if the fitting is secured with a threaded connection, then you can try to simply tighten the thread with a wrench or adjustable wrench;
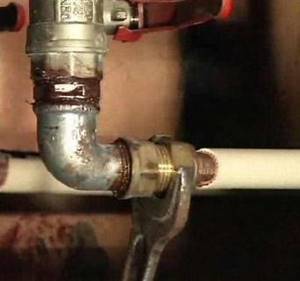
Fixing the fitting with a wrench
- if tightening the connection does not help, then the insulating layer must be replaced. Most often, linen thread or FUM tape is used for insulation;
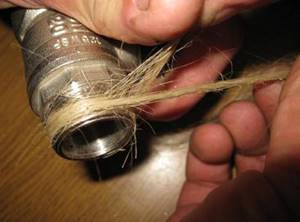
Insulating the connection with flax thread
- If after carrying out the described operations it was not possible to eliminate the fitting leak, then a complete replacement of the connecting element will be required.
Replacing the fitting
If the connection of metal-plastic pipes is leaking and the fitting needs to be replaced, then you need to prepare:
- pipe cutting scissors;
- thread cutting tools;
- seal;
- wrench;
- new fitting.
The replacement process occurs according to the following scheme:
- Use scissors to carefully remove the old connecting element;
- threads are cut in sections of the pipe;
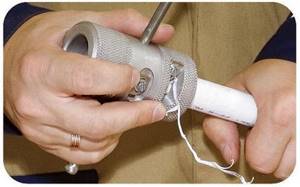
Arrangement of threads on a pipe
The size of the thread being cut must correspond to a similar parameter available on the connecting element.
- the joints are sealed with the selected insulating material;
- a new fitting is fixed.
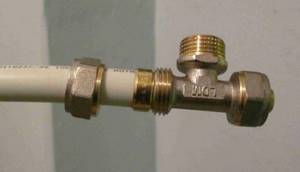
Fixing the new connecting element
Instead of threaded fittings, you can use compression connecting elements or elements installed by welding, but in this case the resulting joint will be permanent.
How to repair a broken heating riser
The incident that happened to me has probably already happened somewhere, sometime. In the light of modern redevelopment and European-quality renovations, there is a very high probability of ending up like I did. But first things first. I was once engaged in the improvement of an electrical panel on one order. I work quietly, peacefully, and don’t bother anyone. A customer comes up to me and asks me to screw on a curtain rod in a free minute. There is no question why not help good people. Children's room. Window. There are cornices hanging. We decided to replace them with new ones. There is a central heating radiator under the window. The riser is hidden in the wall and where it goes is unknown. I warn you right away that I will be installing the fasteners for the new cornices in the old places. I drill and screw the first one, to the right of the window. Everything is going great, there are no signs of trouble.
I mark the holes for the second one. The old curtain rods were attached with one screw, the new ones are attached with three.
The bottom hole is old, the top is new. It seems like he just started drilling, but at some point the drill falls through and a whistling and hissing sound is heard. I jump to the side. Nothing is clear, there is no water, the hissing has stopped. Well, where did I end up? The radiators are cold, the risers shouldn’t be empty, it’s been a couple of days since they stopped heating. I go out to the entrance to smoke, and there the housing department workers are unloading the tools. I ask what happened. It turns out that the heating pad in their basement burst. In the morning, the heating was drained from the house, and the pipe will be replaced for two days. That's why my air whistled. We need to open the riser and see what happened there. Carefully cutting out the freshly painted wallpaper. I'm crushing the wall. Sniper, damn it!
I wonder how the old cornice was screwed on. The hole was drilled to the exact length of the dowel. The screw was screwed in so that its tip rested against the pipe. In the photo this place is marked with a circle.
Even if I hadn’t drilled anything, but simply decided to put a more powerful screw five millimeters longer into the old hole, it would have been a total mess. What can I say about installing a metal-plastic pipe for heating? A person who knows doesn’t need to say anything, and a person who doesn’t know has no need to meddle where he shouldn’t. There is a golden rule: the design of the house includes a steel pipe, so be kind enough to use a steel pipe and change it. I understand that plastic is cheaper and faster, but not to such perversion as in the photo. Well, you can't plaster a threaded fitting! All nuts must be visible and serviceable.
Causes of accidents in non-pressure polypropylene pipelines
The pressure in non-pressure systems is equal to atmospheric pressure. The capacity of such lines is calculated in advance. In addition, the installation of joints in non-pressure systems is carried out using socket technology, with the contact point sealed with a conventional rubber seal. That is, in this case, there is no need to worry about excessive internal pressure or errors in pipeline assembly.
As a result, only a “third force”, malicious or accidental, can damage a polypropylene pipe in such a system.
Moreover, such an impact may look like an attempt to dump a highly active chemical into the system, or as operation of a system with a deliberate violation of the temperature regime, or as trivial mechanical damage.
However, theoretically, another cause of such accidents could be manufacturing defects that went undetected in the technical control departments of the polypropylene pipe manufacturer. However, such defects in polypropylene pipelines are not common. The production process of such products is controlled quite carefully. Therefore, such a “reason” can be neglected.
Causes of accidents in polypropylene pressure pipelines
Construction standards that regulate the laying of polypropylene pipelines allow the use of such structures not only in free-flow lines, but also in pressure systems.
After all, the pressure pipeline is mounted on a fairly strong welded joint that is not forgiving of technological errors. Misalignment of the pipe in the coupling, errors in the soldering process, breakdown of the welding machine - this is just a short list of the causes of accidents at joints. Moreover, most of the accidents of pressure pipelines are provoked precisely by “connecting” reasons. Therefore, we will begin our analysis of methods for eliminating leaks and breaks in pipes by studying ways to deal with poor-quality joints.
Repair of a flat pipeline section
If a metal-plastic pipe (plastic, polypropylene, etc.) is leaking on a flat area, then you can eliminate the leak using one of the following methods:
use a clamp clamp. This is a special device equipped with a rubber gasket that allows you to achieve a tight connection. The main advantage of the clamp is the speed of eliminating leaks, and the main disadvantage is the fragility of the resulting connection;
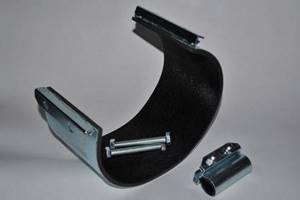
Device for temporarily eliminating pipe leaks
use adhesive tape. A special tape is a cheaper analogue of a clamping clamp. Using the tape is quite simple. It is necessary to wrap the leak area in several layers. The resulting connection will also be very short-lived;
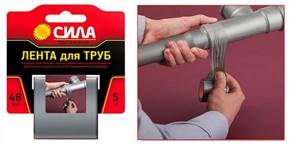
Quick Leak Tape
- cold welding;
- adhesive bandage.
Application of cold welding
Cold welding mixtures help to quickly and efficiently eliminate pipe leaks in the shortest possible period of time. To fix a leak, you must:
- shut off the flow of water into the pipeline;
- Carefully clean the leak area and completely dry the remaining water;
Preparing the pipe for cold welding
- cut off a small piece of the special composition and knead with your fingers until a homogeneous mixture is obtained;
Kneading the composition until smooth
- Apply the mixture to the crack in the pipe in an even layer and allow the material used to completely harden. On average, it takes 3 – 4 hours to harden.
Leveling the composition on the pipe
The work needs to be done as quickly as possible, since when it comes into contact with air, the composition is polymerized in a short time.
The technology for using cold welding in various situations is presented in the video.
How to Seal a Hole with Sealing Tape
Using this modern material, you can efficiently eliminate small leaks in pipes located in bathrooms. Externally, it is an adhesive fabric impregnated with special substances. Most often, joints and connecting elements are sealed with sealing tape. As for straight sections, they can also be repaired using this method.
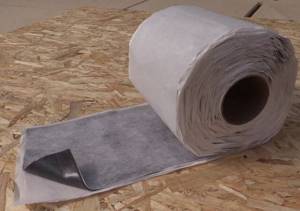
When using sealing tape, it is important to follow the following sequence of work:
- The damaged area must be thoroughly cleaned and dried.
- After stretching a small piece of tape, it is wrapped around the pipe. It is important that this procedure is accompanied by constant tension in the tape, otherwise folds will appear.
- When winding, each new turn should be laid on half of the previous one. It is best to pack the pipe with two layers of sealing tape.
The main disadvantage of this method is the insufficient resistance of the repair material to sunlight. To achieve a good service life, the wound tape is coated with additional protection.
