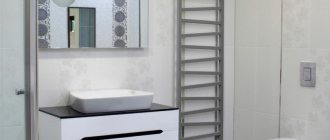
Classification of heated towel rails
Dryers are divided into different groups according to type, size, installation method and material.
By type of coolant connection
The type of connection also determines three types of heated towel rails, and the type of connection plays one of the key roles when choosing a specific model.
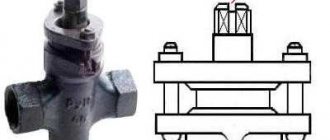
Water heated towel rail. Connects to the hot heating system. Heating occurs during the passage of a heated working environment
It is important to choose a model made of material that is resistant to aggressive water. During operation, there may be a risk of destruction of the structure of the internal walls, so the level of rigidity is an important factor when choosing
Made from stainless steel with a chrome finish, this is an excellent option that will last for many years.
Electric heated towel rail. Does not depend on central heating. Requires an outlet at the installation site. Allows you to use yourself when necessary. There is a function for self-regulation of temperature data. Characterized by increased energy consumption.
Combined heated towel rail. The most practical scheme for installation at home. You choose the connection type that is convenient for you. Alternating the heating method is optimal in different seasons of the year. So, you save money on utility bills. The cost of this modification is an order of magnitude more expensive than the above analogues.
Divided by size format
This variety is more of a design definition than an actual characteristic; it all depends, trivially, on the ratio of height and width.
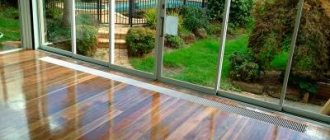
- Horizontal heated towel rail. Combines the features of a dryer and radiator for heating. Installed as a window sill option. Will fit into any design. Does not take up a large area during installation.
- Vertical heated towel rail. It takes up an order of magnitude more space to be placed on the wall. Provides a large usable drying area. Available in exclusive shapes that will make your home decor stand out.
Type
There are 3 types:
- Mermen. Powered by hot water. The advantages include durability, strength, no additional maintenance costs, and low cost. There are no maintenance requirements; replacement is required primarily not due to breakdown, but for aesthetic reasons. The disadvantage is the dependence on hot water supply or heating (to which the dryer is connected). Some devices only work in winter, when the apartment is heated. Others become cold when there is no movement of hot water through the pipes.
- Electric ones are connected to the network for continuous operation. Their disadvantage is expensive maintenance. They are easier to install than water ones, because you don’t need to drill the walls, connect to the water supply, or use additional fittings.
- Combined ones combine the characteristics of both types. These heated towel rails are connected to both a hot water source and an electrical outlet. The ability to change modes allows you to always maintain a comfortable room temperature.
By material
Dryers are made from different materials:
- Stainless steel will withstand high pressure. The walls of the pipe must be at least 3 mm thick.
- Steel is a cheap material. Dryers made from it are no longer sold, but most old houses have them installed.
- Copper is resistant to corrosion and conducts heat well. Such a product will not be heavy and looks good in appearance. Check that the pipe is galvanized on the inside for greater protection against water. The disadvantage of this option is the expensive price.
- Brass has the same “advantages” as copper. Products made from it are cheaper. The "disadvantage" is fragility. You should only buy dryers with chrome-plated inner walls.
Other non-ferrous metals and alloys (for example bronze) can also be used. Such products are rarely used due to their high cost.
Non-ferrous metals are often used to create designer dryers of non-standard shapes and colors.
Decorative screen
If radiators look unaesthetic, violate symmetry, or interfere with the intended composition, decorative grilles come to the rescue.
It is better, of course, that it is not a cheap screen cover from a store, but a box made according to individual parameters in accordance with the features of a particular interior. By “juggling” sizes and colors, you can achieve the best result: create symmetry, balance an area, veil a structure or, conversely, make it a focal point.
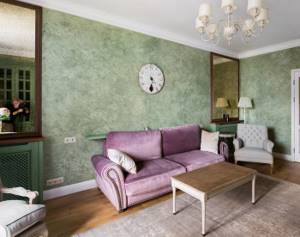
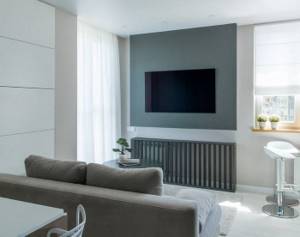
For example, here we created symmetry using the screen. The decorative box turned into an element of the TV wall.
If you independently determine the design of the structure, it will best suit the interior. You can make it classic or modern-minimalist, give it industrial style features or endow it with some ethnic motifs. In general, the screen can be very successfully integrated into the interior - so that it looks not like a necessary measure, but like a carefully selected part of the decor.
Decoupage application process
Despite the fact that decorating heating radiators with napkins is not a complicated process, to obtain the desired result it is necessary to adhere to a certain order of work.
Radiator surface preparation
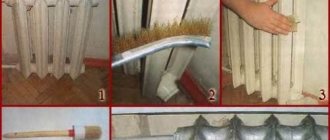
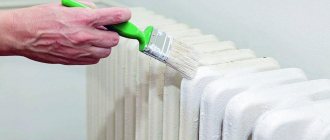
First of all, you need to thoroughly wash the battery using detergents. It should be noted that there are many hard-to-reach places on radiators, so it is recommended to use a brush with a long handle or a brush to remove as much dirt as possible. Then let the surface dry or wipe dry with a cloth.
Next, you should give the surface perfect smoothness. To do this, you need to take sandpaper and clean out all the bulges and irregularities, as well as remove pieces of peeling paint. It is better to use coarse sandpaper to remove deep unevenness, and then sand the surface with a sheet of fine-grain sandpaper. After this, rinse the battery again.
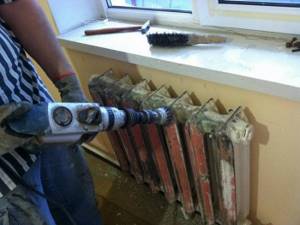
The final stage of surface preparation is the application of heat-resistant white or light-colored enamel. The paint must dry completely, for this it must be left for a day.
Applying decoupage
After the surface of the battery is ready, it is necessary to prepare fragments of the pattern for decoupage. There are several methods for drawing. For example, you can cut out strips of napkins with designs. To do this, first measure the width of the radiator fin and line the napkin into strips of the appropriate size, then cut it out.
You can do it differently: take a napkin with a pattern and tear off the edges so that only a fragment of the pattern remains. This method will allow you to mask the edges of the transition when composing the composition, and will also provide a more reliable adhesion of the fragments to each other.
Next, you should try the drawing on the battery and evaluate how well it matches the drawn sketch.
Currently, there is a huge range of adhesive compositions for decoupage of various surfaces, but in order to save money, it is better to use PVC glue, especially since its properties are in no way inferior to other means. PVC glue should be diluted with water in proportions 1:1.
Place a fragment of the pattern on the battery and, starting from the middle, apply glue, evenly distributing it in the direction from the center to the edges. Movements should be smooth so as not to damage the napkin. If there are gaps between the drawings, they can be painted over with light enamel. To give the decoupage strength after the glue has completely dried, it is necessary to apply heat-resistant varnish in two layers.
If some fragments did not turn out the way you would like, then don’t be upset. An unsuccessfully applied napkin can be painted over with white enamel, wait until it dries, and try again.
Ideas for decoupage can be seen in the video:
Decoration of radiators and heating pipes in different rooms
In the bathroom, the problem of masking pipes and radiators can be solved in two ways:
- hide these elements inside cabinets and other pieces of furniture;
- cover the heating elements with a screen or box.
In the first case, decorative pieces of furniture, in addition to their aesthetic function, can serve as a place to store hygiene items and bath towels.
For the second option, gratings made of plastic, MDF, HDF, glass screens are suitable
In any case, it is important to use materials that are resistant to moisture.
There are several ways to close the battery in the kitchen, but priority will be given to options that allow you to make the most of the protective structures.
Firstly, you can expand the window sill, which could serve as a countertop. In this case, it is recommended to cover the radiator itself with a metal screen.
Secondly, you can make a decorative side table from a material that is resistant to high temperatures
With this solution, it is important to ensure free air circulation from above and below
A fairly functional device that can be used to cover a kitchen radiator is a hanging screen.
When cleaning or repairing, it can be easily removed, providing full access to the heating device.
When installed, it has an attractive appearance, adding stylistic advantages to the kitchen space.
A flat screen mounted on a stand or attached with self-tapping screws to a window sill will hide the radiator and add aesthetic appeal to the kitchen design.
Video:
https://youtube.com/watch?v=KhyRk9GOGhk
Today's market offers a wide variety of such products in different styles.
Using the box, you can make a kitchen radiator in the room into a small table or even a bench. Based on it, you can make a frame for a decorative screen in the form of a fireplace.
Thus, the appearance, shape and functionality of devices that hide the battery in the room depend on the imagination of the homeowners.
The main thing is to adhere to technological feasibility when creating an aesthetically attractive design.
Selection of materials
A false fireplace can be made from a variety of materials. The best ones for this are:
- plasterboard sheets;
- plywood;
- wooden slats.
For the external design of the portal, you can use both thin boards and moldings. In the second case, a false fireplace will be cheaper, and besides, polypropylene decor is simple, reliable, durable and affordable. Stucco molding is suitable as an additional decor. It will help create an imitation of antique columns or luxurious plaster patterns.
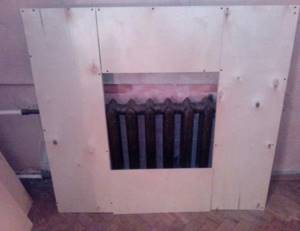
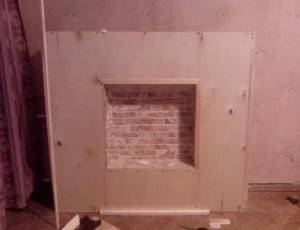
For an effective decorative finish, it is recommended to use artificial stone, and you can use epoxy products, since they are much lighter, which will help reduce the weight of the screen structure as a whole. In addition, artificial stone helps to create an imitation of real brickwork.
Sealing pipes using a special box
This method can be successfully used when repairing existing communications. The first thing you need to do is decide on the material of the box. The box is usually made from the following materials:
- drywall;
- wood;
- special profile;
- plastic;
- metal
Installation of plasterboard box for heating pipes and wooden box
The cheapest way is to cover the heating pipes with plasterboard. This material is easy to process, and with its help you can make a frame of almost any shape. Having installed such a box, all that remains is to finish it. All modern finishing materials for interior decoration are suitable for this - wallpaper, tiles, lining, stucco, etc.
Such a box can become a decoration for any room; with its help it is easy to create a unique design. It is suitable not only for hiding pipes, but also for creating niches for batteries (radiators). To service pipes and batteries, special hatches can be provided in such a box, allowing them to be serviced during repairs.
When making a frame from plasterboard, the following operations are carried out:
- using a pencil, ruler, level and plumb line, mark the contours of the proposed frame;
- a guide metal profile is installed along the drawn lines; it is secured with dowels or shock-absorbing tape;
- then the rack elements are inserted into the profile; The profiles are fastened to each other using metal screws;
- the frame thus obtained is sheathed with plasterboard; to attach it to the frame, screws are used, the heads of which are inserted into the body of the drywall no deeper than 1 mm;
- seal the attachment points and seams with putty;
- external and internal corners are reinforced with a corner metal profile;
- prime the finished structure and, if necessary, putty;
- Next, the finishing of the box is carried out.
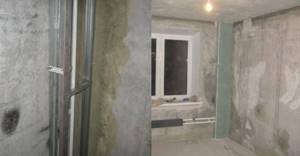
Making a plasterboard box to cover heating pipes
The box can also be made of wood. This will help solve the question of how to hide the pipes if drywall is not available at a particular moment, but decent wooden boards are available. The use of wood to decorate the box will be especially important if the room itself is decorated with wood. This will help maintain its original appearance.
To seal pipes, you can also use other wood-based materials, such as MDF, chipboard, especially with a laminate coating.
Installation of a plastic box for heating pipes
Plastic boxes for heating pipes are also very relevant, especially when it comes to how to seal a heating pipe in the bathroom, hallway, kitchen and other utility rooms.
The procedure for making a plastic box is as follows:
- we mark the frame of the future box; We use a pencil, level, ruler;
- We assemble the frame of the box from metal profiles (similar to the frame for sheathing with plasterboard);
- cut out plastic parts with a hacksaw;
- Using self-tapping screws, special staples or ordinary small nails, we fasten the prepared parts to the frame;
- We cover the joints of plastic elements and their contact with the walls with special decorative corners, starting and finishing elements, as when installing plastic lining.
You can also use metal boxes. They are made of stainless or chrome steel. These are very durable boxes
In addition, metal gives off heat well, which is important for heating rooms. Such metal boxes are most often made when decorating a room in a high-tech style
Algorithm of actions when creating a box to hide the battery
There are two ways in which you can disguise a heating battery behind a plasterboard structure: cover the radiator with a decorative wall made of plasterboard or build a regular plasterboard box around the radiator. Which method should I use? It all depends on the layout of the apartment and the location of heating communications in the room.
The construction of a box is advisable if the radiator is located on the wall. You can do this with your own hands from plasterboard quite quickly. This method is more preferable, since only the battery is masked, and the usable area does not suffer.
The dimensions of the box will depend on the battery that needs to be hidden
It is important to consider that the edges of the box will be approximately 15 cm further from the battery, on all sides
Whether the box will be floating or standing on the floor depends on the interior of the apartment and the designer’s decision. Once a decision has been made on the design of the box, surface preparation and marking should begin.
How to markup
Before hiding the battery, it is advisable to remove the old coating from it and paint it again, because after the plasterboard structure is built, this will become impossible. Meanwhile, the paint will protect the battery from corrosion and will not allow it to deteriorate ahead of time. After the coating has completely dried, the first stage of work begins - marking.
In order to make markup you will need the following tool:
- square ruler;
- roulette;
- pencil, thick felt-tip pen;
- building level.
When making markings, it is advisable to record dimensions to the nearest centimeter. Millimeters should be avoided except in cases where a project is being implemented that requires precise millimeter measurements when creating the structure.
Before you get started, you need to decide on the choice of battery termination option:
- An easier and faster way is a box. It is built around the battery, exceeding its dimensions by only 12-20 cm on each side;
- a more labor-intensive and expensive method is to build an entire plasterboard wall in front of the battery. Because batteries are most often located next to the window, then it becomes necessary to make slopes as well.
When making markings, you must remember that the window sill must protrude beyond the radiator by at least 3 cm. If it is so narrow that fulfilling this requirement becomes impossible, then it should be removed and another one installed. The old window sill is dismantled, a new one is cut out in accordance with the required parameters and inserted at the bottom of the window frame. Next, using a level, it is leveled with choppers. After this, the empty space between it and the base is filled with foam. In order to achieve the strongest possible fixation, place a load on the windowsill. After three hours, the foam will harden enough to continue the construction of the plasterboard structure.
Removing the heating battery
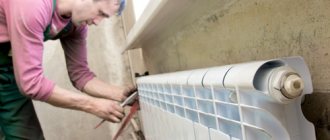
The first thing to do is remove the heating battery. Although a jumper (bypass) is installed in front of it, and by turning off the taps, you can dismantle it yourself, you still need to take one point into account. If the heating in the apartment is not turned on, then you can remove it yourself, but if the heating has already been turned on, then who knows what condition your ball valves that shut off the radiator are in. What if they become thinner over time? In this case, removing it yourself can turn into a big disaster for both you and your neighbors, and it would be better to call a professional.
It is necessary to prepare the site for future repairs, purchase the necessary materials and tools. Plus, call a technician to remove the battery and don’t forget to include time for the technician’s work itself. We plan for 1 day for everything.
After the wizard’s work, we will see the following possible picture:
How to hide a battery in a room
We've sorted out the technical requirements, now the design issues begin.
First of all, you need to pay attention to the color. Often on a colored wall there is a white radiator like an eyesore
A white radiator looks harmonious on a white or very light wall. If this is a modern model, then there is no need to hide anything. They simply blend into the background. They simply don't exist.
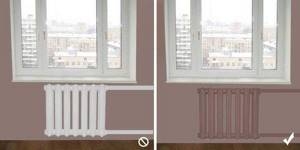
A white radiator only looks good on a white or very light wall. On the rest it needs to be painted to match the wall
If the color of your walls is far from white, but the walls are plain, everything is solved simply. Select heat-resistant paint that is similar in color. If you hit the right tone, it’s perfect; if not, that’s okay too. A difference of two or three tones in one direction or the other does not matter. Here are some examples in the photo.

If you choose the right color, then there are simply no radiators in the interior (click on the picture to enlarge its size)
What to do if there is a drawing on the walls. Nowadays, if they glue wallpaper with ornaments, it’s usually on one wall, or at most two. The rest are covered with plain or almost plain wallpaper with different textures. Then you can stick strips of one or another wallpaper onto the radiator plates. Which ones you need to look at, as they say, “on the spot.” Cutting out the strips is not difficult; you can lightly bait one first and then the other. And in this way, empirically, determine what will look more harmonious.
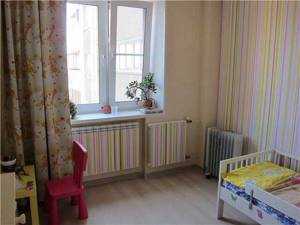
It turned out very harmoniously to wallpaper the radiators
The most correct way from a design point of view is to recess the radiator in a niche, and then cover this niche with a screen. But it must be from wall to wall, and the same color.
If the depth of the resulting niche and the level of illumination of the room allows, you can make a table out of it. In this case, you can generally use a fabric screen for the radiator.
How to hide a heating radiator (click on the picture to enlarge its size)
Another way to hide the battery is to cover it with some kind of functional structure. Naturally, it should be lattice. For example, give the screen the appearance of a chest of drawers, attach shelves to the side, as in these photos.
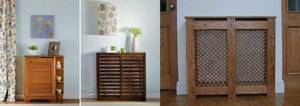
One option is to make the radiator screen look like a piece of furniture (click on the picture to enlarge its size)
One option is to make a closet that reaches the height of the window sill across the entire width of the room. One part of it will cover the radiator - the second will actually serve for storing things.
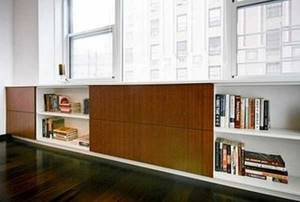
Such a cabinet, up to the window sill, will disguise the heating radiator and will serve for storing things
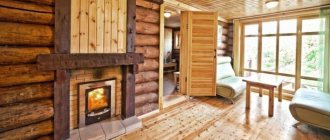
A more difficult method to implement correctly is to decorate the radiator under the fireplace
It is important not to overdo it with details. For example, here is a screen in the form of a fireplace
This structure is assembled from sheets of plywood, then covered with film.
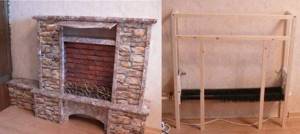
How to decorate a radiator under a fireplace with your own hands (click on the picture to enlarge its size)
The middle part is simply an attached piece of paper with the appropriate coloring. Looks great in the photo.
How to decorate a radiator under a fireplace with your own hands (click on the picture to enlarge its size)
The most common way to decorate radiators standing along one of the walls is an attached screen. It can be made of wood or MDF. But he looks ridiculous alone. More details are needed that will justify its location in this particular place. Here are some ideas that might be helpful to you.
Just placing the screen near the wall is the same as writing: “here we hide the radiator” (click on the picture to enlarge its size)
Screens are also used to decorate heating devices under window sills. But covering only part of the wall is the same as writing in large letters “we are hiding the radiator.” And the main task is to hide it, and not stick it out. What is the difference can be seen in the photo.
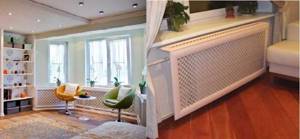
If the screen is from wall to wall, or the entire width of the window, it will not attract attention (click on the picture to enlarge its size)
Recent trends do not exclude the use of screens. This is still the most affordable way to hide your battery. The main idea when decorating radiators is that everything should be logical. If the screen is either the entire width of the window, or, if necessary and possible, then from wall to wall. Color and stylistic solutions have changed. If frames are needed, they should match the mesh. You can create contrasting or eye-catching frames when the room has the same color and style frames on other objects.
In some cases, the decorative grille may not match the tone of the walls, but the tone of the window frame and window sill. But here the style must also match.
Types and forms
In addition to different materials, radiator grilles come in different designs. All this together creates a huge number of options.
- Flat screens. Most often used if the radiator is installed in a niche. In this case, the flat panel is attached to bars fixed around the perimeter of the niche. In addition, glass screens for batteries also have this shape, but are attached to special pins embedded in the wall. This type of decorative grille for heating radiators is also called “facades”.
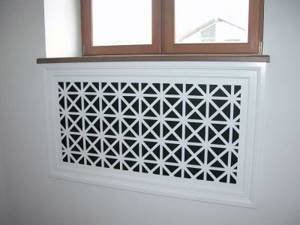
Flat screens are installed if the radiator is hidden in a niche - Hanging screens. There are two types: With a top cover. They are usually used on accordion-type batteries if the radiator protrudes beyond the window sill. The shape of the cover is made so that the grille holds onto the radiator without any problems.
- Without cover. Clings to the upper battery collector using hooks that are attached to the front panel.
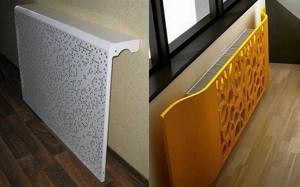
Hanging grilles
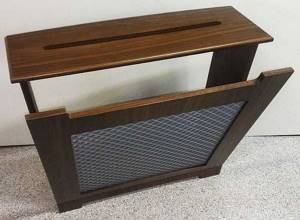
Attached grille-box for radiator
These are only the main types of screens and grilles covering heating radiators. Fantasy is limitless, there are very interesting models, but they are most often made by craftsmen with their own hands.
Homemade screen - an original idea
Price often plays an important role when choosing a screen for a radiator. The range of prices in this segment is more than significant - from 230 rubles for a metal hinged screen, to 8,000 rubles for a glass one. Some prices are shown in the table.
| Radiator grille material | View of the grille on the heating radiator | Dimensions (height*width*depth) | Price | Color |
| Sheet metal, thickness 0.7-0.8 mm | Hinged screen for a cast iron battery | 27 cm * 29 cm * 15 cm | 230 rub. | White |
| Sheet metal, thickness 0.7-0.8 mm | Hinged screen for steel radiator | 44 cm * 39 cm * 15 cm | 250 rub. | White |
| Sheet metal, thickness 0.7-0.8 mm | Hinged screen for a cast iron battery | 61 cm * 49 cm * 15 cm | 280 rub. | White |
| Sheet metal, thickness 0.7-0.8 mm | Hinged screen for steel radiator | 53 cm * 49 cm * 10 cm | 350 rub. | Beige |
| MDF | Facade (flat screen) | from 1500 rub | 7 shades of lamination | |
| MDF | Box | from 2300 rub | 7 shades of lamination | |
| Glass | Screen | from 8000 rub | matte, no pattern | |
| Powder coated metal | Wall mounted with one side | 60 cm * 40 cm * 15 cm | 1790 RUR | colors upon request |
| Powder coated metal | Wall mounted with one side | 70 cm * 60 cm * 15 cm | 2050 rub. | colors upon request |
| Powder coated metal | Wall mounted with two walls | 60 cm * 40 cm * 15 cm | 2340 rub. | colors upon request |
| Powder coated metal | Wall mounted with two walls | 70 cm * 60 cm * 15 cm | 2600 rub. | colors upon request |
| Natural wood | Pristavnoy | from 6200 rub |
Battery near the wall: what to do with it?
Let's start with the important things. Maybe this will even be news to some
In general, the fact is that nowadays it is not customary to be shy about radiators. In many modern design projects, batteries are displayed in prominent places. Often they are even emphasized. They are turned into a decorative object or a style-forming element.

So if this is unimportant, if the battery is located in a corner and does not bother anyone, you can simply buy a new beautiful radiator and not try to disguise it.
The second thing I would like to remind you of. Do not close the radiator tightly. It must perform its main function - heating. If you hide the battery in a cabinet behind solid doors, its heating efficiency will significantly decrease. It is necessary to leave at least the top and bottom of the structure or the entire facade free for air movement (by making it perforated).
Well, now to other solutions.
Method 2. Box cover
An existing heating system can be hidden by installing a box structure.
Suitable materials
- drywall;
- plastic,
- wood panels.
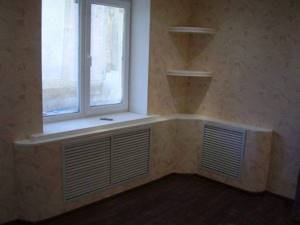
You can see what a heating system mounted under drywall looks like in the photo:
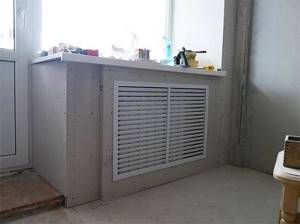
Required tools:
- metal profiles or wood blocks;
- sheathing material;
- drill;
- cutter;
- screwdriver;
- scissors for cutting metal profiles;
- screws, dowels;
- sharp knife;
- roulette;
- level.
Work order
- Markings are drawn around the heating structures, taking into account their distance to the walls of the box, the width of the profile or wooden beam, as well as the width of the cladding material. The distance between the box and the pipe should be 3 cm.
- The frame for the box is assembled from metal profiles or wood blocks. Rack profiles are attached to the walls, the profile elements are mounted with self-tapping screws. To equip the profile with each other, a cutter is used. For racks with a height of more than 1.5 m, horizontal jumpers are installed.
- Sheathing the frame for plasterboard is done with material with chamfers removed from the sheet. If the finished box is planned to be faced with ceramic tiles, there is no need to remove the chamfers. It is better to cut the material with a minimum number of joints.
- The box elements are attached first to the side, then in the center. Strengthen the drywall with a corner profile.
- You can equip the front part of the box with stained glass with lighting installed inside.
- For the convenience of future maintenance of the system, the corresponding areas can be equipped with removable panels or equipped with doors.
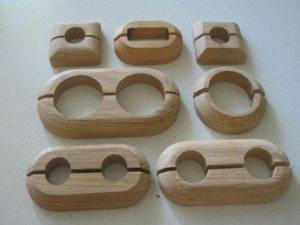
To cover heating structures you can also:
- mount the false wall according to a principle similar to assembling a plasterboard box. It should be remembered that this action will reduce the area of the room;
- install a ready-made box with a perforated surface through which heat will flow into the room;
- hide pipes protruding above the floor or walls under the baseboard.
Ease of maintenance
The role of the coolant in centralized heating systems is usually played by process water containing a sufficient amount of impurities. Having passed through the heating mains, the elevator unit, pipes and risers, the coolant becomes even dirtier by the time it gets inside the battery. As a rule, most of the suspended matter settles safely inside the radiators.
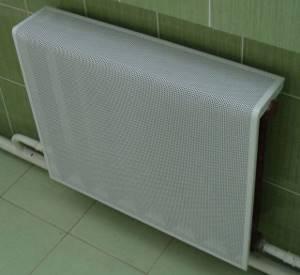
Due to gradual silting, heating appliances require regular flushing (every few years). For this purpose, radiators are equipped with a special flush tap. It is installed on the lower corner, on the opposite side of the supply pipe, which assumes free access to the battery. Otherwise, you either have to get used to the gradual decrease in heating efficiency, or disassemble the decorative box or screen each time before washing.
Do you need a heating radiator for your bathroom?
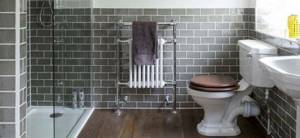
It would seem that the question is rhetorical, of course, necessary. Nowadays, when every second citizen has a higher education, there is no need to explain that the bathroom is classified as a room with a high level of humidity. Therefore, you need a heating device that can not only function flawlessly in such conditions, but is also capable of creating comfortable conditions in the bathroom.
We will still remind you of the tasks that a heating radiator in a bathroom successfully copes with:
- Heating the room.
- Speeding up the drying process.
- Preventing mold and mildew.
- Comfortable microclimate when carrying out hygiene procedures in the cold season.
In standard bathrooms, in addition to a heated towel rail, three or four additional sections of heating radiators are usually installed. This applies to almost the entire territory of Russia, except, of course, the southern regions, where winters are quite mild.
If the bathroom is insulated and equipped with a heated floor system, then installing a radiator in the bathroom may not be necessary. In the case of low floor heating power or its complete absence, it makes sense to install not only radiators, but also a heated towel rail. The latter is usually connected to hot water pipes (if there is one), or another option is an electric “towel”. In general, there are a lot of modifications, the decision is yours, and we will consider the question of the need for heating closed.
Making a reading place above the radiator by the window
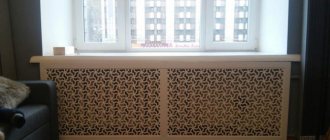
To disguise an unsightly heating radiator, a reading bench is made. It will be a stylish detail in the bedroom. The best option for decorating the battery is to install a special neat grille directly under the window. Thus, the heating element will not be visible at all: instead there will be a neat decorative grille.
The advantage of this design solution is both aesthetic and practical: thanks to the battery under the window sill, you don’t have to worry about a cold seat in winter. The radiator will warm up the place to relax, so you can comfortably spend time with a book in your hands. The grille is selected to match the overall color scheme of the interior. White color will look best.
Repairing radiator breakdowns
When discussing how to hide a radiator, it is important to keep one more point in mind: any system fails sooner or later. Moreover, if we are talking about old, worn-out batteries, which they usually try to hide under additional decorative structures.
List of potential faults:
- Pipeline leakage at threaded connections in front of the battery. Here their thickness is inferior to the straight sections of the riser, so leaks occur most often.
- Leaking along a factory weld. This sometimes happens with risers welded from electric-welded pipes.
- Radiator locknut leaking. A fairly common situation when using cast iron heating appliances.
- Leaks between battery sections (usually at the beginning of the heating season). The service life of paronite gaskets is designed for several years, after which the joints lose their tightness.
Decorative lattice - master class
To make a screen for a niche radiator design, you need to take several steps:
- Making a template in the form of a design you like from waste plywood.
- Going through the template with a jigsaw.
- It needs to be processed with a milling cutter. It is important to achieve ideal transitions between the details of the ornament.
- To close the niche with the battery you need to prepare several templates. Depending on the width of the niche, you should choose your number of fragments.
- They need to be sanded and coated with special enamel. It is important to make special holes for fastening.
- After the enamel has completely dried, the parts are sanded and painted with the required shade of paint.
- The parts are secured using fasteners.
Examples in the interior
Decorating or hiding radiators in a room beautifully so that they are not a “fly in the ointment” and do not spoil the entire appearance of the room is not such a difficult task. Modern materials make it possible to solve this issue at minimal cost.
Vertical, horizontal, sectional, copper, cast iron - the modern market offers a wide variety of radiators for every taste.
A battery with a bright, cheerful color, for example, yellow, will look good in a children's room - it has a positive effect on the nervous system and emotional state of a person.
New models, unusual for the eyes - vertical radiators. They are located vertically on the wall and can occupy the entire height from floor to ceiling. This element looks quite stylish and does an excellent job of maintaining a comfortable temperature in the room.
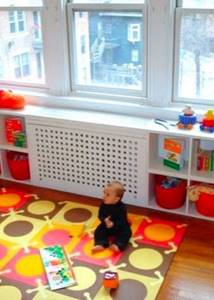
In the bathroom you can place a wide radiator of small height (resembling a bench). It will be able to perform not only its direct task, but will also serve as a clothes dryer or towel dryer. By the way, the dryer can be connected to a battery - you get an interesting combination, again performing several functions. Efficient use of space and objects never hurts.
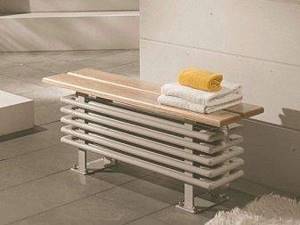
An interesting finish - with the help of chrome - brings to the interior some note of freedom, emancipation, inherent in bikers. These are the ones that come to mind when looking at these sparkling structures.
Designer radiators will also decorate any interior. Unusual designs, shapes, when looking at which you don’t immediately understand that this is an element of the heating system, they become a bright accent, like a picture on the wall. Such batteries should not be hidden; on the contrary, they are put on public display, emphasized with a contrasting background, placed in the center of the wall without any addition, so that nothing distracts attention from the unusual object.

Copper radiators - both vertical and horizontal - can also serve as an effective room decor.
Their design is not complicated, but they have such advantages as:
- High heat dissipation.
- Attractive color.
- Ease.
Pleasant to the eye, the discreet color of copper will be a worthy addition to any interior style.
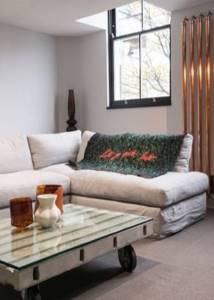
Laconic black elements of the heating system will look good against the background of brickwork - white or gray. They can also be vertical or horizontal; in any case, they will be an attractive, effective, but at the same time, discreet element of decor.
In modern interiors, you can often find heating radiators displayed on display as an independent decorative element rather than hidden in boxes or covered with screens. Even cast iron batteries, which evoke memories of the Soviet Union for many, are now distinguished by an interesting design, unusual color schemes and high decorativeness.
The radiators left open cope better with the task of heating the room; nothing interferes with either air circulation or the emission of infrared rays. This means that the temperature in the room remains comfortable, objects and air are heated evenly, the heat does not remain inside the box or niche, but is distributed throughout the room. And this is the main function of the heating system
To learn how to hide a heating radiator, see the following video.
Heat-reflecting screen behind the radiator
Often, apartment residents are faced with this situation: the existing heating radiators seem to be hot, but the rooms are cold. Typically, these batteries are installed in small niches under window openings and part of the heat from the battery is directed to heating the bricks of the outer wall. It turns out that heat loss at home is increasing. To correct this situation and let the heat flow inside the room, some kind of engineering solution is needed. For example, a heat-reflecting screen behind a heating radiator. This fact was tested by Russian scientists and they received a positive result.
This simple method, although known for a long time, is not very widespread. It will be more effective if there are hot radiators in your house. This is understandable, the amount of reflected heat is greater. I can’t name the exact percentage of increase in heat in the room, it varies in different sources, but they achieve their goal, reducing heat loss.
Materials for production
This heat-reflecting screen behind the battery is usually made of materials that have a low degree of thermal conductivity. There are several such materials on the modern market. These are penofol, foil plastic and others. These materials are also good because in addition to foil they have a layer of insulation. In order to achieve sealing of such a screen, it is necessary to glue all joints with metallized tape.
But these properties are possessed only by materials with metallized aluminum foil. The foil is the reflector. If metal spraying is carried out using the so-called thermal method, then the thickness of the metal layer will be small and such material will not work as a screen. This must be remembered when purchasing material.
You can also make a reflective screen for the battery from plywood by attaching foil to it. A structure made of galvanized sheet is suitable.
In order for heat-reflecting screens to work, there must be a gap of at least 3 centimeters between them and the heating radiator, otherwise convection is disrupted. Warm air will not circulate as we need.
Functionality
By installing a heat-reflecting screen behind the radiator, near the outer wall, you can increase the air temperature in the room by 2 degrees.
Reflective screens are installed according to the following rules:
- The thickness of the insulating layer must be at least 5 mm.
- The reflective side of the screen should be facing the battery.
If the screen does not have a self-adhesive layer, then you can attach it using staples from a construction stapler.
In addition to reflecting heat, such a screen can perform a vapor barrier function, that is, protect the wall from moisture penetration into it.
The size of such a reflective screen should be larger than the size of the heating radiator. Of course, to install such a screen behind heating radiators, you do not need to contact any company; you can do it yourself.
The video shows how to quickly and easily make reflective screens for radiators.
Feasibility
Of course, in houses with central heating, reducing heat loss is not as important as in a private house. We have not yet learned how to control the heat consumed by each individual apartment, just as we can measure water consumption. But we can feel the warmth carried by the reflective screens behind the radiators.
Some skeptical people say that when installing such screens, the dew point shifts and mold forms on the walls. Let me start with the fact that I installed these reflective screens only for the winter period. In the spring and autumn, when the weather outside is still quite warm and the batteries are already working, I removed them. I didn’t specifically compare the temperature in the room by degrees, but it became warmer. There was no cold breath from the wall. I've been installing them behind radiators for three years now for warmth and comfort. They are especially helpful on very frosty and windy days. So I recommend it to everyone. Which is, in fact, why this article was written.

