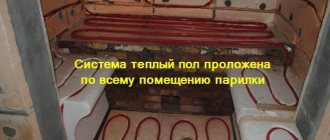
The special property of warm air to rise upward ensures that even in a hot air bath, the floor covering remains cold. Such a sharp contrast between the air temperature in the room and the cold floor does not contribute to comfort during bathing procedures. Moreover, it can lead to a cold. To improve the microclimate in the bathhouse and increase the comfort of staying in it, many owners decide to install warm floors. However, don't rush into purchasing an electric underfloor heating system if you have a furnace in the building. You can make a water heated floor. In this case, you do not need to install a boiler, because you can use a furnace to heat the coolant in the pipeline system.
Warm floor in the bathhouse and its features
As mentioned above, warm air, according to the rule of convection, rises to the ceiling while cold masses remain near the floor, preventing the coating from warming up. Naturally, discomfort is felt while taking bath procedures, and sometimes such a deficiency can lead to colds and other diseases.
Improving the environment in the bathhouse is possible provided that a heated floor heating system is installed, because It is unacceptable to install electric heating. A similar system is not visible in the photo, but visitors will feel it from the first minutes of being in the steam room or shower.
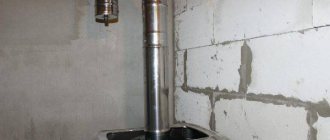
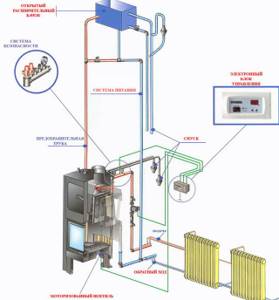
Considering that the warm water floor in the bathhouse from the stove will be heated not by the heating boiler, but by the heat exchanger installed on the chimney. Then the floor heating system itself is connected to the heat exchanger and installed in those rooms of the bathhouse where it is needed (read: “What kind of heat exchanger to make for a pipe in a bathhouse”).
The cooled coolant can only be returned to the heat exchanger if a circulation pump is installed in the system. Otherwise, only a furnace located below the floor level will be able to ensure continuous circulation of the coolant in the circuit. Also, if there is no circulation pump, you will have to use 24 mm pipes. According to the standard, 16 mm are used. In this case, the coolant circulation will be weak, and the efficiency of floor heating will decrease.
If a warm water floor in a bathhouse from a boiler can be equipped with a temperature regulator, then in a brick oven it is almost impossible to control the process of heating the coolant. The optimal temperature for underfloor heating is 40 degrees Celsius. Since the stove in the bathhouse heats the water to boiling temperature, it is necessary to take care of installing a mixer unit in the system that reduces the temperature of the coolant.
Installation of a large heat exchanger in a sauna stove is impossible, therefore it is necessary to install a volumetric tank near the stove to accumulate thermal energy (pro
Heating system
In most cases, continuous burning stoves are installed in bathhouses. which do an excellent job as the main source of heat in the room. At the same time, it is worth immediately making a reservation that for arranging the stove it is advisable to use only cleaned stones, the diameter of which reaches 10 centimeters. To achieve the optimal temperature in the room, it takes at least two hours to heat such a stove, during which you will have to periodically add firewood.
The bathhouse is a wooden building with a high level of humidity in the premises. As you know, wood that is regularly exposed to water can become unusable in a very short time. Because of this, unpleasant odors may appear in the bathhouse, and the building itself will require repairs in the future.
To avoid this, issues related to its quality heating should be resolved in advance. At the same time, it is advisable not to limit yourself to just one stove, but to supplement it with various heating systems, which, moreover, will significantly reduce the time it takes to warm up the premises before taking water procedures.
For safety reasons, in a wet room such as a bathhouse, it is allowed to use one or two heating radiators, which must be connected to the heating system of a residential building. In addition, there are several other options for heating a bath, the choice of which depends only on your requirements and wishes.
Heating radiators in the bathhouse
Advantages and disadvantages of heated floors in a bathhouse
Today, heated floors in a bathhouse from a stove have a number of positive qualities:
- absence of electromagnetic radiation created by any structural elements, which cannot be said about electric heated floors;
- the system is environmentally friendly and absolutely safe for the human body;
- in the bathhouse regularly maintains a positive microclimate;
- Due to low consumption and low cost of fuel, you can save significantly.
However, a warm water floor in a bathhouse from a stove has a number of disadvantages:
- in the cold season, all coolant must be removed from the heating circuit, since freezing inside the system will lead to rupture of the pipes. This can only be avoided if the system is constantly warmed up, or if antifreeze is used instead of water as a coolant;
- a significant part of the thermal energy is spent on heating the storage tank, which leads to a decrease in the efficiency of the stove in heating the steam room and the room where visitors wash themselves;
- The heating process is significantly delayed if the floor heating system takes up a large area in several rooms of the bathhouse at once. The reason is that the volume of coolant in the heating circuit increases and more thermal energy is consumed to heat it;
- In such a bathhouse, it is unacceptable to install leaking floors, since getting the thermal insulation layer wet will lead to a decrease in the efficiency of the heating system.
Operating rules
Recommendations for using heated floors from a brick stove are not much different from the standard ones:
- In winter, the water from the pipes must be drained. If the bathhouse is also used during the cold season, you need to install a different heating system.
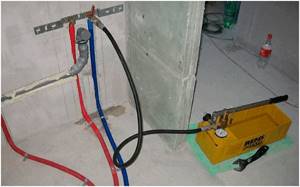
- During operation, you need to monitor the pressure in the system. The oven is not equipped with an appropriate sensor and does not monitor these indicators.
- Before starting, check the operation of the pump and shut-off valves. Leakage must not be allowed.
Repairing a heated floor is complicated. To fix a leak or other damage, it is necessary to remove the flooring, destroy the screed, repair the circuit and repeat all the finishing work again. This is a costly and time-consuming process.
Installation methods and materials used
You can lay heated floors in a heating bath in various ways:
- Concrete screed is considered one of the most effective methods for installing heated floors in a bathhouse. When pouring it, you can significantly save on building materials and get a high-quality moisture-resistant coating. The disadvantage of this method is that water floor heating can be put into operation only after the screed has completely dried (about a month after it has been poured). It will also be very difficult to carry out repair work, since this will require dismantling the screed, which is very difficult.
- As a thermal insulation layer, you can use polystyrene boards with a reflective foil layer and fixing recesses for installing a heating circuit. But, even after installation, the system will have to be filled with screed.
- Installation of a water heated floor in a wooden ceiling is also possible, but for its production you will have to first draw up a detailed diagram. The reason is that the heated floor in the bathhouse from the stove, the diagram of which is drawn up, can be laid in pre-cut holes in the joists, which means their placement will have to be predetermined.
Installation technology
Installing a heated floor from a stove does not require special skills; you can do it yourself. Let's consider what is needed for this.
Required materials and tools
Materials and tools needed to install heated floors powered by a stove:
- bypass;
- valve for bypass regulation;
- coil;
- mechanism for temperature control (thermal head);
- a collector that distributes water along different circuits;
- pump for circulating heated water through pipes.
You will need small consumables in the form of:
- fittings;
- insulation;
- fastening tools;
- reinforcing mesh;
- waterproofing;
- vapor barriers;
- damper tape.
Installation of water heated floors
Standard heated floors in bath rooms are laid in a “pie” of the following layers:
- a layer of waterproofing material that protects floors from condensation;
- a layer of thermal insulation material to avoid loss of thermal energy through a leaky floor covering;
- metal mesh for reinforcement as a protective layer for insulating materials;
- reflective layer , allowing you to direct thermal energy into the room;
- heating circuit for underfloor heating, laid in a spiral manner, which allows for maximum uniform heating of the room;
- leveling screed maintaining a slope over the entire area towards the drainage hole;
- finishing of floors.
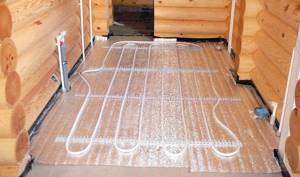
If the floor “pie” is laid on the ground, then before laying the waterproofing material it is necessary to fill and compact a cushion of dry sand-gravel mixture. On top it is covered with an expanded clay layer, which additionally performs the functions of insulation.
You should not be afraid of a slight slope of the floors, since in the photo and during visual inspection it will be almost invisible, but at the same time it will perform a very significant functional task.
Manufacturing instructions
The manufacture of pipelines for floor heating in bathhouses is carried out in several stages. The first of these is preparation, after which the main installation work can begin.
Preparation
Preparing the base for installation of heated floors:
- Remove the layer of soil under the rooms where the heating circuit will be installed. Bury a sewer pipe to drain liquid into a pre-prepared hole near the bathhouse.
- Place a layer of crushed stone mixed with sand on top. Compact the layer.
- Fill in a layer of expanded clay 20 cm thick, which will act as insulation.
After completing the preparation, you can begin installation work.
Installation
Installation steps:
- Check the base for unevenness. Fill cracks and recesses with cement mortar. Knock down the bumps with a hammer.
- Remove dirt, debris, dust.
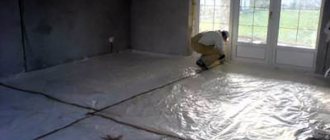
- Apply a double layer of waterproofing. To do this, the concrete surface is filled with molten bitumen. A layer of roofing material is laid on top of it. The individual strips should overlap each other.
- The procedure with bitumen and roofing felt is repeated.
- Thermal insulation is being installed. It is better to use penoplex. Layer thickness - 5 cm.
- Place a reinforcing mesh on top of the insulation.
- Cover the perimeter of the walls with damper tape. It is designed to compensate for the thermal expansion to which the screed will be subjected.
- Arrange the pipes according to the chosen method. Secure them with clamps to the reinforcing mesh.
- Connect the pipeline to the manifold. Start the system to check the tightness of the connection of the main elements.
- Install pipes through which water accumulating on the floor of the bathhouse will flow.
- Mix the cement mortar and pour the screed.
All you have to do is wait for the cement to harden before you start tiling the concrete surface. The laying should be done at an angle, towards the water drain holes.
Starting and checking the system
A test run of the system should be carried out before pouring concrete. After completing the basic installation work and decorative finishing of the floor, it is necessary to light the stove and wait a while to check the functionality of the heating circuits.
Many people do not like that the floors in bath rooms remain cold even when the bath is fully warmed up. This not only causes discomfort when walking without shoes, but also spoils the microclimate. To restore the level of comfort, you can install a water floor heating system, which will be powered by a sauna stove.
Preparation for installation
Before laying a heated floor in a bathhouse from a sauna stove, it is necessary to properly prepare the base so that the floors are not only durable, but also have a well-thought-out drain.
The preparation is carried out as follows:
- The soil under the bathhouse is removed and the remaining area is compacted. A sewer drain pipe is built into the end part of the foundation.
- Then a sand-crushed stone cushion 15 centimeters thick is poured in and compacted.
- An expanded clay layer of 15-20 centimeters is poured on top, taking into account the temperature conditions outside. Do not forget to maintain a slope towards the drain.
Specifications
According to physical properties, warm air masses rise upward, and even in a steam room, where it is hot, the floors are cold.
But such a dissonance between the heat from above and the cold from below makes bathing procedures uncomfortable. Modern technologies make it possible to improve the microclimate in the bathhouse by installing different types of heated floors under the floor covering:
- cable - are a heating cable laid under the finishing coating, powered by electric current;
- infrared - a film with infrared plates inside that heat up when energy is supplied, the simplest structure in terms of self-installation;
- water - a pipeline located under the floor in the bathhouse, the coolant is heated water.
However, the bathhouse has high humidity, so many building owners do not risk installing electric heated floors themselves.
In this regard, water heated floors are considered more popular. After all, the bathhouse is equipped with a stove, and it is possible to heat the coolant from it, so this combination is also economically profitable.
Installation of underfloor heating system
The heated floor system itself is installed as follows:
- First, two layers of waterproofing are laid in the form of rolled roofing felt. The joints of sheets of material are coated with a special mastic. Stripes in different layers should be perpendicular to each other.
- Then a layer of thermal insulation is laid on top of it, maintaining a slope towards the drain.
- A reinforcement mesh is laid as a protective layer.
- The heating circuit is laid on the mesh itself.
- Copper or metal-plastic pipes are connected to the heat exchanger and the system is checked. If there are no leaks, then the screed can be filled.
- Before pouring, the entire perimeter of the room is glued with a damper tape, which will act as a compensation gap and will not allow the floor to deform when expanding due to increased temperature. The screed can be poured using ordinary cement-sand mortar, for the reinforcement of which fiber was used, or using a dry mixture.
- The screed should be poured and leveled according to the beacons with the obligatory condition: a slight slope towards the drain.
- As soon as the screed has completely hardened, it is necessary to lay the finishing floor covering.
Bottom line
The article describes in detail the procedure for installing a heated floor system in a bathhouse. If you follow the instructions, you can get high-quality, reliable, efficient and safe floor heating. You can entrust this type of work to specialists who will take responsibility for all stages - from purchasing the necessary materials to installing and putting the heated floor system into operation.
Installation work
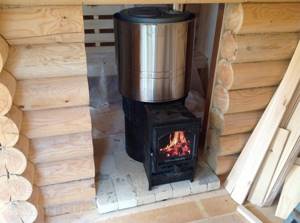
Laying circuits in a bathhouse is no different from similar work in any other room.
- After thermal insulation of the floor, the walls around the perimeter of the steam room are covered with damper tape. It compensates for the thermal expansion of the concrete screed and prevents cracking.
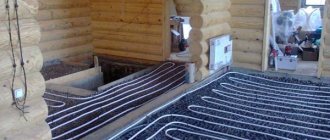
- The tubes are placed on the floor according to the chosen pattern - snake, snail. Secure to the mesh with clamps.
- The tubes are connected to the manifold. Perform a test run of the system to ensure that all connections are tight. Place drainage and drain funnels if needed.
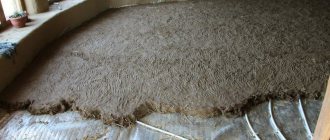
- If everything is in order, the contour is filled with concrete or cement screed. Level the surface along the beacons, not forgetting to maintain a slope to drain the water.
- After the material has completely hardened - at least 28 days - ceramic tiles are laid. Laminate, linoleum, even wooden boards can be used as a finishing coating in a dressing room or guest room.
- The second part of the system is mounted: a heat exchanger is installed above the combustion compartment. If this operation is not feasible, you can tie the firebox with metal pipes. This requires experience and ability to work with metal.
- The sauna stove is low-power. It is difficult to heat a large volume of water here. To create a reserve, a battery tank is included in the system. It can be installed next to the stove or through the wall. It is advisable to choose option 2, since the tank is voluminous, and you need to save space in the steam room.
- A mixing unit is installed - it prevents overheating of water in the heating circuit.
- Connect the systems to the collector. A three-way mixing valve is cut into the supply pipe, and a thermal head with a remote sensor is installed here on the return manifold. Connect the pump.
During testing, the water temperature is monitored. It cannot be adjusted while the stove is in operation, so before first use it is necessary to determine how much water should be taken from the return line.
Alternatives
Electric and infrared heated floors can serve as a good alternative to water heated floors. Let's look at them in more detail.
Cable flooring is made faster and easier - you can use tile adhesive instead of screed
Instead of a water heated floor, you can install a cable or infrared floor. They are independent of the sauna stove, but consume a lot of electricity. It starts up easier: you don’t need to wait for a sufficient amount of water to heat up, you can use the sauna in winter, you don’t need to drain the water.
An easier to install and cheaper option is made from a heating cable. A single-, or better yet, a two-core cable is placed on the base, secured, and covered with a screed. The system must be grounded and connected to the electrical network. The average power of a cable floor for a bathhouse is 250 W per 1 sq. m.
Thermal mats are more convenient to install - they are the same heating cable, but already fixed on a flexible substrate. Installing it requires experience. But it can be placed not in a screed, but in a thick layer of tile adhesive. The height of the steam room decreases by no more than 3 cm.
In a bathhouse, it is better to lay cable models under a screed.
IR film generates infrared radiation. It warms up not the air in the room, but the floor surface, objects and people. At a lower temperature a person feels just as comfortable. Such models consume less electricity and are more efficient.
general information
The tradition of arranging a bathhouse includes a wooden pouring floor. This option is not always possible. If the base of the bathhouse is made of concrete, then a completely different principle of water drainage is required and, accordingly, a different type of flooring. Tiles are most often used as the most suitable covering for wet rooms.
At the same time, the surface of the floor covered with tiles does not have the most comfortable properties - it is cold, which is unacceptable for a bathhouse. In addition, you have to spend more time and resources to heat the floor, which consists of a thick layer of concrete and tiles. The way out was to install a water heated floor, powered by a sauna stove. This solution immediately removes all questions - the floor becomes warm, it’s pleasant to walk on it barefoot, and there are no more uncomfortable sensations from being in the bathhouse.
From a technology point of view, making a water-heated floor from a sauna stove does not pose any great difficulties. The working body - pipes with coolant - is laid according to the usual pattern, the only exception being the method of pouring the screed, since a slight slope is required for the water to flow into the drainage pipe.
And also there are no questions in organizing the mixing unit (if planned) and other elements of the system that make it possible to regulate and configure the operating mode. Power from a sauna stove is essentially power from a boiler, but with some reservations, which will be discussed in more detail.
Read about heating boilers in the relevant articles: gas, electric.
And the structure of the entire water system is described here.
