Laying a heated floor in a screed is a responsible process that requires a high-quality approach. It is on the correct execution of all actions that the final result depends, expressed in the uniformity of heat distribution, reliability and safety of the structure, as well as in saving consumed resources. Despite the difficulties, all the work can be done with your own hands, without the involvement of specialists.
What do we mean by cable heated floors?
The heating element of a cable heated floor is an electric cable. Unlike a regular electric cable, which by definition should not heat up, a heated floor cable is specially made to heat up when an electric current passes through it. It is for these technological features that such cables are called heating or thermal. You can read in detail about heating cables Heating electric cable, here I will briefly remind you.
- There are two types of heating cables: resistive and self-regulating;
- The cable cross-section is round (for floors) or flat (for pipes);
- There may be one or two cores in the cable. Today, two-core heating cables are the most popular due to their ease of installation;
- There are shielded and unshielded cables to suppress electromagnetic interference;
- Each heating cable has a specific power characteristic (W/meter), which is basic to understand the design of a cable heated floor.
What to choose?
For an ordinary apartment in an ordinary multi-storey building, the best option is a warm floor with electric heating.
The installation of a heated floor of this type can be carried out in such an apartment without additional coordination with inspecting and regulatory authorities; it is only necessary to correctly determine the necessary parameters of the floor itself and the electrical network. Currently, the most popular electric heated floors are:
- using a heating cable (cable floors);
- using special thermomats;
- using a special film (film or infrared floors).
The installation of heated floors of each of the listed types has features due to the use of different heating elements in each of the mentioned options.
Cable power, heat loss and tie thickness
If we look at how cable heated floors work, many further calculations will be clear.
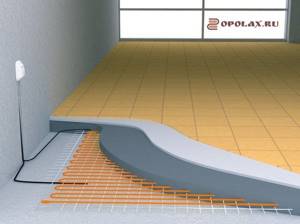
A heating cable laid in the floor distributes thermal radiation in all directions. This means that, by definition, the cable will heat both the floor in the room and the base on which it is laid. If the first heating is important for the tasks being performed, then heating the base is the direct heat loss of the heated floor.
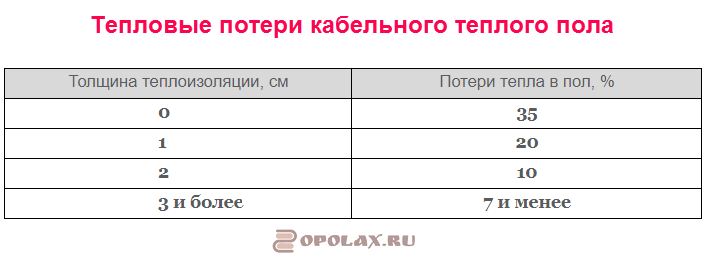
To reduce these heat losses, it is reasonable to place heat-reflecting material under the heating cable. Look at the table of heat loss depending on the thickness of the insulating layer.
To reduce heat loss and increase the efficiency of electric heated floors, foil insulation on foamed polyethylene of the brands Izolon, Folgoizol, Ecofol, Penofol, Isoflex is used as the basis for laying the heating cable. Its thickness is from 2 to 10 mm.
If these thicknesses are not enough for the heated floor to operate effectively, extruded polystyrene foam in slabs is used as additional thermal insulation. It is durable, has various technological thicknesses and does not react with the solution. It is laid under foil insulation.
For example, for heated floors on loggias and balconies, it is recommended to make a thermal insulation layer of at least 50 mm. This thickness can only be achieved by using polystyrene foam in combination with foil insulation.
Infrared heated floor
When an electric current is passed through a special film, infrared radiation appears. Installing a warm infrared floor will heat the room much more efficiently than with any other electric heating option. Such radiation does not have a negative effect on the body, and the undoubted advantage of such a film is its small thickness.
Infrared film floor
Installing a warm film floor does not require much effort and time. Simply spread the film over the surface and cover it with the floor covering. If you have to lay several separate sheets of film, they must be connected to each other with wires. The heating temperature is controlled using a thermostat. In more detail, for example, the entire installation procedure can be viewed in the video.
However, it must be taken into account that not only the installation of heated floors is important; the price list of the work performed should include the use of different protective materials for different finishing floor coverings.
When choosing a heated floor for your apartment, you need to take into account many factors, including the features inherent in different types of heated floors. The choice of a specific floor heating option determines the work that will have to be done to implement it.
Heating cable power
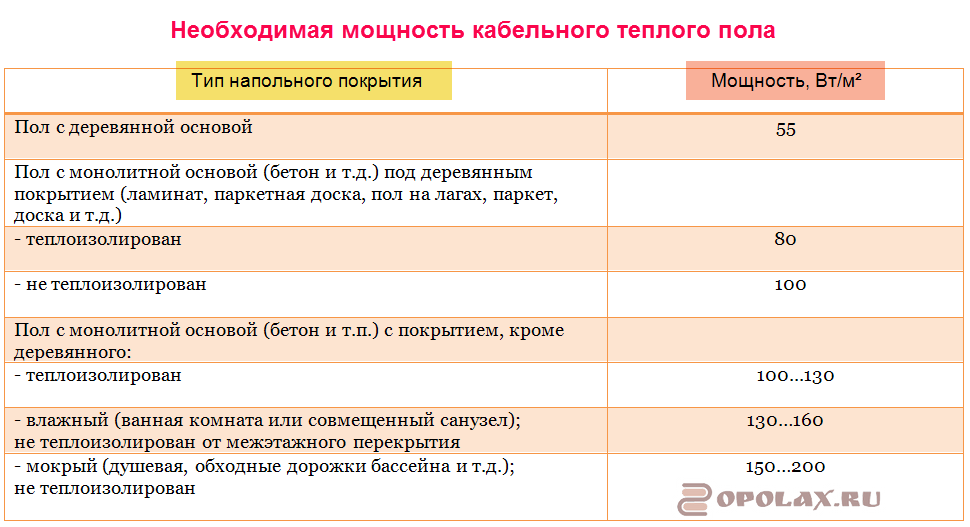
For each type of floor and the presence of thermal insulation on the floor, the required specific power of the heated floor is selected. The specific power of the heated floor (W/sq. meter) is calculated based on the power of the heating cable (W/meter). That is, knowing the type of floor, you can calculate which heating cable should be used and how it should be laid.
Tables for selecting the required specific power of a future heated floor can be considered quite acceptable. From it you can further calculate the power of the heating cable and the method of its installation.
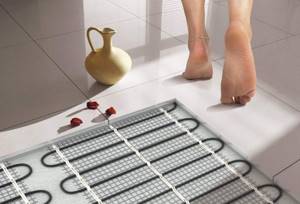
Warm floor using thermomats
After reading the description of how to install a heated floor given above, you can note its main drawback. It requires a cement-sand screed, as a result of which the floor level rises significantly. It is not always possible to do this, but in this case you can install another version of the heated floor, in which the heating element is a thermomat. It is a thin cable located on a synthetic base, and you can see what it looks like in the photo:
Pipe for heated floors, calculation and installation
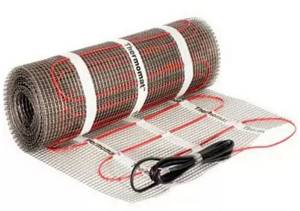
Heating mat
Installation of a heated floor of this type takes much less time than installation of cable heating. Work must begin with preparing a plan for the location of the heating elements and calculating the required heating power.
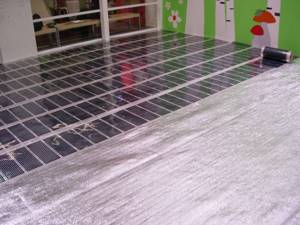
A place is prepared on the wall for installing a thermostat and a groove is punched into which a temperature sensor in a corrugated tube and a wire for supplying electric current will be laid. Debris is removed from the floor, and a corrugated temperature sensor tube is inserted into the groove and secured. A heat-insulating material with a reflective surface is initially placed on the floor. A thermomat is placed on top, starting from the location of the thermostat. If you need to change the direction of installation, then the film can be cut without damaging the cable, as shown in the photo, and the thermomat can be installed in a different direction.
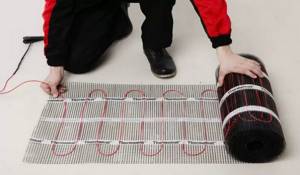
Installation of heating mats
The thermomat is attached to the floor using glue, tape or any other method, the main requirement is not to damage the cable. After installation is completed, the sensor is installed in the corrugated tube. The floor covering is laid on top of the thermomats, the heating elements themselves are located in the adhesive layer. Many materials can be used as flooring; it is possible to install heated floors under laminate, tiles, etc.
Features of heating cable installation
The heating cable is laid on the base of the floor in a spiral. The spiral has two dimensional characteristics: thread pitch and thread length. If the length of the threads is not of great importance for calculating the cable floor, then the laying step is important. Let me explain with an example.
Let's assume the heating cable has a power of 16 W per meter.
- If we put it on 1 sq. meter of floor cable in one thread, we get the specific power of the future heated floor of 16 W/sq. meter;
- If there are two threads (step 50 cm), the power will be 32 W sq. meter.
- If the pitch is 100 mm, there will be 9-10 threads per meter of floor, the floor power will be about 160 W.
- If we make the step 75 mm, then the power of the heated floor will be 13 threads × 16 W = 214 W.
- According to Table 1, we look at the expected heat loss and according to Table 2 we look at which floor such a warm floor is suitable for.
Note: Such calculations are usually carried out in stores when purchasing cables for heated floors. However, you must understand the design and future installation of the cable heated floor in order to calculate the floor level.
Laying scheme for heated electric floors
Before making a warm electric floor, you need to draw a heating wire laying diagram indicating the connection location (
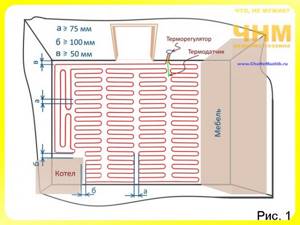
). Such a scheme is necessary for accurate and high-quality installation.
When calculating the cable laying scheme, you can use the formula to determine the distance between the turns: W=100* P/DK.
Where, W is the step in cm, 100 units of conversion, P is the area occupied by the heater, DK is the cable length.
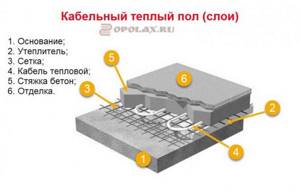
Preparatory work. Base
Before installation begins, the base is cleaned of dust and debris and leveled if necessary.
Next, thermal insulation and a screen that reflects IR radiation are laid. The task of thermal insulation and screen is to ensure rational energy consumption, that is, to eliminate the expenditure of thermal energy on heating the building structures of the floor and the underlying space. Direct all generated heat into the heated room.
I recommend: Warm water floor from a gas boiler
Semi-rigid mineral wool boards and polyurethane foam (including sprayed polyurethane foam) can be used as thermal insulation. The IR screen is made by laying a special film, and more often with the help of heat-insulating materials combined with such a screen (folgoizol, penofol, etc.).
The thickness of the insulation depends on the space under the floor. For example, if you need to make a warm electric floor under the tiles on a loggia, balcony or gallery, where there is open space below the floor slab, the insulation layer can be tens of centimeters. Above heated rooms, a thin substrate with an IR screen is sufficient.
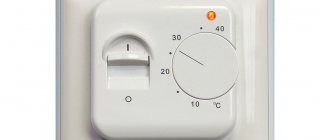
Thermostat and heat sensor
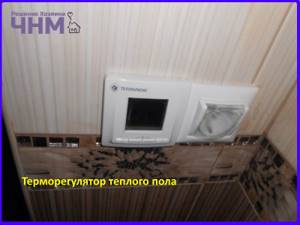
The most important step in installing a heated floor is installing a thermostat.
Its task is to turn on the heating when the floor temperature drops below the set temperature and turn it off when the desired temperature is reached. To do this, use a heat sensor placed in a protective cover made of a corrugated sleeve or (better) a metal-plastic tube with a diameter of 16 mm. The end of the cover must be tightly closed to prevent mortar from entering when laying tiles or leveling screed.
The sensor is placed at an equal distance from the heating cable, as close as possible to the floor surface, avoiding sharp bends in the tube, so that if necessary, it can be replaced without disassembling the coating.
The thermostat is placed in any convenient place, the only limitation on the location is that the distance to the floor must be at least 30 cm. The thermostat is mounted in a standard outlet box and connected to power from the general house network.
Installation of heating elements
First, let's look at how to make a warm floor under tiles (for which mats are usually used).
The mats are laid in accordance with the diagram and secured with small portions of tile adhesive, or in other ways that provide sufficient fixation for further operations.
After completion of installation and inspection, you can immediately lay tiles on the floor on top of the mats.
Installing a separate cable is somewhat more complicated. To fix it in the desired position, a special tape made of thin metal is usually used. On the tape with a groove of 2.5 cm, folding fasteners are made, allowing you to securely clamp a cable with a diameter of up to 8 mm.
The tapes are attached to the base, perpendicular to the cable laying, 50-70 cm from each other using “quick installation” nails.
Connecting a heated floor to the network
After installation is complete, we check the electrical resistance of the sensor and cable for compliance with the specifications. The stripped ends of the cable are tinned.
The wire coming from the protective screen (usually yellow-green) is connected to ground, and if there is no ground line, to the zero terminal (which is undesirable).
Recommend: Is it necessary to install batteries under windows?
Shielding of underfloor heating cables is performed to eliminate electromagnetic radiation. And although its size is insignificant, and hardly even without an electronic screen. floors will cause some harm, but since long-term exposure to increased electricity. The magnetic background on the body has not been studied enough; the requirements of the PUE consider such a measure mandatory.
Having set the thermostat to minimum heating, turn on the installed floor for one to two minutes (the thermostat indicator light should light up and the cable should become warm). Only after making sure that everything is in order do they turn off the power and proceed to work on further installation of the floor.
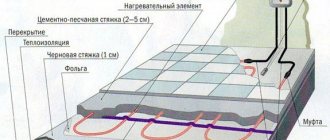
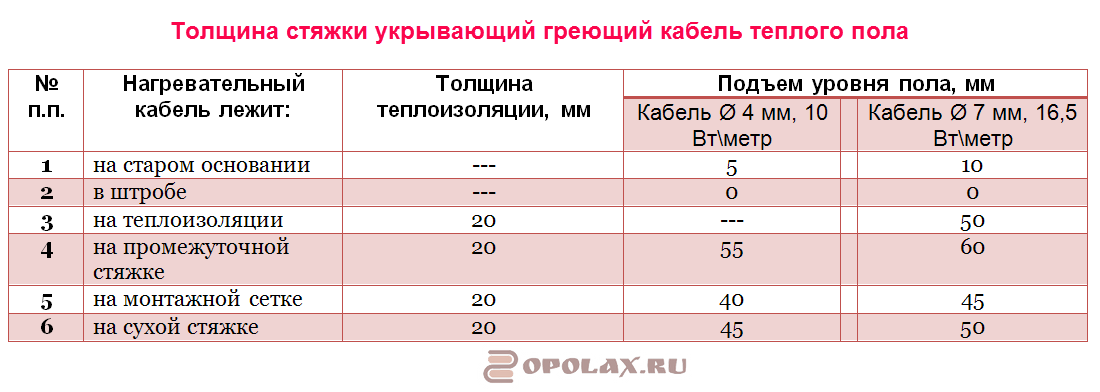
Thickness of the screed over the heating cable
A little higher, I explained why reflective insulation is needed under the heating cable. However, this is not the only important thing for the effective operation of an electric heated floor. The layer covering the heating cable is of great importance. Let me explain.
Imagine you have a sheet of iron and a stone. Now imagine you are simultaneously heating a sheet of iron and a stone in a fire. Then you take them out of the fire and try to warm up. What will heat you longer and better? That's right, a stone.
That is why, for maximum efficiency of a cable heated floor, it (the cable) must be covered with a layer of cement screed. Heated floors under tiles are less effective. However, their effectiveness increases if you use non-ceramic tiles, porcelain stoneware or natural stone.
To select the thickness of the screed over the heating cable of a heated floor, I offer another table.
Energy consumption of heated floors
To determine how much energy an electric heated floor consumes, you must first determine whether it is the main heat source or an auxiliary one. In the first case, about 200 W/m2 is consumed for heating, and in the second - at the level of 100-160 W/m2 in 1 hour. This energy consumption is due to heating the heated floor and room.
To maintain a comfortable mode, its consumption is reduced. To heat the room, the thermostat turns on the power supply 15-20 minutes per hour or 6-8 hours a day.
With the area of the room Stotal. = 14 m2, about 3/4 of the entire surface is heated, which is Sу = 10 m2. The cable cannot be laid under furniture and household appliances due to the risk of overheating. When it heats up, things on top interfere with heat transfer.
If it is not clear where household appliances and furniture will be installed in the room, you should use a resistive self-regulating cable, the resistance of which depends on temperature. Then it will not overheat when objects that interfere with heat transfer are placed on top.
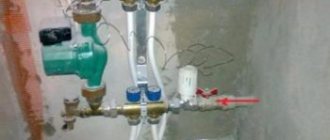
With a specific power of 200 W/m2 for a working area of 10 m2, the nominal one will be equal to 200 * 10 = 2000 W. In Fig. There are 2 heating cables connected higher in the room. If the load is distributed evenly, each of them will consume 1 kW.
How to attach the cable
The question of how to attach the cable to the base is not idle. I have already talked about the importance of spiral laying and the importance of clear distances between the spiral threads. Therefore, the cable must be firmly secured before pouring concrete.
Two methods are offered:
- On the reinforcing mesh using plastic clamps;
- On special strips of fastenings, which themselves are attached to the base.
The first option is preferable, since there is no need to drill into the underlying foil to attach the mounting strips.
Now we have all the parameters to present:
Option 7. Cable heated floor under the tiles
- Preparing the base for tiles;
- Electric heating mat;
- Tile.
Option 8. Cable heated floor over a dry screed
- Dry screed device;
- Mounting tape;
- Cable;
- Finish screed 5 -10 mm.
Option 8. Cable heated floor in a wooden house with a rigid base
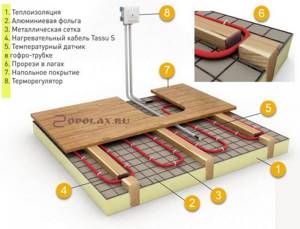
- Laying logs on the base;
- Thermal insulation between joists;
- Laying reflective plates/reflective foil between joists;
- Laying the cable between the joists through the cuts;
- Hard base flooring.
Option 9. Cable heated floor in a wooden house, 2nd floor
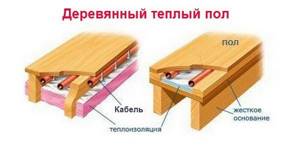
- Laying thermal insulation between joists;
- Laying reflective plates/reflective foil between joists;
- Laying the cable between the joists through the cuts;
- Construction of the second floor floor.
conclusions
As you can see, the installation of cable heated floors can be very diverse. What I would like to draw your attention to in conclusion:
- Be sure to use insulation under the heating cable, preferably foil.
- Cover the heating cable with a cement screed of at least 5 cm.
- When installing cement screeds less than 5 cm, do not forget to add fiber.
- The best option would be to attach the cable to the reinforcing mesh and then install a tie.
©Opolax.ru