How to prepare grout for brickwork joints
- What you need for grouting
- Rules for preparing the grout mixture
- Methods of carrying out work
Each construction process usually ends with a finishing procedure designed to hide traces of work and give the object an aesthetically pleasing appearance.
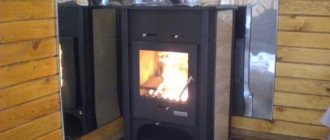
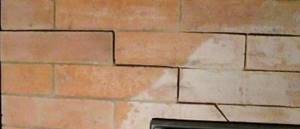
When working with brick, this procedure is to grout the joints of the brickwork. As a rule, it is carried out at the last moment, when all masonry work has already been completed. Brick laying diagram.
It must be said that the quality of the masonry has a great influence on the appearance of subsequent processing. If the excess mixture used to hold the bricks is not removed in time, it can completely ruin the appearance of the wall. To prevent this from happening, the masonry process should be treated extremely carefully and thoughtfully.
How to seal cracks in a stove
One of the reasons for smoke entering a living space may be cracks that appear, which are formed for the following reasons:
- poor quality solution;
- improper finishing;
- gross violation of the technique of use;
- uneven heating of the structure;
- drying of materials.
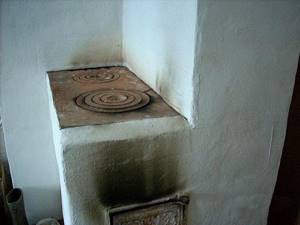
If the problem is an incorrectly made foundation, then drastic measures may be required, including disassembling the furnace. However, with minor cracks, you can simply coat the stove, after first removing the lining and plaster from the bricks. The best options for putty are clay mixed with sand, glue and grout. Materials should be selected based on the extent of damage and financial capabilities.
Quite often cracks in the seams occur in brick kilns. Most often they appear at the junction with the casting: different temperature expansion affects it. Cracks can also occur due to local overheating, as well as due to errors in masonry. If the solution does not pour out, there is no particular cause for concern, but the cracks in the oven need to be sealed.
Repair of small cracks - up to 5 mm - can be done using any of the solutions that are used when laying brick kilns (clay sand; clay sand a little cement). Ready-made formulations diluted according to the manufacturer’s recommendations are also used. If you know what kind of solution the stove was placed on, it is better to use the same one; if not, any will do. Only the color difference will be visible.
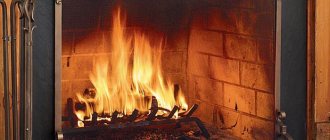
Cracks in seams appear due to exposure to high temperatures
It is better to cover deeper cracks in the furnace masonry with a solution containing crushed fireclay and aluminous cement. If such cement is not available, you can use Portland cement, but you will need a finely ground additive for laying stoves. The presence of ground fireclay reinforces the solution, preventing cracks from appearing again.
How to cover up the cracks in the stove masonry? The operating procedure is as follows:
- heat the oven a little,
- widen the cracks
- clean them from dust,
- moistened with water,
- cover with the selected solution.
Actually, that's all. We wait for the solution to dry, then you can heat the stove again, but not to the full load, but about half. Then you can heat it as usual.
Wider cracks and the mortar spills out....
In addition to covering the cracks in a brick oven with mortar, you can fill them with soaked asbestos cord, and cover everything on top with mortar. Just be careful when working: asbestos in a dusty state is harmful. Better work wearing a mask.
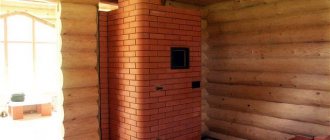
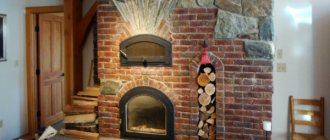
If the firebox is made of red rather than fireclay brick, sooner or later the brick begins to crumble. It sometimes falls off in quite large plates. There is no point in covering it up or reinforcing it with something. The temperatures will cause everything to fall apart.
Ordinary ceramic bricks in the firebox often begin to collapse
It is possible to stop the destruction of bricks in the firebox of a brick kiln only by reducing the impact of temperatures. To do this, it is necessary to make additional lining - install barrier walls that will take on the main thermal load. That is, the firebox (entirely or just the collapsing walls) is sheathed/covered from the inside with some kind of material. It could be:
- Steel or cast iron. Steel will not last long, especially when repairing sauna stoves - it will quickly burn out, and its thermal conductivity is very high, so the walls must be installed with some air gap. Cast iron will last for a longer period of time, but also not for long. And when using cast iron, at least a small air gap is also required. To maintain this gap, you can lay corrugated cardboard between the wall and the metal, which will burn during the first fire, but it will provide a gap.
- Thin fireclay brick ША-6 or ШБ-6.
It is also called “fleshka”. The ShB brand of fireclay is a little worse in terms of quality indicators, but can also be used. These bricks are not placed close to the walls of the firebox, but with a gap of 7-10 mm. For a gap, you can lay basalt cardboard. The flange is placed on the mortar for laying fireclay, just look for it with increased “stickiness”. The masonry is made like a brick - gluing with four edges. With such a lining, the rate of heating of the room is reduced, but the stove lights up much faster - the fireclay quickly warms up. In addition, the temperature in the firebox itself rises (due to increased thermal insulation), which creates ideal conditions for more complete combustion of combustible gases. Dimensions of fireclay bricks ША-6 or ШБ-6 (ladders) - If such a brick is not found, you can use a standard fireclay brick, placing it on its edge. Only the thickness of such a wall is greater. Taking into account the gap, it “eats” a significant part of the firebox volume.
- Vermiculite slabs (panels for decorating rooms made of vermiculite of the “skamol” type are also suitable).
- Material of the SuperIzol type, which can withstand heat up to 1000°C.
The last two materials are rarely used, but they can be used if the volume of the firebox is small and you don’t want to reduce it with fireclay. The only thing is that you will need to come up with a fastening system, since in each case it is different. And keep in mind that the slabs should also not be placed close to the walls of the firebox, but with a small gap.
Such repairs to the lining of a brick kiln make it possible to avoid, or at least postpone for some time, more serious work, which sometimes includes a complete overhaul of the kiln, replacing damaged elements, and sometimes changing the design.
Dangers of using a cracked stove
Through cracks, carbon monoxide can enter the room.
When burned, fuel breaks down into volatile components and solid waste. Smoke contains substances harmful to health, which must be removed down the chimney and out into the street. If there are cracks in the stove walls, then carbon monoxide passes into the living space.
Effect of intoxication on the body:
- content in the air is 0.1%, breathing for an hour - the person loses consciousness;
- concentration 0.5%, staying in the room for 20 minutes - life-threatening poisoning;
- the amount in the air is about 1% - one minute is enough.
Cracks can only be on the surface, without affecting the brickwork. Carbon monoxide is not released into the room, but sealing such defects is necessary. A network of small cracks in the plaster indicates the beginning of larger destruction.
Rules for grouting
To properly coat the stove with clay, you must follow these step-by-step instructions:
- The surface, cleaned of plaster, is generously moistened with primer or water.
- Using a chisel, knock out the gaps between the bricks.
- The oven is warming up.
- Using a trowel, apply the clay mixture into the cracks and spread it over the entire surface in an even layer. If you don’t have a tool, you can do the smearing by hand. The mixture does not cause irritation or damage to the skin.
- When the surface is dry, another layer of the mixture is sprayed. Particular attention is paid to cracks - there should be a dense layer of mortar between the gaps.
- Using a damp wooden trowel, grout in a circular motion to remove any unevenness.
- The last step is plastering the stove.
The process of sealing with fire-resistant adhesive is carried out according to the same scheme, but includes an additional step. After filling the cracks with plastic material, the entire surface is treated with a hard type of glue so that the stove no longer smokes. It takes half an hour to dry, which can be spent on decorating. It is important to remember that the structure can be used after the solution has completely hardened.
Scheme for grouting brickwork joints.
- Sift 2 buckets of sand through a fine sieve into a container for preparing the mixture. The sifted sand should not contain foreign elements and fractions.
- Dry cement is added to the sand in a ratio of 1:2.
- After mixing the dry mixture, water is added to it. The amount of liquid should be such that the mixture acquires the consistency of a thick, homogeneous mass. As a rule, kneading is performed using a hammer drill and a spinner attachment.
If the seam will be treated with a special mixture of colors purchased in a store, its preparation proceeds as follows:
- About 6 liters of water are poured into the solution container.
- The finished powder is poured in.
- The solution is carefully mixed with a puncher and left for some time. When all the liquid is absorbed and the mixture swells, the grout must be thoroughly mixed again.
The solution is ready for use.
We inspect and select material
Before you begin, determine the extent of the damage. Even if small cracks appear, all old mortar in this place should be removed right down to the brickwork. The cleaned area should be covered with a solution, but what should you use to cover the stove so that it does not crack? This question interests many, and there are the following options for building mixtures that are most suitable for brick kilns:
- clay and sand;
- construction grout for stoves;
- fireclay clay;
- oven glue.
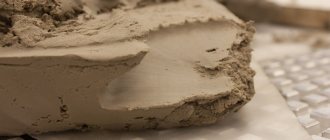
The simplest and most economical option is clay-sand mortar, which was still used by our ancestors. The quality of clay coating is not inferior to modern mortars, but it is much cheaper. Any clay is suitable for oven mortar; it is desirable that it contains no foreign impurities. The clay is placed in water for 12 hours, after which it becomes plastic and homogeneous.
You can buy fireclay clay at the construction market. This material is specially designed for creating fire-resistant elements, bricks, blocks, and is also used for laying stoves. The material, like products made from fireclay clay, is distinguished by high quality, fire resistance and durability. Fireclay clay is inexpensive in hardware stores and is sold in 20 kg bags, with instructions for use included.
To analyze the condition of the stove you do not need to have the professional skills of a builder or stove maker. The main thing is to detect all cracks and assess their size. If there are no major defects in the masonry, then removing the old coating and applying a new one will be sufficient. In addition, you need to remove part of the mortar between the bricks in the place where the crack formed. After these procedures, the masonry is covered with mortar so that the patches are not noticeable.
Methods of carrying out work
Grouting can be done in two ways, in which the seams will have either a convex or sunken appearance. When performing a processing method called sunken, you will need a small spatula, with which both vertical and horizontal seams are simultaneously filled with the mixture. When the grout is applied, the tool with the arc is turned inward and the excess mortar is removed.
In order to perform convex grouting, an arc-shaped tool is applied to the gap between the bricks with an arc outward and the space is filled with mortar. When one of the seams is filled, the tool is pulled further. Thus, all horizontal seams are filled. When the mixture dries, you can do convex grouting of the vertical joints. All excess mixture is wiped off the surface of the bricks with a damp cloth.
As can be seen from the information presented, grouting the joints of brickwork can be successfully done with your own hands. A properly prepared solution will last a long time and reliably, giving brick walls an aesthetically attractive appearance and preventing moisture from entering the masonry.
Is it possible to use the stove if it has cracks?
Using the stove if it has defects of this nature is not only not recommended, but strictly prohibited. If problems are detected, it is necessary to remove the unit from service as quickly as possible and not use it until complete repairs have been carried out and all cracks have been eliminated. If possible, cover up the cracks, perform a number of necessary works on coating the brick, look at what could have caused the slab to crack, etc.
Important! Any stacked cracks are dangerous because they allow harmful carbon monoxide into the room, which is dangerous not only for health, but also for life in general. Statistics say that most of the people who die during fires die not from fire, but from carbon monoxide poisoning. Therefore, if there is excessive smoke and an unusual heat is felt, you should put out the stove as soon as possible.
How to cover cracks in a brick stove?
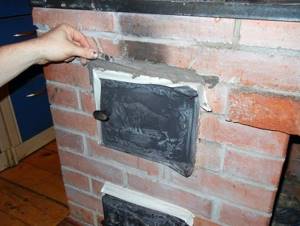
Due to the large difference in the magnitude of the temperature expansion of metal and brick, cracks often form at the junction. To avoid them, during installation, recesses are made in the brick, which allow the metal to expand when heated without destroying the masonry (the recesses are 3-5 mm larger than the casting shelf).
To soften the impact, the casting is wrapped in thermal insulation material. Previously, they used asbestos cord or cardboard, but now they often use mineral wool cardboard cut into strips or a special sealing cord (asbestos is harmful). When choosing cardboard, pay attention that it must withstand temperatures of 800°C and above.
If cracks do appear, they are repaired as described above - using a solution with the addition of fireclay. But if the damage is such that the door wobbles, as do the bricks above it, if the design allows, it is better to disassemble and reattach everything, tighten the fastening wire and re-wrap the casting with heat-insulating material.
Cracks around the casting - around the doors, near the stove - require repair. Errors when sealing the doors lead to the appearance of cracks
Features of mixtures for plastering stoves and fireplaces
The main requirement for the plaster mixture is a normal reaction to sudden changes in the temperature of the base.
Other important qualities:
- maintaining strength;
- components should not emit harmful substances when heated;
- good adhesion.
Conventional cement-sand mortar is deformed with constant temperature changes, and therefore is not suitable for finishing a furnace.

To avoid cracks, the plaster must meet a number of conditions.
High-quality grouting of brickwork joints
When all the work related to bricklaying is completed, all that remains to create a beautiful appearance is to grout the joints of the brickwork. This operation is the final, final stage in construction. It is recommended to postpone it until all brick masonry work is completed. This is done for high-quality finishing work.
Various factors must be taken into account, including the moisture content of the wall and weather conditions, which affect the quality of the grout.
The accuracy of brick laying by builders should be checked personally by you or an experienced foreman. It is necessary to monitor the seams during the construction of walls so that excess masonry mortar that seeps through them is removed. The importance of monitoring these operations during the construction stage is to ensure that problems can be corrected without leaving a trace. When the masonry is completed, you need to determine the color of the grout. The choice of color scheme, as a rule, occurs during the purchase of bricks.
It is necessary to choose a material that is close in color and structure.
When working on clean masonry, it is recommended not to stain the brick with mortar.
The following tools are required:
- perforator;
- nozzle for a hammer drill (spinner);
- putty knife;
- arcuate device;
- trough;
- metal sieve (fine).
You can’t do without materials:
- sand;
- packaged cement;
- ready-made mixture for grouting masonry joints (dry);
- water.
Grouting stages
Grouting the face joints serves to prevent precipitation runoff and its penetration into the masonry.
- If the color of the brick joint does not match the desired one, then the grout will be made from a sand-cement mixture. As a result, we will get a joint of light or dark gray color. If you need to make it, for example, white or another decorative shade, you need to use a dry grout mixture that will contain color.
- In order to prepare the mixture yourself, you first need to sift a couple of buckets of sand through a metal sieve in order to remove various waste from it. After this, the sifted sand must be mixed with cement in a ratio of 1 to 2, but this must be done dry. After mixing, add water to the trough and knead using a hammer drill with a special attachment (spinner) until it becomes a thick, homogeneous mass.
- To get white or colored, you need to pour about 5-6 liters of water into a container. Next, the previously prepared dry mixture, which contains the desired color, is poured into the water. After thoroughly mixing with a hammer drill with a nozzle for grinding lumps, allow the mixture to swell, leaving it for 5 minutes, and mix again.
- When working on clean masonry, it is recommended not to stain the brick with mortar. To do this, apply the solution so that more goes on the inside of the wall and as little as possible on the front. When the brick shrinks with a trowel, the mortar will spread evenly along the plane between the bricks, and the outer seam will be slightly unfilled.
- Grouting is done in two types #8211; convex and sunken. When arranging a convex, the finished mixture is placed into the joint using an arc-shaped device, with the arc facing itself. First of all, it is necessary to fill the horizontal ones, while drawing an arc along the seam. After the mixture in the horizontal ones has set, the vertical ones go to work.
- When performing a sunken method, all seams #8211; are simultaneously filled with the mixture. both vertical and horizontal #8211; using a small spatula. After filling, the arc-shaped tool is turned over with an arc inside the seam between the bricks and pulled out, removing the remaining mixture.
All of the above applies to the processing of brickwork seams.
The color scheme for grouting masonry joints should be combined with the interior. If tiles are used or planned in the interior of the house, then there is a need to think about the same color as the walls. Floor grout, as a rule, should be different so that the walls do not merge with the floor. Tile grout can change or update color without any problems; this process happens quite quickly.
Causes and danger of cracks
Violation of the integrity of the top layer or brickwork occurs for several reasons. In general, we can say that this is the result of the master’s mistakes. With proper selection of bricks, mortar, finishing materials and professional performance of the work, the formation of cracks on the stove, and especially cracks, is unlikely.
Most often, cracking occurs due to the influence of the following factors:
- non-use of the fireplace for a long time, especially in winter (due to sudden temperature changes);
- haste, manifested in the heating of a recently made stove;
- performing masonry using a method that creates large temperature differences in different places of the structure;
- inconsistencies in the thermal expansion capacity of bricks and mortar for laying;
- overheating or using fuel that produces significantly more heat than what the stove is designed for (for example, burning a wood stove with coal).
If the stove begins to crack for such reasons, then it is easy to fix the problem with your own hands. You need to properly seal the cracks, coat the surface - and the job is done.
Repairs cannot be postponed because smoke and carbon monoxide enters the premises through cracks, which can poison residents. In addition, over time, the cracks increase, the stove can let flames pass through and completely fall apart.
Cracks and fissures stretch like cobwebs across the surface of the stove, especially if you heat it up on frosty days. The difficulty is not new, so there are a lot of solutions, but you just need to choose the right one depending on a particular situation. First you need to understand the causes of cracks. According to an impressive count, there can be three of them - poor putty, hasty lining of the furnace without meeting the targets, and subsidence of the furnace itself.
The stove can sag due to an incorrectly laid foundation or low-quality brick. The most effective method to get rid of the problem is to disassemble the stove, secure the foundation and put it back together. However, one should act in a similar spirit if the drawdown is actually significant, smoke is pouring out of the cracks in the combustion chamber, the doors no longer close tightly, and the brick is crumbling in the middle of the stove itself. With such “symptoms” it is necessary not only to disassemble it, but also to assemble it from completely different materials.
Often finishing with tiles is offered instead of solving the problem with cracks. But at the same time, residents of summer cottages forget that the stove can crack even under the help of tiles. And everything may look great, but only through these cracks will smoke enter the room, and this has dangerous results. Thanks to this, the tile is beautiful only if the stove is checked and, moreover, does not crack.
To prevent the cast iron stove from cracking
Another common problem with using brick stoves, not purely bath stoves, but heating and cooking stoves, is cracks in the cast iron stove. They are not terrible if the stove is made correctly, but if there are errors in the masonry or design, smoke and carbon monoxide can leak through the crack, which is many times worse.
In principle, a well-cast slab made of high-quality cast iron should not crack, but the trouble is that such things are very rare. However, trouble can be helped. When firing for the first time, you need to slowly heat the stove, avoiding local overheating, and cool it down just as slowly. This can be done by laying bricks on the surface of the cast iron or pouring a good layer of sand.
Solutions to the problem
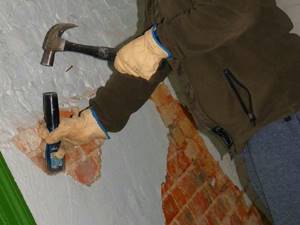
Cracked plaster is removed and plastered again.
Sometimes only the plaster cracks, multiple damages are observed, but they do not affect the masonry. In this case, the layer is knocked down and the finishing is done again. If there are few cracks, repair each one separately. They prepare special grouting compounds that can be used to coat the brick stove inside the house to prevent it from cracking.
As an option, use ceramic or marble tiles to cover the outer area:
- porcelain stoneware;
- clinker;
- tiled, tiles.
The material is durable and contributes to the integrity of the plaster layer underneath. Before laying tiles, deep and minor damage to the surface of the stove or fireplace must be repaired.
Grouting stages
- If the color of the brick joint does not match the desired one, then the grout will be made from a sand-cement mixture. As a result, we will get a joint of light or dark gray color. If you need to make it, for example, white or another decorative shade, you need to use a dry grout mixture that will contain color.
- In order to prepare the mixture yourself, you first need to sift a couple of buckets of sand through a metal sieve in order to remove various waste from it. After this, the sifted sand must be mixed with cement in a ratio of 1 to 2, but this must be done dry. After mixing, add water to the trough and knead using a hammer drill with a special attachment (spinner) until it becomes a thick, homogeneous mass.
- To get white or colored, you need to pour about 5-6 liters of water into a container. Next, the previously prepared dry mixture, which contains the desired color, is poured into the water. After thoroughly mixing with a hammer drill with a nozzle for grinding lumps, allow the mixture to swell, leaving it for 5 minutes, and mix again.
- When working on clean masonry, it is recommended not to stain the brick with mortar. To do this, apply the solution so that more goes on the inside of the wall and as little as possible on the front. When the brick shrinks with a trowel, the mortar will spread evenly along the plane between the bricks, and the outer seam will be slightly unfilled.
- Grouting is done in two types - convex and sunken. When arranging a convex, the finished mixture is placed into the joint using an arc-shaped device, with the arc facing itself. First of all, it is necessary to fill the horizontal ones, while drawing an arc along the seam. After the mixture in the horizontal ones has set, the vertical ones go to work.
- When performing a sunken joint, all seams - both vertical and horizontal - are simultaneously filled with the mixture using a small spatula. After filling, the arc-shaped tool is turned over with an arc inside the seam between the bricks and pulled out, removing the remaining mixture.
How to make oven grout with your own hands?
You can make a suitable mixture at home. To do this, you will need plaster, waterproofing liquid (available at a hardware store) and dye. All components are mixed until creamy.
You can make grout from clay and cement. To do this, take five parts clay, one part cement and dilute them with water.
Very often the grouting mixture is made from Portland cement and sand, but the durability of such a composition when heated can be significantly reduced.
Types of jointing and their main characteristics
Before you begin jointing work, you need to become familiar with the basic methods of sealing seams. You can often find the following types of joints:
- flush. A simple and common type of jointing. The technological process is as follows: it is necessary to cut off excess mortar from the surface of the wall; this can be done using a construction trowel. Next, use a brush to clean the gaps between the bricks. The result of the treatment is clearly defined white seams;
- recessed rectangular. Typically this type is used as a decorative finish. This option is more labor-intensive. If the brickwork is exposed to constant exposure to precipitation, then this method of treatment should not be used. Jointing technology: it is necessary to remove mortar from the joints to a depth of 5 mm. Next, the new mortar should be compacted and smoothed; this can be done using a construction tool called a round dowel;
- concave. An equally popular option that is used for grouting. This method involves using a prepared tool called “jointing”. This grouting implies the following: the excess mortar is cut off and the resulting white seams are treated with a semicircular joint along the entire length;
- beveled. This type of jointing has become widespread in regions with harsh climatic conditions. A prerequisite is a carefully sharpened trowel. Grouting is done in the following way: cut off excess mortar with a sharpened trowel, which must be held at an acute angle. It is recommended to deepen the tool by 3–4 mm.
How and what to rub down a stove after plastering
The last layer of plaster needs to set a little before it can be rubbed down. The soft surface is lightly rubbed with a polisher or a piece of penoplex over the entire area. Then it is completely rubbed in a circular motion until a smooth surface is formed without small pits or tubercles. To make the work easier, you can spray the surface with water. To do this, it is better to use a moklova.

You can start grouting when the solution has already set to the surface.
Recommendations
When performing jointing, it is necessary to adhere to the recommended sequence of work. First of all, seams that are located vertically should be processed, and then horizontal ones.
According to the standards specified in SNIP, the thickness of the horizontal seam should be 10–15 mm, and the vertical one – 8–15 mm. In order to save money, it is allowed to make thin seams, the thickness of which may be lower than the recommended SNIP norm. Also, the value of these indicators may vary depending on climatic conditions.
- You should not do jointing on hot days, as the solution will quickly harden. This is a violation of the technological process.
- It is not advisable to carry out jointing during rain, as the solution absorbs excess moisture.
- It is recommended to mix the solution in small portions using an electric concrete mixer.
- Do not apply liquid or dried grout mixture to the expansion joint. This may compromise its integrity.
Purpose of jointing
The grout is designed to:
- improve the appearance of the building. This type of decorative design of a building well masks the difference in color shades that are obtained due to the fact that the solution is mixed in stages over several days;
- protect the cement base from destruction. This will significantly increase the service life of the structure and delay the timing of major repairs. The main reason why the cement base is destroyed is moisture;
- increase the thermal insulation properties of brickwork, which will allow you to retain heat indoors in winter. To do this, you must carry out all the work yourself in accordance with the rules and regulations.
Restoration of a metal stove
Fireplaces and stoves made of metal can also crack. Owners do not always notice cracks on the walls due to their small size, but such a defect is signaled by the smoke that appears in the room during the fire.
In such cases, a welding machine will not always help. The problem is easier to solve with the help of a special putty-sealant, ready-made or made by yourself.
The basis of purchased heat-resistant sealants is silicone; additives determine the properties of the paste:
Fire-resistant grades contain iron oxide; such compositions have a reddish-brown tint. They are used where the heating is maximum.
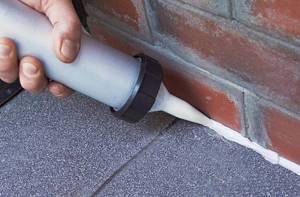
Application of sealantSource insales.ru
- Neutral sealants are needed at the joints of brick (concrete) and metal elements. When drying, they lose moisture and alcohol, after which they acquire the necessary strength.
- Acidic compounds are not used on metal surfaces. As they dry, they release acetic acid and start the corrosion process on the metal.
There are recipes for making your own sealant paste. They are quite complex in composition and require precise proportions between ingredients. However, the result is not always acceptable, since the components may contain impurities.
Only high-quality materialsSource rusolymp.ru
About eliminating cracks in the following video:
Features of application
The basic rule is this: the surface of the walls that will be finished cannot be plastered in advance. This is due to the fact that grout acts as a kind of finishing material, which must be applied to a separate part of the wall.
Grout is most often used for exterior finishing work.
This method can be used for interior decoration in cases where it is necessary to give the surface a certain color.
Brick jointing can be done at any stage of building construction. The most suitable stage for this work is the construction of walls, since it is easier to remove excess mortar.
When jointing the brickwork of an old building, it is necessary to remove the old mortar to a depth of 10–15 mm.
To increase the strength of the structure, it is necessary to use bandaging of brickwork seams at the stage of building construction. Bonding is the laying of bricks with a certain offset.
To carry out the work, it is necessary to use only well-sharpened construction tools. This is done so as not to damage the building materials.