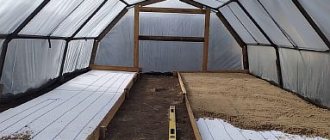
If anyone doubts whether soil heating is needed in a greenhouse, look at the photo below. Under this bed there was a “return” pipe from the radiator heating. As you can see, the onion feather is twice as tall and better in quality. From this plot it was possible to harvest almost twice as much harvest (by weight). After this result, the next season the owner heated all the beds. Very convincing.
The heating return pipeline ran under this bed. Based on the height and thickness of the feather, it is easy to find out exactly where. After such a clear demonstration of the need to heat the soil, the next season a warm water floor was installed under all the beds
How to heat the soil in a greenhouse
Judging by the feedback from practitioners, everyone who wants to make a warm floor in a greenhouse has only one option: a water floor. It is the most economical. The way of organizing it may be different. Some install a separate boiler that serves only pipes buried in the ground, while others supply water to them from the “return” of radiator heating.
Water heating pipes are laid both in the ground and in pallets. Both options are used and work well. The only difference is that it takes longer to warm up the soil than to warm up the soil in pallets. This is understandable: the mass is different. In any case, solid pipes are buried in the ground without connections and fittings. This way there will be no leaks. The number of underfloor heating loops per bed depends on the heat-loving nature of the crop. Cucumbers, for example, love warm soil; tomatoes can be cooler. Most often, one circuit (supply and return) of a warm floor goes to one bed.
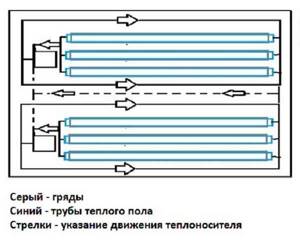
One of the options for connecting a heated water floor: first, the coolant goes to registers or radiators located around the perimeter of the greenhouse, and then to the contours of the heated floor. In this scheme, two boilers are used, and there are two circuits that complement each other
To preserve heat, it is advisable to lay Izolon or foil material at the very bottom. Then, after reaching operating temperatures, the fuel consumption to maintain it will be small. In general, the less heat is lost, the better. Therefore, if you plan to grow something on the ground, it is advisable to make a heat-saving layer. It is necessary to remove the soil to a certain depth, and fill (or lay) a layer of some heat-insulating material. Optimally, polystyrene foam of sufficient thickness. Lay Izolon or similar material on the heat insulator, and then the warm floor.
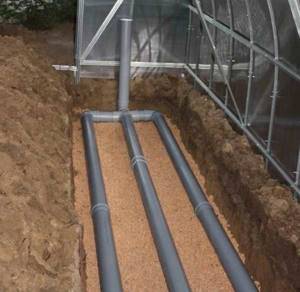
Here a layer of expanded clay is used as a heat insulator. But for greater efficiency it was necessary to lay down a metallized film or foil
The depth of laying pipes depends, firstly, on the crops grown, and secondly, on the desire of the owner. Some people think that it is optimal to lay it 40-50 cm deep, while others bury it only 20 cm. Both options work. The inertia of the system changes. When laying deep, it is necessary to heat the soil for a long time and persistently to reach normal temperature (two weeks or even more). But then you can turn off the floor heating in the greenhouse at night (or vice versa - for the day): high thermal inertia will not allow the plants to freeze. If you plant it shallowly, you won’t be able to afford this, but reaching normal temperatures will be faster in 6-10 days. In this case, you need to carefully control the temperatures: you can burn the root system, and you also need to be careful when working in the ground.
The second option in terms of economy and efficiency: air heating of the soil. Asbestos pipes are buried in the ground, and heated air is supplied to them using fans of the air duct system. The system is not very efficient due to the low heat capacity of the air. But you can make the flow rate higher by using more powerful fans.
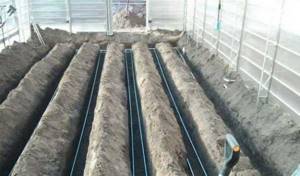
The depth of laying pipes can be different - from 50-70 cm to 20-30 cm
How to heat the air in this case? One of the convectors. The most effective of the solid fuels is Buleryan. You can make a special box around it that will collect heated air, and from this box you can route air ducts to pipes buried in the ground. This system is gentle and comfortable for plant roots.
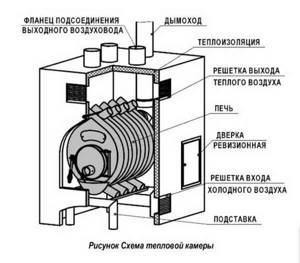
Having made such a chamber to collect warm air, you can then “drive” it into pipes under the beds
Electric heated floors can be installed in a greenhouse only in one case: if you have a lot of money and a three-phase transformer. With a legal connection, the cost of production (any) will be higher than the market price. Therefore, there is not a single review on the use of this method of heating the soil in a greenhouse. It's simply not used.
Features and Benefits
Warm beds are a simple structure that maintains heat in the root layer of the soil. Thanks to this, plants develop and bear fruit faster than in ordinary soil. And the availability of materials and the ease of making such beds allow any gardener to use this method.
If we are talking about greenhouses, which according to the logic of things should already be warm, why bother equipping these structures there. In spring, the soil warms up quite slowly. And the optimal temperature for planting seedlings is achieved only in mid-spring. If the soil is already warmed up, then planting can be done much earlier, at the very beginning of spring. At the same time, plants feel comfortable, take root and develop faster. The heat from the beds also warms up the air in the greenhouses, reaching the optimal temperature and creating a suitable microclimate for the healthy growth and development of seedlings.
Which pipes to use
Here again there are two approaches:
- Use metal (for example, corrugated stainless steel) with high heat transfer. In this case, the installation step is made larger - the heat is transferred well. But here you need to be careful not to burn the roots of the plants.
- Use plastic or metal-plastic pipes. Their heat dissipation is much lower than that of metal, but for some cases this is not bad. For example, pyrolysis boilers do not work well at low return temperatures. In the case of metal-plastic or polypropylene, the temperature difference will be more or less comfortable for such a unit. If you lay metal, then almost cold water will reach the boiler, which will immediately lower the temperature and may disrupt its operating mode. If this situation repeats constantly, expensive equipment (pyrolysis machine) will simply fail.
At low supply temperatures (40°C and below), ordinary black polyethylene pipes can be used. But the reviews here are different. For some they work, others are dissatisfied because they constantly leak from under the fittings. In general, the situation here is this: which pipes in the region are sold cheaper from suitable materials, those are the ones they take. The length of the circuits for heating the soil in the greenhouse is quite large, so this approach is justified. All existing pipes for a warm water floor are also acceptable for heating the soil in a greenhouse (except copper ones, and only because of the price). The only question is cost and feasibility. Therefore, everyone chooses what they consider necessary.
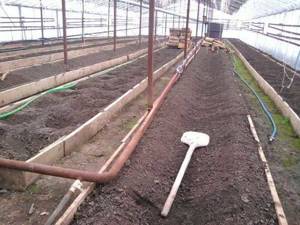
You can use any pipes - the temperatures will obviously be low. Most often they buy those that are cheaper in a particular region.
The system can be organized in different ways. It all depends on volumes and needs. But it’s more rational to do it through a standard comb for a water floor with minimal bells and whistles. Just with shut-off valves and an air vent. Or make a similar design yourself.
Owners' opinion
If you look at the reviews of owners of warm beds, you can see a truly rosy picture. A larger number of authors argue that growing seedlings in warm beds, and even in greenhouses, only has a better effect on the harvest. Those who use organic warm beds claim that in any climatic conditions the yield increases several times. They note the ease of formation of such beds, the possibility of early planting of seedlings and, accordingly, earlier harvesting. Many also point to the cost-effectiveness and durability of this method. On any site there will always be the ingredients to create this type of beds. And even a woman can build it with her own hands.
Owners of electric heated beds point to the ease of installation , if you follow the instructions exactly, and the durability of such a structure. The only downside is that you can’t find such a system in stores everywhere. Some users order installation kits online. Increased productivity, early fruit ripening and full automation of this method are noted if you install a thermostat.
Many gardeners prefer the water method of heating beds. Among the advantages, in addition to high yield and early ripening, is the possibility of self-assembly of this type of heating. Any man is able to install pipes of the required size and diameter, connect a water pump and install a furnace to heat water. In addition, this method, as the authors note, is more economical than electrically heated beds.
Which boiler to use
Since it is important to maintain a constant temperature in the greenhouse, the best option is automatically controlled boilers paired with a thermostat inside the greenhouse. But it's a matter of means. All these units are not cheap at all. However, if possible, buy automated ones. In addition to maintaining a stable temperature, they also save fuel. How? They produce the amount of heat that is currently needed to maintain the set temperature. That is, they will not allow your plants to freeze (if there is fuel) when the temperature suddenly drops, delivering their maximum power. But they will not produce excess heat during an equally sudden warming. In this case, they will simply switch to circulation mode and drive water through the pipes without heating (or with minimal heating - depending on the type of fuel) until the temperature drops below the set one. Then the active mode is turned on again, but only until the specified thermal mode is reached.
If you are going to heat with wood or coal, pay attention to pyrolysis boilers. Although they are expensive, wood in them burns for up to 8 hours, and coal lasts for 24 hours. And you don’t need to “live” in a greenhouse or keep a stoker.
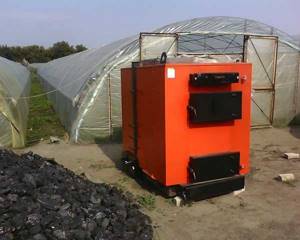
Boilers with automated controls performed best in the greenhouse, and you need to choose any fuel that is available and at the same time inexpensive
How to calculate the boiler power for a greenhouse? In general, the surface area of the greenhouse is multiplied by the heat loss coefficient for the material with which the greenhouse is covered, and all this by the required temperature difference.
The temperature difference is considered to be between the minimum during the heating period outside and the required one in the greenhouse.
For example, we will be heating from February to April. The lowest temperature, even -18°C, will be maintained inside at +20°C. Total delta (difference) 38°C. Now let’s calculate the boiler power for such conditions in a greenhouse 10 x 5 x 2.5 m. Covered with double film. The area of all “film” surfaces of the greenhouse is approximately 150 m2, the coefficient of heat loss through the double film is 3.5. Total we get: 150*3.5*38=19950W. Rounding up we get 20 kW. For reliability, you can take a slightly more powerful boiler, approximately 24-25 kW (in case of expansion or abnormal cold).
A simple greenhouse with heated soil with your own hands
Water heated beds also have a number of advantages. Firstly, the condensate formed on the pipes additionally moistens the soil. This design provides uniform heating of the air in the room. To heat the greenhouse, you will need a gas or electric boiler; you can also use a small wood-burning stove made of brick or metal.
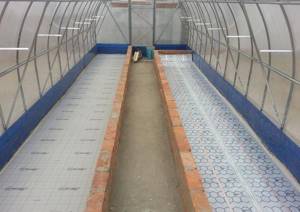
You need to purchase a smoke outlet pipe for it. The choice is made in accordance with the configuration of the heater.
To install a furnace or boiler, it is necessary to prepare a foundation; for a brick structure, a concrete foundation. A metal boiler can be placed on a sheet of asbestos and cement mixture. Next, the structures provide stability and attach the chimney, hermetically sealing the connection points.
Insulation of beds with pipes, necessary work:
- Remove soil 35-40 mm thick;
- Material for thermal insulation is laid at the bottom of the resulting trench; foam plastic is usually used;
- Water pipes are placed on top and connected to the heating system;
- Fertile soil is laid on top of the pipes.
This heating method is considered optimal, but it is necessary to ensure that the temperature of the water in the pipes does not exceed 45 o C, otherwise you can burn the roots of the plants.
What you need to know when arranging soil heating in greenhouses
When the soil is heated, the situation is somewhat different from the usual: the soil dries from the bottom up. Be that as it may, you will have to either conserve the moisture that is available or arrange watering. You can preserve moisture by laying mulching film (black). And if you moisten the soil, it is advisable to moisten it by drip: it is both more economical in terms of water consumption and better for plants. In general, it is optimal to do both mulching and watering in combination.
A heated floor system without a circulation pump is possible in principle, but it is absolutely unprofitable (you need to bury pipes of a much larger diameter) and ineffective. The speed of movement of the coolant in such systems is so low that the soil in the greenhouse does not warm up. Why are such systems made? To avoid freezing during a power outage. But since most greenhouses still try to install automated boilers, a backup power supply system is still necessary. Circulation pumps require very little power, so they will not greatly affect the cost of the equipment.
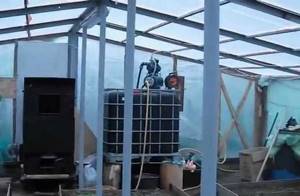
A warm water floor without a circulation pump in a greenhouse will be ineffective
If interruptions are short-term, an uninterruptible power supply (not a computer) with several car batteries connected in parallel is sufficient. This system can provide several hours of boiler and pump automation operation.
If outages are long, you need a diesel generator (or gas). To automatically turn on the generator in the event of a power outage, you also need an ATS (automatic transfer switch). This device automatically starts the generator in the event of a power failure. All this together costs quite a lot of money, but the heating in your greenhouse will work without failure. If you wish, you can save a little: the starting system can be assembled by any normal electrician. He can connect everything.
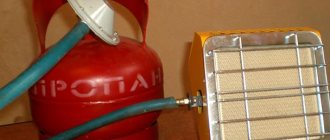
Of the nuances, that seems to be all. The question remains, what type of fuel should be used to heat the heated floor in the greenhouse. There are no options: the cheapest available. If you don’t see any, you can try to prepare some of the fuel yourself:
- Make fuel briquettes from waste, sawdust, coal dust, etc. You don’t need complex equipment for this; you can get by with a primitive press. But briquettes are an excellent fuel. Sunflower husks, for example, provide more heat than many firewoods.
- Install a biogas production plant. Despite the “scary” name, almost the entire installation is a container where manure and plant residues ferment. If you can get hold of such a “valuable” product as manure nearby (pig, cattle or poultry), then you can provide your greenhouse not only with gas, but also with electricity.
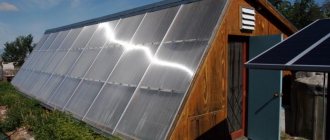
- For regions with a large number of sunny days (not with high temperatures in winter or spring, but with many clear days), part of the heat can be obtained from solar collectors.
Despite the fact that alternative energy is not yet very developed in our country, many people use it very successfully. Why not try it?
Recommendations for using a warm bed
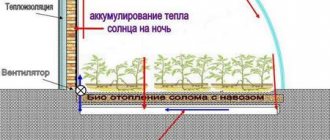
The most commonly used soil heating due to the heat generated during the decay of organic matter is not constant in each specific case and changes its temperature and quality indicators over time. Typically, a warm bed filled with organic waste is fully functional for 4 years.
You will be interested to know how to insulate a greenhouse for the winter with your own hands.
And since in each year of this period it demonstrates different conditions, it is advisable to vary the vegetables grown on it:
- The first year is characterized by maximum heat generated and a high concentration of nitrogen. During this period, it is preferable to plant pumpkins, watermelons, cucumbers, tomatoes, melons, eggplants, peppers, and zucchini.
- The next year, the heat generated, having decreased somewhat, still remains at a high level. The same is observed with a high nitrogen content, so it is recommended to replant the same crops as originally. The exceptions are melons, watermelons and pumpkins. During this period, crops prone to saturation with nitrates should also not be grown here.
- The third year is most suitable for growing tomatoes, legumes, peppers and cabbage, as well as root vegetables and herbs.
- In the fourth year, when heat generation is minimized and the concentration of nutrients decreases, it is advisable to plant unpretentious crops such as peas, beans and greens.
Experts recommend creating new beds with bioheating in a greenhouse in the fall after harvesting, so that the heat release is maximum in early spring.
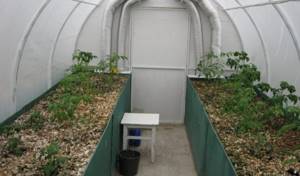
Planting seedlings in a greenhouse in early spring and growing them in almost winter soil is quite possible if you resort to the help of warm beds. Some difficulties in arranging them are fully compensated by the numerous advantages that gardeners receive from their use.

