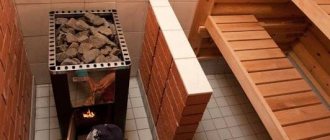
When considering options for acceptable solutions for fastening bricks in fireboxes and other parts of stoves and fireplaces, it is important to understand that we are talking not only about the beauty and strength of the structure, but above all about safety.
A good refractory mixture for masonry stoves prevents the formation of cracks during repeated heating with any type of fuel, cooling, mechanical loads from cast iron grates, doors, and ash containers. Accordingly, no harmful combustion products will enter the premises, residents can enjoy the warmth with complete peace of mind and confidence in safety.
Step-by-step instructions for making the mixture
The stove is made to heat a country house, it is used not as an additional, but as the main heating option. In this regard, the load on the elements increases; at all stages of masonry, the recommendations of professionals must be strictly followed. We have already mentioned that the reliability, duration and safety of operation of the stove largely depends on the quality of the mixture. In the middle zone of our country, clay is everywhere; there is no need to waste a lot of time searching for it. As for the quality of clay, in the vast majority of cases it can be used to make a mixture; the final properties of the solution are regulated by changing the amount of sand.
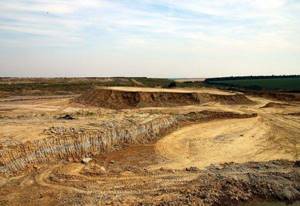
The best clay is in industrial quarries
But this does not mean that you need to specifically go in search of brick factories; you can dig a hole on your site and collect clay. A few buckets of clay and sand are enough for a stove; the total number of bricks rarely exceeds 600–700 pieces. How to properly prepare a solution from clay?
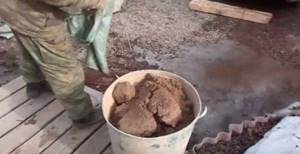
Step 1. Dig up the clay. This can be done on any site with a suitable soil structure. As we have already said, no one will do any analysis of the clay; there is neither the opportunity nor the need for this. In our case, the clay was harvested in the forest; there were enough traces of previous harvests in it; you can dig clay from old pits.

Clay can be dug up in the forest or on your own plot
For one large rural stove, it is recommended to fill a barrel with a capacity of 200 liters. There is no need to compact it; let the soil lie freely and there will be air gaps between the individual lumps. The fact is that the clay must be soaked for at least a day; the cracks will ensure the penetration of water throughout the entire volume. The longer the material is soaked, the better its quality, the more uniform it is, and the easier it is to make the mixture.
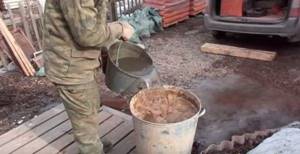
The clay is poured into a container of suitable size.
Step 2. Fill the clay with water. We have already mentioned that the correct technology requires that the soil be wet for at least a day. Immediately prepare river sand and a sieve. The mesh size of the sieve is 0.5–0.6 mm. There is no need to make it smaller - it will be difficult to pass the mixture through. And if you use a sieve with large cells, the stones will interfere with the work. Our seam thickness is about one centimeter, stones of five millimeters do not create problems.
The clay must be filled with clean water and left for at least a day.
Step 3. After the clay has infused, begin stirring the composition. It is recommended to do this for the first time using the following algorithm:
- Mix the clay and water thoroughly in a container. It is necessary to use powerful mixers, the clay is mixed tightly;
- if there are pebbles in the solution, then filter it through the prepared sieve. All large impurities should be removed;
- add sand to the clay at a rate of approximately 1:3 (three parts sand per part clay);
- Stir the mixture and add water as needed. The consistency of the mixture should resemble rich sour cream.
Construction mixer price
Construction mixer
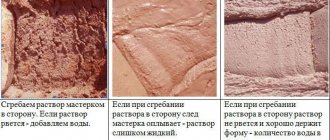
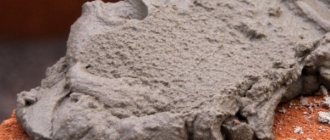
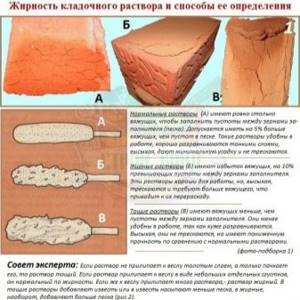
The quality of the mixture is determined by eye. If it hardly slides off the surface of the trowel and large marks remain on it, then there is a lot of clay in such a solution, add sand. If the composition falls easily, the trowel is completely clean, then you need to reduce the amount of sand. This is how experienced stove makers make up the proportions; in addition to finishing experiments, they can learn a lot about the physical characteristics of clay and sand by eye.
Determining the correct consistency of the solution
Lime mixture
It contains lime paste and sand.
You can prepare lime paste yourself by mixing quicklime and water in a ratio of 1:3. But it is better to buy ready-made dough in the store, its quality is much higher. To prepare the mixture, fine sand, sifted through a sieve, is mixed with lime dough in a ratio of 3:1 and diluted with water until a creamy consistency is achieved. After preparing the mixture, you need to check its plasticity. This is done by stirring the mixture with a wooden bar:
- lean mixture - does not stick to the plank at all, you need to add lime to it;
- normal - after removing the plank from the solution, it remains on it in the form of a film or lumps;
- greasy - sticks to the wood in a thick layer, you need to add sand.
The disadvantages of the lime mixture are the long drying time of the masonry and the negative effect on the respiratory system.
Clay based
One of the cheapest and most accessible types of connecting stove mixtures. Clay mortar for laying stoves is characterized by increased fat content, which determines the degree of plasticity, heat resistance and strength of the finished material.
Natural clay oven mortar can be:
- Fat – characterized by plasticity, strength, but the rapid appearance of cracks after drying;
- Normal - quite plastic and resistant to cracking, gives a small percentage of shrinkage after drying. Able to withstand high temperatures up to 110 degrees;
- Skinny - non-plastic and short-lived, susceptible to rapid delamination and crumbling.
A refractory clay mortar is prepared using three components: clay, sand and water. This composition is resistant to cracking and drying out and ensures reliable installation of a brick stove.
To build a stove, it is recommended to use fatty and normal compositions, which have increased strength, ductility and resistance to delamination.
The quality of the clay determines the amount of sand needed to mix the solution. Clay and purified water with a low content of impurities are used for work. To lay 100 bricks, on average, up to 20 liters of clean water are used.
To prepare the solution, fine-grained quarry or river sand without additional impurities is used. Before use, it must be sifted through a fine-mesh sieve. If it contains gravel impurities, then it is recommended to use a sieve with a mesh size of up to 10 mm. For fine-grained material, a sieve with 2 mm cells is suitable.
Before adding other components, it is recommended to test the clay base for plasticity. How to do such a check? To do this, a small board should be lowered into the resulting mixture for laying the stove and its thickness should be determined. It should be moderately thick and viscous. If there is excess liquid, then it is worth adding a little binder, stirring periodically and testing the mixture for plasticity.
The optimal thickness of the connecting material is 2 mm, which indicates the correct proportions of all components. The finished masonry mass is viscous and not very dense.
The appropriate density of the mortar for masonry depends on the ratio of the main components in it - clay and sand, respectively:
- Fat mass – 1:2;
- Normal weight – 1:1;
- Lean mass – 2:1.
How to prepare high-quality clay-based connecting mass? There are several proven methods.
Method No. 1
The required volume of clay is soaked for 24 hours, water is added to obtain a thick mass. The resulting material is carefully filtered, then sand is added to it and mixed again
It is important to avoid the formation of clay puddles, which can be eliminated with a small portion of the binder component
Method No. 2
Fireclay sand and clay are combined in a container in equal proportions, purified water is added (1/4 of the volume of clay). All components are thoroughly mixed until a homogeneous mass is obtained.
Method No. 3
The composition is mixed on the basis of loam. This recipe involves preparing 10 different solutions, from which the best one is selected.
For the first: 10 volumes of loam, 1 volume of sand and 1 volume of cement, etc. Descending volume of loam. Ten resulting bases are placed in different containers and left to dry for 5-6 days. At the end of the allotted time, the highest quality composition of the solution with a minimum degree of shrinkage and resistance to cracking is determined.
Method No. 4
Sand and ¼ water are added to the clay. All components are mixed to obtain a thick viscous mass. To increase strength, it is recommended to add rock salt or cement to such a mixture. For a bucket of mixture – up to 250 g of salt and ¾ liter of cement. The salt is first dissolved in water, and the cement is diluted with water to a thick consistency, after which it is added to the finished base.
Features of material selection
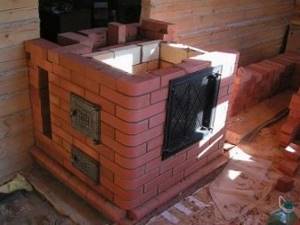
The process of constructing modern stoves is divided into several stages:
- The first stage is the arrangement of the furnace foundation using a concrete composition;
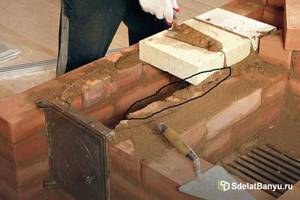
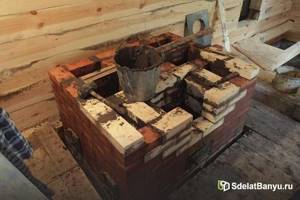
- The second stage is the laying of a furnace from refractory bricks using a clay-based masonry compound;
- The third stage is lining the furnace with a plaster composition.
The most important is the stage of direct masonry and the preparation of a reliable base, which must have high performance characteristics - heat resistance, adhesion, water resistance, strength and durability.
To equip modern stoves, several types of masonry mortars are used: clay, lime and cement.
Masonry mortars can be simple or complex. Simple ones consist of one type of binder and filler; complex mixtures include two or more binders and several aggregates. Binding components are lime, clay and cement.
To prepare the mortar for masonry, you will need the following tools:
- Mixer;
- Kneading container;
- Sieve;
- Trowel;
- Master OK;
- Plastic spatula;
- Construction thermometer;
- Scales.
Secrets of choosing ingredients for high-quality clay mortar
The basis of the mortar for laying bricks is the following ingredients:
- water. The main requirement for it is the complete absence of all kinds of impurities, the presence of which can negatively affect the quality of the finished solution and lead to a noticeable decrease in the strength of the structure. The durability of the binder also directly depends on the quality and purity of the water, so you should take this issue responsibly and immediately abandon the idea of using water from the nearest body of water;
- sand. You should use clean sand that does not contain crushed stones or stones. The best solution would be to buy homogeneous sand, which should first be sifted through a sieve. The diameter of the holes in the sieve should not exceed 1.5 mm;
- clay. It is the main ingredient that provides excellent astringent properties of the finished solution and the reliability of the furnace design. The correct choice of this ingredient guarantees the durability of the structure and its excellent tightness.
Before making your final choice, perform a few simple tests to help determine the quality of the clay. It is advisable to make several mixtures with different amounts of sand and clay, forming small cakes. Leave them for 10-12 days in a warm room to make sure there are no cracks and the correct proportions of the solution ingredients are selected.
It is important to remember that solutions based on clay and fireclay can only be used for a certain type of masonry, because otherwise you will not be able to achieve the desired results! This mixture is ideal for the combustion and heat storage areas, and can also be used for laying the foundation and chimney. This feature is due to the increased level of resistance to prolonged exposure to high temperatures of the clay mixture and resistance to mechanical damage
But keep in mind that with prolonged exposure to condenser moisture, such structures will not last long, numerous cracks will appear on them and the structure itself will last a short time.
For laying the chimney pipe and foundation, it is better to use solutions based on cement or a mixture of quicklime and sand. They are distinguished by excellent resistance to the negative effects of increased moisture, and will also ensure the durability of the stove design. Use clay solutions in “hot spots” where you need to achieve maximum tightness and impeccable reliability of the structure.
Tips for use
When doing the work yourself, you should prepare everything carefully. You will need containers and mechanical devices. The base must be cleaned of dirt, dust and foreign particles.
It should be noted that the mixture is prepared in such quantity as to last for an hour of work. After this period of time, the composition begins to harden, losing its properties. Fireclay mortars can be used within 40 minutes, and lime mortars can be used within 24 hours.
The masonry mixture holds liquid well, so there is no need to wet the base before working with it.
The layer of the applied mixture should not exceed 10 mm. When constructing chimneys, especially the part that faces the street, as well as when laying the foundation, it is not recommended to use pure clay mortar, since the substance quickly collapses under the influence of fumes. In this case, a mixture with the addition of lime and sand is suitable.
When adding clay to the mixture, it is necessary to take into account the degree of its fat content. To check the quality, you can try rolling a thick strip of wet material
Then you need to carefully try to stretch it. The formation of torn surfaces will indicate the content of a large amount of sand - it is better not to use such material
You can use a stirring tool to check the quality of the clay. When a substance sticks to the surface, the clay is said to be greasy. If after some time liquid appears on the surface of the clay, then the substance contains too much sand.
A mixture based on low-quality clay can soon lead to deformation, destruction of the brickwork, and shrinkage of the surface.
After laying the stove or fireplaces, you can start heating no earlier than three days later. This time is necessary for the mixture to completely harden. Brickwork can be faced only after a month of using heating structures, and the heating of the furnace must reach a temperature of at least 300 degrees within an hour.
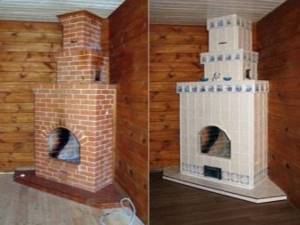
When using the solution, follow the instructions for use. Strict adherence to the sequence of actions will ensure a positive result and high quality of the surface being used.
The right job with the right solution
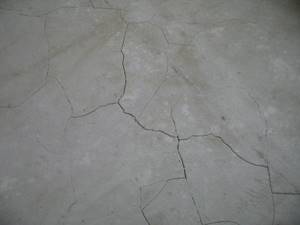
The characteristics of plaster are important for the quality of the coating, but without following the application technique, even an expensive solution will certainly crack during use. Therefore, if you do the work yourself, strictly follow the algorithm of actions.
Preparatory stage
After completion of the masonry, the stove should stand for at least a month until the end of the initial shrinkage.
Join the joints, deepening them by 5-10 mm to increase the area of contact with the solution.
Clean the wall from dust and dirt using a brush and heat the oven to 50-60⁰C.
Moisten the masonry thoroughly with water so that the brick does not absorb moisture from the plaster, speeding up its drying.
Reinforcement of the finishing layer
photo from the site https://obustroeno.com
It is necessary to reinforce the surface, and there are several options for performing this stage:
Metal soft mesh. The metal must be galvanized so that the contours of the mesh do not show rust stripes. You need to take care of attaching the mesh at the stage of masonry, leaving wire outlets for it. If this has not been done, then the mesh will have to be secured with screws or nails into the seams.
Burlap or gauze. Opponents of this method of reinforcement point to the flammability of burlap, while supporters talk about environmental friendliness and the impossibility of ignition in clay. Having decided to reinforce the plaster with burlap, it is cut into squares, dipped in a liquid solution and glued to the wall after spraying.
Plastering
photo from the site https://kursremonta.ru
The plastering stage will require work to be performed in the following sequence:
Padding. You need to use deep penetration primers and prime the surface before applying each layer.
Spray. To spray, use a brush and the same solution as for plaster, only diluted with water to the consistency of liquid kefir. This is done to fill small irregularities and roughness, so as not to leave air voids that will lead to cracks.
Plaster. The solution is applied using a trowel and smoothed with a trowel, the thickness of each layer is 2-3 mm, while it is advisable to keep the total thickness of the plaster within 10-15 mm.
Covering. It is also done with a liquid solution, after which it is rubbed with a trowel. In the case of clay mixtures, grouting can be done with a rag soaked in the solution.
The stove cannot be lit for the next three days, and the first heating should not exceed half the maximum power of the stove.
If the finished plaster does crack, the crack must be repaired. To do this, it is expanded with a spatula, the surface is wetted and filled with the same composition that was used during the main work. Don't forget about primer and grout.
Now you know exactly how to make a mortar for plastering a stove, and let it please you with its impeccable appearance and cozy warmth for many years to come.
How to properly prepare clay for laying a stove
Based on the experimental results, appropriate conclusions are drawn. If the fat content is high, the amount of sand should be increased by at least 1.5–2 times; if it is low, on the contrary, it should be reduced.
The ideal proportions of clay and sand for laying stoves are 1:1; this solution is plastic and heat-resistant. But it is necessary to dilute the mixture, focusing on the intermediate result. The classic recipe involves adding ¼ liquid, but depending on the specific situation, the amount of water can be increased.
Clay preparation
Based on the volume of work, the required amount of the base substance is prepared. But before preparing the solution, the material undergoes preliminary preparation:
- The clay is placed in a container and completely filled with water. It could be an iron-lined box or a barrel. If there are pieces or seals, they are first broken off.
- Everything is thoroughly mixed and left for 48 hours. Many craftsmen believe that clay should be kept for at least 5–7 days, constantly adding water.
If after 48 hours small lumps are observed, then everything is mixed again, ground and left for another 24 hours.
Mixing the solution
The finished clay material can be mixed using several methods, each of which takes into account the characteristics of the substance:
- The standard method is to add sand. Its quantity depends on the measurements taken and may vary. Sand is poured into the prepared container, then clay is applied and covered with sand again. A shovel is used to knead the ingredients. If liquid comes out from above, it means a little more sand is required. Clay that is too dry should be diluted slightly with water. The composition is considered ready after it slowly slides off the shovel and has a uniform structure.
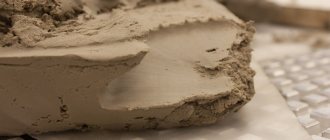
- With medium fat content, clay can be diluted without sand. The material is laid on the prepared platform in layers, wetting is carried out each time. When the height reaches 30–35 cm, mixing begins; for this, the back of the shovel is used: it is struck on the clay. The kneading continues until a homogeneous mass is obtained. The readiness of the mixture for masonry is checked as follows: a thin layer of the composition is applied between two bricks and left for some time. Then you need to lift the top piece, and if the second brick holds, then you're done.
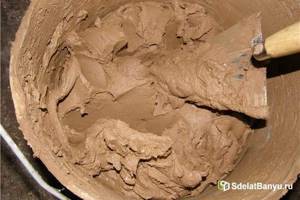
You can determine the quality and readiness of the solution using tactile sensations. The resulting material is rubbed by hand: when a homogeneous rough layer is formed on the fingers, the mixture can be used. Externally, the composition should resemble thick sour cream, then the stove will be reliable and will serve for many years.
Checking the plasticity of clay
To check clay for quality, we recommend several proven methods:
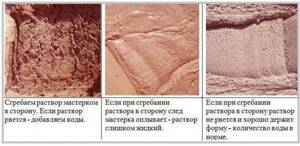
The first method is based on clay of different plasticity, which shrinks differently on a wooden surface. Pour ten liters of water into a bucket and add clay until a creamy solution is obtained, stirring it with a cleaned board. If a thick layer of clay remains on it, then the solution is too plastic. It is necessary to add sand at the rate of one liter jar per bucket of solution until it reaches normal plasticity. The solution is considered to have normal plasticity when a layer of clay of 2 millimeters remains on the board and sticks to it in clumps. If the board is covered with a thin layer of 1 millimeter, then the solution is low-plastic.
The second method is to mechanically test the solution after drying. We clean the clay from large pieces and measure out five even portions in a 1-liter jar. Add sand to medium-plastic clay in proportions: leave the first without sand, mix the second with ¼ of a jar, add ½ of a jar to the third, add a whole jar to the fourth, and 1.5 jars of sand to the fifth. We dilute each mixture with water so that the clay does not stick to our hands, but kneads well. Balls are molded from the resulting solutions, which then need to be crushed into cakes. These cakes must dry, the main thing is not to confuse which solution is which. Those with little sand will crack, and those with too much sand will crumble. The optimal composition is considered to be the one from which the cake is dense and not cracked.
For the third method, it is necessary, as for the second, to prepare balls. After they dry, two planed boards are taken. The ball rests on one of them, and the second one is pressed down on top. Where the optimal composition of the solution is, it will begin to crack when it is compressed by 1/3 of its diameter. A greasy solution will crack halfway across the diameter, while a thin solution will crumble almost immediately.
How to coat a stove with clay
The choice of how to seal the stove so as not to crack depends on what mixture you decide to use. But first you need to clean the bricks from the plaster and the layer of finishing material. They are then treated with a solution.
If you decide to use a clay mixture, then you need to follow the instructions on how to properly coat the stove with clay:
- The prepared solution is stirred one more time.
- They check its quality. To do this, roll the mixture into a ball and if it starts to crack, then add water.
- Before coating the stove with clay to prevent it from cracking, the damaged areas are moistened with water.
- The cracks are filled with the solution.
- Then the oven can be plastered.
- Despite the fact that the repair of the brick kiln is completed, you should not rush to heat the unit, since the solution must dry completely.
If you carry out repair work in full accordance with the instructions on how to coat the stove with fireclay clay to eliminate cracks, then you can forget about them for a long time.
Preparation of materials for preparing mortar for laying a stove
The easiest way to prepare sand. It is dried because the raw material cannot be sifted. And then they are sown on a mesh with a mesh size of 1.5 - 2 mm. The task is to remove pebbles and impurities.
Clay is more of a hassle. In the classic version they did this. Clay was dug up in advance, ridges about a meter high were formed from it, moistened and left for the winter. Water, penetrating into the pores of the clay, freezing, destroyed the structure of the clay, crushing it. After such exposure, the clay easily dispersed in water, creating a homogeneous suspension - clay milk.
Then the clay was mulched. Stir with excess water in a tall barrel and leave. Heavy impurities (stones and sand) collected at the bottom of the container. Light impurities (roots, grass, other debris) simply floated up. They were easy to assemble and remove. After waiting a little (a day or two), the lightened, settled water was removed from above, and the middle layer with clean clay was collected and used for further preparation. If the clay turned out to be thin or heavily contaminated, the mulching procedure was repeated several times. Today they also resort to it, but in full only in cases of extreme need - when there is no fatty or normal clay.
Afterwards the clay was left to “ripen”. They simply filled it with water and waited for all the organic matter to rot. The process is quite smelly and long - about one and a half to two months. The “rotten” water was not changed. The smell served as a marker for the completion of the process. As soon as the stench disappeared, the clay was considered ready. This meant that all organic impurities in the clay were removed.
Today, rarely does anyone allow themselves the luxury of long clay preparation. Therefore, the preparation process is shortened as much as possible.
First of all, the clay is soaked for several days, stirring daily with a mixer. Any grass and roots that float (or are wound around the mixer auger) are removed. As soon as the water settles, the excess is carefully drained, and the soaked clay dough is scooped out to prepare the solution. The stones are removed from the bottom, and the remaining lumps of clay are again filled with water.
If there are a lot of lumps and foreign inclusions, it is filtered through a sieve with the same mesh as for sifting sand.
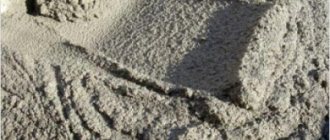
The prepared clay milk should have the consistency of thick cream.
Removing Impurities
Almost all quarry clays and sands contain impurities and require purification. Remains of plants, roots, grains of sand, pebbles, and pieces of crushed stone are removed from raw materials in various ways.
How to remove impurities from clay
Impurities greatly degrade the quality of the masonry. Purification of raw materials is carried out in three stages:
- manual sampling of plant remains, roots, crushed stone, pebbles;
- sifting through a metal sieve with a hole size of 1.5 mm;
- soaking clay;
- rubbing through a metal fine-mesh sieve.

Photo 2. The process of sifting clay through a metal sieve. You need to press it with your palm so that all the particles pass through the mesh evenly.
In practice, to clean clay for mortar, craftsmen do without the labor-intensive process of soaking the raw materials.
How to remove impurities from sand
The sand is considered prepared when the water passing through it becomes clear. To prepare the material, you need to do the following:
- Plant remains, roots, and large stones are manually selected from the sand.
- After a rough sampling, the material is sifted through a metal sieve with a mesh size of 1.5 mm.
- The sand is placed in a burlap bag (or net) and washed with running water. A hose is used for flushing; water is supplied under pressure.
How to prepare a solution for plastering a stove?
When preparing the solution, the main attention should be paid to the ratio of the components and the order of their mixing to obtain a uniform consistency. The standard preparation method is to mix the dry ingredients, followed by adding liquid until the required thickness is obtained, but it is worth taking into account the nuances that depend on the type of plaster chosen.
Simple clay mortar for oven plaster
To prepare such a solution you will need the following components:
Clay – 1 volume part.
Sand – 2 volume parts.
Asbestos (fiberglass or straw) – 1/10 by volume.
When preparing clay mortar for plastering a stove, the proportions may change. If the clay you received has a high fat content, the volume of sand must be increased to 3 or 4 parts, based on the results of the Shepelev test or your own experience.
The secret of seasoned masters
Experienced craftsmen advise adding 200 g of salt to a bucket of solution to avoid the appearance of cracks in the future. This advice has a logical basis - salt is hygroscopic and slows down the setting of the plaster, making it dry evenly. Subsequently, when heated, hygroscopicity prevents drying out and cracking of the coating.
Lime-gypsum mortar for stove plaster
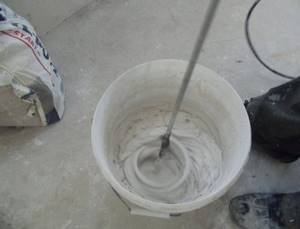
photo from the site https://nashaotdelka.ru
The components for this type can be purchased at any construction supermarket:
Slaked lime – 2 parts by volume.
Gypsum – 1 volume part.
Sand – 1 volume part.
Asbestos fiber 2/10 by volume.
Keep in mind that gypsum sets very quickly, and you need to prepare the amount that you can use within half an hour, because it will not be possible to dilute it after preparation.
Do-it-yourself cement-clay mortar for plastering a stove
The addition of cement is intended to give strength to the coating. The following ratio of components is recommended:
Portland cement – 1 volume part.
Clay – 1 volume part.
Sand – 2 volume parts.
Asbestos – 1/10 part by volume.
For mixing, it is convenient to use a drill with a mixer attachment, which will allow you to mix the components evenly without forming lumps.
Lime-clay mortar for plastering a stove: proportions
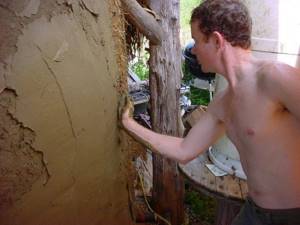
photo from the site https://myshtukaturka.ru
To prepare this composition you will need:
Lime – 1 part by volume.
Clay – 1 volume part.
Sand – 2 volume parts.
Asbestos – 1/10 part by volume.
As you can see, the differences with the previous composition are small, but thanks to the addition of lime, this clay solution for plastering the stove will be lighter, which means that fewer layers of paint will be needed to give the finished look.
Ready-made heat-resistant plasters
A limited number of manufacturers produce such highly specialized products, but in general, buying heat-resistant plaster will not be a problem, and the cost of domestically produced plasters is quite affordable.
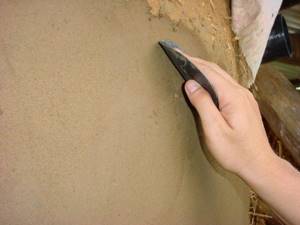
photo from the site https://granstroy.ru
The following brands are available on the Russian market:
Terracotta is a Russian company with a very affordable pricing policy. The prepared solution retains its properties for 60 minutes, giving even novice craftsmen time to develop.
ORTNER is an Austrian brand specializing in materials for the construction of fireplaces and stoves. High quality is consistent with the cost of building mixtures.
Rath HefnerPuts is another representative of Austria, the undoubted advantage of which is the fact that the mixture is not produced in dry form, but in the form of a solution, without requiring dilution.
Plitonite is a domestic plaster that contains reinforcing fibers. The hardening time of Plitonit fireproof plaster is 30 minutes, which is also quite a decent indicator.
The stove is a clay-cement mixture in which the optimal proportions have already been met, and all that remains is to add water. This eliminates the need to think about how to prepare a clay mortar for plastering the stove.
As you can see, the choice is quite wide, and allows people with any financial capabilities to choose their own option. Ready-made fireproof plasters can withstand temperatures of 400-600⁰C, so they can be used for the exterior of a stove without fear.
Types of clay solutions
The stove is in extreme conditions: the base is always cool, the firebox has steep temperature changes, the outer part of the chimney is always cold and damp, but during heating the passing heat of the smoke warms its inner part. Other solution compositions may be needed. They will have to be mixed not only with clay. Depending on the characteristics of each part, several types of fastening agents are prepared for the following work:
- The furnace foundation is installed using a cement-sand mortar. 1 part cement is mixed with three parts clean sand. Or cement-lime (the proportions are as follows: 1 part cement and 2 parts lime paste are diluted with water, then 9 parts sand are added).
- The masonry of the first two rows is made on the basis of a cement-sand mixture, and then - on a clay-sand mixture, the firebox - on a clay-chamotte mixture. Fireclay sand will provide resistance to high temperatures.
- Facing work requires a different mortar; lime-clay or limestone is suitable. Clay mortar for plastering a stove requires the addition of asbestos or gypsum, the proportions will be as follows: 1 part clay, 2 parts sand, 1 part lime, 0.1 part asbestos.
- When constructing that part of the chimney that functions on the street, lime or cement-sand mortar is used. The hygroscopicity of the dried mortar will not allow bricks to be laid on clay in places where moisture is available. The lime mixture is mixed using lime paste, and sifted sand is added to it in a ratio of 1:3.
Concrete and heat-resistant concrete mixtures
Concrete mortar is also used for the stove foundation and chimney above the roof. Its strength is not inferior to limestone, hardening begins after 45 minutes. Before mixing, the components are sifted through a sieve. First, sand is poured into the container, and cement is placed on top of it. Stir until smooth, then add water
It is important to achieve a viscous consistency, not thick and not too runny.
For a monolithic firebox, a heat-resistant concrete mixture is used. Its composition is as follows:
- Portland cement M400 1 part,
- crushed brick 2 parts,
- sand 2 parts,
- fireclay sand 0.3 parts.
Strength increases if you use quartz sand instead of ordinary sand. Refractory concrete is characterized by large fractions (up to 10 cm) and high density. The following proportions are used as standard: 8 liters of water per 20 kg of mixture. Mixing is carried out mechanically, for example, in a special mixer.
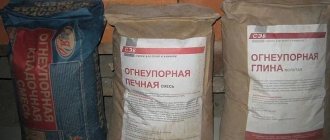
In ready-made oven mixtures, all the above procedures have already been done at the factory. There is no need to look for the right proportion of sand and clay. Most heat-resistant mixtures are simply filled with water and mixed. You don’t have to select the amount of water either: it is indicated on the package. Experienced stove makers may not need such mixtures, but for a beginner, when laying a stove with their own hands, a heat-resistant mixture will be useful. The main disadvantage of using a heat-resistant mixture is the higher overall cost of building the stove.
A significant advantage of ready-made mixtures is the presence in their composition of ingredients that are usually not used when preparing masonry mortar with your own hands. Such components include plasticizers and fireclay chips.
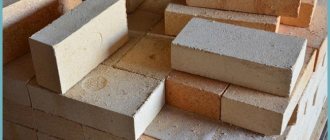
Ready-made oven mixtures based on crushed refractory ingredients are called mortars. They are divided into fireclay, semi-acid, mullite and mullite-corundum. When laying home stoves, only fireclay mixtures are used. The rest are used in the production of blast furnaces, cupola furnaces, hog furnaces, etc. Let us dwell in more detail on fireclay mixtures.
Fireclay is a fireproof material that is obtained by firing fireclay clay. The material is exposed to high temperatures until it completely loses its plasticity and moisture. After this, the fireclay is ground into powder, mixed with various types of clay, to obtain different heat-resistant mixtures. Mortars are classified as thermo-hardening, that is, they acquire their fire-resistant properties only after high-temperature firing.
| The brand of the mixture is designated by the letter M, the letter Ш stands for “fireclay.” The number in the marking indicates the size of the proportion of aluminum oxide (Al2O3) in the composition, and, accordingly, the fire-resistant properties of the material. Grades MSh 39 and MSh 36 have a fire resistance of at least 1730 degrees, MSh 31 - 1690 MSh 28 - 1650. |
For all their advantages, ready-made mixtures also have certain limitations. Many mixtures do not provide for re-mixing unless the entire supply of solution has been used up. Masonry cannot be carried out at sub-zero temperatures. The solution from the finished mixture will take longer to dry due to the addition of plasticizers.