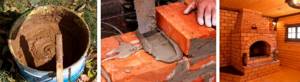
To build a fireplace or stove, classic red brick is most often used; its main advantages are durability, reliability, sufficient density, high heat capacity and fire safety. When performing installation work, a special mortar for laying furnaces is used, which is based on special components. The stability and strength of the entire structure depend on how conscientiously and in what proportion they are mixed. Most often, when constructing furnaces, solutions based on clay, cement or lime are used. The last two materials are a more preferable choice if the master has started building a pedestal for the chimney: cement and lime are more durable and resistant to cracks. To ensure that the future structure is stable, solutions for furnaces are prepared in precise proportions, guaranteeing the required plasticity and optimal density.
Important points
The construction of the furnace takes place in several stages, each of which has its own mortar recipe. First, a foundation is made; work on it requires a reliable concrete solution, which is based on cement. After this, the laying of the furnace itself begins; as a rule, refractory bricks are taken for it, and here you cannot do without masonry mortar. Work on a chimney has its own characteristics: the priority is resistance not to high temperatures, but to atmospheric changes, because its installation is carried out not only indoors. The final stage is coating the oven with a plaster solution, the composition also differs from the previously used mixtures.
Of all the stages listed, the greatest attention should be paid to preparing the mortar for the stove masonry. It must meet the following conditions:
- High heat resistance , expressed in the ability to withstand the influence of open flames and maintain a flat surface even under high temperatures.
- Even heat-resistant bricks adhere well to each other , ensuring a minimum seam thickness.
The most commonly used stove mixtures are clay-based, which have been used by stove makers for several centuries. Other stages of furnace construction are characterized by the use of lime-based solutions, as well as mixed ones - with the addition of cement or cement-sand to lime.
Those who want to prepare a solution for stove masonry with their own hands cannot do without such devices as:
- construction mixer;
- pallet or other similar shaped container;
- measuring bucket;
- shovel;
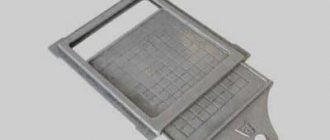
- sieve;
- putty knife;
- Master OK;
- thermometer;
- scales;
- trowel.
Requirements for oven mixtures
The stove mixture must be resistant to high temperatures and fire; these properties can be expressed in different ways.
- Heat resistance is the ability of a substance, when exposed to high temperatures, to maintain the integrity of the structure and not lose load-bearing strength.
- Heat resistance - when exposed to high temperatures, the material not only does not lose its structural integrity, but also withstands mechanical loads.
- Fire resistance is a more general concept that implies the ability of a material to resist high temperatures. Refractory material can be both heat-resistant and heat-resistant. Fire resistance is also characterized by the viscosity of the material and resistance to aggressive environmental influences (gases from fuel combustion).
For oven mixtures, the main parameters are heat resistance and fire resistance, since the masonry is practically not subjected to mechanical stress.
Clay mixtures by type and consistency
To prepare it, you need to take clay, red or white, combine it with sand and then add water. It is very important to use only high quality components for the mixture: for example, only calibrated sand is suitable. To clean it from fine gravel and various plant impurities, use a sieve. The same is done with clay, achieving its homogeneity. As a rule, the following proportions are used: 1 part sand and clay, or 2 parts sand and 1 clay. The water in the solution should be approximately ¼ of the amount of clay.
The main criterion for the finished mortar is
its level of fat content , which determines the elasticity and astringent properties of the mixture, and therefore the reliability of the future structure.
It is also worth paying attention to the purity of the water used: it is better if there are fewer minerals in it. Otherwise, stains may appear through the plaster in the future, which will be caused by sufficient mineralization of the liquid. The finished mortar for the stove should be moderately greasy: too soft will lead to the fact that the finished masonry may crack; a thin mortar will not provide the structure with sufficient reliability. The ideal mortar for laying a brick stove is sufficiently elastic , guaranteeing the stability of the structure after drying.
How to coat a stove with clay
The choice of how to seal the stove so as not to crack depends on what mixture you decide to use. But first you need to clean the bricks from the plaster and the layer of finishing material. They are then treated with a solution.
If you decide to use a clay mixture, then you need to follow the instructions on how to properly coat the stove with clay:
- The prepared solution is stirred one more time.
- They check its quality. To do this, roll the mixture into a ball and if it starts to crack, then add water.
- Before coating the stove with clay to prevent it from cracking, the damaged areas are moistened with water.
- The cracks are filled with the solution.
- Then the oven can be plastered.
- Despite the fact that the repair of the brick kiln is completed, you should not rush to heat the unit, since the solution must dry completely.
If you carry out repair work in full accordance with the instructions on how to coat the stove with fireclay clay to eliminate cracks, then you can forget about them for a long time.
Optimal fat content of clay
To check the fat content of this main component of the masonry mortar, there is an elementary way. You need to take 0.5 liters of clay and mix it with water until the consistency becomes like stiff dough. Then the resulting mass must be thoroughly kneaded and formed into a ball with a diameter of 4–5 cm. When it dries, it must be placed between two planks and squeezed.
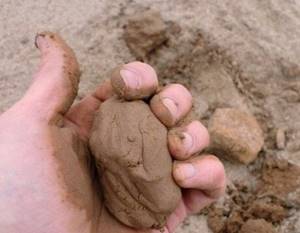
If as a result the ball cracks when squeezed halfway, its fat content is high, which means the mixture does not have enough sand. If it disintegrates almost immediately, you need to add clay. In the event that cracks appear when the ball is compressed by a third, the composition of the oven mixture is selected ideally.
To ensure the reliability of the future furnace, the clay solution for laying it must be prepared from thoroughly cleaned components and have normal or high fat content.
The obvious advantage of the solution, the ingredients of which are carefully selected and dosed, is that the masonry will have a neat appearance due to the thin seam. In addition, a stove mixture of normal fat content will provide the structure with sufficient reliability and durability. True, such a solution still has one drawback: such a solution is not resistant to environmental humidity.
Characteristics of solutions and their production
In addition to knowing the characteristics of the individual component materials, it is necessary to have information about what effect is obtained when they are mixed, that is, about the characteristics of the finished solutions, as well as about the technology for their preparation.
Table of consumables for making the most commonly used mortars for laying stoves:
| Name of materials | Clay mortar | Mortar | Cement mortar |
| Material consumption in parts | |||
| Sand | 4 | 2.5 | 3 ÷4 |
| Fireclay clay | 1 | — | — |
| Regular clay | 1 | — | — |
| Lime | — | 1 | — |
| Cement M400 | — | 0.5 | 1 |
Clay-sand mortar
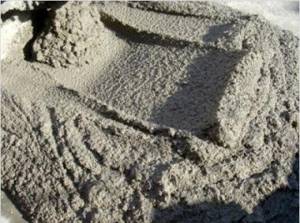
The clay-sand mortar can be called the main one, since it is on it that most of the furnace is laid. This material is the most affordable, even if you have to buy it in the store. But, as a rule, its components can be found literally under your feet, and if you decide to extract clay yourself, then it will cost practically nothing.
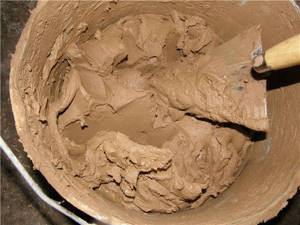
Clay-sand stove mortar
Clay mortar interacts well with baked bricks, also made from clay, and has special qualities that are ideal for laying a stove:
- medium strength;
- heat resistance up to 1100 degrees;
- absolute fire resistance;
- maximum gas density, that is, the ability to resist the penetration of gases into the thickness of the substance;
- all the mortar on which the masonry was made, except for the furnace, can be reused;
- The finished mixture of clay-sand mortar is suitable for use for an unlimited time after mixing it, since it can, if necessary, be diluted with water and mixed again.
The disadvantages of this solution include its low moisture resistance, so it is not recommended to use it for constructing a foundation and constructing a chimney.
The proportions of clay and sand for the solution are determined depending on the fat content of the former, using the techniques described above.
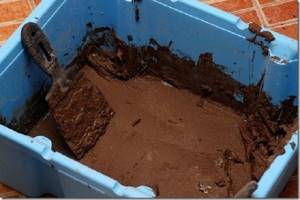
Well-infused, soaked clay is thoroughly mixed using a shovel or by trampling, that is, with your feet. The mass should be absolutely homogeneous, without lumps or individual inclusions. While mixing the main ingredient, sifted clean sand is gradually poured into it, and a little water is added as needed. Ultimately, the solution should be plastic and easily slide off a clean and smooth trowel.
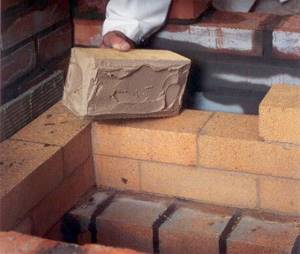
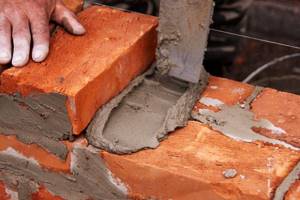
In addition, the mixture must be immediately checked for adhesion - to do this, the solution is applied to the soaked brick in an even layer 5 mm thick, and a second brick is placed on top of it, which is gently pressed. After 30 minutes, you can check how well the adhesion of the two bricks has occurred. If the mortar is of high quality, then the lower brick should remain on the upper one even if the structure is suspended.
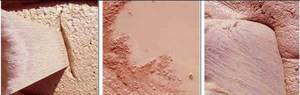
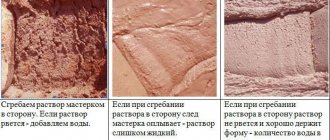
Checking the consistency of the mixed solution (from left to right): too dense, too much water, optimal
The correct consistency of the solution is checked as follows:
- A clean trowel soaked in water is lowered into the prepared mixed solution of normal consistency, and if the solution sticks to it, then the clay is too greasy. In this case, you need to add a little sand to the mixture, and then mix it again and run the test again.
- If the solution is made in normal consistency, but after leaving without stirring for some time, water appears on the surface, then the mixture has low fat content, that is, it turned out to be too lean. Such a solution can be corrected by adding fatter or ordinary clay to it, thereby changing the proportions of materials, that is, reducing the amount of sand in its composition.
- If the fat content of the solution is normal, but when you lower a clean trowel into it, the mass does not stick to it at all, then you need to make the mixture more plastic by adding a small amount of fatty clay.
Clay mortar: mixing technology
You need to start by leaving the clay, cleared of impurities, in water for about a day. Then you need to add a little more liquid to it, achieving homogeneity of the mass. The consistency of the mixture for stoves and fireplaces should be similar to thick sour cream. After straining, you need to add sand until the oven mixture becomes viscous. To give the solution strength, you cannot do without cement and salt. The required quantity of these components is 700–750 g and 200 g per bucket, respectively.
Checking the quality of the solution
The quality of the solution is checked using a variety of methods. The most accessible method is to drain the material from a shovel, which is done right during cooking.
A tactile test gives a reliable result. The normal composition creates a rough layer on the fingers. Oily forms a film and sticks to the palms. Skinny leaves no traces.
You can visually assess the quality of the mixture using an ordinary wooden stick. After immersion in a normal solution, traces and particles of the mixture remain on it; in an oily solution, a dense film remains. The thin solution leaves no traces, the wood remains wet.
The most reliable practical method is to lay a layer between the bricks. If the solution is thick and greasy enough, after 5 minutes the bricks will not separate from each other. If it is greasy, this effect is observed even when a very thin layer is applied, no more than 2 mm. If skinny, the bottom brick will fall.
Mortar for stove masonry according to all the rules
As already noted, its ideal consistency should correspond to the thickness of sour cream. If you use oily clay for it, then you need to add 2 parts of sand to 1 part; if it’s normal, the proportion should be equal.
Before starting to lay the stove, it is necessary to check the quality of the resulting stove mixture. To do this, you will need to fasten 2 bricks with mortar, wait about 5 minutes, and then lift the top brick. If the structure does not fall apart after several lifts, the mortar for laying a brick stove is ideal. If this did not happen and the adhesion quickly disintegrated, most likely, lean (non-greasy) clay was used to prepare the solution.
Experienced stove makers also advise increasing the strength of the solution by adding table salt to it (150 g is enough for 10 kg of clay). You can also add M400 cement: 1 kg for the same volume of clay.
When the stage of work on the chimney begins, it would be better to replace the clay mortar with lime-sand mortar: it is more resistant to moisture. To prepare it you need to take 3 parts sand and 1 part lime dough. Alternatively, use 1 part quicklime and 3 parts water.
Preparation of materials for preparing mortar for laying a stove
The easiest way to prepare sand. It is dried because the raw material cannot be sifted. And then they are sown on a mesh with a mesh size of 1.5 - 2 mm. The task is to remove pebbles and impurities.
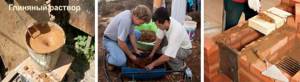
Clay is more of a hassle. In the classic version they did this. Clay was dug up in advance, ridges about a meter high were formed from it, moistened and left for the winter. Water, penetrating into the pores of the clay, freezing, destroyed the structure of the clay, crushing it. After such exposure, the clay easily dispersed in water, creating a homogeneous suspension - clay milk.
Then the clay was mulched. Stir with excess water in a tall barrel and leave. Heavy impurities (stones and sand) collected at the bottom of the container. Light impurities (roots, grass, other debris) simply floated up. They were easy to assemble and remove. After waiting a little (a day or two), the lightened, settled water was removed from above, and the middle layer with clean clay was collected and used for further preparation. If the clay turned out to be thin or heavily contaminated, the mulching procedure was repeated several times. Today they also resort to it, but in full only in cases of extreme need - when there is no fatty or normal clay.
Afterwards the clay was left to “ripen”. They simply filled it with water and waited for all the organic matter to rot. The process is quite smelly and long - about one and a half to two months. The “rotten” water was not changed. The smell served as a marker for the completion of the process. As soon as the stench disappeared, the clay was considered ready. This meant that all organic impurities in the clay were removed.
Today, rarely does anyone allow themselves the luxury of long clay preparation. Therefore, the preparation process is shortened as much as possible.
First of all, the clay is soaked for several days, stirring daily with a mixer. Any grass and roots that float (or are wound around the mixer auger) are removed. As soon as the water settles, the excess is carefully drained, and the soaked clay dough is scooped out to prepare the solution. The stones are removed from the bottom, and the remaining lumps of clay are again filled with water.
If there are a lot of lumps and foreign inclusions, it is filtered through a sieve with the same mesh as for sifting sand.
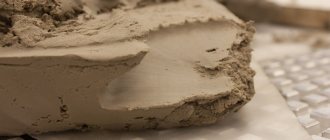
The prepared clay milk should have the consistency of thick cream.
Cement as a base for mortar
To build a furnace foundation, the solution must be selected in such a way as to ensure reliability and stability of the structure, and cement is best suited for these purposes . This mixture is also suitable for the construction of that part of the chimney that will rise above the roof. The composition of the solution is cement, sand and water. Most often, the proportions used are: 1 part M300 or M400 cement and 3 parts sand. The components must be mixed well and diluted with water until the consistency of sour cream. The resulting mixture for laying stoves should be moveable, but not flow off the bayonet of the shovel if it is located at an angle of 45 degrees.
For the foundation and bottom of the combustion chamber, you will need a stove mixture with good heat resistance. Here is its composition: for 1 part of portlant cement M300 or M400 take 0.3–0.5 parts of fireclay sand and 2 each of finely sifted sand and crushed stone (gravel is also suitable).
No. 4. Clay-fireclay mortar
It is recommended to use clay-chamotte mortar for laying the firebox allow the use of ordinary clay mortar when building stoves with a not very intense thermal regime: these are Dutch and Russian stoves, hobs, and barbecues.
In other cases, you will need gray, white or yellowish clay with high fat content. It is thinned with fireclay sand, but more often, to save money, a mixture of quartz and fireclay sand is used in a 1:1 ratio. Soft water must be used, with a hardness of up to 160 mg/l. The preparation is no different from ordinary clay mortar with one caveat - strength tests are not needed, because it is provided by the original raw materials.
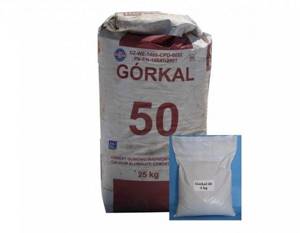
Prices for refractory cement
In accordance with the special purpose and special manufacturing technology, the cost of refractory cements is quite high. In addition, large quantities of this type of material are usually manufactured to special order. At this point in time, the retail price of refractory cement is:
- Cement GC-40, GC-50, GC-60: 1,600 rubles per bag weighing 50 kg. Manufacturer: Pashiysky Metallurgical-Cement Plant OJSC, Russian Federation.
- Cement VGTs 70-VGTs 75, VGTsI-VGTsIII: 1480-1550 rubles per bag weighing 20 kg. (NIZHNETAGIL PLANT OF ALUMINA CEMENTS) Russian Federation.
- Cement VGKTs-70-1: 1,580-1,680 rubles per bag weighing 20 kg. , Russian Federation.
Material cost
The price of cement compositions with refractory properties is quite high due to the high cost of the components and the complexity of the technology. In addition, the exact cost depends on the season: in the summer it usually increases along with the increase in building volumes. In winter, when demand decreases, the price falls.
For a bag of GC-40 grade material you will have to pay 1300-1500 rubles, while import companies offer it at a higher price. VGTs-50 costs from 1800 rubles per 20 kg. When purchasing, be sure to read the certificate of conformity, since low-quality fakes are often found on the market.
Features of furnace construction that influence the choice of solution
The construction of furnace structures has its own characteristics that influence the choice of a particular solution. Let's take a closer look at each stage of construction:
- The foundation is the base of the furnace, and if it fails, it becomes necessary to rebuild the entire furnace structure. During the operation of the furnace, the foundation experiences virtually no thermal loads, so a sand-cement or cement-lime mixture is suitable for its construction. If the structure is large, you can simply use lime mortar for masonry.
- The heat-storing part of the furnace structure, its heating reaches 700 degrees, and it is also exposed to the chemical influence of flue gases, with the formation of acid condensate. For the construction of this site, ordinary clay mortar is used, the quality of which has been tested for centuries.
- The broiler or oven firebox can heat up to 1200 degrees. It is recommended to use a clay-chamotte, fire-resistant masonry mixture.
- The source of the chimney heats up to 300–400 degrees, allowing the use of a clay solution.
- The chimney fluff is the connecting link between the chimney and the ceiling. The edges of the ceiling in this place rest on the fluff, thereby preventing it from sagging. This area requires increased strength, which is achieved by using clay-lime or simply lime mortar.
- There are special requirements for the construction of a chimney located above the roofing, since this area is exposed not only to internal thermal effects, but also to external atmospheric loads and temperature changes. The best option would be to use lime mortar.
Area of use
For the construction of modern fireplaces and stoves, when laying chimneys and constructing ventilation.- In the production of lining elements as a connecting element.
- In the glassmaking industry.
- For the manufacture of furnaces of special strength (for production tasks in ferrous and non-ferrous metallurgy).
- For the construction of structures, without which the production of phosphorus, ammonia and alcohol is indispensable.
- When preparing a solution for coating home ovens.
- For the production of building blocks, fire-resistant bricks, prefabricated reinforced concrete structures with increased resistance to fire (construction of mines, foundations for cars, underground structures).
- To restore a melting device or other thermal unit operating at temperatures up to 1600 degrees Celsius (burner stones, glass furnaces).
- For organizing a monolithic lining in the process of restoring a stove or fireplace.
- As a component in the creation of adhesives and solutions in the chemical, construction and oil refining industries.
- Using refractory cement, the base is made for window sills, lintels and floors.
There is no better bonding material for construction work during the colder months than heat resistant cement. Thanks to the resulting solution, shrinkage can be avoided at temperatures below zero (up to -10 degrees).
How to work
Cement compositions with heat-resistant properties are more expensive than simple brands, so you need to work with them more carefully and responsibly. If you do not take into account the rules and make mistakes, this can lead to unjustified financial costs and the formation of a low-quality design.
In order for the material to adhere well to the surface, it is important to approach the preparatory work correctly and clean this area of any unevenness or defects.
When planning to apply the mixture to the work area, it is important to get rid of dust and dirt, carry out grinding work and remove soot or grease stains. The more competently these measures are carried out, the longer and better the structure will last.
Difference from other types of cement
The main difference between fire-resistant cement mixtures and other brands is enhanced protection against high-temperature exposure. Classic products are subject to cracking when heated to +250°C.
If the material is exposed to temperatures above +500°C, the concrete will begin to deform, the mass will lose its integrity and become unsuitable for further use.
Unlike traditional brands of cement, heat-resistant analogues remain resistant to heating up to +2000°C.