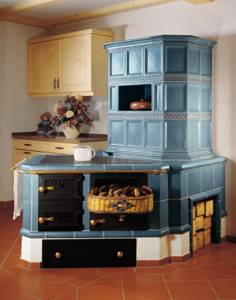
A Russian stove with a stove and a stove bench is one of the most popular and popular solutions for arranging heating in mansions, country houses and country cottages. Self-construction of such a unit is a very difficult task. But even in the absence of practical experience and deep theoretical knowledge in the field of stove heating, it can be performed perfectly. And for this, only two conditions are necessary: a careful and thoughtful study of the design and operating principle of the furnace unit and, of course, strict adherence to construction technology.
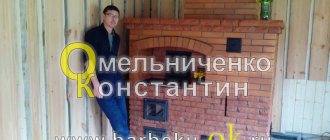
Construction of a Russian stove with a stove bench and stove
The main feature of the traditional Russian stove is the presence of a crucible. This is the chamber in which the wood is burned. The furnace roof should have a slight slope in the direction of the entrance opening (mouth). This arrangement of a Russian stove with a stove bench ensures the accumulation of hot air under the ceiling of the chamber, which transfers heat to the walls of the stove, simultaneously heating the working surface of the hob and the plane of the stove bench.
Along with the crucible, the list of main structural elements of a Russian stove includes:
- Hailo (space connecting the firebox with heat exchange channels).
- Valves (designed to control the exit of heated air into the chimney and control the circulation of flue gases when using the hob).
- Chimney (serves to transport gaseous products of fuel combustion to the external atmosphere).
- Fluff (an expanded section of the chimney duct located under the ceiling).
- View (a small window with a door that provides access to the damper that regulates draft and allows you to completely block the chimney).
- Brow (surface near the firebox hatch).
- Damper (steel firebox door with thermo-inert handle).
- Pole (niche in front of the entrance to the firebox).
- Overtube (closed internal compartment located above the pole).
- Hole (small window on the back or side wall of the stove firebox).
- Firebox (a channel with cast iron grates installed in the space between the firebox and the ash pan).
- Opeche (brick or concrete foundation of the furnace).
- Podpechie (compartment for storing dry firewood, household equipment and food supplies).
- Under (the bottom of the combustion chamber with a slope directed towards the opening).
- Bed (usually located behind the chimney directly above the internal circulation channels).
Stove
When the oven is ready for use
The stove is considered well dried if the smoke valves do not show any traces of moisture. There is also another way to check the readiness of the oven. A heap of crumpled newspapers is placed in the cleaning area. After a couple of days it comes out. With a well-dried oven, the newspapers will remain dry.
Until the structure dries well, it cannot be used. The very first firebox will begin to destroy it.
The service life increases significantly if it is heated every day. The first fire of a stove that has not been fired for a long time, for example, in a country house, should be light and of low intensity.
Russian stove with stove and stove bench: general operating principle
The design of a Russian stove determines the general principle of its operation. It goes something like this:
- circulation of gases through the internal channels of the stove is carried out due to the free draft of the chimney and due to some features of the fuel combustion process,
- air from outside is sucked into the mouth, the lower part of which is filled with flue gases,
- as a result of natural heat exchange, the heated air mass enters the firebox and displaces flue gases from there,
- Before exiting into the external atmosphere through the chimney channel, gaseous combustion products transfer residual heat to the walls of the furnace.
- the processes of heat exchange and circulation of air flows and smoke occur as long as the firewood is burning in the firebox.
Thanks to its design features, the Russian stove provides an efficiency of at least 60%, which leaves other types of solid fuel heating systems far behind in terms of energy efficiency.
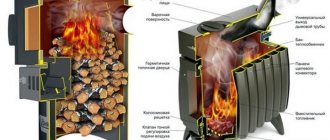
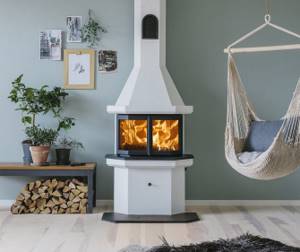
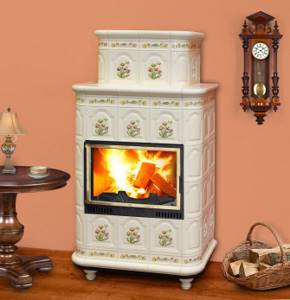
How does a Dutch oven work?
The design of the furnace looks like this: the path along which the flue gases pass is artificially increased in length, which is why they more intensively transfer heat to the structure of the furnace itself. Any subtleties of physical or chemical type are not provided.
Dutch stove-fireplace
Brick Dutch oven
A design of this type arose due to special conditions in the Netherlands during the Middle Ages. In that ancient time, almost many dishes were prepared on the hearth or using a fireplace.
Dutch oven in the recreation room
Dutch oven in the kitchen
First of all, the territory of Holland has almost always been characterized by cramped space. Residents of the country reclaimed fields and plots of land from the sea. Building houses starting with a stove was not the best option. Therefore, heating devices were built into finished apartments, which in turn were built in accordance with the free plot of land. The design was supposed to be simple, significantly flexible and compact - the very first examples of Dutch women were installed on site.
Small Dutch oven
Metal Dutch oven
In this form, the stoves have survived to this day, which explains the absence of a classical arrangement similar to the old Russian stoves.
Nowadays, Dutch ovens are developed in accordance with certain requirements, and electronic programs are used in production. But the simplicity of the principles inherent in Dutch ovens ensures that the thermal properties remain unchanged. The main thing is maintaining basic proportions.
Modern Dutch fireplace stove
It is also worth mentioning that the climatic conditions of Holland are directly dependent on the Gulf Stream: severe frost may well be replaced by a thaw with above-zero temperatures. Winters are usually characterized by relative mildness. For this reason, people have felt the need for stoves that can heat up in a very short period of time. This was achieved only with the correct combination of the dimensions of the area of the internal winding compartment and the amount of material from which the furnace is made. Thanks to this ratio, products from Holland are distinguished by a rapid heating process and a positive level of heat capacity.
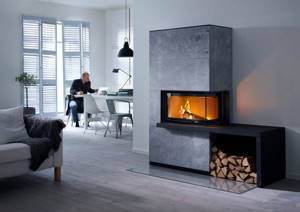
Stove-fireplace
Semicircular Dutch oven
The property was paid for using the house pipe. The more chimney openings, the larger the economic burden. It is for this reason that there is a need for side outlets for house gases. This kind of device involves connecting several furnaces to one pipe. Here the problem of optimal compatibility of chimney device elements arises.
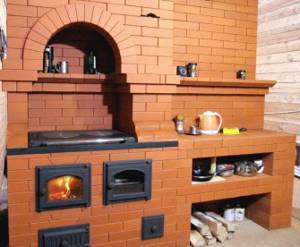
Dutch oven with hob
Due to the same cramped space, city buildings in Holland were very tall. The five-story structure was not an innovation in the fourteenth and fifteenth centuries. Concrete floors did not exist at that time, which is why there was a need for lightweight and material-intensive household products.
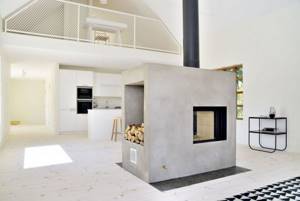
Swedish stove made of concrete in a country house
Russian stove with stove bench and stove: masonry diagram, placement and calculation of basic design parameters
The classic Russian stove is a rather cumbersome design. Its dimensions are 2.5 m in length, 1.5 m in width and 2 m in height. Such a stove unit is capable of providing high-quality heating of an area of about 40 square meters. Due to the extensive system of internal smoke channels and a number of technical solutions that ensure rapid heating and high thermal capacity of the structure, modern modifications can be smaller in size.
The most commonly used are 3 standard sizes of Russian stoves:
- Large (area from 2310*1600 mm),
- Medium (with an area of no more than 2130*1470 mm),
- Small (base area does not exceed 1780*1240 mm).
The configuration and dimensions of the heating unit, as well as its location in the room, are selected depending on the size and layout of the latter.
The most important part of the project is the diagram of the Russian stove. It is this that allows you to accept the configuration of the unit, as well as determine the required amount of building materials and calculate the total amount of work. Therefore, you need to try to make the drawing as accurate as possible.
Advantages of a Dutch oven
- Any design changes will have a minor impact on the product's performance and durability.
- Great functionality: a Dutch oven with a stove is a very common phenomenon.
- Relatively small dimensions - a Dutch oven can have dimensions of 0.5 x 0.5 meters.
- Low material consumption - a Dutch brick oven with large dimensions will require about 650 pieces of ordinary brick.
- The low weight is considered a consequence of the small capacity of the material: the concentrated load produced by a Dutch oven is not higher than the maximum acceptable for many types of floors.
- Extensibility. This indicator demonstrates that the development of the area above the ceiling does not worsen the efficiency of the entire home system. There are many three- and four-story Dutch ovens.
- Resistance of the material from which the stoves are made to various external influences, especially thermal deformation.
- A smooth change in temperature during the period of smoke spread, as well as a simply arranged flue.
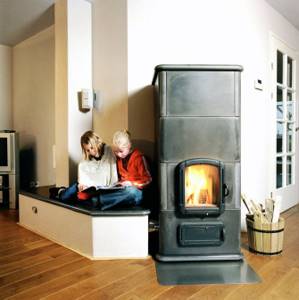
- The Dutch oven is distinguished by the fact that it warms up in a short time and cools down very slowly.
- There is no need to provide combustion on a regular basis, as well as accelerated heating.
- High level of heat output: a large Dutch oven can provide heating of 60 square meters.
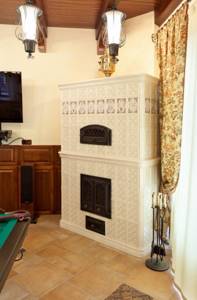
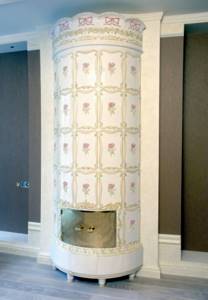
Swedish tiled stove
Tools and materials for laying a Russian stove with a stove bench and stove
Before starting work, you should prepare the structural elements, the presence of which is provided for by the previously designed diagram of a Russian stove with a stove bench. For a standard unit design, this list includes:
- cast iron stove with 2 or 4 burners,
- door for the firebox opening (14*25 cm),
- door for the opening of the ash chamber (13*13 cm),
- grate (26*28 cm),
- 2 adjusting valves (24*26 cm),
- a door with a technological hole for a view (at least 22*22 cm),
- steel water tank (40*26*28 cm)
- soft wire for tying,
- scraps of corner, roofing or sheet steel.
As for the tools, to build a stove with your own hands you will need:
- bucket,
- shovel,
- scoop,
- containers for preparing clay and mortar,
- level and plumb,
- trowel (trowel),
- hammer,
- wash brush.
To build a medium-sized heating unit, you will need 1500-2000 pieces of ceramic bricks, as well as clay and sand for a building mixture with a total volume of at least 100 buckets.
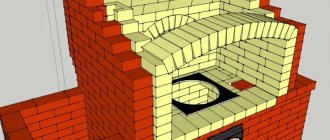
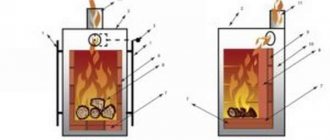
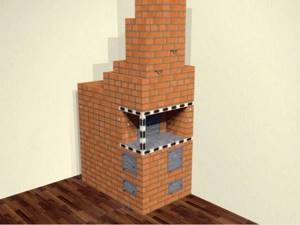
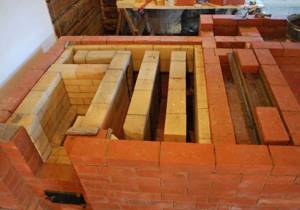
Another diagram of the furnace masonry
*
We will not dwell on this option in detail. From the previous diagram it is easy to understand what each element in the illustration represents.
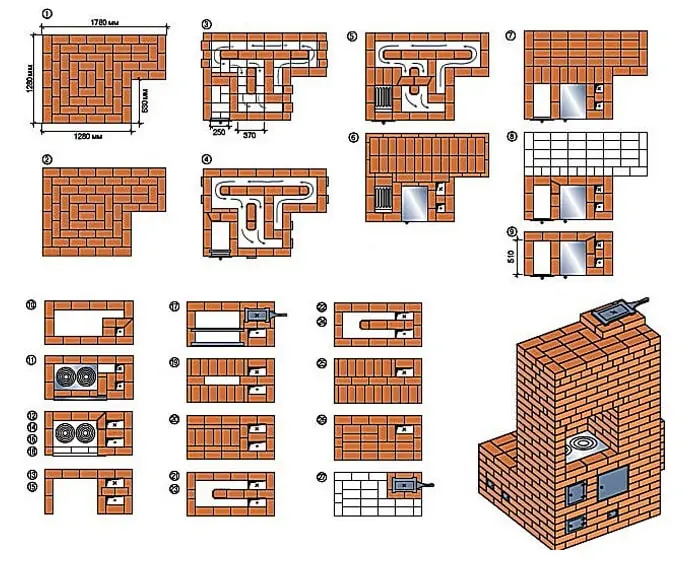
Figure 5. Layout diagram of another furnace option
This model is one of the simplest. However, it is effective and efficient. Unlike more complex structures, the execution of this one can also be entrusted to even a relatively unprepared homeowner.
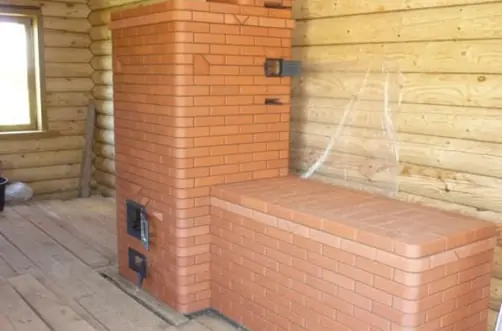
Figure 6. Alternative design with a bed
Preparatory work and laying the foundation
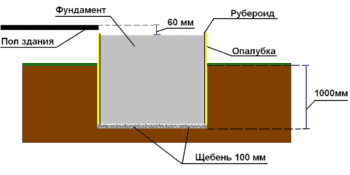
The construction of a Russian stove begins with laying the foundation. The most reliable option for its construction is reinforced concrete.
The work is carried out in several stages:
- The foundation pit for the furnace is dug to a depth corresponding to the level of soil freezing. The width of the pit must be at least 100 mm larger than the dimensions of the first row of brickwork.
- The bottom of the pit is covered with a cushion of crushed stone at least 10 cm high, which is carefully compacted.
- Formwork is installed around the perimeter of the pit, after which the bottom of the pit is laid with a waterproofing film overlapping the walls of the latter.
- The next step is tying with reinforcing mesh with a cell size of 150*150 mm.
- Concrete mortar prepared in proportions 1:3:7 (M400 cement: sand: crushed stone) is poured into the pit at floor level.
- The dried foundation is covered with a layer of heat and waterproofing, after which you can begin bricklaying.
We make the foundation
Before you start building a heavy structure, you need to pour its foundation. But if you make a stove in an already finished house, then you will create the foundation for it right there. It is important to ensure that the base of the house does not come into contact with the stove. The depth of its foundation depends on how large the stove is: the larger the structure, the deeper the foundation needs to be made.
Foundation
Creating a pillow
Before pouring the foundation, it is important to carry out preparatory work. First of all, you need to put markings. Afterwards, you can proceed to digging a pit of the required depth. When you have thoroughly compacted its bottom, add slightly damp sand there and compact it again. The thickness of the compacted sand ball should be 10-20 centimeters. Now fill everything with crushed stone to a height of 15 centimeters. It also needs to be compacted.
We create formwork
Before pouring the solution, you need to build and install the formwork. Any wooden slats are suitable for creating side walls. If there are any gaps, cover them with plastic and secure them with a stapler. The formwork must be higher than the soil and reach the foundation. It can be done right along the edge of the pit.
Fill the solution
When the formwork is installed, fill the foundation with mortar. For it you will need coarse gravel, cement and sand.
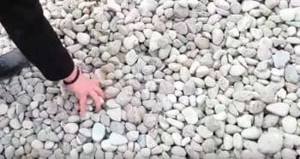
Coarse gravel
The minimum fill height is 15 centimeters. When the first layer has been poured, place reinforcing bars vertically in it - this will connect this layer to the concrete mixture.
Fill in the lightweight solution
Fill the reinforcement sheets with lighter concrete, the layer of which should reach the ground. When everything is done, level this mixture and wait until it hardens a little. After this, cover it with steel reinforcing mesh and fill it with concrete to the thickness of the formwork. Level the poured screed and leave to dry for 27-30 days.
Creating a waterproofing surface
When the screed has dried, remove the formwork. Cover the base with a layer of waterproofing made from glued roofing felt balls. When everything is ready, start laying the stove walls.
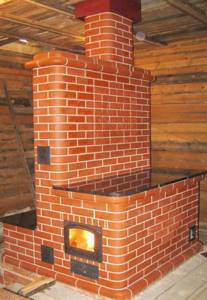
Masonry of a Russian stove with a stove bench and hob
Cooker arch
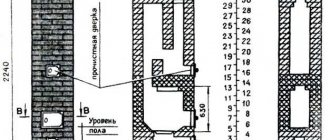
The standard design of a medium-sized kiln unit includes 29-30 horizontal rows of bricks. The laying of a Russian stove with a stove bench and stove is carried out according to the following method:
- When constructing the outer walls of the furnace, the 1st row of brickwork is laid out from solid brick. The internal space between the outer walls is filled with brick chips.
- Installation of the next row is carried out in parallel with the design of internal cleaning channels.
- When constructing the 3rd row, the doors of the cleaning chamber and the blower are fixed with wire.
- The next row closes the treatment channels, forming a bottom vault.
- Laying the 5th row involves installing a grate for the firebox, laying the internal surfaces of the firebox with fireclay bricks cut into 2 equal thicknesses, and installing the firebox door located above the bottom channel.
- When laying the 6th row, a water tank is installed.
- In the process of laying the 7th row, the small firebox is equipped with a grate. Installation of the rear wall of the combustion chamber is carried out without mortar.
- When laying the 8th and 9th rows, the door of the small firebox is fixed.
- When installing the 10th row, you should lay out the bottom of the furnace and connect the arches of the small and large firebox.
- The 11th row involves installing a 50*50 mm metal corner above both combustion chambers, which will serve as the basis for the hob.
- The 12th and 13th rows are laid out in parallel with the installation of the valves of the cooking chamber and chimney.
- When constructing the 14th row, an entrance is made to the chimney channel and the walls of the firebox are removed with a technological hole for installing the damper.
- On the 15th and 16th rows, the masonry narrows. At this stage, you need to close the cooking chamber, remove the chimney pipe and fasten the side walls with metal strips.
- When installing the 17th row, the rear stove wall is mounted.
- On the 18th row above the crucible, a template should be installed according to which the roof of the cooking compartment will be laid out.
- When laying the 19th row, you need to strengthen the wall above the hatch of the cooking chamber.
- When laying the 20th row, the roof of the furnace is compacted with sand.
- The 21st row involves covering the furnace.
- When constructing the 22nd row, the overpipe narrows and is crowned with a metal lid with a hole that will allow flue gases to be redirected through the internal channels of the furnace.
- When installing the 23rd row, you should install a door that provides access to the chimney duct.
- When laying the 24th row, an adjustment valve is installed on the over-pipe.
- During the construction of the 25th and 26th rows, the space above the valve is completely blocked.
- In parallel with the masonry of the 27th, 28th and 29th rows, the overpipe is connected to the chimney channel.
At the final stage, the chimney is laid out to the ceiling level, in which a fireproof cut should be prepared.
The final finishing of a Russian stove is carried out only after the structure has completely dried, which can be determined by the absence of wet stripes on the masonry and the uniformity of its color. At this point, the construction of a Russian stove with a hob and a stove bench can be considered complete.
Variety of designs
A classic oven has an oven, and the lower part does not heat up. Polati, also called a couch, are intended for resting people, drying clothes and fruit. If you make them two-tiered, then the whole family can fit on them, for example, children can lie on the upper tier, and adults on the lower tier.
Water procedures are also performed on the beds, and to wash, water is heated in a vat. The heating unit is erected separately or in combination with other devices.
How to lay the base
A stove with a stove bench, even the most compact one, is a massive structure; large models can weigh up to three tons, so special attention should be paid to laying the foundation.
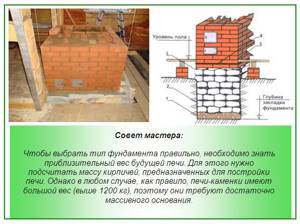
To do this, you will need to dig a pit 80cm - 1m deep. The foundation of the future structure should not be tied with the foundation of the building - they have different settlements, and the hearth itself is deformed if its foundation is not laid correctly. Make sure that there is a gap of at least 5 cm between the foundation of the house and the stove. The bottom is leveled.
After preparing the pit you must:
- Fill the bottom with sand.
- Fill with water in large volume.
- When the sand compacts and settles, crushed stone is poured onto it. Layer thickness - 10-15cm.
- The crushed stone also needs to be compacted and a reinforcing frame laid on top. This issue must be approached responsibly; a regular mesh will not be enough due to the large weight of the stove - special vertical racks are installed, which are reinforced with several levels of reinforcement. The fittings should not be welded, they should be connected.
- Everything is poured with concrete up to floor level. The foundation must be given time (about a month) for it to harden properly.
- When ready, the base must be waterproofed with roofing felt or roofing felt.
What materials do you need to have:
To construct a furnace, you must have the following materials:
red brick in the amount of 800 pcs.;
- sand-lime brick for the firebox 150 pcs.;
- cast iron doors for the firebox 25×21 cm, vent 25×13 cm, 1 pc. and 18×10 -5 pcs.;
- cast iron chimney valve 25×13 cm -2 pcs.;
- hob with two burners size 71×41 - 1 pc.;
- grate for firebox 25×25 cm - 1 pc.;
- oven measuring 31x37x28 cm;
- metal corner 5×5 or 4.5×4.5 cm;
- crushed stone and reinforcement for the foundation;
- steel wire for fastening doors;
- cement, sand, gravel, clay or a special dry mixture for laying fireplaces.
It is best to take all the materials with a small reserve, so that during the work it does not turn out that something is missing.
Modern warm beds
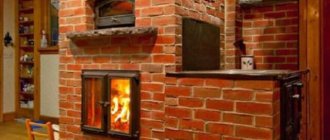
A heating and cooking stove with a stove bench in those days was considered truly royal. Not surprising, because it made it possible to solve many issues in the household at the same time. Today you can even find a fireplace stove with a stove bench.
Now that high technologies are being introduced into our lives everywhere, many can no longer imagine life without computers, telephones, refrigerators and televisions, but the Russian stove has not lost its relevance.
The thing is that brickwork accumulates heat well, and then releases it evenly for a long time. It is safe to say that the Russian stove surpasses any modern design in this indicator.
If there are units that can have such a beneficial effect on the human body, as the Russian stove does, then most likely they are incredibly expensive and only specially trained professionals can service them. In addition, a Russian stove in the interior of a house or cottage will look very harmonious.