Causes of wear and tear on chimneys
There are a large number of reasons that lead to wear and tear of the chimney.
For example:
- corrosion that occurs due to the impact of combustion products and flue gases on the masonry and other materials of the chimney;
- wind, humidity, precipitation, excessive heat;
- shortcomings in the design and construction of the pipe itself;
- unqualified intervention in the chimney system;
- when using the structure for other purposes, for example, when connecting artificial ventilation, the risk of destruction of the chimney increases;
- transition from one type of fuel to another;
- technologies, including “wet cleaning”, aimed at protecting nature;
- strong air injection from the boiler.
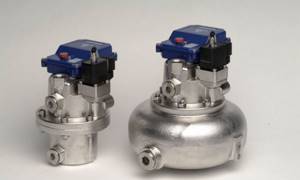
Steam traps
Expert opinion
Mironova Anna Sergeevna
Generalist lawyer. Specializes in family issues, civil, criminal and housing law
Devices that automatically remove liquid formed during condensation of water vapor. They are installed at the outlet of water heaters, air heaters, and other devices whose activity is related to heat exchange. There are three types: mechanical, thermostatic, thermodynamic.
The first type of steam traps is otherwise called float traps. The principle of operation is based on the use of the difference in the densities of vapor and liquid. Their masters are chosen more often due to several advantages:
- high reliability;
- consistently high performance;
- resistance to sudden temperature changes and heavy loads;
- regulation of energy saving in the system;
- ability to work with the lightest load.
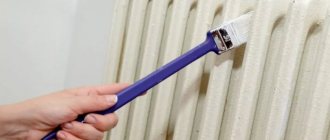
Carrying out work
Before you start painting the tubes, you need to prepare your tools and work surfaces.
Preparation
Preparation stages:
- Wipe the pipes with a dry cloth to remove dust and dirt.
- Degrease the surface and wait until dry.
Additionally, it is recommended to clean the plastic using fine sandpaper. Large grains can leave scratches that will lead to damage to the integrity of the material.
Tools and materials
To perform painting, you will need a number of tools and consumables:
- masking tape;
- film for covering surrounding objects, walls, floors;
- paint in a can or can;
- if the coloring composition is without a can, you will need several brushes and a roller;
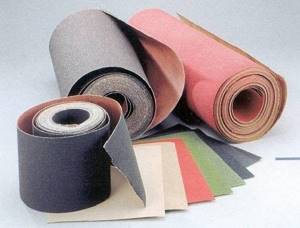
- sandpaper;
- a few dry rags.
After preparing the tools, you can start painting.
Painting of sewer systems
To paint sewer pipes, you need to choose a coloring composition that will meet certain requirements:
- enamel must contain organic components;
- the layer should be hard and dense;
- Drying time: more than 12 hours.
Technology:
- Remove the old paint layer, if any.
- Prepare surfaces, degrease them, and clean them with sandpaper.
- Sweep away polypropylene dust.
- Apply coloring composition.
Sewer PP pipes (Photo: Instagram / set_mir_sveta)
Gas pipe painting
There are no difficulties in painting gas lines made of polypropylene, but such systems are rarely made of plastic. To carry out the work, it is enough to select a waterproof paint composition and coat the tubes with it.
Heating system painting
Before painting heating pipes, you need to turn off the circuit and wait until the pipeline has cooled completely. When painting is completed, hot water should not be run into the tubes for 3 days.
Painting water supply pipes
When painting water pipes, you need to take into account some nuances that depend on the type of enamel.
Advantages of the coloring composition for metal:
- low price, availability;
- no surface preparation required.
Flaws:
- Acrid, persistent odor. It takes a long time to ventilate the room.
- Intended for a different material, but this does not stop buyers.
Advantages of wall paints:
- versatility of compositions;
- large selection of shades;
- compatibility with the walls if the same shade was chosen.
Flaws:
- the top layer of the pipe will be destroyed if a water-based dye is used.
- not suitable for hot water pipes because it is destroyed by heating, expansion, and contraction of the plastic.
Advantages of acrylic compositions:
- no negative impact on plastic;
- ease of application;
- large assortment of shades;
- no pungent odor.
Flaws:
- Plastic expands when heated. This may lead to cracking of the layer.
- Before applying the paint composition, you need to apply a layer of primer. It is recommended to use mixtures in aerosol cans as primer. They are easy to apply and durable.
Plastic pipelines running through rooms often spoil the interior. Paint can be used to improve aesthetics. You need to select paint, prepare polypropylene surfaces, and apply enamel. Until the layer hardens, do not touch the pipes or turn on the hot water supply.
PVC pipe painting technology. Painting ventilation pipes. CrimeaKamService. Igor Usenko...
Dye selection
Various types of coloring compounds can be used as a coating for polypropylene pipes, among which the following items stand out:
- standard paints used to protect metal surfaces;
- classic dyes intended for wall decoration;
- acrylic compositions, as well as mixtures designed specifically for plastic;
- polyurethane based dyes.
All of these types of coloring mixtures are commercially available and can be purchased at a hardware store.
Additional Information. When choosing a material suitable for painting polypropylene pipes, we advise you to contact the manager of a trade organization who will advise you on this issue.
When determining the coating application method for polypropylene, we proceed from the characteristics of the selected composition. Let's consider each of the options proposed above in more detail.
We recommend that you read: Manufacturers of polypropylene pipes on the Russian market
How to get rid of condensation on pipes: basic methods of combating
Having discovered dampness, you must first dry the cold flow pipe and try to prevent further appearance and accumulation of moisture by eliminating the cause.
Perhaps the issue can be resolved by simply changing the gasket on the tap or adjusting the valve of the drain tank.

You can prevent further formation of condensation on pipes using homemade products or more expensive professional materials, for example, heat-insulating paint.
Installing an exhaust fan in the bathroom
If it turns out that the ventilation system in the room is not functioning well, you should check the hood. After removing the ventilation grille, remove accumulated debris, dust, and cobwebs. Instead of a grille, it is recommended to buy and install a compact fan, which will provide more intense air circulation.
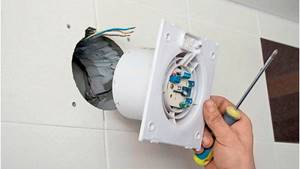
The market offers a large selection of devices of different configurations, power and cost. With their help, the ventilation problem will be solved.
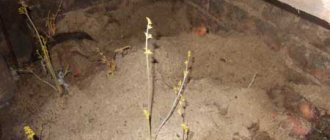
Installation of insulating tubes
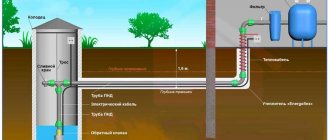
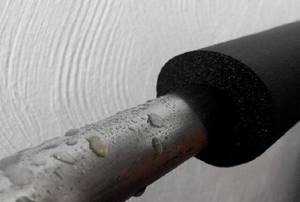
If the cause of fogging of cold pipes is a temperature difference, then it’s time to start insulating them. One option to do this quickly and inexpensively is to use special linings. They look like tubes with a longitudinal cut. Made from foamed thermal insulation material (thermoflex, energyflex, polyethylene).
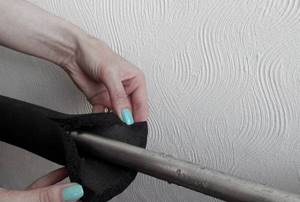
The cover is placed on a pre-dried pipe, straightened, and the ends are glued with metallized tape. The main subtlety is to select the tube exactly in size so that it fits tightly, leaving no voids, but at the same time it can be closed and glued. This is the easiest way to isolate a cold water system.
Application of epoxy putty material
Another option, used to combat condensation on cold structures, is more labor-intensive, but also more effective. You will need acetone or solvent, epoxy putty, rust converter, strips of fabric 5-7 cm wide, spatula, roller or brush, sandpaper, strong thread.
- Sand the cold water pipe to remove dirt, rust and improve adhesion.
- Treat the surface with acetone to degrease.
- Wipe with rust converter and wait until completely dry.
- Apply a layer of epoxy putty and immediately wrap tightly overlapping strips of fabric. Secure the edge of the fabric with thread.
- Repeat the step of applying putty and wrapping with cloth two or three more times.
- Finally, coat the fabric again with a layer of putty.
- Wait for the entire structure to dry completely.
- Sand the dry, cold pipe and then paint it.
Temporary methods
If you don’t have the necessary materials, time or ability to do repair work right now, simple methods will do. Here's how you can temporarily fix the situation yourself:
- provide additional air access without closing the door to the room;
- establish moisture removal from a cold pipe - wrap it with a bandage or a strip of cloth, and lower the end into some container that is emptied regularly;
- Place moisture absorbers in the room; you can use both special products and improvised products as filler, for example, salt or cat litter.
Treatment of water pipes
The most affordable way to deal with condensation is to coat cold water pipes with special products. This is required, first of all, for old systems mounted from metal components, since they are most susceptible to corrosion. But it wouldn’t be amiss to treat cold pipelines using more resistant materials that are now used.
Metal pipes
Metal structures are often protected by painting. For these purposes, use oil paint or drying oil. The coloring composition is applied to a previously rust-free and completely dry surface.
It is important to know: while any brand of paint is suitable for cold water pipes, hot water pipes require exclusively heat-resistant materials.
Another fairly effective option is to protect the metal with a hardening compound, such as a crack-clogging compound in walls or floors. The surface is covered with a layer of paste 5 mm thick, wait until it hardens completely, then sand it using fine-grained sandpaper or sandpaper. After this, you can paint the pipe with oil paint in a color suitable for the interior.
Epoxy varnishes and primer compositions can also be used for pipe processing. For better visual perception, suitable paint or enamel is also applied on top of them.
Plastic pipes
Plastic is not subject to corrosion, which makes cold water supply more durable, even if moisture accumulates on the surface. However, accumulated condensation also provokes the appearance of fungus on the walls and puddles on the floor. Therefore, insulating the cold water supply will not harm. Paired foam pads are universal, they just need to be put on the pipe and secured, avoiding any cracks. Mineral wool or glass wool is also used.
How to get rid of condensation on plastic pipes
A common cause of condensation is leaks in plumbing fixtures. If the workpiece supplying water to sanitary fixtures gets wet, then damage may occur in the faucet, in the shower mixer, in the inlet valve of the toilet tank. A wet riser may indicate that there are leaks in the neighboring apartments above.
If the pipe network is made of plastic, then the problem of how to eliminate condensation on plastic pipes is solved as follows:
- The hoods are checked and the ventilation grille is replaced with a compact fan.
- The network is insulated using special pipes with a cut. These products are offered in every hardware store. They are made from energyflex and foamed polyethylene. This is a very simple method, only before starting insulation, you need to thoroughly dry the pipes.
- Complete insulation of plastic pipes can be ensured by the use of fabric strips and plastering. Above is a detailed description of how this is done.
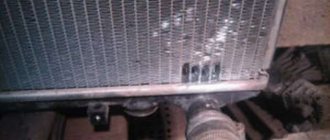
Features of metal water pipeline
Video
https://youtube.com/watch?v=DivAeAmshCs
The problem of how to eliminate condensation on metal water pipes is no less acute than in previous situations.
The following actions help eliminate condensation from metal pipes:
- The pipes are protected from rust, dried and opened with drying oil and oil paint.
- Cover with carbonate. This is a paste-like product for sealing cracks in walls and floors; it is applied in a layer of 0.5 cm. This composition should harden for 24 hours, and then the surface is sanded with fine sandpaper and painted with oil paint.
- Projector primers. They consist of zinc dust, which is diluted with drying oil. The line is opened with this composition, and then it is painted (with enamel).
- The toilet line can be treated with a product based on drying oil and red lead, or with special primers (for example: FL-031, FL-053).
How else do you deal with condensation?
Video: how to eliminate condensation on plastic water pipes
Eliminating condensation on pipes is not an easy task without determining the exact cause of this phenomenon.
Experts express this opinion on this matter.
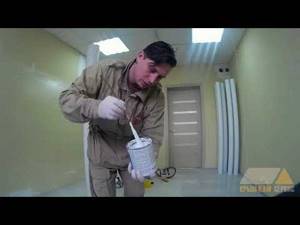
- Professional plumbers advise purchasing Corrugated. This is a special composition that can be bought at building materials stores. It is applied to the surface of the pipes and forms a strong and elastic film there, which prevents moisture from appearing.
- Experts are also confident in the effectiveness of liquid thermal insulation, which is applied to a dry and cleaned line.
- If all plumbing and pipework are in good condition, then condensation can accumulate due to the difference in temperature between the pipes and the air. In this situation, only insulation of the system will help. Professionals call foamed polyethylene or Merylon the most suitable option for such insulation, which are not difficult to buy at any building materials store at a low cost. This insulating material is attached by placing it on the pipeline. Secure it with a clamp and wire.
Video
Most often, the recommended methods quickly lead to the desired result. But sometimes the water never disappears.
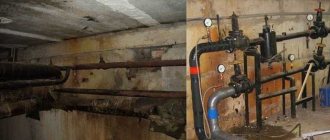
The fact is that in addition to the main ones, there are also side effects that lead to the formation of condensation. The source of dampness is evaporation from the basement, poor waterproofing and insulation of the walls.
Because of this, condensation and frost appear. In such situations, there is only one way out - insulating the floors and walls in the house with high-quality material.
In addition to the reasons already listed that lead to “wet” troubles, there are others. For example, weather conditions. Frequent and prolonged rains, the proximity of a reservoir, and the proximity of groundwater also significantly increase the moisture level in the house.
You can reduce it by installing a moisture absorber or an air conditioner that has a dehumidifying function. Moisture absorbers available on the market today are an excellent method for eliminating moisture.
Video
These are plastic boxes containing absorbent tablets. When using these devices, they not only get rid of fogging on pipe networks, but also eliminate humidity throughout the entire house.
Experts can advise you on how to eliminate condensation on a cold water pipe. If you entrust them with this task, you can be sure that they will quickly and effectively eliminate the causes that lead to dampness in the apartment. And in this case, you won’t have to worry about people’s health.
Useful tips
You should work in gloves and work clothes, and when spraying aerosol materials, wear a mask and goggles. All tools must be promptly cleaned of paint before it dries. The floor under the pipe and other nearby surfaces must be covered with film in advance, then they will not have to be cleaned from accidentally falling drops of paint.
Many compounds have a strong odor or contain toxic volatile components, so you need to ensure a constant flow of fresh air into the work area. This can be done by opening the door and placing a fan on inside the washroom.
I hope you have received the necessary recommendations to decorate your sewer pipes. The following video offers another way to design communications.
This entry was posted on Saturday, March 7th, 2021 at 12:05 am and is filed under Category name. You can follow any responses to this entry through the RSS 2.0 feed. You can leave a response, or trackback from your own site.
Technology of painting a metal chimney
Painting a pipe is not an easy process. The first thing a specialist from our company should do is come and assess the scope of work. The fact is that very often it turns out that the chimney requires minor repairs. If you start painting without fixing the problem, the work will be done in vain. When it comes to metal chimneys, they are usually made of steel, which is resistant to corrosion, so the preparatory work does not take much time.
First, the pipe must be cleaned of dirt. Over time, a thick layer of dust, sand, and other contaminants settles on the outside of the pipe. It is also recommended to regularly clean the inside of the chimney to remove soot and soot that can clog it. Our specialists can do this either manually or using mechanized equipment.
Secondly, before painting a metal chimney, be sure to remove the previous layer of paint. Exfoliated pieces are cleaned off using scrapers, spatulas, brushes, and often you can limit yourself to only these tools, since usually up to 30 percent of the surface is cleaned. You can manually tidy up individual sections of the pipe, but in some cases complete removal of the old coating is required. In this case, the specialist will select the appropriate technology that allows you to dissolve the paint and varnish material on the entire surface of the pipe.
Do not forget that the quality of coloring directly depends on how well the previous layer is removed. Otherwise, you will soon have to resort to the services of industrial climbers again.
Thirdly, the painting itself is done. It is produced in two ways: with and without primer. In the first case, a primer is applied to the pipe, and then one layer of special paint. In the second case, the paint is applied in two layers. When applying paintwork materials, a pneumatic sprayer is used, which allows you to accurately, evenly and without smudges apply the optimal layer of paint.
We should also talk about the paint and varnish materials that our specialists use when painting metal chimneys. The paint must be heat and frost resistant. In particular, silicone enamel has proven itself to be a strong and durable coating that protects metal from damage, exposure to ultraviolet radiation and dirt.
Our company’s specialists will select paint and varnish materials that are suitable specifically for your case. We use high-quality, certified materials, because this is a guarantee of excellent work!
Need to paint a metal chimney?
Painting metal chimneys is our job. Professional climbers will complete the painting with high quality and on time. If you need to paint a metal chimney, call us, and our specialist will answer all your questions, and an expert who visits the site will draw up an estimate taking into account your wishes!
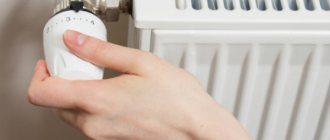
Is it possible to paint hot heating pipes in an apartment?
If you use a special dye correctly, you can give pipes and radiators a pleasant, updated look even during the heating season. But when choosing such paint, you need to have certain knowledge. After all, the work will be carried out in a residential area, therefore, special requirements are imposed on the dye:
- absence of harmful fumes;
- short drying period;
- long service life;
- protection of metal from rust;
- ease of use.
But even when choosing a paint with optimal characteristics for painting batteries, the average person can make a lot of mistakes when painting, since they still need to properly prepare the surface, select a tool and perform the work properly. More on this later.
When is it necessary to paint galvanized pipes?
One of the reasons for painting galvanized pipes is that under the influence of the sun, air, and water, a thin zinc film loses its qualities over time: it becomes thinner, and pinpoint damage appears. Then the protection becomes unreliable, and the steel quickly rusts.
In addition, the surrounding aggressive environment can damage the zinc itself over time: a white coating forms on it. In such cases, painting extends the service life of rolled metal.
Another reason why additional anti-corrosion protection is required is zinc peeling at welded joints.
It is recommended to paint water-gas pipes (WGP) when they are hot-dip galvanized, i.e. protection is applied on the outside and inside.
There is no consensus on the need to paint galvanized pipes in an apartment. The homeowner makes the decision himself. If the metal structure disrupts the harmony in the design of the room, or the owner does not like the dull gray color of the pipes, he can paint them in any color.
Types of paints for external and internal gas pipelines
Almost any external compositions that can provide reliable anti-corrosion protection are suitable for external gas pipeline structures.
Alkyd enamels (PF-115). A classic option that has been used for many years. The advantages of alkyd enamels are that they are resistant to weathering. After drying, they form a dense layer, the service life of which is at least 5 years.
Polyurethane coloring compounds. Provide good adhesion to the pipe and have a high coefficient of elasticity. The service life of these compounds ranges from 10 to 12 years.
Two-component epoxy compounds. They are resistant to wear and less elastic than polyurethane coatings.
Dispersions of aluminum or zinc powder in varnish, represented by organic material. They are the most resistant to corrosion compounds. The service life of a pipeline structure that has been painted with this composition can reach several decades.
Paint for internal gas pipes should not be vapor permeable to ensure the pipe is insulated from water vapor and oxygen. Almost all types of paint compositions are suitable for painting internal gas transmission lines (for both external and internal work).
Special attention should be paid to fire-resistant coatings, which, when directly exposed to high temperatures, turn into carbon foam. This coating can protect the pipeline from exposure to flame for 45 minutes
Condensation in the bathroom on cold water pipes
Before starting repair work, it is important to determine exactly the cause of the problem, which usually consists of the following:
- When a riser pipe gets wet, it's usually a matter of leakage from the neighbors above.
- If a pipe near a plumbing fixture gets wet, then the reason lies in a faulty faucet.
- If problems with ventilation are detected, work will need to be done to remove blockages blocking the hood.
If condensation appears on the pipes in the bathroom: what to do in such cases? When listing ways to eliminate condensation, one cannot help but recall thermal insulation, which quite effectively helps with this problem.
Preparing for painting
Most often, when carrying out construction and renovation work in the bathroom, old pipes are replaced with new models, and metal heated towel rails are replaced with stainless steel options. Many apartment owners cannot afford such pleasure, so they prefer to carry out light cosmetic repairs. It is in this case that you will need to paint the pipes in the bathroom.
To prepare metal batteries for painting, you will need:
- putty knife;
- sandpaper;
- grinding machine (“grinder”);
- primer.
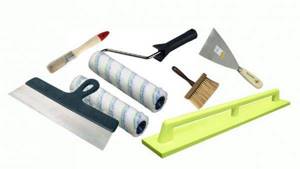
Tools for painting
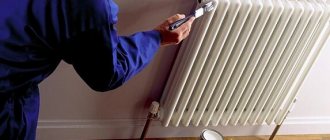
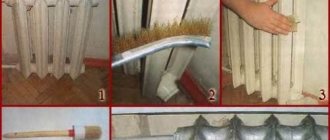
First, you need to remove traces of corrosion on the batteries, this is done using a stiff wire brush and sandpaper. For the preparatory process, you will also need a spatula; such a tool must be used very carefully. In addition, you need to remove the old paint, for which you need to use a sanding machine.
Then the batteries are coated with a special primer; this must be done so that the paint adheres better to the surface. After the work is completed, you should remove all debris, wash the floor from dirt and dust so that nothing gets on the fresh paint. You will need to cover the floor with film or old newspapers, and you can secure such materials with construction tape.
Step-by-step instruction
Almost anyone can paint the pipes in the bathroom; it does not require enormous physical effort.
It is necessary to choose the right paint and primer.
If the pipe is metal, then you will need the following set of tools and materials:
- Tools that can be used to clean pipes from old paint and rust (grinder with cleaning disc, metal brush, sharp spatula, sandpaper).
- Rust conversion products.
- Flute brush, roller.
- Cuvette.
- Primer.
- Dye.
- Rags for wiping, materials for protecting floors and walls from accidental paint.
- Gloves.
The procedure is as follows:
- We close the walls and floor around the pipe.
- We clean the pipe from the old coating.
- We treat areas with traces of rust: remove rust with a stiff brush, sand with sandpaper, and treat with a rust converter.
- Carefully wipe the pipe with a damp cloth to remove dust, then wipe it dry.
- Apply primer.
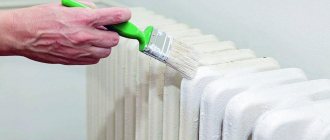
- After the primer has dried, you can paint it. It is better to use a roller, using a brush in hard-to-reach places.
- After the first layer has dried, you can apply the second.
How to remove old grout from tile joints
with your own hands?
Find out in this article how to cover the pipes in the bathroom with plasterboard with your own hands.
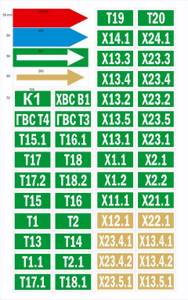
GOST 14202-69
- Information
- GOST text
- Download GOST
Categories of GOST 14202-69 according to OKS:
- 23. Hydraulics and pneumatics
- 23.40. Pipelines and their components
Document status: valid Purpose GOST 14202-69: This standard applies to identification paint, warning signs and marking panels of pipelines (including connecting parts, fittings, fittings and insulation) at designed, newly built, reconstructed and existing industrial enterprises inside buildings, on external installations and communications located on overpasses and in underground channels in order to quickly determine the contents of pipelines and facilitate the management of production processes, as well as ensure labor safety. The standard does not apply to the identification painting of pipelines and ducts with electrical wiring. Amendments and changes to GOST 14202-69, the standard has no amendments
Available versions of GOST 14202-69 for downloading:
Date added to file version: Downloads: Size: Download link: 12/12/2011 02:57 5979 0.62 Mb download GOST 14202-69 ')8
. /var/www/gostexpert2/data/www/gostexpert2.ru/engine/system/filters/filterChain.
php:55, In: contentFilter->run(object 'filterChain')7
.
/var/www/gostexpert2/data/www/gostexpert2.ru/engine/system/filters/authFilter.php:44, In: filterChain->next() 6
. /var/www/gostexpert2/data/www/gostexpert2.ru/engine/system/filters/filterChain.
php:55, In: authFilter->run(object 'filterChain')5
.
/var/www/gostexpert2/data/www/gostexpert2.ru/engine/system/filters/configFilter.php:23, In: filterChain->next() 4
. /var/www/gostexpert2/data/www/gostexpert2.ru/engine/system/filters/filterChain.
php:55, In: configFilter->run(object 'filterChain')3
.
/var/www/gostexpert2/data/www/gostexpert2.ru/engine/system/filters/filterChain.php:64, In: filterChain->next() 2
. /var/www/gostexpert2/data/www/gostexpert2.ru/engine/system/core/Core.
Important
php:38, In: filterChain->process()1
. /var/www/gostexpert2/data/www/gostexpert2.ru/index.php:25, In: Core->run()
SAPI: apache2handler, Software: Apache/2.2.22 (Debian), PHP: 5.4.4-14+deb7u8 on Linux,
Categories of GOST 14202-69 according to OKS:
- 23. Hydraulics and pneumatics
- 23.40. Pipelines and their components
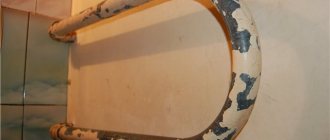
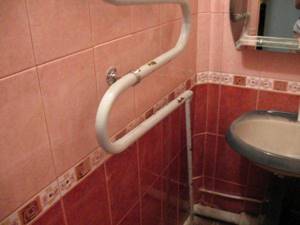
Condensation in the bathroom
If there is such a problem in a bathroom or bathroom, it is recommended to check the functioning of the ventilation at the very beginning.
Over a long period of time it could become clogged. Problems in the ventilation network are clearly visible when the windows are closed, if there are plastic windows in the room. This can be checked very easily.
And one more feature in the bathroom is the layout of pipes with cold and hot water. They are often carried out in close proximity, without laying thermal insulation.

It is not surprising that in the place where water is supplied to the plumbing, the pipes begin to “cry”. It is easier to eliminate condensation on open wiring.
But, in a situation where the network is hidden in a wall, resolving the issue entails more complex work. This will also include repair activities, because the geometry of the structure will most quickly have to be changed.
When considering the causes of condensation in cold water pipes in a bathroom or bathroom, it should be noted that in general the situation is similar to the one described above, but one “BUT” arises.
Which paint to choose?
For metal pipes, paints and primers based on organic solvents are optimal; water-soluble ones are not suitable.
Today, compositions are offered that combine primer and paint. This makes the job easier. But the traditional method gives more reliable results. The primer provides good adhesion to the metal, the paint adheres well and has a smooth top layer. In addition, such “two-in-one” compositions are presented in a limited range of colors, unlike paints.
Experts recommend the domestic primer GF-021. It is inexpensive: the cost is from 35 rubles/kg. It is advisable to choose anti-corrosion paints.
The following paints are popular and in demand:
- Alkyd enamel. It is resistant to various influences, including temperature changes. Disadvantage: from the moment of application until complete drying, it emits an unpleasant odor.
- Water-dispersion paint. It has a long service life, dries quickly, has virtually no odor, and is absolutely safe.
- Acrylic enamel. It is durable, aesthetically pleasing, and has good consumer characteristics.
The cost of paint for metal starts from 150 rubles/kg. When painting hot pipes, it is advisable to choose heat-resistant paint.
The following paint options are suitable for painting polymer pipes:
- acrylic and pentaphthalic based on white spirit,
- aqueous compositions for mineral surfaces: dispersed, emulsion, acrylic, organosilicon,
- water-soluble for joinery.
Painting gas pipes
First of all, it is worth remembering that the paint for painting gas pipes serves as their anti-corrosion protection.
And one moment. Modern paint used for gas pipes usually has a specific name. The common man sometimes cannot understand him. The fact is that the word “paint”, as a rule, is absent on the label of a unit of this product. To give you an idea of what we are talking about, below are the most popular painting materials today that can be used to paint a gas pipe.
For painting metal pipes, special compositions with additives that prevent corrosion are used.
- Zinconol. This is a one-component polyurethane primer for metal, filled with zinc.
- Epostat is an epoxy chemical-resistant primer-enamel.
- Polyurethol – polyurethane oil and petrol resistant primer-enamel.
- “Nerzhakhim” is a chemically resistant primer-enamel.
Returning to the conversation about how to paint a gas pipe, it should be noted that this procedure is no different from painting any other metal pipe. But there is one nuance here: when removing the old layer of coloring material, it is prohibited to use heating devices.
Regardless of what paint is used for gas pipes, the painting steps are identical:
- Wrap the area to be treated in a rag pre-soaked with the remover. Remove the softened paint with a spatula after 20 minutes;
- clean the gas pipe with a metal brush from the old layer and rusty accumulations;
- Apply degreaser over the pipe. Information about its consumption rates per 1 sq. m is indicated on the bottle label;
- paint the pipe.
At the same time, follow the unshakable rule for gas pipes: paint is applied to them in two layers with intermediate drying. This way you will provide the pipeline with long-term coating.
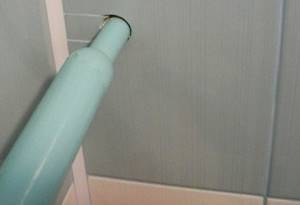
And finally, some information about how to paint a pipe with condensate. There are two possible options here.
- If the dead-end branch from the central riser, through which water is supplied to the sink or bathtub, “sweats”, simply turn off the tap on the riser and wait until the pipe warms up. After this, dry its surface, and, making sure that there is no condensation, paint the pipe using the above technology.
- With the transit branch the situation is more complicated. Here you need to listen to the advice of home craftsmen. If condensation does not particularly bother you, you can wait until the water in the entire house is turned off and, without wasting time, after drying the pipe, quickly paint it with quick-drying paint.
It is necessary to paint pipes taking into account their type, material of manufacture, purpose, etc. And the paint itself must correspond to the characteristics of the utility service being processed.
How to paint pipes correctly
The main reason for painting pipes is to protect them from corrosion. Unfortunately, since the 50s of the 20th century, in order to save money, they began to install steel pipes for heating, as well as for cold and hot water. These pipes, of course, were not coated with anti-corrosion protective agents and were very vulnerable to rust formation. And when, in the 80-90s, the installation of engineering structures practically ceased to be controlled by construction organizations due to strict financial conditions, it became possible to use cheap steel pipes (which were essentially intended to carry gas) in heating and plumbing systems.
As a result, after ten years of their use without touch-up, they begin to crumble. Unfortunately, water pipes made of steel are still often used in apartments, although galvanized or plastic pipes do not require any corrosion protection at all. However, it must be taken into account that the protective coating on the threads of galvanized pipes is often damaged and in this case it is better to tint the threads.
Preparing pipes for painting
Wet pipes cannot be painted - but often those carrying cold water are much colder than the air in the room and for this reason so-called condensation forms on their surface.
To dry cold water pipes, it is enough to turn off the water supply in the apartment for a day, making the necessary reserve in advance. The temperature will become equal to the room temperature and the moisture will evaporate.
In the case of painting the riser, you will have to use a fan, with a strong directing air flow from which the moisture will evaporate a little faster and there will be no condensation on it.
About coloring
Before you start painting the pipes, you need to remove layers of rust or old paint, which can be easily removed using a sharp knife. If it is difficult to remove old paint, you can use a hair dryer, heat it up and then clean it well. The main thing is not to overheat the threaded connections, so that the winding does not burn out and the pipes do not leak.
After cleaning with a knife, the pipes should be cleaned with a metal brush to remove any remaining rust and old paint, thus preparing them for priming. The MT 2003 magnetic thickness gauge will help you check whether paint remains on the pipes and carry out cleaning more efficiently.
It is best to prime them using an anti-corrosion primer to protect against rust and for better paint coverage. When it is completely dry, they begin to paint the pipes. It is best to use thin two layers of paint. When the paint thickens, it is necessary to dilute it, otherwise the thick paint will leave unsightly streaks, and it will take much longer to dry.
Dyeing process
In fact, there can be only two options for painting radiator heating pipes - when the paint is applied to new pipes or when the composition must be applied to previously painted batteries and pipes to them.
Option 1
Often you have to deal with new steel pipes immediately after purchasing an apartment in a new building. Often such radiators are not even coated with a primer, but simply cleaned. If there is rust on the surfaces of metal pipes, it must be cleaned mechanically. Otherwise, the paint on metal simply will not adhere properly.
In order to solve this problem with your own hands, you can use regular sandpaper. Also, do not forget about coating the pipes with a primer and degreasing compound.
Remains of slag on welds can be removed using a light hammer, after which the pipes should be wiped with white alcohol. If the pipe is made of copper, then the process of preparation for painting ends here. In the case of the steel version, rust must be removed.
If the case is too advanced, then you can use a grinder to process the seams on the pipes. For steel pipes, a rust converter can be applied to the surface, which can easily convert the too loose layer of the pipe into a smooth film. Applying paint to the film is not difficult. But it is preferable to first treat this area with a primer.
It is very convenient to use alkyd primers, which often contain a rust converter. As a result, when applying the primer, you can immediately achieve the desired effect. Usually information about this is indicated directly on the packaging.
The final stage in this option is painting the surface of the pipes in two or three layers with the selected coloring composition.
Option 2
If you need to paint radiator pipes that have already been painted previously, it is advisable to completely remove the previous composition from their surface. This need can be explained by two factors:
- The first of them is an exclusively aesthetic nuance, because if you apply new paint on top of an old one that has deformed over time, you won’t be able to get a beautiful, even layer;
- The second is that it is difficult to repair or replace pipes if necessary, since the fasteners are literally welded over time under several layers of paint.
Removing old paint will not be difficult if you use a remover for this purpose that can soften the paint layer. Next, all that remains is to clean off the melted old paint with a spatula. It is preferable to use a universal type of wash, as shown in the photo, since in this case you will not have to think about the composition of the old paint.