How to clean a Junkers column with your own hands
Any repair work on gas consuming equipment must be carried out by a specialist who has the appropriate work permit.
Cleaning the pilot burner and heat exchanger is a job that you must not do yourself. Maintenance is carried out at your own risk. To clean your Junkers speaker at home you will need to do the following:
- turn off the gas and water supply;
- remove the casing;
- disconnect the smoke receiver and water unit;
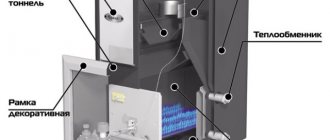
- pull out the heat exchanger.
The water heater radiator is washed in warm water with the addition of any non-abrasive detergent using a stiff, long-bristled brush.
You can clean the wick and main burner using a special awl. Clean each nozzle, removing carbon deposits. Do-it-yourself repair of Junkers geysers results in the manufacturer’s refusal to provide warranty service for the equipment.
Open type: how to start a gas water heater
Flow-through geysers installed in residential premises cause a lot of controversy. It should be noted that modern geysers do not pose a danger if you follow all the rules for their use. Everyone who lives in an apartment or house and uses such a column to heat water should know the rules for handling a water heater.
If the smell of gas appears in the room while the speaker is operating, the device must be turned off immediately.
If there is a large accumulation of gas in the room, it is necessary to open the windows to reduce the gas concentration. It is important to know that if there is gas in the room, turning on electrical appliances and fire is strictly prohibited. If the water heater is not working properly, you should call the gas service.
How to light an open type column:
- It is strictly forbidden to light a fire if there is no reverse draft in the chimney.
- Do not turn on the device without understanding the instructions.
- It is important that the room is equipped with a constant flow of air.
- You cannot repair or make changes to the operation of the gas water heater yourself.
When lighting, do not touch the front of the panel. When turning on the speaker, it is better to set it to low power. It should be noted that modern models of speakers are equipped with safety devices that stop the operation of the speaker if there is no traction.
Types of geysers Junkers
All modifications of Junkers geysers are equipped with different types of igniter.
Junkers Version "B"
Bosch Therm 4000 OW 10-2B
The burner is ignited using 2 batteries. The water heater starts at an automated level. There is a comprehensive system responsible for operational safety:
- traction control;
- safety valve;
- ionization fire setting.
The level of water pressure and temperature conditions are adjusted based on the flow in the water supply system. This version has a malfunction indicator that indicates the need to repair the Junkers geyser.
Based on user reviews and manufacturer statements, the unit in this series is capable of serving properly for more than 10 years. This classification includes all types of Junkers WR geysers, including Min-Maxx and Junkers WR 10, but with the prefix “B”.
Junkers "R"
In these versions, piezo ignition is installed, the igniter will always be ignited. Water pressure and flow can be adjusted separately. Models WR13-P, 15-P, 10-P have a thermoelectric device that controls the flame level.
Junkers "G"
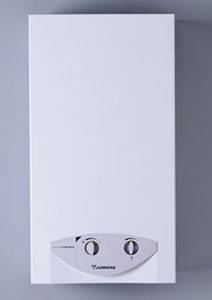
Class “G” units have Hydro Power technology and are capable of operating at a pressure of 0.35 atm. The burner is ignited by a hydrodynamic generator. Class “G” devices operate at three water intake points. Modifications: WR 13-G, 15-G, 10-G.
Cost of units
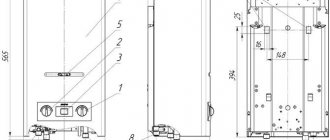
Modifications of two versions are released on the market - standard and mini. They differ in size, all other parameters are completely identical. The cost of devices depends on the dimensions, the need for transportation and installation. On average, the price of devices is equal to the following indicators:
| Versions by size | Dimensions | Cost, rub. | |||
| Standard | Miniature | Height, cm | Width, cm | Depth, cm | |
Each device comes with an instruction manual, which provides detailed information on how to turn on the gas water heater, configure it, and even install it. But it is recommended to entrust the installation to specialists from the gas service. Otherwise, you can make a mistake that will harm not only the water heater, but also the health of the user.
Common problems
More than 60% of breakdowns occur due to non-compliance with operating rules, the remaining percentage is attributed to power surges, poor water quality and corrosion. Manufacturing defects are not included in this list, since they can be eliminated free of charge by sending the equipment to a service center.
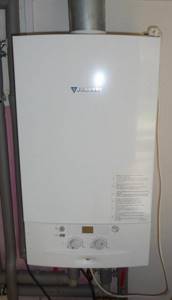
Despite the fact that Junkers are very high quality and reliable among their competitors, breakdowns sometimes occur. They are associated with voltage surges, housing corrosion, and scale formation. Factory defects are eliminated free of charge
As for paid repairs, approximately 800-2000 rubles will be required for the services of a specialist, depending on the complexity of the work. But here it should be borne in mind that it is more profitable to transport the water heater to the service center yourself, since a visit from a Junkers geyser repair technician is even more expensive.
Common malfunctions that users often encounter during equipment operation:
- A few seconds after starting the water heater, the wick goes out. The main reason for this situation will be the failure of the thermocouple, valve device, or combustion product sensor.
- The water does not heat up. In this case, most likely the heat exchanger has broken down or a large layer of scale has formed in it.
- The device began to make loud noises and overheat. The reasons are completely similar to the previous paragraph.
- Water leak. The integrity of the heat exchanger is compromised or the seal requires replacement.
To fix the problem yourself, first of all you need to carry out the following manipulations:
- establishing the exact cause of the breakdown;
- purchase of original spare parts;
- preparation of equipment that may be required during repair work;
- studying the rules for troubleshooting and following the recommendations of specialists.
After replacing the broken part, before lighting the Junkers geyser, you need to make sure that all fasteners are firmly fixed and there will be no gas leakage when turning on the burner.
Water heater repairs may only be carried out independently if you have the necessary experience. Also, only original parts should be used. You can purchase spare parts from an official representative. For example, a new hydraulic fitting will cost up to 7,500 rubles, an igniter - 400-500, an electronic ignition device will cost 5,500 rubles.
VIDEO: How to clean JUNKERS yourself
Pros and cons of Junkers geysers
Junkers geysers are considered quite common; they are often found in private homes and country houses. But even modern units made on the basis of leading technologies have some disadvantages. The main disadvantages are the following nuances:
- increased noise level - this factor applies to almost all modifications;
- after 5-6 years, problems with the heat exchanger begin, water leaks appear;
- All joint areas require additional sealing; the supplied gaskets are not enough to eliminate all leaks.
According to water heater repair specialists, the main reason for the appearance of the listed nuances is the formation of scale. The manufacturer claims that this equipment can be used in Russian conditions only with the installation of an additional water filter. In this way, you can increase the resource to 10-12 years.
But here other nuances arise. Firstly, regularly replacing cartridges is considered quite a troublesome task, and secondly, doubts arise about the usefulness of taking baths with magnetized water. Russians are quite satisfied with the service life of water heaters of 10-13 years without the use of various filter systems.
But despite such categorical disadvantages, Junkers Control equipment has a large number of advantages, which include:
- modifications are adapted to the pressure in the domestic gas pipeline system of 13 mbar, when in Europe the figure reaches 20;
- water heaters are able to function in combination with a plumbing system in which low water pressure is from 0.1 atm;
- the units have increased productivity and are capable of heating 11-17 liters of liquid per minute;
- the equipment is equipped with a flame modulation system, when automatic power selection occurs depending on water pressure;
- high degree of safety and affordable cost.
To all this, you should also add the operating life of the water heater equal to 10-13 years and a warranty of 24 months.
VIDEO: How to backflush water pipes and water heaters without chemicals
Why one article at once about speakers from two different brands, Junkers and Bosch? At their core, the Junkers WR-11 and Bosch WR-10 speakers are the same speaker. They have slight differences in the body and handles. For example, on Junkers dispensers you can find a tap that is attached to a water block and is sold together with the dispenser. This is where the differences, in general, end. Inside the case there is the same filling. Both speakers are semi-automatic and have proven themselves well for their simplicity, maintainability, and the price of new products. They have been very popular in Russia for a long time. You can do the repair of these geysers yourself, using my step-by-step disassembly instructions.
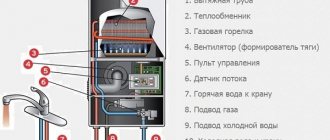
How does this column work? In order to light it, you need to set the slider on the front panel to the middle position and press on it. Thus, we forcibly open the electromagnetic gas valve and supply gas to the igniter (wick) of the gas water heater. In order for the gas to ignite, it must be ignited with a piezoelectric element, which is located in the lower left corner of the gas column. After the spark has ignited the gas coming out of the wick (igniter), you must continue to hold the slider button pressed for 10 to 40 seconds. At this time, the column thermocouple is heated. Then release the slider, the wick should continue to burn without pressing. If this does not happen, then you must repeat the entire procedure from the beginning. If the igniter does not light up, then most likely the column requires repair or maintenance, cleaning the wick (igniter). After the thermocouple has warmed up, it generates an EMF, which independently holds the electromagnetic gas valve of the column in the open position. The column is ready for use. All that remains is to set the gas flow rate you need using the slider and the water flow rate on the water block.
What happens when you open the hot water tap of the mixer? Everything else is simple. The membrane of the water block presses on the rod, which in turn opens the mechanical gas valve, and gas is supplied to the main burner of the Bosch (Junkers) column. The gas mixture is ignited by the burning igniter wick and heats the water, which flows through the radiator of the gas water heater.
1.Remove the handle from the water block, set the gas regulator slider to the middle position, unscrew the two self-tapping screws from the bottom of the speaker body (on Junkers there may just be snap-clips) and remove the body.
2. Unscrew the two self-tapping screws securing the cap of the gas exhaust device to the body of the column and two self-tapping screws on the strip attached to the cap, which secures the radiator (heat exchanger) of the gas column.
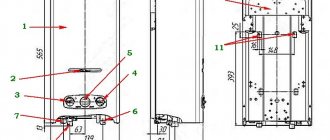
3. Remove draft sensor 1 (it is located on the right side of the smoke exhaust hood), disconnect the wires from it. Remove temperature sensor 2 from the heat exchanger by disconnecting the automation wires from it. Here Junkers and Bosch have slight differences. For Bosch, the wires from the traction sensor are removed, for Junkers they are soldered. Don't try to remove them - you'll only break them.
4. Next, nothing prevents us from disconnecting the gas exhaust cap from the heat exchanger (radiator) and the column body.
5. To remove the heat exchanger, it is necessary to remove the threaded pipe from the left pipe of the heat exchanger, having first removed the latch. Instead of removing the threaded pipe, you can unscrew the hot water hose from it. From the right pipe of the heat exchanger, you need to remove the tube that connects the heat exchanger to the water block of the gas water heater. It is also attached to a latch; after removing the latter, it can be removed. Rubber rings are used as seals in both pipes. They often leak after disassembly and reassembly, because... rubber ages and dries out. It must be disassembled carefully. When assembling, I advise you to change the rubber bands; in any case, lubricate the pipes during assembly.
6. Nothing prevents us from removing the heat exchanger. Although... Bosch has two brackets for the heat exchanger stamped on the back wall of the case. It is better to bend them upward. They are not particularly needed and do not affect anything. After this, remove the geyser heat exchanger upwards.
7. Disconnect the pilot tube from the burner. It is secured at the top with such a bracket (if it hasn’t been thrown out before you) and in the area of the jet it is secured in a latch. Use a screwdriver to pry up the tube in the area of the latch and remove it from the grooves at the top.
8. Behind the igniter tube there is a ceramic ignition electrode. It is also attached with a quick-release latch and can be easily removed.
9. In order to remove the burner, we unscrew a pair of screws that secure the burner to the body of the gas water heater, and a pair of screws that secure the burner in the gas block of the water heater. Next, gently press the thermocouple down with a screwdriver so that it comes out of the burner body. You can stagger the burner upwards from the gas block.
10. To clean the burner, we disassemble it into parts. To do this we need to unscrew 4 screws. We separate the two parts of the burner from the gas train.
Actually, the disassembly of the column is completed. For maintenance (cleaning) this is quite enough. The gas block usually does not break if no one has climbed there. There's nothing to do there. This is a factory product. If necessary, you can also remove the water block and disassemble it to replace the membrane or oil seal cover.
We carefully wipe the disassembled elements, rinse them from dust, soot and other deposits.
Particular attention to the heat exchanger. I wash it both outside and inside with chemicals or a solution of citric acid. By the way, it really eats away scale and rust from the inside. If the water is from a well with increased hardness, then this simply must be done at every maintenance, because it becomes overgrown from the inside so that it cannot be blown out with a compressor. Scale and soot impair heat transfer, increase gas consumption, and can lead to heat exchanger failure. Burnt-out heat exchangers on these columns are rare, but those clogged with soot are very common. Both the Bosch and Junkers water heaters begin to heat the water poorly. Usually, all these “shoals” emerge at the beginning of winter, when water through the pipes begins to flow colder than in summer.
Dust accumulates in the burner, which enters the apparatus with air, and combustion products fall onto the openings from above. You can’t clean the burner in this column without disassembling it, so drive away all those who suggest you clean the column with a vacuum cleaner—they’re freeloaders!
Thoroughly clean the thermocouple of carbon deposits and soot. I have not encountered burnt thermocouples on these columns. It is better to wipe the insulator of the piezo ignition electrode from carbon deposits and dirt with alcohol, no matter how much it sticks onto the body. Thoroughly blow out any dust from the igniter tube. Most often, because of this dirt in the tube, the wick becomes weak, smokes, does not heat the thermocouple well, and the column may go out and not ignite. Cleaning the tube usually solves the problem and the column wick lights up. Ideally, the pilot flame should be blue and hit the thermocouple horizontally. If the wick flame is yellow and the large “tongue” goes up, the igniter clearly needs to be cleaned.
