The peculiarities of such sources of room heating are the low limited pressure of the liquid circulating in them and high heat transfer rate.
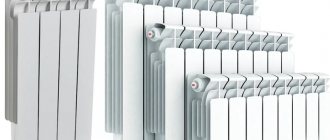
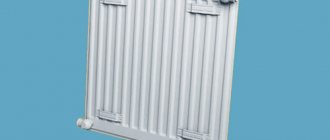
Thus, the installation of aluminum heating devices is often carried out in private houses with a small number of floors or when forming an autonomous system.
This is done to prevent the occurrence of water hammer and to obtain high-quality heating of the rooms.
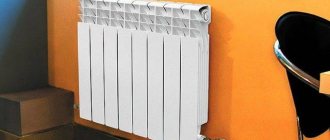
Aluminum radiators are mainly mounted under window sills or in any free area of the room, including on racks near the wall. The latter option provides for the supply of pipelines on both sides.
Important! , the rate of heat loss to objects located near it must be taken into account
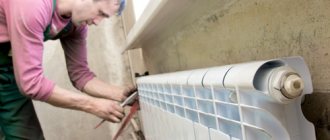
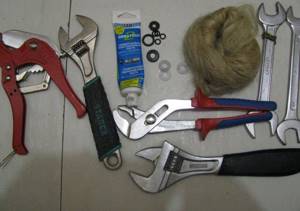
Tools required for work
If you do the extension yourself, you should first ensure that you have the necessary tools. The set includes:
- Radiator key, standard for all battery types.
- Special nipples with which aluminum heating radiators are connected to each other.
- Pipe wrench.
- Plugs for side sections with left and right threads.
- Paronite or other intersectional seals for heating radiators.
- Emery cloth.
You can purchase these tools at any building materials store.
Installation
The installation of aluminum radiators can be ordered from a special organization or done by yourself. In this case, you need to know the sequence of actions and how to carry them out most correctly.
Preparatory work
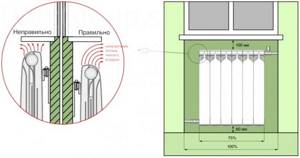
Before you begin installing radiators with your own hands, you need to calculate their mounting locations and install the bracket. To do this, a calculation is made based on the building rules for installing a radiator:
- At least 10 cm from the window sills,
- About 12 cm from the floor,
- From 3 to 5 cm from the wall.
The bracket must be secured to the wall using dowels, sealing the holes drilled for them with cement mortar. The radiator can be floor-mounted, that is, it can be supplied with a floor holder - a stand. At the same time, it should be attached to the wall lightly, only to maintain balance.
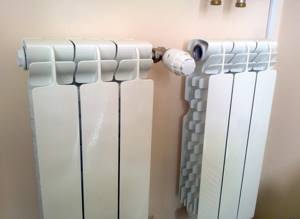
Radiator assembly
Before connecting, the radiator itself needs to be assembled, that is, the necessary elements must be installed:
- Screw in the radiator caps and plugs,
- Connect the shut-off valves,
- Assemble thermostats
- Check the reliability of the nipples,
- Attach air valves
A diagram of how to disassemble an aluminum radiator and reassemble it should be included with the new device.
Attention! In order for the valves to do their job correctly, you need to immediately calculate that their outlet heads are facing up.
The radiator can then be secured to the bracket. In this case, the hooks must be located between the sections. The bracket is also involved in the process of adjusting the installation level of the radiator.
How to properly disassemble or assemble an aluminum radiator
Experienced people advise not to try to figure out by eye how to dismantle aluminum radiators of 10 sections. In front of us is usually a battery mounted on the wall, which looks the same from all sides. But it is not so. If the old cast-iron radiators were truly perfectly symmetrical, then the new ones show with their shape where to turn. Usually there is a tooth in the upper part on the front surface, which bends from the back towards the room. Now, if you look directly at it, the thread on the left will be left-handed, and on the right - right-handed. We do not insist that every manufacturer does this; moreover, we could be wrong. However, all these guesses can be verified by calling the dealer. (See also: What types of heating radiators are there)
This is the only way to guarantee that the cost of the aluminum radiator section will not have to be paid again due to a broken thread. In fact, each battery comes with four threads, two left-hand threaded and two right-hand threaded. But they all have a standard thread in the hole. Therefore, dismantling from the wall does not cost anything, and we have already explained how to determine which direction to turn. When the footings are removed (it is not necessary to do this on both sides, depending on the situation), you can begin to use the key through the holes. And this is where Nova Florida radiators show their vulnerability. It is enough to carelessly touch the inner coating with a crowbar or wrench to get the result that we feared - a crack that will cause impact electrochemical corrosion. Not very nice.
How to avoid this? We do not know. And we won’t even tell you how to assess whether a scratch has appeared. It may not be visible to the eye even with a flashlight in hand. The width of the aluminum radiator section is small (standard), but given that the channel is not always round (resembles a rhombus or ellipse), assessing the condition of the surface becomes dramatically more complicated. That is why we recommend that the impact heat transfer of 1 section of aluminum radiators (more than that of all other materials) should be used only when implementing complete house projects from the foundation to the roof. Of course, it would be possible to make everything from copper. But such designs are not visible for sale. We believe that they would be heavy and expensive, but copper oxidizes quite well in water. Which is not always healthy.
Ultimately, we think it's more about price. In addition, the melting point of aluminum is half that, which makes production relatively cheap. But in light of how much cast iron models made to look like works of art cost, all this seems like trifles. As a result, we must admit that we do not have an exact answer to the question of why the entire section is not cast from copper at once. Still, there are economic considerations here. According to some reports, bimetallic batteries with copper inserts are already available, but durable products are not commonly produced today. There are probably two reasons: durability and price. Are you surprised? And some believe that Calgon is only harmful, and it is specially advertised so that washing machines and dishwashers break down more often (we tend to think that you just need to dose the product correctly). (See also: How to choose heating radiators)
Battery Installation
Position
To ensure maximum heat transfer from the radiator, when installing it you need to follow a number of simple rules:
- The distance from the wall should not be less than 2 centimeters. The gap will ensure the unimpeded movement of convection air flows from the back of the battery;
- The distance to the window sill when installed in a window sill niche is no less than 8-10 cm. A closely located window sill will again limit convection;
- The minimum distance from the floor is 10-12 cm. The gap will provide an influx of cold air, replacing the heated air and displaced upwards.
Which battery connection scheme should I choose?
Since heating radiators can be connected to each other using different schemes, let’s consider which one is more convenient and efficient.
Series connection of radiators is most often used. Because it provides a high level of reliability. Requires minimal maintenance. Technical costs are low. Using this scheme, you can connect up to four batteries. The heating device is connected to the system from below. If radiators or pipes sag, it is necessary to install spacers.
The only disadvantage when connecting batteries according to this scheme is large heat losses. When water enters the top of the system, the battery cools by about 7 degrees. The latest radiators will heat the apartment worse. The temperature difference between the near and far batteries can reach 18 degrees. Thus, the room will warm up unevenly. But this problem can be solved by installing an additional electric boiler.
What should you consider when choosing radiator piping schemes?
How does a heating radiator work?
If you take a simplified look at most heating radiators, their hydraulic design is a fairly simple, understandable diagram. These are two horizontal collectors that are connected to each other by vertical jumper channels through which the coolant moves. This entire system is either made of metal, which provides the necessary high heat transfer (a striking example is the power of a cast-iron radiator section), or is “clad” in a special casing, the design of which allows for maximum contact area with air (for example, bimetallic radiators).
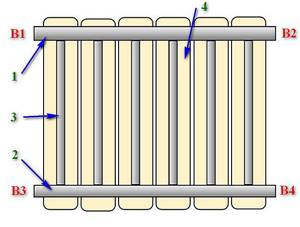
Very simplified - diagram of the design of most heating radiators
1 – Upper collector;
2 – Lower collector;
3 – Vertical channels in radiator sections;
4 – Heat exchange housing (casing) of the radiator.
Both collectors, upper and lower, have outputs on both sides (respectively, in the diagram, the upper pair B1-B2, and the lower pair B3-B4). It is clear that when connecting a radiator to the heating circuit pipes, only two of the four outputs are connected, and the remaining two are muted. And the operating efficiency of the installed battery largely depends on the connection diagram, that is, on the relative position of the coolant supply pipe and the return outlet.
Instructions for connecting heating radiators
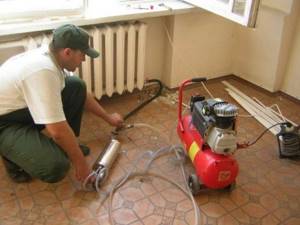
Extending sections and replacing a heating device with your own hands is done when there is no water in the heating system. It is not recommended to carry out replacement in the autumn-winter period, especially in apartment buildings, since it will require turning off the heating system of neighbors and draining water from the pipes, as well as calling the personnel of the operating organization and will entail additional costs for their work and for filling the pipes with water. Before connecting the heating radiators to each other, select the necessary components.
Materials and tools
To install the unit, you will need torque wrenches, specialized radiator wrenches, a set of plumbing tools, an impact drill, a hammer drill, drills, pliers, a building level and a screwdriver.
- Instrumentation - pressure gauges and thermometers;
- shut-off valves;
- brackets for fastening;
- for a one-pipe system - bypass;
- Mayevsky tap for air release;
- simple and through tees;
- nipples, corners, couplings, threaded pipes;
- intersectional seal;
- paranitic gaskets;
- stuffing;
- sandpaper.
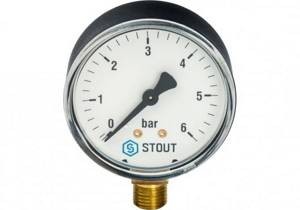
To connect heating radiators you will need a pressure gauge
Scheme selection
The type of piping in the house will depend on the heating scheme: one-pipe or two-pipe and the design features of the room. In a one-pipe system, radiators are connected along the side routing, in a two-pipe system - along the bottom and diagonal; it is believed that the latter is more efficient. It involves a significant initial investment in additional pipes and piping. Nevertheless, the costs are quickly returned because such a system is more efficient, works with fuel savings and its payback period does not exceed 3-4 years.
To pre-select the thermal power of heating devices, an estimate is used on the basis of: 1 kW per 10 m2 of heated area. This ratio works well for the central regions of Russia; for the northern and southern territories it will be necessary to introduce special correction factors. Next, you need to enter another coefficient taking into account the connection diagram of the devices:
- Side liner - K=1.0.
- diagonal connection - K=1.1–1.2.
- lower trim - K=0.7–0.9.
Even from these relationships, it is clear that for economical operation of the system, a diagonal battery piping scheme is preferable.
Preparatory stage
In order to install new radiators or expand old ones in the heating system, you will need to carry out preparatory work:
- Before connecting aluminum radiators, you will need to drain the water from the system and make sure that there is no water before removing the device. To do this, you will need to open the drain valve at the bottom of the return pipeline and the air vent at the top of the supply.
- Dismantle the old device using keys. Some old, boiled connections cannot be unscrewed; in this case, the pipe is cut off with a grinder and a new thread is cut.
- Old aluminum heating radiators and mountings are removed.
- Before connecting two heating radiators to each other, perform a visual internal inspection. If lime deposits are found, such devices are washed.
- Make markings for new brackets and install them. Extension of the panel is carried out.
- The aluminum heating device is placed strictly horizontally and at a slight angle relative to the wall to ensure maximum heat transfer. You will also need to maintain gaps from the unit to the window sill of -100 mm, to the wall of 50 mm.
- If necessary, increase the length of the pipe and secure it to the wall.
Direct connection
If you decide to connect aluminum batteries at home with your own hands, you need to choose any of the connection methods (upper, lower, vertical, horizontal, diagonal) . Then carefully read the diagram of the central heating pipelines in your house or apartment. It is necessary to take into account the fact that the entire heating system must be made of one material: metal or polypropylene. Connection:
- Wipe all joints and pipes with sandpaper and degrease them.
- Fix the radiator : temporarily or installation (depending on the circuit).
- Screw in adapters , which, by turning, can be adjusted to the direction of the pipes. If they are located below, on the floor, then the adapter is screwed down with a thread; if the pipes pass deep into the room, then the direction of the adapter changes.
- Adapters for connecting the radiator and pipes are made of domestically produced polypropylene. Using a tubular soldering iron, we attach it to the main pipe.
- We install the tap on top and the plug on the bottom .
- Install the Mayevsky tap. Thanks to it, it will be possible to rid the heating system of air.
- Install the valve-regulator using threaded connections, if it is metal and not polypropylene. It is better to make threaded connections using flax in combination with unipak.
Testing the assembled structure
After soldering the pipes, the most crucial moment comes - checking for water leaks. Some experts try to check the joints in a container of water, but, in essence, this is a waste of time, and nothing more. You can check how well the parts were connected only by pumping hot water into the system.
A bronze tap is usually installed at the entrance to the heating radiator. It will be needed to repair or adjust the heat supply to the system. If drops appear during filling, you will have to turn off the water, remove the plug and sequentially tighten the nuts.
Materials and tools for attaching an additional section
Before connecting a heating device, you need to calculate the number of sections required to effectively heat the rooms. In order to correctly and efficiently solve the problem of how to connect an aluminum radiator, you need to prepare the following tools and materials for work:
- Two keys: pipe and radiator.
- Nipples for heating system.
- Side plugs.
- Intersectional seal.
- Paronite gasket.
- Sheets of sandpaper.
Radiator cleaning
We have already discussed how to remove the battery above. Therefore, now all that remains is to bring it into the bathroom (if you live in an apartment) or take it out into the yard. Please note that you will also need a wooden pallet or something similar to place the radiator on. This technique is used to avoid scratches or dents in the radiator.
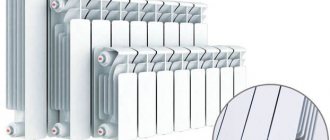
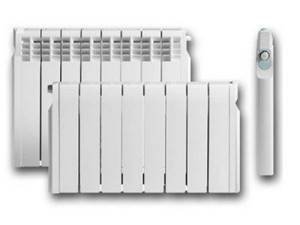
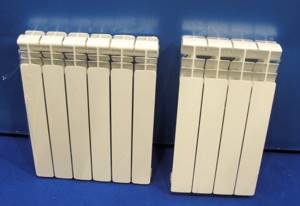
Inexpensive heating device with excellent appearance and very good heat dissipation
We unscrew the battery seals only in the bathroom. Otherwise, you may flood the floor with water, which has a rather unpleasant odor. To rinse the battery, just connect a hose to it and turn on the water under pressure. If you cannot get rid of the blockage in this way, you should use a solution of vinegar diluted 70% with water. Close the bottom seal to prevent the vinegar solution from escaping through the hole. Pour it inside the battery and let it sit for several hours. After this, unscrew the seal, drain the dirt and rinse with water.
Before returning the radiator to its original location, clean the threads with a dry cloth. After this, it is recommended to apply tow with paint to the footers. If you have more modern batteries installed (not made of cast iron), you can not use tow, replacing it with film.
As you can see, the work of cleaning and adding additional sections to the battery can be done independently, without the help of specialized teams. It is important to follow the sequence of work, as well as to exercise maximum accuracy, caution and attentiveness. If you have encountered this type of work or are just planning to add several battery sections to your home, be sure to share your experience or thoughts on this topic with us and our readers!
Direct connection of sections
The problem of how to connect sections of a bimetallic radiator is solved as follows:
- Additional sections are attached to the main part.
- Place the sealing element.
- Determine the distance to the nipple using a radiator wrench.
- In accordance with this distance, install the nipple into the radiator.
- The radiator key is turned using a pipe wrench.
- The nipple is wrapped into two sections located opposite each other.
- Turn the radiator key three turns.
- In the lower part perform similar actions.
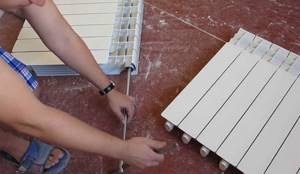
After this, the paronite gaskets and side plugs are installed, and a pipe wrench is used during the work. Tightening is carried out as much as possible so that the connection is reliable and tight. The remaining sections are connected to the battery according to the same scheme.