Ball valves are modern products that replaced conventional rod valves, at the bottom of which a thick rubber band was screwed, designed to stop the water. The stem of such a tap pressed against the rubber, as a result of which the water stopped flowing. Modern ball valves are more convenient and attractive in appearance; they have only one drawback: if the water contains a large amount of various salts, the ball-sphere quickly becomes slagged and the product stops working.
When installing a ball valve on the thread, it is necessary to wind fum tape, flax or liquid fum.
To prevent this from happening, you need to open and close the tap at least once every 2 months to remove salt deposits. Installing a ball valve is a fairly simple task and can be done with your own hands. However, in order to correctly and efficiently install a ball valve, you need to prepare for its installation and strictly follow the instructions.
Types of cranes
The choice of joint will largely depend on what type of locking mechanism is used as a basis. The taps are divided according to their location.
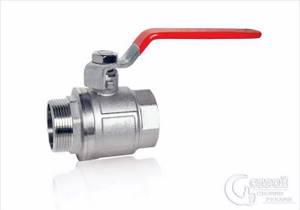
Ball pass
Passage. Installed on straight sections of plumbing, heating or other systems. Their purpose is the ability to adjust the pressure or turn off a certain circuit depending on the need or an unforeseen situation. Often such connections are permanent.
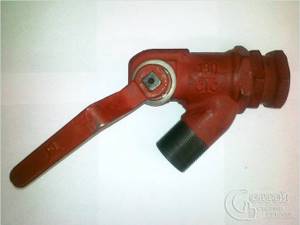
Terminal
End. Mounted at the end of a system. Their purpose is to be able to provide the discharge of liquid or other material, or to organize a water collection point for technical or domestic use.
Cranes are also distinguished by their structure.

Valve
Valve type. Used less and less. Structurally, they consist of a body made of copper or other metal, and inside there is an axle box. It can be full-turn (also called worm-wheel) or half-turn. In the first case, the mechanism is made in the form of a valve, which is lowered and raised by a rod. At the end there is a rubber seal that closes the hole, thereby regulating the pressure. In the second option, two ceramic plates are installed close to each other. Each of them has one or two holes. When they coincide, fluid flow begins, and vice versa. Plug taps are also distinguished separately. This design is similar to the first option, but instead of a flat gasket, a conical rubber is used, which also moves along the thread. The advantage is the simplicity and minimal step of adjusting the pressure. Such mechanisms are easy to repair. The disadvantages include the relative bulkiness and the need for a large number of turns for complete flow.
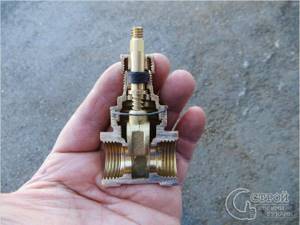
Valve valve device
Ball. To put it simply, the design consists of a small piece of brass or copper pipe in which there is a metal ball. The latter has a through hole. If it is turned with the hole towards the walls, then the current stops, and vice versa. The positive side is the speed of adjustment. Disadvantages: impossibility of repair, as well as difficulty when it is necessary to slightly increase or decrease the pressure.
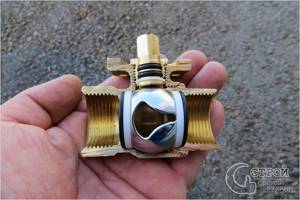
Ball valve device
Cylindrical. They are similar in structure to ball ones, but inside there is a cylinder with a hole.
Ball valves are separately divided into several types.
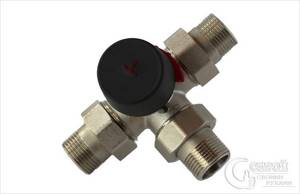
Three way valve
Single-pass and multi-pass. The first type is different in that the inner ball has one through hole, which can only be closed and opened. In the second case, the ball has one through hole and one blind hole. The fluid can move in either one or two directions. Everything will depend on the position of the locking mechanism. In the case where there are 4 outputs, then the flow is simply redirected.
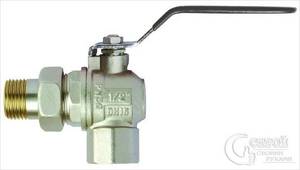
Angular
Angular. They are used in cases where the fittings must be installed at the junction of two pipes at an angle.
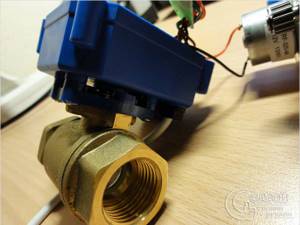
Electrically driven
Electrically driven. They are gaining more and more popularity. This is due to the spread of water leakage systems. Structurally, they are a ball valve, but instead of a handle for turning, a motor is installed on the top part, which automatically regulates the position of the passing element. The drive itself can be either 220 or 12 V.
End taps also include mixers.
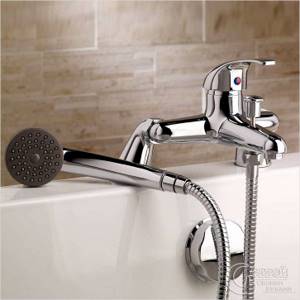
Lever
Lever. They usually have one handle that resembles a perpendicularly bent flag. Inside these products there is a special cartridge. It is shaped like a small cylinder. There are three holes in its lower part. Hot water is supplied to one, cold water is supplied to the other, and the third is an outlet. A special plate is installed above them; as the lever is tilted, it opens the move. To adjust the temperature, the handle is turned towards one of the holes. In some modifications, instead of a cartridge, a ball with several holes is installed, similar to multi-way ball valves.
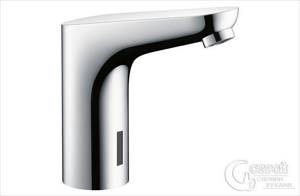
Mixer with sensor
With sensor. In this case, you won’t have to unscrew or lift anything. It all comes down to the fact that a person puts his hands under the gander, a photocell transmits a signal and the drive opens the flow. Some models require preliminary temperature adjustment. Others have a touch panel with symbols on it that you need to touch, like a modern smartphone to change settings.
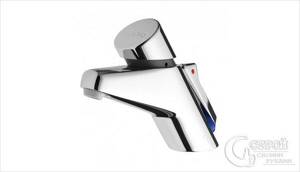
Portioned
Keyboard or portioned. The essence of their functioning is that the locking mechanism has a spring of a certain stiffness. When the user presses the button, the water flow opens and the spring begins to slowly lift the valve into place; when it reaches the upper level, the flow is blocked. Products for home sinks have a small lever on the side that allows you to select the appropriate temperature.
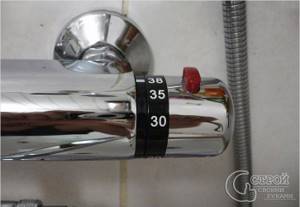
With thermostat
With thermostat. Such faucets will be relevant for the shower, especially if there are children. The essence of their operation is that the user selects the required temperature in advance. All you need to do next is press a key or turn a knob. The crane does everything else automatically. As pressure or other conditions change, it will supply more hot or cold fluid to maintain the flow.
Valve type. Their design coincides with what was described for the corresponding type of taps.
Principle of operation
Photo - with electric drive.
A ball valve is a shut-off valve where the valve is a metal or rubber ball. It is connected to a lever or a special device that controls its position (gearbox, pneumatic or electric drive). The ball has a hole that must match the diameter of the connected pipe. When you turn and open the device, these holes coincide and water begins to flow. If you turn the lever in the other direction, the flow stops.
In apartments, houses and utility rooms, a lever mechanism is used, but to control the operation of the device on large diameter bends, the use of drives is necessary. The main advantage of this mechanism is that you can control hot and cold water with one handle.
Sometimes ball valves are even installed in the heater of a VAZ car to control antifreeze fluid. But this is not the best solution - dust and dirt gets clogged under the ball, which significantly reduces its service life.
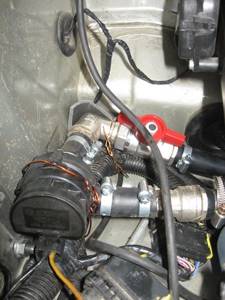
Photo - faucet on the stove
Types of ball valves:
- Flanged. Mounted on large diameter communications. A distinctive feature is the presence of an additional sealing element near the locking ball, which provides the maximum level of sealing. Therefore, they can be used for pumping gas and oil products, heaters and installed on heat converters;
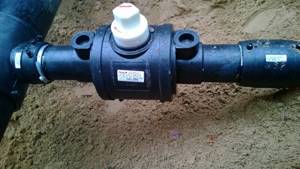
Photo – flanged - Fittings. The most common. They can be dismantled many times; the locking mechanism can be either static or smooth;
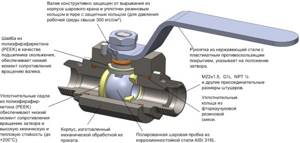
Photo – design of the nozzle model - Welded. Installed only once, used in main water pipelines, in conditions of high pressure and if a well-free installation is needed.
Based on the material of the housing, there are polyethylene and metal (copper, stainless steel, steel). The former are necessary in special operating conditions, for example, where the pressure exceeds 10 bar.
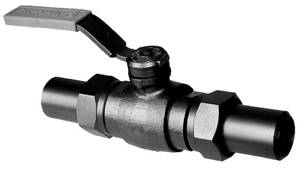
Photo – rubber lock
Materials for the manufacture of locking mechanisms
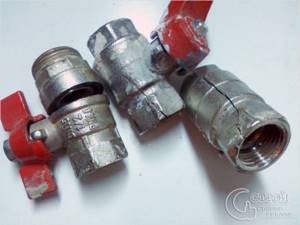
Silumin cranes
Often the valve body is made by casting, pressing or milling. Materials can be:
- Plastic. Most often used for end taps, which are used for outdoor washbasins or taps.
- Stainless steel. Any types of shut-off valves are made from it. The advantages are maximum corrosion resistance and long service life. The disadvantage is the susceptibility to the deposition of various salts on the internal walls.
- Silumin. This is an inexpensive metal, or, more precisely, an alloy. The main component is aluminum, to which silicon is added. Used in cheap faucets or ball valves. It is better to install products made from it in non-critical areas or where there is no pressure.
- Bronze or brass. The most common metals for such purposes. Their advantages are corrosion resistance, good interaction with other materials, and a minimal amount of accumulated sediment.
- Ceramics. Typically used for faucets. It has all the positive aspects of brass, copper and bronze, but the price of such products is very high.
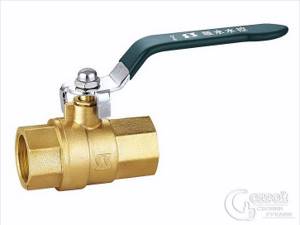
Brass tap
Installation of a tap on polyethylene pipes
Special locking mechanisms have been developed specifically for this type of pipe. Their installation can be carried out in several ways. The choice of one of them will be determined by the diameter of the pipe, as well as the method of connecting the pipe itself.
Soldering method. This is one of the most reliable solutions, but requires a scrupulous approach and some skills. The joint turns out to be one-piece, so the crane can be dismantled only if the integrity of the area is damaged.
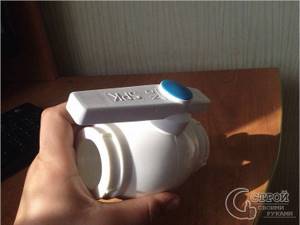
Soldering tap
Clamping coupling. It is a ball valve. There are locking couplings on one and the other side. In appearance they are exactly the same as those used on fittings for HDPE pipes.
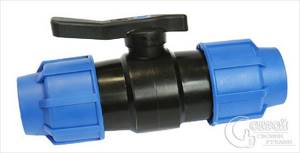
Clamp coupling
Faucet with built-in heater. It is used for polyethylene pipes that are installed using sleeve welding.
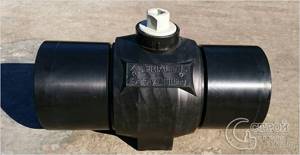
Faucet with embedded heater
Flange. At the ends of the locking mechanism there are metal discs with holes drilled around the perimeter. They are installed to the same elements on the pipe.
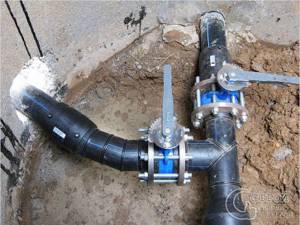
Flange
The easiest way to install a faucet on a polyethylene pipe is with a coupling. In order to implement this you will need the following tools:
- pipe cutter or hacksaw with fine teeth;
- fine sandpaper or knife;
- chain key;
- marker;
- roulette.

Connection using a compression coupling
To achieve the highest quality connection, the following must be observed:
- The ends of the pipes are cut at right angles. This is an important condition so that identical segments are fixed inside.
- All chips are removed, as well as any burrs that have formed. You can do this with a knife or fine sandpaper.
- The couplings are unscrewed from the locking mechanism and the sealing rings are removed. There should be two rubber bands left inside in the form of rings.
- The pipes are chamfered.
- First, clamping couplings are put on the pipes, then sealing rings
- The ends are lubricated with soapy water or dishwashing detergent.
- In the same way, it is necessary to lubricate the rubber bands inside the tap.
- The valve is installed exactly to the plane of the end of the pipe.
- With a slight rocking, the pipe is inserted inside. It must reach the limiter that is located there.
- The sealing ring slides flush against the fitting.
- The clutch is clamped using a chain wrench.
- The same must be done with the second part.
For pipes whose diameter exceeds 80 mm, the butt soldering method is used. Various fittings are installed in the same way. To weld a faucet for such a structure, you will need to ensure that you have the following tools:
- a welding machine, which consists of a vice, a pneumatic block, a trimmer and a heating element;
- fine-tooth hacksaw or pipe cutter;
- roulette.
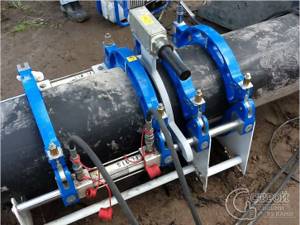
Butt welding
The process is as follows:
- A pipe is clamped into the centralizer on one side, and the element that needs to be welded on the other.
- It is better to tighten the front bolts a little less than the rear ones. This will make it possible not to deform the roundness of the end.
- The initial distance between them should be such that a soldering iron and knives can be placed in the middle.
- The pressure supply unit starts. The handle is slowly unscrewed until the platform begins to move.
- Once this happens, this value must be recorded.
- On the table that comes with the unit, it is also necessary to clarify the pressure that will be used during welding.
- A cutting tool is installed between the ends. You need to place it close to the pipe.
- It starts. The pressure that was recorded at the first start is set on the pneumatic unit.
- After closing the parts, it is necessary that 4 turns of continuous chips are removed.
- The pressure is released.
- Using a knife or other tool, internal burrs, if any, are removed.
- The pipes are checked for alignment. To do this, they are simply brought together closely and visually inspected so that there is no distortion or cracks.
- The areas where adhesion will occur are treated with an alcohol wipe or other degreasing liquid.
- The soldering iron heats up to the required temperature, which is also indicated in the manual.
- It is installed between the parts and is pressed under pressure for welding.
- It is necessary to maintain tension until a small influx forms; its thickness should be approximately 1 mm.
- Next, the pressure is released and a timer starts, which controls further heating.
- After the time has elapsed, the parts are moved apart and the soldering iron is removed.
- Within 5 seconds they must be brought together and held for another 4 seconds.
- The next step is to release the pressure, but the centralizer modules do not move apart.
- The cool down timer starts.
Installing a valve with a built-in heater will also require a welding machine, but it will have a completely different configuration. Typically, to carry out such an operation, a transition coupling is required. This is so due to the fact that the locking mechanism itself is not equipped with an embedded heating element. It is a main module to which PET pipes with union nuts are screwed. In addition to this, it is important to take care of the availability of:
- pipe cutter;
- stripping devices;
- degreasing liquids;
- roulette;
- marker;
- devices for eliminating ovality.
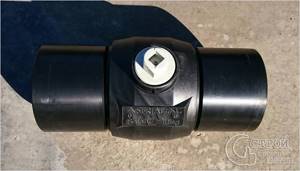
HDPE ball valve
The process proceeds as follows:
- Using a pipe cutter, the end is brought into ideal condition so that the angle is exactly 90° relative to the axis.
- The distance to which the pipe will enter the fitting is measured and a mark is made with a marker. It is desirable that it be permanent white.
- A gap of another 2 cm is left from the applied mark.
- Using a scraper or a special device with a blade, the oxide layer is removed. This should be done to a depth of 0.1–0.3 mm, everything will depend on what diameter of pipe is used. It is very important to maintain uniformity, because... otherwise it will not be possible to achieve the required results.
- Using alcohol wipes or a solvent, wipe the outer surface of the pipe and the inner surface of the fitting to remove dust, dirt and grease.
- The coupling is put on the pipe, and the valve pipe is inserted on the other side.
- The outputs from the welding machine are connected to the contacts.
- An optical scanner reads the information printed on the barcode of the fitting.
- After this, the voltage, welding temperature, and cooling time are automatically set.
- The unit starts. It is very important to wait for the complete cooling cycle. If this is not done, then the bundle may become leaky.
- The same must be done on the second side.
- The final touch will be installing the tap into the threaded connections.
The flange connection method involves a combination of several methods.
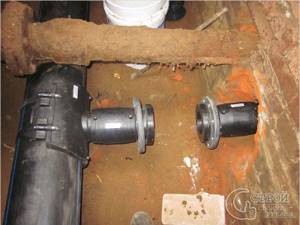
HDPE flanges
- The flange for the polyethylene pipe comes as a separate fitting. It consists of a plastic collar and a metal plate with holes. Installation is carried out by butt soldering or electrofusion welding. The sequence is followed as described above.
- This must be done with each of the two parts, between which there will be a locking mechanism.
- All required gaskets are installed.
- A tap is placed in the middle. Bolts are inserted into each of the flange holes and nuts are screwed on.
- They need to be tightened clockwise. This should be done so that there is no distortion. Also, don't try too hard. This will cause damage to the articulated elements.
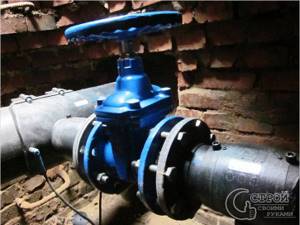
Installed flange valve
Each of these options ensures reliable fixation and tightness of the entire structure. All of them, except for butt soldering, are dismountable and can be subjected to repair work.
Features and applications of ball valves
Ball coupling valves are most often used for equipment of gas, water supply and heating systems of residential buildings and public buildings. For example, installation of taps on radiators is recommended using coupling taps.
Such cranes have the following advantages:
- they are practical;
- easy to use;
- have small dimensions;
- They are easy to install and dismantle without the use of special equipment.
It is advisable to use a coupling ball valve for installation on pipes with a diametrical cross-section that does not exceed 40-45 mm. For larger pipes, it is better to install flanged ball valves.
Installing a tap on a metal pipe
The need to carry out this kind of action arises much more often. This is due to the prevalence of metal pipes in domestic or industrial settings. Several connection methods have been developed for this option.
Threaded. It's the easiest to do. It involves screwing the valve onto a part of the pipe that has a thread and is packed using one of the suitable materials.
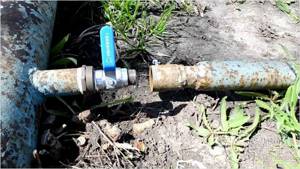
Threaded method
Flanged. The essence of the method is the same as in the description for polyethylene pipes, but the manufacturing method is different.
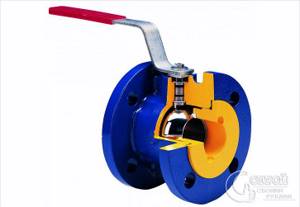
Ball flange valve
Welding method. Produced using a transformer, semi-automatic or inverter welding machine. In addition, the gas welding method can be used.
Note!
It is not the tap itself that is welded to the metal pipe, but a conduit with a pre-cut thread.
There are cases when it is necessary to implement the first method on a pipe that does not have a thread. Therefore, the first step will be cutting it. To do this you will need:
- clamp with ratchet;
- die of the appropriate diameter;
- lubricant;
- file;
- metal hacksaw, reciprocating saw or grinder.
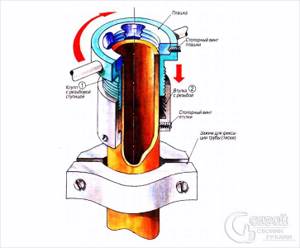
Threading diagram
This is done like this:
- The end is leveled to provide a uniform area for gripping and holding.
- The pipe is cleaned of old paint and rust.
- Using a vice or other device, the pipe is fixed motionless.
- The chamfer is removed with a file or grinder. This is necessary so that the cutters can catch on the metal and cut.
- The cleaned area is lubricated with machine oil or another similar substance. If you don’t have anything on hand, you can use dishwashing detergent. Some masters recommend the second method as a higher priority.
- The clamp is inserted into the ratchet and put on the pipe. The most crucial moment is to set the tool at a right angle. If this is not done, then the turns will be torn off and it will not be possible to wind the required element.
- Two turns are made. This is necessary for a good grip to be achieved.
- The next step is to return the tool half a turn back. Thus, chips will be cut off, which interferes with further work and can damage the teeth.
- Then, after each full turn, you need to go back half a turn.
- Lubricant is added as needed.
- The thread length should be such that the tap can make 4-5 turns. To implement this, you need to measure the length of the cut on the locking mechanism in advance or screw it in and check it during the process.
- When working with a clamp, it is important to remember that the far turns will be less deep than the near ones. To correct this, you will need to make the finishing pass with an ordinary plane.
Before installing the valve, packaging will be required. For such purposes, tow, Teflon tape, special glue or Teflon thread are used.
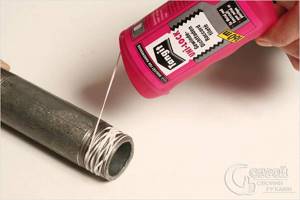
Teflon thread
The tow is wound in this way:
- To prevent the flax from peeling off and twisting, it is necessary to make perpendicular notches on the threads using a file, a hacksaw or other device.
- There is no need to think that the more tow is applied, the better it is. In fact, this can be harmful, because... excessive compaction will simply tear the wall or prevent you from making the required number of revolutions.
- A small strand is separated from the main strand.
- It is leveled to a homogeneous layer, all excess fibers are removed.
- You need to take this piece in the middle and put it on the middle of the thread.
- Make two turns with one piece.
- Cross both ends together and carry out further winding so that at first there are two turns left for coupling.
- The resulting plane is lubricated with a paste, for example, Unipack or a similar composition. It will make it easier to disassemble the joint if such a need arises.
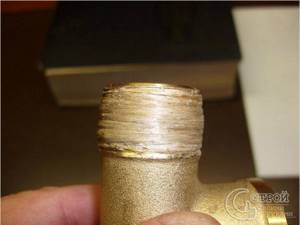
Tow
Packing with Teflon tape or thread is carried out by simply winding a sufficient layer. In this case, at the initial stage it is necessary to fix the edge so that the entire skein does not scroll.
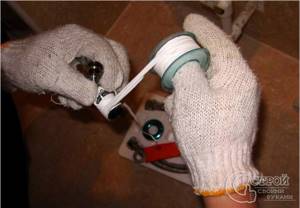
Teflon tape
The locking mechanism is screwed onto the prepared joint. It's easier to do this using an adjustable wrench. Don't be too zealous. Once you feel enough pressure, you should stop screwing, otherwise the tap may crack. If after starting the system there is a slight digging, then when using tow, you don’t have to worry, after a few hours it will swell and block the fistula, but in the case of other materials you will have to repack.
The flange method is used on large diameter pipes. Usually these are highways on which locking mechanisms are installed as passage points, but not as end points. To implement this method, you need to prepare:
- two free flanges;
- sealing rubber bands;
- spanners;
- bolts and nuts;
- grinder or reciprocating saw;
- file.
The process looks like this step by step:
- An even cut is made on the pipe at an angle of 90° relative to the axis.
- Using a file, various burrs are eliminated so that they do not become an obstacle to the tightness.
- Flanges are put on the pipes, and then rubber seals. This must be done so that the latter protrudes beyond the plane by 1 cm.
- The crane is brought to the installation site.
- The flanges are moved towards the locking mechanism and put on elastic bands.
- Bolts and nuts are inserted for fixation.
- It is necessary to twist diagonally, moving clockwise.
In another option, the flanges are welded to the ends to ensure the best fit.
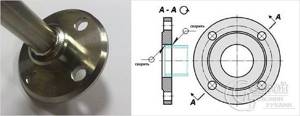
Welding the flange
The welding method is used quite rarely, but it also takes place. For its quality implementation, it is important to observe the following points:
- The thickness of the pipe wall and the wall of the locking mechanism must be the same. This will allow for uniform heating of the entire area and good adhesion.
- The ends must be very well cut and processed in order to fit well one to the other.
- The electrode material must match the material being processed. For example, for a stainless steel pipe, you need to take a stainless steel pipe.
- The current strength on the welding machine must be sufficient to thoroughly weld the workpieces.
- Do not overheat the joint to avoid burning the metal. You can repair such a hole, but it won’t look very nice.
- The elements should be placed with a small gap from each other, approximately 2 mm.
- You should not immediately proceed to forming the seam. The first step is to fix the details. This is done with tacks in several places.
- If possible, it will be more convenient to rotate the pipe during the process; then the electrode can be moved perpendicular to the pipe at the top point. When this is not possible, then you need to start from the bottom and move up.
- It's better to do two passes. The first seam is called the root seam, its purpose is to join the parts hermetically. The second is the facing one, it brings all the work to the final.
- The joint must be applied evenly to avoid the formation of cavities, which during operation can turn into fistulas.
- Scale is removed by lightly tapping with a hammer and a wire brush.
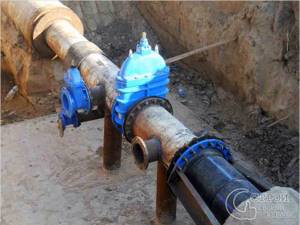
Flange valve on a metal pipe
Gas welding is carried out using a similar technology, but wire made of the same material as the pipes is used as a binding material. It can be with or without flux. The process can take place in a protective gas environment or in normal atmospheric air conditions.
Tap for metal-plastic pipe
Metal-plastic pipes, as well as cross-linked polyethylene pipes, are being used more and more often, so special fittings and fasteners have been developed for them. When working with such material, there are 3 ways to connect the tap.
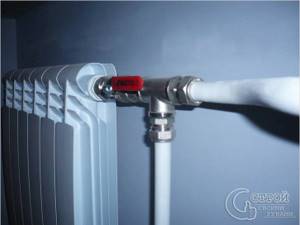
Installed crimping valve
Crimping. Special taps made using the threaded fitting method are used.
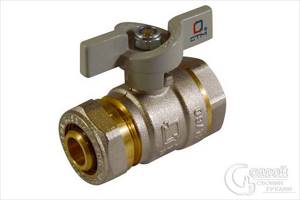
Ball with crimp nut
Ball valve for crimping. For this method, special locking mechanisms have also been developed that secure the pipe inside the tap using a special crimper.
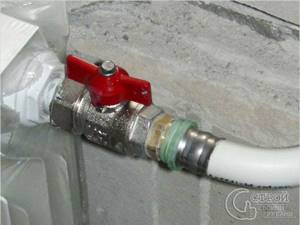
Crimping
Through the transition fitting.
All methods are quite simple. For the first you will need:
- Trim the end of the pipe evenly. This is done with special scissors or a knife.
- The nut is unscrewed from the ball valve and put on the pipe; the same must be done with the clamping ring.
- Flaring is done using a special expander or a small tube.
- The pipe is put on the special valve fitting until it stops.
- The sealing ring is pulled on top.
- The clamping is carried out by the main nut.
- For greater convenience, it is better to use two wrenches or adjustable wrenches.
The last method is carried out using the same method, but first a fitting with external or internal thread is installed, and the tap is already fixed to it. You will need to resort to packing the cutting, as described for the metal pipe.
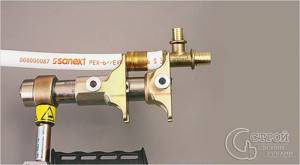
Crimper
The crimping method is carried out as follows:
- The end of the pipe is prepared as described above.
- A sealing sleeve is put on the pipe and moved away from the edge.
- The pipe is expanded using a special tool.
- The locking mechanism is inserted.
- Using special pliers, the coupling is pulled onto the joint.
Note!
In another crimping option, the tap already has a crimp coupling installed. It is simply put on the pipe, and the protruding part is compressed using special pliers. In this case, you should not immediately unclench the tool; you need to hold it for a couple of seconds so that the metal acquires the required shape.
Best answers
Andrey Volkov:
It's time for you to get married ED. And then already...
bright corner...))):
You are so smart, Ed...)))) MuSh said that it doesn’t matter...)))))))) If I knew what a ball valve is, I would have discussed...))))))))
bell:
Ed, well, your questions (some of them) really baffle me! I immediately think how to turn on my brains to give the correct answer and I understand that I won’t be able to turn on them because I don’t have any brains for this topic!
Dmitriy:
Take a close look at this faucet. Do you see that one side is completely cast and the other has a connecting thread? So this is where the danger of the crane lies. If you install the tap incorrectly, the likelihood of a spill in the event of an accident will increase many times over.
Why? We draw your attention to the fact that the ball valve must be installed in such a way that the solid part is turned towards the pipe located at the riser. In general, if you installed the faucet incorrectly, for example with a thread inside the house, then if part of the faucet is bent and breaks off, you will not be able to cover the broken part, since it will lie on the floor and only the piece that was screwed into the winder during assembly will remain on the inlet pipe
Sergey Dmitriev:
Hello Ed. . Any ball is placed with a solid thread to cut off the line. Assembly - only in the apartment. We were taught this way, because if there is a water hammer, if the ball is closed (possibly) if it is installed incorrectly (assembled into a riser) - the thread breaks - hence there will be a flood
NEO AnuNaK:
I don't see much difference. When disassembling from the coupling side, the threaded connection can also come loose in any direction of the tap. If there is a crack in the body on either side, the faucet stops holding water. I convinced myself by freezing several of these taps.
Sergey Frasinyuk:
On the faucets there is an arrow showing how to install it. But on the ball valves there is no such mark, which means it doesn’t matter how to install it. Now about the breakdown and other wisdom - if the faucet bursts, you won’t be able to turn off anything. And also especially for Dmitry - how unfortunately the faucet breaks off in its solid cast parts and not at the place of assembly, and thus the reasoning about “it is impossible to block” - disappears by itself
Bely Oleg:
And I always try to make it convenient to open and close, especially taps with a lever... Which side goes which way is another matter...
Yaroslavsky:
I also don’t see any difference in which direction the flow is, based on its design, but I think if you do it, it’s better that everyone stands the same, there are fewer questions and you’ll know if you’re doing a lot of bells and whistles, what’s going where and where.
REM2009:
Ed! The factory installation instructions for ball valves say, "Bi-directional, all positions." That is, the direction and position do not matter! And regarding the assembly and driving side, there is only one warning! You cannot hold the crane with a plumber's clamp! To install it, it is recommended to use two wrenches; with one, hold the coupling tap by the nut (any one on the side of the work being done), and with the second, screw (unscrew) the part to be connected. That is, during installation, the key must be on both valve nuts.
Mikhalych:
do not care…. Before installation, I screw it “dry” to choose which side the thread will go all the way so that the handle is in the right place….
Ivasenko Stanislav:
From an operational point of view, the supply must have a cast, stronger part so that during water hammer, disassembly, or mechanical impact, the valve remains on the pipe and blocks the flow. Info 100 percent I have been in housing and communal services for 20 years.
Polypropylene tap
Polypropylene pipes began to replace metal pipes in the field of heating and plumbing. They also cannot do without locking mechanisms. There are two ways to install a crane on such products:
Threaded. Includes the following method, but allows the use of any ball or valve valve.
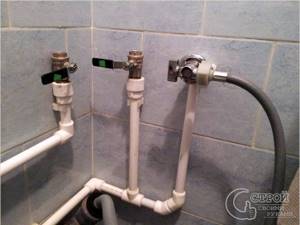
Threaded tap polypropylene
Soldering method. For this case, special tap fittings have been developed. When used, permanent connections are formed.
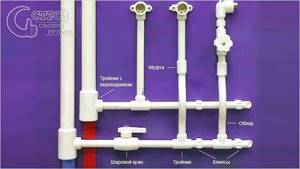
Soldering method
To implement the first method you will need the following tools:
- soldering iron;
- pipe cutter
For fittings, you can use the following options: MPV, MPH, plastic neck with a union nut, American with a plastic pipe. Each of them will be useful in certain situations. The work will be carried out as follows:
- The end of the pipe must be smooth.
- A nozzle of the required diameter is installed on the soldering iron.
- The soldering iron heats up to the desired temperature.
- On one side, a pipe is brought to the nozzle, on the other, a fitting.
- The elements are heated for the required time until part of the wall softens.
- They are butted together and pressed tightly. You cannot turn it after connecting.
- After cooling, the external thread of the tap or fitting is packed as described for metal pipes and the locking mechanism is screwed into place.
The second method is carried out in exactly the same way, but the tap is soldered directly onto the pipe.
How to install a ball valve
First of all, you should decide on the installation location. The locking device must be accessible for unexpected replacement or repair. In this case, it is important to pay attention to how the tap will open and close, and whether the handle will rest.
Some ball valves have a fluid direction arrow. Such taps are installed strictly in the direction of the arrow, that is, on a certain side. Valves without arrows on the body can be installed in any direction, however, taking into account the above advice, it is better to install them with the cast part towards the pipe.
An important point in installing a ball valve is sealing the threads. To prevent the thread from leaking, tow or fum tape should be used for sealing. To be honest, it is much easier to work with fum tape than with tow, but flax also has its advantages.
The tow, even if there is not enough of it on the thread, will swell and the connection will stop flowing. In the case of fum tape, nothing like this will happen; here you will have to reseal the threads and add winding.
Source
Mixer installation
In order to install a faucet in a bathroom or kitchen, you will need most of the skills that were described above. The connection can be made using hoses or eccentrics. Everything will depend on where the installation takes place.
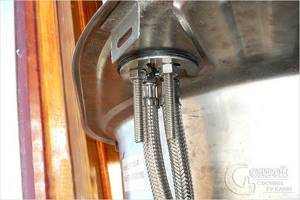
Securing the faucet to the kitchen sink with pins
The kitchen faucet is installed like this:
- The delivery package is being checked. It must contain all the necessary seals, a retaining bar, nuts, and rods. It is better to buy hoses separately; those that come with the kit are usually not of very high quality.
- If necessary, a hole is made in the sink using a special device or a drill.
- The mixer is being assembled. To do this, a gander is screwed to the main module.
- If the mixer has an installation thread, then it is simply placed in the manufactured socket and secured with a nut, if not, then it is necessary to install threaded rods into the corresponding holes on the body. Next, a rubber gasket is put on, the tap is placed in its place and secured from the inside with a metal plate and nuts.
- Two ball valves are installed on the supply pipes, which can be used to cut off the supply during repairs. Threaded connections are sealed as described above.
- Hoses with long and short needles are screwed into the mixer, and then screwed onto the mounted locking mechanisms. They usually have a sealing gasket, so no packing is required.
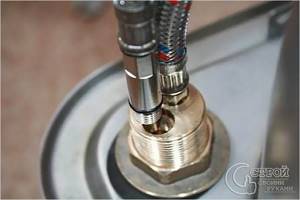
The hoses are screwed in
For the bathroom, everything is a little easier if the outlets for the mixer are already installed.
- The crane is assembled.
- The eccentric threads are packed and the elements are screwed into the coupling or angle.
- Chrome rims are installed on top.
- The mixer is screwed onto eccentrics.
- Using a level, its plane is set.
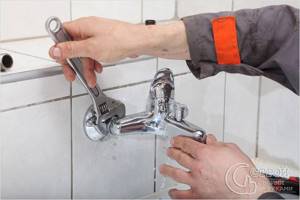
Installing a faucet in the bathroom
Now you know how to install locking mechanisms. This information is useful for any home handyman. We hope you will not have any problems with laying communications at your dacha or at home.
