Dangerous temperature
For comparison, consider a number of studies conducted by scientists in the twentieth century to monitor the effects of regular visits to a steam room heated to extreme values of 110-130 °C.
Professor H. Their in the 80s of the last century put forward an assumption about the connection between high temperatures in Finnish saunas and the occurrence of cancer, which was subsequently confirmed by the results of a large study. After considering a significant number of cases of lung cancer in those who like to steam at 110-130 ° C, it was found that staying in a steam room heated to such temperatures contributes to the formation of this disease.
The fact is that you can only be in such conditions when the air in the room is very dry, and this eliminates the hydrostatic effect of steam on the body. As a result, the blood does not supply the lungs well enough and they become burned due to their inability to adapt to the elevated temperatures to the required extent.
A number of other studies have also discovered that exposure to the dry, highly heated air of a sauna negatively affects sperm production and also leads to digestive problems in children born to mothers who frequently visited such saunas during pregnancy.
There are a lot of discussions about “what is the temperature of the stove in the sauna” or about the temperature around the stove in the steam room. Unfortunately, they are all carried out on an intuitive level and only a few specialists devote entire studies to this issue using pyrometers, thermometers and other equipment. How does the temperature of a sauna and steam room oven actually differ from the one that the thermometer shows us?
Bath lovers are not builders and, for the most part, coordinate the stove modes with their feelings. The other half of the steamers glance at the thermometer. I decided to find out what the difference is between our perceptions, between the data from the needle of a universal thermometer and what a digital remote temperature meter will show us.
Some temperature measurement data puzzled me, which I wrote about in the conclusions after the video.
By and large, we are not interested in the temperature of the oven, but in the conditions in the steam room. Your own skin is more expensive than the lid of a piece of iron. Therefore, I measured everything where the laser pointer of the device was shooting. I wanted to document the temperature measurements with a diagram, but decided to make a video with remarks
Attention! I used a device with a maximum measurement threshold of 330 degrees (footage in the furnace firebox)
The manufacturing technology of a sauna stove places special demands on the equipment of all its departments, including the chimney. Its design is slightly different from the chimney system of a home stove. It should ensure long-term heat conservation and safety for steam room visitors. Before organizing a chimney in a bathhouse, it is worth knowing several important nuances.
The design of sauna stoves includes 2 types of chimneys:
- Indigenous. They are organized next to the stove, using a special pipe for connection, through which the smoke goes into the main channel. One chimney can be used for 2-3 stoves. The main thing is that its internal diameter has the appropriate parameters, and the pipes from each heating device are located at different heights;
- Systems with a mounted pipe are mounted directly on the stove pipe and discharged through the roof. This chimney option is the most common for sauna stoves.
Classification of chimneys according to installation location includes 2 types:
- External. Their main part is located on the street and fixed to the wall using a bracket. They are not particularly recommended for baths, as they quickly cool down, losing precious heat.
- Internal. These are vertical structures with good traction, located inside the building.
Depending on the material used, chimneys are:
- Brick. A traditional look, characterized by labor-intensive masonry and high requirements for compliance with all parameters. They have a lot of advantages: durability, fire safety, strength, good thermal insulation and heat accumulation. Disadvantages include the roughness and angularity of the inner surface on which soot deposits accumulate;
- A metal chimney is faster to install and costs less. It has a perfectly smooth surface, but weaker heat-retaining characteristics;
- A combined version, including 2 parts: the lower one is made of brick, the upper one is made of a modern sandwich pipe. Allows you to organize neat, small passages that are easier to cover with heat-resistant material.
How to bring a pipe through the roof
To organize a hermetically sealed connection between the roof and the chimney, an internal apron is created at this point. To create it, use the lower abutment strips. The strips are applied to the walls of the chimney, where its upper part is marked. A groove is made along this line using a grinder. Then the dust is carefully removed from the formed border. This is done so that small particles of sand and cement do not fall on the surface of the waterproofing or roof. In some cases, fine grains of sand will turn into an abrasive over time, which can seriously damage the roofing material.
The lower apron begins to be installed from the bottom wall, while only one part of the apron is inserted into the groove. Similarly, this element is attached around the entire perimeter of the chimney. Individual elements must be overlapped with an overlap of 15 cm. The joints are sealed.
For chimneys with a round cross-section, you can purchase special passage elements in hardware stores, consisting of a steel sheet and an apron cap. Their use allows you to significantly speed up the work on equipping the passage of the chimney pipe through the roof. The purchased or manufactured apron should be securely fixed to the roof. At the same time, it is not rigidly fixed to the chimney, since expansion of the material or shrinkage of the rafter system can cause damage to the chimney by the apron (be sure to read: “Roof penetration - device”).
The passage of a chimney pipe through the roof, detailed video instructions:
At the junction of the pipe and the apron, a skirt is installed - a steel clamp, which is secured using a heat-resistant gasket. This approach can significantly improve the waterproofing of the roof in a given location. Upon completion of the installation of the apron, it is necessary to apply sealant to all junctions between the element and the chimney. This helps to obtain a reliable connection that does not leak.
Design features of a chimney for a steam room
The main purpose of a chimney in a steam room is high-quality and controlled removal of combustion products in order to completely eliminate the accumulation of harmful carbon dioxide and the formation of burning on surfaces. The resulting draft (with air suction into the combustion chamber) maintains a stable operation of the heat generator.
Features of heat distribution with different methods of connecting the heater to the chimney
The stove in the bathhouse is heated inconsistently. Accordingly, the smoke channel cools down completely between sessions, so the chimney parts experience the strongest repeated thermodynamic loads. The second important factor is operating temperature. Unlike boilers and furnaces used for heating, gases heated to 700 degrees or more are removed here.
Direct-flow stoves are often used in the bathhouse; due to the lack of heating shields or water jackets that remove some of the heat, the smoke turns out to be so hot. Therefore, the problem of chimney burnout (the danger of gas contamination and fire) always remains relevant. Chimneys for bathhouse stoves are made from high-quality materials. If these are factory products, they must be approved by the manufacturer for such difficult operating conditions.
Each individual building and each fireplace requires a suitable chimney with individual parameters and characteristics.
Parameters by which you should select a chimney:
- Chimney material;
- The location of its structure;
- Chimney made of steel. The steel chimney design includes pipes, insulation and an external circuit. Stainless or galvanized steel is used to make pipes. The steel chimney design is easy to install and lightweight.
Galvanized steel pipe has a lower cost, but it is less reliable than the previous model. Accordingly, the best chimneys are made of stainless steel.
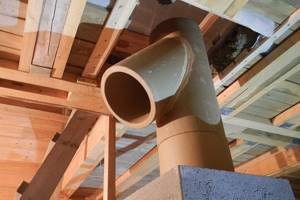
- Ceramic chimney design. Installing a ceramic chimney requires certain specialist training and, very important, accuracy. Ceramics provide excellent thermal insulation. The service life of the material is approximately 30 years. The ceramic structure consists of an internal ceramic liner, lightweight concrete blocks are located on the outside and, of course, a heat-insulating gasket that must be laid between the layers. (See also: )
- Glass construction is considered the most expensive and is very difficult to install. Some installation experience is required, but the glass fits perfectly into the interior of the house and looks very impressive and irresistible. Glass is very resistant to the formation of corrosive plaque, heat from the resulting combustion products and any exposure to moisture. Undoubtedly, these advantages of the design bring it to a high level of use.
- The chimney is a vertical structure mounted inside the bathhouse or on the facade of the building. Its main task is to remove fuel combustion products at a speed sufficient to maintain natural draft in the furnace.
- A well-designed design ensures quick heating of the bath, maintaining the necessary microclimate in the steam room and economical fuel consumption.
- The most common problems with smoke exhaust ducts: Extremely strong draft, which will lead to rapid burning of fuel without adequate heating of the steam room. Traction too weak. An inadequate amount of oxygen enters the firebox, as a result of which the combustion process is interrupted and the thermal conductivity of the stove decreases.
- Proper installation of the chimney is a guarantee of your own safety and the longest possible service life.
We suggest you familiarize yourself with the Height of the chimney in a private house.
You need to know that the likelihood of using a sauna without a threat to your health depends on how the chimney of a sauna stove is installed.
The chimney installation scheme comes in two configurations: internal and external. Depending on this, the chimney elements are selected.
Types of installation
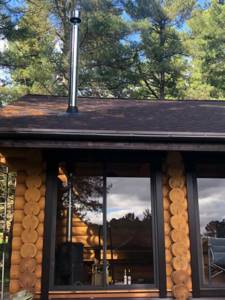
Installation can take place on brackets through the wall or straight through the roof.
In the first case, the entire system is carried into the wall, and then rises, adjacent to the bathhouse, but without passing through it. This looks more aesthetically pleasing, and has the following advantages:
- the free space of the steam room is not used;
- there is no risk of getting burned on steel or stone;
- less chance of fire;
- It’s easier - you don’t have to make a hole through the entire attic.
- cases of smoke are easier to detect, as well as to track the general condition.
But at the same time:
- heat loss increases, since steam actually immediately enters the outside;
- the installation itself is more difficult due to the need to comply with the dimensions of the connection between the hole in the wall and the parts of the product;
- The heating of the pipe is greater due to the fact that the gases escape in the horizontal direction. With this arrangement, the resistance of the flue gases when moving through the channel increases;
- In terms of the number of elements, this option is 10% more expensive than the usual one.
When installing smoke exhaust systems in a straight line through the roof, the chimney is located straight, without bends, it departs from the boiler and goes upward, where it crosses the ceiling and exits on the back side of the roof. Advantages of such a connection:
- Stable draft due to the location of the chimney closer to the roof ridge.
- The condensate container is kept warm, so its cleaning pocket is dry and clean. This extends the service life.
- Cold bridges do not form in the walls, and thermal insulation is not compromised.
- The stability of the smoke exhaust duct is higher due to the fastenings to the roof. The fasteners themselves can be chosen cheaper than for the option on the facade.
- The aesthetics of the structure are not spoiled by side smoke outlets.
- Only a small part of the structure is located outside, which deteriorates over time from snow and rain. You can inspect and clean most of it without leaving the building.
- You can use non-insulated parts of the chimney that are located inside the bathhouse.
- This option is easier and 10% cheaper to install than when outputting through a wall.
- Flue gases go up, there is no obstacle to their exit. Heating is less than with a horizontal connection, since the resistance to smoke flow is minimal.
However, there are also weaknesses:
- The probability of “missing” the occurrence of a fire is higher, since smoke occurs in the ceilings that are located in the attic and on the roof, and they are simply not visible until the fire appears.
- Heat loss through the roof. Tightness is restored when waterproofing is installed before coating.
- Reduction of usable area, since according to safety requirements there should be nothing around the stove pipe for a bath.
- Increased costs for changing the roof and ceiling of the steam room, in particular, after finishing the final finishing.
- If the integrity of the smoke exhaust structure is damaged, the bathhouse begins to smoke.
- Condensation leaks and accumulated soot spoil the appearance of the roof.
- Burns from heated parts are possible in emergency situations.
When deciding on the installation method, the following nuances must be taken into account:
- dimensions of the building - if it is very small, then it is logical to make an external structure;
- the steam room is built from scratch or in an old room - in the first case, you can immediately think about the issue of insulation;
- Do you need to heat adjacent rooms?
External placement
An external smoke channel device is more expensive and difficult to install. This is due to increased requirements for compliance with the dimensions of the connection between the hole in the wall and parts of the product. For external installation, it is necessary to use double-walled chimneys to avoid the formation of condensation and fire.
It is external structures that are the least flammable, since the smoke is instantly directed outside, rather than circulating through a pipe located in the building. The advantage of such a system is the absence of the need to make a hole in the ceiling and roof and saving of internal space. This reduces the risk of carbon monoxide poisoning.
The main advantage of the internal location of the chimney is the easy provision of draft in the chimney structure, which is achieved by the vertical direction of the exhaust gases. In this design, the main part will be located in the interior of the building, which allows the bath room to heat up much faster.
Kinds
Options for chimney designs are selected depending on the material used to build the bathhouse. All elements of the device can be purchased ready-made or built independently. Until recently, the main material of the chimney was brick. It has ideal characteristics, durability, and fire safety.
To build a brick pipe, special knowledge and skills are required. This option is not suitable for every bath. Without a lack of practical experience in laying a brick pipe, it is almost impossible to build a proper chimney. The brick structure has characteristic rough areas, which cause soot deposits in the chimney, which leads to rapid clogging of the structure. In addition, soot deposits can lead to sparks when lighting the stove, which is unsafe.
Modern craftsmen often choose a stainless steel chimney for a sauna stove. The main advantage of such a device is quick installation. In addition, metal chimneys are free of problems that can arise in a brick stove structure. Stainless steel chimneys are often of sandwich construction. A straight iron chimney for a bathhouse is easy to install with your own hands.
The inner part of the steel pipe has a smooth surface. Missing edges and roughness contribute to better smoke removal from the stove. But with temperature changes, condensation appears on the steel pipe. When the pipe is closed with thermal insulation, this phenomenon does not occur. It is worth remembering this effect when organizing the arrangement of the structure with your own hands.
Another type of chimney for sauna stoves is ceramic. This design is fire resistant and reliable. Modern ceramic pipes are suitable for solid fuel boilers, as well as devices operating on liquid fuel.
The main differences between these structures and other types:
- universal system (possibility of selecting different diameters);
- ease of chimney processing even with a side passage;
- water and vapor tightness (availability for stoves with heaters);
- mechanical strength.
Varieties of ceramic, metal models and brick products imply the mandatory presence in the designs of a base, a container for accumulating condensate, and a tee for cleaning and inspection.
Correct temperature in the steam room
A lot can be said about the rules of classic health bath procedures, but in this article we will dwell in detail on the temperature. If we talk about the temperature in the steam room that is most suitable for health in all respects, then this indicator lies between 50 ° C and 70 ° C. In the classical Russian bathhouse, the stoves were always built of brick and, as a rule, they had closed heaters.
A ladle of water was poured onto the stones, heated red from the direct flame, which instantly turned into light, hot, finely dispersed steam, most comfortable for both the respiratory tract and the skin. A cloud of steam rose to the ceiling and a person lying on the shelf was gradually doused with small portions of this steam using brooms.
When designing your own sauna, it is important to understand that in addition to the correct temperature to obtain the full range of positive effects of steaming on the body, the sauna must also have a certain humidity. The optimal indicator is within 60%
It is this combination of temperature and humidity that provides ideal conditions for healing the entire body.
It is possible to ensure that the steam room has both the specified temperature and the correct humidity at the same time only if the stove is in it with a closed heater
To obtain high-quality finely dispersed steam, it is very important that the stones in the furnace are heated to at least 300 °C. And if the heater is open, then when the stones in it are heated to such an extent, the stove itself will be so hot that the temperature of the steam room will go beyond 70 ° C
Electric oven installation
It is much easier to solve the problem of how to properly install a stove in a bathhouse powered from the mains. The placement of such a unit is simplified due to its more modest dimensions and the absence of connection to the chimney, which is not necessary.
But in this case, other requirements arise, primarily related to electrical safety.
The main advantage of an electric furnace is independent installation. Source usproekt.ru
When installing an electric furnace, it must be grounded. If this is difficult to implement, then grounding is used by connecting the ground wire of the unit to the neutral terminals on the distribution panel. Also, to avoid short circuits during power surges, a residual current device (RCD) is installed.
Certain requirements are also imposed on the wiring: its cross-section must correspond to the power consumption and voltage in the network. And the shell material must be heat-resistant.
Choosing material for a chimney in a bathhouse
The market offers a wide range of raw materials for the production of smoke exhaust structures; let’s briefly name each of them.
It is low cost and easy to install, however, due to its porous structure it can accumulate condensate.
It conducts heat very well and heats up quickly, but lacks corrosion resistance. It has a large mass, which complicates the installation process and requires the construction of a foundation.
The model is quite expensive and difficult to install, although its appearance is very pleasant. If you do not line the inside, the structure becomes clogged with soot, susceptible to condensation, dampness, and subsequently cracking and allowing carbon monoxide to leak.
We suggest you familiarize yourself with the temperature at which wood can be treated with an antiseptic.
Due to its strength, ceramics can withstand high temperatures, are durable and can be used with any type of boiler. However, the installation of such a chimney is very expensive, and the design itself is poorly maintainable. Therefore, installation should only be carried out by a qualified technician, and the owners will have to treat this ventilation system with care.
Most bath complexes - home or commercial - use this option. This is due to excellent resistance to atmospheric agents; soot virtually does not accumulate, and the installation will last for many years. The appearance fits well with any bathhouse exterior; the shiny surface is pleasing to the eye. In addition, this design is quite easy to maintain.
Our production
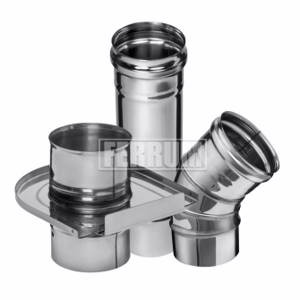
Single wall chimneys
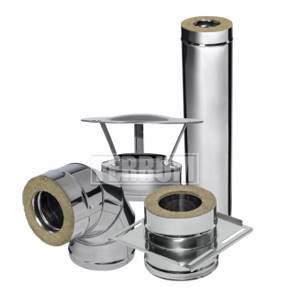
Double wall chimneys
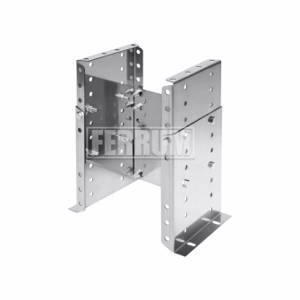
Mounting elements
A glass smoke duct is a good choice, since this material has minimal inertness and is resistant to moisture and corrosion. The constant increase in the cost of installing such a structure is due to the complexity of the process and the high cost of fire-resistant glass in general. Therefore, such chimneys are the most expensive systems these days, although the cost is fully justified by the advantages of this option.
Before purchasing materials, you need to determine the structural features of the chimney.
Brick system
The construction is made of heat-resistant brick using a special dry mixture or oven clay. In addition, you may need material to create a fungus over the pipe.
Before purchasing material for the manufacture of a metal chimney in a bathhouse, it is necessary to draw up its exact diagram with the detailed location of all corners and turns of the pipe.
You will also need 2 iron sheets with holes corresponding to the diameter of the pipe. They are fixed on the ceiling of the bathhouse and on the floor of the attic. You will also need a heat-resistant material that will be secured around the pipe at the point where it exits into the wooden attic.
To create waterproofing around the chimney on the roof, you need to prepare a sealant or a special rubber seal.
Choosing pipes: what to look for
When purchasing iron chimney pipes, you need to decide on their cross-section. Basically, it depends on the power of the stove, but for most bath options this parameter is 15-20 cm. You should not take a diameter that is too large, as it will not retain heat well. And if it’s too small, it won’t create the draft necessary for removing smoke. Whatever it is, the cross-section of the pipe should not be less than the diameter of the outlet pipe of the heating structure.
There are a number of other requirements for the elements of a chimney in a bathhouse:
- The minimum pipe height is 5 m. Neglecting this requirement may result in deterioration of traction. The exact value is calculated depending on the location of the pipe on the roof. In any case, it should rise above the ridge by at least half a meter. The ideal height from the ridge is 1.5 m, but this is not necessary;
- The minimum thickness of the metal used to create the pipe is 1 mm;
- If it is planned that the chimney system will be equipped with a hot water tank, then it must be reflected in a previously drawn up diagram. It is better if the tank is made of stainless steel.
What does a chimney consist of?
Before we begin installing a chimney for a bathhouse, let's figure out what this structure consists of and what are the principles of its operation.
Based on their location, chimney systems can be divided into internal and external.
An internal chimney is very easy to install, but the proximity of the hot surface of such a pipe to the wooden elements of the bathhouse seriously increases the level of fire danger.
The external chimney loses heat faster, which can negatively affect the draft level in the sauna stove. You will add additional fuel to the stove to create a normal temperature in the sauna.
Thus, both installation options have their drawbacks, but all of them can be compensated for by reliable insulation of the chimney. But creating an internal chimney system, from a technology point of view, is much simpler.
Material used for the construction of a chimney for a bath
There are three main methods for constructing an internal chimney from different materials:
- Metal pipes. This material is quite affordable, but has very high heat transfer. As a result, it requires very good thermal insulation. More than one or two fires arose due to a burnt-out pipe.
- Ceramic pipes. The most reasonable option would be to use an asbestos-cement pipe. Asbestos cement has excellent heat-insulating properties and the construction of chimneys from it will not require a lot of additional work.
- Brickwork pipes. This is the traditional construction method for Russian stoves. Brick gains heat slowly and releases it slowly - this is a smart choice.
Protective thermal screens
As the main protection of the walls of the bathhouse, heat-resistant screens are used - special insulation shields to cover the side surfaces of the stove and reduce the intensity of the spread of IR radiation in the room.
Screens are divided into two categories: metal and brick.
Metal
Protective screen made of sheets of steel or cast iron. It is mounted around the perimeter of the sauna stove, while maintaining small technological gaps (3-5 cm) between the screen and the outer walls of the heating structure to ensure additional air convection.
Depending on the characteristics of the walls of the bathhouse and the type of stove, metal screens can be front and side. Some models of metal stoves are produced with an additional protective casing, which is installed when installing the firebox.
Installation of metal screens is carried out using adjustable legs and secured to the floor with bolts. In addition, the legs allow for clearance at the bottom of the structure for additional ventilation. To increase service life, the screens are coated with a fire-resistant paint layer.
Advantages:
- reduction in the intensity of IR rays;
- improvement of air convection between the oven walls and the screen;
- reduction of the overall heating temperature of the external walls of the heating structure.
Brick
A protective screen made of brick is intended for enclosing the walls of a sauna stove.
The masonry is done in ½ brick around the perimeter, maintaining technological gaps of 6 cm. The lower part of the structure is equipped with additional air ducts at a distance of 2.5 cm from each other.
To construct a brick screen for furnaces, heat-resistant fireclay bricks without voids are used. As a connecting mixture - a thick solution of cement or clay.
The finished screen walls should be 22–25 cm higher than the wall of the heating structure.
Advantages:
- low thermal conductivity of the material from which the screen is made;
- resistance to high humidity and high temperatures;
- long-term accumulation of heat in the room;
- receiving soft heat from the stove.
Rules for choosing pipe length
If the pipe comes out of the roof at a distance of 0.5 m to 1.5 m from the ridge of the roof, then according to the standards it should rise above it by 0.5.
This saves chimney material and provides the most efficient heating. During snowfall, the least amount of snow collects in this place, which eliminates leaks during melting. The standards stipulate that the resulting estimated length should not be less than 5 meters, if measured from the surface of the grate to the top edge of the pipe. When the chimney exits to the surface more than 3 meters from the ridge, you should draw a horizontal line from the highest point and lower it by an amount of 10º relative to the horizon. Above it the head of the pipe ends. If other buildings are built nearby, then the height of the chimney is higher than the neighboring roofs. For very high neighboring houses, the 45º rule is used, that is, a straight line is drawn at this degree from the neighboring roof to the one where the chimney is made, and the head is arranged slightly higher than the mental straight line.
What should you pay attention to when installing a chimney in a bathhouse?
When choosing a chimney design, you need to pay attention to the following factors:
- The chimney exhaust material needs to be stable so that it can withstand the high temperature of the exiting products; (See also: )
- Must withstand a mixture of soot and condensation;
- The design of the chimney must fully comply with all required standards (construction, fire, technological, operational).
For a fireplace that will be fueled by gas, a chimney made of stainless steel is perfect; for coal, it is better to choose a chimney made of brick, and for firewood, a design made of ceramics, brick, and stainless steel is suitable.
Below are guidelines on what to focus on first.
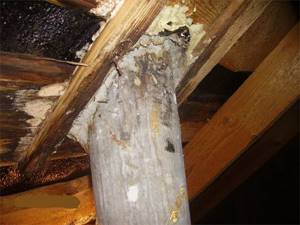
The small cross-sectional size will prevent the removal of fuel products in the required quantity. The volumetric section, on the contrary, contributes to the movement of smoke too quickly, which will not allow the bathhouse room to be properly heated. This, in turn, will increase fuel costs. You should take this point seriously, since the result will depend on it.
Deciding on the form is easy if you take into account the basic principle of its operation. Chimneys tend to heat up unevenly, as a result of which smoke comes out to the roof surface along the central axis. It follows that the correct shape is a circle. Cylindrical structures heat the room much faster and do not require unnecessary financial costs.
A chimney with a rectangular cross-section provokes turbulence that interferes with the necessary draft. A rectangular configuration is permissible only when we are talking about heating devices that do not require powerful traction.
Pipe diameter
The scale is determined by the degree of power draft of the sauna stove and is located in the intermediate range from 115 to 270 (mm). However, in order to accurately determine the diameter, you need to familiarize yourself with some of the requirements specified by the manufacturer in the instructions. If you do not have a diagram for installing a chimney for a bathhouse with your own hands, then it will be enough to know the ratio of the cross-sectional diameters of different shapes. It looks like this:
- cylindrical – 1 to 10;
- rectangular - 1 to 1.5.
For brick chimneys, the minimum cross-sectional diameter should be 140x140 mm.
The successful operation of a chimney system primarily depends on how accurately the pipe size is determined.
Flue height
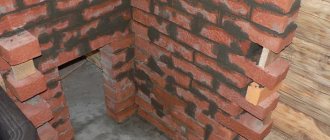
According to the standard, its height should be at least 5 meters. The calculation of the height of the chimney is carried out in accordance with the basic technical characteristics of the materials.
We invite you to familiarize yourself with Directly heated sauna stoves - pros and cons. Updated 02/27/2020
The channel should be located at least half a meter above the roof ridge and not below its level. In this case, it is worth taking into account the thickness of the roofing covering and the angle of inclination of the roof slope. The height is selected without taking into account the chimney “umbrella”.
Laying a simplified chimney
We hope that you have carefully read our tips and already have an idea about laying a traditional chimney. In this case, the simplified version will not create big problems. Let us dwell on its differences and technological features.
Video - Simplified chimney
The chimney has no fluff and no otter. The fluff serves as a fixation element; since it is missing, the structure needs to be secured in a different way. We recommend making a frame around the perimeter of the chimney from a corner and using threaded connections to attach the frame to the chimney at ceiling level. Next, it needs to be fixed to the ceiling beams. It can be fixed with metal plates or building reinforcement, it doesn’t matter. The main thing is that the chimney does not wobble.
The otter was needed to seal the chimney outlet above the roofing. It does not wall up - do the sealing yourself. Use metal sheets for this; the specific sealing technology depends on the type of roof. We will indicate only the main general points.
Laying a simple brick chimney
Brick chimney passage through the ceiling
Pipe outlet through the roof
- Protective aprons must be bent and inserted into a groove cut on the planes of the chimney.
- To completely prevent moisture from entering, it is highly advisable to treat all contact areas with any sealant.
- There is an opportunity - when installing the roofing, purchase factory-made chimney outlet sealing systems.
If the brick used to lay the chimney has already been used, then it is necessary to plaster the internal channel as well. Special angles and straightness should not be observed; the main thing is that the surfaces are as smooth as possible.
Brief description and dimensions of the metal stove
Our design will have a separate tank for heating water and a heater built into the top of the stove. The flame heats the heater from all sides, this significantly increases the efficiency of the stove. You can take arbitrary sizes, take into account the parameters of the steam room and the number of people washing at the same time. We give the dimensions of our stove as an example.
- External heater. Width 50 cm, length 50 cm, height 80 cm.
- Internal heater. Width 40 cm, length 40 cm, height 50 cm. The distance between the walls of the inner and outer heater is five centimeters around the perimeter.
- Bake. Width 50 cm, length 90 cm, height 50 cm. You can change the length of the stove, make it only for an external heater 50 cm long (then the water tank will have to be mounted on the side on stops) or increase the length to increase the volume of the tank.
- Water tank. Width 40 cm, length 50 cm, height 60 cm. The tank holds 120 liters of water, which is enough to wash three or four people. Of course, hot water needs to be diluted with cold water.
Installation procedure for external chimney
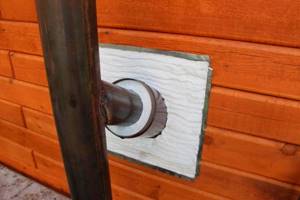
- The stove is installed in the design position, the corner element is pre-mounted on the outlet pipe and the exit point through the wall is marked. The knee does not have to be at a right angle. The pipe can exit horizontally or at an angle.
- Remove excess wall material. If it is made of wood, there are usually no problems. With a brick or concrete structure you will have to tinker longer. When calculating the height and width of the opening, fire safety requirements are taken into account.
- Install a wall groove - a metal insulating flange through which a horizontal or inclined section of the pipe will pass. This can be a ready-made or home-made design. The space between the flammable materials and the flange is filled with thermal insulation. Basalt wool mats are usually used in wall openings.
- The final installation of the internal section of the chimney is carried out: the starting section, damper, corner, adapter from monopipe to sandwich and horizontal pipe.
- Mark and install supports and brackets along the facade.
- All outer sections of the chimney are assembled, including the head with an umbrella or deflector.
General installation recommendations
It is necessary to study in as much detail as possible the information on how to properly make a chimney pipe in a bathhouse and all the details related to its installation, because reliability, service life, performance and, above all, your safety will depend on its quality. Any seemingly insignificant mistake can provoke irreversible consequences.
First you need to familiarize yourself with the main instructions of specialists and instructions (if available).
The areas where the smoke channel passes through the ceilings must first be protected. The step-by-step guide for this stage of installing a chimney in a bathhouse with your own hands is as follows:
- Preparing the passage pipe. It is required to fill its exterior with basalt wool.
- Next, you need to insulate the inside of the unit - decide on the installation point on the ceiling and prepare a hole of the desired shape.
- In the area where it meets the ceiling, spread another thermal insulation layer and then proceed to the cutting device.
- Be sure to leave a small gap between the passage unit and the smoke channel.
Roof work
Start this stage by dismantling the roof:
- It is necessary to determine the dimensions from both the internal and external areas of the roof, taking into account the roof slope (slope).
- Cut a hole inside the roof. To do this, cover the opening areas with metal sheets on both edges, the thickness of which should be 0.5 (mm). You need to make 4 holes measuring 450 by 450 (mm), using the square section method. The scale depends largely on the adapter.
- A roof flashing or master flash is used to pass the chimney through the roof. Their main task is to seal the passage and protect against moisture.
Please note: the master flush must be placed under the top edge of the roof to avoid leakage. Also, seal the joint with the pipe and secure everything with roofing screws.
Passage through the wall
We invite you to familiarize yourself in more detail with two installation schemes with detailed descriptions.
What does a novice stove maker need to know?
Especially for you, we have made a selection of current recommendations that will give you an idea of do-it-yourself installation. So let's get started!
- When you install a pipeline in a bathhouse, installing a stove ceiling box is a mandatory procedure. It promotes uniform distribution of heat that comes from the pipe, eliminating the possibility of fire.
- What material is suitable for insulation? The use of mineral wool, foam glass, and expanded clay is allowed. Earth and sand are unlikely to work. Due to the high coefficient of heat capacity, the materials will retain heat, but in our situation this is not necessary.
- It is desirable that the chimney in the bathhouse has a height of 4-5 meters when assembled. Usually it is placed closer to the wall of the room. Since the wood trim is very close, you should take care of a protective screen.
- GOST rules are as follows. The distance from the pipe to the beam is at least 13 centimeters. The diameter of the pipe with additional insulation is 32-33 centimeters. The distance between the beams is from 60 cm. If you install a ceramic pipe in a bathhouse through the ceiling, the distance should be at least 25 cm on each side.
- We always make a metal outlet from the stove made of thick, fire-resistant material. Even stainless steel will not work - it will not be able to withstand such prolonged exposure to high temperatures. Height – at least one meter.
- Extraction of the chimney excludes the use of more than three elbows (bends).
- Where the structure passes through the ceiling, we recommend using a sandwich pipe. The range of such products in stores is quite diverse. You can find products with insulation thickness from 3 to 10 centimeters or more. Take the “ten” - it’s reliable and safe.
Useful information: “What and how should I insulate the ceiling in a Russian bath?”
Normal temperature of gases leaving the furnace
In order for the water present in hot gases to evaporate better, the temperature of the latter must be increased. On well-heated pipe walls, settled drops of moisture quickly evaporate.
The normal temperature of gases leaving the furnace before exiting into the pipe is 12O...14O°C, when leaving the pipe into the atmosphere - not lower than 100°C.
If the flue gases, when exiting into the chimney, that is, at the view, reach a temperature of about 250 ° C, then condensation does not form, draft improves, the stoves heat up faster, while consuming less fuel.
The temperature of the exhaust gases can be determined using a dry splinter, which is placed across the view hole during combustion. If after 30...40 minutes you remove the splinter and scrape off the sooty surface from it with a knife, you can set the temperature of the gases. The color of the splinter does not change at temperatures up to 150°C. If the torch turns yellow (to the color of a white bread crust), it means the temperature has reached 200°C;
Thus, when firing the furnace, the temperature of the gases must be adjusted so that at the viewer it is within 250°C.
You should know that in the summer, condensation either does not form at all or occurs in small quantities. The formation of condensate largely depends on the size of the grate, the correctly raised hearth and the design of the furnace in a Russian stove, the size of the channel, the thickness of the walls, clay and height of the chimney, the temperature of its heating, the humidity of the fuel used, the temperature of the gases leaving the chimney and the excess number of chimneys in the stove.
The height of the chimney must be at least 5...6 m, counting from the level of the ash chamber or the hearth of a Russian stove. The thickness of the pipe walls should be half a brick, 20 mm). Thinner pipe walls heat up quickly and cool down quickly, which leads to the formation of condensation.
Such pipes must be insulated. Various cracks in the pipe and the stove, through which cold air penetrates, also contribute to the cooling of gases and the formation of condensation. When the cross-section of the pipe channel (chimney) is higher than required for a given stove, the flue gases rise through it very slowly and the cold outside air cools them in the pipe.
Sometimes, to improve draft in stoves, it is necessary to rearrange the pipes, reducing the size of the chimney, lowering or raising the height of the pipe on the roof. This is done until a satisfactory result is obtained. Where the chimney narrows, right angles should be cut off to ensure a smoother transition of gases.
Do-it-yourself stove laying
How to clean a smoke duct
It takes a lot of effort to get the insides of the chimney from a sauna stove covered with a thick layer of soot. For deposits to form, the heater must constantly operate in slow smoldering mode or be “refueled” with damp wood. In both cases, it will not be possible to heat the bathhouse properly. In normal mode, high-temperature gases simply burn out the soot in the pipe and no blockages arise there.
Now about how to clean a chimney in a bathhouse with your own hands if plaque does appear on the walls and the draft force has decreased:
- Place dry wood of high-calorie species with a low resin content in the furnace firebox: acacia, oak, ash or aspen. Burn the fuel with the ash-burner fully open at the maximum setting to burn off the soot.
- Clean the flue using a special “Chimney Sweeper” log, burning it strictly according to the instructions on the package.
- Using a brush attached to a rope with a weight, perform mechanical cleaning of the pipe, reaching its head.
Advantages and disadvantages of ceramic chimneys for fireplaces
The advantages of a ceramic pipe include the following characteristics:
- the material is very quick to install and assemble;
- is a guarantee of high efficiency;
- long service life;
- the range of blocks is large, which makes it possible to mount a chimney opening with any configuration;
- the presence of a special hole that makes it possible to clean the chimney;
- the condensate that appears drains away thanks to the hole located at the bottom of the chimney.
Among the disadvantages of block ceramic pipe systems, it is customary to highlight the following:
- relatively high price;
- Due to the fact that most of these chimneys are manufactured abroad, the delivery time is sometimes very long.
Basic rules and regulations
Before insulating a pipe in a bathhouse from the ceiling, you should study the following SNiP requirements:
- To ensure optimal draft force, a chimney pipe with a height of at least 5 m should be erected;
- A minimum distance of 250 mm must be maintained between the chimney pipe and the nearest combustible elements;
- If materials with insufficient fire protection are used for roofing, a spark arrester must be installed;
- A certain distance must be maintained between the upper stove ceiling and the ceiling: for metal pipes - more than 1.5 m, for brick chimneys - 0.5 m.
Video installation of a sandwich chimney with your own hands
A feature of modern sauna stoves is their heating temperature, which can reach 400 degrees. An important indicator of the efficiency of the furnace is instant heating of the body and maximum heat transfer.
The entire heating process is accompanied by the release of infrared radiation, which is distributed on surfaces adjacent to the furnace. Under the influence of high temperatures, the wooden structure of the bathhouse can char or ignite.
This is why it is so important to ensure that wooden surfaces are reliably insulated from the heat of the stove. A protective screen and lining made of fire-resistant materials are suitable for this.
Safety
When building a chimney in a bathhouse, you first need to think about safety issues. After all, if something is done incorrectly, wooden structures can catch fire very easily. The problem must be approached carefully, then the bathhouse will last a really long time, and there will be no risk to people’s lives.
All the necessary requirements that chimneys must meet are established by the relevant sanitary rules and regulations. They specify the distance that must be maintained between the pipe and flammable parts of the roof slabs. This value depends on the pipe parameters. If you are planning to make a chimney in a bathhouse, you should familiarize yourself with SNiP 41-01-2003, which approves the rules for the installation of ventilation, heating and air conditioning
In this case, pay special attention to paragraph 6.6.22, which contains all the necessary information
To ensure that the chimney is completely safe, you need to use appropriate materials for thermal insulation:
- mineral wool;
- basalt cardboard;
- mineralite
Non-flammable mineral wool with long service life
Fire-resistant plasterboard and glass-magnesium sheet are also suitable for this purpose.
Fire-resistant drywall can withstand exposure to direct fire for about an hour
Glass-magnesium (glass-magnesite) sheet (SML), moisture-resistant, fire-resistant, frost-resistant, environmentally friendly
You need to pay attention to some other points
So, it is important to choose the right materials from which the chimney itself will be made - they must be resistant to high temperatures. For example, if you decide to use a metal pipe to construct a chimney, it must be made of non-galvanized material
The fact is that when heated to high temperatures, zinc begins to evaporate, and its evaporation is extremely harmful to health.
For example, if you decide to use a metal pipe to construct a chimney, it must be made of non-galvanized material. The fact is that when heated to high temperatures, zinc begins to evaporate, and its evaporation is extremely harmful to health.
Installation through the ceiling
The advantages of venting a bathhouse chimney through the roof are:
- high efficiency, as more heat remains in the room;
- less deposits and condensation;
- stable traction.
The disadvantages of this scheme include the increased complexity of installation work. All internal flammable structures must be shielded from thermal radiation with specialized materials. It is also necessary to compare the weight of the structure with the load-bearing capacity of the furnace and, if necessary, unload the roof using brackets. The relative position of the chimney and rafters must be taken into account when designing the building, so as not to weaken the ceiling or roof.
Selection of chimney system elements
If you decide to install a metal chimney with your own hands, it is important to choose the correct pipe cross-section. Oven manufacturers indicate the recommended diameter for each model in the instructions.
In the absence of this information, this parameter is calculated based on the power of the stove, the height of the chimney and the number of turns. However, it is better to entrust the calculations to an experienced consultant, since the draft and safety of the chimney depends on him.

Scheme of a chimney system made of metal pipes
Please note that the length of horizontal pipe segments should not exceed 100 cm; neglecting this simple rule can result in weak draft of the stove and soot deposits inside.
- If you lead the chimney through a wall, it would be correct to place it at a distance of 50-60 cm from the edge of the overhang.
- When installing a pipe through the roof, try to place it 50-150 cm from the ridge.
- If the location of the stove does not allow this, the chimney umbrella is raised above the highest point of the roof by 1.5 or more.
- Typically, the internal chimney system is laid strictly vertically; if it is necessary to change the direction, elbows with an angle of 45 or 90 degrees are used.
- In order for the seller to correctly select the chimney for the stoves, it is better to make a diagram with its dimensions.
