Types of jet heating devices. Choosing a design for self-production
Craftsmen have developed several designs of rocket stoves suitable for mobile or stationary use:
- portable units made of metal pipes, cans or buckets;
- jet heating devices from a gas cylinder;
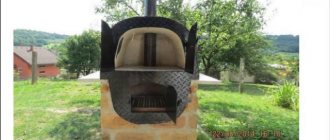
- ovens built from fireclay bricks and metal containers;
- heating heat generators with a stove bench.
The most difficult to manufacture are the structures, the construction of which requires the skills of a mason. However, if you have detailed diagrams of serial layouts, even a novice home craftsman can handle this work.
Portable rocket stove
Portable rocket stoves are mass-produced by industry
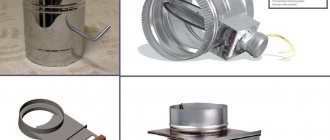
Hiking options are represented by the simplest designs, which are based on the same pipe bent or welded from individual sections. The improvements affected only the installation of a partition for arranging the ash pit, in which a slot is made for air leakage. Often the lower part of the loading chamber is equipped with a grate to supply air directly to the combustion zone. The opening for storing firewood is equipped with a door, which subsequently regulates the air supply.
Gas cylinder unit
The use of a gas cylinder is the next step in the development of jet heating devices. A more complex design can significantly increase the thermal power and efficiency of the furnace. All that is required to make the installation is a household gas cylinder or fuel barrel, sections of thick-walled steel pipes and a metal sheet 3–5 mm thick.
A rocket stove made from a gas cylinder can be used to heat small utility rooms
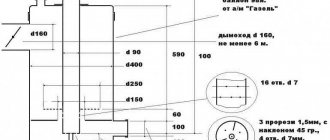
How such a design works can be seen in the diagram below. Firewood loaded into the firebox burns due to the flow of air through the loading window. Afterburning of combustible gases occurs in a pipe installed inside the cylinder due to the supply of secondary air. To enhance the effect, the inner chamber is insulated, which makes it possible to raise the temperature inside above 1000 °C. Hot gases hit the bell as they move and enter the outer chamber, the walls of which act as a heat exchanger. Having given up their energy, the combustion products are discharged through a chimney cut into the lower part on the back side of the cylinder.
Combined rocket stove made of brick and metal barrel
The use of fireclay bricks for arranging the firebox and internal chambers of a jet heating device transforms the “rocket” into the category of stationary structures. The high heat capacity of the materials used allows heat to be accumulated and released within several hours, which is why such units are often installed in residential premises.
Furnace structure with refractory lining of the working area
Jet stove with stove bench
Like other solid fuel stoves, the "rocket" has the disadvantage that most of the heat is lost through the chimney. Despite this, certain advantages of its design make it easy to get rid of this disadvantage. The thing is that the unit was called reactive for a reason, but because of the high rate of excision of burning gases. This feature can be turned into a benefit by significantly increasing the length of the smoke exhaust channels.
Scheme of a jet stove with a stove bench
This idea found its implementation in massive stationary structures with a couch in the shape of a sofa or bed. It is successfully made from brick or rubble stone, decorated with a plastic mass of clay and sawdust. Thanks to the high heat capacity of the materials used, the stove can retain heat all night, which, combined with high efficiency, makes the heating unit very attractive for installation in residential premises.
When choosing a design for manufacturing at home, you need to take into account the features of its operation. As a camping option, choose a mobile unit - it will be enough to warm up, dry clothes and cook lunch. In order to occasionally heat small technical rooms, a portable structure made from a gas cylinder is used. If you need to heat a small country house or cottage, then there is simply no better option than a jet heating unit with a stove bench.
Predecessors
Solid fuel stoves are imperfect. This has been understood for a long time. But a more understandable theory of combustion - the processes occurring inside the firebox - appeared relatively recently - in the 19th century.
Before this there were only guesses. They were not always far from the truth, but they did not give an accurate idea of the mechanics of what was happening.
In the 17th century, the prerequisites for the global industrial revolution appeared. It was then that the first experiments on pyrolysis were carried out. But the resulting product was used separately.
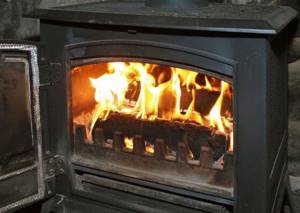
Understanding how to combine the reactor and the result in one system came much later.
The most difficult thing in a furnace is not to take heat from the flue gases, but to provide ideal combustion conditions.
Firstly , the difficulty lies in the dosage of oxygen, without which combustion of fuel is impossible.
Fuel is never monolithic in composition. It is always a complex composite of organic matter (there is more of it, and it is heterogeneous) and a non-flammable mineral residue that forms ash.
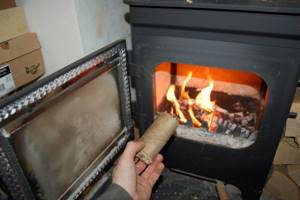
Accordingly, each of the compounds included in this composition has its own optimal combustion conditions. And it is simply impossible to provide all of them.
Secondly , excess air supplied to the combustion zone can worsen the combustion itself. This happens because the air cools the “reactor” part of the firebox.
A deficiency will result in incomplete combustion. Hence the soot and tarry condensation inside the furnace and pipes. This is the carbon that did not have enough oxygen to burn.
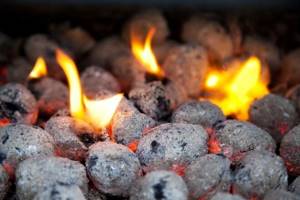
It would be possible to organize a targeted supply of air to the combustion zone. And a very intense feed, something similar to the blast used by metallurgists.
The fuel begins to burn more intensely, but the rate of passage of gases inside the furnace also increases. And again there is a dead end: the heat does not have time to be utilized by the stove. It is simply released into the atmosphere; not all organic matter has time to burn. There is still a decline in efficiency.
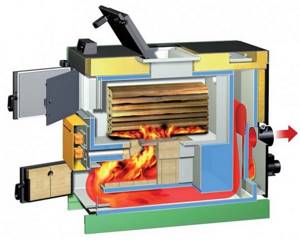
The issue is partially resolved by preheating the supplied air. But this increases energy consumption and requires a lot of technical tricks. This unnecessarily complicates the entire design.
For a long time, designers thought about how to complete all combustion processes in the volume of the firebox and prevent unburned particles from getting inside the furnace, into its smoke channels.
There are insurmountable difficulties here. If the firebox were a point in space, then everything would work out. Here is the firewood, and here we supply the required amount of oxygen.
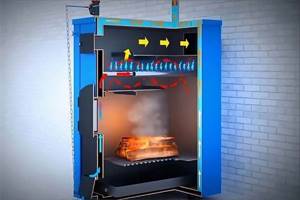
But this is only possible in an ideal scenario. So far no one is able to crush fuel into a molecular fraction. So, you have to deal with fairly large pieces, briquettes or logs.
Consequently, the firebox will represent a certain volume. It is impossible to provide it with oxygen evenly. Even simple growth of the grate over the entire surface of the hearth will not work. Parasitic vortices arise inside the firebox, which block the normal flow of flue gases.
What is the result: at the beginning of the firebox, where oxygen enters through the grate and into the cracks of the combustion door, combustion conditions are good. But a little deeper, closer to the exit from the firebox into the furnace channels, which are responsible for heat recovery, there is already a lack of oxygen.
Since the temperature in the firebox is approximately the same, the fuel partially decomposes. But the products of this reaction do not have time to burn. They go down the chimney in the form of unburned carbon (soot) and a mixture of flammable gases, the most famous of which is poisonous carbon monoxide CO.
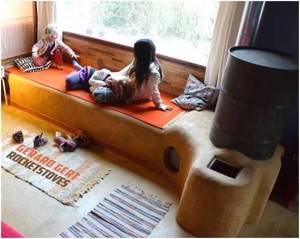
Popular method: making rocket stoves from adobe. The material is very flexible and expressive.
But, for reliability, inside this adobe structure there are still channels made of metal or brick.
The process of finding the optimal solution was lengthy. Only in the 80s of the 19th century did the Russian engineer Stepanov propose lowering the gases below the firebox to warm up the bottom of the furnace. And in the 1920s, the German engineer Brabbe came up with the idea, for the same purpose, to make a special chamber immediately behind the firebox.
It turned out by chance that in this chamber there is post-burning of those residues that did not have time to burn out in the main section of the firebox.
To improve combustion, we decided to specially introduce atmospheric air into this chamber. This is how the furnaces began to separate the air flow into primary and secondary.
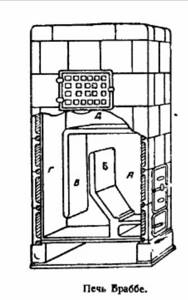
Primary air went into the firebox and participated in combustion on the grate. The secondary one was sent to the Stepanov-Brabbe chamber and allowed fuel residues to be burned. Those that did not have time to burn out in the main volume of the firebox.
It turned out that this afterburning chamber heats up a little less than the firebox itself. In addition, the chamber behind the firebox does not immediately begin to work effectively. Occurs after the temperature in it reaches a certain point.
A decrease in temperature affected the efficiency of the entire system. It was a short step before the invention of the rocket stove.
But, before we talk about the new operating principle of the heater, let’s return to pyrolysis again. Have been using it for a long time. This is how illuminating coal gas was obtained by burning coal with a lack of oxygen.
Then coal gas was used in this way: it illuminated streets and homes. But it was more regarded as a by-product of coke production for metallurgy and transport.
During the Second World War they again remembered about pyrolysis. This time the firewood was dry distilled. The resulting gas mixture was used as automobile fuel, a forerunner of gas cylinders in commercial vehicles.
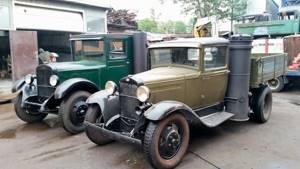
The whole system was called gas generator. It was so simple in design that it was often installed on cars by the drivers themselves. It was just necessary: a couple of barrels and plumbing skills.
This was the first time that a pyrolysis reactor was combined in one installation, and the result obtained was immediately used. True, functionally these were two different units: a system for producing combustible gas and a car engine.
The third predecessor comes from Mexico. Let's clarify, the immediate predecessor. The Greek heating system has been modernized.
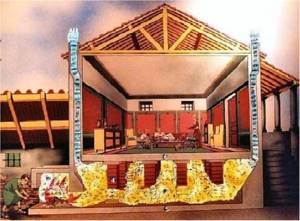
This technique was borrowed and refined by the Romans - the result was the famous hypocaust, the prototype of future heated floors. The essence of the idea is that gases from the furnace were directed into channels laid under the floor. It turned out simple and effective.
By the way, Chinese kana stoves and Korean ondoli are an eastern modernization of that same Roman idea.
But there was approximately the same stove in Mexico. This happened at the instigation of the Spaniards and Portuguese, who had a lot of contact with the Middle East.
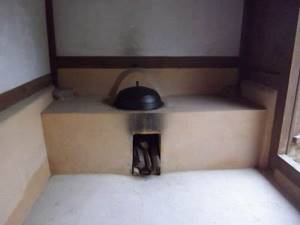
In the 20th century, Americans curious about technical experiments decided to combine a Mexican adobe stove with a stove bench and a pyrolysis system. They moved the Brabbe chamber just above the firebox and made it into a kind of heat exchanger.
This is how this technical miracle appeared. Outwardly, when operating, it resembled an inverted rocket engine (compact versions of the stove).
Jet heating unit from a propane cylinder
Drawings and instructions for creating a carport from a profile pipe with your own hands
A rocket stove made from a gas cylinder is an easy-to-make wood-burning stove that uses fuel economically and effectively warms up the room.
For its assembly it is used
:
- empty propane cylinder (unit body);
- steel pipe with a diameter of 100 mm (for arranging a chimney and a vertical channel);
- steel profile pipe 150x150 mm (firebox and loading hopper are made);
- sheet steel 3 mm thick.
Making a stove from a gas cylinder requires the use of a welding machine. If you are planning to assemble such a rocket stove with your own hands, the drawings will help you accurately maintain the optimal dimensions of all structural elements.
Scheme of processes in a rocket furnace
At the preliminary stage of work, you should prepare a gas cylinder - turn off the valve, fill the container to the top with water to ensure that gas vapors that can explode from a spark are removed from the container. Then the top part is cut off along the seam. A hole is cut in the lower part of the resulting cylinder for the chimney, and in the bottom for the combustion chamber with an attached firebox. The vertical channel is brought out through a hole in the bottom, and a structure from a profile pipe is welded on the bottom side, according to the rocket drawing.
If you are installing a rocket stove from a gas cylinder yourself, you should pay close attention to the quality of the welds and check their tightness - air should not flow uncontrollably into the working stove. If everything is in order, you can install the chimney.
Such a home stove is regulated in power by the volume of fuel loading. The jet stove is put into operation by supplying air through the combustion chamber; this is regulated by the hopper lid. Next, secondary air is constantly supplied to the unit. This heating stove explodes at the end of the combustion process, since it is impossible to shut off the supply of secondary air, and soot deposits on the inner walls of the vertical channel. The casing cover is made removable so that it can be removed periodically.
Boiler unit
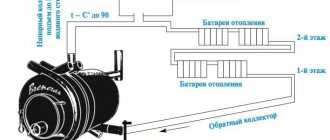
A long-burning boiler can be obtained by installing a water circuit on the chimney of a stove made from a gas cylinder or other materials, but according to the same scheme indicated above. However, heating the water in the circuit of such a unit will be inefficient, since the main part of the thermal energy is transferred to the air in the room and to the containers on the hob.
An effective version of a rocket stove made from a metal barrel
If you want to create a rocket boiler for water heating with high efficiency, you will have to sacrifice the cooking function. A do-it-yourself rocket stove according to the drawing presented below can be installed in a short time.
This will require
:
- fireclay bricks and refractory masonry composition (for installing the base of the stove with a firebox);
- steel pipe with a diameter of 70 mm (for a vertical channel);
- steel barrel (for the casing);
- fireproof heat insulator;
- sheet steel 3 mm thick and a metal barrel (or pipe) of smaller diameter than the casing (for arranging a water jacket and smoke channels for heating the water circuit);
- steel pipe with a diameter of 100 mm for the chimney;
- container, pipes and connecting pipes for arranging a heat accumulator.
A rocket furnace with a water circuit is characterized by the fact that the thermal insulation of the vertical channel provides an optimal combustion mode for pyrolysis gases, while all the heated air enters the “coil” with a water jacket and releases the main part of the thermal energy there, heating the coolant.
Rocket stove with water circuit
The heat accumulator will continue to supply heated coolant to the heating circuit even after the furnace itself has cooled down. The container with water is equipped with a thick layer of insulation.
Manufacturing recommendations
The easiest way is to make a small portable stove with your own hands - the Robinson rocket, whose drawing is presented below. You will need cutting profile pipes, metal for legs and stands, as well as welding skills. Moreover, compliance with the exact dimensions indicated in the drawing is not necessary. You can take pipes of a different section, but you just need to reduce or increase them proportionally so that the parts fit together.
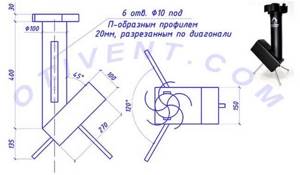
Drawing of an improved “Robinson” camping stove with nozzles made of a profile pipe, cut lengthwise into 2 parts
Note. Please note that the drawing shows a design improved by our expert Vitaly Dashko. As befits a rocket, improvised nozzles are attached to it, which receives secondary air for afterburning, which enters the pipe through a series of holes. Due to this modernization, the combustion intensity increases noticeably. For more information about the operation of a compact wood stove, watch the video:
The most common versions of large rocket stoves are made from a gas cylinder or a two-hundred-liter metal barrel. You must understand that these ready-made elements are used as an outer hood, and the internal parts of the stove must be made from pipes of smaller diameter or laid out from fireclay bricks. Moreover, from a cylinder you can make both a stationary heater with a small bench, and a unit that can be moved.
Advantages and disadvantages
Drawings and instructions for making your own rollers for a profile pipe
Long combustion rocket stoves have the following advantages:
- high efficiency - at least 85%;
- high speed of heating the room - 50 m² will become warm in less than 1 hour;
- absence of soot - the exhaust during fuel combustion does not form soot, but is formed in the form of steam and carbon;
- the ability to operate on solid fuel of any type;
- low consumption - the fuel consumption of a rocket stove is 4 - 5 times less than a conventional stove under equal conditions: combustion time and heating temperature;
- the possibility of installing a warm bed;
- the duration of heat retention in a well-heated structure without adding fuel is up to 12 hours.
This stove has many advantages, but there are also disadvantages
Disadvantages include:
- manual method of controlling a heating device - fuel burns out quickly and requires regular reporting;
- the high heating temperature of some structural elements threatens owners with burns in case of accidental contact;
- the heating speed does not allow the use of a rocket stove for baths;
- the aesthetic component of such a device is not for everyone and is not suitable for every interior;
- danger of carbon monoxide entering living rooms.
Operating principle of a rocket furnace
DIY greenhouse made of profile pipe and polycarbonate
Although the design of a rocket stove is quite simple, it successfully uses two operating principles borrowed from other types of solid fuel heating devices:
- the principle of afterburning wood gases released during combustion (pyrolysis);
- the principle of free flow of gases through the channels (without encouragement from the natural draft of the chimney).
First, we will analyze the design of direct combustion rocket stoves, intended only for cooking food. Here the firebox is a short horizontal section of pipe, which then turns upward. The design is simple to the point of disgrace, as shown in the figure:
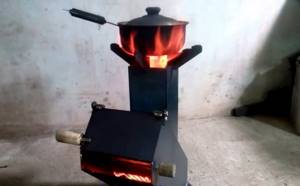
The fuel is placed in the pipe and ignited, resulting in an upward flow of hot gases, tending to rise along the vertical section and exit outside. Here, at the cut of the pipe, a container for food or water is installed. Of course, there is a gap between the pan and the pipe for combustion products to escape. This is achieved through various metal stands.
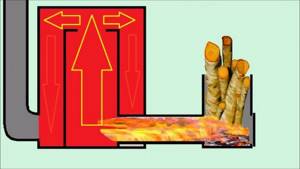
Since it is impossible to heat rooms with such a unit, the design of the heating rocket stove was supplemented with a heat exchange device and channels for removing flue gases. To maintain a high temperature in the vertical section of the pipe, it is insulated with any fire-resistant material. Further, for intensive heat extraction, the nozzle is covered from above with a cap, for example, an ordinary metal barrel. At the bottom of the horizontal fire pipe there is a separate channel for supplying secondary air.
Now the principle of operation of a rocket furnace looks somewhat different. Firstly, at the end of the horizontal fire channel, afterburning of pyrolysis gases occurs due to the supply of secondary air. Secondly, combustion products that have a high temperature accumulate under the top of the bell (barrel), creating some excess pressure. As heat is transferred outward through the metal walls, these gases cool and flow downward.
Since the cooling gases are supported from below by a new hot flow, they cannot descend in the same way, but pass through the space between the walls of the pipe and the barrel, safely exiting into the chimney channel. The flow of processes is well reflected in the diagram of a rocket furnace:
So, thanks to pyrolysis, the efficiency of wood combustion increases, and the use of free flow of gases creates a self-regulating system that limits the flow of fresh air into the firebox. The air mixture is supplied as the combustion products cool under the hood, making room for its new portion. Excessive pressure of hot gases “pushes” the cooled part out, so the operation of the stove depends little on the presence of draft in the chimney.
Operating principle and design
The rocket stove got its name due to its vague similarity with the design of a jet engine, and also due to the roaring sound that occurs in a certain mode of operation of the heater. Craftsmen weld stoves of this kind with their own hands from a cylinder or lay them out of brick. In the latter case, in addition to the heating unit, a stove bench is built, passing flue gases through it.
For their operation, rocket stoves use 2 principles inherent in other designs of wood-burning heaters:
Operating principle of a rocket stove.
- natural movement of gases during heating and cooling;
- pyrolysis combustion of solid fuel.
The natural movement of gases is used in two-bell furnaces, where combustion products exit into the smoke channel only after they have given up their heat to the brick walls. This principle provides a huge advantage, thanks to it the heating unit is able to function with minimal draft in the chimney pipe. The release and combustion of pyrolysis gas is a way to use fuel energy more efficiently.
The rocket furnace consists of 3 channels - one horizontal and two vertical. The horizontal channel is a firebox where firewood is inserted from above. Primary air is supplied into it and combustion occurs, releasing pyrolysis gases. These flammable gases burn out in a vertical channel that rises upward and ends in a hood. Below it, heat exchanges with the environment, after which the combustion products cool, become heavier and fall into the second vertical channel leading outside.
Oven with water circuit.
Due to the fact that the cooling flue gases are forced out from under the hood by new hot masses, the rocket stove operates practically without chimney draft. The horizontal and first vertical channel are laid out of brick, and an iron barrel is installed on top of it, acting as a heat exchanger roofing felt. The gap between its walls and the brick vertical shaft is the second channel through which gases leave the heater.
There are design options and drawings where, instead of an overturned iron barrel, the rocket stove can be equipped with a multi-pass steel heat exchanger. In it, combustion products make several moves in different directions, giving off heat along the way. But such a design looks less aesthetically pleasing and is unlikely to be suitable for residential premises.
A rocket stove can be improved with your own hands by additionally using the heat of combustion products. To do this, they are not taken directly into the chimney, but are passed through the brick channels of the stove bench. True, in this option, chimney draft is already necessary, because the force of natural gas flow will not be enough.
We make a stove - a rocket
The easiest way to make a light camp stove, shown in the drawing, is to find the following materials in the household:
- round steel pipe with a diameter of 133-150 mm and a length of 0.5 m;
- profile pipe 14 x 20 cm, length 0.4 m;
- sheet of metal 2-3 mm thick for grates;
- rod Ø8-10 mm for legs;
- scraps of iron for the stand.
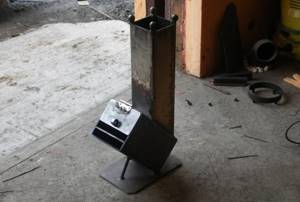
A vertical round pipe is welded to the profile at an angle of 45°, then eyes for the legs are attached to the body (they should be easily removed). A grate is placed inside the inclined firebox, and a lid is attached to the outside. To make it easier to clean the ash below, it is advisable to install a second door.
Drawing of an improved version of the portable stove
The design of the furnace can be improved by organizing the supply of secondary air inside the flame tube. Modernization will increase the efficiency and duration of firewood burning. Drill holes on both sides on both sides, covering them with rocket “nozzles” according to the presented drawing. How this stove functions is demonstrated in the video:
From a gas cylinder
The following materials will be used to make a do-it-yourself rocket stove:
- round pipes with transverse dimensions of 70 and 150 mm; with a wall thickness of 4 mm;
- square corrugated pipe 150-200 mm in diameter;
- chimney pipe Ø10-15 cm;
- low-carbon steel (grade St20) sheet;
- dense basalt wool (80-120 kg/m3) or bulk fire-resistant materials, for example, vermiculite or perlite gravel.
To begin, cut the rolled metal into blanks in accordance with the drawing. Then you need to saw off the lid of the propane tank, after unscrewing the valve and filling the tank to the top with water. The tool is an ordinary grinder with a metal circle.
Further assembly technology is as follows:
- Cut the corrugated pipe lengthwise, 35 mm from the edge. One part will be used to make an ash pan, the second - a blower.
- Join the firebox and flame tube at an angle of 90°, making appropriate cutouts. Cut an opening on top of the combustion chamber where the loading hopper will be welded.
- Weld the riser with the firebox, then put on the casing from a 150 mm pipe, making a cutout at the bottom to fit the width of the combustion chamber.
- Install and scald the bunker for storing firewood. Secure the doors of the firebox and ash pan.
- Place perlite sand between the walls of the afterburner and the shell.
- Make a side opening in the cylinder to insert the finished structure. It is better to make the lid removable.
- Perform final assembly and weld the chimney pipe.
The master will tell you in detail about the manufacture of a rocket stove from a cylinder in the video:
Made of brick
The simplest rocket stove for cooking can be built from bricks without using mortar, as shown in the diagram with the order. Such a structure can be easily disassembled and moved if necessary.
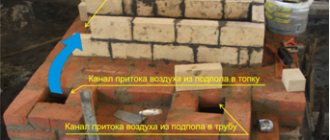
The rocket stove with a stove bench must be placed on a foundation made of concrete or rubble stone. Material – ceramic or refractory brick, sand-clay or fireclay mortar, respectively. The finished base is covered with roofing felt for the purpose of waterproofing, then a continuous first row of bricks is laid. The further work order looks like this:
- Lay out the firebox, placing the bricks on edge. In the same way, cover the chamber, leaving an opening for loading firewood and a riser.
- Build an afterburner pipe from 9 rows of stones installed “on edge” with ligation.
- Place a pipe or tin buckets on the riser, fill the resulting cavity with insulation or regular sand.
- Place the barrel upside down, with the flue gas pipe coming out from the bottom.
- Build a brick bed from 3-4 horizontal channels.
- Coat the barrel and bench with clay mortar.
The length of the smoke channels inside the stove is limited by the draft in the rocket stove and the external chimney. It is better to keep the total length of the flue pipes within 4 m. To prevent the heater from smoking back into the room, raise the top of the chimney to a height of 5 m, counting from the grate. How to build a brick stove - a rocket without a barrel, watch the video:
Composition of a reaction furnace
- Knee. It is made of 2 pipes welded at an angle of 90°, the diameter of these pipes should not be less than 15 cm in a ratio of 1:2. This is how the finished firebox comes out with chimney outlets. Up is the long part of the pipe, and to the side is the short part. When lighting a fire in this pipe, the heat will go up. To separate air from the hearth, it is necessary to make an additional supply of oxygen. For this purpose, a metal sheet is attached to the firebox (on brackets), thanks to which the air that will pass through it will always end up in the corner of the knee. Because of this, it is called secondary. For ease of use, legs are installed under the product, and on the top there is a stand for a pot or kettle. The lid of this oven can be used like a regular gas stove for cooking or heating food, as it heats up to a high temperature.
- Rocket stove. Naturally, the base will be a knee made in advance. A pipe cut lengthwise is added to it. Since it is much more convenient to use than a whole pipe. The air duct is positioned as desired. Next, the air duct is attached to the knee. Then you can install the cover. It will not be possible to completely accurately imagine the composition of the furnace elements, since various materials can be used for construction, as a rule, 200-liter tanks or gas cylinders.
- Vertical heat exchanger. The heat exchanger is made of metal with thick walls in the direction of the flowing heat. To do this, an empty container is installed instead of a vertical pipe, which is necessary for dry heat exchange. The design is made so that the chimney channel and the horizontal structure are on the same axis. The pipe (horizontal) can be of any shape, for example, a square, cylinder or stove body. To make the rocket stove work constantly, up to 4 hours, the space for the logs is expanded, but not higher than 60 cm. In this case, the logs are loaded vertically. Thanks to this, the logs will burn from below.
- Installing the injector. It is necessary to make a channel so that oxygen can flow during the combustion of the raw material. This requires a pipe with a diameter of 1.2-1.5 cm. Install a plug on one side, and cut up to 8 holes with a diameter of 5-6 mm on the left or right wall. and no more than 10 cm in length. The finished pipe must be passed into the structure and secured. When heated, the metal will create the necessary traction.
- Installation of turbocharging. The air pump is connected. A regular old vacuum cleaner will do for this. The tube should allow air to pass through well. This will increase the flow and create additional pressure to increase the temperature in the heat exchanger.
How to do it yourself?
Before you make a rocket stove, you need to decide on the location of its installation, the dimensions of the future design, and develop a diagram. The masonry technology itself is quite simple; any novice builder can master it.
The simplest design of a rocket stove can be built from 20 bricks at a summer cottage and used to heat food brought from home.
Selecting a location
Before starting construction, the first thing is to choose a location. It is recommended to place rocket-type brick stoves closer to the front door. In this case, after cleaning, the ash will not need to be carried across the entire room, which will have a positive effect on the overall dustiness of the room.
It is also desirable that at the point where the pipe exits there are no rafters located closer to the chimney than 40 cm. And yet, the stove should not be adjacent to the external wall of the house, so that expensive heat is not lost to heating the street.
Preparation of the solution
Cement mortar will quickly crack under the influence of high temperatures, so for laying heating devices made of bricks, only a mortar consisting of clay and sand is used.
Their proportions are determined experimentally, depending on the quality of the clay. Most often in a ratio of 1:2 or 1:3, and the higher the fat content of the clay, the less it is added to the solution.
First, the clay must be soaked, strained, and then sand must be added. The resulting solution should have a consistency similar to thick sour cream. You can check its viscosity level in the following way:
- place a wooden stick or trowel handle into the mixture;
- remove the tool and shake well;
- check the thickness of the adhering layer: if less than 2 mm add clay, more than 3 mm add sand.
The preparation of the mortar must be approached with all responsibility, since only a plastic mixture of the required thickness can fill all the unevenness of the bricks and ensure their strong adhesion.
Ordering a rocket stove for 20 bricks
Example of a brick rocket stove
Installation work
First, you need to decide on the material from which the structure will be assembled, make calculations and determine the dimensions. You can even draw drawings of a rocket stove with your own hands. In this case, a device with a water circuit (jacket) will be manufactured.
It’s not difficult to make a rocket stove yourself by making a drawing and studying a few rules
To make a jet stove with your own hands, you need to do the following:
- Pour a solid concrete base so that the future wood-burning stove does not warp or deform, but stands strong and long.
- Lay out the firebox and fire duct from fireclay bricks.
- A homemade firebox will have a vertical loading type, and an ash pan with a side door will be installed in the lower part. This design will make it quite easy to clean the stove from accumulated ash.
- A vertical channel is made from a steel pipe, which must first be wrapped in a thick layer of insulation and then placed in an outer metal casing.
- The heat exchanger assembly with the water circuit must be sealed on the outer casing, and then the horizontal plates must be installed. They will create a kind of labyrinth, which, in turn, will provide maximum area and long heat exchange time.
This scheme allows a hot air flow to pass through the heat exchanger, then bend around the metal plates, heating the entire heating unit, and at the same time transfer heat to the water that circulates through the water circuit. Having performed all these actions, the cooled air enters the chimney.
The heat accumulator through which water circulates can be made of any material. Most often, old cylinders and boilers are used for this. Any container equipped with valves through which you can connect cold water and drain hot water will do. You can even connect a heating radiator to such a device.
If you line the stove with brick, it will fit perfectly into the interior
You can cover such a rocket stove with brick, and then it will fit perfectly into the design of a private house; it is also suitable for a bathhouse. This design allows you to save money on water heating and heating. This is because the device does not require a large amount of fuel, and it does not need to be connected to electricity.
Jet stove - what is it?
The home heat that comes from a jet stove cannot be provided by any modern heater.
A jet stove, or, as it is also called, a rocket stove, actually has nothing in common with modern technologies. The only thing that makes this heating unit look like a space vehicle is the intense flow of flame and the humming associated with improper operation. Nevertheless, it cannot be said that the rocket stove is a completely backward device in technical terms. Despite its simple design, it uses the most advanced methods of burning solid fuels:
- pyrolytic combustion of gases released during dry distillation of solid fuel;
- movement of gaseous products through the furnace channels, which does not require forced ejection due to draft.
This is what a simple jet-powered stove looks like
The simplest “rocket” is a curved piece of large diameter pipe. Firewood or other fuel is placed in a short horizontal section and set on fire. At first, the heating device works like an ordinary potbelly stove, but this is only until the temperature of the longer vertical part, which acts as a chimney, rises. The red-hot metal promotes the re-ignition of flammable substances and the appearance of a vacuum at the top point of the chimney. Due to increased draft, the air flow to the firewood increases, which significantly increases the burning intensity. In order to achieve even greater efficiency from this original device, the firebox opening is equipped with a door. When the cross-section of the air channel decreases, the supply of oxygen to the firewood stops and its pyrolytic decomposition into gaseous hydrocarbons begins. But in such a simple installation they will not burn completely - for this you will need to set up a separate area for afterburning the flue gases. By the way, it is this, as well as the thermal insulation of the chimney, that allows more complex “rockets” to successfully compete with other solid fuel units. As for the simplest design we are considering, it is often used for cooking or heating food. All that is required for this is to equip a convenient platform for a pot or kettle on the vertical section of the stove.
Geography of application of rocket heating units
Being a simple and convenient heating and cooking unit, the rocket stove is widely used in both mobile and stationary versions. Most often it is used:
- for heating residential premises;
- as equipment for drying fruits;
- for heating greenhouses;
- to ensure normal working conditions in workshops or garages;
- to maintain above-zero temperatures in warehouses, utility buildings, etc.
Thanks to its simplicity, unpretentiousness and reliability, the jet heater enjoys well-deserved respect among fishermen and hunters, car rally enthusiasts and survivalists. There is even a special version, the purpose of which is indicated by the name - “Robinson”.
Advantages and disadvantages of the rocket stove
Despite its simple design, the rocket stove has many advantages:
- efficiency level at the level of the best examples of modern heating equipment operating on solid fuel;
- efficiency - to achieve the required temperature, the jet unit will consume four times less firewood than a traditional stove;
- heating temperature above 1000 °C;
- the ability to use any type of solid fuel, including dry plant waste, cones, pine needles and shavings;
- complete combustion and environmental friendliness - during operation, the flame temperature increases so much that the soot ignites. Rocket stove smoke consists primarily of water vapor and carbon dioxide;
- possibility of additional fuel loading for continuous operation of the heating device;
- simplicity and reliability;
- the presence of portable structures intended for mobile use.
The heating unit is not without its drawbacks. Operation of the device is associated with the risk of carbon monoxide entering the home. The stove cannot be used to heat a large house, and attempts to install a water heat exchanger in the combustion zone lead to a decrease in thermal power and disruption of normal operation. The disadvantages include the low aesthetic value of the design, which, however, is a very ambiguous statement, since for lovers of ethno-style, the design of the stove is a real find.
How to properly sink a rocket?
To obtain the maximum heating effect, the rocket-type furnace should be thoroughly heated before the main loading of fuel material. For this, flammable materials are used: paper, wood chips, dry shavings, sawdust, cardboard, reeds or straw, which are placed in an open ash compartment.
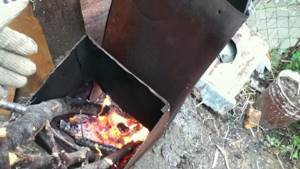
Warming up the system will lead to the appearance of a characteristic sound - a quiet or loud hum. Next, the main fuel is added to the heated device to obtain the required amount of thermal energy.
The combustion process itself is carried out according to the following scheme:
- Opening the door to the ash compartment.
- Adding fuel material to maintain optimal combustion temperature.
- With the appearance of a hum in the furnace, the blower closes until it completely switches to silent operation.
Important! If a closed air valve has led to a decrease in flame intensity, it must be opened to increase draft and enhance the fuel combustion process.
Heating unit with bench
A rocket stove with a stove bench is a device that can create a comfortable environment in one room. Such a unit cannot be used to heat several rooms, let alone the entire house.
Arranging such a long-burning unit with your own hands requires precise calculations - its power and the maximum permissible length of the hog on which the stove bed is located depend on the size of the stove body
It is also important to select the correct pipe cross-section for installation of the structure. Mistakes will result in the jet furnace becoming overgrown with soot in a short time or roaring loudly during operation due to turbulence in gas flows
Design of a stove with a stove bench
Dimensions and proportions of the structure
To build a rocket stove with your own hands, you need to prepare detailed drawings, indicating the dimensions of all elements. At the project preparation stage, calculations are made based on the basic values to which all others are tied.
Basic calculated values are
:
- D – diameter of the drum (furnace body);
- S is the internal cross-sectional area of the drum.
Calculations of design parameters are carried out taking into account that
:
- The drum height (H) ranges from 1.5 to 2 D.
- The coating of the drum is carried out at 2/3 N (if its edge is planned to be shaped, then 2/3 of the height should be the average).
- The thickness of the coating layer on the drum is 1/3 D.
- The internal cross-sectional area of the vertical channel (riser) is 4.5-6.5% of S, the optimal value is in the range of 5-6%.
- The height of the vertical channel is the maximum, as far as the furnace design allows, but the gap between the upper edge of the riser and the drum cover must be at least 70 mm for normal circulation of flue gases.
- The length of the flame pipe (fire duct) must be equal to the height of the vertical channel.
- The cross-sectional area of the fire pipeline is equal to the corresponding indicator of the riser. Moreover, it is recommended to use a square-section profile pipe for the fire pipeline; in this case, the stove operates more stable.
- The cross-sectional area of the blower is ½ of the cross-sectional area of the firebox and riser. For stability and smooth adjustment of the furnace mode, a rectangular profile pipe with an aspect ratio of 2:1 is used, which is laid flat.
- The volume of the secondary ash pan depends on the volume of the drum minus the volume of the riser. For a stove from a barrel - 5%, for a stove from a gas cylinder - 10%. For containers of intermediate volume, it is calculated according to linear interpolation.
- The cross-sectional area of the external chimney is 1.5-2 S.
- The adobe cushion under the external chimney should be 50-70 mm thick - if the channel is made of a round pipe, the counting is from the lowest point. The thickness of the cushion under the chimney is halved if the bed is mounted on wooden floors.
- The thickness of the coating layer of the stove bench above the chimney duct is 0.25 D if the drum is from a 600 mm barrel, and 0.5 D if the drum is from a 300 mm cylinder. If you reduce the coating layer, the structure will cool faster after heating.
- The height of the external chimney pipe should be at least 4 meters.
- The length of the flue, on which the length of the stove depends: for a stove from a barrel - up to 6 m, for a stove from a cylinder - up to 4 m.
A long-burning rocket stove made from a 600 mm diameter barrel reaches a power of about 25 kW, and a heating rocket made from a 300 mm barrel reaches up to 15 kW. The power can be regulated only by the volume of fuel; such a stove does not have air regulation, since the additional flow disrupts the stove mode and provokes the release of gases into the room. Changing the position of the blower door regulates not the power, but the operating mode of the furnace.
Lining features
The quality of the riser's thermal insulation directly affects the efficiency of the heating unit. In our area, lightweight fireclay bricks ШЛ and river sand with an admixture of alumina are available for lining. The lining should have an external metal casing, otherwise the materials will quickly absorb carbon deposits and the furnace will roar during operation. The end of the lining is tightly covered with oven clay.
Proper execution of lining
When using hewn fireclay bricks, the remaining cavities are filled with sand. If only sand is used for lining, it is sifted to remove large debris and covered in layers - each approximately 1/7 of the height of the pipe. Each layer is compacted tightly and sprinkled with water to form a crust. The backfill must be dried for a week, and then the end must be covered with a layer of oven clay. Then the construction of the rocket furnace with your own hands continues according to the drawings.


