With elements from car wheels It is not always possible to install a heating system in a country house, garage or outbuildings that would run on natural gas. There may be several reasons for this - the lack of a centralized gas supply, the high cost of connecting to the gas main, etc. Therefore, many “homemade craftsmen” decide to build a miracle stove with their own hands, which can be heated with any type of solid fuel. And such fuel outside the city limits is usually in abundance.
Purpose
We can say that the scope of such furnaces is simply enormous. They can be used to heat residential premises with an area of 30 to 80-100 square meters, in work and industrial buildings, technical structures such as a utility room or utility block.
Such a miracle oven can be placed in a greenhouse to produce several harvests per year. You can even install it in the courtyard of a country house to keep warm late in the evening. Perhaps the scope of the miracle stove is limited only by the desires of its owner.
Installing and testing the device
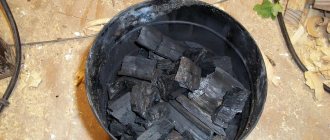
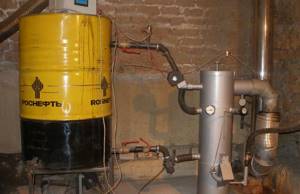
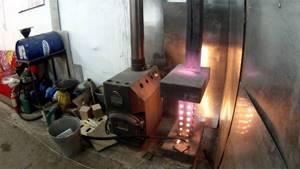
The stove is installed in a fire-safe place, not on a wooden (linoleum) floor. It is advisable to provide a container with sand in the garage in case of fire. Drafts and installation in cramped conditions (under hanging shelves, racks) are excluded. Pour oil into the lower tank. It is advisable to clean it before use and let it sit.
A chimney must be installed, otherwise the stove cannot be used in the garage. Water impurities are not allowed in the oil. First, pour in a small portion, a couple of liters. Then, using a paper wick, set fire to the oil in the tank. By opening or closing the damper, stable traction is achieved. After 2-3 minutes, the stove returns to operating mode and the oil begins to boil. The unit is ready for use.
Manufacturing instructions
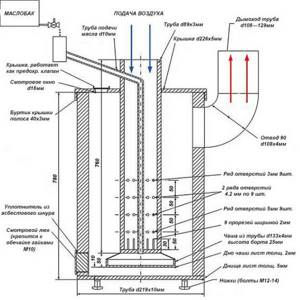
Scheme:
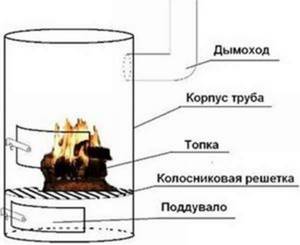
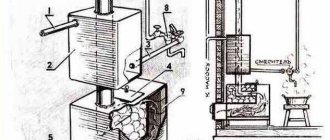
General diagram of a miracle wood-burning stove
How to make a miracle wood-burning stove with your own hands? Procedure:
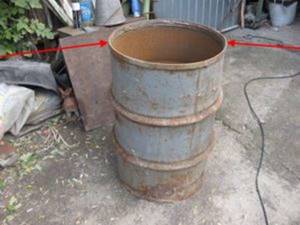
- Place the barrel on a flat surface so that it remains stationary during work.
- Weld the lid at the top of the structure.
- Using a chisel, cut 2 holes in the front: for supplying firewood and from the bottom, at a distance of approximately 20-25 centimeters, for cleaning out the ash pan. Make doors and latches.
- Make a hole at the back of the barrel for the chimney (110 mm pipe).
- Next, weld the chimney.
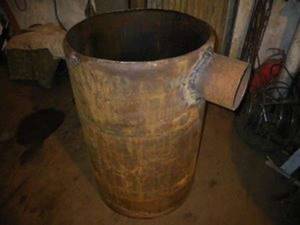
- Insert (weld) the grate bars at the level of the bottom hole. The grate can be made from reinforcement bars.
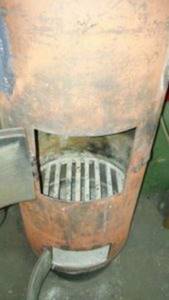
- Install the resulting stove on a stone base or weld 4 legs and install them on them.
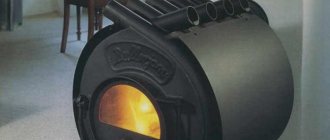
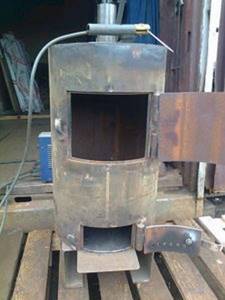
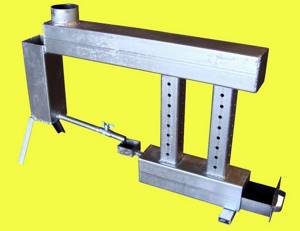
Ready-made miracle wood-burning stove
Features of heating structures during testing
The devices described in this article are often referred to as miracle stoves, because they use used oils (motor, transmission), which cost very little. Thanks to this, the operation of this type of furnace is cheap. The other miracle stoves that interest us will not operate on gasoline, diesel fuel, kerosene and other highly flammable mixtures.
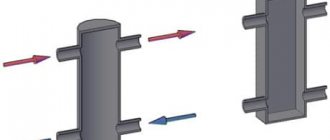
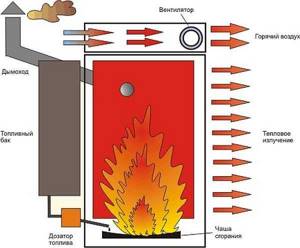
“Exhaust” devices heat rooms by directly heating the air in them. From a constructive point of view, such a unit consists of two combustion compartments. In compartment No1, the used oil is burned, resulting in the formation of flammable vapors. After this, the vapors are fed into compartment No. 2, where they are mixed with air and, having a sufficiently high temperature, quickly burn, which is why large volumes of thermal energy are released.
Note! The design described above will work correctly only when air is constantly supplied to both compartments of the unit. Moreover, compartment No. 1 must be equipped with a special damper designed to regulate the volume of air entering the chamber.
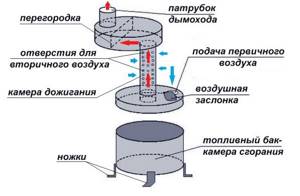
In most cases, both compartments are connected to each other using a pipe. It is important that holes with a diameter of about 10 millimeters are drilled in the latter - through them air will flow into compartment No. 2 for mixing with flammable vapors.
Below are the main advantages of “working off” units.
- They are quite safe, since in this case it is the oil vapor that burns, and not the used oil itself.
- It is quite possible to make such a stove with your own hands, using cheap and affordable materials.
- Finally, such devices are easy to install and use, which is good news.
But there are also some disadvantages that anyone who plans to make a miracle stove on their own should know about.
- Only a warm room should be used to store used oil. At sub-zero temperatures it will simply freeze and lose all its properties.
- In addition, this oil must be specially filtered. It is prohibited to use simple contaminated waste from car services. It is almost impossible to clean contaminated oil at home.

On a note! It is also impossible to heat living rooms with the help of such units. Yes, this is an ideal option for a garage, but it is not suitable for a room where people are always present.
Video - How to work with a furnace during “working out”
Advantages and disadvantages
- Among the advantages of such a miracle wood-burning stove, it is immediately worth noting that it is very profitable and easy to operate. Its benefit lies both in the low price of the stove itself (you can make the stove yourself) and in the availability of fuel for it.
- You can also cook a simple dish or boil tea on it. Another advantage of such a device is that it warms the air very quickly without burning it in the process; for example, a room of 50 square meters can be heated in 20-30 minutes using the stove at full power.
This is where its advantages end. The disadvantages include not entirely uniform heating of the room and a large amount of fuel consumed, which must constantly be supplied to the stove.
The principle of operation of homemade stoves
If you simply set fire to any used oil, it will smoke mercilessly and “smell” even more intensely. Therefore, direct combustion is not used. First, volatile substances are evaporated, then they are burned. This is the basic principle of design development. Therefore, in some versions, the stove has two combustion chambers connected by a tube in which holes are made.
In the lower chamber, the fuel is heated and evaporated. Combustible vapors rise upward. Passing through a pipe with holes, they mix with oxygen dissolved in the air. Already in the upper part of this pipe the mixture ignites and burns out in the second chamber. Moreover, the combustion of vapors occurs with the release of much more heat and less smoke. With the right technology, there is practically no smoke, as well as soot.
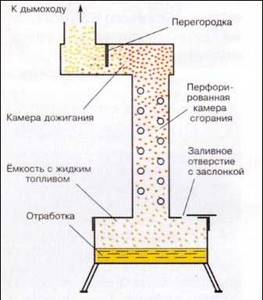
Structure of a waste oil furnace with an air supply pipe
The second method of separating “heavy” fuel (oil of any origin) into “flammable” components is more effective, but also more difficult to implement. For efficient evaporation, a metal bowl is installed in the lower chamber. It heats up, and drops of waste falling on it instantly turn into volatile flammable vapors. In this case, the glow turns out (in the correct mode) white-blue, as when burning a plasma. This is where another name for this design comes from - with a plasma bowl.
To achieve the greatest efficiency of fuel combustion, used oil must be fed into the lower chamber in very small portions. In some variants - drops, sometimes - in a thin stream. That is why this technology is called drip feed.
Operating principle of a waste oil furnace with a plasma bowl
These are the basic principles of the “action” of homemade heating units. There are a very large number of their combinations and variations. Several of them are described below.
You can see an example of waste combustion in a plasma bowl in the video below. This is a Gecko mining furnace; it has a built-in water heater and can work as a heating boiler.
Do it yourself
You don’t have to buy a miracle stove that runs on diesel fuel in a store, since you can make such a heating device yourself.
To do this, you do not need to have any specific knowledge or experience working with metal, you just need to have basic skills and read the instructions, so virtually anyone can master this technology.
The detailed algorithm of actions is given below:
Initially, it is necessary to prepare all the drawings of all parts of the body, mark them on the selected material and cut them out.
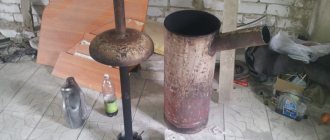
The previous stage can be skipped if the base is a barrel made of steel with suitable physical and technical properties. In this case, you will need to make a small hole in the lower part, which will be intended for igniting diesel fuel and ensuring air exchange inside the stove.
The barrel or self-made body is equipped with a removable lid
It is necessary to pay special attention to it, since this part must ensure tightness, without which it will not be possible to achieve stable combustion and operation of the heating device. When assembling the body from various parts, all internal seams should be generously soaked in kerosene, and the external joints should be covered with chalk.
After this, you can observe the reaction: darkening of the metal will indicate the presence of defects, since kerosene has the ability to penetrate even the most microscopic holes
When assembling the body from various parts, all internal seams should be generously soaked in kerosene, and the external joints should be covered with chalk. After this, you can observe the reaction: darkening of the metal will indicate the presence of defects, since kerosene has the ability to penetrate even the most microscopic holes
In this case, you will need to look for left gaps and improve the quality of existing seams.
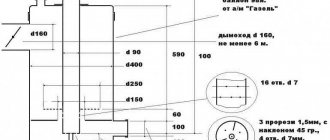
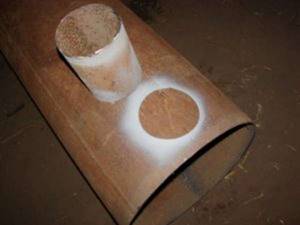
A non-pressure type burner is manufactured separately; it will consist of two different parts that fit together. The optimal burner diameter is 21.5 cm.
The upper part of the burner is equipped with a lid, in the center of which a small cutout is made.
Small holes are made in all side surfaces of the burner; it is better to arrange them in 5 rows.
Near the surface of the bottom of the burner, you need to cut out an exhaust pipe and a unit that will supply oxygen inside, since without it the combustion process will not be supported.
All individually manufactured parts are assembled into a single unit. Even if you have no experience, all the processes described usually take no more than 2-3 days.