Window sills for plastic windows
PVC window sills are most often installed on plastic windows.
Wooden window sills are installed less frequently. And very rarely, stone window sills are installed. The latter have their own installation specifics. We will not talk about them in this article. How to install a wooden window sill on plastic windows? The technology for installing plastic and wooden window sills is not fundamentally different. Therefore, further, we will only talk about methods for installing PVC window sills.
For those who first decided to install a window sill with their own hands, it is important to know that the quality of the window sill plastic affects the installation process. If you intend to work with an economy class window sill (for example), then you need to treat it with care
For example, when cutting such a window sill with a jigsaw, large chips may appear.
Where can you buy a PVC window sill in St. Petersburg at an affordable price? - read in this article. Below, for comparison, I give approximate prices for a window sill for plastic windows measuring 250 x 2000 mm:
- Inexpensive and not high quality - “Eco” - 350 rubles.
- Inexpensive, but high quality - “Stained glass” - 450 rubles.
- Expensive and high quality - “Stained glass VPL” - 1250 rubles.
- Very expensive and very high quality - “Danke”, “Moeller”, 2200 rubles each.
Connection diagrams
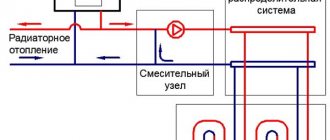
- Lateral connection. Characterized by maximum heat transfer. With this connection, the input is made from the top of the battery, and the output is from the bottom on the same side. This is the most popular connection diagram.
- Diagonal connection. Produced with significant system dimensions. Water enters the radiator through the top and is discharged from the bottom on the opposite side.
- Lower connection or “Leningradka”. It is produced in small one- and two-story houses, as well as when installing pipes hidden under the floor. The efficiency of such a system is 5-15% lower than with a lateral connection.
Why are batteries mounted at the bottom of the wall?
Many of our fellow citizens ask the question: “Why are batteries still placed directly under the windows?” It would seem that the space near the window is the least protected from the penetration of cold from the street, so why not place heating radiators away from such places?
Closer to winter, when the first frosts arrive, the heating season begins. And, indeed, radiators placed under windows warm the space more effectively than radiators installed in other places. The fact is that the window is the place of greatest heat loss in the entire space of a house or apartment, and it is the weakest point in terms of thermal protection. Go to the window and place your palm on the glass. You will feel that the glass is cold, perhaps even feel a slight breeze of cold air. Even if the most modern, high-quality and reliable double-glazed windows are installed in the window openings of your home, and all the necessary technologies for their installation are followed, they still let in more cold air than, for example, walls or doors.
All batteries heat the space according to the same principle, using the ability of air to circulate. Let's turn to the laws of physics. Everyone knows that cold air is heavier than warm air and therefore sinks. The same thing happens with the air from the window. Frosty street air, entering the room through cracks and micropores, falls down to the floor. But thanks to the radiators attached under the window, the cold air has time to heat up and rises to the ceiling, giving way to the next “portion” of frost. Thus, the cold does not have time to spread throughout the entire area of the room, but, on the contrary, by warming up, it provides the home with warmth. What happens to cold air if the radiators are located away from the window? Due to the temperature difference, cold air circulates from the window deep into the room, and only after reaching the radiator does it begin to heat up and “travel” to the ceiling according to the already outlined pattern. Therefore, if the battery is located far from the window, the heating process of the room slows down significantly.
Low radiators for panoramic windows
We need to talk specifically about this class of batteries. The fact is that conventional models with a small height are not always suitable for placement under open panoramic window structures. Therefore, radiators with a height of 15-25 cm are selected for installation under them.
Low cast iron batteries are small works of art. Miniature cast iron registers are decorated with artistic elements and placed on special stands. And if you consider that such batteries are made to order and covered with enamel, then the window design only benefits from this.
You can install stainless steel radiators. The cold shine of the matte surface will add special sophistication to the room, and polished panels will create the illusion of infinity.
Well, for the dynamic style of a modern city, you can use low aluminum radiators or bimetallic batteries for panoramic windows. Here, in addition to the traditional white color, you can choose any color from the manufacturer’s palette, even order decoration to match the color of the floor.
Dining area by the window
If for you the most important thing in the space of a room is not a work area, but where you can sit down with the whole family and have a meal, fly away with your thoughts somewhere in your cherished dreams, and plus get aesthetic pleasure from beautiful curtains, then be sure to organize a cozy dining area.

If your space allows, then you can simply place a table by the window, and if not, then a folding table will be your saving and convenient option. A bench along the window will look beautiful; besides, it will provide more seating than chairs and can be equipped with drawers under the seats for storing kitchen utensils.
The kitchen along the window is not scary
An eternal problem is lack of space. Especially in the kitchens of old houses, where this room was not given enough space and most of them today are from 6 to 9 squares, which is very small. Once you look at a photo of such a room, you immediately wonder how to properly arrange it so as not to reduce the space and accommodate everything you need.
Some people solve this problem with square footage by combining several rooms or making a kitchen-studio, that is, a separate corner for cooking and a living or dining area. This is a fairly good option, but not everyone agrees, especially if the apartment is one-room. On the one hand, the kitchen automatically becomes visually larger, and on the other, you get the feeling of sleeping in the dining room.
Use the niche for storing vegetables and canning
To avoid loading the refrigerator with vegetables in the winter, you can use this niche as a cold pantry. If necessary, insulate the wall a little so that during severe frosts the vegetables do not freeze. Replace shelves and front doors with more modern and practical ones. You can even use glass ones, the only condition is that there must be order so as not to spoil the aesthetic appearance of the interior.
Window sill installation
Before installing the window sill, you must complete step 14. Installing a vapor barrier sealing tape.
When installing a window sill, you must perform the following steps:
1.
Check the window sill for consistency in size, color and absence of scratches or other damage, having first removed the protective film.
In the case when it is necessary to trim the window sill depending on the size of the opening, marking is done first, and then the window sill is trimmed. The marking is made with a construction pencil relative to the center of the structure. Trimming is done with a jigsaw or a plastic hacksaw included in the installation kit. 2.
Check that the connection between the window sill and the frame of the window unit is tight, airtight and resistant to deformation.
3.
The gap between the end of the window sill and the load-bearing walls on the sides should not exceed 3-4 mm.
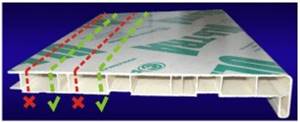
Additionally, it is recommended to install a spring bracket for a tighter connection of the window sill to the frame profile. The bracket is attached to the stand profile using a self-tapping screw. The brackets are installed by attaching them to the stand profile at a distance of 20-25 cm from each other, after which the window sill is simply snapped into the brackets and does not require additional installation.
The recommended overhang of the window sill beyond the inner surface of the wall should be ½ the width of the heating radiator, but not more than 100 mm (without brackets). If the overhang exceeds the specified value, it is necessary to use standard brackets, the distance between which should not be more than 500 mm, the distances from the edge of the window sill should be no more than 250 mm. Check the accuracy of the installation of the window sill using a level in the longitudinal and transverse directions. Be sure to foam the support pads for fixation. Along the entire length of the window sill, where there will be contact with the frame, it is recommended to apply a strip of white silicone or PVC glue. Installation of the threshold under the box of the balcony block carried out in the same way as installing a window sill. The projection of the threshold beyond the inner plane of the wall is from 30 to 40 mm.
. NO GAP IS ALLOWED BETWEEN THE BOX AND THE WINDOW SILL.
In order to avoid scratches on the surface and chips at the cutting site, you must be careful and cut without putting too much pressure on the window sill.
Based on thermal expansion, the maximum length of the installed PVC window sill is limited to 3000 mm.
When installing a window sill from the inside and outside under the window of a balcony block, the window sill must extend beyond the frame of the balcony door and at the same time overlap the corner of the lower quarter (wall panel) and protrude no more than 15 mm, unless otherwise agreed with the Customer.
The window sill must extend under the bottom surface of the frame by at least 5 mm and be pressed tightly against it along the entire length of the junction.
If the distance from the stand profile to the edge of the wall under the window sill is more than 150 mm, it is necessary to provide measures to prevent the window sill from deflecting under load in the area adjacent to the frame and along the plane of the window sill (threshold). For these purposes, additional support blocks and fragmentary foaming are used.
If the opening under the window sill is small, then it foams. Structurally, a new window sill is always about 2-4 cm higher than the old one, so it is usually impossible to preserve wallpaper under the window sill. Sealing under the window sill is done with a building mixture, for further wallpapering or plastering.
Chipboard or wooden window sills are installed in the same way.
Installation using holding brackets is also possible: using fasteners (two holding brackets are screwed in one after the other with cylindrical screws measuring 3.9*16 or screws with a half head 4.5*16) in a layer of mortar, 2 pieces each. at a distance of 60 cm – for window sills with a maximum length of up to 2 m.
Store things and objects in a niche
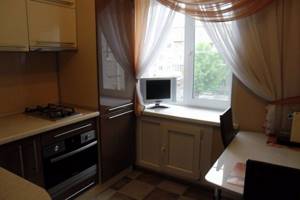
Depending on how you organize the space around this niche, you can store both very popular things and objects there, and vice versa. If there is free access to it, then place those items that you use constantly. If access is limited, it is very convenient to put there everything that you use rarely or seasonally. But in any case, such an additional cabinet can free up a table or hanging shelves for you. In this case, it is advisable to insulate the wall so that cold air does not penetrate into the apartment. Such a niche can be made with both open and closed shelves.
PVC window sill markings
Following the technology for installing a turnkey plastic window, the plastic window sill should be installed after the plastic window has already been installed. In the previous article, I already said that the ebb and window sill are installed at the same time. Read here.
In order to understand how to install a window sill on plastic windows, you need to understand that the most important operation in this process is marking the PVC window sill. Next, step-by-step verified instructions with photos, and my video is at the end of the article.
First, take a sheet of paper and a pencil. We draw a window in a section along the width, in a simple way, in the form of an elongated rectangle. View from above. And enter the value of the window width into our rectangle.

Secondly, we find the starting point of the marking. This is done as follows. We measure the length of the window sill. We write the value above the rectangle. We get two numerical values in a column that need to be subtracted. Like at school, in first grade))).

We divide the resulting difference in half. And we get the main number, which determines the starting point for marking the PVC window sill. This figure is equal to the distance from the edge of the window sill to the edge of the frame on each side.

Thus, after installing the window sill and slopes, we will have the same:
- The side projections of the window sill are the “ears” and
- Dawn angles of slopes
Thirdly, continuing the marking, we take two bench squares (90 degrees) with a scale of 30 cm and 50 cm. Next, we place the first large square with one side against the window sill profile, and with the other side, perpendicular, we press it against the wall, leaving a small gap. The main thing is to understand that the position of the square is the future position of the cut-off window sill. All that remains is to take the first measurement along the length of the window sill, and write down this size on our sheet of paper, on which the starting point of measurement has already been determined.

Fourthly, using a second square, pressing it against the inner wall of the room, we fix the second size along the width of the window sill. After which, the last cutting line of the side protrusion is automatically obtained.

Dimensions are taken similarly on the right side of the window sill.

After which the markings are applied to the window sill itself.

This markup that we looked at is the simplest. It is made in a flat perpendicular opening.
It happens that the opening has a step configuration, then it is necessary to take several measurements. But the principle of marking does not change.
Fifthly, if the opening has an angle, then the marking of the PVC window sill is carried out at an angle. To do this, just as in the first case, we press one side of the large square against the window sill profile, and direct the other perpendicular side at an angle. Let's imagine that this will be the corner cutting line. And we place the second square against the inner wall of the room. The point where the squares intersect is the end point. Let's fix its value. Next, leaving the second small square in a stationary position, we again attach the large square to the window sill profile at 90 degrees. We fix the second value at the intersection of the squares.
Thus, the PVC window sill is marked. It must also be said that the cutting line of the side protrusion can be either flush with the inner wall of the room or recessed into this wall. This depends on whether the customer will make repairs after installing the window.
Are radiators needed in addition to heated floors - testing the theory
The question often arises whether radiators are needed if the house has water-heated floors. Will a water heated floor be able to independently heat a house or apartment to make the rooms comfortable?
Nobody wants to bear the additional costs of installing batteries. But why then are they still installed?
Next, we will consider in more detail the features of modern heating in private houses and apartments, and the use of these systems together and separately.
Experts calculate heat loss at home
The exact heat loss of a house or apartment can only be determined by specialists after carrying out calculations. Such services are not cheap; in private construction, they are often not provided at all.
To select heating devices, including making a decision on the design of heated floors, they are guided by approximate “estimates” of heat loss and construction experience in the region. In this case, as a rule, a critical error in choosing the power of heating devices does not arise.
- Heat loss in the house will directly depend on the climate of the region.
- Also, heat loss will depend on the degree of insulation of the building.
Determination of heating power for rooms
For a moderately insulated house in the central region, where winters are quite severe, it is believed that heat loss is about 1 kW per 10 square meters. area. But for each room these values are adjusted.
- For rooms without external walls, heat loss is assumed to be zero and heating devices are not installed there.
- For a room with a narrow outer wall and one window, the value is multiplied by 1.1.
- If the outer wall is called “wide” or the window is larger, then 1.2.
- If there are two windows, then 1.4.
- For rooms with 2 external walls with 2 - 3 windows - 1.4 - 1.6.
Recommendations for placing radiators
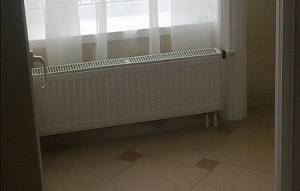
Experts pay great attention to the correct location of heating devices. In this case, the room will be heated with the greatest efficiency.
Basic recommendations for choosing a location for installing batteries:
- For high-quality air circulation near the battery, it is necessary to maintain a distance of 3-4 cm between the thermal insulation layer and the heating device. When this gap decreases, air exchange becomes difficult and the efficiency of the system decreases.
- If it is impossible to create insulation, the inner surface of the wall is covered with a layer of foil. It serves as a heat reflector that directs flows into the room.
- When installing batteries under the window sill, a gap of up to 10 cm must be maintained between the radiator and the floor. The distance from the radiator to the window sill must be at least 8 cm. This is due to the fact that the board is an obstacle when warm air rises upward.
- If the house has large windows, batteries 30 cm high are used. Then condensation will not form on the glass.
- The radiator is installed at an angle of 90°. If there is a deviation from the norm, air will accumulate and corrosion will form.
- The battery should be installed exactly in the middle of the window. Then it will cut off cold air flows and will not allow them to penetrate into the room.
Why is it important to maintain the dimensions of the gap between the radiator and the wall?
When installing a heating system, you need to adhere to the following scheme: the more powerful the radiator in terms of its thermal characteristics, the wider the gap to the wall will be. As a rule, its size ranges from 2.5 cm to 6 cm.
Specific dimensions consist of two parameters:
- real possibility of installation (window sill width, niche dimensions);
- power of the heating device.
If foil heat-reflecting material is glued to the wall, the distance can be minimal (2.5 cm - 3 cm).
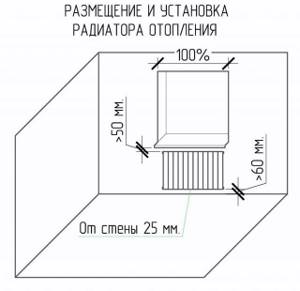
It is not recommended to install a heating device close to the wall for many reasons:
- to ensure free heat transfer from the entire surface of the radiator, conditions must be created for free air circulation around the device; if you place the radiator close to the wall, this process will be disrupted and the heat will be partially lost;
- when the radiator is “pressed” to the wall, a high temperature level will constantly remain on its back surface, as a result, the device will fail faster due to overheating;
- in the narrow gap between the radiator and the wall, debris and dust will accumulate, which will also impede heat exchange;
- if the heat-reflecting plate is not glued, the radiator will “waste” heat the external walls, and in apartment buildings they are usually concrete and have low thermal insulation properties.
Important. Due to an incorrectly set distance to the wall, both the water radiator and the electric one will overheat. Moreover, electric ones run the risk of shorting, while water ones will be susceptible to corrosion. Naturally, the dimensions of heating radiators in height and length must be taken into account in advance, at the design stage.

The distance from the floor to the heating radiator is also kept optimal for each heating device. Thus, proper installation of the radiator is important for efficient heating of the room.
Alternative
Of course, you can save space by using furniture. For example, put a kitchen island with everything you need for cooking or a small corner equipped with everything you need. However, this will not really solve the problem, especially if there is a large window and you want a wide window sill, which will also take up some of the space. There is a good option - to combine business with pleasure.

Positioning the kitchen along the window is a design solution that is far from new, but very popular. Especially when it comes to a small room. Usually the entire wall along the window is empty if furniture is placed along other walls. And it turns out that the use of space is not entirely rational. If furniture and interior items are placed along the wall with a window, then along the other two you can organize a relaxation corner and a dining area.
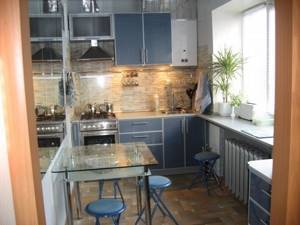
This option has another plus - light and air. That is, it turns out that in case of strong fumes, in addition to the hood, you can open the window and quickly ventilate the room, getting rid of heavy odors. However, there is another side to the coin. In the case of the sunny side, bright light can interfere with cooking, so if you still decide to install the kitchen along the window, you can close the window with special blinds or shutters to protect from the bright sun. Another important detail in this arrangement of the room is the absence of curtains and drapes. They will not only be inappropriate, but also dangerous, because there should be a stove or hob nearby.
Battery
Another seeming obstacle to conquering space is the battery. It is no secret that in most rooms the battery is located strictly under the window. When installing furniture there, you need to come up with a good way out of the situation. In principle, you can go in two ways: complex and simpler.
Battery transfer
This is rather a very difficult path. After all, it is impossible to do this on your own, without the skills and, most importantly, special equipment. More precisely, it is possible, of course, but the one who does it will be responsible for the consequences. In this situation, the old fittings along with the pipes are cut off. From the remaining ends of the pipes, special polypropylene or other polymers intended for this product are carried to the desired place where the battery will be located. After which everything is welded back.
Decoration
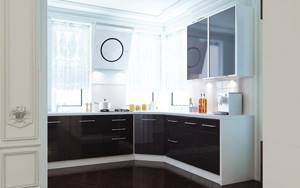
The furniture can be placed under the window sill, leaving a gap for the battery. You can cover it with a decorative screen or decorate it a little yourself. For example, paint it in an original way. If, for example, the color of the furniture is black or white, you can paint it in the spirit of a piano with keys, but if the kitchen is multi-colored and suggests the presence of bright colors, then it would be appropriate to paint the radiator in a rainbow pattern.
Hide and forget
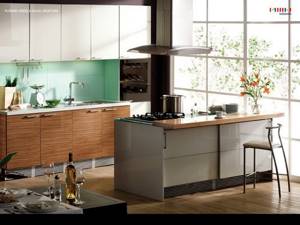
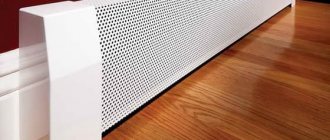
Another simple way would be to disguise the battery, for example, under a false wall. To do this, it is enough to make a sheathing from a metal profile, and then tighten everything with plasterboard, leaving special ventilation or vents with doors. In this case, the wall will look quite neat along with the furniture.
Conclusion
Furniture placement is an important issue, especially with small rooms, so it’s worth planning and thinking about everything several times before taking action.
Clogged radiator
Sometimes the reason that the radiator does not heat can be a simple blockage. When determining the causes of blockage, let’s highlight the symptoms:
- It only warms around the perimeter.
- Only the top part.
- The bottom is heated, the top is not.
- Only a few sections out of all possible provide heat (if the bypass location is correct)
Could it be just the old battery that is clogged? Not at all. New systems (modern and ultra-modern, aluminum and cast iron) suffer from this just as often. The problem may lie in the general contamination of the system:
- From long-term use.
- Due to installation errors.
- Sediments with high water hardness.
- Erosion of system elements (oxide, rust).
How to get rid of it?
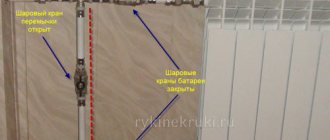
Modern heating devices with properly installed shut-off valves include an “American” valve, by turning off which the non-working part can be easily dismantled and cleaned, purged, and washed under pressure.
It’s harder where the equipment is “countless years old.” To disassemble, you may have to turn to specialists, emptying (preliminarily or with their help) the entire volume (usually just water).
Cast iron radiators can be cleaned. It is recommended to replace steel flat flow welded radiators with new ones of other models. But it is they, ironically, that are most often susceptible to rusting and clogging of channels - due to the design features and materials used. Therefore, they often do not heat properly. An additional reason not to clean this type of heating device is the risk of leakage of the eroded wall due to its thinning in the process of peeling off oxidized metal flakes. A leak can be costly (even if you forget about the cost of repairing the “junk”). This is the same case when the stingy one has every chance to pay twice, or even three times.
Interesting fact: cast iron radiators clog 3-5 times less often than aluminum or stamped ones.
Battery under the window
If the radiator is in the way and preventing you from realizing the desired design, you can consider several options to solve the problem.
- Replace the battery with a heated floor , completely removing it.
The advantage of this solution is the ability to use different headsets without adjusting them to the installed heating. But not every floor covering can be insulated, and costs will increase. - Move to another wall.
Moving the battery will also require additional costs, but access will be open and the headset will fit without any difficulties. - Make a box for the battery.
This option is suitable if you plan to install a sink under the window. Drawers can be tricky, but in a pinch you can use doors that open. - Recess the radiator deep into the wall.
This will require partial demolition to free up space. At first glance, the option seems labor-intensive, but a specialist will do everything in a few hours, and the cost will be lower.
Small stylish kitchen
Choose the best option, taking into account all the features of your kitchen, layout and wishes. If the apartment has a battery already located in the wall, then it will be easier to create a kitchen design to your liking.
Install the battery in the niche
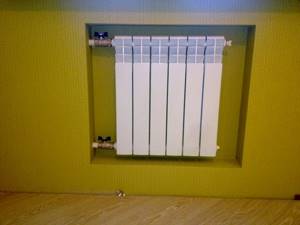
Original design of the battery in the niche.
This niche can be used as a place for a radiator, having previously insulated the wall with heat-insulating materials. If you place it in the depths of the free space, you can not only solve the problem of heating the apartment, but also significantly save space.
Why should batteries be placed under windows?
We have all seen that heating radiators in residential premises are located mainly under windows. And many are interested: why do batteries need to be placed under windows? What generally determines such a layout of the heating system? It turns out that this is not without reason - radiators located under window openings actually work more efficiently and can heat a much larger area.
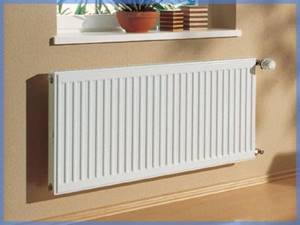
Reasons for placing heating batteries under windows
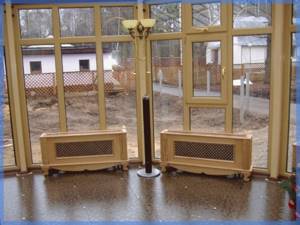
In addition to the window, a source of heat loss can be:
- floor,
- door,
- joints between ceilings,
- ventilation system.
But the window opening is still considered the undisputed “leader” in this regard. It is worth noting that some people blame it on incorrect installation or lack of insulation material, but in reality, even those windows that were installed in accordance with all requirements draw out the greatest amount of thermal energy.
Note! Radiators heat homes through physical laws such as air circulation. Cold air falls down
the hot one has more weight than the hot one, while the latter, accordingly, rises upward.

So, why are batteries placed under windows? Because when cold air enters the room from the street, it falls down, and there it is immediately warmed up by heating radiators. When heated, it rises, which ensures that same air circulation. In other words, the cool air coming from the windows is also used to make the heating network more efficient. You can get acquainted with the features of installing radiators by watching the video below.
How to cut a PVC window sill
After marking, the PVC window sill must be cut off. There are four tools you can use to do this:
1. Hacksaw for metal. Yes, the cheapest instrument, but it requires good physical training.
2. Electric jigsaw. The most acceptable option. You can use an inexpensive one. For example, I've been using . Such a jigsaw costs from 1700 to 2500 rubles.
The main thing when working with a jigsaw is to set the pendulum stroke to the number “0” and use a metal file with a fine tooth.
3. Grinder ("angle grinder" - angle grinder). The most effective tool. Allows you to cut PVC window sills most accurately. But, at the same time, the grinder is very noisy and creates a lot of dust.
4. Cordless saw “Makita HS300DWE” and “Bosch GKS 10.8 V-LI”. Lightweight, convenient, cordless tool, but very expensive. The cost of such a saw is about 10,000 rubles.

By the way, we don’t throw away the trimmings from the window sill. They will be useful to us during installation. Read about it below.
Recommendations for installation and operation of radiators
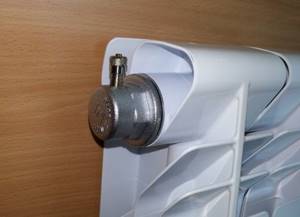
The efficiency of heating and the service life of the heating system depend on the correct installation of the battery. There are a number of recommendations that you should use during installation:
- It is recommended to lubricate the gaskets with silicone sealant before installation. This is an optional step, but it will help protect the joints.
- Do not open the valves suddenly when filling the heating battery with liquid. Otherwise, water hammer may occur, which will damage the system.
- If thermostatic valves are installed in a single-pipe system, a bypass must be installed. Without it, the entire riser will be regulated, for which the owner may be fined. Ball valves are placed in front of the valves, allowing the supply and return to be shut off.
- If the radiator has more than 12 sections with a one-sided lateral connection, place the flow guide at a length equal to two-thirds of the battery (it is better to do it up to the last section). This will allow the radiator to fully warm up.
- If the radiator fills with water, it is necessary to bleed air from it. If this is not done, the device will not warm up. The air is removed every year at the beginning of the heating season.
After installing the radiator, pipes are connected to it. They are selected in advance by material, cross-section and length.
Heating radiator installation procedure
It should be noted that SNIP also prescribes the procedure for installing the radiator. Using it, you can do everything correctly:
- First of all, you need to determine the location for the fasteners. Their number depends on the size of the battery, but even if the smallest radiator is installed, there must be at least three brackets;
- The brackets are being attached. For reliability, it is necessary to use dowels or cement mortar;
- The necessary adapters, Mayevsky tap, plugs are installed;
- Now you can begin installing the radiator itself;
- The next step is to connect the radiator to the inlet and outlet pipes of the system;
- Next you need to install the air vent. According to modern SNIP, it must be automatic;
- After the correct installation of the heating radiators is completely completed, you can remove the protective film from the radiators.
If during the installation of heating radiators you adhere to all the rules and requirements described above, then you will enjoy the warmth that your correct installation of radiators and a well-made heating system provides for a long time.
Sequencing
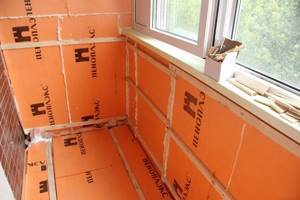
So, the legal and technically correct sequence of actions if you want to place a heating radiator on the balcony consists of the following steps:
- insulation of external walls;
- coordination of redevelopment, obtaining relevant permits and conclusions;
- choosing the optimal type of radiator and installation method;
- wall preparation - installation of thermal insulation, finishing;
- direct installation.
If you are firm in your intentions, then for apartment buildings it is recommended to move the radiator from the room to the balcony, and not to install an additional one, which will immediately significantly reduce the efficiency of the general building system - this is unlikely to please the neighbors and will entail inspections.
Specifics of connecting and installing different systems
Redevelopment of old houses or simple renovation of an apartment with the replacement of old heating radiators is always associated with the need to study the peculiarities of laying pipelines and methods of connecting batteries. With the open installation method, it is enough to select the correct parameters of the device and shut-off valves, calculate the mounting locations for the brackets and install the battery.
When installing hidden, work is carried out on laying communications, equipping the installation site, and adjusting the decorative grille. It must be remembered that hidden installation requires more space than the size of the convector. For air movement, it is necessary that there is at least 3-5 cm of free space around the radiator around the perimeter and the same amount below it.
In addition, the decorative grille should have an inclined arrangement of the blinds. This element plays an important role in shaping the direction of the flow of warm air. If the sashes are turned towards the frames, then a heat shield will be created effectively. And if the blinds are turned in the opposite direction, then the flow of heated air will be used ineffectively.
Sink under the window
This layout option allows the housewife to admire the view from the window and also masks the radiators in the room. When placing a sink next to a window, you need to carefully consider the details before starting installation.
On the island there is a hob and a cooking area. The right overhang of the furniture structure can be used as a small bar counter.

Country style kitchen with island and work area near the window
Choose a compact mixer, otherwise the tap will interfere with opening the frames. It is better to purchase a model in which the water flow is directed downward so that moisture does not fall on the windowsill.

Minimalist corner kitchen with black countertop
Roller blinds are a color accent in this interior. They do not take up much space and cover the opening from the sun, if necessary.

Bright roller blinds in a country style kitchen
U-shaped set with a sink near the window opening. In order to wash dishes comfortably, a recess for the feet was made in the basement. The faucet with a high spout does not interfere with the opening of the frame, due to the sliding glass system.

White U-shaped kitchen with sink near the window
An additional lamp was installed above the sink, which is useful only at night.
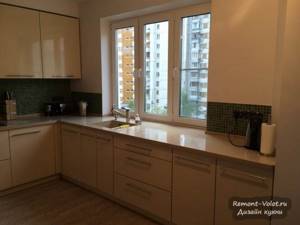
Minimalism in a corner set with a sink opposite the window
Correct operation of the radiator in the countertop is ensured by special holes for ventilation.

Ventilation grilles for radiators in kitchen countertops
The upper tier of cabinets can be continued along the entire perimeter, or open shelves can be made if there is enough storage space.
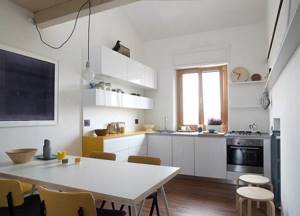
Sink and work surface near the window in the corner kitchen
General list of recommendations for installing a window sill
- The window sill is attached inside the room and at the bottom of the window opening;
- At the bottom of the window sill, a maximum of 60 mm from its edge, there is a gutter - a teardrop up to 20 mm deep, necessary for draining water;
- The final stage of installation begins only after preparing the lower plugs;
- The lower part of the solution of the side slopes is cut down to the wall. Then the wall is cleaned of debris, dust, dirt, etc.:
The window sill is placed like this:
- So that the board is in a strictly horizontal position (measured using a level), and the transverse slope of the window sill inward from the window frame is approximately 3;
- The wedges that form the basis for installation should not extend beyond the wall. Therefore, if they are installed correctly, they will require additional fixation with plaster.
- After this, they proceed to removing the window sill, wetting the wall with water and covering it with lime-gypsum mortar, so that the level of the mortar exceeds the level of the wedges by 15 mm;
- The window sill is placed in the solution and pressed forcefully onto the wedges until it stops;
- At the last stage, the excess mortar is leveled and pressed flush with the wall plaster, followed by rubbing. In this case, the window sill itself fits into a groove made on the block at the bottom of the box. In relation to the side slopes located in the lower part, the same actions are performed - covering with mortar and subsequent rubbing.
The window sill can be installed correctly, so as to prevent its subsequent bending and breaking, by placing metal strips under it and inserting the ends of the latter into the lower plug. However, most often you have to deal with plastic and wooden window sills, during the installation of which strength and reliability can be achieved in your own way for each option.
Height calculation
The distance between the radiator and the window sill must be at least 10 cm, regardless of what type of heating device is used. You also need to take into account the height of the battery itself. It is necessary to retreat 8 cm from the rear. The battery itself should rise above the floor by 10 cm, that is, when installing a window sill from the floor according to SNIP, you will need to retreat 70-80 cm.
An important role is also played by what the window sill protrusion will be : it can move significantly away from the wall or be invisible. If there is no radiator under the window, it is not necessary to meet any requirements, but if heating is present, the projection must be strictly regulated. The task of the window sill is to redirect heat flows. Without it, they will rise upward, and proper heating of the room will not occur, since some of the heat will evaporate and be distributed on the ceiling.
Poor convection can also be caused by a window sill that is too wide. It will not allow warm air to escape; as a result, condensation will begin to accumulate on the window, since the main air flows will go up, and some of them will get stuck under the window, heating the atmosphere. In this case, it is very important to calculate the distance from the window sill to the heating radiator, both in height and how much of a protrusion can be made. You can avoid the problem described above by using a slab that does not extend beyond the wall by more than 8 cm.
Tip: when calculating the dimensions, you need to take into account the level of the wall with decoration.
The best option is a solution in which no more than 10% of warm air will be retained in the window niche. To do this, the window sill should not protrude more than 6 cm beyond the radiator, but it should not be shorter than the heating device. If the design solution of the room requires the installation of non-standard wide structures, it is necessary to provide ventilation holes in them. Their size must be sufficient for proper air circulation.
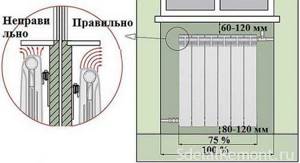
The distance between the window sill and the heating radiator will remain standard in this case. As for the thickness of the structure, it usually does not exceed 4 cm, but this indicator is not a standard. A thinner slab has a risk of deformation caused by warm air currents. The thicker one has more mass and costs more. If such structures are not provided for by the design plan, there is no point in installing them. Detailed instructions for installing a window sill.
Is clearance necessary?
Some window owners believe that the window sill extends deep under the window frame, but this is not the case. The distance between the window and the window sill is approximately 10 mm. Otherwise, the structure may become deformed. The fact is that under the influence of warm air, the material from which the slab is made expands. The gap is left so that the structure can take the desired shape without being damaged. Visually, this technique is invisible.
How to position the curtain?
The distance of the window sill curtain also plays a role. In order for the curtains to move without clinging, without leaving marks on them, and for warm air to circulate freely, the distance must be at least 5 cm.
Conclusion: it is not always possible to apply the standard distance from the floor, radiator, curtains to the window sill, but you can find a way out by observing certain requirements.
Washing
If you want to get a modern kitchen design, washing under the window is an excellent solution that has many advantages. Most often, the window is not involved in space optimization. By placing a sink underneath it, you will free up some space for other tasks. You can also save a little on electricity by getting more natural light from the window.
Frosted glass is an excellent analogue to curtains
Having made the choice to place the work area along the window, you need to pay special attention to the curtains. As a rule, it is very difficult to maintain perfect cleanliness where people cook.
Therefore, textiles should be practical and not interfere with the cooking process. Short curtains or blinds are perfect for this.
Modern sunny style
Colorful elements in a bright kitchen make it more interesting
The disadvantage of placing the sink under the window is the additional costs involved. The main costs are the transfer of communications. For example, the most pressing issue will be battery transfer. What can be done to successfully implement such a project?
