Master's secrets: how to properly prepare a stove for whitewashing
A new stove should be plastered or coated with clay before decorative finishing. If the old plaster does not hold up well, is cracked or is falling off, you will have to completely remove it and apply a new layer. For plastering, special heat-resistant mixtures or self-prepared solutions are used. The plastered stove is left to dry for at least two days. After this, the stove is heated three times, but in the first firebox the walls are only allowed to warm up slightly.
If there is no need for new plaster, you can limit yourself to cleaning the surface from soot and removing the old whitewash. It is convenient to remove a layer of lime and soot stains with a steel wool for cleaning dishes or a metal brush. You must work carefully, otherwise gouges and scratches will appear. It is possible not to remove the old whitewash only if it is clean and holds well, and the goal of the repair is to give the hearth a fresh look.
To clean the kitchen stove from greasy stains, use a two percent solution of soda ash. Rust can be removed with a solution of copper sulfate prepared from 100 grams of powder and a liter of boiled water.
Minor cracks formed during operation or after cleaning must be covered with putty. It is recommended to apply the putty not only with a spatula, but also with a brush, carefully eliminating unevenness.
How to apply the composition to a surface according to all the rules ↑
Instructions on how to whitewash walls with lime vary widely. The thing is that each master has his own recipe for a lime mixture, his own tool, and therefore his own technique. But you can try to combine the fundamental points into one algorithm. The result is a universal method, which everyone has the right to supplement or slightly adjust depending on the situation.
A roller is suitable for the ceiling
If the task is to quickly whitewash the walls and the decorative side of the issue does not really concern you, you can skip the preparation stage altogether. In fact, you can whitewash directly on top of other coatings without worrying that the result will not live up to expectations. But if the walls are covered with adhesive paint, then you need to remove it first.
If speed is not your priority, then it is better to prepare the surface for applying lime mortar. This way the result will be more accurate. The old whitewash is washed off, the swollen areas on the plaster are removed, sanded, and puttied. The same applies to cracks, if any.
Preparing the ceiling for whitewashing
Plain water is used as a primer. The surface is slightly wetted for better contact. And if the mixture contains one or more of the additives listed above, then adhesion will be even better.
The worker must wear a protective suit, gloves, goggles and a mask for personal protection.
The application process is not particularly difficult. A brush or paint brush is dipped into a container of whitewash and the solution is applied to the walls or ceiling in a thin layer. For ceilings, it is better to use a tool with a long handle. You can make it yourself. This will make your work easier and eliminate the need to climb on unstable structures made from tables and chairs.
Direction of movement of the brush or roller
Apply whitewash in several layers - 2-3. Each layer must be applied perpendicular to the previous one. This way the coating will be more uniform and there will be no streaks or thickening. There are often unbleached areas in the corners. In these places it is better to go through the brush again.
It is necessary to maintain a time interval between applying layers. The previous layer must dry completely. This will happen much faster if the layers are thin. The thinnest and most uniform layer will be obtained when using an electric spray gun. The lime mixture is poured into the tank and sprayed onto the surface in tiny drops. This eliminates the occurrence of divorces.
Spray gun - a solution to many problems
Despite the fact that the process of whitewashing walls and ceilings with lime is not difficult, for those who are faced with this for the first time, it may seem like an impossible task. Especially when it comes to high ceilings or extensive work over large areas. It's never too late to turn to a master - a professional in his field. He can easily do this job efficiently and much faster than a beginner.
Proven recipes for whitewash solutions
Traditionally, lime or chalk mortar is used to whitewash the stove. In old recipes for stove makers, there are options based on milk and egg whites. Modern craftsmen do not neglect new generation products. There are plenty to choose from!
Mortar
Lime is an accessible material in all respects. Lime solutions have bactericidal properties, and after drying they are absolutely harmless and do not cause irritation of the mucous membranes. Properly prepared lime mortar adheres well to plaster, stone and brick, is not afraid of temperature changes and can be used outdoors and in wet rooms, including baths.
To prepare the solution, it is better to buy slaked lime in the form of a dry powder. To whitewash oven equipment, it is recommended to use a ten percent salt solution instead of water. Salt makes the coating strong and prevents the formation of cracks.
Lime powder should be diluted in one third of salt water, thoroughly stirring the mass until smooth. If the solution is prepared from lime dough, then it is also diluted with salt water to the consistency of liquid sour cream. To neutralize possible yellowness, it is recommended to add diluted blue.
One liter of lime mortar is enough for about two square meters of area. Accidentally stained floors can be easily washed with clean water, but this must be done immediately, before the lime has time to dry.
Chalk based whitewash
Chalk is an inexpensive natural material that is easy not only to apply, but also to wash off. Using chalk you can get a rich white color, but every time you touch the stove it will leave white marks on your clothes. For whitewashing, chalk is used in powder form, which is sold in hardware and construction stores. When diluting chalk, do not be afraid of the gray tint of the solution - after drying, the stove will become crystal white!
To prepare the solution per liter of water, take 800 grams of dry chalk, but stove makers advise using skim milk instead of water, and adding natural laundry soap and wood glue for strength.
First, one and a half kilograms of sifted chalk are diluted in 3 liters of milk, after which the mixture is heated and a piece of grated soap and 100 grams of wood glue are added, continuing heating until the ingredients are completely dissolved. It is important to prevent the liquid from boiling! Before whitewashing the stove, the solution is filtered through cheesecloth and applied to the surface while warm.
Tooth powder solution
This recipe cannot be called the cheapest, but it has many admirers who claim that the finish does not get dirty and retains its original appearance for a long time, and the stove can be lit on the very first day after painting.
To prepare the solution, take 4 packages of tooth powder, 4 egg whites, and a glass of milk. All ingredients are mixed and allowed to brew for 10-15 minutes. The consistency of the composition should be similar to oil paint. This mixture is applied to a heated oven so that the milk and eggs “set” and gain strength. As the product is consumed, a new portion is prepared.
Russian stove in the house - whitewashed with lime and painted
The classic whiteness of the Russian stove is usually talked about from the standpoint of symbolism and with reference to historical traditions, comparing the design of the stove with the purity of the first snow, thoughts and healthy family life. There is also a practical aspect of whiteness - after all, lime painting is not just an environmentally friendly finish: walls and ceilings bleached with lime improve the air in the house and are resistant to both high temperatures and humid environments. The toxicity of lime whitewashes is zero at any degree of heating, and they can be used in both living rooms and bathhouses.
Fluff lime allows you to get a beautiful coating of bright white color, but everyone knows the disadvantages of lime paints: this is insufficient durability - the coating quickly becomes dirty and needs to be renewed, and also the fact that a bleached wall, when touched by clothes or hands, “whitens” everything, that touches her. To strengthen the whitewash and make it “whiten” less, add wood glue to the lime mortar. Another old method is to dilute lime with water and add skim milk or egg whites.
The first stage of finishing is always preparation. The new stove is plastered with a clay mortar or a composition prepared from a ready-made heat-resistant dry mixture, of which the market offers a considerable range. If the old stove is to be finished, prepare the surface in the standard way - clean it to a solid base, remove all weak areas of the old plaster and seal them with a heat-resistant mortar. Then the oven needs to be dried thoroughly. It happens that old plaster holds up perfectly, in which case it is enough to clean off the top dirt and soot.
Soot can be easily removed with metal brushes, and greasy stains with 2% caustic soda solution. Rust, if any, must be removed, since rust stains can penetrate through a thick layer of plaster, not to mention the lime layer. The best way to prevent rust stains from appearing is to treat metal parts with anti-corrosion compounds or oil paints (glyphthalic and pentaphthalic enamels).
Appearing rust stains can be removed with a solution of the following composition: 0.1 kg of copper sulfate in powder per liter of water.
Drying the oven takes at least two days. The plaster, which contains clay and fireclay powder, should dry slowly, and the walls of the stove should not be hot, but barely warm. In the first two days, the furnace is heated at least three times, gradually increasing the fuel load and heating time.
When quickly dried and subjected to sudden heating, the clay layer may crack due to uneven internal deformations, and then the new plaster may begin to lag behind.
If dried correctly, the clay layer acquires the strength of stone and properties similar to red stove brick (linear thermal expansion and heat capacity and heat transfer qualities).
Whitewashing the stove
Classic and inexpensive time-tested materials are chalk and slaked lime. For a country stove, these are budget-friendly, affordable and easy-to-use products, and subsequent painting or painting of the stove - at the request of the owner - can turn the stove into a decoration for a country house or even a country house. Considering that the Russian stove usually occupies the center of the room and a considerable part of its functional area, and is also the “heart” of the house and the highlight of the interior, beautiful painting is very relevant.
For whitewashing, it is better to use slaked lime, since the process of slaking lump lime, despite its simplicity, requires both space and time, and with an ignorant approach it can become a risk factor - the heat generated during this chemical reaction is enormous. It should be extinguished in a ventilated area, in a large metal container, and do not pour lump lime with water, but carefully place the pieces into the water. It is imperative to cover the boiling pot with a lid, stir it very carefully, and there must be a non-flammable base under the container. The wooden floor under the boiling bucket will most likely become charred. But it’s much easier to buy fluff lime.
Flax lime powder is diluted with water with a small addition of table salt until thick, reminiscent of very thin sour cream. Salt is added to make the whitewash stronger and not crack. The consumption of this composition is approximately one liter per two square meters. It is known how easily lime eats into wood and other surfaces. Therefore, everything near the whitewashing area is carefully covered. Fresh drops and streaks of lime are easy to remove, but dried, stubborn lime will have to be cleaned off repeatedly.
Dilution with the addition of skim milk and wood glue gives the best result - the stove “whitens” less, the coating stays clean longer. You can dissolve lime in hot water, or heat the composition, but in no case allow it to boil. When the mixture becomes homogeneous, filter it through a fine sieve, and then begin whitewashing. Whitening is traditionally done with wide fly brushes; it is also convenient to use rollers with a fur coat. The stove should be cold when whitening begins.
The first step is to moisten the plastered surface with water, then apply the first layer of whitewash. To avoid streaks, whiten with horizontal movements, and subsequent layers - the second and sometimes the third - are done until the bottom layer is completely dry, on a damp base. Then the whitewash should dry completely, within about a day, depending on the air temperature. After the lime layer has dried, they begin the most creative part - painting, ornaments or stencil designs.
Painting or stenciling
To decorate a stove with painting, it is not necessary to have the talent of an artist; this process is quite artisanal and requires only care and precision in application. There are enough stencils on sale for every taste, and you can choose a plant, floral or fairytale motif - as desired.
How to whitewash a stove without streaks
The whitewash solution is applied to the pre-moistened surface of a cold stove. There is no point in wetting the entire structure at once; it is better to treat small areas with water, taking into account the speed of work. It is recommended to whitewash with a wide paint brush or roller.
To avoid streaks, the first layer should be applied in horizontal lines. When working with lime mortars, you should begin applying the second layer without waiting for the first to completely dry. This time the movements should be vertical. It is advisable that the stove is not exposed to sunlight during operation.
Non-production methods
To paint the stove, you can use different materials, for example, use one of the traditional methods. It involves preparing paint on your own from available substances that are easy to find. To do this I need to prepare:
- Casein glue;
- Lump or grated chalk;
- Slaked lime;
- Gouache or water-based dye.
You do not need to use all of the ingredients listed. For painting I will take only part of these materials. But if one of the components is missing, you can use another paint recipe.
As a rule, everyone at their dacha has lime for whitewashing trees. This is what I use for work. To get quality paint, I will use 700 grams of slaked lime for every liter of water. You need to mix thoroughly so that there are no lumps left in the mixture. For this I use an electric drill with an attachment. It turns out quickly and efficiently.
If you need to get water-repellent paint, then after mixing, you can add 50 grams of drying oil and the same amount of table salt to the mixture. I mix everything again and get a good mixture that is completely ready for use. It is better to apply paint to the stove using a sprayer. This will make it faster and more productive. One coat will not be enough, so after an hour I will paint the stove again.
Another way to make paint from scrap materials is to mix chalk, water and casein glue. The question of how to paint the stove is not worth it for me, but I keep this option as a backup. For every kilogram of chalk I take 1.25 liters of water. I mix the mixture with a drill and attachment and add a little glue at the end of the process. It is needed to prevent dry paint from quickly shedding, which extends the time between repairs.
I will spray paint the stove to get a thin coating. Since a second time cannot be avoided, there is no point in making a thick layer. This will only lead to the formation of drips. You can begin the second painting only after the oven has completely dried. This is where the difference between the two types of homemade paint lies.
I want to talk a little about color. The stove does not have to be white. It can be given different shades using blue or gouache. The first one is now almost impossible to find, since it has been discontinued, but if someone still has stocks left, then you can safely use them. Gouache is easily diluted with water, which allows it to be used for tinting paint. The stove can be made in any color, the main thing is not to be afraid to experiment.
DIY artistic painting
If the classic white stove seems boring, it makes sense to decorate it with artistic painting. One should not think that only natural artists can do such work. As a basis, you can take ready-made stencils intended for painting walls, or transfer the image you like onto thick paper.
If the stencil does not have a self-adhesive base, it is first secured to the surface of the oven with tape. The outline is carefully transferred with a simple pencil and the missing lines are completed. For beginners, it is better to choose simple ornaments and patterns with large elements that do not require artistic skills.
Painting
Initially, beautiful Russian stoves were white, as if symbolizing the purity of the thoughts of the owners of the house. But in the modern world, stoves have not been installed in every home for a long time, so the meaning has gradually been forgotten. Many people find a simple white stove uninteresting, so they often make unusual paintings of stoves.
In order to paint a stove with your own hands, you do not need to be a great artist. Now it’s enough to choose the right stencil. You can find it in the store - a stencil for painting walls. Another option to make a stencil of a design for the stove is to find any image and print it on thick paper. The stencil is fixed to the surface of the oven using adhesive tape (or, if the stencil is “purchased”, it already has a self-adhesive base). It is then transferred to the surface using a colored pencil.
You can apply painting to the surface of the stove using a stencil.
If this is your first time dealing with such work, it is better to choose a simple design for a Russian stove. National patterns may be the best option: they will look harmonious on the stove, and also consist of individual simple elements that can be easily mastered.
You can color the pattern using whitewash, to which a coloring agent is added. It can be simple gouache, but it is better to purchase acrylic paints, which can withstand high temperatures much better.
The drawing itself is applied using ordinary artistic brushes of different sizes. After the drawing on the Russian stove is ready, it is not recommended to heat it for at least two days so that the paint can dry.
Photo gallery
What to whiten?
In stores you can find modern compositions for whitewashing stoves; they are made by different manufacturers, but they go under one name - putty. Before use, such a purchased composition must be diluted with water in a ratio of 1 to 2.
After treating the stove with it, its walls will have a well-groomed appearance for a long time and will not fade. Among the popular manufacturers, it is worth highlighting those whose products come at an affordable price and with a high quality composition.
| Brand | Volume, kg | Description | Price, in rubles |
| Master | 1 | For this product, you need to prepare the surface of the oven so that it is dry and dust-free. They can be used to repair small cracks and whitewash walls, ceilings and stoves. |
30
115
The best way to whitewash the stove in the house is up to everyone to decide for themselves; you can choose the appropriate one from the given means.
Prices for whitewashing
Using whitewash is considered the most inexpensive repair option. Construction crews also charge minimal amounts for whitewashing. Typically, whitewashing walls with an area of one square meter and using one layer starts from 50 rubles.
Naturally, the cost varies greatly and depends on many factors - surface contamination, cleaning application, application of lime in several layers. If you know your square footage, then it will not be difficult for you to calculate the approximate cost of all the work.
In conclusion, we suggest watching a video - useful tips from Professor Chainikov when whitewashing:
https://youtube.com/watch?v=2d1jNkyNQEo
How to prepare whitewash yourself?
There are three common methods for preparing a solution for whitewashing a stove, each of which has been used for decades.
Mortar
Whitewashing a stove with lime has been known for a long time; if you dilute 1 liter of the composition from it, then it is enough for 2 m2. The preparation of such a composition is as follows: take 40 grams of salt and dissolve it in water, then add 1 kg of lime to it.
Salt acts as a fixative; after applying such whitewash, the oven must be heated so that a smooth transparent layer forms on its surface. It is better to dilute this product with low-fat milk instead of water.
Chalk based whitewash
The chalk should be prepared: finely crush and sift, you need to take about 1 kg of this component, then pour 2 liters of milk and 50 ml of blue into it.
Some people neglect such scrupulous preparation and end up with a solution with various inclusions; after application to the oven, under constant exposure to high temperatures it begins to change color from white to yellow.
It is the blue that prevents such a transformation of the color of the stove. The prepared milk-chalk mixture must be used immediately so that it does not harden.
Tooth powder solution
This unusual product will give the stove a pure white tint and keep it for a long time. To prepare the composition, you need to take 2 boxes of tooth powder, half a glass of milk, 2 eggs. Any dairy product can be used, boiled or unboiled.
Only the whites are taken from the eggs, which are mixed with milk and powder; after standing for 10 minutes, the mixture can be used. Its consistency should resemble paint. After staining, the oven can be used the same day, but you should note that the smell of tooth powder will disturb you during the day.
Video description
Whitewashing the stove with hand-made lime.
Using chalk
When people are discussing how to start whitewashing a stove, they often remember the beneficial properties of ordinary chalk. This material has a bright, rich color, so it is widely popular among users. A significant disadvantage of the substance is its ability to crumble and get dirty, which complicates interaction with surfaces. Each time you touch it, white marks will remain on your hands and objects, which may not be to everyone’s liking. To prepare a chalk solution, use the following recipes:
- Mix the chalk with the liquid in a 2:1 ratio, after which you can immediately begin painting.
- Combine dry powder chalk with water or milk. Then you need to heat the crushed soap, add 100 g of wood glue to it and mix all the ingredients together.
- Chalk in milk is a traditional recipe for making whitewash. For it, take two parts of the first component and one part of the second.
Using chalk allows you to transform your hearth quickly and at low cost. The disadvantage of this method is the occurrence of streaks, so several layers of the product will be required when applying.
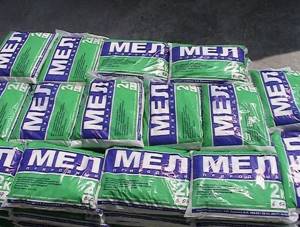
Powder chalk packaging Source kabel-house.ru
You should know that chalk turns grayish in water, but as it dries it becomes bright white. To get rid of yellow tones, you can add a little blue to the solution.
Powder for teeth
The advantages of the method are greater stability of the coating, a long period of its operation and the ability to use the oven immediately on the day of application. To whiten the hearth, take 4 packs of powder, 1 tablespoon of milk and 4 egg whites. All ingredients are combined and mixed thoroughly. Then the resulting mixture should be left to infuse, in the end it should look like oil paint. After this, you can begin the procedure. If there is not enough product, you need to knead it again.
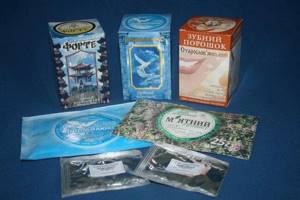
Types of tooth powders Source aptechki.com.ua
It is best to paint using this method in a heated oven, so that the coating becomes durable as it dries. If everything is done correctly, the result will be a flat and smooth surface.
Shpakril
This is a special tool designed for indoor work. It has many advantages, including the following:
- Resistant to moisture and liquids;
- Sold ready-made, diluted with ordinary water;
- Has a bright white tint;
- Does not leave marks on skin or objects;
- Allows you to eliminate small cracks.
A noticeable disadvantage of the material is its rather high cost, so not everyone can afford it.
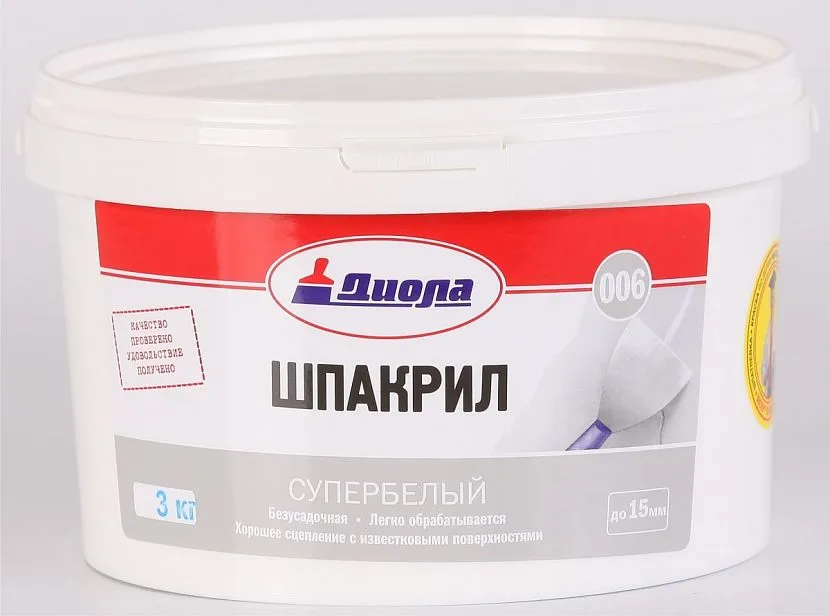
Super white putty in a container Source remontveka.ru
Special coloring compounds
When choosing a material for processing a furnace, you need to take into account not only cost, but also ease of handling, especially if a novice will be doing the work. An affordable and safe option are special paints, which can be purchased at any hardware store. When purchasing, you should pay attention to the packaging of the product - it must be resistant to high temperatures when the stove heats up. In this case, the coating will retain its appearance for a long time and will not form cracks or chips.
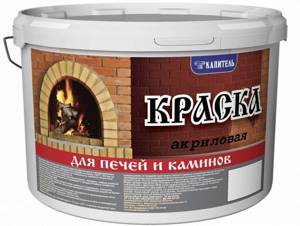
Acrylic paint for stoves Source kraski-kapitel.ru
How to whitewash a stove with your own hands?
First, you need to conduct a visual inspection of the stove; if there are deep cracks and chips on it, then they must first be covered in the old fashioned way with clay or specially purchased putty. It will not be possible to beautifully whitewash the stove without preparatory work; you need to carefully eliminate all defects so that your efforts do not go in vain.
Tools for work
Before whitewashing the stove, you should clean its surface with a broom or brush; for old exhibits, you can use a metal brush, but the main thing is not to damage the plastered surface with it. Then you need to determine the method of applying whitewash, for this you can use:
- A brush is chosen by those who have painted any surface more than once and are confident that they will do everything smoothly and without streaks. Before painting, it is advisable to soak the brush in water so that no hairs remain on the surface of the stove during whitewashing.
- A sponge is an alternative method; it does not give a clearly even color; it is used only for small stoves, since it will take a lot of time to obtain the desired painting density.
- Roller - suitable for both beginners and professionals; it covers a larger area with one stroke than with a regular brush. Applying the selected composition with a roller is very simple; the main thing is to move along the surface in the direction of the window to create uniform stripes.
- Spray gun - it is used for large stoves. It is easier to handle with two people: one person will maintain the required pressure in the device, and the second will monitor the uniform application of the composition filled into it. Before using it, you need to check the spray gun, and then constantly hold the spray gun at a right angle to the oven wall, while maintaining an optimal distance of 30 cm from it.
How to choose?
The choice largely depends on the location of the stove. If it is located outside, then the finishing putty should not contain gypsum (it is susceptible to moisture). You can also make working mixtures yourself. The solution must withstand the following standards:
To prevent the release of toxins when the mixture is heated, you need to choose it without asbestos in the composition.
- Heat.
- The composition must be elastic so that it can be used to easily create a perfectly flat surface.
- Resistance to cracks (so that the oven does not crack due to temperature changes).
- Be environmentally friendly during operation. Do not release toxins when heated. No asbestos in the composition.
- Durability, service life exceeds 50 years.
- High ability for adhesion or adhesion to substrates made of various materials.
Return to contents
Do-it-yourself whitewashing of the stove
Today, much is dictated by fashion and morals, the “house in the village” is increasingly becoming a trend, and few people, when rebuilding boyar mansions according to fashionable designs, think about what meaning our ancestors put into this or that interior detail, in particular in whitewashing the stove with their own hands. The Russian stove, which since ancient times was only white, today is painted in any color of the rainbow, including avant-garde paintings. Almost no future owner of a house with a Russian stove thinks that its white color symbolized the purity of the owners’ thoughts and peace and tranquility in the house. Only a few take this historical moment into account and carefully study chronicles and historical documents in an attempt to understand how to whitewash the stove so that it fully complies with traditions and does not catch the eye like a knight in full armor at a modern disco.
Workflow Stages
- First of all, divide the ceiling into several sectors. Each section needs to be finished gradually. The best option would be to start from the window and move towards the door. When working with a roller, give preference to a tool with a long handle. If whitewashing is done with a brush, organize small scaffolding. This design will allow you to move around the entire perimeter of the room.
- After applying the solution to the ceiling, wait until the first layer dries, and then treat the surface a second time. Sometimes you will have to apply the solution several times - this is due to the unevenness of the ceiling and the first experience in whitewashing (for more details: “White the ceiling with your own hands: easy and economical”). The resulting moisture on the ceiling must be rolled out over the surface.
- By evenly distributing the chalk solution on the ceiling, you will get the best result. Under no circumstances should you rush. It is also recommended to refer to photo and video materials.
Whitewashing the ceiling with chalk, watch the video:
Decorative finishing of the stove
In order to give a newly built stove a pleasant appearance, there are many ways; describing each of them does not make much sense, so we will focus on the most popular and common ones. (See also: Simple DIY oven)
Tiling the stove. Perhaps the most universal method of decorative finishing of stoves, due to the widespread use of ceramic tiles, this method is gaining more and more popularity among people who do not strive for the historical correspondence of the stove and who love simplicity. But this finish has several disadvantages, one of which is that under the influence of temperature, the tile heats up unevenly, which causes minor deformations and the tile “looses” its fastening. After several heating cycles, such decor may begin to fall off and will have to be reinstalled.
Using tiles to decorate a stove increases its beauty and reliability of the coating several times. These specially made ceramic tiles require specific installation skills, and their price itself is quite significantly higher than regular tiles.
The simplest and most affordable way to give a structure a “marketable” appearance is to whitewash the stove with chalk, which allows you to obtain an attractive and inexpensive coating without resorting to significant costs. The disadvantage of this decor is the need for periodic updating.
(See also: DIY stove painting)
Another way that won’t be too difficult for the owner of the stove is to paint it with regular floor paint. The method seems to be simple and reliable, but after 2-3 months the entire gloss of the coating begins to fade and peel, and it will have to be completely renewed at least once a year.
Solutions and mixtures for restoration
External defects on the stove can be corrected using several compounds; Some of them are mixed independently, others can be purchased ready-made. Each of the compositions has its own characteristics, but all of them will reliably seal the cracks and prevent carbon monoxide from entering the room.
Fireclay putty
Chamotte is clay with fire-resistant properties, a professional option for stove restoration. Chamotte is sold in construction stores; it has valuable advantages. It is often chosen by owners when evaluating options for how to coat the stove to prevent it from cracking.
The main advantage is the combination of heat resistance and strength. After application and drying, the clay becomes vapor-tight and moisture-resistant
It is also important that fireclay is a natural, healthy material suitable for use in residential premises
To prepare the mixture for restoration, mix one part of M-500 cement, two parts of fireclay and seven parts of river sand. Water is added until a plastic consistency is obtained. The materials are pre-prepared: sand and cement are sifted, clay is soaked in water for several hours.
Fireclay putty recipe Source tproekt.com
Sand-clay mixture
An inexpensive solution for restoration is made from ordinary building clay and sand. The mixture is quickly prepared and serves as a quick solution to the problem of how to cover the stove so that it does not crack. The mixture is prepared according to the following recipe:
- To obtain a solution, the clay is poured with water at the rate of one part clay to three parts water.
- The clay is infused for 24 hours, then it is mixed and sifted through a sieve with a mesh size of 3x3 mm.
- The solution is allowed to settle and excess water is drained. The remaining solution should have the consistency of thick sour cream.
- River sand is added to the container in a 1 to 1 ratio and mixed with clay until smooth.
Then the mixture is brought to the desired condition - sand is added to it in parts; As a result, there are 2.5 parts of sand for one part of clay. If you plunge a shovel into the container and pull it out, the correct mixture remains in homogeneous clumps. After application and drying, the sand-clay layer remains flexible enough to withstand high temperatures.
Kneading claySource notperfect.ru
Ready-made adhesive mixtures for stoves and fireplaces
Construction stores offer glue for repairing fireplaces and stoves, eliminating the problem of covering up the stove. There are two options for glue, plastic and hard, with the following composition:
- The filler for all brands of glue is quartz sand.
- Binder: a mixture of fireclay and sand, or heat-resistant aluminosilicate cement and kaolin,
- Mineral plasticizer: fireclay fiber, liquid glass or soapstone flour (furnace or soapstone).
The main advantage of industrially produced glue is its uniform texture, which cannot be achieved at home. Different brands are characterized by different limits of heat resistance, as evidenced by their characteristics: the composition can be heat-resistant, heat-resistant or heat-resistant. The composition and temperature ranges are indicated in the instructions.
The glue is quickly prepared for use and sets quickly, so it is prepared in small portions. Plastic varieties are applied to cracks and cracks, while hard ones are intended for plastering the entire surface.
Grout adhesiveSource wp.com
Ash grout
Homemade grout allows you to save on purchasing factory mixtures, and the result is no less high quality. To prepare a solution of ash and salt for the stove, perform the following steps:
- Wood ash is sifted. If there is no ash, you can take coal slag.
- Quicklime is diluted with water at the rate of 2-3 kg of lime per bucket of cold water, as for whitewashing.
- Ash (6 liters by volume) is mixed with 1 kg of salt.
- Add slaked lime (4 l) to the mixture and mix everything thoroughly.
Options for whitewashing the stove
Let's look at the simplest way to give the stove a neat look, which was used by our grandfathers and great-grandfathers. But even in this case, there may be several options for whitewashing.
Whitewashing a stove with lime is one of the most common ways to decorate a stove. The lime mixture is quenched with milk or a solution of table salt in water. The brine solution is prepared in the proportion of 100 parts lime and 4 parts salt per liter of water. The resulting composition is poured into lime and a thick, viscous mass is prepared.
(See also: How to decorate a stove with your own hands)
The advantage of using lime as a finishing material is its high availability and reliable contact with brick or clay. The lime mixture also has bactericidal properties.
The disadvantage of using lime can be that even in the “slaked” state it remains quite active and caustic, which can lead to burns, especially for people with sensitive skin.
There is an option that we inherited from our ancestors - whitewashing the stove with a stove bench with chalk and preparing a mixture with skim milk. After milking, the milk is placed in a warm place for several hours, as a result the cream rises and is skimmed off with a spoon; the skim milk remaining in the jar is used for mixing with chalk. You can also use ordinary water to mix with chalk, but in this case it is necessary to add a little water-based glue to the resulting mixture - bustylate, paste, etc.
(See also: DIY Russian stove repair)
The advantage of using chalk mixture as a decorative finish for a stove is its high availability and environmental friendliness. When working with it, inconvenience can only occur in a person with respiratory tract diseases; for others, the mixture is safe.
The disadvantage of using chalk is that it washes off easily and this can lead to the need to periodically repaint, and in important environments it is better to avoid chalk altogether.
A recipe that appeared relatively recently and the main component in it is tooth powder.
Choice of solution
I’ll immediately answer the most frequently asked question: is it possible to putty a stove with regular putty? So, forget about this idea right away; temperature deformations will destroy your efforts in a couple of months. The plaster layer will first crack and then begin to fall off in pieces.
Then how to putty a brick stove if conventional compounds are not suitable? There are 2 options here:
- Make a mixture for puttying stoves according to old grandfather’s recipes. The option is quite suitable and we will also talk about it, but homemade putty is well suited for an inexpensive country stove; an amateur cannot make a work of art from such a composition;
- Buy ready-made factory mixture. This thermal putty would be a good solution for a beginner: you will save a lot of time, you definitely won’t make a mistake in the proportions, and then there are instructions. Plus, factory-made compounds are an ideal option for decorative finishing, for example, under brickwork, although the price will be higher.
What does the market offer?
It is not necessary to look for a mixture that says that it is specifically a putty for stoves; the vast majority of modern heat-resistant masonry mortars are excellent for finishing. Please also note that the prices in the article are current in the spring of 2017.
| Illustrations | Recommendations |
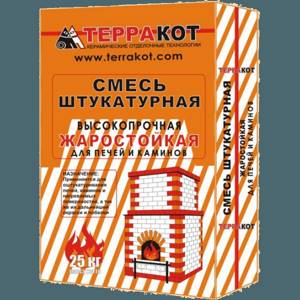
| Terracotta. Heat-resistant putty for stoves from the Terracotta brand is considered one of the market leaders.
|
| "Termo +999" from the "PRO" brand. High-quality universal repair and putty mixture:
| |
| "Pechnik" In terms of popularity rating, it is on the same level with mixtures of the “Terracotta” brand.
| |
| Clay-sand mixture. From my own experience, I can recommend a clay-sand mixture from the Makarov Stove House brand. In general, this manufacturer produces masonry stove mixtures; I haven’t seen any putties from them specifically, but these mixtures are also suitable for finishing and the quality is really good. |
Grandfather's recipes
In all folk recipes, the main component is clay. But there is a nuance: for laying and finishing stoves you need to take the fattest clay you can find.
The simplest fireproof putty for a stove is a mixture of clay and sand. There is no universal proportion in this case; it must be selected experimentally depending on the fat content of the clay.
If you dig clay yourself, then take it from a depth of at least 1 meter from the line of the beginning of the fertile layer of the earth.
| Illustrations | Recommendations |
| Soak the clay . The clay is soaked in water for at least a day, then it needs to be mixed well. It is better to mix with a construction mixer. | |
| We wipe the clay . The cleaner the putty, the better the result, so you need to take a fine sieve (up to 2 mm) and rub the clay milk through it. | |
| We wipe the sand . We wipe the sand in the same way. Only quarry sand should be taken, since river sand can cause severe shrinkage of the mixture. | |
| Mix the mixture. As a rule, 2 parts sand go to 1 part clay, but if the clay is oily, then you can put 2.5 parts sand. The video below in this article shows in detail the process of mixing and determining the quality of the clay-sand mortar. |
In addition to the simplest clay-sand mortar, there are also various variations; slaked lime, alabaster, horse or cow manure can be added to it. Fiber (loose fiberglass) is often added for reinforcement.
In proportions it looks something like this:
- Clay – 1 hour, sand – 2 hours, lime – 2 hours;
- Clay - 1 tsp, sand - 2 tsp, alabaster - 0.3 tsp (this composition hardens quickly, shelf life up to half an hour);
- Clay - 1 hour, sand - 2 hours, cement - 0.3 hours, fiber - 0.1 hours (take grade 500 cement);
There is another option to add asbestos powder instead of gypsum or cement, but I do not recommend it, the fact is that asbestos is quite harmful and cannot be used inside residential premises.
Whitewashing the stove. How and with what to whiten a stove
To prepare the mixture you need the tooth powder itself, 2-3 eggs and milk with 1.5-3 percent fat content.
(See also: Laying a Russian stove with your own hands)
The advantages of the mixture are not very different from chalk, but due to the fact that the powder is finer ground, the mixture prepared on its basis practically does not require additional cleaning and sifting procedures before whitening the stove.
The disadvantages are basically the same as those of the chalk mixture, but they also add the difficulty of acquiring tooth powder in sufficient quantities.
Of all the proposed methods of decorative whitewashing, the most reliable and affordable is lime mortar. Therefore, we will consider it in the future.
Traditional painting methods
Homemade varnish
At home or in the country, you can whitewash the stove with paint prepared at home and using safe materials. A homemade solution is prepared in this way:
To make homemade paint you will need egg whites.
- Grind the red brick to a powder, then sift through a sieve.
- Add egg whites and fresh milk to the powder until the consistency of the mixture resembles thick sour cream.
- Mix the ingredients well.
The solution is applied to a warm surface, after which it is recommended to additionally coat the brick with drying oil or varnish. This coating will last a long time because the mortar protects the brick blocks from cracking and abrasion. This option will look great in an interior with natural accents.
To prevent the brick stove surface from getting dirty, it is recommended to first heat the device well, and when it is hot, apply a thick layer of beaten egg whites. Then the whitewash will remain clean for a long time, and any dirt can be wiped off with a damp towel.
Return to contents
Lime-chalk whitewash
This option is considered simple and cheap, but these are not the main advantages. A stove whitened with lime becomes moisture resistant and can withstand temperature changes. To prepare the solution, use:
For finished whitewashing you need to grind the chalk.
- crushed chalk and diluted in water;
- lime;
- gelatin or wood glue.
The resulting solution is applied to the surface in 2-3 layers; before applying it is important to make sure that the previous layer has dried. After this coloring, the stove becomes snow-white; if you want to make a blue tint, it is recommended to add blue to the solution. The stove is also often painted with water-based paint. When choosing a material, you should pay attention that the composition does not contain an emulsion of PVA and styrene butadiene, since these elements react poorly to high temperatures and quickly crack.
Return to contents
Whitewashing the stove with lime mortar
The first place to begin the procedure for treating a stove with lime mortar is preparing the surface of the stove itself. We will not consider the procedure for puttying and priming a new stove; there are separate topics for this, but let’s move straight to preparation for whitewashing.
The furnace is inspected in an attempt to find areas covered with soot. If there are any, then you must first completely clean or wash them, otherwise after whitewashing blackness will appear in these places. Washing is used if the soot has not yet had time to eat into the clay well. If the furnace has been in operation for several years, then the best way to clean it from soot is to use a metal brush. Just be careful not to cause excessive damage to the plaster.
It is necessary to carefully inspect the stove for cracks and chips on the surface that appeared during operation. If such elements are found, then it is necessary to prepare a clay solution and cover them up, and small cracks, the so-called cobwebs, can be eliminated simply by wetting the clay that makes up the stove putty.
After preparing the surface of the stove, you need to prepare a lime mortar that will be used to whitewash the Russian stove with your own hands. To do this, take quicklime and pour it into a metal container; an old enameled basin or galvanized bucket is quite suitable for this. Before starting the extinguishing procedure, it is necessary to go out into fresh air or be in a well-ventilated area. If a universal plastic mass is needed for whitewashing, then dilute the existing lime with salt water in a ratio of approximately 1 to 4 and mix thoroughly. If you just need to lightly whitewash the stove over the existing whitewash, then you can dilute the lime with salt water 1 to 1. After you have a homogeneous mass in the container, you need to leave it for an hour in order to completely eliminate the active reaction of the mixture during its further use. After the chemical reaction has stopped, the water is allowed to evaporate, and the lime, after removing the water, is preferably crushed into a fine fraction for ease of further use.
Painting the stove surface
Before painting the stove, you should make sure whether it needs to be restored? Restoring the surface of the stove with your own hands will not take much effort and time, but will protect it from cracks, damage and the negative effects of time.
Recommendations for performing the work:
- The outer part of the warm oven is treated with a brush with a special environmentally friendly varnish that is resistant to prolonged high temperatures and mechanical damage. To do this, you can use a mixture - varnish, prepared by yourself. Make a mixture of flour obtained from tap bricks, milk and 10 egg whites. It should be thick and viscous, then the surface will be a uniform red color.
- To give the surface a dark red matte hue, you can apply drying oil.
- If you want to get a shiny effect, you can coat the stove with oil or synthetic varnish.
- Shades of latex coloring composition will help satisfy color preferences.
A mixture of turpentine and varnish PF-283 can also be used as paint for the stove. Taking equal proportions of these substances, a transparent, slightly matte substance is obtained. It can be given the desired color. To do this, the dried gouache, ground into powder, is first carefully sifted, then added to the mixture, achieving the desired result.
Painting other oven elements
In addition to the surface, the oven also has other elements: a door, a lid, etc. Since they are made of iron or cast iron, it is quite possible for rust, soot, or stains to appear on them after whitewashing. For painting them, heat-resistant and heat-resistant enamel in the form of aerosols is recommended. The prepared surface is not primed, but painted immediately. Your stove should be the most beautiful, remember this!
Options for whitewashing a Russian stove
To prepare the solution, you need 2 liters of milk and 1 kg of chalk. That is, the composition proportion is 2:1. Crush the chalk into dust, use a mortar. Sift through a fine sieve: there should be no stones or large fractions in the material. Pour in milk and immediately begin whitewashing.
Tip: at high wall temperatures, the composition may turn red. To avoid this, add 50 ml of blue to the prepared solution. This is about a quarter of a glass.
Protein and milk composition. To whiten the stove in this way, you will need 100 ml of milk, two chicken egg whites and 2 boxes of tooth powder. Mix the ingredients, you should get a mass similar in consistency to sour cream. Do not make large volumes of the product: the protein coagulates quickly.
Lime-salt composition. Everything is simple here: you will need 1 kg of lime and 40 g of salt (two heaped tablespoons). Prepare the solution as for regular whitewashing, dissolve the salt. After finishing work, light the oven. When heated, the salt melts and covers the surface with a transparent and even layer.
The modern method is putty . If there is a hardware store nearby, buy a jar of putty. Dilute with water in a ratio of 1:2 and start whitewashing. Experienced craftsmen claim that this treatment of the wall surface is durable, does not stain clothes and does not fade.
A stove so indispensable in a private home for its practicality of use, independence from gas and electricity, still has its drawbacks. We will not list them all, but according to the thematic feature of our article, one of them is the release of exhaust gases through fittings, cracks, etc., which as a result leads to the deposition of soot on its walls. At the same time, the stove can get dirty; the stove also loses its attractive appearance and stands out from the interior of the house. The solution to this problem is to whitewash the stove.
In fact, whitewashing a stove is not such a complicated procedure; it is similar to whitewashing a ceiling. The difference is that it is usually even more convenient to whitewash the stove, but with the peculiarity of applying a thicker layer of whitewash to certain parts of the stove.
The first step is to remove part of the surface layer where most of the soot has settled. If we don’t remove the soot and start whitening, it will begin to show through, and we won’t be able to whitewash this area to its original whiteness. It is best to remove the top layer with a steel wool for washing dishes or a metal brush, but this must be done more carefully with a brush, since it is harsher and its use can lead to deep scratches on the stove.
Next, you need to wet the oven with water. Applying whitewash to a dry oven surface will be difficult, as the whitewash will roll into balls and be poorly absorbed. The oven can be soaked with water in parts, in accordance with the speed of whitewashing and the areas intended for whitewashing. At the same time, try to wash off any remaining soot if possible.
Now you need to inspect the stove and if there are cracks, or the plaster has crumbled somewhere, then it needs to be restored. You can use a brush to apply the putty. Its advantage in use is that it follows complex surface contours, filling in depressions and chips with hair putty. Or use a more traditional putty spatula. For whitewashing and puttying, you can use putty. More detailed information about putty can be found in the article “Shpakryl”.
We dilute the whitewash solution.
Preparing for work
It is imperative to use a reinforcing component, including chopped straw, sawdust or crushed fiberglass. The primacy of natural ingredients, environmentally friendly. Before starting work, the craftsmen carry out preparatory activities:
- If there is previous plaster on the stove, then it needs to be rubbed off.
- Wash the brick wall (remove dust, dirt).
- Make the joints between the bricks up to 1 cm deep, which improves the adhesion of the mixture to the surface of the object.
- After working with the seams, clean the surface again.
- Covered with a heat-resistant primer mixture.
- The mesh is secured (as needed) with large nails. They are driven directly into the seams.
Return to contents
