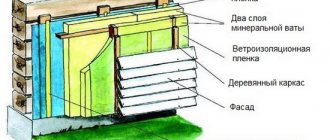
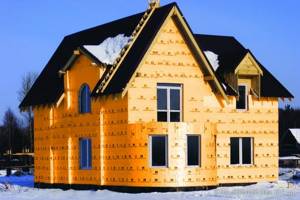
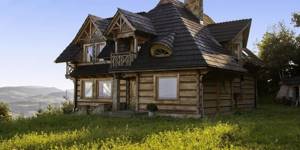
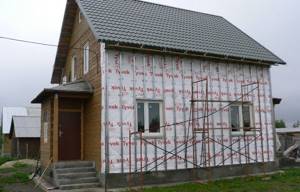
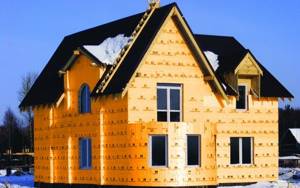
A wooden house needs insulation, like any other structure, although wood itself is a good heat insulator. The outer cladding also performs a protective function. The wooden base, lined with an insulating layer, will last longer.
In any building, the walls that need most insulation are the walls. Heat loss from wall surfaces can be 30%. The thermal insulation layer can be placed on the walls both inside and outside the room. But preference is given to external insulation with penoplex.
Advantages of external insulation
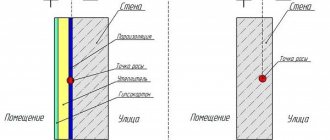
If you insulate a house, including a wooden one, from the inside, the dew point shifts. Thanks to this indicator, the required temperature level is determined. If the temperature is below the required level, condensation will form. The dew point in this case will be located inside the building. As a result, humidity will increase, the walls of the room will “sweat” and various molds will appear.
In addition, if you carry out interior decoration of the building, this visually reduces the space. Another negative factor of internal insulation is the general deterioration of the indoor climate. If the house is insulated from the inside, the wood will not be able to “breathe,” and this also negatively affects its properties.
Insulating a wooden house with Penoplex eliminates all these negative aspects.
The importance of insulation
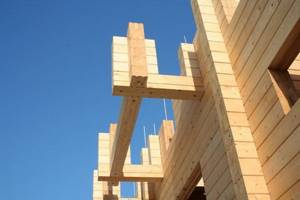
Due to the fact that construction technologies for houses made of timber came to us from Western countries, where, as we know, winters are much milder, houses made from this material turn out to be quite cold for our conditions. Although 150x150 timber is an inexpensive material, and this explains its popularity, but, on the other hand, if you live in such a house without high-quality insulation, then in frosty winters you can “compensate” for this savings with huge electricity bills and go broke on heating.
Therefore, insulating houses made of 150x150 timber is a necessity. But after the work has been done, you will be able to enjoy a beautiful, warm home for many years, and get by with short-term (and therefore profitable) heating of the room, even in cold winter. But this information will help you understand how the facade of a house is insulated with modern materials.
Is it possible to insulate a wooden house with EPPS?
Wall insulation with Penoplex is allowed only in frame houses.
Insulating a wooden house with Penoplex is not always possible. First of all, you need to look at the design of the house itself. For example, if it is a frame, then polymer materials can be used to insulate any structural elements. If we are talking about structures made of logs or timber, then insulating a wooden house from the inside with Penoplex can still be allowed, but external insulation of walls in this case is simply excluded.
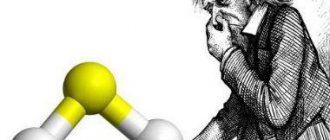
Such limitations are associated with the characteristics of extruded polystyrene foam. It practically does not allow steam to pass through, the coefficient is only 0.013 mg/m*h*Pa. For ordinary foam plastic, this value is five times higher, not to mention natural wood, which transmits steam in a volume of 0.32 mg/m*h*Pa.
The use of extruded polystyrene foam will disrupt the natural circulation of air, and the house will stop breathing.
As a result:
- moisture accumulates in the wood structure;
- harmful microflora is actively developing;
- the wood fibers are destroyed and the material rots.
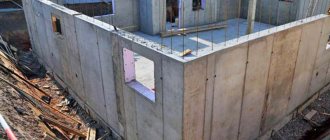
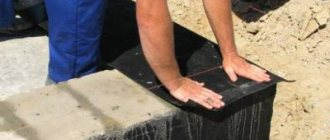
Insulating a wooden house from the inside with Penoplex means installing thermal insulation in the floor and attic floor, on the roof, but not on the walls. At the same time, you need to understand that we are talking about the theoretical possibility of using extruded polystyrene foam. The material is very expensive and therefore it is mainly used only for insulating the foundation or basement. This type of work can be attributed to the insulation of a wooden house from the outside with Penoplex, since the foundation and base are also structural elements of housing.
Eps and wood
Extruded polystyrene foam has a separate “relationship” with wooden walls.
If you want wooden walls to “breathe”, then this option will require another insulation for the walls of the house outside under the siding. Penoplex simply prevents water vapor from escaping - the wooden wall will rot, and as a result, the walls of the house will become unusable.
To prevent this from happening, the wooden walls on the interior side are lined with vapor barrier - a film that does not allow water vapor to pass through, leaving it in the room.
In this case, water vapor does not enter the wall and, as a result, there is nothing to condense between the wall and the layer of vapor-tight insulation.

For the same reason, it is possible to use EPS as insulation in a frame house, because the inside of the frame is covered with a vapor barrier with overlap and taping of the seams.
However, in this situation there are two important additions for a wooden house:
- Since wooden walls now do not allow water vapor to pass through, proper exhaust ventilation must be organized to remove this vapor from the interior to the street.
- By installing a vapor barrier from the inside on wooden walls, you actually turn your home into a “thermos”. Are you sure this is what you want?
As for timber, timber is also wood. I think that after reading this section, you yourself can now tell us how to properly insulate a house made of timber from the outside with penoplex under the siding.
Features of the material
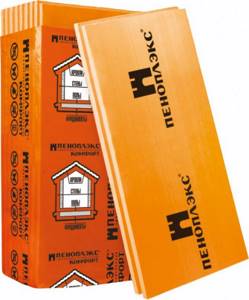
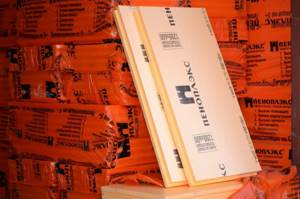
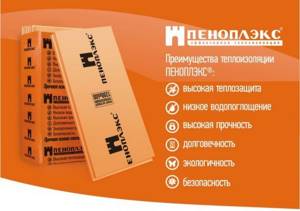
Penoplex is an extruded polystyrene foam - insulation produced using a special technology, thanks to which the output is a material with improved strength properties. You can read about the characteristics and advantages of EPS in the article “Step-by-step instructions for thermal insulation of a log house with polystyrene foam.”
Insulation characteristics
- Water absorption. The material shows minimum values for the volume of absorbed liquid. In this case, water, if it penetrates, then only into the upper layers, inside the structure consisting of closed cells, the access of liquid is completely closed;
- thermal conductivity. The performance of penoplex is very low - 0.03 W/m-K, and the values remain unchanged, regardless of operating conditions. Therefore, the material can be used for thermal insulation of the roof, foundation, basement, as well as floors and basements;
- environmental friendliness. The insulation meets environmental standards, which is confirmed by relevant certificates;
- vapor permeability. This indicator also has low values. The material does not allow steam to pass through itself, which on the one hand can be called a positive property, since condensation does not accumulate in the insulation, which, at critical values, transfers to wooden walls and causes rotting. But on the other hand, the material does not allow the wood to breathe, which contributes to the creation of a greenhouse effect in the room;
- strength. As a result of using the extrusion method, a homogeneous material consisting of tiny cells is obtained. This structure provides high compressive strength;
- chemical resistance. The insulation interacts well with a large number of substances used in construction: alcohol- and water-based paints, acids, alkalis, oils, concrete mixtures, etc.;
- life time. The material retains its properties for 50 years;
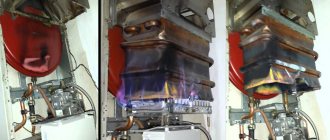
- fire safety. Penoplex has a flammability class of G4, which indicates a fairly high degree of flammability. Therefore, when using the material, it is necessary to use fire retardants;
- operating temperatures: from -50 to + 75 degrees.
When heated, the insulation releases harmful substances, so it is not recommended to use it for thermal insulation of the walls and floors of baths and saunas, where the temperature can reach up to +95 degrees. It is especially dangerous to use it to insulate the ceiling of a steam room, since according to the laws of physics, heated air is always directed upward.
Types of Penoplex
The manufacturer produces several types of penoplex, which have different densities and differ in some technical characteristics. The following types are intended for insulation of houses made of timber and logs:
- Thermal insulation boards for insulation of external and internal vertical structures: walls and partitions. The insulation has a milled surface, which improves adhesion to adhesive and plaster solutions. Density 22 kg/m3.
- Universal insulation of the “Comfort” series. Suitable for finishing floors, including on the ground, plinth, foundation, roof, walls. The material can withstand high humidity well, so it can be used for thermal insulation of bathrooms, bathhouses and saunas. Density from 22 kg/m3.
- Thermal insulator for pitched roofs. The material has a U-shaped edge on all sides, thanks to which the plates fit comfortably and easily. As a result, a flat surface is created, due to which the thickness of the thermal insulation is significantly reduced. Density 26-34 kg/m3;
- Foundation cladding slabs. The material is characterized by increased strength and wear resistance and can withstand increased loads. Used to insulate foundations, floors, and basements. Excellent for finishing garden paths. Density 27-35 kg/m3.
A little theory
Regardless of the material of the walls, in the house, the external enclosing structures that provide the heat transfer resistance required by the standards are subject to drafts, and in the absence of proper ventilation, mold forms, fungus affects the walls and ceilings.
In the case of a wooden house, the walls of which “breathe” - releasing water vapor through the natural pores of the wood - improper insulation without ventilation will lead to the formation of mold. In order to prevent such a disaster from happening, the insulation design must freely release steam, which means that each subsequent layer in the direction of the street must have greater vapor permeability.
For wood, this figure is 0.06 mg/(m*h*Pa), for penoplex – 0.018 mg/m*h*Pa. That is, when insulating the outside of a house with penoplex, water vapor will settle on the surface of the wooden wall, which will gradually lead to its rotting. This disaster can be avoided by laying a vapor-permeable film and an air gap between the insulation and the wall.
This solution will allow steam to be removed outside, condensate to accumulate on the vapor barrier, and then ventilated through the air gap. Since penoplex has minimal water absorption (from 1 to 4%, depending on the brand), water vapor coming from the house will not significantly affect its thermal conductivity, and low vapor permeability will not allow water vapor from the atmosphere to penetrate to the wooden wall.
IMPORTANT: Insulating an external wooden wall with penoplex from the inside due to the low vapor permeability of the material will require the creation of a forced ventilation system, since the steam will not have access to the outside.
useful tips for insulating the walls of a timber house with your own hands
How warm can a log house be? Wood is quite rightly considered a warm material that provides good protection from the cold. In fact, wood is about five times warmer than brick, and foam concrete is 2-3 times warmer. But what happens in practice and how to make a house really warm?
Heat engineering issues
In order for the house to be warm, its walls and other enclosing structures must have a certain resistance to heat transfer. In accordance with SNiP 23-02-2003, the heat transfer resistance of external walls of residential premises is determined depending on the terrain.
For example, in the Moscow region, according to new standards, this indicator should not be less than 3.13 K m 2 /W. A wall 150 mm thick, made of pine timber, has a thermal resistance of about 1.25. With a thickness of 200 mm - approximately 1.6 K m 2 / W. In any case, the thermal insulation properties of timber walls do not meet modern requirements, although they are fully within the standards in force for buildings built before 2000.
From this we can conclude that in order for a log house to comply with modern ideas about minimum energy efficiency, it is necessary to insulate it, and for this there are various materials.
How to insulate a timber house?
Before you begin work on insulating walls made of timber, you need to understand what is happening in the thickness of the wall, how it works to save heat.
In addition to the temperature difference on the inner and outer surfaces of the wall, we must not forget about the difference in humidity. The air humidity inside is always higher than outside. Steam penetrates the pores of the wood and moves towards lower partial pressure - towards the outer surface.
The most effective method of insulation is external thermal insulation. With this method, the wall always remains warm and is not affected by frost damage. But it is very important that the insulation is sufficiently permeable to steam. High humidity in the walls can quickly render a wooden house unusable, and create a very unpleasant, pathogenic microclimate inside.
Among modern heat-insulating materials, mineral wool is the best at transmitting steam. For comparison, we can cite the vapor permeability of wood and various insulation materials.
- Pine across the grain – 0.06 mg/(m h Pa).
- Polystyrene foam (expanded polystyrene) – 0.05 mg/(m h Pa).
- EPPS – 0.013 mg/(m h Pa).
- Mineral wool – 0.5 mg/(m h Pa).
From the above data it is clear that the best material for insulating a house made of timber from the outside is mineral wool. The advantage of vapor permeability is so great that it outweighs the not-so-low cost of mineral wool.
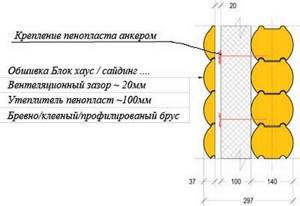
The best conditions for moisture removal are created by a ventilated façade, in which an air gap of 20–50 mm thick remains between the insulation and the outer cladding. There should be air access from below and exit from the top. In this case, a constant air flow is created in the gap, which prevents moisture from accumulating.
To prevent transverse diffusion of air into the insulation, it is covered with a windproof membrane, which does not prevent steam from escaping, but increases the efficiency of thermal insulation. For exterior cladding, you can use vinyl siding, blockhouse, or other suitable material.
Warming step by step
How to insulate a house made of timber: you can cover a new timber house with thermal insulation only after it has completely shrunk. In any case, insulation of timber walls must begin with surface preparation. It is necessary to remove moss, clean areas damaged by rot or mold, treat the walls with an antiseptic and caulk the cracks.
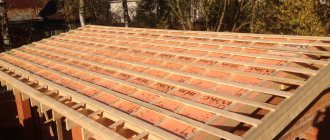
The next stage is installation of the sheathing. It can be made from wooden blocks of a suitable cross-section, or from metal wall profiles for drywall. The profiles are installed vertically, every 40 - 50 cm.
Selection of insulation
In this article, we decided to reveal to you all the nuances and subtleties of the technology of floor insulation with polystyrene foam, as well as extruded polystyrene foam. And all because this material is perfect for any structure. And a wooden house is no exception.
Unlike other insulation materials, polystyrene foam is really cheap. Ordinary polystyrene foam costs almost 2-3 times less than mineral wool. At the same time, their basic thermal insulation properties are practically the same.
Moreover, polystyrene foam reacts even better to moisture when insulating a house made of aerated concrete from the outside. That is, he does not react to her at all. Its water absorption coefficient is only 0.5-1% of the total volume.
What is penoplex?
There are a great many types of insulation. Penoplex and expanded polystyrene occupy a special place in this list.
Actually these are names of the same material. Expanded polystyrene, or to be precise, extruded polystyrene foam, is the general name for polymer insulation made from styrene. Penoplex is the brand name for expanded polystyrene.
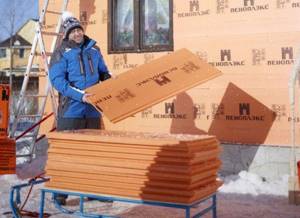
Penoplex is produced in the form of slabs with a thickness of 2 to 15 cm. Size 60x120 cm with a mounting groove on the long side.
The advantages of the material are:
- Low thermal conductivity;
- High strength (compression index – 27t/m2);
- Low water absorption coefficient;
- Durability (does not rot and decay up to 50 years);
- Resistant to temperature changes.
Penoplex has one drawback - low fire resistance.
But since the entire volume of material will be hidden underground, this indicator will not have a negative impact on the structure of the foundation. However, this should be taken into account if you want to insulate the entire house from the outside.
This material should not be used indoors either. Styrene emissions can have negative health effects.
Flaws
When choosing penoplex for thermal insulation of a wooden house, you should also take into account the disadvantages of the material. The main one is flammability.
A wooden house itself is a fairly hot structure, and the use of materials with a low fire safety rating only increases the likelihood of a fire.
Another important disadvantage is the high vapor permeability rate. If a high-quality vapor barrier is carried out before thermal insulation of the house, then this drawback can be ignored.
Penoplex is usually treated with flame retardant compounds that prevent combustion. Such material does not burn, but melts slowly, gradually dying out.
Some aspects of the insulation problem
We want to explain how to insulate a log house with penoplex. This is a material produced using the extrusion method, which provides a mass of uniform consistency.
I would like to immediately say that penoplex is an environmentally friendly material, non-toxic, homogeneous (it has virtually no micropores through which moisture can penetrate under the insulation).
In addition, the material does not rot, it is durable, reliable, can withstand high loads, is characterized by high fire safety, minimal thermal conductivity, and ease of use.
True, insulating a house made of timber with penoplex is also characterized by some disadvantages, the main of which is the impossibility of treating it with organic solvents, since they violate the structure of penoplex, the complexity of fitting and cutting, as well as the rather high cost.
Since it is best to start from quality, and no one is going to treat the material with acetone anyway, let’s talk about insulation with penoplex and polystyrene foam, as a more budget-friendly option.
Those for whom the amount turns out to be unaffordable can insulate a log house with polystyrene foam. The material is distinguished by the presence of a large number of air bubbles, which are a natural barrier to thermal conductivity and give the material incredible lightness.
Zones for insulation
Insulation with expanded polystyrene can be done in almost all areas of a wooden house. That is, any designs are processed.
It is very important to finish both the inside and outside of the house. In this case, it is necessary to take into account what work was carried out outside the wooden house, and what inside.
This will help you cut down on unnecessary costs. For example, reviews say that insulating walls from the outside provides sufficient insulation.
Therefore, additional insulation of the walls from the inside will no longer be required. Unless caulking the walls, all the cracks, etc. A similar situation exists with the finishing of floors and even ceilings.
If your ceilings are placed on beams, that is, they are hollow, then the ceilings will no longer need insulation. All you have to do is fill the cavity of the floor or ceiling from the inside.
It is worth understanding that it is necessary to work as a whole. That is, insulating the walls from the outside alone will probably not give a sufficient effect.
Fortunately, the entire process of arranging thermal insulation from start to finish can be completed with your own hands.
Penoplex - what is it?
Penoplex is a manufacturer’s trademark and at the same time a common name for extruded polystyrene foam as a type of insulation that relatively recently appeared on the Russian market, and they began to produce it under this brand. Penoplex is hydrophobic, has a low volumetric weight and practically zero vapor permeability, which allows it to be used without the use of hydro- and vapor barriers. We can say that this is the best insulation of all existing ones in terms of thermal conductivity, it is easily processed and mounted on all types of surfaces - vertical, horizontal and inclined.
Among the negative characteristics is that penoplex does not support combustion, but when exposed to fire, it melts, emitting caustic toxic smoke. In addition, it loses its properties and becomes unusable under the influence of prolonged exposure to the sun.
Advantages of insulating walls outside
The owner of a house always has a question: should he insulate his home with penoplex from the inside, or mount it from the outside? The option of placing the insulation on the facade side is more preferable - it allows you to transfer the dew point into the insulation (provided the thickness is calculated correctly) and thereby protect the walls from excessive moisture. It should also be remembered that the internal location of penoplex significantly reduces the area of the house, and also leads to the need to finish the walls, which is not entirely advisable - well-treated wood looks good in the interior of a home without any finishing. Therefore, it is better to insulate the surface of the walls with penoplex from the outside.
Features of working with wood
Let us separately note this fact. That the structure of a wooden house and the structure of the material itself is slightly different from the standard one, as if you insulate a wooden house from the inside. This is important to consider.
For example, if finishing standard brick walls is enough to simply clean them of dirt, then you will have to tinker with wood longer.
House insulated with polystyrene foam boards using frame technology
So, it doesn’t matter whether you are insulating from the inside or outside, in any case there will be a need to seal the cracks. Moreover, you need to seal all the cracks, even the smallest ones. Over time, the wood may open up a bit, increasing their area.
It is also mandatory to treat wooden material with various antiseptics and fire retardants. And this applies to both the floor and the walls.
Here you need to understand that after insulation you will no longer take care of the wood. You simply can't. It is unlikely that anyone would want to disassemble the entire thermal insulation pie for a banal check. And it often happens that inattention costs too much.
But reviews from experienced users indicate that successfully and timely processed wood is not subject to negative influences at all.
Sequence of work
If you decide to carry out the insulation work yourself, it is better to study in advance and subsequently follow the procedure for performing the work.
Insulation calculation
First, determine the required thickness of the sheets. The final consumption of material depends on it. The thermal resistance indicator (in Russia it ranges between 3.5 to 4.6 m*K/W) is divided by the thermal conductivity coefficient of penoplex slabs. The second parameter is found in the characteristics of the material.
After taking measurements of the insulated room, the required amount of material is calculated. When purchasing, it is recommended to make a reserve of 10-15% to compensate for possible losses from defects or installation errors.
Required tools and materials
If work is carried out on the ceiling, scaffolding will be required to avoid the collapse of the structure. In all other situations, a basic set of tools is sufficient:
- drill with hammer;
- hacksaw;
- sandpaper or fine construction grater;
- laser level;
- hammer;
- spatulas of different sizes.
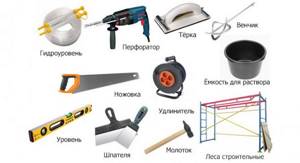
A set of tools for laying penoplex.
Auxiliary materials will also be required:
- dry adhesive mixture for installation of extruded polystyrene foam;
- polyurethane foam;
- reinforcing mesh;
- dowels;
- plaster mixture;
- finishing materials (lining, drywall, etc.).
Preparation
To ensure that the slabs are light, even and dense, before installation, you need to remove old finishing materials, dust and cement residues from the working surface. After this, using a building level, you should check the evenness of the structure and, if necessary, eliminate deviations with putty and plaster. Then the surface is primed.
When it stops being wet, you can start insulating it. There are 2 common installation methods: with glue and with the additional use of dowels. Whichever one is chosen, the slabs are first lightly rubbed with sandpaper to improve adhesion. The glue is applied with a spatula.
During installation, you can lay the finishing material directly on the insulation, or you can use a wooden frame and guides installed at the width of the slabs. The frame method will take more time, but is considered more reliable.
Walls
It is recommended to start insulation from the bottom corner of the wall, slightly moving the slabs at each next level. For reliable fixation, use bitumen mastic, cement-based glue, polyurethane glue or polyurethane foam.
The slabs are attached to the wall using special glue.
After applying glue to the slab, it should be pressed firmly against the wall and held for 1 minute, if necessary driving in dowels in the corners and in the center. The adhesive layer may be uneven, so it is necessary to check the evenness of the installation from time to time using a level. The gaps between the plates are filled with polyurethane foam. When it dries, the resulting mounds are cut off.
Ceiling
As in the case of walls, it can be mounted with or without a frame of guides. If a private house is being insulated, then penoplex is laid on the ceiling from the inside and outside, from the attic side.
In apartments there is no possibility to use the outside, so installation is carried out only from the room.
The ceiling should be cleaned, leveled and primed. Glue is applied to the material and pressed tightly to the installation site. For best fixation, dowels can be used. The seams are sealed with foam.
Finishing
Depending on what decorative material will be used to complete the finishing, the finishing of the insulation is carried out. Reinforcing plaster is applied under the tiles or wallpaper, then a reinforcing mesh is laid, plastered again (the second layer is at least 3 mm) and puttied.
It is permissible not to apply plaster under drywall. When the glue has dried, the decorative sheets are mounted to the insulating structure with self-tapping screws, and the joints between them are puttied. Before gluing wallpaper, the surface should be sanded.
Insulation of a wooden house from the inside
Insulation of wooden houses must be carried out taking into account the characteristics of the material and design. The very need for this procedure arises quite rarely, since wood has low thermal conductivity and practically does not require the installation of additional insulating materials. To clarify the details, separate reviews have been prepared about the insulation of the foundation of the house, floor, ceiling and loggia.
The cause of uncomfortable room temperature is most often heat loss that occurs at the joints and connections of structural elements of external walls.
The main tasks that need to be solved as a result of the work are cutting off wood from contact with water vapor and eliminating thermal energy leaks . Success depends on how accurately the reasons for the uncomfortable environment in the house are determined, as well as on the correct choice of how to resolve the issue - general issues of internal insulation are discussed in detail here.
Material selection
Before you begin insulating work with your own hands, you need to choose the right insulator. The choice is determined by three main indicators:
Density
For work on wooden buildings, a heat insulator with a density of 25 kg/m³ is suitable. As density increases, the strength of the material also improves. But the main indicator is still thermal conductivity. With increasing density, the thermal insulation qualities of the material will decrease.
The thickness is calculated depending on the location of the house and climatic conditions. To clarify this indicator, it is better to contact sales consultants. Let's consider the advantages of using and insulating a wooden building with penoplex.
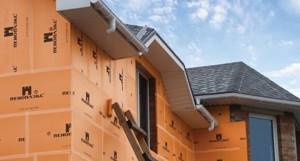
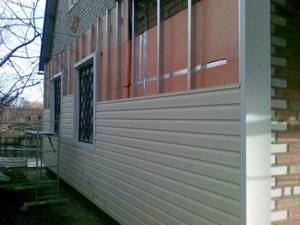
Insulation of a wooden house from the outside
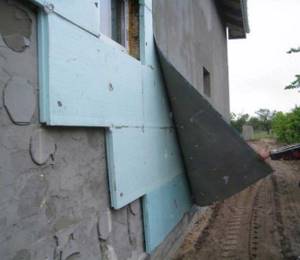
Insulation of the outside walls of a wooden house with penoplex is carried out in compliance with certain rules. The structure itself is built on the principle of a ventilated facade. In addition, it is possible to use extruded polystyrene foam for stone cladding. This means that there must be a gap between the penoplex and the wooden wall of the house to ensure air flow. If this is not done and a wooden house is insulated directly along the walls with penoplex, moisture condensation and, as a result, the “start” of the rotting process can hardly be avoided.
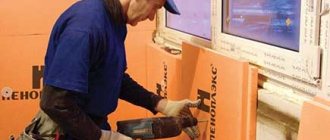
- Insulation of a wooden house from the outside with penoplex begins with the installation of sheathing made of 50x50 mm wooden blocks.
- Insulation boards are laid in the sheathing. If the house is made of logs, then their unevenness will create conditions for ventilation. If it is a flat beam, then slats should be laid between it and the penoplex to create the necessary gap.
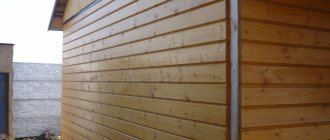
- The exterior finishing of a wooden house with penoplex is completed with cladding - siding, blockhouse or the all-familiar brick.
Timber house: how to properly insulate the outside
Despite the widespread belief that wooden houses do not require additional thermal insulation, since wood has good heat-saving parameters, insulation of a house made of timber from the outside is not necessary only if timber with a thickness of 40 cm or more was used for the construction of such an object.
In practice, wooden houses with such thick walls are quite rare; this is, of course, due to the high cost of quality materials.
Insulation of wooden houses
Most modern private log houses do not have thick enough walls to provide comfortable living conditions in the winter season. In this case, sealing all the detected cracks will not help; unfortunately, it will not be possible to achieve a tangible result with the help of such work.
Technology of insulating facade walls with Penoplex
To properly insulate the facade with penoplex, compliance with the installation technology is required. The necessary tools are pre-selected and the base is prepared.
Preparatory stage
According to the technology of penoplex insulation, the preparation stage is the first, and this procedure concerns not only the surface of the wall, but also the insulator itself.
Preparation of materials
To insulate a house with penoplex, the material needs to be prepared. The surface of the slabs should be slightly rough. To do this, polystyrene foam is processed with a needle roller. If it is not available, a stationery knife is suitable, which makes small notches.
Preparing the walls
Before insulating a wall with penoplex, it also needs to be prepared. It is cleaned of dust, old finishes, grease stains, and weak areas of plaster. If there is fungus or mold on the surface, they must be removed and the base treated with fungicides and antibacterial agents. Protrusions on the wall or remnants of masonry material are knocked down to the general level.
Cracks of any size are cleaned, treated with a priming liquid, and then covered with a repair compound. As for wooden walls, it is necessary to completely eliminate damaged areas, which are treated with antiseptics. The cracks between the logs need to be caulked.
After cleaning, the vertical and horizontal level of the base is checked. If the differences are significant, the problem needs to be corrected. For this, a solution based on cement and sand is used. All metal structures are treated with a special anti-corrosion compound. You can begin attaching the thermal insulation a month after the preparatory procedures.
Sealing joints
Wooden walls tend to change linear dimensions due to the drying process. The intensity of shrinkage depends on the type of material. For a log or timber house it is the greatest, the shrinkage is slightly lower for a building made of rounded logs.
The record holder is laminated veneer lumber (or euro-beam), which practically does not change its dimensions.
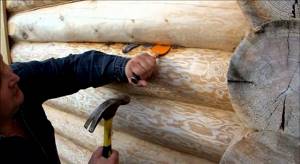
As the wood dries, the gaps between individual crowns or beams increase. They must be puttied or filled with sealant . Traditionally, moss or tow was used, which was hammered tightly into the cracks with a hammer and chisel. This option is not suitable for new buildings in which the shrinkage process has not yet been completed. For them, it is best to use synthetic sealants that are elastic and can compensate for changes.
Marking the zero line and setting the starting profile
Before insulating walls with penoplex, you need to mark the location of the lowest row of sheets. For this, a laser or water level is used. The material must be attached so that it is 30 cm below the floor level of the first floor. This way you can avoid the appearance of dampness in the room. The markings are carried out in such a way that there are no even minimal errors that could lead to significant distortion of the slabs in the upper part of the wall.
The starting profile is attached along the perimeter of the building (below the highest point of the building foundation). The clamps are mounted every 30-50 cm. At the points of contact with the base, the elements must fit tightly to it. If there are even small gaps, they can be eliminated using spacer washers. To connect adjacent profile elements on a straight wall, special fasteners are used. In addition, there must be a gap of 3 mm between them.
Preparing and cutting penoplex boards
The insulation of the wall is carried out after adjusting the foam boards. At the corners, the sheets are mounted with a toothed lock. To do this, the fragments through the row are shifted outward at a distance slightly greater than the thickness of the material. All pieces that border the profile should not be narrower than 20 cm.
In the area of window and door openings, you need to use elements cut in the shape of the letter “L”. In this case, it is important to leave an allowance inward for proper joining with the slope insulation. For cutting slabs, heated wire (nichrome), a hacksaw with fine teeth, and a stationery knife are used.
Preparation of adhesive composition and installation of insulation boards
To insulate walls with penoplex from the outside, special glue is used, which is prepared immediately before starting work. Preparation of the mixture and fastening of the material is carried out according to the following instructions:
- The glue must be mixed in accordance with the proportions and in the sequence indicated on the package. The first stage lasts 5 minutes, after which the composition should stand for 10 minutes. Next, it is kneaded again for 5 minutes. The product must be used within 2 hours. The glue must be used at a temperature of at least +5 degrees.
- Glue is applied along the perimeter of the slabs in a strip of 10 cm. The maximum layer thickness is 2.5 cm. The sheet must be filled to 40% of the entire area.
- The first row is laid on the starting profile so that the edge of the material rests tightly against the limiting edge and does not extend beyond it.
- After applying the glue, each fragment is pressed tightly to the base. Excess mixture is removed immediately. In this case, you need to constantly monitor the horizontal and vertical levels. You can adjust the position of the plates by tapping with a grater.
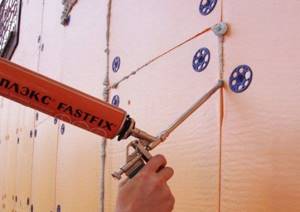
- 3 days after laying the panels, they are additionally secured with “fungi” dowels.
Since when using penoplex to insulate walls, gaps may remain between the slabs, which are filled with polyurethane foam-based polyurethane foam.
Creation of a reinforced protective plaster layer
After installing the insulation, it is covered with plaster reinforced with fiberglass reinforcing mesh. Its specific density is 140-160 g/m2. The insulated facade is plastered with the same compound on which the slabs were attached, but its consistency should be more liquid.
Strips of mesh, 30 cm wide and 1 m long, must be fastened starting from the corners and slopes. Next, an adhesive composition is applied to it. The layer thickness is 0.2 cm. After this, a metal corner is mounted. The mesh must be completely hidden in the plaster. There is no need to make the stripes too long. Adjacent elements must be overlapped by up to 10 cm.
External thermal insulation
Do-it-yourself wall insulation can be divided into five main stages:
- wall preparation;
- vapor barrier sheathing;
- arrangement of sheathing;
- installation of penoplex;
- home decoration.
Before starting work, it is necessary to check the foundation. The base for the heat-insulating device must be reliable.
Preparing the walls
The wood must be dried. If there is paint on the surface, it must be removed. The joints between the beams are also checked. They must be caulked along their entire length.
If there are protruding parts on the outside, they must be cut down. The last step in preparing the surface should be treating the wood with special impregnations.
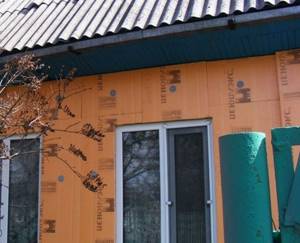
Sheathing with vapor barrier
Along the entire perimeter of the walls, wooden slats with a thickness of 25–30 mm are installed. The step between them should be no more than 1 meter. A vapor barrier is laid on the slats and secured with nails or a stapler.
Due to the stuffed slats, a gap is formed between the logs and the vapor barrier material for ventilation.
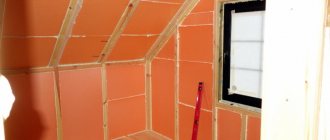
Arrangement of sheathing
It must be made from bars measuring 25×50, 50×50 or metal profiles. The arrangement of the sheathing is necessary for the installation of thermal insulation material. The pitch between the padded beams is selected according to the width of the insulation sheets.
In order for the penoplex to be firmly installed in the formed openings, the size between the beams should be 5 cm smaller.
Installation of penoplex
A heat insulator is placed in the openings between the guides. If two thermal insulation layers are used for insulation on the outside, then the insulator can be laid in two ways:
- sheets of two layers are placed offset to avoid cold bridges;
- the arrangement of two layers is carried out in perpendicular directions.
Let's take a closer look at the second do-it-yourself installation option. The lathing is laid on the vapor barrier first in a horizontal direction and the first layer of penoplex is laid into it. Then vertical bars for the second row of thermal insulation are installed perpendicularly on top of it.
Insulation of external walls with penoplex with siding
Carrying out work on insulating external walls must follow certain rules:
- First. Preliminary preparatory work on the surface must be carried out; the wall must be free of flaws and treated with antifungal agents;
- The second step is the installation of the base profile on which the penoplex will be installed. These manipulations are necessary for an even layer of future insulation, this will provide additional protection from harmful factors.
- The next step is to install the foam boards so that there is a gap of 2 millimeters between the sheets.
- After installing the penoplex boards, they must be secured; for this purpose, special dowels or an adhesive mixture are used, which is used to pre-treat the wall surface and the penoplex sheets.
- The last stage is decorative processing or finishing of the facade with siding.
Penoplex for siding
Fill the joints with polyurethane foam
Insulation of external walls using penoplex is possible due to the lightness of the material and installation work. After completion of the repair, subject to technical nuances, you will receive additional insulation and insulation from many unpleasant external factors. Good luck with the renovation.
Waterproofing
The insulating layer installed on top of the insulation performs several tasks:
- cutting off material from water vapor
- protection of insulation from possible condensation
- strengthening the tightness of the insulation cake
As a waterproofing layer, it is recommended to use a vapor-waterproofing membrane , which does not allow any moisture to pass through from the outside, but is capable of allowing water vapor to pass through from inside the package. This makes it possible to remove steam that somehow got into the insulation, which increases its performance and service life.
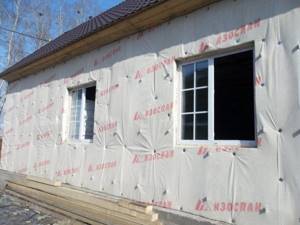
The material is mounted in horizontal strips . The first is laid from below, then the second is overlapped by 10-15 cm - and so on until the wall surface is completely covered. The joints are taped with a special adhesive tape, ensuring complete tightness of the insulator.
Thermal insulation of walls with Penoplex
Let's start with the fact that the process of insulating walls with polystyrene foam boards requires one thing from this process. It consists in the fact that penoplex should be laid on the surface of the walls without gaps and air layers. That is, tight. This is what ensures high thermal insulation of walls.
Therefore, before starting the thermal insulation process, the surfaces of the walls must be leveled to the maximum. The easiest way is plastering or applying a layer of façade putty. In this way, the wall is not only leveled, but also repaired: cracks, chips and potholes are repaired, stains of paint and other materials are covered. Often craftsmen lay insulation directly on a brick wall. But at the same time they must be secured with self-tapping screws.
And one more point related to preparing walls for insulation is primer. The primer liquid will increase the adhesive qualities of the wall surface, which will create improved conditions for attaching penoplex to the walls with glue.
Finishing the facade with penoplex slabs Source 2gis.com
So, everything is ready, you can proceed to the installation of thermal insulation panels:
Insulation of external walls with penoplex begins with the installation of a starting profile. This may be one of the galvanized profiles used during the installation of drywall. It is simply mounted on the border between the foundation and the wall, secured with ordinary steel screws on plastic dowels. But there is one point here that not everyone pays attention to. The width of the profile must match the width of the selected foam boards, that is, no less, no more
In this case, it is very important that the profile is installed below the floor level of the rooms by 20-30 cm.
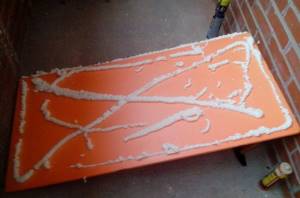
The process of installing insulation boards is simple. They are “planted” with glue, which is used to treat the edges of the panel and apply two stripes diagonally
Mushroom-shaped plastic screws can be used as an additional fastening element. But keep in mind that you can use the screws after 3 days of installation. It is necessary that the adhesive composition dries well.
Installation of slabs on the wall is carried out staggered with an offset of half the panel. Difficulties can arise in the corners of the house and near window and door openings. Here the penoplex will have to be cut to the required dimensions using a knife or hacksaw. The main thing is to strictly adhere to the sizes of the cut pieces. In the corners of the openings it is necessary to use L-shaped pieces that are cut to size.
Laying insulation around windows Source remontami.ru
It is not easy to join insulation boards at the outer corners of the building. For this, a so-called toothed lock is used. This is when a part of the slab protrudes at an angle, from one wall, then from the other, alternately. The protrusion size is the width of the slab material.
So, the thermal insulation material is installed on the wall. All that remains is to cover it with plaster on top. For this purpose, a fiberglass plaster mesh is used as a reinforcing frame. The specific density of the mesh is 140-160 g/m².
The technology for plastering foam boards is special. First, a plaster solution is applied to the insulation, which is leveled with a notched trowel. Then a reinforcing mesh is applied to it, on top of which a finishing layer of plaster is applied.
Roof insulation with Penoplex
You can insulate an attic with Penoplex, but it is expensive.
Roof insulation with Penoplex, again in theory, is quite possible, everything depends only on the cost of thermal insulation. Working with extruded foam is as easy as working with regular foam; the techniques are no different. By definition, in any house made of wood, the roof consists of a rafter system. Depending on its configuration, another living space, called an attic, can be arranged in the attic. Insulation of the attic with Penoplex, layers from the inside:
- interior decoration;
- a layer of extruded polystyrene foam, which is held between the rafters on polyurethane foam, and all joints are filled with it;
- diffusion membrane - although extruded polystyrene foam is not afraid of moisture, it does not provide additional waterproofing, at least to protect the rafters;
- ventilated gap of 15 mm or more;
- roof finishing.
Roof insulation with Penoplex is a rare occurrence due to the inexpediency of using such an expensive material. After all, you can replace it with ordinary polystyrene foam and still get the same result, that is, there is no technical need to use EPS.
Insulation systems
You can insulate a house with penoplex using two systems:
- “wet” - plastering system;
- "ventilated facade".
The plaster insulation system involves attaching the insulation directly to the outer wall, but since it is necessary to create a ventilation gap between the wall and the insulation, the use of this system in the case of a wooden house is not structurally justified.
The “ventilated facade” system will allow you to meet all the requirements of heating engineering, and will provide comfortable conditions and a healthy microclimate in the house, without additional costs for forced ventilation.

Any slab or slatted facing material can be used as finishing material.
Insulation of ceiling and floor with Penoplex
You can easily insulate the ceiling with Penoplex, as well as the floor, but it is too expensive. Apart from the obvious insulation, there are no other advantages. At the same time, not only extruded polystyrene foam can cope with the task of insulation; many materials are suitable for this:
- bulk insulation materials;
- liquid thermal insulation;
- mineral wool;
- Styrofoam.
Perhaps insulating the attic with Penoplex will help in the fight against rodents, because according to the manufacturers, this material does not infest them. But based on numerous reviews, we can say that this is not the case; mice can be found in almost any insulation.
Benefits of penoplex
Penoplex, like many other thermal insulation materials, has its positive qualities. Every owner of a wooden house who decides to use it when working on wall insulation should know about its advantages. Its main advantages are given below:
- Extruded polystyrene foam, which is the basis of penoplex, should be considered as insulation, providing maximum thermal insulation characteristics of the building when used. Therefore, for wall insulation, penoplex seems to be the optimal choice;
- Due to the fact that this material provides high insulation efficiency, during operation it is applied to the walls in a thin layer.
Disadvantages of penoplex as insulation
Despite the many advantages of penoplex, as an insulating material, it also has a number of disadvantages. The main ones include the following. Firstly, penoplex is sensitive to the effects of organic solvents, which are often included in adhesive mixtures, so you need to very carefully choose adhesive for penoplex and focus on specialized adhesive mixtures. Secondly, when working with penoplex, it may be difficult to cut it when adjusting the slabs to size. And finally, low vapor permeability can sometimes act as a disadvantage of penoplex rather than its advantage. This is typical for regions with hot climates.
Penoplex characteristics and features
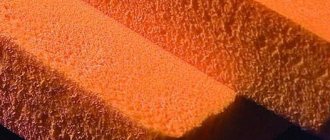
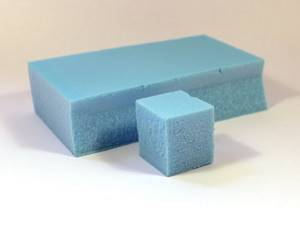
This material is an improved version of polystyrene foam. It is made from granulated polystyrene: under conditions of increased pressure and temperature, the mixture of granules foams and forms a low-density cellular structure.
The finished insulation is a sheet material with a uniform cellular structure. The pores are identical, very small in size - up to 0.2 mm. The top layer is non-porous.
Several types of heat insulator are available, differing in density and thermal conductivity. Penoplex 31 C and 35 are used to insulate the facades of a brick building from the outside. The photo shows samples of the material.
Subtleties and advice from professionals
In order to insulate the outside or inside with your own hands correctly, you need to take into account some of the nuances of the work:
- instead of polyethylene film for waterproofing, it is better to use a multilayer membrane;
- to insulate a wooden house from the inside, it is better to choose vapor-permeable types of materials;
- polystyrene foam must be laid tightly against the wall;
- there should be good ventilation in the room.
Penoplex insulation has its own characteristics, but if all installation rules are followed, the material will provide high-quality protection against heat loss and will last a long time.
Characteristics of penoplex
This is the name given to extruded polystyrene foam. It is the most productive heat insulator due to its qualities:
- low moisture absorption, its cellular structure practically does not absorb water;
- high thermal efficiency allows the use of a smaller thickness of the insulating layer;
- fire safety, polystyrene foam does not burn and does not emit toxic substances;
- ease of installation;
- good strength and resistance to mechanical stress;
- resistance to the formation of fungi and mold.
Types of extruded polystyrene foam
Penoplex can have different densities, its value ranges from 25.0–45.0 kg/m³. Depending on this indicator, the material has different purposes and is divided into five types:
- the first – for the roof (28.0–33.0 kg/m³);
- the second – for the foundation (29 kg/m³);
- third – for walls (25 kg/m³);
- the fourth is universal (25.0–35.0 kg/m³);
- the fifth is industrial (45.0 kg/m³).
Each of them has its own purpose depending on its name. The universal option combines all the best indicators, so it can be used for any part of a wooden building.
Results
Extruded polystyrene foam is a really good polymer insulation, the characteristics of which are higher than those of its predecessor, foam plastic. At the same time, for a wooden house it is important that the insulation allows steam to pass through, for example, like mineral wool. The low vapor permeability of EPS in this case will be a negative factor. Theoretically, Penoplex can be used to insulate roofs, floors and attic floors, although in reality this is unprofitable.
EPS is not suitable for log and beam walls. The main purpose of this material is thermal insulation of underground structural elements, such as a foundation, plinth or blind area. Also, if the soil under the house is very wet, you can use extruded polystyrene foam to insulate the ground.
Sources
- https://DomZastroika.ru/walls/uteplenie-derevyannogo-doma-penopleksom.html
- https://utepleniedoma.com/uteplenie/zagorodnyj-dom/uteplyat-dom-penopleksom
- https://dom-data.ru/uteplenie-sten-snaruzhi-penopleksom-s/
- https://ebtim.com/uteplenie/uteplenie-derevyannogo-doma-snaruzhi-penopleksom-svoimi-rukami.html
- https://uteplimvse.ru/dlya/doma/derevyannogo-penoplexom.html
- https://kak-uteplit.ru/mozhno-li-uteplyat-derevyannyj-dom-penopleksom.html
- https://Krysha-pro.ru/uteplenie/derevyannogo-doma-iznutri.html
- https://TeremizBrusa.ru/facts/uteplenie-karkasnogo-doma-penopleksom.html
- https://strir.ru/uteplenie/snaruzhi-penopleksom
- https://nashprorab.com/uteplenie-derevyannogo-doma-snaruzhi-p/
Types of penoplex
Based on technical features and installation location, penoplex is divided into several types:
- “C” - used for thermal insulation of rooms on the ground floors, walls and room partitions;
- “F” - used for insulating foundations and basements;
- “K” - installed on roofing structures;
- “Comfort” - used when arranging loggias and free-standing small buildings;
- “45” (density 35 - 47 kg/m³) - suitable for thermal insulation of industrial structures, used at airfields and in civil engineering.
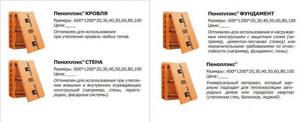
Main types of penoplex.
Instructions for insulating a house with Penoplex from the outside
After the preparatory work, you can sheathe a wooden house with penoplex, following the steps of the step-by-step instructions:
- attach penoplex to a wooden wall, glue the slabs “bottom → up” from the bottom of the building upwards;
- after the 3 days required for the glue to dry, nail the sheets with disc-shaped dowels;
- Fill the joints with polyurethane foam and seal with tape;
- if necessary, glue the 2nd and 3rd layers of penoplex, moving them away from the joints of the previous row in order to bandage the seams;
- attach a reinforcing mesh and plaster, or construct a new sheathing to attach the facing material.
Glue application process
Depending on the type of adhesive composition, the following methods of applying glue are used:
- dry mixtures are diluted in water and distributed evenly over the surface of the stove using a notched grater;
- polyurethane adhesive compositions are sprayed from a can in stripes around the perimeter and in the center of the sheet;
- liquid nails are squeezed out of the tube onto the surface at several critical points;
- bitumen mastic is applied with a spatula or roller.
Fastening process
To properly insulate a wooden house, during the fastening process you should use penoplex with a tongue-and-groove system. Along with the plane of the slab, the joining elements at the ends are coated with glue. After a few days, the joints must be sealed.
Penoplex slabs are additionally secured with dowels 40–50 mm longer than the thickness of the insulation. “Mushroom” type fasteners with metal nails in the amount of 5 pieces per 1 m² of penoplex are optimally suited.
How to attach penoplex siding to a wall without sheathing
For small wooden panel or frame buildings, it is quite possible to install insulation and decorative panels without a supporting frame. Instead of tape holders or purchased brackets, we attach 70x70 mm pieces of timber to the wall. It is clear that you will first need to mark horizontal lines on the wall along which the top edge of the siding will go, so as not to miss screwing in the screws.

We glue Penoplex onto the wall with mounting foam, blow out the joints between the slabs, the top and bottom edges under the roof, under the windows and along the foundation. Installation of penoplex turns out to be more labor-intensive, since in each slab you have to cut out a window for a screwed-on block, stick the slab on and blow it with foam.
In this case, the end of the block should protrude 20-25 mm above the plane of the penoplex. All that remains is to lay the siding panels and screw them directly to the wooden “brackets”.
Penoplex - advantages and disadvantages, technical characteristics
In recent years, penoplex has become increasingly used in construction. All thanks to the special properties and unique manufacturing technology.
This is an inexpensive, synthetic thermal insulation material that is much easier to install than, for example, glass wool.
The standard dimensions of a penoplex sheet are length 1.2 m, width 60 cm. Only its thickness can be different, from 2-10 cm.
From a technical point of view, penoplex has the following characteristics:
- Thermal conductivity according to GOST. the standard should be 0.03 W/m*C;
- Vapor permeability should not exceed 0.008 mg/m*hour/*Pa;
- Sound insulation at 41dB;
- Moisture resistance no more than 0.6%;
- The density of the material varies between 28-45 kg/m3;
- The maximum pressure when compressing the sheet between the plates should be no more than 0.18 MPa;
- Temperature difference range from –100 to +55 C0.
Specifications
When choosing a material for better thermal insulation, focus on these characteristics. This guarantees you high-quality insulation of the facade of a brick house with a low rate of liquid absorption.
Like any building material, penoplex has a number of advantages and disadvantages.
Advantages:
- The best thermal insulation performance in comparison with other insulation materials;
- High protection against vapor formation due to the unusual structure of the material;
- Good moisture protection, so the material can be used to insulate baths and saunas;
- The material is durable, withstands heavy loads both in compression and in rupture;
- Excellent soundproofing characteristics;
- The material is treated with special solutions at the production stage, therefore it is resistant to fire;
- Protected from the development of fungal parasitic organisms;
- Easy to carry out installation work without additional assistance;
- Processing of penoplex can be carried out using improvised means without additional purchase of special devices, for example, for cutting sheets;
- The material is very light;
- Long service life - up to 50 years while maintaining the basic properties of the material.
Flaws:
- Although the material does not ignite, during a fire it melts, releasing toxic and dangerous smoke, and even after extinguishing it continues to smoke for a long time;
- The material is afraid of direct sunlight, and loses its properties when exposed to the sun for a long time.
- Susceptible to the use of solvents, destroyed;
- The price depends on the properties and qualities of penoplex;
- Practically zero vapor permeability, therefore it is not recommended for insulation of wooden and frame houses.
Comparison of penoplex with other insulation materials
Criteria for choosing insulation
When choosing a material for insulating the floor and walls of a wooden house, you should take into account such indicators as price, thermal insulation properties, ease of operation and strength.
The main feature is the low price of penoplex. It is almost three times lower than mineral wool. The thermal insulation characteristics of penoplex and mineral wool are practically the same. In addition, penoplex has a very low water absorption rate.
Installation of penoplex is extremely simple. It can be used to insulate your home yourself.
Low weight allows even one person to work with it. And to cut into pieces of the required size, just use a stationery knife.
Installation of insulation
So, when the choice in favor of one or another insulator has already been made, the following questions arise: how to insulate a frame house with foam plastic or penoplex? How to correctly install insulation?
It is especially preferable to use polystyrene foam as insulation for a frame house on the outside, given the fact that mineral wool, with its low moisture resistance, is much less suitable for this and is used more for internal insulation of walls.
Expanded polystyrene boards are mounted on the wall in several different ways, namely:
- Using special glue for polystyrene foam. There are two types of such glue: in the form of a dry mixture and in the form of foam. Dry adhesive, similar in appearance to tile adhesives, is diluted with water (according to the instructions) and then applied to the wall. Foam adhesive is similar to regular polyurethane foam and is usually used for smooth walls. This glue is applied using a regular foam gun. When insulating frame walls with polystyrene foam, you must be extremely careful, since this material is quite fragile and the edges of the slabs break off easily. If you plan to further plaster the walls, then during installation it is preferable to apply the adhesive not in slaps or strips, but rather distribute it over the entire joining surface of the polystyrene foam board.
- Using fasteners (“fungi”). To install slabs when insulating the walls of a frame house with polystyrene foam, fastening elements are used, which are ordinary dowel-nails for concrete, but with a special cap that holds the foam plastic in the frame wall. Made of plastic, such “fungi” are not subject to corrosion and eliminate the formation of cold bridges.
Installation of polystyrene foam in a frame house using “fungi” is reliable and quite simple. The steps are as follows:
- Holes are made in the wall corresponding to the thickness and length of the “fungi”.
- Apply a sheet of polystyrene foam.
- The plastic part of the “fungus” is inserted, and then the special nail that comes with the “fungus” is hammered in, thereby pushing apart its part located in the concrete
- Using a frame. When insulating a frame house with penoplex and polystyrene foam, an additional wooden frame is sometimes used, which is a lattice or strips that are attached to the wall, after which insulation is attached inside the frame itself.
Otherwise, due to the same thickness of the slats and polystyrene foam, insulation in a frame house may turn out to be ineffective, since unique cold bridges will form.
For better fastening of slabs to the wall when insulating a frame house with polystyrene foam, several options for fastening polystyrene foam can be used simultaneously. In a frame house, for example, there is a frame and “fungi” or “fungi” and glue.
Regardless of what material you prefer to use for thermal insulation: polystyrene foam or polystyrene foam, your frame house will be warm and cozy. And by insulating a frame house with polystyrene foam yourself, you can also save a lot of money.
See more on this topic on our website:
- How to insulate a timber house from the outside with polystyrene foam and polystyrene foam. After building a house made of timber, many people are faced with the question of how much its walls can save heat, because in our conditions of harsh winters this is the case.
Insulation of a frame house from the outside with environmentally friendly insulation Since insulation of a frame house from the outside is a task of paramount importance during the construction process, it is recommended to approach the choice of a heat insulator with particular seriousness. In addition to such characteristics
Do-it-yourself insulation of the walls of a frame house from the inside Manufacturers of SIP panels and people who understand how the walls of a frame house are insulated say that well-installed walls can fully replace a half-meter wall.
Insulation of a wooden house from the outside with polystyrene foam. The effectiveness of the external insulation of a wooden house equally depends on the correctness of the chosen thermal insulation material and on the correctness of the installation. One of the most widely used.
Insulation for a frame house - reviews and which one to choose If you are planning to build a frame house, then, in all likelihood, you are asking yourself the question: “What material is best to use for its thermal insulation?” Choosing insulation for frame.
Reviews about penoplex insulation from the inside
Oleg, 36 years old, Moscow: “Our loggia runs along the room and kitchen. They installed double-glazed windows, but in the frosty winters we were still cold, and this also affected the temperature in the apartment. I read the reviews on the forum and chose penoplex for insulation. I did it myself by watching videos on the Internet. I liked that almost no debris was generated during operation. I installed all the slabs in a day, and another 2 were spent on clapboard cladding. The temperature on the loggia is now significantly higher than before insulation.”
Mikhail, 45 years old, Kaluga: “I bought an apartment on the ground floor with a rough finish. I decided to use thermal insulation when screeding the floor. The building materials store recommended penoplex. I was surprised by its weight - the slabs are light, but they are not so easy to break. I placed a reinforced mesh between the insulation and the cement. Installation went quickly and without any difficulties. And I didn’t have to spend money on electric heated floors.”
Siding installation sequence
Many people are interested in the question of how to attach siding to penoplex and where exactly to start?
First, you need to make a sheathing from wooden slats or a special metal profile. It is mounted through the insulation to the wall using dowel nails or long self-tapping screws. You need to make sure that the slats are securely fastened and at the same time do not crush the thermal insulation. During installation, they can be supported on the mushroom caps, which we “lined” in rows for this purpose. Another way is to fix brackets on the wall in advance, while gluing the penoplex, which will then hold the planks. Installation of siding on polystyrene foam must be carried out with a gap of at least 2 cm, which means that the minimum thickness of the sheathing must be the same. Sheathing with foam siding is carried out according to the technology provided for siding installation using starting and finishing strips, corners and other elements. Let us note this point once again - insulating a house with penoplex under the siding requires accurate calculations of the thermal insulation layer. If you neglect this, the “dew point”—the point of moisture condensation in the wall—may shift. Then dampness will inevitably appear in the house.
Whether or not to use penoplex for insulation is a matter for the owner. Some are inclined towards this option due to the relatively simple installation, while others, on the contrary, believe that penoplex has no place in insulating a house above the foundation. After studying all available materials and asking the opinion of professionals, everyone will make their own choice.
Main types of insulation for walls
Nowadays, the following materials are used as the main insulation for the walls of a house outside under siding:
- Polystyrene foam (expanded polystyrene), penoplex, polyurethane foam.
- Mineral wool.
- Basalt insulation.
The thermal conductivity of each insulating material can be clearly seen using the following comparative table. Standard brickwork 90 centimeters thick is taken as the starting material for comparison.
| No. pp. | Wall materials | Brickwork 90 cm thick (cm) |
| 1 | Concrete | 213,2 |
| 2 | Wood pine | 34,0 |
| 3 | Mineral wool | 12,5 |
| 4 | Styrofoam | 7,5 |
| 5 | Penoizol | 5,0 |
Foam plastic (expanded polystyrene)
This is a modern insulation for walls and other surfaces. It is used in all areas of industrial and civil construction. It has a low thermal conductivity coefficient. Resistant to chemical and biological influences, has high sound insulation. Durable and environmentally friendly material with a service life of more than fifty years.
Another advantage of foam sheets is their low weight and low price. The weight makes the work performed less labor intensive and does not load the walls, which eliminates the need for additional strengthening of the foundation. The disadvantage of this material is flammability.
Extruded polystyrene foam (penoplex)
Thermal insulation material of the latest generation based on graphite nanoparticles. The thermal conductivity coefficient of penoplex is 0.03 W/m*K. Very resistant to mold, chemicals, insects and rodents. Excellent sound insulator. In addition to insulating the walls of buildings, it is used in the manufacture of foundations for individual low-rise buildings using the “insulated Swedish plate” technology. It is used for protective cladding of loggias and balconies, basement walls.
Polyurethane foam
Plastic with a foam-cellular structure. The proportion of air-filled cells in polyurethane foam reaches 90 percent of the total mass of the insulation. Because of this, its thermal conductivity is one of the lowest. It has good adhesion to all surface materials: wood, concrete, metal and brick.
This creates an airtight coating with good water vapor barrier.
It is applied to the surface under pressure using a hose and compressor. When blown in, the plastic mass fills all cavities and cracks. The disadvantage of this insulating material is its high cost and the need for expensive equipment.
Mineral wool
This is basalt insulation, glass wool, stone wool. A product of processing waste from metallurgy and processing of rocks such as dolomite and basalt. It is characterized by durability, non-flammability, environmental friendliness, strength, and elasticity. Low price and ease of installation. Absorbs sound well. You can install cotton wool at any time of the year. When insulating walls from the outside with mineral wool under siding, it does not require any special skill.
The industry produces this insulation in rolls and in the form of slabs. Roll insulation is used to cover horizontal surfaces or surfaces with a slight slope. It is more convenient to insulate vertical walls with slabs. Mineral wool can be used in conjunction with blown polyurethane foam. Rolls and slabs are produced in the following sizes:
| No. pp. | Length(cm) | Width(cm) | Thickness(cm) |
| 1 | 100 | 60 | 5 |
| 2 | 700 | 120 | 5 |
| 3 | 900 | 120 | 5 |
| 4 | 1000 | 120 | 5 |
| 5 | 1000 | 120 | 10 |
Liquid thermal insulation
These are new generation insulation materials. Liquid thermal insulation materials are now used to insulate metal pipes, foam block houses and other structures. It is a multi-component ceramic substance similar to acrylic paint. It only contains up to 80 percent voids in its sticky mass.
It is applied to the insulated surface with an ordinary paint brush, roller or spray gun. When applied using a spray gun, it fills all cracks and voids. After drying (at least six hours) it is resistant to mechanical stress, protects structures from precipitation and sun, and metal from corrosion.
Advantages of expanded polystyrene
We found that polystyrene foam is resistant to environmental factors and mechanical stress. But this is just one item from a wide list of advantages :
- Effective energy saving . Due to the structure of cells filled with gas, polystyrene foam has low vapor permeability and thermal conductivity, and has excellent thermal insulation properties. According to statistics, the thermal insulation properties of a layer 3 cm thick are equal to 123 cm of concrete, 64 cm of brickwork, 11 cm of wood or 6 cm of mineral wool.
- Durability . Research conducted in the homeland of expanded polystyrene, Germany, showed that the material that was used to insulate the roof back in 1950 did not change its insulating and other properties.
- Safety . The material is not a source of harmful dust and does not contain fibers. Therefore, it does not require special protective equipment (glasses, gloves) and can be easily processed without causing irritation of the mucous membranes and other health problems. Even if a piece of polystyrene foam is swallowed, there is no negative impact on health, and the material passes through the digestive tract without changes in structure.
- Lightness . The low weight of polystyrene foam makes it the most economical and convenient material for insulation.
- Resistant to chemicals and biological attack . Expanded polystyrene is resistant to various chemicals, UF radiation and temperature changes. It is not susceptible to decomposition, leaching and mold development. This material does not create a breeding ground for the life of fungi and bacteria, and is also not digestible by rodents and other animals.
- Eco-loyalty . Polystyrene foam is an environmentally friendly, non-toxic material. It does not contain binders, does not emit formaldehyde resins, does not destroy the ozone layer and does not pollute the environment. Therefore, in addition to construction, it is used for the manufacture of children's toys, food packaging and growing greenhouse fruits. In addition, polystyrene foam is recyclable and is 100% recyclable without harmful consequences for nature.
- Fire resistance . Expanded polystyrene is flammable. But if its cells are filled with carbon dioxide or other fire-resistant components, the material does not ignite and does not allow the flame to spread further.
- Moisture resistance . Expanded polystyrene is not exposed to moisture, its absorbent and diffuse properties are practically zero, due to which it does not require additional waterproofing.
And here is an article about insulating a wooden house with mineral wool.
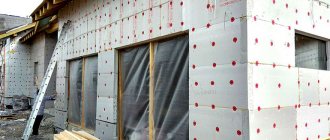
Technology of insulating walls with penoplex from the outside - what elements does the thermal insulation pie consist of?
To insulate external walls, the following order of placement of thermal insulation layers is used:
- Glue, it is applied to a wall that is previously dry and cleaned of various types of dirt and irregularities;
- Insulation, which is additionally attached to the wall with special mushroom dowels. This allows the sheet to lie tightly on the wall surface without creating heat bridges;
- After fixing the penoplex, it must be protected from exposure to ultraviolet radiation. Therefore, a layer of reinforced putty using a soft mesh is applied. If you plan to finish with siding, then it is recommended to install a waterproofing membrane;
- Decorative finishing creates an additional layer of protection and gives an aesthetic appearance to the building.
wall pie
Description of material
Before installing penoplex, you need to get acquainted with the main features of the material
It is important to know its characteristics and properties. Penoplex is extruded polystyrene foam
This material is produced using a certain technology. It is based on foam plastic. After heat treatment, the material becomes stronger and acquires high thermal insulation properties. They can significantly influence installation technology and determine the scope of application of the material.
These properties include:
- low degree of moisture absorption;
- smooth surface.
Due to the fact that penoplex has a smooth structure, the material can be used in adverse conditions. For example, penoplex is excellent for insulating facades. However, such material has low adhesion. This means that it is better not to use the material when performing “wet” work.
The biggest misconception among newcomers to the construction industry is the wrong choice of work technology. Many inexperienced builders work with penoplex in the same way as with simple polystyrene foam. However, this does not mean that you should not use wet technology at all when using new insulation. You can use a method that allows you to create a durable wall finish on top of modern insulation.
Beginners often want to know why not use simple polystyrene foam instead of penoplex? After all, it has a lower price, and its adhesion is much higher
First, you should pay attention to some advantages of penoplex:
- The material is highly durable, making the finishing layer more reliable.
- Penoplex is vapor permeable.
- It has low thermal conductivity.
Therefore, it is still worth using such material for “wet” work. For dry insulation of a house with penoplex from the outside, used to create a curtain wall, you don’t have to follow any special subtleties. Each of these methods is worth considering in more detail.