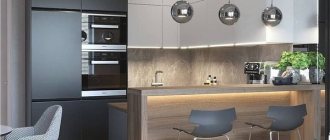
The quality and technical characteristics of the hood installed in your kitchen determine, first of all, the cleanliness and freshness of the air, and, accordingly, the level of comfort and coziness in the apartment. If your kitchen is the place where delicious food is often prepared, having a good hood above the gas stove is doubly important. Let's find out what features the installation of different types of devices has and what the installation height of the hood should be.
What types of hoods are there?
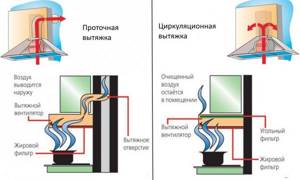
Kitchen hoods come in two main types: those with a filter system and those with a duct connection.
In the first case, the device is powered from the mains and operates on the principle of internal circulation of air flow. Dirty air goes inside, is cleaned and returns outside. For small kitchens, this type of hood over the stove is an ideal solution.
If the kitchen is large and something is constantly being prepared in it, it is recommended to hang the unit with a connection to an air duct, which will simply remove dirty air from the room. In addition, such models have greater productivity.
How does the hood work?
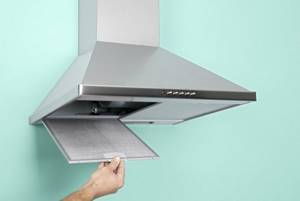
The hood is equipped with removable grease traps that need to be washed and replaced.
The main purpose of an electric hood is to remove combustion products and unpleasant odors from the air, which can spread throughout the house. That is, the air is actually purified. The installation of such equipment is especially important when using gas stoves, since they run on fuel, which, when burned, emits a large amount of harmful substances. Among them are carbon dioxide, nitrogen and other impurities. If there is no hood, they will be removed through a ventilation shaft leading into the room or through an open window, but until this time they will remain in the room for some time.
Find out how to clean grease from a hood, and also read useful recommendations on how to clean it at home in a special article on our portal.
Using a forced action hood allows you to speed up the process of removing combustion products to minimize your contact with them. Being in a small room with poor ventilation while cooking can have a particularly strong impact on your well-being (shafts and passages are often clogged).
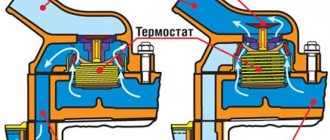
Hood with two electric motors
The heroes of our review can purify the air in two ways. The first is the removal of exhaust gases from the room, the second is additional passing through a filter system.
Interesting to know! The hood itself is a very useful and necessary device, but in some cases its use will be ineffective. Such situations are possible in the absence of normal supply ventilation, so it is worth taking care of this during installation.
Features of operation
The hood itself is not complicated. It is controlled via a simple mechanical control panel. It can have both push-in buttons and slider switches. The former, being in a characteristic position on the same level with the body, indicate the activation of one or another function of the device, and the latter allow you to quickly change operating modes or turn the device on/off. These control options are typical of cheaper units that can be hung above a gas or electric stove.
As for ultra-modern units, they are equipped with multifunctional electronic panels, which are characterized by the following features:
- Pressing a button can perform several functions at once, for example, switch operating modes in a certain sequence or change the air suction power.
- All set settings can be visualized using the display. This allows you to control the work process without remembering in which mode the installation is operating at a certain point in time, but simply look at the indicators displayed on the screen.
USEFUL INFORMATION: Types, sizes and costs of kitchen countertops made of chipboard
The latest developments are equipped with sensors popular in various industries. Any element of such a system requires only a light touch with a finger to activate or deactivate the function for which it is responsible.
Equipment selection criteria
The configuration of the devices under consideration is such that even the smallest of them cope with the tasks assigned to them without compromising quality. Therefore, the issue of choice must be approached comprehensively - taking into account not only the technical “stuffing”, but also the dimensions, design, level of efficiency and potential associated difficulties, for example, labor-intensive maintenance. Next, we will consider basic factors that should not be overlooked.
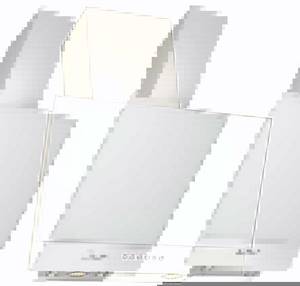
Dimensions of inclined hood
The width of such household appliances can vary between 35-120 cm. For small kitchens, it is advisable to purchase small-sized models, the same as the installed hobs and stoves. The average frontal width in this segment is 50 cm. More respectable variations also have their own audience - they are bought for spacious kitchens, often combined with a dining room.
Performance Level
This indicator is determined in accordance with the volume of air that is forced through the equipment for 1 hour. To more accurately determine the required performance of the hood, you should use the standard formula: multiply the volume of the kitchen by 12 and add another 15% of the resulting value. If you purchase equipment in accordance with this calculation, you can end up with an effective air purification system that functions stably, that is, without fluctuations under extreme loads.
Inclined hood with a capacity of 750 cubic meters. meters per hour
For example, if the kitchen area does not exceed 17 square meters. meters, an inclined hood will be sufficient for it, the productivity of which is kept within 1,500 cubic meters. meters per hour. If the workspace is even smaller, you should not overpay - it is better to install an inexpensive model with a capacity of no more than 1,000 cubic meters. meters per hour.
Specifics of the filter used
The vast majority of series are equipped with disposable carbon elements that require periodic replacement. In the improved lines of the mid-price segment, there are reusable grease filters. In this case, maintenance comes down to periodically washing them with a neutral agent.
If we omit the criterion of external execution - undoubtedly important for maintaining the unity of the design composition - the presence of such convenient additional options as automatic shutdown and a timer with several modes may come to the fore.
Popular brands
Developments under the following brands are recognized as the most reliable and practical in conditions of intensive use:
- Siemens and Bosch are “Germans” proven over decades;
- interesting lines from the Swedish brand Asko;
- Some of the most affordable, and high-quality, are Slovenian Gorenje hoods.
If we consider newcomers to the specialized market who have not yet acquired such an “impenetrable” reputation, but still offer high-quality equipment, it is worth mentioning:
- Russian manufacturer Elikor;
- Ukrainian debutant Eleyus;
- German innovator Kronesteel.
Inclined hoods from Russian manufacturers Elikor
Hansa, Faber, Electrolux, Jet Air occupy a significant part of the industry market, and their pricing directly depends on the status of the manufacturer and its resource allocation policy. Krona, Elica are representatives of the budget segment, here the cost of equipment starts from 15 thousand rubles.
Types of hoods according to installation principle
Based on the installation features of a particular model, hoods are classified according to the type of installation:
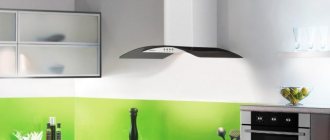
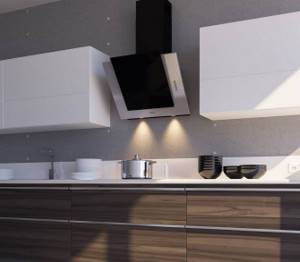
- The dome version, like the fireplace version, is mounted on the wall and will take up a fairly large space. Such a device will be an excellent solution not only for modern, but also for classic style.
- An island hood is attached to the ceiling in any part of the kitchen and is used when the electric or gas hob is located in a non-standard location, placed in the center of the kitchen and not blocked by any cabinets. It will be a good addition to absolutely any design.
- The corner type of device is installed in the corner of the kitchen; it will solve the problem of ventilation and air purification if, due to the layout or location of communications, the stove is located in the corner of the kitchen room.
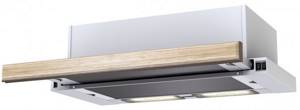
- A flat hood is mounted on the wall, most often under a wall cabinet.
- Built-in models are mounted entirely in a wall cabinet.
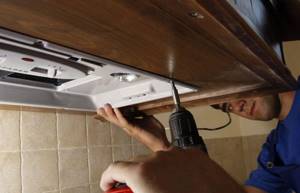
How to install a hood over a gas stove: instructions for a hanging model
Devices of this type are installed quite simply. The work is carried out as follows:
- We carry out markings. To do this, mark the height of the lower edge of the body, then determine the center line. We attach to the received outlines the template that comes with the equipment. If it is not there, we outline areas for fasteners.
- We are preparing the fastenings. We drill holes and insert plastic inserts into them.
- We install the brackets and fasten them securely.
- We hang the case on the brackets and fix it.
All that remains is to connect the device to a properly assembled air duct and to the network.
@ Instagram avtor_studio
Hanging models are attached to the wall above the stove. Devices of this type are installed quite simply.
- Ventilation and air conditioning
Is it possible to connect a kitchen hood to ventilation and how to do it
General installation rules
If you decide to install a hood without the help of a specialist, you need to know some rules:
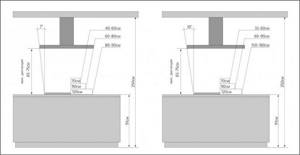
- The hood is hung above the gas stove at a level of 60 cm or higher. But for its most efficient operation and a good addition to the interior, the height of the hood mounting is calculated individually. It is not for nothing that standard operating recommendations indicate ranges that allow one to take into account factors such as hood power, kitchen design, and the height of the person who most often cooks at the stove.
- The width of the hood should not be narrower than your stove. Therefore, it is not recommended to buy or order, or install a hood before installing a gas stove.
- If the hood is electric, then the outlet from which it will consume electricity should not be located above the stove to avoid a fire.
- When connecting the device directly to the duct, a pipe with a minimum number of bends should be used.
USEFUL INFORMATION: Corrugated siphon for sink: technical characteristics, selection and installation
Selection and installation of ventilation ducts
There are two types of ventilation pipes for hoods - plastic products and corrugated pipes. The latter variety is in great demand, as it has many advantages.
The advantages of corrugated pipes include:
- Easy to install. The product is made of thin aluminum, thanks to which the corrugation can be bent and rotated as required.
- Ability to quickly change length. If the pipe is too long, then the excess can be cut off using ordinary scissors. And when the calculations were carried out incorrectly, the corrugation can be increased without any problems - the elements are quickly and well connected to each other.
- Light weight. The material is very light, thanks to which you can save on additional fasteners and reduce the time required for installing ventilation.
- Cheapness. A buyer with any income level will be able to afford to purchase corrugation.
But when installing this material you need to be extremely careful. After all, corrugation is very pliable and strong pressure can leave an unsightly dent on the product.
In general, it is recommended to use plastic ventilation pipes. This kind of product has a smooth inner surface, so the flow will not be slowed down by the walls and lose its speed. In addition, the material is inexpensive, lacks elements susceptible to oxidation, and is safe for human life and health.
To connect the air duct to the ventilation with your own hands, you need to connect the plastic flange of the hood with a corrugated or plastic pipe, insert the same element into the ventilation grille and fasten the entire structure using construction clamps
Installation of a hood with a carbon filter
This type of hood is very easy to install even for non-professionals. Using a level, the height and location of the device are calculated, after which places for future fastenings are marked. After this, using simple manipulations with a hammer drill, holes are made for fastenings. The device is attached to special hooks that will hold it firmly and securely.
Installation of a flow-through hood with an air duct
The process of hanging the hood with connection to the air duct occurs, as in the previous case, using fasteners. The device must be leveled horizontally and hang at the permitted distance from the stove. Next, an air duct is installed, which must necessarily match the diameter of the ventilation duct in the wall, which will ensure no power loss.
Experts recommend the use of a smooth plastic pipe for connecting to the air duct.
After installation, you must check that everything was installed correctly and functioned properly.

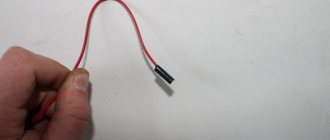
Connecting the hood to the power line

Design diagram of an inclined hood - must be studied before installation
- This type of work is not complicated and consists of isolating all existing contacts.
- It is worth connecting the hood after the electricity in the apartment is turned off - this is a mandatory rule for working with power lines.
- After connecting the equipment, it is worth checking it for functionality, namely functionality and the presence of traction.
Installation features
The distance between the hood and the hob surface is measured from the bottom edge to the burners. The unit should be mounted exclusively by level, since the possibility of adjusting the position in the future is excluded.
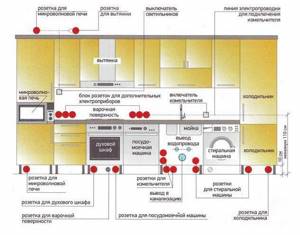
Before installation, you need to think carefully about choosing a location again, because the device must have access to the ventilation shaft and power supply at the same time. For this reason, the location of all communications is indicated on the kitchen plan.
In cases of major renovations, the location of the hood is calculated and drawn on the kitchen plan along with other electrical appliances. If the only question is replacing certain equipment, then you will have to adapt to existing circumstances.
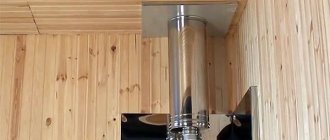
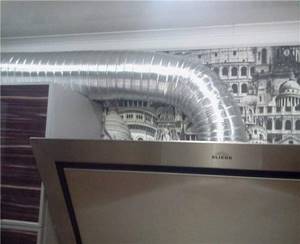
Fastening corrugated pipe
To install and connect an inclined hood to a ventilation duct, it is necessary to determine what type of air duct is suitable for a given room: flexible, rigid or combined. For a flexible channel you will need materials:
- corrugated pipe ∅ 100, 125 or 150 mm (depending on design);
- plastic transition 1 pc. in case of a difference in the diameters of the pipe and ventilation pipes on the hood or ventilation grille;
- silicone sealant or Moment sealant;
- 2 pieces of worm clamps ∅110-130 x 12 mm;
- PVC dowels 6 pcs. with a diameter suitable for an SDS drill (available complete with a hood).
A flexible air duct made of corrugated pipe must be laid from the outlet pipe. Products are made from aluminum foil or reinforced PVC. The features of aluminum pipe are easy processing, good deformation, light weight. The advantages include low cost, and the disadvantages include noise when air passes through.
An exhaust pipe made of reinforced polyvinyl chloride is stronger, has an unlimited service life, is well cut and absorbs noise; The downside is the higher cost.
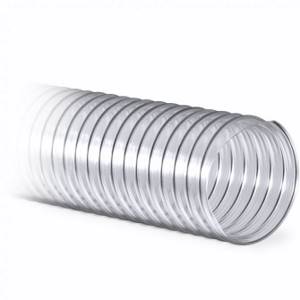
Corrugated suction hose made of heat-resistant PVC
The order of the air duct installation:
- The reverse draft valve from the hood must be moved to the end of the route to the entrance of the ventilation duct. This technique masks the sounds of claps overhead; in the distance the operation will not be heard. A good purchase would be to purchase a silent backdraft device with a silicone seal.
- We coat the edge of the pipe on the hood body with sealant and stretch the flexible hose, clamping the landing site with a worm clamp.
- If the diameter of the pipe is smaller than the corrugation, we use a plastic transition 100x125 or 125x150 mm for connection.
- If there is a cabinet above the hood, use an electric jigsaw to cut out holes in the lower and upper parts for the passage of the pipe. Make the diameter 5-10 mm wider than the pipe. We fill the resulting gap with silicone sealant to reduce vibration and noise.

Openings in the cabinet for the passage of flexible duct
Important rule! To avoid a decrease in draft, the diameter of the flexible air duct must be no less than the outlet pipe and not have any narrowing along its entire length.
- We lay the suction pipe along the top of the cabinets and fasten it with clamps to the wooden panels using short self-tapping screws. Fixation eliminates the risk of accidental movement and noise. To eliminate vibration under the aluminum corrugation, every 30-40 cm we glue pillows made of several layers of double-sided tape.
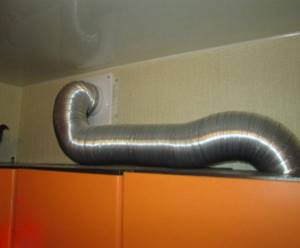
Free placement of corrugations on top of kitchen cabinets
- At the entrance to the ventilation duct we install a connector with a backdraft valve. We process the edges with silicone sealant to seal the junction of the corrugation and secure it with a worm clamp. We also insulate the junction of the connector to the wall. We check the tightness of the system with the hood on.
- Due to the fact that the kitchen has one ventilation duct, we install a connector with a grille to maintain natural draft.
The entire installation in numbers in this video:
Additional recommendations
Any hood is connected to the electrical network, so if the electrical cable is not hidden in the wall in advance, it can be hidden in the cable channel. This will give your kitchen a more attractive look. Also, the wiring can be hidden behind a false wall or kitchen panel. For safety, it is recommended to install the machine on the socket for connecting the device; this will be very important in the event of a fire or short circuit. Therefore, you will keep your kitchen safe.
USEFUL INFORMATION: Corrugated hood: diameter, dimensions and installation
You should not try to make a new hole for the air duct yourself. At best, you will end up in someone else's air duct; at worst, if you block an existing one, you will disrupt the ventilation system.