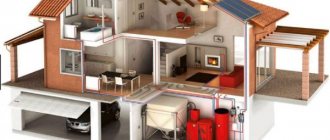
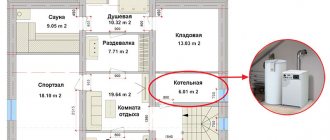
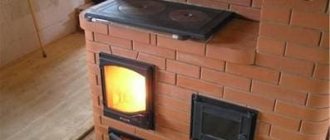
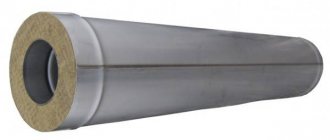
The main element of the natural ventilation system for housing is the general building ventilation ducts, through which stagnant and polluted air is removed from the premises. In apartment buildings, ventilation ducts are necessarily built during the construction of the house; they are carried out from the basement to the roof of the building and have access to all apartments.
When constructing private houses, little attention is often paid to the installation of ventilation ducts. They save on the air exchange system, replace it with pipes and allocate insufficient space in the wall for laying ventilation channels. This leads to air stagnation and may be unsafe when using gas heating boilers.
In this material we will tell you how to make ventilation in private houses made of brick, foam blocks and aerated concrete with your own hands.
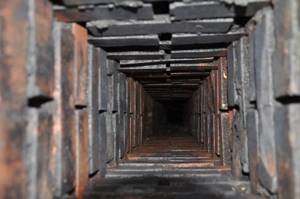
The need to arrange smoke and ventilation ducts
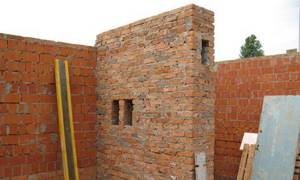
Full ventilation is air circulation, in which enough fresh air enters the room and waste materials are removed.
In modern homes it is becoming more and more complex. This is due to the equipment of apartments with plastic windows. Sealed structures reduce heat loss and protect against noise, but prevent microcirculation. As a result, natural exhaust cannot cope with air exchange. The dwelling must be equipped with additional ventilation ducts or forced ventilation.
For stove or boiler heating, separate chimney ducts are needed to serve only the heating unit. To burn 1 cubic meter of natural gas, 10 cubic meters of oxygen are required. It is impossible to take such a mass of air from a room. The supply of oxygen and the removal of combustion products is provided by chimneys.
Overview of common mistakes
Independent installation of a ventilation system in brick buildings is often accompanied by repeated errors. Firstly, a duct is not provided in rooms without windows; in this case, air humidity increases and mold and fungi form on the walls. To solve this problem, it is enough to equip an air duct with a capacity of 15 m³/h.
The outer wall is equipped with a hole, believing that it will be sufficient for complete air exchange. You need to install a fan in it, and protect the surrounding brick with a hydrophobic compound so that moisture does not accumulate in the “window” area.
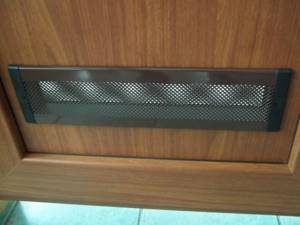
To improve air circulation in the house, interior doors can be equipped with ventilation grilles
If ventilation holes are not provided in the interior doors (a gap at the bottom edge of the leaf is sufficient), the effective cyclicity of flows will be disrupted. To solve this problem without distorting the interior composition of the premises, you can equip the doors with decorative grilles or bushings that will allow clean or waste air to pass through. masses. Their total area can vary between 80-150 cm².
If plastic double-glazed windows are installed in a brick dwelling, hermetically sealing off the internal microclimate, coupled with a makeshift air duct system, they can lead to the effect of clogging the premises. To ensure proper operation of the channels, you can equip the windows with special ventilators that promote additional air circulation.
Requirements and standards
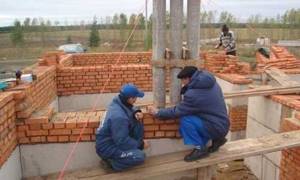
A number of documents regulate the construction of ventilation and chimney ducts: SNiP “Heating, Ventilation and Air Conditioning”, SNiP “Gas Supply”, “Safety Rules in the Gas Industry” and many others.
Based on these documents, a ventilation project for the building is developed. Calculations are made taking into account the amount of required air exchange. For a living room, 3 cubic meters of air per 1 hour per 1 square meter is sufficient. m area. For bathrooms, this value is much higher - up to 25 cubic meters. For the kitchen, at least 60 cubic meters are required. m. per hour, and if a gas stove is working - 100. Cooking in a kitchen with metal-plastic windows is only possible with a hood, since it is very difficult to arrange such powerful natural ventilation.
Requirements for ventilation ducts:
- The fewer horizontal parts, the more efficient the ventilation. If a forced one is being built, the horizontal fragments can be quite long, and turns are allowed.
- A round cross-section is more efficient than a rectangular one. It is preferable to use pipes with a minimum diameter of 120 mm.
- Ventilation holes should be placed at a distance from the ceiling of no more than 10 cm.
- The minimum length of ventilation ducts made of heat-resistant brick is 12.5 cm - half of a regular brick.
- The height of the shaft head depends on the distance to the ridge.
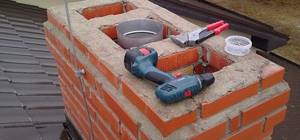
Additional requirements apply to chimney ducts. The combustion temperature of fuel varies greatly. In addition, firewood, coal, even gas often burn incompletely, releasing aggressive acidic residues. This is taken into account when choosing.
- The chimney duct must be absolutely sealed and not come into contact with the air of the room through which it passes.
- The structure must be strictly vertical.
- The chimney material must withstand the temperature of fuel combustion and the action of aggressive substances.
Ventilation and chimney ducts must be cleaned periodically; this requirement is taken into account when developing the project.
How to make pipes yourself
You can create a ventilation channel in a brick wall with your own hands, even if it is thin. For a partition half a brick thick, an asbestos cement pipe with a diameter of 120 mm (internal - 100) is “suitable”. The opening in this case should be 130 mm wide. Having lowered the pipe into it, it is secured with a cement mortar.
In the absence of a pipe, it is performed as follows: two large half-waves of asbestos-cement corrugated roofing sheet of the required size are secured with wire. It is fixed on a brick bedside table, which is laid out along with the partition. However, there is another way: on the sides of the partition in its upper part, place a couple of bricks on the edge and install the structure. A hole is cut out at the bottom for the ventilation grille, where it is fixed. Lastly, plastering. The part that ends up in the attic must be insulated with asbestos (foil will also do). On the roof it should be no closer than a meter from its highest point.
There are also much thinner openings - a quarter of a brick. In this case, the bedside table will be replaced by a system that can be created from strips of flat asbestos-cement corrugated roofing sheet (20 cm wide). They are inserted into the canal, spread out and tied with wire, and plastered.
Technical features of channel laying
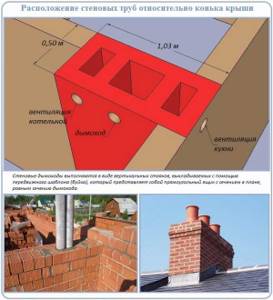
The construction of the ducts is carried out in accordance with the rules of SNiP:
- The construction of air ducts of any type without an approved design is strictly prohibited.
- Brickwork of smoke and ventilation ducts at the same time is prohibited. They are arranged separately.
- It is recommended to install the ventilation duct parallel to the chimney. Combustion products heat the air in the ventilation duct, which improves draft.
- The masonry depends on the thickness of the wall. With a thickness of 380 mm, the masonry is single-row, with a thickness of 640 mm - double-row.
The dimensions and nature of the masonry depend on the power of the heating system, the area of the room, and the purpose of the building. This is important when building a brick channel: after all, its parameters depend on the parameters of the brick.
How much does it cost to build a masonry
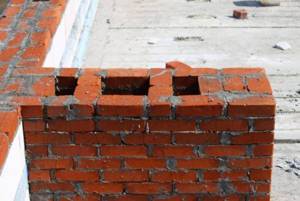
Despite the popularity of monolithic and frame house construction, masonry made from piece materials is still in demand in construction. Experienced craftsmen with certain skills and knowledge can do the job well. If it is planned to invite specialists to perform this type of work, then an estimate must be drawn up. It is affected by:
- number of storeys of the building;
- area of premises;
- geometric complexity of channels;
- performing dressings with existing masonry;
- the need to finish sedimentary seams;
- type of material and its price, etc.
At the same time, the speed of work does not depend on such characteristics of the brick as strength grade, resistance to freezing, and color preferences. Therefore, these parameters do not affect prices.
Refined calculations take into account the real costs of working time for each type of work performed (man-hours). After timing the execution of each construction operation, its exact duration is determined. Having this data, as well as the average salary for a specific region, you can calculate the hourly rate using the formula:
P = C/V,
Where:
R – tariff (rubles);
C – salary size (average) (rubles/day);
V – duration of work per day (hour).
Example
The crew carries out the laying, working 12 hours a day. With indicator C = 900 rubles/day, the cost of work for 1 hour will be: 900/12 = 75 rubles per hour.
It is also taken into account that the tariff for laying, for example, hollow one-and-a-half bricks will be significantly lower. This is justified by the higher speed of work completion. The number of piece units per unit of masonry volume in this case will also be less. All this explains why prices for this type of service differ in different regions and at different facilities.
A properly implemented ventilation system in the house will help maintain optimal microclimate parameters, promote cleanliness of the air in it, and prevent the formation of dirt in the ducts and heat loss.
System Design Options
Ventilation ducts in a private brick house can have different designs. The design is chosen taking into account the characteristics of the rooms and one feature common to the hood. Along with the exhaust air, heat is also removed. To prevent cooling, a bend in the form of a brick staircase will be included in the ventilation system. It creates a barrier and prevents premature removal of heated air: after being delayed, the air flow has time to partially transfer heat into the room.
Conclusions from the premises
This design is used for arranging complex ventilation. In the upper part of the building, all the channels are combined into a common shaft and discharged through the roof, like a chimney. Its height and diameter depend on the volume of the premises and the distance to the roof ridge.
Wall pipe
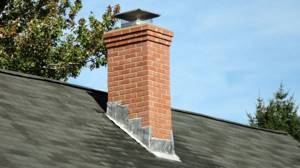
The air duct is installed directly in the internal wall. Installing ventilation ducts, and even more so chimney wall pipes, in external walls is allowed only in exceptional cases. The wall is in contact with cold outside air. In this case, the exhaust gas, passing through the air duct, cools faster and does not warm the room properly. For the same reason, condensation quickly forms inside the chimney or ventilation duct itself. This reduces traction and accelerates wear, as acid anhydrides are deposited on the walls of the shaft. The wall pipe in the outer wall must be additionally insulated.
A separate chimney is installed for each stove. In exceptional cases, 1 chimney outlet is installed for 2 stoves. A ventilation duct is installed on every 2 chimneys.
The chimney riser ends at the top floor and turns into a regular chimney. The height of the chimney and the head of the ventilation duct depends on the exit location.
Root pipe
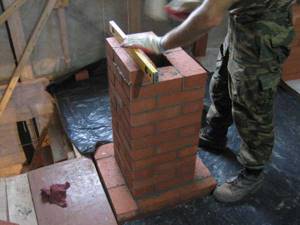
is usually installed in wooden buildings. A brick chimney is erected on its own foundation, and the latter is not adjacent to the foundation of the building. The thickness of the walls is equal to half a brick.
The root pipe can be connected to two hearths. For this purpose, reversible sleeves are installed.
Mounted pipe
Constructed directly on the stove. Experts recommend placing a brick chimney not directly on the neck of the stove, but by first laying a reinforced concrete slab with holes on it. This device allows you to repair the stove in the future without disassembling the chimney.
Do-it-yourself bricklaying process
to come back to the beginning
Tool you will need
Laying brick ventilation channels with your own hands will require the following tools:
Brickwork tools.
Laying brick ventilation channels is done using a template. The template is made of plywood or chipboard and has a square or cross-section with right angles, equal to the cross-section of the channel. The length of the template is equal to 8-9 brick thicknesses.
Laying bricks begins from the corner of the wall. The first channel is developed after laying 1.5-2 bricks. The channel is developed using a template, which is placed strictly vertically in a plumb line. Between the channels there is a distance equal to the width of the brick. Laying is done “end-to-end” with cutting of the mortar. Linking is done between the rows of bricks, i.e. vertical seams in two adjacent rows are shifted by half a brick in relation to each other.
Indication of readiness of brick mortar.
The solution used is a simple sand-cement mixture in a ratio of 1:(3-4), thoroughly mixed in the water mass. It is best to use cement grade M500. You can use a mixture that is already ready for use for brickwork. Before laying, the brick is moistened. The mortar is applied to the surface of the masonry and the bottom of the brick. Every 6-7 rows the template moves.
If there is a need for an outlet, it is made at a distance of no more than 100 cm. The inclined angle of the outlet channel should be no more than 30? to Wall. The slope of the outlet is created by grinding the brick at the required angle. Its laying is carried out only horizontally. The cross-sections of the outlet and the key channel must match. If there will be a chimney next to the ventilation hole, then between them you need to lay a continuous masonry with a width of at least 40 cm. When forming a wall with a chimney and ventilation, it is necessary to use white brick. The seam in the middle of the ventilation device must be carefully smoothed and rubbed.
Upon completion of the wall laying, it is necessary to check the cleanliness of the channel; to do this, a ball with a diameter of about 100 mm is lowered into it on a cord for the entire length.
to come back to the beginning
Materials for smoke and ventilation ducts
Air ducts experience considerable load. Warm air flows out through the shaft. When it comes into contact with cold outside air, the gas inside quickly cools. Since its humidity is noticeably higher, condensation is deposited on the walls of the channel. In this case, the difference between the temperature inside the ventilation duct or chimney and the temperature outside becomes even greater.
Under-oxidized combustion products, acid anhydrides and oxides are removed with the exhaust gas. When condensation appears, they turn into acids and destroy the wall material. So the latter must be resistant to temperature and acids.
Brick
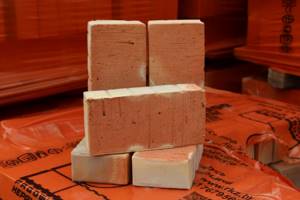
Brick ventilation is a traditional solution. Ventilation and chimney ducts of any kind are constructed from building stone. When setting up, the following rules are followed:
- Not every brick is temperature resistant. For chimney ducts, only solid ceramic ones are used. Silicate and hollow do not withstand temperature changes and are unstable to acids.
- The shaft cross-section is rectangular, which reduces draft. You need to accurately calculate the height of the pipe.
- The inner surface of the air duct is carefully leveled. The smoother the surface, the less soot, soot, and sulfur oxide is deposited on it.
- Tightness is a must. This is also true for ventilation, since good traction cannot be achieved with cracks and uneven surfaces.
The laying of brick ventilation ducts and chimneys is paid at higher prices compared to the construction of a partition.
Prefabricated single-circuit galvanized and steel systems
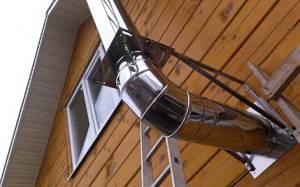
With high ceilings, outlet with wall pipes is not possible. It is also almost impossible to create an effective overall ventilation plan if the building is intended to be rented out, as each owner has his own needs. In this case, single-circuit systems are installed.
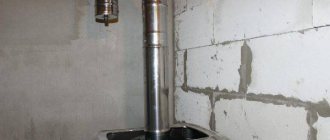
The structure is assembled from metal pipes and elbows. The connection is hermetically sealed - in a lock or with screw connections. There are round and square pipes. The former are used for the chimney, the latter for ventilation, where the draft force is not so important.
There are several restrictions:
- The smoke channel can only include 1 elbow - at the exit from the furnace or boiler.
- The pipe gets very hot. It can be laid in a brick or stone wall, but not in a wooden one. If the pipe is not hidden, it is insulated to prevent fire.
- You cannot use galvanized steel for the chimney: the alloy actively interacts with acids and will quickly fail. The best option is stainless steel.
The service life of a single-circuit system is short - up to 15 years. However, replacing the pipes is very easy.
Dual circuit systems
Option for chimney. The system includes 2 steel pipes - for air supply and for exhausting combustion products. The pipes are insulated from each other and from the outside air with mineral wool. The system is fireproof and lasts much longer. Thanks to thermal insulation, condensation forms in smaller quantities.
Asbestos cement pipes
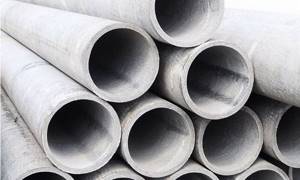
are not very resistant to temperature, but are insensitive to the action of chemically aggressive substances. The cost is low. Suitable for the construction of ventilation ducts and chimneys for devices with low temperature output.
Asbestos-cement pipes are inconvenient: it is impossible to install corners or transitions, the material is fragile and difficult to work with.
Sand cement pipes
Such shafts are constructed from a special type of building blocks. Their shape is traditional - 20*20*40 cm, but they include 1,2 or 3 channels. Sizes can be large. The blocks are used in the construction of wall ventilation. They are not suitable for chimneys, as they are rarely of sufficiently high quality and do not always provide a tight seal.
Prefabricated ceramic systems
They consist of a round ceramic pipe, thermal insulation made of mineral wool and a concrete cover. Such blocks are easy to install, last a very long time and are very reliable. The downside is the high cost.
Ceramic systems are used in the construction of chimneys; such ventilation turns out to be too expensive. If desired, the blocks can be mounted into the wall and hide the chimney.
Corrugations
Corrugated steel pipes make it possible to construct complex exhaust systems where turns and transitions cannot be avoided. They are often used as hoses and for connecting wall chimneys to boilers. A corrugated pipe is not suitable for smoke removal: a lot of soot and soot are deposited on such a wall, and the pipe quickly fails.
Polymer pipes
Have limited use. Plastic is not highly heat-resistant, so they are used for exhaust hoods and for smoke exhaust from boilers using liquid fuel or gas: the combustion temperature of the fuel is relatively low here.
Plastic pipes are used to modify an old brick chimney. Inserted into the canal as a sleeve.
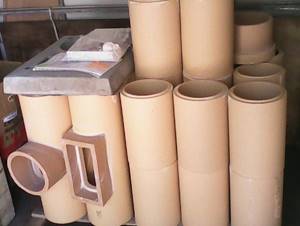
Ceramic pipes
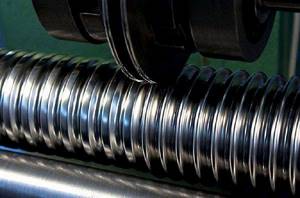
Corrugated stainless steel
Brick ventilation duct laying
Ventilation ducts are made using solid bricks.
In rare cases, facing and hollow are used. Existing voids in the material must be eliminated with clay or cement mortar. Sand-lime brick is not suitable for ventilation ducts due to poor resistance to temperature changes. They cause it to crack and crumble, disabling the entire system. The ventilation duct is laid using the same mortar as the internal walls. Prepare masonry mortar in the following proportion: one part cement (M500, but another can be used) and three parts sifted sand. Debris and stones in the sand can make the solution worse. When calculating the amount of water, an adjustment is made for the moisture content of the sand. Add water gradually with good stirring.
It is easier to make a large volume of masonry mortar using an electric concrete mixer. Usually the ventilation duct is laid out in 2 bricks; before starting work, markings are done using a plywood template. After several laid rows, buoys are placed (bricks laid in a plumb direction transverse to the channel). They protect the channel from debris and ensure correct geometry. However, it is more difficult to clean the ventilation duct with them. The masonry is carried out independently with single-row or multi-row dressing. Laying end-to-end will help prevent smoke from escaping into the living space.
Installation of smoke and ventilation ducts
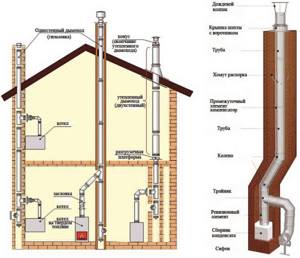
Chimneys and ventilation ducts in brickwork work only under one condition - sufficient draft. It occurs due to the difference between air pressure at different altitudes. In a one-story house it is quite small, but this is enough to ensure that the rarer heated air is drawn out.
To ensure traction, the following requirements are met:
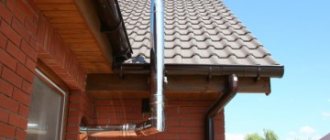
- The ventilation and chimney pipes go out onto the roof and reach a certain height. The value depends on the distance between the exit and the ridge. If the distance is less than 1.5 m, the pipe should be 50 cm higher than the ridge; if from 1.5 to 3 m, it should be at the same level as the ridge. If the distance is more than 3 m, the height is calculated: the line from the ridge to the pipe head is 10 degrees below the horizon. If there is a parapet on the roof and there is a taller building nearby, the height of the pipe is increased.
- Ventilation ducts can be combined. Chimneys are combined only in exceptional cases - when constructing a stove with a fireplace.
- If the chimney ducts are not located in the wall, they are thermally insulated along their entire length. Any terminals at the points of transition through the roof are insulated. Use asbestos or safer mineral wool.
It is recommended to waterproof the pipe between the roof and the otter. If this is not done, the entire wall will get wet.
Why is it needed?
Advantages
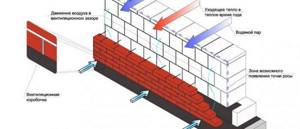
Building a house from scratch requires studying all the nuances. One of the controversial issues is the need to install a ventilation gap in the brickwork. The device has the following positive aspects:
- Drying. During the period of temperature difference inside and outside the room, condensation is observed on the outside of the main wall. Excessive humidity reduces the thermal insulation capabilities of the insulation and leads to destruction of the brickwork.
- Hiding surface imperfections. A small air gap between the wall and the cladding helps hide its unevenness without intervention.
- Keeping cool air inside the house in the summer. When the facing brick heats up to 90 °C, it begins to transfer heat not to the wall, but to the air cushion. This promotes the release of hot air into the atmosphere, rather than further transmission into the room.
Design flaws
Ventilation in masonry is a controversial issue. The argument that makes us think about the need for this device is heat loss in winter. Indeed, through the holes in the brick cladding, not only excess moisture, but also heat evaporates from the gap. To prevent strong cooling, it is recommended to make the supporting structure thicker. If the building material from which the wall is made does not lose its quality characteristics when wet, then there is no need to leave a gap. A ventilation gap must be made in the following cases:
- the use of insulation, which loses its ability when wet;
- high vapor permeability of the building material from which the inside of the wall is made;
- selection of facing material with high vapor barrier and moisture-condensing abilities.
Algorithm for laying smoke and ventilation ducts
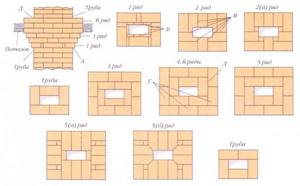
Installation of air ducts is carried out according to a previously created project. In order not to make a mistake when laying a channel in the wall, first create a template: a wooden board 250 * 14 * 2.5 cm, on which the diagram of the channels in the wall is marked. Thanks to the workpiece, it is easier to design a straight, even stroke.
Air duct construction diagram:
- The template is used from the 1st row of masonry. The board is laid so that the end is adjacent to the wall from the inside, and the holes for the channels are outlined with chalk. The template is used constantly to prevent shifts.
- The walls of the channel are laid out in 1 brick. If the cross-section is large, you can strengthen the ventilation by laying bricks across the channel.
- The bricks are placed end to end, and excess clay mortar is immediately removed. The treatment is carried out by mopping: the seams are thoroughly rubbed and leveled. A single-row dressing is used near the ventilation duct. It is performed using halves and three-quarters.
- If necessary, make a channel diversion. The angle is at least 60 degrees from the horizon. Lay out the outlet from bricks, hewn at the required angle. At the same time, the dimensions of the main channel and the outlet remain the same.
It is important to maintain cleanliness during construction. The holes are filled with newspapers. After removal, check the cleanliness of the shaft using a ball.
Brick for masonry and notes on working with it
For brick walls, solid stone is usually used. It is possible to use hollow facing bricks, but with voids filled with clay or mortar.
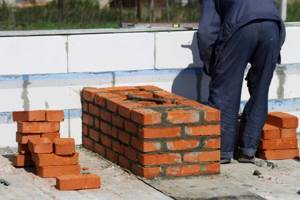
Ventilation ducts are made of red brick
Attention! Sand-lime brick is not used to form ventilation ducts, because... sudden temperature changes provoke its destruction.
The brick is fixed in the channels with the same mortar that was used for the construction of the internal walls. In order for the batch to be of sufficient strength, the following proportions must be observed when preparing the solution:
- purified construction sand – 3 parts;
- cement M500 – 1 part.
Water is added in measured portions to the dry, pre-prepared mixture with constant stirring. The consistency of the mixture should be such that when the container is tilted at 45 degrees, it does not spill out.
The formation of a ventilation duct often requires the use of non-standard size bricks in cases of bandaging seams, at the junction of walls, etc. For their mechanical processing, the following is used:
- chopping with a trowel or pick-hammer;
- Bulgarian;
- mechanism for cutting bricks.
In order to save money, scraps, material with broken corners, chips, etc. are processed.
Negative sides
The design disadvantage of brick ventilation shafts is considered to be minor side effects. In addition to their direct purpose, they
They let the heat out. To reduce these indicators and not resort to additional insulation of brick walls, it is necessary to provide a bend inside the shaft to retain the escaping air. The brick is laid out with a ladder, the protruding niches are sealed with mortar, and in the lifting areas the stone is placed on the edge and then pressed against the next masonry row.
At the point where the ventilation duct exits to the roof, an air gap of 13-15 cm must be provided. According to fire safety standards, there should be no connection between the chimney and the roofing material. The defect is covered with a special galvanized apron.
The operation of the ventilation duct is negatively affected by overcooling of the exhaust gases. Inside the passage, due to temperature changes, condensation begins to form and it all settles on the brickwork, which, being oversaturated with moisture, becomes the result of weakening internal draft. In order not to violate safety regulations, which will subsequently lead to disastrous results, the distance from the inner stone wall to the outer side of the metal air duct should be 1.5-2 bricks.
Technical parameters of ventilation ducts
The ventilation system must operate at an outdoor temperature of at least twelve degrees, and a room temperature of at least twenty. The presence of ventilation ducts in rooms without windows (bathrooms, toilets) is mandatory. The area of the channel opening should not be less than 0.016 square meters, and the channel wall should not be less than 10 centimeters. Resistance to air movement can be reduced by maintaining the cross-sectional area of the channel along its entire length. Brickwork must be made with smoothed seams.
Separate channels that lead into one shaft must be of the same length. The deviation of the ventilation duct from the vertical is allowed at an angle not exceeding thirty degrees. Cold air in the shaft and adjacent air ducts leads to reduced draft. To prevent this, the mine must be insulated.
Recommended parameters for brickwork of ventilation ducts. A single-row arrangement of channels is arranged with walls no thicker than 38 centimeters. Double-row placement is done with walls from 64 centimeters. The dimensions of the channel clearance are selected based on the power of the heating system:
- 3.5 kW - 14x14 centimeters.
- 3.5-5 kW - 14x20 centimeters.
- more than 5 kW - 14x27 centimeters.
The masonry is carried out vertically so that there is a distance of 0.4 meters to doorways and corners. If there is a chimney near the channel, then the walls of the channel are thickened and insulated.
Hood connection
In the kitchen, only the ventilation installed in the wall may be “missing”, especially if you cook often and the kitchen is small. A hood helps out by removing unpleasant air from the kitchen. It is important to connect it correctly to the ventilation duct. It is desirable that the distance to the ventilation shaft be minimal. Otherwise, the effect of the hood will be reduced. And long air ducts look ugly.
For connection, special air ducts and adapters are required. The elements are connected hermetically. A number of rules are important for safety and efficient operation. When connecting an exhaust pipe, it should not block the entire ventilation duct: when it is not working, the main ventilation operates from air draft. To do this, you need to remember to place a grill over the entrance of the exhaust pipe.
To ensure that the hood does not fail, the air must not be obstructed. This is why it is important to keep the duct length shorter. And it’s better to forget about turns altogether. The smoothness of the pipe will also contribute to high-quality traction. Therefore, corrugated pipelines, which are preferred due to their flexibility, still block the air flow. If you can't do it, you need to smooth out the turns. Danger: if a gas heater is used in the kitchen, the hood must not be vented into its smoke duct
Basic requirements for the design of ventilation ducts
The ventilation system is designed to provide a microclimate in the room that is favorable for human health. Therefore, it must comply with all accepted construction standards.
The utmost attention is paid to the installation of life support systems and all the rules for their construction are approved in SNiP. For a private developer, those that relate to low-rise buildings are important:
Rooms in which windows are not installed must have access to the ventilation system of the house. These are toilets, showers and bathrooms. The homeowner must keep the grates covering the vents clean. This is especially important to do in the kitchen, where soot regularly forms.
Device Features
Ventilation ducts are air ducts through which air moves due to the difference between external and internal pressure (natural ventilation), or the movement is set by a fan (forced ventilation).
draft ventilation is made up of ventilation ducts (inside the wall or attached), closed with louver-type grilles, prefabricated air ducts located horizontally, and a shaft to provide exhaust. Stagnant air from the house is directed into the channel, bypassing the grille louvers, rises and accumulates in a horizontal air duct, from where it escapes out through the shaft exit. Air flow is controlled internally by a louver valve, and inside the duct and shaft by gate valves.
In buildings with brick walls, ventilation ducts are installed inside the walls or in grooves covered with slabs. The minimum size of brick ventilation ducts should be half the length of the brick (14x14 cm). The thickness of the channel partition should not be less than half a brick. Ventilation ducts are not formed in external load-bearing brick walls. In cases where the house does not have internal brick walls, attached air ducts with a minimum size of 10x15 cm are installed. Such air ducts at normal humidity are usually made of gypsum slag and plasterboard slabs, and at high humidity - from concrete panels up to 40 mm thick. Sometimes air ducts are made of asbestos cement, metal sheets or plastic.
Horizontal air ducts located in attics or other rooms are made of gypsum slag panels up to 50 mm thick with an air gap of 40 mm or from hollow concrete slabs up to 10 cm thick. Horizontal air ducts are installed on top of the ceiling covering by laying one row of slabs, then covered with a layer cement more than 5 mm thick. The size of horizontal air ducts is at least 20x20 cm. Horizontal air ducts in rooms with high humidity (bathhouse, sauna) are made with a slope of 0.01 to the exhaust shaft.
Tubular channel in a brick wall
A ventilation duct in a brick wall can be made from a pipe. Asbestos or plastic pipes with a diameter of 125-150 mm are used, and for forced ventilation - 100-125 mm. The pipe is installed inside the brickwork strictly vertically and sealed with cement mortar. For a thin brick partition (0.5 brick thick), using a pipe is the most acceptable method. In this case, the pipe is not located inside the masonry, but between two sections of the wall. The pipe is connected with mortar and thoroughly plastered.
Exhaust natural ventilation is a very important element of home improvement. When erecting brick walls, it is necessary to immediately provide ventilation ducts that can be placed inside the masonry. Otherwise, you will have to use overhead systems, which will spoil the appearance of the room.
ostroymaterialah.ru
Ventilation shaft in houses made of aerated concrete and foam concrete
Ventilation in a house made of aerated concrete has its own organizational features. Aerated concrete is an unsuitable material for the construction of a mine - it absorbs moisture, gases, and is susceptible to high temperatures. Therefore, in houses made of aerated concrete, other materials and devices should be used for organizing air ducts:
- laying out the channel and adjacent brick walls;
- lining the shaft with stable pipes made of metal, asbestos, plastic;
- installation of a galvanized box lined with aerated concrete blocks.
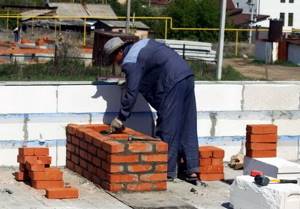
Brick ventilation ducts in such buildings are constructed according to the same rules as for brick buildings, but here special attention must be paid to the stability of the structure. For reliability, it is necessary to line the walls adjacent to the shaft with bricks to create support.
Stages of work
Brick cladding: this technology provides that cladding work will be carried out in the following sequence:
- The required number of bricks is calculated before laying begins. It is necessary to clearly calculate this amount, so as not to later buy additional material from another batch, as you risk running into a mismatch of bricks in shade. Knowing the exact amount of material, it is worth adding about 10% to the resulting figure. This reserve will be needed in case some of the bricks suffer irreparable damage during the laying process.
- First of all, we carry out a test laying, that is, we install about 1 square meter. m of brick to check the texture of the mortar. This is also necessary in order to decide on the method of filling the resulting seams. A trial installation is carried out for each type of brick or mortar that will be used.
- To correctly calculate the brick consumption and determine the required thickness of the joints, a trial row is first laid and then dismantled. The work is carried out what is called “dry”, that is, without solution. This way we can make sure that the corners are bandaged correctly and we won’t make any mistakes when laying them.
- If you started laying one way, do not change it to another until the very end of the work. The solution also cannot be changed. Otherwise, you risk ruining the aesthetics of the masonry. This rule must be observed, regardless of which part of the building is covered - the basement or the walls.
- There is no need to experiment while preparing the solution. The desire to save money leads many to violate the manufacturer’s instructions, and this leads to disastrous consequences. It is not recommended to use antifreeze additives in the solution. It is much wiser to simply stop working if the temperature drops to 0°C. Do not risk the quality of future cladding.
- To achieve a uniform color of the masonry, it is necessary to simultaneously use bricks from different pallets.
- Before laying, it is recommended to briefly immerse the prepared brick in water. This will wash away dust from its surface, plus the water will prevent the solution from drying out too quickly. Remember, dry brick will almost instantly absorb water from the mortar. This will cause the finished masonry to become less durable, as the mortar will crumble.
- Remember to use a level and plumb bob to check that the rows are horizontal and the seams are vertical.
- During the work you should take breaks to assess the correctness of the masonry from a distance. This will help to detect possible defects in a timely manner so that they can be quickly corrected.
