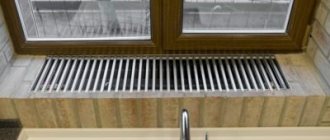
The principle of operation of ventilation in the window sill of plastic windows
In rooms with windows, heating radiators are usually located under the window opening, which in the autumn-spring period, when heating devices are in operation, leads to the formation of condensation on the window sill. The formation of condensation is caused by temperature differences from different sides on the surface of the window sill. To prevent the occurrence of this negative phenomenon, use window sill grilles for heating radiators.
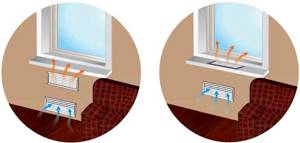
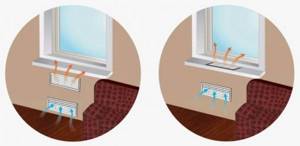
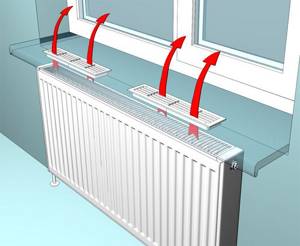
The operating principle of ventilation created in a window opening using special grilles is based on the natural circulation of warm air in a confined space. Warm air from the heating radiators rises upward, passing through convection grilles installed in the window sill, while the temperature difference on its upper and lower surfaces is insignificant, which ensures the absence of condensation.
Air circulation in a window opening with a heating system installed underneath it
How to choose
The main criteria for choosing a ventilation grille for a window sill are the following parameters:
- Length of the product. The length of the grille must correspond to the length of the battery installed under the window sill. This can be a single structure consisting of several individual elements.
- Section of the product. The width or cross-section of the ventilation grille must ensure sufficient air circulation to prevent condensation from forming on the surface of the window sill.
- Presence and quantity of connecting elements. This parameter determines the possibility of foreign objects falling into the internal space behind the window sill. This is especially important if the front side of the heating radiator is protected with facing material.
- The style, color and design of the design determine the placement of a particular product.
- The cost depends on all of the above parameters.
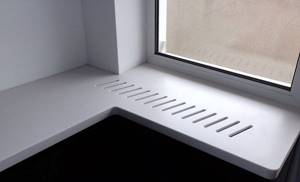
One of the unconventional ways to design ventilation holes on a window sill board
Related article:
Screen for the heating battery. Why is it needed, what materials is it made from; Tips on choosing, assembling the box and increasing the efficiency of hidden batteries, review of prices for popular screen models - read in the publication.
Advantages of convection grilles for window sills
The presence of ventilation grilles for radiators of the heating system, installed in the window sill, has a number of undeniable advantages that ensure an optimal microclimate in the room where they are installed. In addition, the advantages of their presence include the following indicators:
- natural ventilation in the room improves;
- the issue of preventing the formation of condensation in the window opening is resolved.
The advantages of such products can also be considered:
- versatility of the installation method and ease of installation work;
- variety of shapes, designs and colors;
- ease of use and maintenance;
- affordable price for models made of plastic.
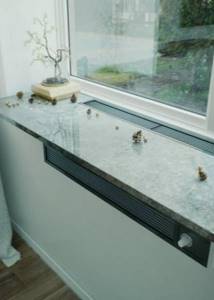
Convection grilles can be installed in different ways, depending on the materials of the enclosing structures, the design style of the room and the personal preferences of the user
At what price can you buy ventilation grilles for a window sill - price review
Ventilation grilles for window sills can be purchased at building materials stores and retail chains that deal with similar products and also specialize in sanitary equipment. In addition, similar products are offered by online stores of various types, both working with building materials, and with plastic products and elements of decorative finishing of premises.
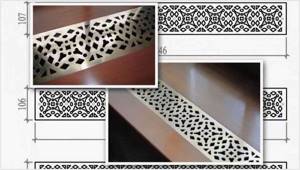
From companies engaged in the production of interior decoration elements, you can order ventilation grilles according to individual sketches
The following table shows the cost of individual models of ventilation grilles as of the second quarter of 2021:
| Image | Model and material of manufacture | Overall dimensions, mm | Average cost (as of May 2021), rub. |
| ERA 4513 (plastic) | 450×131 | 179 | |
| Vents МВ450/2 (plastic) | 450×70 | 151 | |
| Vents МВ350 (plastic) | 350×35 | 182 | |
| Vents МВ430/2 (plastic) | 450×70 | 137 | |
| Vents МВ450 (plastic) | 450×15 | 91 | |
| SETE (aluminum) | 480×60 | 370 | |
| GTV (inox) | 500×100 | 850 | |
| Werzalit (aluminium) | 800×80 | 1850 | |
| AIRO-LD (aluminium) - adjustable | 340×61 | 294 | |
| AIRO-PE (aluminium) - perforated | 700×352 | 763 |
The presence of a large number of models made from various materials and in a wide range of overall dimensions allows you to choose the necessary product for a specific location, and the ease of installation allows you to do the installation yourself.
Features and purpose
According to building codes, heating radiators should be installed directly under window sills. Thanks to this, not only the air in the rooms warms up, but also provides protection against condensation on the windows. To do this, the design of the batteries should protrude slightly forward in relation to the window sills.
However, these requirements are not always met. In recent years, metal-plastic windows have been installed en masse. Often, sealed window structures are installed, and the window sills cover the radiators, interfering with the movement of air flow. This leads to the formation of condensation on the windows.
Other reasons for condensation on windows may be:
- high room temperatures;
- improper installation of window structures;
- high thermal conductivity of double-glazed windows;
- lack of ventilation in the room.
Many modern double-glazed windows provide a tight fit, resulting in air circulation being disrupted. Therefore, condensation may appear in the corners of windows, which is a favorable environment for the development of mold and harmful microorganisms.
The installation of ventilation grilles ensures the required air exchange, which eliminates the formation of condensation. They can be mounted on various types of window sills (plastic, stone or wooden). In this case, warm air from the radiators will rise, passing through the grilles to the windows. The cooled air will sink and also pass through the grilles, which will provide air ventilation in the room.
Modern standards for the construction of multi-story buildings take into account the possibility of including ventilation grilles in the design. But in most existing buildings you have to install the grilles yourself. In this case, it is necessary to choose the right place where they will be attached.
It is worth considering that convection grilles are considered an element of the interior. Therefore, when choosing a product, it is recommended to pay attention to its appearance.
The grille should look attractive and fit harmoniously into the overall interior. It can even be a decorative decoration for a window sill, giving it an original design.
The color of the grilles is also of great importance. Usually it is selected in such a way that it matches the color of the double-glazed windows. The most common are white designs. Steel grilles are often painted in gold or silver tones to create an original design.
Wooden gratings are rarely painted. Typically, wooden surfaces are coated with a special varnish. It protects the material from negative external influences. It must be remembered that some varnishes and paints can release toxic substances when heated. Therefore, you should choose a paint that is resistant to high temperatures.
Thanks to the grilles, an ideal microclimate is established in the room. Air circulation allows you to obtain optimal values of humidity and heat. In addition to improving indoor air ventilation and the possibility of decorating window sills, the main advantages of ventilation grilles include ease of installation and maintenance.
When choosing a grate, you should consider its length. It is recommended to choose a product whose length will coincide with the length of the radiator. In this case, the ventilation structure itself can be implemented in the form of a single element or can have several short-length grilles mounted in the window sill in series. If you install an insufficiently long grille on only one side of the window sill, then condensation will still appear on the opposite side of the window.
In addition to the length, an important characteristic of the lattice is its cross-section. It determines the area of the holes for air circulation. The optimal cross-section will be a value from 0.42 to 0.6, which will be an effective means of combating condensation on windows. The larger the cross-section, the more air the grille will be able to pass through.
However, in some cases, large holes may not be the best option. If you plan to put various things on the windowsill, then it is better to choose grilles with small holes, otherwise various small objects may fall through them.
During operation, ventilation grilles should be periodically cleaned of dust and dirt. This improves air circulation.
Sometimes the grilles need to be replaced (if they become unsuitable for further use). It is also recommended to ensure that there are not many pots of indoor flowers on the windows. This is due to the fact that regular watering leads to the accumulation of condensation on the windows.
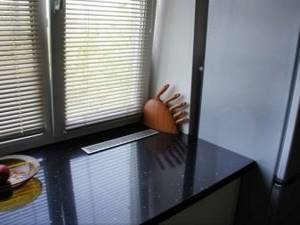
Causes of window fogging
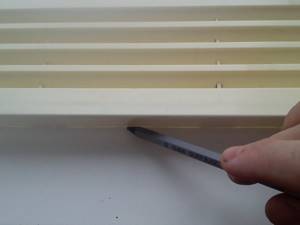
Metal-plastic and wooden sealed windows, which have practically replaced ordinary wooden ones, perfectly retain heat in the room, but they do not let fresh air inside. Does the lack of natural air exchange lead to condensation on the windows during the cold season? This is a physical phenomenon. Surfaces cooled by the external environment interact with the warm air of the room, but if there is a lack of it, condensation forms.
But what are the reasons? After all, the appearance of droplets on the kitchen windows when food is being prepared is due to the evaporation of moisture - everything is clear here. The water in this room undergoes transformation several times into different states. But windows fog up not only in the kitchen, but also in other rooms where metal-plastic windows are installed. The reasons are as follows:
- Indoor air is too humid. In addition to the kitchen, such a microclimate is also found in the sanitary rooms.
- Incorrect design of windows, which do not have special openings for ventilation or are made of thin profiles. Such a profile is not able to retain heat, forming a dew point when the air near the glass turns into condensation.
- A missing or poorly functioning heating system cools the air to a temperature where the air turns into water and falls out as condensation.
- Poor air circulation caused by improper operation of natural ventilation.
- The design of a window sill that interrupts the connection of warm and cold masses. Because of this, cold air prevails above the window sill, and warm currents are retained under it.
Types of ventilation grilles in the window sill for radiators
Convector grilles for batteries are classified by material and color, size and configuration, as well as their design, which assumes a static or adjustable shape.
Material and color
For the manufacture of such products, various materials are used, namely:
- plastic is the cheapest material, making products made from it accessible to users of any income;
- metal is the most resistant material to external influences, therefore ventilation grilles made from it have a long service life;
- wood is an environmentally friendly material, which leads to the high cost of products made from it.
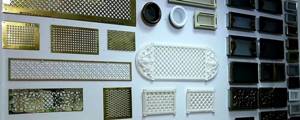
A variety of colors, shapes and designs allows you to choose products in accordance with the design style of the room where they will be installed
The color of the design of ventilation grilles made of plastic and metal can be different, depending on the chosen dye option, and for wooden analogues - in accordance with the types of tree species used.
Dimensions and shape
The shape of ventilation grilles can be absolutely varied: from classic rectangular and round to diamond and asymmetrical configurations. The most popular sizes of ventilation grilles are for:
- narrow models – 50×300 and 50×500, 50×600 and 50×800 mm;
- medium width models - 80×500 and 80×600, 80×800 and 80×1000 mm;
- wide models - 100×500 and 100×600, 100×800 and 100×1000 mm.
Decorative grilles designed for ventilation and installed in the window sill, in sizes different from the standard ones, can be ordered in accordance with the required need, determined by the location of their placement and the required air circulation.
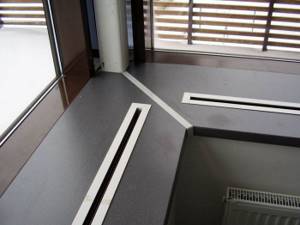
Narrow models, as a rule, only frame the ventilation hole in the window sill
Adjustable and static models
By their design, these products are classified as static and adjustable. Static models can be built-in or overhead, which determines the conditions for their installation in the window sill. Built-in ones are mounted directly into a manufactured seat, and overhead ones cover the ventilation holes on top.
Static ventilation grilles are a one-piece structure with intermediate connecting elements. Adjustable analogues work on the principle of operation of blinds, when using a drive mechanism you can open and close their internal space. In addition, according to their design, static and adjustable models are divided into those installed in the plane of the window sill and those protruding above its surface.
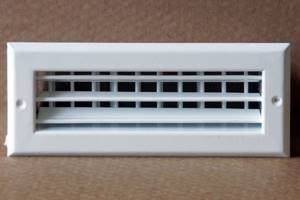
Closable ventilation grille
Photo gallery of decorative ventilation grilles for window sills
This section of this article provides some possible installation options for various modifications of the products in question.
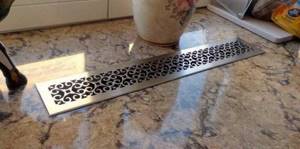
Decorative grille for window sill and table top
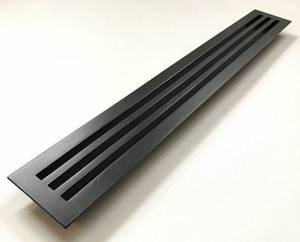
Slot type model size 720×70 mm
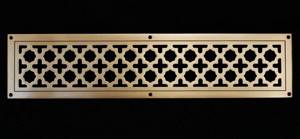
Models made of polished brass look stylish and expensive
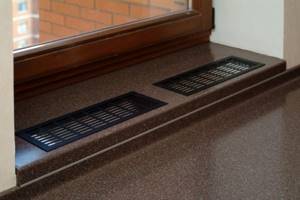
Metal models look stylish on a stone surface

Round models look very original and unusual
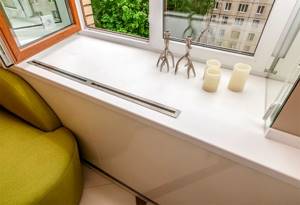
Option for using slot-type products
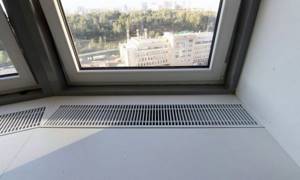
Overhead plastic products are the most affordable option to use
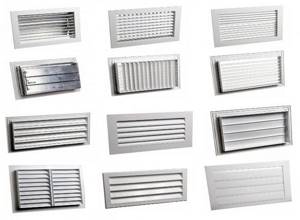
Adjustable louvre-type grilles differ in the type of shutter drive, size and materials used in their manufacture
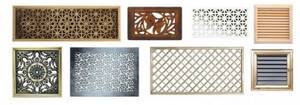
A variety of offers allows you to choose a model in accordance with your requirements
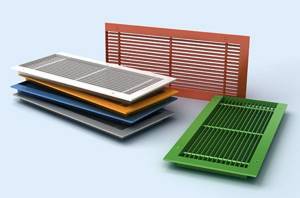
The color range of plastic products is quite extensive, which helps designers when decorating rooms in the same style
Why do you need ventilation grilles for window sills?
Condensation on a window is a pressing and well-known problem. This happens due to impaired air circulation in the room and due to increased humidity levels. One of the simple ways to solve this problem is to install a special grille in the window sill. The ventilation grille in the window sill helps prevent condensation from appearing on the windows.
Thanks to the grille, the air heated by the radiator freely flows through it up to the window, and when cooled at the opening, it falls down.
Now let’s take a closer look at why it is so important to install bars in the window sill, and why our windows “cry”. According to SNiP, central heating radiators should be located under the windowsill. Their task is not only to warm up the room, but also to heat the window opening (to avoid condensation). Therefore, according to the rules, the radiator should always protrude slightly relative to the window sill so that the air from it can rise up to the window.
However, nowadays these rules are often violated:
- Sealed plastic windows are installed.
- During repairs, window sill boards of greater depth are installed, completely covering the radiator.
Old wooden frames that were installed in houses built during Soviet times had cracks and gaps. Through them, air freely entered the rooms and was removed through ventilation shafts - that is, its natural circulation occurred.
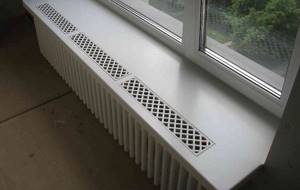
Now people give preference to sealed plastic windows, forgetting that they need to worry not only about the beauty of the window, but also about normal ventilation. There are two ways to solve the problem:
- Install a ventilation grille in the window sill.
- Install a supply ventilation valve on the window itself.
Ideally, these two options should be combined: if there is a grille in the window sill, this will not solve the problem of stuffiness in the room.
Types and characteristics of window sill grilles
Convection grilles are made from different materials:
- Steel.
- Tree.
- Aluminum.
- Plastic.
The most common rectangular shape of different sizes:
- 80 x 800 mm.
- 100 x 800 mm.
- 100 x 600 mm.
- 80 x 480 mm.
- 100 x 500.
- 80 x 500.
The feasibility of using a ventilation device
Building codes stipulate that heating radiators must be located under the window. This simultaneously performs the function of heating the entire room, including the window opening, to eliminate fumes. The location of the battery should always be with a slight protrusion relative to the window sill to ensure vertical heat distribution.
Although what has a positive effect on the comfortable life support of the owners of the premises, in their opinion, negatively affects the interior design.
The trend in modern renovations is to remove everything unnecessary from view, when the window sill is installed flush with the radiator, and the radiators are covered with plasterboard. And plus there are sealed plastic windows. In this case, the requirements of SNiP are violated. As a result, a beautiful design and a complete lack of natural air circulation, which negatively affects the health of people in the room.
Due to temperature changes in the room and the formation of steam during cooking, excessive humidity also appears. Increased moisture levels lead to the constant formation of condensation, which leads to the formation of fungus and mold.
Ventilation devices are needed to eliminate these problems. A grille on a window sill is a simple and inexpensive way to exchange air in a room. The air heated by the battery flows upward through the sections of the grille, and the air cooled at the window opening is directed downward.
The feasibility of installing grilles in the window sill space is due to the need:
- ensuring the circulation of hot air from the radiator battery to the window profile to reduce excessive air humidity;
- getting rid of condensation on windows.
Note! A ventilation grill installed in the window sill ensures vertical distribution of heat, which is why it is called convection.
How to install a grille in a windowsill
You can install a ventilation grille in a window sill yourself if the window sill is plastic or wooden. Installation into a concrete “board” will require much more experience and a different tool. Otherwise, the grille is installed in a concrete window sill in exactly the same way.
Let's consider the procedure for a plastic or wooden board and the same grate. It is not necessary to remove the window sill to carry out the work. The direction of the slats (if the holes are slot-shaped and the slats are installed at an angle) should be towards the window.
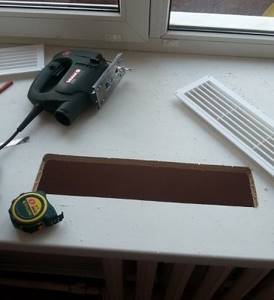
Stages of work
The process itself looks like this:
- Mark the place where the grille will be located.
- Holes are drilled in the corners.
- A jigsaw blade is inserted into the hole and a mounting hole is cut out for the grill itself.
- First, the grille is installed in the “fitting” hole.
- If everything is fine, the edges of the hole are coated with glue.
- The product is installed in its seat and pressed tightly.
- The glue that comes out at the edges is carefully removed.
- Any heavy object is installed on top of the grate as a press.
It is better to fasten metal gratings (as well as some plastic and wooden ones) not with glue, but with bolts.
You don’t have to use glue if the groove is perfectly even: so that the lattice “sits” tightly in it without moving. In this case, if necessary, it can be pulled out - for replacement, repair or cleaning.
Installation Tips
To create high-quality ventilation, grilles can be installed indoors and outdoors. When installing indoors, you need to pay attention to the location of the radiator. If it is located deep under the window sill, then the grille is mounted as close to the window as possible. And if the radiator protrudes beyond the window sill, then the grille should be installed above the radiator.
It is worth remembering that the wrong location for installing ventilation grilles will lead to them not performing their functions correctly.
It is advisable to involve specialists for design and installation. If the installation is carried out incorrectly, the window sill can easily be damaged, which will entail the need to replace it.
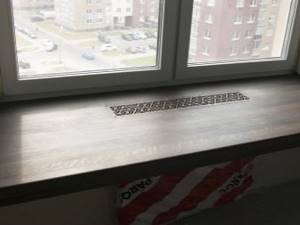
For window sills made of plastic or wood, installation of ventilation grilles is quite simple. You can do it yourself. If the window sills are made of concrete, then it is better to use the services of specialists, since the installation process will require additional tools and experience working with this material.
For installation you will need a pencil or marker (to make markings), a grinder, a drill, as well as some heavy object to press down the grille. For plastic surfaces, glue is sometimes used.
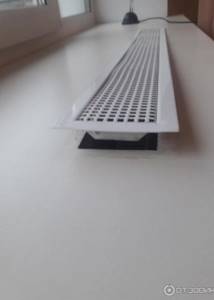
When installing ventilation structures, there is no need to remove window sills. The procedure itself is quite simple and does not require special knowledge or skills. First, use a pencil to mark the installation site. Then the corresponding holes are cut out in the window sill using a grinder. Instead of a grinder, you can use a jigsaw.
The next step is to finish the surfaces of the cut holes. To do this, sandpaper is needed to clean the surfaces from irregularities and sharp protrusions. Next, the grate is inserted into the hole.
If the structure is adjustable, then the slats should be positioned so that they are directed towards the window. In this way, ventilation grilles are installed for plastic and wooden window sills.
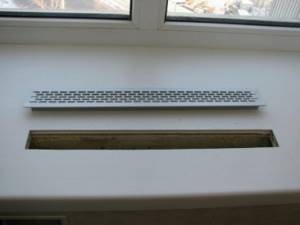
To fix the grille, you can use silicone. Also, the structure is often fixed using glue. To do this, before installing the grille, the edges of the holes should be coated with glue. After placing the grille in the hole, you need to remove excess glue, and then press the product with a heavy object for a while (until the glue dries).
It is worth noting that fixation with glue is not the best option. The fact is that when the need arises to remove the structure, it will have to be torn off from the surface. Therefore, it is better to ensure a tight fit of the structure using accurate measurements of the holes. If the edges of the hole are perfectly adjusted to the dimensions of the grille, then it will be tightly fixed. Moreover, if necessary, it can be easily pulled out.
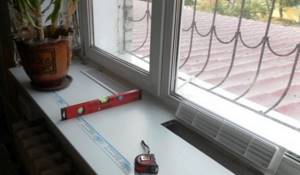
Sometimes there are structures (mostly metal) that are fastened with bolts. This is another convenient fixation option.
You can also find window sills with already built-in grilles on sale. However, this is not always a good choice, since the dimensions of the grilles may not match the dimensions of the radiator.
Criterias of choice
In addition to the price decision, when choosing convection grilles there are criteria:
We recommend that you read: Adsorption air dehumidifier
Criterion Description
| Bandwidth | depends on the size of the open section of the product (the sum of the areas of the holes through which air moves). For rooms where there is heating, a range from 0.42 to 0.60 l/s is suitable. This size is also convenient to use - the throughput is sufficient, and the small size of the holes will prevent small parts from getting into the window sill. |
| Size | the length of the structure must correspond to the length of the radiator, so that the grille mounted in the window sill ensures uniform heat distribution. Neglecting the size or placing the product in one part of the window sill will make ventilation ineffective. In the part where the grille is not installed, condensation cannot be avoided. |
| Material | The service life, maintenance rules and price depend on the material from which the grille is made. Steel products are the most durable, plastic products are the least durable. |
| Color | Initially, when choosing a grille, you should decide on a color scheme. These can be either monochromatic colors with the window sill, or contrasting ones. |
Note! It doesn’t matter whether one long grille or several short ones will be installed, the main thing is that the size of the product is the same as the size of the radiator battery.
Types of gratings
Depending on the functional and visual features, they are distinguished:
- Decorative non-adjustable grilles - a common option with fixed lamellas.
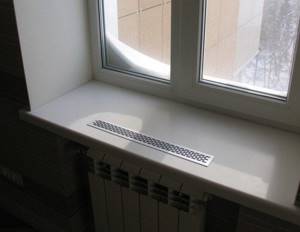
- Perforated gratings – models made of metal can harmoniously fit into any interior. This type of grille is used when it is necessary to cover a radiator battery recessed in a niche. Thanks to the perforation of the metal sheet in the form of square, round, triangular, slit-like cells, it is possible to choose the design of the grid.
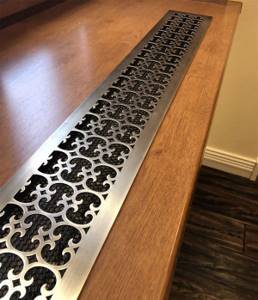
- Adjustable Models – equipped with slats that can be tilted. Installed to regulate air flow and direction.
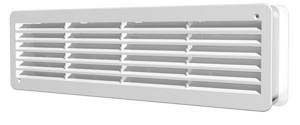
This is interesting! Lamels are horizontal strips located along the entire length of the grille.
Shape and material of the product
Convection grilles mounted in the window sill structure are rectangular in shape and can be made of the following materials:
- plastic – low cost, but can darken in the sun (if made in white);
- aluminum – not too expensive, not exposed to ultraviolet radiation (a good price/quality option);
- wood is the most “noble” natural material for decoration, more expensive and less common. Requires care;
- steel – has the highest cost, is durable in use, and easy to maintain.
Note! The choice of lattice material does not depend on the material of the window sill. Any type of product can be installed in a plastic/wooden/stone window sill. It all depends on the customer's preferences.
How to install the grille correctly
Correct installation of the convection grille is the key to effective operation of the ventilation tool. When working with plastic and wooden structures, it is not necessary to dismantle the window sill to install them. For slot-shaped openings and slats located at an angle, they should be directed towards the window.
Installation work requires the following tools:
- for marking - pencil, tape measure;
- Bulgarian;
- drill;
- jigsaw;
- stationery knife;
- if the grille is planned to be mounted on an adhesive base - glue and a press (any heavy object will do)
Stages of work:
- Initially, marking is carried out at the planned location (if there are several gratings, they are aligned along the length).
Note! The correct location of the grille is along the entire length of the window sill above the radiator.
- The lattice is applied to the window sill canvas and outlined with a pencil.
- Using a grinder, a hole is cut along the marked lines.
- Using a drill, holes are drilled in the corners.
- The edges of the opening are processed with a stationery knife (small irregularities from the use of rough tools are smoothed out: grinders, jigsaws).
- Ventilation grilles can be glued or screwed, or left removable. In order to glue the product, glue is applied along the entire length of the inner surface, the grid is placed in the prepared niche and a press is placed on top. A heavy object will press down the product, ensuring its stability until it is completely glued. Screw the grille with self-tapping screws using a drill.
- The last stage is final installation, carried out on a surface free of dust and debris.
Note! A removable grille option is often preferable because the grille can be easily removed for wet cleaning.
In this way, the grille is installed in plastic or wooden window sills; installation in concrete structures is a more complex process that requires other tools and skills.
We recommend that you read: How to choose ventilation grilles for external ventilation
What are radiator grilles made of?
Almost any material is used to make a decorative screen for heating radiators; it is important that it covers the unsightly edges of outdated equipment and has sufficient perforation for good heat transfer
You can use elements made of metal, plates, glass or plastic, but if you want to really surprise your guests, you should pay attention to products made of bamboo or rattan. Their price is slightly higher than their popular analogues, but, in addition to their beautiful appearance, they have excellent thermal conductivity and durability
Wood and metal
Metal is one of the most popular materials; thin sheet steel is used to make the radiator. The service life of such products depends on the quality of the paint; preference should be given to powder enamel, it protects against corrosion and lasts longer on the surface. The advantages of the material include:
- durability;
- when heated, the metal is an additional source of heat in the presence of perforation;
- low cost.
You can make a screen from forged gratings - this unique product will decorate any interior. Under the openwork forging, the original material will be visible, so it is recommended to first cover the radiators with a thin perforated metal sheet.
Wooden elements are classified as premium materials. They make completely unique products that will suit any style of room. Even inexpensive rocks can be used to create interesting compositions; however, one should not forget about perforation, since closed equipment will transfer heat to neighbors.
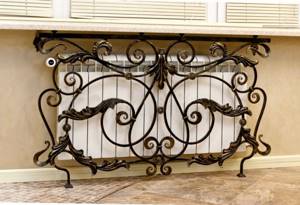
Hand forging is a work of art
Screen for radiator made of plastic and glass
Plastic for radiators is a controversial material; it is important to use a heat-resistant compound for batteries that can withstand heating temperatures of up to 70°C. It's easy to care for and inexpensive
However, it is necessary to note the negative aspects of the material:
- low thermal conductivity;
- low strength of cheap materials;
- At elevated temperatures it releases toxic substances, so it cannot be installed in children's and living rooms.
Glass screens began to be made only a few years ago. The thermal conductivity of the material is also low, but they have a beautiful appearance and fit perfectly into any interior. For batteries, only durable tempered glass is used; for decoration, the surface can be matted or an interesting pattern can be applied.
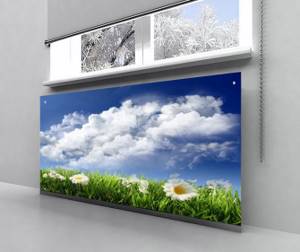
Glass screens can be made in different designs
Heating radiator box made of MDF and HDF
Decorative screens made of MDF and HDF− are made using natural components; natural lignin acts as a binder, so they are absolutely safe. HDF differs from MDF only in the production conditions: it is pressed under high pressure, resulting in a thin material with a more uniform and dense structure. HDF screens are better than wooden ones, since the material is thinner and the presence of perforations conducts heat well. It is from this fabric that beautiful openwork lattices are obtained. There are a number of advantages of using MDF and HDF:
- easy care;
- a wide variety of patterns and shades, you can choose for any room design;
- simple processing, does not require additional coloring;
- budget cost.
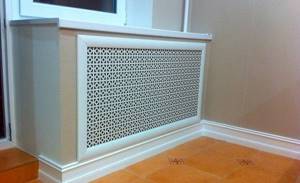
MDF lattice can be selected to suit any interior
What causes condensation to form?
The concept of condensation refers to water that settles on window glass and frames due to excess presence in the air.
Most often, the occurrence of condensation is provoked by the following factors:
- operation of heating radiators;
- room temperatures are too high;
- making serious mistakes when installing windows in openings;
- lack of ventilation or incorrect operation of these products;
- installing a window sill whose width is too large and covers the radiators, resulting in water diffusion;
- high thermal conductivity of walls and window structures.
In most situations, the heating radiator is placed directly under the window sill tabletop, therefore, this element gets very hot and causes condensation. To get rid of this trouble, you need the correct installation of a ventilation grille that is built into the window sill
Ventilation grilles for window sills: advantages and disadvantages
This is a rare case when no flaws can be found. As for the advantages, let's try to list them:
- improving air circulation, heat exchange and, as a result, the microclimate of the room;
- installation is quite simple, any home craftsman can handle it. No special skills are required for this;
- installation is carried out on any surface under which the heating radiator is installed, be it a window sill or a tabletop;
- maintenance is simple - you just need to periodically wipe off the dust;
- The range of products on Russian shelves today is so wide that it allows you to choose a grille to suit any, even the most sophisticated interior.
Important! Before purchasing a window sill ventilation grill, there are many options to consider. It should be in harmony with the design of the room, not conspicuous
Otherwise, after installation, the home technician will be very disappointed with the result. It is not a fact that based on the cut-out dimensions it will be possible to select a product of a different color.
Another consequence of the lack of proper heat exchange
Installation location
Ventilation grilles can be installed in two ways - external and internal. Products intended for installation indoors directly above the battery must have an aesthetically attractive appearance, as well as not very large dimensions, so as not to reduce the usable area of the living space.
The material used can be anything, the main thing is that it harmonizes perfectly with the overall style and is of high quality.
External grilles must ideally withstand harmful environmental influences, so it is best to choose aluminum options. In addition to their main task, such products also effectively prevent the penetration of dirt, dust and insects.
Depending on the type of structure, there are adjustable and non-adjustable options. Adjustable ones have built-in movable blinds.
Installation instructions for window sill ventilation
Depending on the method chosen to create ventilation in the window sill under plastic windows, the homeowner or craftsman will have to perform certain manipulations.
Option #1 - drilling holes with grille overlay
This is the easiest and fastest way to slightly improve the circulation of warm air generated by a heating radiator.
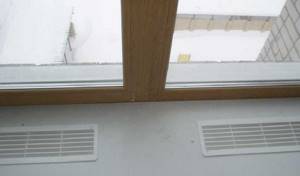
A decorative overhead ventilation grille in the window sill hides the holes made and looks aesthetically pleasing. When installing, you should be careful and place the product so that the angle of the slats is directed towards the glass unit
For installation you will need: a screwdriver (drill) with a drill, a pencil for marking, a ruler, an overhead grid of the required size, glue for fixing.
After preparing the necessary equipment, you need to follow a few simple steps:
- Compare the dimensions of the purchased ventilation grille and the length of the window sill to place the trim in the center, maintaining equal distances from the edges of the window sill, and make notches with a pencil.
- Attach the grille to the window sill, focusing on the marked notches, outline its perimeter.
- Inside the outlined area, make multiple holes with a drill, retreating from the pencil line by about 1-1.5 cm.
- Cover the perforated area of the window sill with a ventilation grill, securing it with glue.
In fact, all work can be completed in less than half an hour. Plastic shavings remaining after drilling can be easily removed with a vacuum cleaner.
Advantages: quick and easy implementation, minimal set of tools, simple preparation for installation. But such a grill protrudes above the level of the window sill. Also among the disadvantages is a decrease in the efficiency of the lattice cross-section.
Such measures will make it possible to slightly improve air circulation and partially solve the problem of condensate settling.
Option #2 - installing a grille with cutting a groove
This method of installing a window sill ventilation system is no more complicated than the previous one, but it allows you to more aesthetically hide an improvised ventilation duct in the thickness of the window sill if you use a built-in ventilation grille.
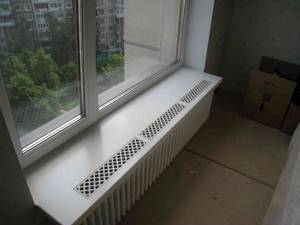
Such grilles fit more organically into the interior, since they do not rise above the level of the window sill. You can safely place indoor flowers on them without worrying about the stability of the pot
However, a similar method can also be used to install an overhead product.
In addition to the tools listed above in the description of the first method, you will also need:
- jigsaw or grinder;
- a heavy object to use as a press if the grille is fixed with glue;
- bolts, if the grille is secured with them.
After the preparatory work has been completed to mark the place where the grille will be located, you must perform the following steps:
- Drill four holes at the corner notches. The diameter of the drill bit should be larger than the width of the jigsaw cutting blade.
- Inserting the jigsaw blade into one of the resulting holes, cut out a groove.
- Insert the grate into the hole to make sure it fits properly.
- Secure the grille with glue or bolts. When using glue, use a press for better adhesion to the window sill.
If desired, you can use neither glue nor bolts. Free dismantling of the grill will greatly facilitate its care, since the product can be taken out and washed with water at any time.
Advantages of this method:
- ease of installation;
- installing the grille flush with the window sill;
- aesthetic appearance.
Disadvantages include the need for more tools and damage to the integrity of the window sill.
This window sill ventilation system looks quite aesthetically pleasing, allowing the surface to be fully used as a storage area.
Option #3 - installation of supply window sill ventilation
This is the most labor-intensive, but also the most effective way to correct air flow.
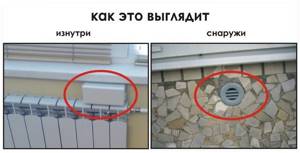
An additional ventilation duct with a supply valve is not only extremely efficient, but also looks quite attractive both inside and outside the building
This measure allows you to fully replace heavy indoor air with fresh outdoor air and get rid of excess moisture that causes condensation to settle.
The main working tool for installation will be a hammer drill with a crown capable of making a hole in the wall of the required diameter. Check for draft in the apartment ventilation duct. If the ventilation system is working properly, proceed with installation.
Procedure:
- Select installation location. The optimal area would be between the heating radiator and the window sill itself.
- Disassemble the purchased product by disconnecting the internal unit from it. Mark the installation location, focusing on the mounting points of the box.
- Using a hammer drill, drill the exit hole for the future channel at a slight downward angle.
- Wrap the vent pipe with insulation and install it into the duct. The outer part of the device must be flush with the wall surface.
- Following the instructions for the device, install soundproofing membranes and air filters. If the valve has a fan to generate additional air flow, connect this unit to the wiring, based on the connection diagram in the passport.
- Secure the inner box with dowels.
More detailed instructions for installing a supply valve into a wall are given in the following article.
The installed ventilation system requires minimal maintenance. However, the user should still clean or change the filters at least once a year so that the equipment does not lose its efficiency.
Advantages of this option:
- the most effective method of ventilation;
- complete air exchange;
- removing excess moisture from the room.
Disadvantages include more complex installation, damage to the integrity of the wall, and higher cost of work due to the price of the valve that has to be purchased.
It is still more appropriate to entrust the selection of the supply valve and the work to a specialist. The technician will be able to accurately calculate the required equipment performance and install it correctly.
Important Requirements
The main task of each ventilation grille is to ensure the fastest possible rise of warm air coming from heating appliances to the windows through the window sills. Therefore, the location for it must be chosen as close as possible to the window structures.
If the window sill is large, the convection grille should be installed strictly above the heating radiators. It is important that the grille openings coincide with the dimensions of the upper section of the heating radiator.
The sections (holes) of the grating may differ in shape, but the value of the open section, that is, the total sum of the areas of all holes must be no less than 0.42 and no more than 0.60 l/s.
Such indicators are quite sufficient for effective ventilation, and besides, small parts cannot fall through such openings.
Basic installation requirements
The appearance of the product will be determined not only by the material, shape, but also by the installation location.
Vent grilles can be installed outside and inside the room. The latter option should be harmoniously combined with the window sill, and also fulfill its main function. To do this, the structures are mounted closer to the end of the window sill or next to the window. The placement of the grille will depend on the location of the heating radiator. If the battery is hidden deep in the window sill, then the grille should be located close to the window. When the radiator protrudes, then ventilation is done above it. Products must fulfill their main function - to prevent the accumulation of condensation in the window area and regulate the flow of warm air.
Installing ventilation at the radiator location is a basic installation requirement. The length and width of the structure should be approximately the same dimensions as the radiators or slightly larger. Small sizes will lead to the accumulation of hot air and the appearance of condensation.
How to install correctly
According to the new rules, the design of all new buildings is carried out taking into account ventilation grilles. But in most cases, you have to install these products yourself.
Most often, such gratings are easily glued with ordinary construction silicone. It is recommended to attach plastic ones using a special glue for PVC products. Other important materials and tools include a drill, electric jigsaw, and marker.
Using a marker, the area of the window sill intended for cutting is marked, and then one small hole is drilled in each corner.
Next, the excess area of the window sill is carefully sawed off, and a grille is installed on this area, followed by a strong fixation. To make the glue dry faster and more reliably, it is recommended to temporarily place some suitable press directly on the grille.
Installation algorithm
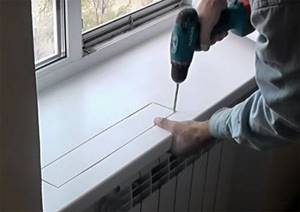
To install ventilation on the windowsill, the installer performs the following steps:
- marks the place where the window sill grille will be placed;
- drills holes in the corners where he has previously marked;
- using a grinder or jigsaw, makes a small hole for the grate and tries it on;
- coats the edges of the cut hole with silicone;
- places the convection product on a previously prepared place;
- removes excess silicone sealant;
- places the press on the installed product;
- after 3 hours the silicone hardens and the installer removes the heavy object.
At the same time, during installation, metal products are secured using special bolts or silicone sealant, but not ordinary glue.
Installation using glue is rarely carried out, because when used, the window sill with ventilation becomes a solid structure.
In case of repair, the ventilation product fixed with glue will be difficult to dismantle.
Thus, it is better not to use glue to secure it in the groove of the ventilation system. You just need to install the product in this small hole on the windowsill, and at any time it can be quickly removed from there.
Useful tips
There are several important recommendations that will prevent condensation from occurring.
For wide window sills, installing ventilation grilles is a mandatory step. The grilles must be cleaned or replaced regularly to ensure proper air circulation.
Try to keep the number of plants in pots on windowsills to a minimum, as frequent watering promotes condensation.
If you are not confident in your abilities, it is better to entrust the installation of ventilation grilles to professionals.
The principle of choosing window sill grilles
When choosing a grille for a window sill, you need to pay attention to the size of the holes. For convection ones, the sum of their areas should be at least 0.42-0.6 m2 of the active cross-section of the grid. This size is quite enough to prevent condensation from collecting on the windows. But if the window sill will not be used as a stand for flowers, decorations, etc., then you can use grilles with a total hole area of up to 1 m2. This design will allow air to pass through well, so conditions for condensation will not be created.
Wooden gratings are very demanding to maintain. Wood has the ability to accumulate moisture and expand, then dry out under the influence of elevated temperatures. In addition, this is an expensive material, so it is used extremely rarely.
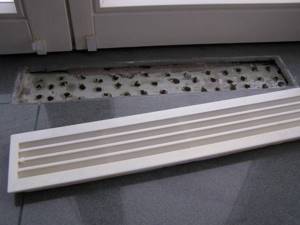
Plastic grilles are convenient, cheap, and easy to install. But they quickly lose their aesthetic appearance, fading in the sun, and losing their original color. The most common are aluminum. They do not fade in the sun, can be washed without worrying about deformation, and are not expensive.
Important! Before installing a ventilation grille on the window sill, it is worth considering the option when the ventilation grille is initially part of the window sill. But first they make measurements to see if it is suitable for radiators. Offset or small holes will not solve the problem of “crying” windows and the product will become a useless purchase.
Condensation and ventilation
If condensation occurs, experts recommend reducing the humidity in the room and moving heating radiators further away from the window sills so that warm air flows onto the glass unit.
But when it is not possible to move the battery, you can resort to a new method invented by manufacturers - installing ventilation grilles in the window sill panel.
The manufacturer of this product offers grilles of any shape and size, as well as in any color shades. They can be installed on window sills made of absolutely any material.
Wood, plastic, porcelain stoneware - ventilation holes covered on window sill panels of these types with grilles look aesthetically pleasing and do not spoil their appearance at all.
The purpose of these products is to achieve natural and constant air circulation in the window area. There are even grilles with special adjustable slats that allow you to change the direction of air flow, which is very convenient.
When are window sill bars needed?
This solution may be useful in several cases, which include the following:
If you plan to install wide window sills that will completely block the heating device located underneath them, the air distribution will be incorrect, condensation will begin to collect, and the room will not warm up well. The problem can be solved without violating the design intent and without changing the window sills to smaller models. It is enough to install a decorative grille in existing products.
- The cause of condensation may be an incorrectly installed double-glazed window. A visit to a specialist from a window company will correct this problem, but if there are holes in the window sill, you can ensure that warm air is blown across the glass and reduce fogging.
- If there is no grill or it is clogged with something, air circulation will become worse, which will affect the comfort of being in the room.
Ventilation grilles for window sills often solve the problem of condensation, but if it does not disappear, it is worth paying attention to other factors that cause it. These include the following:
- It can form when watering flowers.
- Incorrectly installed windows.
- The windows are located in the kitchen, the room heats up sharply and is rarely ventilated. To prevent your kitchen windows from sweating, you can try installing a range hood. This will remove excess moisture and odor and make the room cleaner.

Aesthetics come first
Despite the many advantages that an apartment dweller gains when installing ventilation grilles on window sills, not everyone wants to take advantage of such a convenient and fairly inexpensive way to improve the microclimate near the window.
Many people do not like the appearance of such grilles. Currently, in addition to the usual ones, manufacturers also produce decorative grilles, the holes in which are made in the form of various patterns.
Such products give the window an additional zest and are an excellent additional decor for the entire light-transmitting structure.
When choosing gratings, you should think in advance where it will be more profitable to install them. Experts recommend installing these products closer to the window itself, so that the amount of warm air supplied to the glass unit and frame is greater.
Summarize
Such elements are a fairly convenient way to get rid of dampness and fungus on slopes and double-glazed window frames. And the fact that the cost of plastic products is low, and installation is quite simple, only adds confidence in the necessity or simply profitability of their installation.
Sources
- https://ventihome.ru/elementy/reshetki/ventilyacionnaya-reshetka-v-podokonnik-konvekcionnaya-dlya-batarey.html
- https://HomeMyHome.ru/ventilyacionnye-reshjotki-dlya-podokonnikov.html
- https://okna-comfort.ru/ventilyatsia/reshetki
- https://oventilyacii.ru/otoplenie/ventilyatsionnye-reshetki-dlya-batarej.html
- https://seti.guru/ventilyatsionnyie-reshyotki-dlya-podokonnikov
- https://stroy-podskazka.ru/furnitura/podokonniki/ventilyacionnaya-reshetka/
How do you like the article?

Sergey Vladimirovich
Ask a Question
Ventilation grilles for windows: convenience and comfort for every home
Every house has windows and almost every one has window sills. Window sills can also bring comfort and convenience into your life, and to make this so, there are ventilation grilles specifically for window sills. This fitting helps ensure proper air circulation from the battery to the window profiles.
Without a window sill, a window loses its aesthetic appearance, but with the invention of ventilation grilles, it acquires not only an aesthetic appearance, but also solves all important problems.
There are a lot of ventilation grilles now being produced, their main task is to install plastic on window sills and solve the problem of ventilation.
If the air from the heating radiators rises upward through the ventilation system of the window sill, and the already cooled air descends to the bottom, this will create natural air circulation.
Types of ventilation grilles for window sills
The faster this process happens, the better. The best location for grilles is close to the windows.
The cross-section for throughput varies. It all depends on the area of the room, the width of the window sills and, of course, the size of the batteries. But the smaller the cross-section of the gratings, the less likely it is that something could fall between them.
Grilles with adjustable blades, reminiscent of horizontal blinds, are also available. As experts say, such grilles help save windows from condensation and freezing.
How window sills with ventilation grilles are installed and manufactured
Window sills with built-in heating grilles are secured using silicone sealant. To make a custom-sized window sill, you need to use a milling machine.
Condensation on the surface of the window glass
Sometimes, despite all the tricks aimed at reducing the level of humidity in the room, condensation still continues to appear on the window glass. Many people use various folk remedies to combat it, wipe the windows with rags and dry wipes, additionally ventilate the room, and so on.
Only ventilation grilles for window sills will help you cope with this situation once and for all. Only they will keep the window profile dry, thereby extending its service life for a long time.
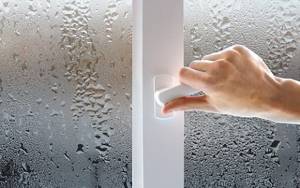
Condensation on glass is an unpleasant phenomenon
Types of devices
A grille installed in the window sill more effectively distributes the flow of warm air near the window, preventing the accumulation of moisture on the glass.
There are many varieties of these devices:
- external, internal and transfer;
- unregulated, adjustable and inertial.
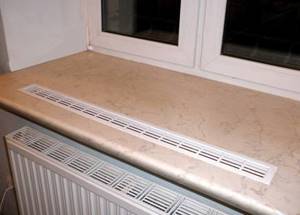
Thanks to the grille you can get rid of moisture on the glass
In addition, depending on the type of materials used, gratings are divided into:
- polymer - one of the most common materials, which over time can turn yellow and warp from exposure to high temperatures;
- aluminum - have an excellent appearance and low weight, the disadvantage is high cost;
- made of wood - goes well with any type of room design, but requires increased attention and care;
- steel - have a lot of weight, cost and attractive appearance.
Installing gratings on a window sill
In order to independently secure devices that help eliminate condensation from the surface of the window frame and glass, you need to stock up on the following tools:
- drill;
- marker;
- jigsaw;
- glue for joining polymers;
- weight for securing the grille during installation.

