Installing a screen on a heating radiator with your own hands
The installation will worsen the heating properties of the radiator.
To prevent this from happening, attach a reflector behind the radiator before installing the screen. The simplest reflector is foil. In this case, heat rays will be redirected back into the room, which will increase the level of heat transfer. Attention! If the inner surface of the product is painted black, the structure will heat up more from the radiator and itself transfer heat into the room. The design of the screen on the radiator is selected depending on the type of battery and the method of its installation
Before making a decorative element, think about how to dismantle it in the event of an accident, repair, replacement or simple cleaning
The design of the screen for the radiator is selected depending on the type of battery and the method of its installation. Before making a decorative element, consider how to dismantle it in the event of an accident, repair, replacement or simple cleaning.
Lattice
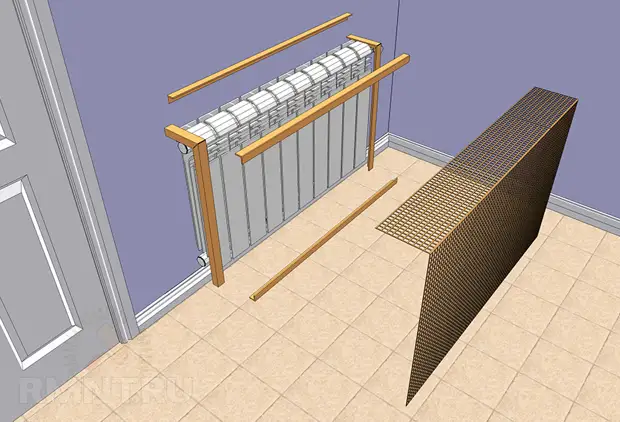
The grid screen is the simplest of the options for similar products. It is a flat panel consisting of a frame with wooden slats. The slats are placed horizontally, vertically, diagonally, in the form of cells. The last option looks the most attractive.
Manufacturing begins with the installation of a frame according to the size of the battery. Only dried material is used so that it does not deform or dry out during use.
Photo 1. A method of securely attaching openwork lattice cells to a wooden frame is demonstrated.
Then the required number of slats is attached to the frame using the chosen method. Before installation, parts are carefully polished and strengthened with special compounds. The slats are attached to the frame using glue or self-tapping screws. The finished product is coated with varnish or paint.
Box
To make the screen-box, dimensions are taken from the radiator. The dimensions of the product will be 10 cm larger in width and 3-5 cm larger in height. First of all, the facade part is made. It is made in the form of a lattice panel or the necessary holes are cut out on a solid plate.
Important! You cannot cover the radiator with a screen more than 50%. Then the top and sides are made according to the dimensions
They can be lattice or solid. The parts are connected to each other by metal corners. To stabilize the screen, legs are attached at the bottom
Then the top and sides are made according to the dimensions. They can be lattice or solid. The parts are connected to each other by metal corners. To stabilize the screen, legs are attached at the bottom.
Water system
The most commonly used and therefore have the widest range of heating devices are water heating systems. This is explained by their good efficiency and optimal level of costs for acquisition, installation and maintenance.
Structurally, the devices are not too different from each other. Inside each there are channels for the flow of hot water, the heat from which is transferred to the surface of the device, and then, using convection, to the air of the room. For this reason they are called convection.
The following types of radiators can be used in water heating systems:
- cast iron;
- steel;
- aluminum;
- bimetallic.
All of these heating devices have their own characteristics, due to which they are selected for each specific case depending on the area of the room, the nuances of installation, the quality and type of coolant (which is sometimes antifreeze).
Cast iron batteries
Cast iron was one of the most popular materials in domestic heating systems. His choice, as a rule, was due to the relatively low cost. Later, such devices began to be used less frequently, since they have a small heat transfer coefficient (only 40%), due to which the power of one section is approximately 130 W. Although they can still be found in old-style systems. In modern interiors, designer models of cast iron radiators are sometimes used.
The advantages of such devices are a large surface area that transfers heat to the room, and a long operating period (up to 50 years). Although there are still more disadvantages - these include the relatively large volume of coolant used (up to 1.4 liters), the difficulty of repair, and the inertia of heating, due to which the temperature of the device increases relatively slowly, and even the need for periodic (at least once every 3 year) cleaning. In addition, heavy sections are very difficult to install.
Aluminum radiators
The use of aluminum radiators allows us to ensure the maximum level of heat transfer - the power of the section can reach 200 W (which is enough to heat 1.5–2 sq. m).
Their cost is quite affordable, and their low weight allows you to install them yourself. True, the operation of the device is possible for only 20–25 years.
Bimetallic batteries
Their advantages include the presence in the design of convection panels that improve air circulation over the surface, ease of installation of devices for regulating the intensity of coolant flow, as well as ease of installation. The radiator section, with a power of up to 180 W, is capable of heating about 1.5 square meters. m area.
Despite the advantages that such heating devices have, there are also problems with their use. For example, for bimetallic radiators it is not recommended to dilute water with antifreeze, which, although they do not allow the system to freeze, negatively affects the internal surfaces of heating devices.
Screens for radiators made of solid wood differences:
- Possibility of manufacturing together with a window sill,
- without harmful emissions, unlike MDF,
- do not rust like metal, do not delaminate like MDF,
- do not warp when exposed to water,
- tinting in any color (with the possibility of repainting)
Decorative screens and grilles for radiators and heating radiators made of wood are made only to order, since there are no identical sizes for different interiors.
You can order a decorative screen for batteries by phone. To do this you need:
- know the dimensions of the opening for the screen,
- know the dimensions of the screen itself,
- know the color number if it is RAL or have a sample.
What to look for when choosing
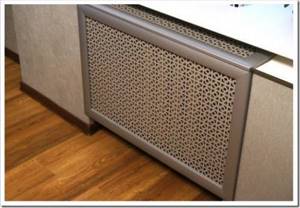
When decorating heating appliances, do not forget that first of all they must fulfill their utilitarian function - to provide the room with heat.
Any grille, even with a large perforated area, will retain heat and reduce heat transfer. Only one option will contribute to this by 10-15%, and the second, and for another, very attractive in appearance, this figure will reach 60%.
How does the screen affect the heating process?
In pursuit of the external beauty of the product, one should not forget about its functionality - the screen should not interfere with effective heat exchange in the room. Do not be afraid that after installing the grille on the radiator, heat will be retained, which will provoke an increase in home heating costs. If you select the right design, such problems will not arise. Moreover, with the help of a special layout and configuration of the screen elements, you can even increase the amount of incoming heat.
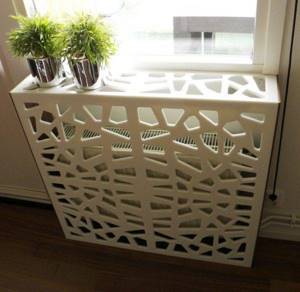
The larger the holes, the more efficient the heat transfer
If you understand the operating principle of a standard heating radiator, then there will be no problems with choosing the correct design of a decorative screen.
Operating principle of a heating battery
When heated, the heating radiator transfers heat into the room as a result of the movement of heated air masses (convection process) and through direct thermal (infrared) radiation.
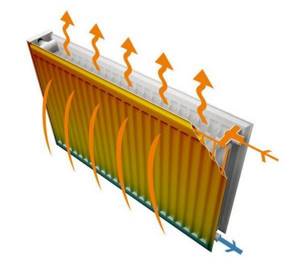
The principle of operation of the radiator
The effectiveness and priority of each of the two thermal energy transfer options may vary. This is influenced by the design of the radiator, the temperature of the coolant and air in the room, and the presence of obstacles in the path of heat flow.
So, at not too low temperatures, cast iron batteries give off heat according to the principle of convection, but after the coolant temperature rises to 70 degrees and above, heat is transferred using infrared radiation.
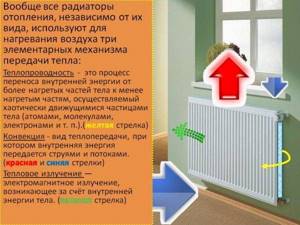
Main methods of heat transfer
So, in order to ensure free air circulation, the converter radiator is equipped with a grille that does not have an upper horizontal panel.
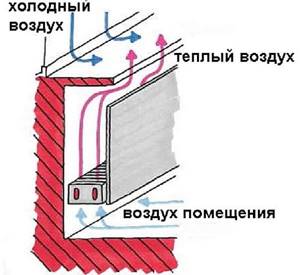
Warm air distribution
What to consider when choosing a grate
The main rule that must be observed when choosing a grille is that its design should not interfere with the free circulation of heated air and the passage of infrared radiation. This is possible if the front panel of the grille is equipped with a sufficient number of holes, amounting to at least 50% of the total area, and the free passage of warm air is ensured above the battery.
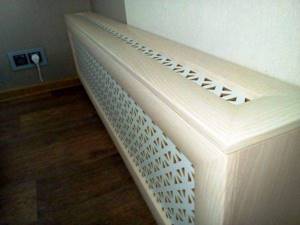
The holes at the top should not interfere with convection
It is also recommended that the material used has excellent thermal conductivity and allows air to flow freely into the room. If the inner surface of the screen is painted black or dark brown, the heat absorption will be better.
Types of radiators
When selecting components for an autonomous heating system, you need to take into account its features and desired characteristics. Not only the operation, but also the installation of heating radiators in a private home will depend on the selected elements.
Heating systems of private houses differ from centralized ones in the following qualities:
- Firstly, operating conditions are more favorable - for example, the pressure in local heating is an order of magnitude lower;
- Secondly, the quality of the coolant in private homes is always at a higher level;
- Thirdly, there are no significant pressure drops, and the likelihood of water hammer is practically absent.
There are quite a lot of radiators that can withstand such operating conditions, so you will have to spend some time choosing the best option. However, if you simplify the choice of radiators to the limit, then the best option will be products with the best combination of heat transfer, price and quality.
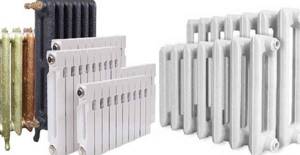
Depending on the design, the following types of batteries are distinguished:
- Panel and sectional. The cheapest type of battery, characterized by fairly high heat transfer and relatively small size. These radiators do not impose any requirements on the connection diagram.
- Tubular. The technical characteristics of tubular radiators are practically the same as the previous type, but the cost is much higher. The increased cost is due to the good visual qualities of tubular products and the ability to use radiators as dryers.
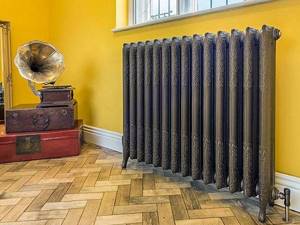
However, much more often radiators are classified according to the material of manufacture, depending on which the following types are distinguished:
- Aluminum. Quite a popular option, perfect for use in private homes. The main advantages of aluminum radiators are good visual qualities and high heat transfer. It takes a little time to warm up, but such radiators cannot retain heat. The cost of aluminum products varies over a fairly wide range depending on the manufacturer and characteristics.
- Bimetallic. This type of radiator, as the name suggests, consists of two materials. Due to this, it is possible to create a product with an optimal combination of characteristics - in particular, bimetallic batteries can withstand pressure drops well and do not corrode. The cost of bimetallic products is quite high, so they are not very popular among owners of private houses.
- Steel. Steel batteries have good heat dissipation and good decorative properties. Simple steel batteries are cheap, but quickly fail due to corrosion. Stainless steel options are more reliable, but also cost an order of magnitude more.
- Cast iron. The arsenal of advantages of such devices includes high wear resistance, due to the high thickness of cast iron and its resistance to corrosion, as well as the ability to operate at high temperatures and pressure changes. Cast iron batteries have high inertia. For normal operation, such products must be cleaned every year.
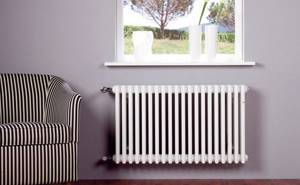
Installation stages and rules
You can install a ventilation grill with your own hands in a plastic or wooden window sill; installation in a concrete “board” will require much more experience and other tools. Otherwise, the grille is installed in a concrete window sill in exactly the same way.
Let's consider the nuances and stages of work for a plastic or wooden board and the same lattice. It is not necessary to remove the window sill to carry out the work. The direction of the slats (if the holes are slot-shaped and the slats are installed at an angle) should be towards the window.
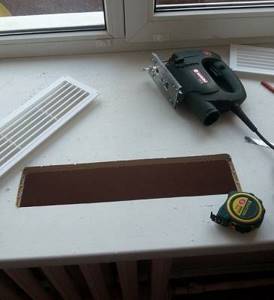
A hole cut in the window sill for the ventilation grille
Tools you will need:
- Marking tool (marker, pencil).
- Jigsaw or grinder.
- Glue for plastic (optional).
- Any heavy object that can be used as a press (needed if the lattice will stick).
- Drill.
The diameter of the drill bit must be larger than the width of the jigsaw blade (so that it can fit into the drilled hole).
Stages of work
The process itself looks like this:
- Mark the place where the grille will be located.
- Holes are drilled in the corners.
- A jigsaw blade is inserted into the hole and a mounting hole is cut out for the grill itself.
- The product is installed in the hole for “trying on”.
- The edges of the hole are coated with glue.
- The grille is installed in place and pressed.
- The glue squeezed out along the edges is removed.
- Any heavy object is installed on top of the grate as a press.
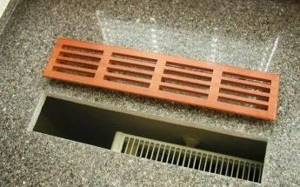
Hole in the window sill for installing a grill
Metal products (as well as some plastic and wooden ones) are attached not with glue, but with bolts.
Using glue is not an ideal solution - in this case the structure will be solid. If necessary (for example, if the plastic lamella breaks), the grille will have to be torn off from the surface.
You don’t have to use glue if the groove is perfectly even: so that the lattice “sits” tightly in it without moving. In this case, if necessary, it can be pulled out - for replacement, repair or cleaning.
how to remove and tuning methods

In any car, the radiator grille is one of those elements that catches your eye when you first look at the car. It is located on the front of the car and is therefore so noticeable. The “facial expression” of a car also very much depends on how the radiator grill looks.
It is for this reason that many car owners change it or perform tuning to give their car some individuality. The Lada Granta radiator grill is no exception. You can see many attempts to improve it in various ways.
Many owners complain that this model has virtually no protection for the radiator from dust and dirt entering from the outside. Proper tuning helps eliminate this problem.

How to remove the radiator grille of a Lada Granta
Before tuning this element, let's figure out how it can be removed from the car.
The Lada Granta radiator grill can be removed in 2 ways. According to the classical method, you need to proceed as follows:
- remove the front bumper;
- on its inner side, unscrew the nuts securing the grille, there are 9 of them;
- Click to open 2 locks under the headlights.
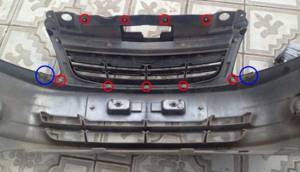
The second method makes it possible to do without dismantling the front bumper. The algorithm looks like this:
- Unscrew 6 bolts from the top of the grille;
- bend it, stick your hand in, find by touch 4 bolts at the top and 5 nuts at the bottom - for this you will need a figure eight wrench;
- Under the headlights, use a screwdriver to open the 2 clamps.
After dismantling, you can begin tuning. After this, installation is performed in reverse order.
Tuning using a utility net
Tuning the front part of a Lada Granta car using a Chain-link mesh is very common. Such a mesh can be bought at any hardware store - it can be metal or plastic.
Choose the option with small cells
This is important to avoid excess dust getting under the hood of the car.
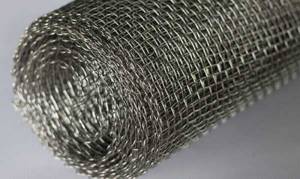
Next you need to follow a simple algorithm:
- using one of the methods described above to remove the radiator grille;
- cut off all horizontal and vertical jumpers, leaving only the outer frame;
- using cold welding, seal all the holes that were created after the jumpers were cut off;
- clean the surface from all irregularities and burrs;
- Cut the mesh to size and attach it to the frame. If the mesh is plastic, you can simply glue it. If it is made of metal, heat the frame so that it does not burst, and screw the mesh with self-tapping screws;
- paint and wait for it to dry. At this point the tuning can be considered complete.
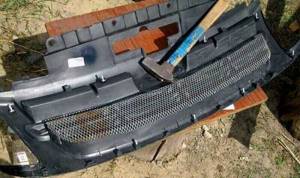
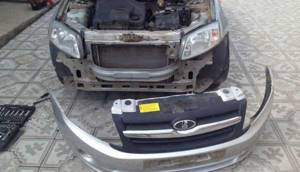
Installing a radiator grille on a Lada Granta car
After tuning is completed, the Lada Granta radiator grill is installed back. To do this, the finished part is placed in the standard opening in front of the radiator and secured with nuts, bolts and clamps. Next, you need to check how correctly the fit is made and inspect the front part of the machine for irregularities, burrs and protrusions. If any are found, clean them with a file or fine sandpaper.
Conclusion
Tuning the radiator grille is a good way to make the appearance of a car more attractive, make it stand out from the crowd, and add originality. This can significantly change the visual perception of your car when looking at it from the front.
The car will acquire a more modern, stylish and attractive exterior. It is precisely these considerations that drive those car owners who decide on tuning.
In the case of the Lada Granta car, the argument in favor of alterations of this type is the actual lack of protection of the engine compartment from particles of dirt, dust and moisture entering from the front. This is unlikely to benefit the car. Therefore, many car enthusiasts resort to making radiator protection with their own hands.
Education: secondary specialized. Specialty: car mechanic. Professional diagnostics, repair, maintenance of passenger cars of foreign production 2000-2015. Extensive experience working with Japanese and German cars.
DIY metal screen
You can use a perforated metal sheet or expanded mesh as a panel for the screen. There are ready-made expanded metal mesh with anti-corrosion treatment (for steel) and enamel decorative coating. Such a mesh can be fixed to a wooden frame and used in the structures described above.
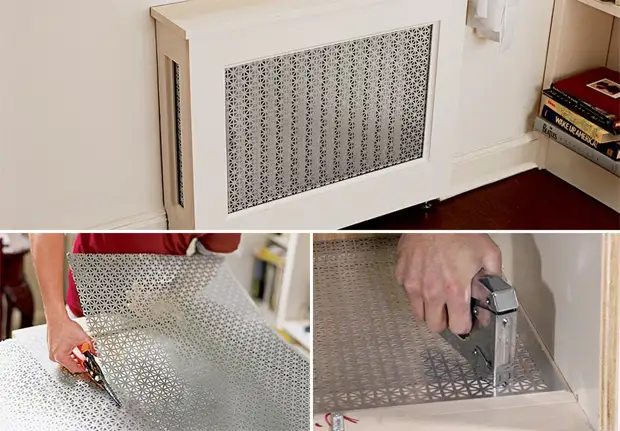
But metal has a serious advantage over wood - a high thermal conductivity coefficient. This property allows you to make screens that rest directly on the battery. They even increase its heat transfer by increasing the surface area. Moreover, a battery with such a screen works better not only for radiation, but also for convection - just look at the ribbed heating elements of convectors.
It is better to choose an aluminum corner for the frame, and an aluminum sheet or expanded mesh for the screen panel. They are easier to work with, and the thermal conductivity of aluminum is almost 5 times higher than that of steel.
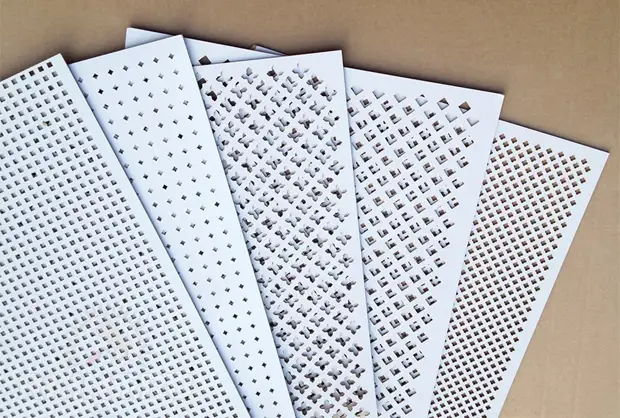
A hanging metal screen is quite simple to make:
- Take two corners with a length equal to the sum of the height of the screen and the depth of the battery.
- Along the fold line on one of the walls of each corner, two counter cuts are made with a total angle of 90° (45° for each relative to the edge of the corner). Moreover, the cuts must be made so that the uncut walls of the corners face each other.
- Bend the corners in the shape of the letter G.
- Prepare a blank for the screen from a perforated sheet or expanded mesh. Its length is equal to the total length of the L-shaped corner.
- Three corners are made with a size equal to the width of the screen.
- Bend the screen blank and attach it to the L-shaped corners using screws and nuts with washers (in holes specially drilled in the corners). It is better to drill holes in place so that they fit into the perforation of the sheet or into the mesh cell.
- On the inside of the mesh, three corners are attached in the corner and along the edges, which serve as stiffening ribs.
- Paint the outer part of the L-shaped corners.
To ensure that such a screen is in a stable position, you can fix a pair of dowels with straight hooks in the wall, and drill holes for them in the short parts of the L-shaped corners.
Benefits of using decorative elements
Similar decorative elements are used for batteries for several reasons:
- Improving the aesthetic properties of the room. For example, creating a beautiful accent in a room.
- Protective function against touching a hot battery. This is especially true if there are small children.
- Simplifies the maintenance of radiators.
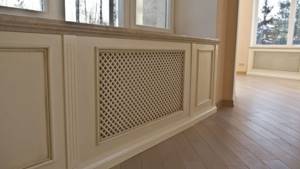
A multifunctional screen can be made in several versions:
- Flat - protects the battery located in a niche.
- A closed box is used when it is necessary to close the entire radiator.
- The hinged cover is designed to cover the radiator protruding from the window sill.
Branded or homemade?
And this is up to anyone. My good friend, Kulibin from God, made himself a whole set of universal nets, which he adjusted to his Chevrolet. But he is a hands-on fan with a lot of free time. He tried both rigidly fixed and removable structures, securing his crafts with screws or clips. Material: aluminum or plastic. Aluminum is light and durable, but a friend says that over time it quickly fades. Plastic is easy to process, but its strength is not so great. That's why his latest craft is made entirely of stainless steel! It looks decent, but it’s better not to ask about the cost and fuss...
As for the type of fastening, the removable screens are easy to remove for cleaning, but on the road they like to rattle obnoxiously. On the contrary, the tightly fixed structure does not make any sounds when driving, but, frankly, it is inconvenient to clean it.
Basic installation methods
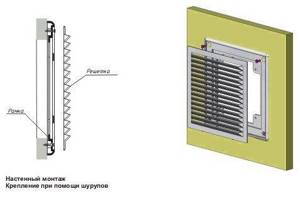
Installation of the ventilation grille does not require special knowledge and skills. It can easily be done by a home craftsman with patience and accuracy. Most industrial products consist of two parts:
- main body, mounted directly on a hole in the wall or door;
- a removable part inserted into the openings of the housing, which allows you to inspect and clean the channels of the ventilation system without any problems.
Begin to hang the internal ventilation grille from the first part, which plays the role of a frame. This is done using fastening materials or adhesives. Before this, the outer surface of the ventilation hole is prepared accordingly. It should be smooth and clean. Typically, the grille is placed on the wall after the finishing coat has been applied to it. This can be done in different ways:
- Fastening with screws or self-tapping screws is carried out on a solid wall made of concrete, wood or plasterboard. To do this, through holes are drilled in the grill body in places covered by the removable part, which are countersunk to the shape of the cap. You will have to install dowels in concrete or brick in appropriate places using a drill. When constructing a grating without a removable part, after installation, the screw heads are puttied and painted to match the color of the base material.
- Fastening with plinths or glazing beads is usually used for wooden products that fit well into a country-style interior made entirely of wood. In this case, self-tapping screws or finishing nails with a reduced head size are also used.
- Industrial models with standard spring-pressed spacer elements included in their device can simply be inserted into the ventilation hole, which must have standard dimensions for this.
- The easiest way to attach a plastic grill to any base is with glue. This is especially true for walls lined with fragile materials such as ceramic tiles. For this, compositions such as “liquid nails” are usually used. They are applied in a continuous stripe to the back side of the part, which is pressed against the wall and fixed with masking tape until completely dry. In this case, it will no longer be possible to dismantle the fragile part without destroying it.
The removable part of the grille is tightly inserted into the base fixed to the wall. In this case, for aesthetic reasons, it is better to rotate it so that the holes between the slats of the blinds are not visible to a casual observer standing on the floor of the room
When selecting and installing the transfer grids, pay attention to ensure that light rays do not directly pass through them. This can reduce sound insulation and does not look very nice
Plastic models usually include a thin mesh, which quickly becomes clogged with dust, reducing the effectiveness of the ventilation system. That's why most craftsmen don't install it. Otherwise, you will have to regularly clean the mesh.
Installation of the outer grille element - metal frame
Window grilles are made both with and without an element such as a metal frame.
To produce a similar version of a window grille without a frame, use only:
- steel strip;
- reinforcing rod.
If you need to install bars on the windows of a country house, then welding and forging elements are unlikely to be needed. Especially if the house is simple, wooden. In this option, the vertical parts are located at a considerable distance from each other, so that natural light will not be obscured.
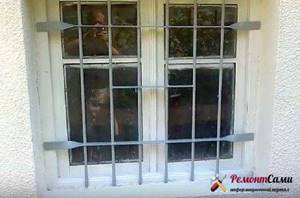
Grille without external metal frame
Step one. A metal strip 4 mm thick and 40 mm wide is used. But the length depends on the following factors:
- how wide is the window opening;
- how many crossbars are there in the lattice?
You will also need smooth reinforcement Ø 14 mm. The length of the reinforcing bar will depend on:
- on the required number of vertical elements;
- from the height of the window.
In addition, you will need to have a threaded rod Ø 10-12 mm.
To create the main grille (horizontal), you will need to stock up on two metal strips of sufficient length. Their size should be 5 mm less than the width of the window opening. The strips will need to be secured in the lower and upper areas of the grille.
The third strip will be installed in the middle part of the structure. This strip will become the connecting link between several middle or all reinforcement bars.
Step two. An auxiliary reinforcing bridge will need to be welded into the central part of the grille.
Step three. Now you need to process the metal strips, cut according to the required dimensions. The edges of the strips are rotated 90 degrees.
Step four. The edges of the strips are highlighted - approximately 10-12 cm. The edge is laid on the table and securely fastened to the metal tabletop. Through a gasket strip made of metal, that is, quite strong, this element is tightened with two clamps. You can clamp the strip in a large vice.
Tightening metal strips with two clamps
A gas wrench is used to grab the free edge of the strip and slowly turn it at a right angle. Such actions are carried out with each long side of the strip.
Step five. When the strips are prepared, markings are made on them in order to drill a hole, the diameter of which is 1-2 mm larger than the same parameter of the reinforcement bars. A hole Ø 15-16 mm is drilled.
Now the strip can be moved to make another hole at the same distance from the previous one. Such actions will be carried out until the last hole is drilled.
Step six. The holes are drilled, you can insert reinforcement rods into them. The grille elements are assembled into a common structure and fastened together by welding.
Step seven. When bending the edges, the mounting areas of the strips are highlighted. Markings are made on them to weld the threaded rods. Each of the pins should have a length equal to the thickness of the window block with an addition of 3 cm (1-2 cm should be removed from the edge). These additional 3 centimeters will be required to screw the locking nuts from inside the room.
Step eight. You need to weld the studs to the side of the strip that will press against the window frame. Welding should be a continuous seam. After welding, a nut will be immediately screwed onto the stud.
Assembling a grille with two transverse stripes
Step nine. To clean the grate from rust, use an iron brush. After this, each grille element is wiped with a degreasing solution. You need to wait until the solvent evaporates and the grate dries.
Step ten. Next, the window frame is marked and holes are drilled in the designated areas. Then the grille will be attached to the window block through welded pins inserted into the holes.
Step eleven. You can lift the grille and press it against the window block with the ends of the pins. Then there will be points on the frame that have the meaning of marks. Holes are subsequently drilled through these marks.
Welding studs
It is advisable to drill holes using a wood drill. Its diameter should be 2-2.5 mm wider than the diameter of the stud. Then the pin will fit freely but tightly into the “socket”. The drill must have a length that exceeds the thickness of the window block by at least 1 cm.
Step twelve. The grille is mounted on the frame. For this purpose, you will need to insert pins into the holes of the window block. From the inside, put washers of sufficient width on and tighten the nuts.
Video: How to make window bars with your own hands:
The battery is installed in a niche
One of the most common options for installing a heating device. A niche is a kind of cavity with one open side in which the battery is mounted. You can simply cover it with a screen.
In this case, the decorative panel is installed using visible or hidden fasteners.
Both conventional flat screens and products of a more complex design: with a rear flange and an overhead frame are mounted with visible fasteners. The installation process itself is very simple:
- Countersunk holes are made on the front panel of the screen.
- The product is applied to the niche, pressed tightly and securely fixed using self-tapping screws.
You should not think that by installing a decorative screen in this way, you will get an unaesthetic picture. The screw caps are finished in the same way as the front panel of the product. If you order an accessory made of bright polished brass, then the caps of the mounting elements will have the same texture. A similar rule applies to all screens produced by DecoGrille: made of stainless steel, brass or painted steel.
Flat screens are the most budget option. However, there is one caveat. If the product is wide, it will bend after installation. At the attachment points, the accessory will press tightly against the surface, and in the central part it will slightly retreat from it. To avoid this, the screen needs to be stiffened; the rear flange will do this perfectly.
Rear flange - plates installed on the back side of the front panel at a slight distance from the edges of the frame. A mesh backing and eyelets for hidden fastening are mounted on the flanging sheets.
Back flange screens are more rigid than conventional flat products. After installation, the front panel does not bend; the accessory is pressed tightly against the surface along the entire perimeter.
The process of installing screens using hidden fasteners is more complicated than using visible screws or self-tapping screws. It occurs in several stages:
- Special corners are mounted inside the niche (included with the product).
- The screen is inserted into a niche and is first fastened to the corners through the eyes.
- The product is leveled relative to the surface of a niche or wall and screwed tightly.
The last of the above steps is only possible with hidden fasteners. This is especially true in cases where the niche is curved. After installation, the screen will hide all the mistakes made by the builders.
Installing a screen for a heating battery with your own hands
Screens for radiators are a modern solution to the problem of obsolete heating elements that do not fit well into the interior. Being relatively cheap and easy to install, the screen eliminates the need to replace the radiator and supply pipes.
The screen for the battery is hung either on special brackets or directly on the elements of the heating system, which makes installation possible even without special skills and permits within 15-20 minutes.
Battery screens are metal products that visually cover heating radiators that are not very pleasant in appearance, most of which are a decorative mesh for heat transmission. Screens for batteries are very relevant when carrying out European-quality renovations, as they can give the room a finished look.
Probably, many will agree that beautiful curtains or stylish blinds do not look at all with “Soviet”-style radiators, even if they are painted. In addition, the shape of previously manufactured batteries no longer looks so aesthetically pleasing. Screens on radiators will help solve the problem.
They will hide the unsightly looking pipes. In addition to decorative functions, battery screens perform several protective functions. Everyone knows how quickly dust settles on a battery. Radiator screens installed in the apartment serve as an excellent barrier to the “ubiquitous” dust.

But not only this function ensures demand for our products. Outdated batteries often cause injuries. This circumstance must be taken into account if children live in the apartment. Due to the absence of sharp parts in the design, these products are absolutely safe.
The perforated screen is more environmentally friendly. It looks much sleeker than its metal brother. You can make patterns at the request of the client, which will increase the cost of the product, and, consequently, your profit. To make a radiator, we will need a wooden plank, plywood or chipboard, a sheet of perforated chipboard, a saw or jigsaw, self-tapping screws, paint, varnish, and foil. Most likely, you have the tools, and the materials are easy to buy at the construction market or stores like OBI.
To begin with, it is worth constructing two square profiles according to the size of the battery with an allowance of 5-7 cm on the sides, and on the bottom side to the floor. After which the top, them and sides of the profiles are sheathed with plywood, plasterboard or chipboard around the perimeter, leaving the back and front sides open.
Then we put a sheet of foil behind the battery, put on the screen and connect the entire structure. Foil is needed for better heat reflection. If the pipes approach the radiator from the side, you will need to cut a hole to fit the screen.
Another option is to not make side walls and put the screen on top. The choice is at the discretion of the customer. After that, all you have to do is cut out the decorative grille from perforated chipboard to size and attach it to the screen from the front side. Next, the screen can be painted or varnished to give the desired shade.
First you need to soak the rattan fabric in warm water in a bathtub or in a large basin for about two hours, so that it is easier to stretch the fabric onto a wooden frame, since when dry it is very hard and fragile at the same time.
Assemble the wooden frame. To do this, you will need ordinary wooden slats of approximately 2x3cm. (photo attached). Stretch the fabric over the frame and secure it with small nails or a furniture stapler and leave to dry.
Then connect the platbands to each other at right angles, using the same furniture stapler. When the individual parts of the screen are ready, you need to screw the frame to the frame from the platband with screws from the inside.
Naturally, before work you carefully measure the size of the hole in the wall in front of the battery. So that later the frame fits exactly into the opening. By the way, if the designer is sleeping in you, then the trims can be painted using the craquelure technique, or you can choose the trims not in the color of the walls, but, for example, in the color of the baseboard, this is something anyone has enough imagination for, it looks simply gorgeous!
The result of the work done is attached for viewing.
How to install correctly
The grilles should be installed so that future operation of the radiator and pipes does not cause difficulties. Parts must be cleaned of dirt at least once a year, so access to them is necessary.
Sometimes emergency situations occur in which an immediate response is necessary, and unscrewing fasteners can take up valuable time. In this regard, it would be advisable to consider a fastening system that allows you to remove the radiator protection with one movement.
What fasteners will you need?
The simplest in this matter are hinged and attached screens - they can be removed or moved aside. Flat ones attached to the wall are the most problematic. However, using a couple of strips, you can fix the box on the wall. In this case, the planks must have a beveled top edge.
In addition, you can use metal plates or magnets. Instead of a wooden plank, you can fix a metal corner in the wall. For flat screens, you need to use magnets, plates or hinges with hooks. Sometimes such screens are made in the form of sliding doors.
Installation
Knowing how the battery works, you can personally build a structure that improves heat transfer. It is recommended to use metal for this. However, to work with it, you need a large number of tools and skills.
You can build a grid either from a mesh or from a fiberboard (chipboard). The product will resemble a box on legs, with a lid located at the bottom and top. The facade with the sides is assembled from the frames. The mesh, which is located inside the wooden frame, will ensure good air flow.
Stages of work:
- Prepare the blanks. Knowing the dimensions of the battery, for air exchange you need to add three to eight centimeters on both sides.
- The joints of the parts should be sanded.
- Cut the mesh to the size of the radiator.
- Fasten the frame to the mesh and sides.
- Using corners and self-tapping screws, build a box.
- For better heat transfer, a metal sheet should be mounted at the back.
- The legs are attached to the bottom of the box.
- Install the manufactured box to the radiator using corners and self-tapping screws, fixing it in the wall on each side.
- Elements can be painted or decorated with self-adhesive.
Glass screen
In principle, you can order self-adhesive film with large format printing for a glass screen. You can also make a design on a matte or transparent surface using sandblasting or paste for chemical etching of glass.
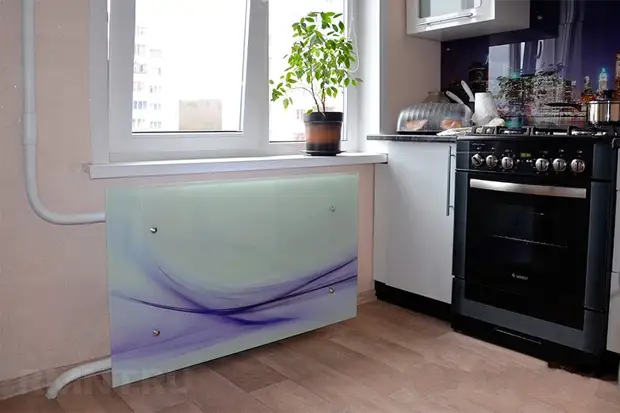
If you don’t want to bother with decorative processing, then glass with a matte surface or painted in bulk is available for sale - you just need to order the desired size, and you can process the edge yourself. The only condition is that the glass must be tempered.
The simplest option for installing a screen is to point-mount the glass to the wall in four places. To do this, use special fittings with remote fastening.
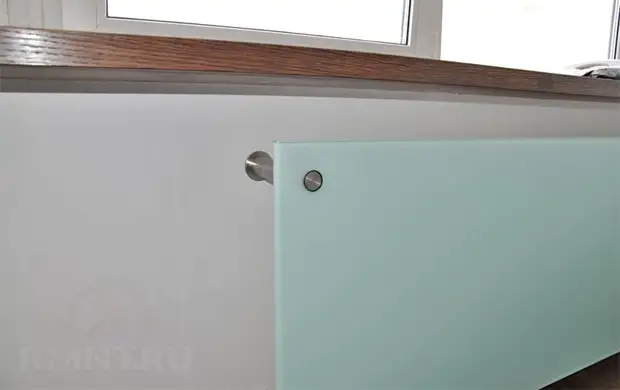
But there is one drawback - you need to drill holes in tempered glass, and this is difficult to do at home.
Therefore, it is better to use a cold-rolled thin-walled pipe as the supporting structure of the screen. It (and fastenings for it and glass) are sold in stores that sell everything necessary for making furniture. As a rule, such pipes and fasteners are made chrome, but you can order them to be painted in any shade from the RAL palette. The screen stands are attached to the floor.
As an additional support for the racks, two remote adjustable fasteners of a closed type (with a plug for the pipe) can be attached to the wall. The glass is secured between the posts using clamps.
rmnt.ru
Types of gratings based on material of manufacture
Today, decorative grilles for heating radiators can be purchased in different types. Based on the material they are made of, they are divided into wood, plastic, glass, metal, and MDF (medium density fiberboard).
Regardless of the material of manufacture, protective screens must withstand high temperatures without changing their shape and original appearance and, when heated, must not emit unpleasant odors, much less harmful substances.
Wood
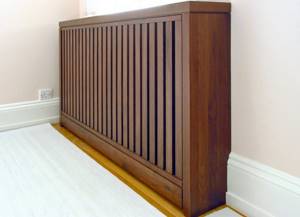
Wood looks great and is suitable for almost any interior. Well-treated and stained wooden gratings are in great demand, despite the rather high price. They are made from hardwood, which does not release resin when heated. These species include beech, oak, and ash.
It is not recommended to install wooden screens on convector-type radiators. The design of such heating devices involves covering almost the entire upper surface with a grille. Small holes located on it will not be enough for maximum heat transfer.
Rattan lattices, which stretch over a wooden frame, look very beautiful. These materials have good thermal conductivity and are environmentally friendly.
It is not recommended to buy wooden panels for home-made heating devices, since failure to comply with the technology can lead to premature loss of the appearance of the product.
MDF
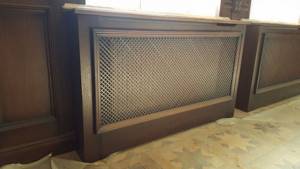
MDF decorative grille models should be approached with great care. These materials contain adhesives that, when exposed to high temperature heating, can cause surface deformation and delamination of the product. They can be installed solely for decorative purposes if you do not plan to heat the room too much.
At the same time, MDF lends itself well to processing. You can cut out various patterns on the panel that will decorate the room and ensure free flow of heat. To improve the performance of the radiator, it is better to choose MDF screens with sufficiently large holes.
Advantages of MDF gratings:
- low cost;
- ability to withstand significant mechanical loads;
- good thermal conductivity;
- easy installation and dismantling.
Panels made from this material can imitate oak, beech, maple, walnut, cherry, mahogany, wenge, metal and other textures. MDF can also be painted any color.
Glass
Some people are wary of installing battery guards made of glass because the material is very fragile. But for the manufacture of such products, high-strength tempered glass with a thickness of 6-8 mm is used. It is very difficult to break it even with a strong desire.
Advantages of glass panels:
- relatively low cost;
- ease of installation;
- high decorative characteristics (various degrees of transparency, various shades, the ability to apply drawings or photographs using thermal printing);
- safety;
- ease of care;
- good heat resistance.
Glass screens are attached to the wall using stands and completely cover the battery. There is space left below and above for the free circulation of convection currents. Heating of the room due to directed thermal radiation in this case is significantly limited.
Metal
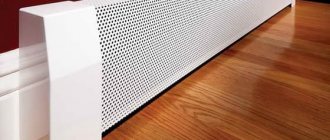
Metal is the most common material for the manufacture of decorative grilles for radiators. This product is a panel made of perforated sheet with a different arrangement of holes. The metal screen looks neat, elegant and provides good heat dissipation.
The most commonly used frame design. The metal can be black or galvanized. Stainless steel panels, which are produced in factories, are also common. The thickness of the steel sheet should be 0.8-1.0 mm.
The metal screen body is usually painted using baking technology (powder technology). This layer does not change color when exposed to high temperature. Often various designs are applied to metal surfaces.
Metal grilles for heating devices, except apartments, are installed in public buildings: schools, children's hospitals, gyms.
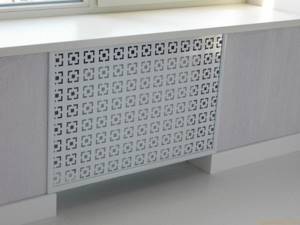
Prices for screens for heating radiators
screens for heating radiators
Some types of plastic
Plastic, along with the above materials, can be used to make radiator grilles, but only some of its types, in particular those based on PVC (polyvinyl chloride).
If the manufacturing technology is followed, a PVC screen can withstand temperatures up to +95 °C. It begins to smolder or burn at a temperature not lower than +220 °C. But since the thermal conductivity of plastic is less than wood or metal, more energy will be spent heating the room.
When choosing plastic gratings, you should pay attention to the following parameters:
- painting the material in bulk, without laminating film;
- non-flammability;
- sufficient strength.
Plastic screens are not suitable for gyms and children's rooms. But at the same time, they have a number of advantages: aesthetic appearance, variety of shapes and colors, low cost.
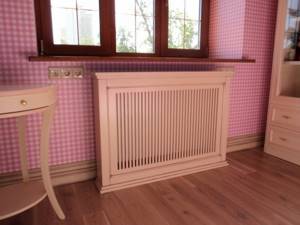
There are also combined screens made from two or more types of materials, for example, metal with PVC, rattan or wood with MDF.
Advantages and disadvantages
I have made my choice - next weekend I will equip my machine with a branded mesh. However, minor troubles are possible - I studied the list of them myself and want to share with everyone.
Cooling of the radiator by the incoming air flow after installing the mesh will deteriorate somewhat, and the thermal regime of the motor will change. Well, this is an expected phenomenon. When I installed nets on plastic windows at home, they tried to impose on me an “ideal net” with the smallest cells, through which “nothing could get through at all.” But it is, to put it mildly, difficult for air to pass through such a mesh - it’s easier not to open the window at all... Therefore, you can’t install a completely fine-mesh mesh. True, dirt will still penetrate through large cells. But this, it seems to me, is obvious.
How are plastic radiator grilles attached?
In the apartment you need to install radiator grilles on drywall. Tell me how this is done? What is the optimal distance from the grill to the battery?
Typically, plastic grilles are attached to a plasterboard box. Plastic is a cheap material with low resistance to mechanical damage. If you want the plastic to be strong enough, then you should choose a grille made of thicker material, although the price will also be higher. A plasterboard box, in general, is not the best idea for a room, since the heat transfer from the battery is reduced by 1.5 times, and to access the radiator you will need to completely dismantle the entire box. To prevent this from happening, the plasterboard box should initially be made in such a way that there is free access to the valves and chokes inside it, and the plastic grille can be easily removed. Typically, the distance at which the grill should be located is about 10 cm. Remember that it should not come into contact with the battery under any circumstances!
Variety of grating types
Before you go to the store, you need to find out what type these products are, what material they are made from, in order to correctly select the design to suit your needs. Man is a very picky consumer, so manufacturers are actively working to please the buyer, providing him with various color variations and shapes. There are also companies that are willing to create custom designs to order.
Particular attention should be paid to the material from which these products are made.
Plastic products for ventilation
They are especially convenient, since they are not expensive, last a long time, do not require special care, are light in weight and the most common in our CIS countries. Plastic grilles for ventilation are offered freely.
Aluminum gratings
They are 100% stronger than plastic ones, but still just as light and comfortable. The only thing that differentiates them from their competitors is their price, which is an order of magnitude higher.
Luxury made of natural wood
We didn't just say it was luxury. Products of this type require a lot of care and are very expensive in themselves. However, they are environmentally friendly and ideal for almost any interior.
Product form
If we are talking directly about shape, then these are basically simple geometric shapes such as a square, circle, ellipse or rectangle.
A narrow rectangular grille is ideal for a window sill. However, if you are looking for ventilation models for a window sill, then you should opt for narrow rectangular grilles. And if you are considering which model of hood you need, then select solely based on the size of the hood itself. Now, having familiarized yourself with the basic concepts of appearance, you can move on to the installation itself.
Why do you need ventilation grilles for window sills?
Condensation on a window is a pressing and well-known problem. This happens due to impaired air circulation in the room and due to increased humidity levels. One of the simple ways to solve this problem is to install a special grille in the window sill. The ventilation grille in the window sill helps prevent condensation from appearing on the windows.
Thanks to the grille, the air heated by the radiator freely flows through it up to the window, and when cooled at the opening, it falls down.
Now let’s take a closer look at why it is so important to install bars in the window sill, and why our windows “cry”. According to SNiP, central heating radiators should be located under the windowsill
Their task is not only to warm up the room, but also to heat the window opening (to avoid condensation). Therefore, according to the rules, the radiator should always protrude slightly relative to the window sill so that the air from it can rise up to the window.
However, nowadays these rules are often violated:
- Sealed plastic windows are installed.
- During repairs, window sill boards of greater depth are installed, completely covering the radiator.
Old wooden frames that were installed in houses built during Soviet times had cracks and gaps. Through them, air freely entered the rooms and was removed through ventilation shafts - that is, its natural circulation occurred.
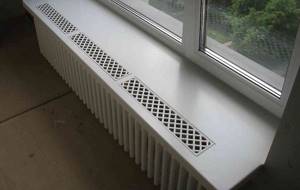
Now people give preference to sealed plastic windows, forgetting that they need to worry not only about the beauty of the window, but also about normal ventilation. There are two ways to solve the problem:
- Install a ventilation grille in the window sill.
- Install a supply ventilation valve on the window itself.
Ideally, these two options should be combined: if there is a grille in the window sill, this will not solve the problem of stuffiness in the room.
Types and characteristics of window sill grilles
Convection grilles are made from different materials:
- Steel.
- Tree.
- Aluminum.
- Plastic.
The most common rectangular shape of different sizes:
- 80 x 800 mm.
- 100 x 800 mm.
- 100 x 600 mm.
- 80 x 480 mm.
- 100 x 500.
- 80 x 500.
Installation of a metal box - step-by-step instructions
The method of fixation and design of the decorative screen should provide easy access to the battery for its maintenance and prompt resolution of emergency situations. An attached or hinged metal screen has similar qualities.
Lightweight mounted model
Table 2. Step-by-step instructions for installing a metal box.
| Illustration | Description |
| Step 1. Before you go to the store to purchase a finished product or order a screen based on individual data, you need to take all dimensions: depth, height and width of the product. | |
| Step 2. Markings for fasteners are applied to the wall. First, mark the line. | |
| Step 3. Points for drilling are marked on the line. | |
| Step 4. Drill holes for dowels. | |
| Step 5. Dowels are inserted into the finished holes. | |
| Step 6. Screw in the screws. | |
| Step 7. There should be a free space of 1 to 2 mm between the wall and the screw head. | |
| Step 8. The screen is hung on self-tapping screws |
