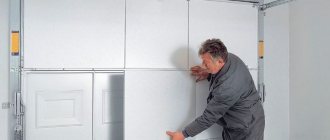
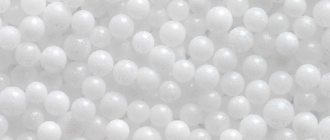
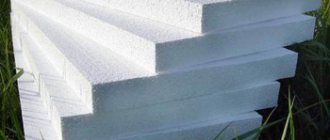
Polystyrene foam is used as insulation, since its thermal insulation properties are higher than those of natural materials, and the cold buildings in which it is used are mainly made of concrete. Often polystyrene foam needs to be attached to surfaces where it is impractical to assemble rigid sheathing (walls, ceilings, facades).
In such situations, sheets of material are attached using a variety of methods and adhesives. The right technological solutions make the work easier. So, how to glue foam to concrete?
Attaching foam to concrete with glue
It is optimal to use special glue in powder form with polystyrene foam. You can also use adhesive compositions for ceramic tiles and facades (frost-resistant).
Their basis is cement with the addition of binding polymers. The glue must be diluted with warm water before use. Such compositions reliably adhere to concrete, are moisture resistant, do not react to temperature changes, and last a long time.
Limitation - adhesives are used at positive air temperatures. It is better to knead using a drill with an attachment to prevent clumping. After settling for 5 hours, the mixture is stirred again.
Then the glue must be used within 2 hours. The fastening mixture is applied to the insulation material. The slab should be glued by pressing it to the surface and holding it in this position for several minutes.
It is necessary to exclude the formation of an air “plug” under it. After installing the slab in an interval of 2 - 3 minutes, it is possible to correct its position on the surface.
The final hardening period is 3 days. The method of applying glue depends on the height of the differences in irregularities on the surface. When they are within 50 mm, the composition is applied in wide dashed stripes (gaps for air to escape).
If the deformation differences are up to 15 mm, the substance is laid in intermittent strips with a protective distance of 20 mm from the edges of the slab. A little glue is applied to the middle of the area.
When the concrete surface is almost flat (height difference is about 3 mm), a notched trowel is used to lay the adhesive on it so that it covers the entire surface. The excess squeezed out from under the slabs is removed with a dampened cloth. Adhesive compositions can be in ready-to-use form.
Bitumen adhesive has hydrophobic properties, frost-resistant, and flammable. Needs heating to 20 degrees at an air temperature of about 0 degrees.
Apply with a notched trowel and provide adhesion within 20 minutes. Bitumen-latex emulsion mastic does not heat up before application, is resistant to low temperatures, and can be laid on a wet concrete surface. It hardens over a period of time from 3 hours to one day.
Another alternative is an adhesive, dense liquid based on rubber (dimethylpolysiloxane), which vulcanizes in air within 24 hours to form strong compounds. The temperature range for its vulcanization is from minus 60 to plus 300 degrees.
Return to contents
Materials for attaching penoplex to the wall
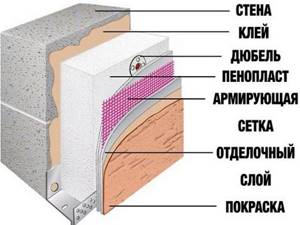
In addition to insulation, adhesives and dowels, to install the slabs you will need polyurethane foam to fill the joints, a reinforcing mesh that is laid to cover the insulation, as well as foil tape to insulate the seams.
The tools you will need are a glue gun, a puncher for punching holes when installing on dowels, a knife, a drill, containers for preparing the solution, a spatula, and to control the perpendicularity of the seams you need a building level and a plumb line.
The list of fastening materials includes commonly used adhesives and hardware.
Mineral-based dry mixes
The main binder is Portland cement. To improve the qualities of the future glue, plasticizers and polymers are added to the sand-cement mixture. The advantage of the solutions is that they can be used on uneven surfaces.
Sequence of installation work:
- add water to the powder poured into the container and knead the solution using a drill attachment, avoiding the formation of air bubbles;
- wait 2 hours for the liquid to be completely absorbed by the mixture, repeat stirring;
- Apply the prepared solution onto the slab with a notched trowel, retreating 2 cm from the edges;
- install the insulation in its intended place and hold for 1-2 minutes.
Polyurethane-based adhesives
They are used for fastening insulation outside and inside the building; the compositions are used at temperatures ranging from -6...+30ºС. They set in light frosts and in conditions of high humidity in a time not exceeding 30 seconds, and completely harden in 15-30 minutes. Polyurethane adhesives are available in the form of a viscous liquid, ready for use.
- adhesive foam is applied with a mounting gun in straight or wavy lines along the perimeter of the slab and along the long side in the middle of the penoplex;
- the insulation is pressed against the concrete base for 30-40 seconds;
- The installation work continues after the slab is laid, after 2 hours: this is installing dowels and painting or plastering the front side of the structure.
Polyurethane glue is used by professional builders to carry out large volumes of building insulation. The price of the compounds is quite high. The need to use a mounting gun is another disadvantage. In addition, you need to remember that foam is toxic and burns well.
Liquid Nails
The adhesive is used for a smooth surface of a concrete wall. Its advantage is that there is no need to cover the entire area of the slab.
Available in tubes, applied using a gun in the following order:
- point portions are squeezed out along the perimeter of the penoplex and in the center;
- the plate is applied to the wall, then torn off and left for 10 minutes until the glue dries;
- The insulation is finally fixed to the wall by pressing and holding for 40-60 seconds.
Bitumen mastic
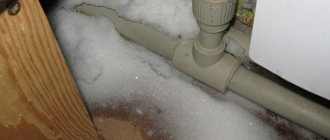
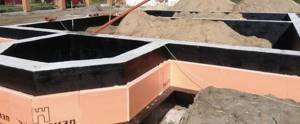
The traditional use of bitumen in construction is waterproofing the underground part of foundations. On its basis, mastics are made for gluing penoplex to concrete walls, which have water-repellent properties.
Installation of penoplex sheets is carried out after preparing the concrete surface:
- the cleaned wall is primed;
- the mastic is applied in a thin layer to the insulation boards with a spatula, another option for the foundation is to thickly coat the wall with a brush;
- penoplex is pressed against the concrete surface for up to 1 minute.
The disadvantage of bitumen glue is flammability at high temperatures and toxicity. If the insulation is installed indoors, air exchange must be ensured and measures must be taken to comply with fire safety rules. Mastic is sold in buckets ready for use. Foundations and plinths of buildings are objects for insulation and waterproofing using bitumen.
Disc dowels
In order to increase the strength of the adhesive connection of the slabs to the concrete, the insulation is additionally secured with dowels with a wide cap - mushrooms or umbrellas. Hardware has a number of advantages: the use of a washer allows you to increase the radius of coverage of the surface from 30 to 50 mm, the anchor structure of the polyamide rod can withstand a pull-out load of 100-150 kg, and is not susceptible to corrosion and rotting.
The procedure for strengthening the fastening of the insulating layer on the facade of the building:
- Points for drilling holes are marked. The diameter of the drill for a concrete wall is 10 mm. The depth is taken from the calculation: length of the dowel sleeve + 1-1.5 cm. For adjacent sheets, one hole drilled in the connecting seam is sufficient.
- Use a hammer drill or impact drill to make holes for umbrellas through the foam plastic in accordance with the markings. Drill cuttings are blown out with compressed air. The anchor must fit freely into the hole.
- Dowels are installed: the cap is pressed into the slab with a hammer so that it does not protrude beyond the plane of the insulation. A rod is inserted into the umbrella and hammered.
The penetration of the hole into concrete is ≥45 mm. The length of the dowel with an insulation thickness of 5 cm will be 95 mm. Before installation, the glued slabs must stand for at least 3 days. After completing the installation work, the wall surface is prepared for finishing: dents and voids are filled with adhesive using a spatula.
Using dowels
Fastening polystyrene foam using dowels.
A simple, inexpensive, quick and durable glueless method of fastening polystyrene foam, however, requiring the use of a hammer drill and the required number of umbrella dowels. Their length is selected sufficient for reliable fastening of the slabs to the concrete base (taking into account the thickness of the sheets). On a clean, flat surface, a lower starting level is set, from which installation begins.
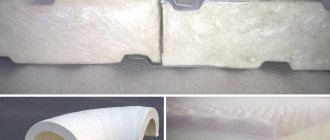
Each sheet is fastened with three dowels: one in the middle and two in the corners, so that their “umbrellas” press the corners of adjacent slabs. A gap of 3 mm is formed between the sheets - a deformation-temperature seam, which eliminates mutual deformation of the plates during daily and seasonal changes in temperature and humidity. Sealant is applied to the seams.
Return to contents
Bonding with liquid nails
Another alternative way to glue polystyrene sheets. Suitable only for smooth concrete surfaces.
The offer of liquid nails is extensive, so it is advisable to familiarize yourself with their purpose, conditions of use and operation indicated on the packaging. Compositions are created for various pairs of materials to be glued, including the pair polystyrene foam and concrete. This product is a polymer paste composition to which components have been added that improve adhesive properties.
Fastening with liquid nails.
Thanks to this, liquid nails are stronger than powder adhesives and harden even at high humidity. However, there is a significant drawback - the compositions are poisonous, so you should work with gloves. Such adhesives are packaged in oblong tubes, which are inserted into mounting “guns”. The benefits of using them include:
- the highest strength of the connection of materials; heat resistance; low technological consumption; complete hardening of the joint within 24 hours; frost resistance; efficiency and ease of installation; absence of odors and short setting time (from 20 to 40 minutes).
The latter increases the labor intensity of the work when the slabs are to be mounted on the ceiling (equipment, patience and skills are required).
The composition will firmly adhere to polystyrene foam when the surface of the concrete is leveled, cleaned and dried. The substance squeezed out of the tube with a “gun” is located on the foam plastic in a small volume at several points, and not over the entire sheet area, as, for example, in the case of applying polyurethane foam. The boards should be glued, providing pressure over the entire surface for a sufficiently long time so that the liquid nails set. Then the seams between the sheets are treated with polyurethane foam (sealant).
Return to contents
Bonding with foam
Foam adhesive for polystyrene foam.
You can glue polystyrene foam to a flat concrete surface using a special foam adhesive. This takes a little time.
This method is relatively inexpensive. At the same time, the material can also be glued to regular polyurethane foam. However, this will increase the work time, since you will have to forcefully press the slabs to the surface for a long time.
If this is not done, due to the increase in foam volume, the sheets will swell and rise above the surface, and the seams will separate. Before using foam adhesive, you should make sure that the contents of the tube are intended for foam plastic (and not foam concrete) and find out the conditions of use. The use of special foam is possible even without priming; it is enough to clean the concrete surface from dirt and moisten it for better adhesion.
The advantages of this composition are:
- acceptable adhesion; the ability to glue slabs at low temperatures inside and outside buildings; no odors; moisture resistance; the ability to take long breaks during installation; frost resistance; no shrinkage; biological resistance; safety (fire, chemical); ease of use.
The disadvantages of this substance are that the foam needs protection from UV rays, it requires washing the mounting “gun” during long breaks in work, and also that the adhesion force (holding capacity) with smooth concrete surfaces is weakened.
You should also be careful not to get the composition on the mucous membranes of the eyes. Special foam is filled into standard cylinders filled with a polyurethane compound.
Before use, it is installed in a mounting “gun”, which regulates the release of the substance. The can is shaken first and can be heated in warm water. The temperature for using the cylinder is approximately plus 20 degrees.
The foam can be placed on concrete or foam, covering at least 40% of the area under the sheet. The patterns for its application are stripes along the perimeter of the slabs or in a checkerboard pattern (with indentations from the edges), in the center it is squeezed out in a zigzag manner (necessary when the surface is not flat enough).
Then a little time is given for the mixture to soak into the surface to improve adhesion. Any foam that appears is removed. This composition is used to foam the seams between sheets of material.
Return to contents
Additional recommendations
Installation of the material must begin from the bottom up.
Expanded polystyrene is not hygroscopic, so free water should not be a component of the adhesive, otherwise the boards will lag behind the load-bearing surface. Their contact with adhesives containing solvents (gasoline, acetone), which destroy the structure of the material, should also be excluded. The purpose of adhesive compositions and the conditions for their use should be determined from the manufacturer’s recommendations on the packaging.
Work begins with ensuring high adhesion of concrete surfaces (cleaning from dust, building materials, greasy stains, priming) with an adhesive applied to the insulation boards. Before they begin, deep defects and cracks are widened and sealed with sand-cement mortar, then the surface is primed again.
Expanded polystyrene sheets are glued from the bottom up from the level line. Adhesive compositions are applied in such a way as to avoid the formation of air plugs under the surface of the sheets. The joints between the plates are not specially glued, since they are subsequently filled with sealant.
In some cases (due to the long setting time of the mixtures), it is necessary to forcibly hold the slabs pressed with their entire plane to the concrete surface until the mixture sets. All thermal protection after the glue, foam or liquid nails have hardened can be additionally secured with dowels. Their number on a sheet can be more than five (center and 4 corners) if it has a significant area.
Return to contents
Foam interior lining
It is quite possible to fix the slabs indoors yourself.
To securely fix the foam, work should be done according to the following scheme:
- Clean the walls from peeling paint and various contaminants, level them if necessary and seal cracks.
- Remove finishing elements of doors and windows that are subsequently replaced.
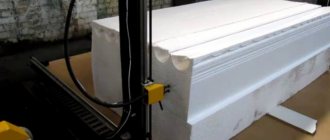
- Cut the foam into slabs of the desired size using a special cutter or a simple hacksaw.
- Buy foam adhesive in cans or make a solution from a suitable dry mixture.
- Before fixing the slab, apply adhesive to its edges, center and
- Apply adhesive in the center, along the edges and on the end surface of the board to be glued.
- Fix the foam to the wall. The fastening of the slabs can be done either in rows with a shift along the perimeter of the room, or in a pyramid - first, the first row is fastened along the entire perimeter, then the corners are made in the shape of a pyramid.
- The glue squeezed out from the joints between the plates should be removed with a spatula.
- At the final stage, cover the insulation with a mounting mesh and plaster.
conclusions
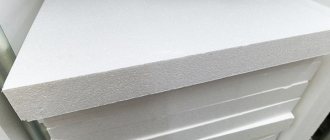
Expanded polystyrene boards are an effective lightweight thermal insulation material that does not require lathing for installation indoors or outdoors.
Durability of attachment to concrete is ensured by the correct selection and intended use of adhesive mixtures and dowels.
Polystyrene foam is used quite widely in modern construction due to its attractive cost and good heat and sound insulation properties.
Expanded polystyrene is used for both interior and exterior decoration of buildings. Moreover, this material is quite easily attached and glued to any surface. The most important thing is to adequately evaluate the advantages and disadvantages of each installation method and choose the best option for attaching insulation sheets to the existing surface, as well as choose the best installation material that meets all the characteristics of the insulation.
Basic moments
Let's look at how to properly attach polystyrene foam. Laying polystyrene foam is done from the bottom row up. Two fastening options are used: in rows and pyramidally.
In the first case, the work is carried out sequentially; after laying the first row, the second is laid along the entire perimeter.
The second option is more complex, but also justified under certain conditions. It allows you to reduce the time it takes to move lifting equipment to a height.
In this case, the lower level is glued around the perimeter, then the corners of the building are laid out with foam plastic in a pyramid.
Methods of fastening polystyrene foam
Modern developments offer a wide range of construction adhesive materials that facilitate gluing or fastening materials of absolutely any nature.
If you are wondering how to glue foam to concrete, then you have the opportunity to choose one of the following options:
- Dry adhesive mixtures. Mounting foam. Liquid nails. Use of mechanical fastening devices, such as dowels.
The choice of method for installing polystyrene foam boards on concrete surfaces depends on financial capabilities, installation location (outside or indoors) and the degree of unevenness of the working surface.
Reply to reader
We welcome you, Peter, to the vastness of our website! You are right, indeed, the foam will corrode if you use acetone-based compounds, so do not use them under any circumstances. Now we will name the 3 most common ways to solve the problem assigned to you. But first…
Preparing the concrete surface
Regardless of what type of glue you use, the surface must be properly prepared to obtain a reliable connection.
The procedure will not take much of your time, but it must be done.
- First of all, take a hard spatula and go over the entire surface of the ceiling, removing small debris and possible growths from it. If there are frozen pieces of concrete, you may need the help of a hammer drill. All protruding metal parts are cut off with a grinder.
- Mark the ceiling with a brush and prime it thoroughly - preferably in two layers.
- After the primer has dried, seal the seams between the concrete slabs with gypsum or cement plaster. An option with polyurethane foam is possible, the main thing is to ensure insulation from drafts and prevent large unevenness (excess foam is cut off with a sharp knife).
- Separately apply primer to the dried plaster.
All! The ceiling is ready for further work.
Dry mixes
The first way we will consider how to glue polystyrene foam to concrete is to use a dry cement-based mixture.
The use of dry adhesive solutions for installation
A dry adhesive mixture is a good option for gluing polystyrene foam to concrete, because...
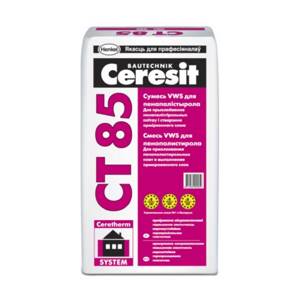
It is based on cement mortars using polymers that improve astringent properties. To use this group of substances, it is necessary to add water to its dry form. The best dry adhesive mixtures on the construction market are those produced by Ceresit, Stopter and Termokreps.
The advantages of these mixtures are:
- Long service life. High rate of adhesion of materials to each other. High degree of moisture resistance and frost resistance. Possibility of adjusting the location of polystyrene foam sheets within 20 minutes after installation until the solution has completely hardened. Relatively low price.
Unfortunately, dry adhesive mixtures also have some disadvantages. For example, it is impossible to carry out installation at negative ambient temperatures, the diluted solution is applicable only for two hours, the possibility of making mistakes when diluting the mixture and the long drying time of the glue, reaching 72 hours.
The dry mixture, without dilution with water, should be used when installing polystyrene foam on surfaces that have various irregularities that will be hidden by applying glue over the insulation.
There are three methods for installing foam plastic using dry glue:
The continuous method can be used if there are irregularities less than 3 mm.
The glue is applied with notched spatulas over the entire area of the foam sheet, after which it is instantly attached to the work area. Remember that in this case, it is advisable to apply some physical force so that the adhesive solution fills the space between the existing irregularities. If the irregularities reach 5 mm, then use the cavity method. The glue is applied in separate strips around the perimeter, and then in the center of the insulation sheet.
This method will avoid the formation of air cavities when polystyrene foam touches the insulated wall. The latter, beacon method, is useful if unevenness reaches a size of 15 mm. The adhesive solution is applied along the perimeter of the sheet in strips, departing from the edge by 1.5 - 2 cm, the diameter of the strip is 50-60 mm, and the height is up to 20 mm. In the center of the sheet, glue is applied in a similar way.
What do you need to know before insulating your home with polystyrene foam?
When installed correctly, polystyrene foam can serve as an insulating material for at least 25 years. The main condition when insulating the walls of a house with polystyrene foam is that its surface must be protected by a layer of plaster or other finishing material. Otherwise, ultraviolet radiation and various other external influences will seriously change the structure of the foam.
The second condition is the correct installation of the insulating material on the wall. And although foam plastic can be glued to almost any surface, the latter must be properly prepared. Otherwise, you can forget about the normal adhesion of glue and polystyrene foam to the insulated base, and ultimately ruin the entire finish.
As a result, you cannot skimp on surface preparation and adhesive composition for foam plastic. Glue must be applied in at least 5 places on the sheet, usually in the corners and in the center. This is the only way to prevent the foam from detaching from the surface during operation.
As mentioned above, properly preparing the surface of the walls before insulating them with polystyrene foam is of great importance. Firstly, for maximum adhesion of walls with glue, old finishing material should be removed from their surface
Particular attention is paid if the walls of the house have been painted. Then you will have to remove the paint using a grinder for this purpose.
In any case, before gluing the foam to the wall, the surface must be cleaned of dirt, paint and rust by sanding. Also, many craftsmen degrease and prime the walls before gluing the foam with a special solution, which allows several times to increase the adhesion of the adhesive composition.
The role of polyurethane foam when installing polystyrene foam
Polyurethane adhesive foam is a one-component aerosol, which is produced in ordinary cylinders, the same as regular polyurethane foam.
First, the aerosol canister is inserted into a special gun, which is used to adjust the release of the desired volume of foam. Before direct use, you need to thoroughly shake the contents of the container in order to mix the particles that have separated during storage.
In modern construction there is a wide range of aerosol adhesive mixtures that have the following advantages:
- Reduced time required for installation operations. Absolute absence of any odors. High adhesion coefficient with all building materials. Moisture and frost resistance. Compact dimensions for storing polyurethane foam. Possibility of installation work at subzero temperatures. Possibility of use both inside and outside buildings. The adhesive material does not emit any toxic fumes. The dowels can be used 2 hours after installation.
As you can see, this method of installing polystyrene foam has a large list of advantages, but also disadvantages. For example, it is necessary to have a particularly carefully leveled surface for using foam, high harmful effects of ultraviolet rays, high price of the material, and it is also necessary to use special washing, which will extend the service life of the gun.
So, mounting adhesive foam is ideal for installing sheets of expanded polystyrene on a relatively flat surface. Moreover, this material can significantly save time for installation work, as well as the amount of energy resources consumed.
Liquid nails for foam installation
An alternative to dry adhesive mixtures and various types of mounting foams are liquid nails, which are widely used for installing polystyrene foam on concrete surfaces. Liquid nails are a mixture of polymers and various additives and fillers. Some of them are only suitable for gluing dissimilar surfaces, but some companies offer options for use with both homogeneous and dissimilar materials.
Liquid nails have a wide list of benefits. For example, they are odorless, frost and heat resistant, provide high quality surface gluing, and the glue hardening time is within 30 minutes. In addition, low glue consumption, complete hardening of the solution within a day and the ability to smooth out surface irregularities that do not exceed 5 mm allow for installation of unusually high quality.
To install foam plastic sheets on concrete, liquid nails are applied pointwise or in thin continuous lines along the border zone of the heat-insulating sheet. The use of liquid nails is preferable to dry adhesives or polyurethane foam only if you have good skills in working with it. In this case, you can save both time costs and reduce financial losses.
A few important tips before starting installation
Regardless of which method you choose for installing foam plastic on concrete, remember that you absolutely always need to clean the insulated surface from unstable areas and dust particles, which in the future can reduce the adhesive properties of the surfaces. In addition, it is important to carry out high-quality work to remove deep cracks and strongly protruding irregularities, as well as carry out soil work over the entire area of the working surface in order to achieve the best results.
So, as you can see, today it is impossible to unambiguously decide on the choice of material for installing polystyrene foam insulation material on concrete, since there are a huge number of parameters that at any time can change the need to use any method. Remember that you need to choose an adhesive solution in accordance with the operating conditions, the characteristics of the wall, as well as your financial capabilities.
Ivan Publitorov
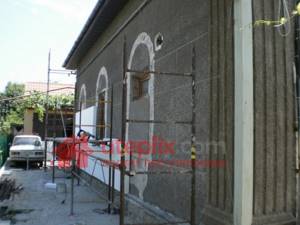
Polystyrene foam is an almost irreplaceable material for insulating building facades, walls and ceilings inside rooms, balconies and basements. It is environmentally friendly, practical and safe to operate, while at the same time having a low cost. Working with the material does not present any difficulties, since the weight of the slabs is quite small, which makes them easy to cut and glue.
Polystyrene foam has the ability to retain heat well.
The effectiveness of thermal insulation can be increased by ensuring the tightest possible contact of the material with the working surface. Installation of slabs must be carried out strictly according to technology. The choice of glue is also very important: first of all, it must be of high quality.
Only after this will it be possible to decide how to glue the foam to the concrete, and which of the 2 types presented by the manufacturers is better: polyurethane adhesive foam or dry-mix adhesive.
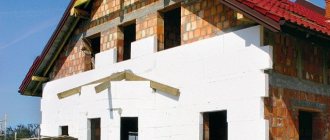
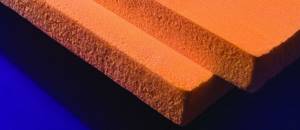
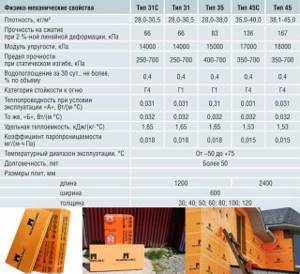
Technical characteristics and advantages of penoplex
Penoplex is a type of extruded polystyrene foam. The material is wear-resistant plates, inert to mechanical damage, rotting, destruction and high humidity. It is also characterized by a long service life, frost resistance and does not require the use of waterproofing protection.
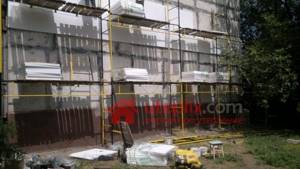
The high performance characteristics of penoplex allow it to be used for internal and external thermal insulation of foundations, walls, ceilings and floors. In addition, the material is widely used for interior decoration of wet rooms, insulation of balconies, loggias and verandas.
Particular attention is paid to the technology of installing “Facade” insulation from the outside. In this case, it is necessary to create a ventilation space for laying the waterproofing layer.
For internal installation, Comfort penoplex is used, which provides good thermal insulation of the room, has increased strength, flexibility and reliability.
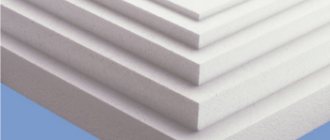
For external and internal work, it is recommended to use material of various sizes. Slabs up to 4 cm thick are suitable for internal installation, and up to 10 cm thick for external installation.
The materials have the following characteristics:
- Thermal conductivity (W/mk): “Facade” and “Comfort” – 0.03.
- Flammability (MPa): “Facade” – 0.2; “Comfort” – 0.17.
- Moisture absorption (%): “Facade” – 0.6; “Comfort” – 0.41.
- Sound insulation (dB): “Facade” and “Comfort” – 42.
- Operating temperature (degrees): “Facade” and “Comfort” – from -99 to +74.
Plates for external and internal installation have standard dimensions: length - 1.2 m and width - 0.6 m.
Penoplex has a lot of advantages that set it apart from other well-known insulation materials (mineral wool, expanded polystyrene):
- Universal use.
- Wide operating temperature range.
- Resistant to steam and moisture.
- High thermal insulation.
- Long service life.
- Ease of processing and installation.
- Chemical resistance and safety.
The procedure for preparing glue from a dry mixture
Dry mixture adhesive is perfect for insulating work indoors, both indoors and outdoors. Before purchasing, you must carefully examine the packaging, or rather the bag, which usually weighs 25 kg.
The first thing you should focus on is the date of manufacture, since glue based on a dry mixture can be stored for only a year. It is also important whether the bags were stored in dry conditions or not, which is not at all difficult to check on your own: when stored outside, you can see spots of moisture on the bags, and you can feel hard, stuck together lumps to the touch.
To prepare the solution you will need: 5 liters of clean water, without unnecessary impurities, per 25 kg of dry mixture, a clean container. You also need a construction device for stirring the solution: this can be either a drill equipped with a special attachment or an electric mixer.
2.6 - 6 kg of glue can be used per 1 m², which depends on the thickness of the applied layer. The finished adhesive mixture tends to harden within 2 hours, which requires mandatory preliminary calculations to determine the scope of work. In the future, the mixture cannot be diluted with water under any circumstances.
So, the procedure for preparing glue is as follows:
- Fill the container with water; Add the dry solution; Stir; Let the solution sit for 5-10 minutes; Stir again.
But these actions have some nuances.
Firstly, when mixing, you need to monitor the position of the mixer or drill: the blades must be completely immersed in the container with the composition. This eliminates the possibility of air bubbles getting into the mixture, which can reduce the quality of the finished product. And secondly, it is necessary to settle the glue in the interval between stirring so that the lumps that did not have time to dissolve are completely saturated with water.
After carrying out the above operations, the glue is ready. To check how correctly it is prepared, you can conduct a small experiment.
To do this, you just need to scoop up the glue with a trowel: if the glue drips right away, it means it is too liquid. Therefore, it is necessary to add the missing amount of dry mixture to the solution, which is done before the solution sets. Otherwise, you will have to throw it away and then start preparing a new one.
How to glue polystyrene foam with polyurethane foam?
When carrying out external thermal insulation work and insulating the ceiling, it is mandatory to additionally strengthen the glued foam plastic boards using spacer dowels.
In this case, balloon polyurethane foam is more popular, since literally after 2-3 hours after its use it will be possible to carry out further work. This helps to increase their speed, which cannot be said about the effect of using dry glue: from 2-3 hours the time increases to at least a day. Detailed instructions for use can be found in our article on how to use polyurethane foam without a gun.
Comparison of dry mix adhesive with polyurethane adhesive foam:
- using foam, you can glue the foam plastic together, fill the joints and gaps formed between the slabs for thermal insulation, so that heat does not escape through cold bridges in the future; the dry mixture does not provide this possibility; when working with adhesive foam, you do not need to prepare a solution using heavy bags, which is its big advantage compared to glue based on a dry mixture; as for adhesion to the surface, or adhesion, in this case balloon glue also wins; the degree of moisture resistance of glue based on a dry mixture is much lower than polyurethane; balloon the glue has a fairly low consumption: one is enough to process approximately 10 m²; in order to bond polystyrene foam with metal or concrete, only foam adhesive is suitable; the cost of both materials is approximately the same, but polyurethane adhesive foam is still more expensive; for convenience When working with foam, it becomes necessary to additionally purchase a mounting gun, which can cost from 450 to 2000 rubles, which is not so much. After each use, it will need to be washed using special solvents.
You need to work with foam carefully; it is recommended to wear glasses, gloves and special clothing, since washing foam from your hand or cleaning foam from clothes is not an easy task. Be careful!
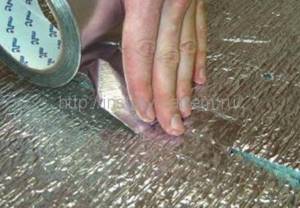
How to glue polyethylene foam: choosing glue
There are a large number of insulation options on the market.
Foamed polyethylene is the most commonly chosen material because it has impressive vapor, heat and sound insulation properties. The choice in today's market is truly great. The proposed options may have a self-adhesive surface, may be foil-coated on one side or both. There are such types of foamed polyethylene on sale as isolon, polyfom, penofol. The insulation can be attached to different materials. And depending on all its characteristics, glue is selected. For such purposes, the material that is optimally suited is penofol, which has a layered structure and consists of aluminum foil supplemented with polyethylene foam. It is characterized by its low thickness and low weight, as well as ease of installation.
This material is used for finishing building structures, units of specialized machines and entire mechanisms, individual parts of technical equipment on a production scale, pipelines, air conditioning systems, drying cabinets, as well as inclined surfaces with a complex profile.
In order to ensure maximum steam, thermal, hydro and noise protection, Penofol must be glued to a previously prepared surface (cleaned and well-dried).
Before you begin gluing Penofol and the working surface, it is recommended that you read the instructions for the selected adhesive. However, there is one rule that applies to working with any adhesives, namely, all surfaces to be fastened must be clean and solid.
It is first necessary to eliminate existing chips and cracks, even the smallest irregularities, dirt, and blockages of various origins. If wooden, metal, or polymer surfaces require a primer, its chemical composition must be suitable for the selected type of adhesive. This is the only way to ensure maximum and strong adhesion of the fastening planes.
Selecting adhesive for Penofol
The modern construction market offers universal and special adhesives for Penofol, but all of them must correspond to the operating parameters of the material being described, namely:
- The temperature range of the glue must correspond to the performance characteristics of the insulation used.
- Persistent adhesive properties.
- Possibility of using a biologically non-toxic bonding composition when finishing indoor surfaces (residential, office).
Many conditions also depend on the target objectives. For example, when insulating external walls, the adhesive must be resistant to external factors - sudden temperature changes, snow and rain, direct sunlight, etc.
When working in baths or saunas, the adhesive must withstand sudden temperature changes and constant excess moisture.
If we are talking about insulating residential buildings and apartments, it is necessary to use polyurethane glue that is non-toxic and completely safe for the human body.
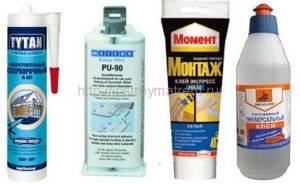
Types of glue
Since penofol is a fairly lightweight insulation material, the adhesive for attaching it does not pose great demands on strength.
- For exterior work, the range of operating temperatures is important, so it is best to choose mounting adhesive from the Moment Montazh Liquid Nails series. It is best to take “Super Strong Plus” glue, it is most resistant to temperature changes.
- For interior work, “Universal” or “Express” is suitable, as it dries quickly and can be used both outside and inside.
- Waterproof MV-40 is suitable for a bath or sauna.
- Weicon Easy-Mix PE-PP 45 adhesive is a specialized two-component adhesive based on methyl methacrylate, used for bonding PP polypropylene and PE polyethylene. The only drawback is the long hardening time (2-3 hours - preliminary, 1 day - full)
- For working with large quantities of penofol, PU-2 and PU-2A adhesives are suitable. They have good properties and are very durable, while being quite cheap. Unfortunately, these adhesives must be prepared on site: to do this, you need to mix polyester 24, technical acetone and polyisocyanate 102-T in equal parts. Portland cement is also added to PU-2 glue as a filler (0.25 parts).
- For small quantities, for example, when upholstering the inside of a car door or hood, it is better to use type C penofol with a self-adhesive layer. It is much more expensive, but it holds tightly and is absolutely harmless.