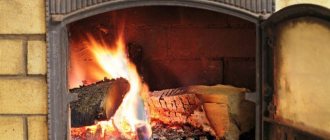
Over time, baths have not lost their popularity; on the contrary, now one can observe an increase in demand for their construction.
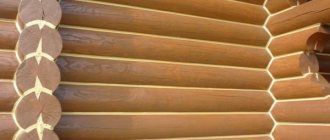
At the same time, bathhouses are built not only from classic wooden materials: logs and timber (as was customary before), but also modern technologies are used: the construction of bathhouses with frame walls and bathhouses made of various blocks (cinder blocks, gas silicate and expanded clay concrete blocks, etc. ).
They are durable, have no problems with rotting, exposure to insects, birds and rodents. The blocks do not burn, therefore they meet high fire safety requirements.
The insulation of block baths deserves a separate article, since this type is fairly new. This gives rise to many controversial issues, so we will try to cover the topic of insulating a bathhouse made of blocks, and in other articles we will talk about the insulation of other parts of bathhouses.
What do you need to know about the general principles of insulating block baths?
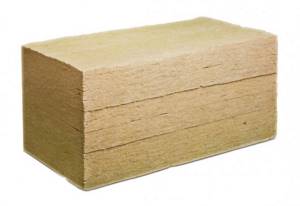
Building blocks are good because they retain heat well, are hygroscopic and resistant to temperature changes (this is important for the winter period). The thermal insulation properties of blocks , as a rule, are higher than those of brick or concrete, but in any case they are inferior to those of natural wood.
Baths built from blocks, regardless of their type, require insulation from the inside without fail. This is explained simply - by insulating the bathhouse exclusively from the outside, you will get a structure that will need to be heated for an incredibly long time.
After all, in order for the air inside to heat up, it is necessary to heat all the structures of the bathhouse: walls, ceiling, floor, etc. But in fact, you only need to keep the heat inside while using the bathhouse.
This distinguishes residential buildings from bathhouses (exception: bathhouses that combine their functions with a place for permanent residence). In residential buildings there is a constant source of heat that maintains a permanent positive temperature in the premises, but the bathhouse has a different procedure for use: it is heated 1-3 times a week, and even less often in winter.
It is impossible not to mention such a feature of the blocks as the ability to heat up to high temperatures. And if their surface is not covered, then the risk of getting a burn is quite high at the slightest contact .
Therefore, our recommendation is simple: insulate the baths inside, apply the rules for composing the insulation “pie” and do not forget about ventilation and vapor protection.
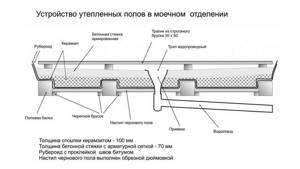
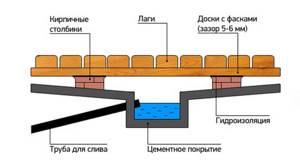
Bathroom floor insulation
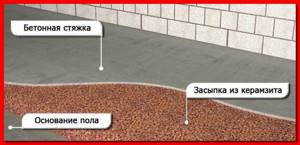
Precious bath heat also escapes through the floor, so it also needs to be insulated. To insulate the floor in a bathhouse, it is recommended to use expanded clay as the lightest and most environmentally friendly material.
Expanded clay is poured between layers of concrete floor as follows:
- pour the first layer of concrete;
- wait until it hardens completely;
- expanded clay is poured (layer thickness - 10 cm);
- install reinforced grating.
- pour a layer of concrete;
- make a cement-sand screed.
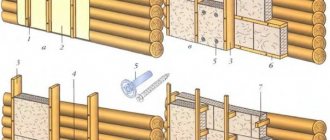
Installation of a “pie” of insulation from the inside
In addition to the very need to insulate the bathhouse from the inside, it is important to make the right insulation pie.
- lathing on a load-bearing wall;
- insulation;
- vapor protection and waterproofing;
- ventilation gap (can be arranged with a sheathing device, it is required);
- Decoration Materials.
For lathing, you can use wooden blocks or a metal profile. We recommend treating the former with an antiseptic to increase service life, and choosing metal profiles from the galvanized category (not subject to rust).
It is best to use dowels as fasteners: they will make it easier to work with blocks, which have a stronger structure than wood, and will provide a tighter connection. Although, in order to save money, it is permissible to use wood screws.
A ventilation gap is left between the finishing materials and the layer of vapor and water protection so that condensation can flow down without affecting the insulation.
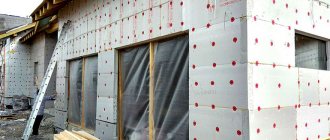
Insulation of walls in a bathhouse made of foam blocks (the diagram is suitable for all block walls of bathhouses)
Advantages and disadvantages of aerated concrete baths compared to wood
Wood is considered the best choice for building a bathhouse. It’s hard to argue with this, but this material is quite expensive - especially in those areas where it is imported. There are also regions where climatic conditions are not very suitable for the operation of a wooden frame. This is the south of Russia, where in winter there is eternal slush, wind and the thermometer practically never drops below zero. Here, private construction is carried out exclusively from stone materials, and aerated concrete is closest to the characteristics of wood. And many qualities even put him a step higher.
Comparing characteristics
This is what a comparison table of the properties of wood and aerated concrete looks like:
| Evaluation criterion | Wood | Aerated concrete | ||
| Characteristic | +/-/= | Characteristic | +/-/= | |
| Fire safety | Highly flammable | — | Does not burn | + |
| Performance | It is subject to biological effects, causes severe shrinkage, requires periodic treatment with a fire-retardant composition and sealing of inter-crown seams. | — | Does not rot and is not attractive to insects and rodents. | + |
| Service life | Over time, the wood cracks and warps. | — | With proper protection from moisture, it has an almost unlimited service life. | + |
| Density | For the construction of walls, pine lumber is used, the density of which is about 500 kg/m3. | = | Aerated blocks are produced in various densities, but in low-rise construction blocks of the D500 brand are most often used. | = |
| Thermal conductivity W/m*S | 0,14 | = | 0,14 | = |
| Wall thickness | 0,3 | Almost equal | 0,35 | |
| Compressive strength at the same density kgf/cm² | 439 | + | 50 | — |
| Water absorption | 30% | — | 25% | + |
| Frost resistance | Not limited | + | 50 | — |
| Eco-Friendly Factor | 1 | + | 2 | — |
| Labor costs per 1 m³ of wall (person/hour) | 0,5 | — | 0,15 | + |
As can be seen from the table, aerated concrete is not much inferior to wood, and in most positions it has a significant advantage. The only indicator that is significantly lower for a porous block is its resistance to compressive loads. But the strength that exists is more than enough. There is absolutely no need for more here, because in the bathhouse they don’t even have concrete floors, but beams.
Expert opinion Vitaly Kudryashov builder, aspiring author
Ask a Question
Note: As for the problems of hygroscopicity, they are the same for these two materials. Wood has an even higher water absorption coefficient, and it also needs protection from steam. And since bathhouses are built from wood, it means that aerated concrete is also suitable for this purpose.
The main thing is that the external and internal finishing of the aerated concrete bathhouse is done correctly. This will be discussed further.

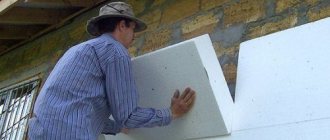
Insulation of a bathhouse from the outside
In fact, most often it is not required. Indications for thermal insulation of a bathhouse from the outside may be:
- harsh climatic conditions caused by critically low temperatures in winter;
- location of the bathhouse (for example, if it is located in a lowland with constant fog);
- combining insulation with external decorative finishing.
External insulation additionally plays the role of protecting the structure from the effects of precipitation and other natural phenomena of high humidity. The pie of external insulation is essentially similar to the internal one: sheathing, insulation, vapor barrier, ventilation gap and finishing materials.
The installation of external insulation is justified if you are going to cover the walls of the bathhouse with finishing materials. A thin layer of insulation will perform several functions at once, and you would do the sheathing for attaching siding or other finishing materials either way.
Methods for finishing an aerated concrete bath from the inside
Craftsmen are increasingly using aerated concrete blocks in the construction of baths. The light weight of the material does not require the construction of a powerful foundation, which significantly saves time and money. The building is practically not subject to shrinkage, and the interior decoration can be done with your own hands.
The blocks perfectly retain heat inside the building. The bathhouse will not require additional external insulation and cladding. Aerated concrete is not affected by mold, it is not afraid of rodents and insects
In conditions of high humidity this is very important
- Durability. With proper use it will last for several decades.
- Fire resistance. Resistant to fire even under prolonged exposure to temperature.
- Environmentally friendly. Does not emit substances hazardous to living organisms.
- Affordability. The cost of aerated blocks is significantly lower than that of wooden beams. The costs of building a bathhouse will be minimal.
One of the characteristics that makes one doubt the application is the water permeability indicator. Blocks absorb moisture very readily. Correct internal and external finishing of the bath will help solve the problem: the outside walls are treated with a special primer, and waterproofing materials are selected for cladding inside.
Source: mr-build.ru
Insulation technology by type of block
Differences in the insulation technology of baths built from different types of blocks are directly related to the method of production of the blocks. The spread of block baths is caused by the reasons already stated, as well as the high speed of construction of baths from building blocks.
Insulation of a bathhouse made of foam blocks from the inside
The specificity is related to the porous (foamy) structure of the blocks, because they are produced by foaming cement or concrete with the addition of sand and a special protein agent. Porosity makes the blocks more susceptible to moisture penetration, thereby reducing the thermal insulation of the structure and its service life.
Insulation of a bathhouse made of expanded clay concrete blocks from the inside
Expanded clay concrete blocks also have a porous structure, despite their production on a vibropress. They are among the high-quality and environmentally friendly materials. When a bathhouse is built from expanded clay concrete blocks, the insulation of the walls is similar to the thermal insulation of foam block walls.
Similar to foam blocks, they have a tendency to absorb moisture. Foil (including aluminum foil) and kraft paper work well as waterproofing. Foil is excellent as an additional shielding material.
Interior decoration and insulation of a cinder block bathhouse
Cinder blocks are distinguished by a very low price, which can hide various “fillings” of the block : from residues of the metallurgical industry to slag from coal combustion. They are most often made in a handicraft way. Therefore, blocks may differ in weight, thermal conductivity and other characteristics .
The popularity is also due to the fact that the blocks can be produced in different sizes. The insulation is similar to the insulation of a bath made of expanded clay concrete.
Interior finishing must be carried out while maintaining a ventilated gap. Wooden finishing materials are best suited: lining, block house, etc. Cover them with bath oil, and they will last a long time (they will protect against moisture, and as a result, prevent the appearance and development of rot). In addition, oil impregnation will emphasize the natural grain of the wood.
Insulation of a bathhouse made of gas silicate blocks from the inside
Gas silicate blocks have several gradations:
- category D800 and higher (high strength, but low thermal insulation);
- category in the range D500-D800 (average of both indicators);
- category D500 and below (characterized by low strength and high thermal insulation).
In addition, aerated concrete is a type of cellular block, that is, its structure contains air cells. But they are all hygroscopic. You can’t do without high-quality and reliable waterproofing. In addition, it is necessary to protect the blocks themselves from exposure to high temperatures, which can negatively affect their strength and durability.
Comparison of insulation materials
The choice of insulators for insulating bathhouse walls made of expanded clay concrete blocks is based on the following criteria:
- ease of installation, quick assembly;
- functionality;
- heat resistance;
- heat saving;
- hygroscopicity.
The most popular thermal fiber is its safety and versatility - it can be used both inside and outside. Before installation, preliminary preparation of the walls is necessary - cleaning them from dust, dirt, plastering. The latter measure also serves as additional insulation.
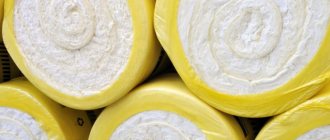
Natural jute felt is easy to install and does not impose specific requirements on conditions. This is an effective, environmentally friendly option. Polystyrene foam and mineral wool have good insulating characteristics and are attractive due to their low cost, low dead weight, and ease of installation. Mineral wool is more preferable here, since it does not arouse interest among rodents.
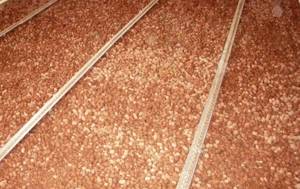
Expanded clay insulation is used to insulate block baths
Expanded clay insulation is still relevant, since it is free-flowing and can only be used to strengthen the ceiling and floor. Basalt wool is fireproof, mold and fungi do not grow in it, it is durable and environmentally friendly. Foamed polypropylene is used in tandem with foil; this combination can withstand heating up to 150°C.
Insulation for block walls
A distinctive feature of the bath is the high temperature level during its use. Therefore, for a steam room, the choice of insulation must be limited. We generally recommend not using the following materials to insulate a bathhouse from the inside :
- mineral wool;
- polystyrene foam and polystyrene foam;
- glass wool
When heated, mineral wool They are definitely harmful to the human body. The same situation is with the release of harmful substances from polystyrene foam and expanded polystyrene under the influence of temperature.
We can say an unequivocal “no” to glass wool It is dangerous to use: protection of hands, skin, eyes and respiratory tract is required. It is subject to deformation under the influence of high temperature (which is typical for a bath). Over time, it may begin to emit an unpleasant odor.
Nevertheless, these insulation materials are popular due to their availability and low price.
A good material for insulation can be ecowool : it is environmentally friendly, when applied using the “wet” method, it fills the entire surface, creeping even into small cracks. But this is also its disadvantage: you cannot do without special skills and equipment to apply it.
Peat blocks and foam glass have proven themselves to be modern and high-quality materials . They are not exposed to moisture, are fireproof, but, alas, quite expensive. At the same time, peat blocks are rare - only a few companies produce them in Russia.
Foil roll insulating materials work well (see link above). They need to be overlapped and glued with aluminum tape.
Insulating a bathhouse from the inside is a labor-intensive but necessary process. You will be able to recoup your costs due to the fact that with proper insulation, you will need significantly less firewood (or other type of fuel) than you would spend trying to heat a bathhouse insulated from the outside.
Internal insulation goes well with the upholstery of the bathhouse and finishing materials. You provide: warmth, safety and a beautiful aesthetic appearance.
You may also need the following materials for insulating baths:
Vapor barrier of bath walls
The most important nuance when insulating the walls of a bath structure made of foam blocks is the correct use of a vapor barrier layer indoors, especially in the steam room. Foiled polystyrene foam is used as a vapor barrier.

When laying heat-reflecting and vapor barrier layers between the interior wall finishing and the insulation, an air gap must be left. The internal finishing material is attached to a wooden sheathing - a special frame that is fixed on top of the heat reflector.
Vapor barrier polystyrene foam is applied to the wall in two layers, while its sheets are combined with each other end-to-end or overlapping, without tensioning the material. Additional sealing is provided using metal (mirror) tape.
A layer of mineral wool can be laid on top of the foil insulating layer on the internal walls of the bathhouse, which is separated from the internal decorative upholstery by a layer of waterproofing. The resulting air gap can be equipped with a ventilation pipe, which will prevent the accumulation of moisture in the thickness of the wall of the bath structure.
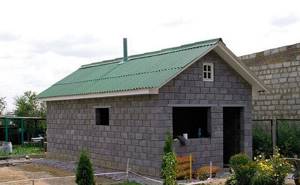
Bathhouse made of gas silicate blocks: construction and finishing using the example of a small private bathhouse
After several years of owning a summer cottage, I decided to build my own bathhouse. The planned dimensions are 5x5.3 m, the height to the ceiling is 2.25 m. The bathhouse is small, family type, with a gable roof and a small attic (the height from the attic floor to the roof ridge is 1.9 m). I thought about the construction material for a long time and decided to go with gas silicate blocks. The walls of the bathhouse and the gables of the attic were built from them. Inside, the steam room was insulated with a standard “pie” of insulation, vapor barrier and lining. In the rest room and in the attic, gas silicate was lined with clapboards, in the washing room it was tiled. I’ll tell you about all the stages of construction and internal lining of the walls of my bathhouse made of gas silicate.
Key points for insulating a steam room in a wooden bathhouse
Wooden structures shrink during the first years, so it is better to start insulating the bathhouse and carry out interior finishing work 1-2 years after the installation of the log house. If you neglect this rule, then after a year cracks will appear in the walls of the bathhouse, which will have to be carefully caulked, sometimes more than once.
If you decide to insulate yourself, then you need to draw up a sequence of work and impeccably follow all the points of existing rules and instructions on how to properly make a steam room in a wooden bathhouse.
A steam room insulated according to all the rules is a thermos, which is why, in addition to insulation, when carrying out work, steam and waterproofing materials are used, which not only increase the service life of the material, but also increase its thermal insulation properties.
Structure of the thermos steam room:
- load-bearing wall or partition;
- waterproofing;
- thermal insulation;
- vapor barrier;
- interior decoration.
Why were gas silicate blocks chosen?
When I just started construction, many neighbors in the dacha community asked me a question about why I chose gas silicate blocks. Somehow everyone got used to either wood or brick. And my arguments are:
- Quick installation. Gas silicate blocks are larger in size than bricks, so the construction of walls from them is much faster.
- High thermal insulation. Gas silicate belongs to cellular concrete, that is, it has many air cells inside. They play the role of heat insulators. Therefore, a bathhouse made of gas silicate blocks, in comparison with a brick one, warms up faster and retains heat longer. In terms of thermal insulation qualities, gas silicate is not inferior to wood.
- Fire resistance. Gas silicate blocks do not burn, unlike wooden structures.
- Impossibility of rotting.
- Low cost compared to brick, timber or logs.
In addition, I have good bricklaying skills, so I decided that I could handle gas silicate blocks.
I'll start in order.
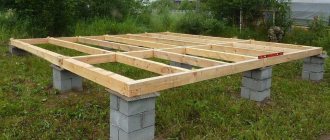
Stage No. 1: floor
Insulating a steam room starts from the floor. It all depends primarily on what method of arranging it you choose:
Design selection
- Concreting . The main advantage of this option is its high moisture-proofing properties, which is very important especially when arranging a Russian bathhouse, which requires the presence of a large amount of steam. But looking at the screed and walking on it barefoot is not very pleasant, and installing an additional finishing coating is expensive;
Photo of a concrete screed in a steam room
- Laying wooden boards . This is a classic that allows you to create a unique interior of the same steam room in which our ancestors even steamed. The boardwalk is also comfortable when in contact with bare heels and emits a pleasant woody aroma, which complements the overall ambiance. And although the tree is afraid of dampness, I still decided to use it as a form of the floor structure.
Wooden floor - ideal for a Russian bath
It should also be noted here that the wooden floor structure, in turn, can be of two types:
- Leaking . In this case, the boards are installed at intervals through which water flows. This is great for a summer shower, but not for a permanent bathhouse, from which all the heat will escape through such a floor;
Leaky floor structure
- Leak-proof . Here, of course, you will have to tinker with the drain to prevent stagnation of water, leading to rotting of the wood, but the insulation is easy to install, allowing you to achieve the thermos effect needed for the steam room.
Leak-proof floor structure
Choice of insulation
What is the best way to insulate a bathhouse floor? This is exactly the question I asked myself after I decided on its design features. And the following options seemed to me the most interesting thermal insulation materials:
Construction of building walls
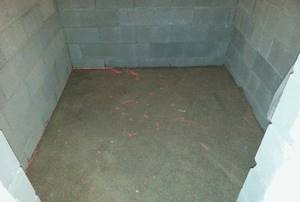
The blocks were laid on a ready-made strip foundation, protected by two layers of roofing felt waterproofing. Blocks with dimensions of 200x300x600 mm were used. I laid them on edge, that is, the thickness of the walls turned out to be 200 mm.
The construction of gas silicate walls will be carried out on a strip foundation
For masonry, cement mortar was used, mixed in a 3:1 ratio (ratio of sand to cement).
The work was carried out according to the following plan.
Stage #1 - laying the first row of blocks on the foundation
I started laying from the angle that (according to the laser level) was the highest. I applied the solution (about 5 mm) onto the roofing material with a trowel, and pressed the block on top. For better fastening, I tapped the blocks with the handle of a trowel.
The first row is the most important; the remaining rows of blocks will be aligned with it. Therefore, the accuracy of laying the blocks of the first row must be constantly monitored by the building level in 3 directions.
If it was necessary to cut blocks, I used a grinder with diamond discs for concrete. By the way, I once saw workers from a construction crew cutting blocks with a chainsaw. It worked out very quickly. So, whichever of these tools you have, use it.
The first rows of gas silicate blocks
Stage #2 - erection of walls
Subsequent rows of blocks were laid with an offset of 15 cm. That is, the seams of the overlying blocks were shifted by 15 cm in relation to the underlying ones. Gradually the walls were built to a height of 2.25 m.
The walls of the bathhouse are made of gas silicate blocks and lined to the ceiling
Stage #3 - construction of gables
The gables were built according to the same principle as the walls, to a height of 1.9 m at the ridge. Except there was more hassle with cutting the blocks!
The gables of the bathhouse were also lined with gas silicate
Installation of a steam room in an aerated concrete bath
Insulating a steam room in a bathhouse made of aerated concrete is no different from steam rooms in other bathhouses, because any material must be protected from the effects of high humidity. Let's look at the main stages of this process.
Floors
Insulation begins from the floor, the pie of which can be structured in several ways. We present three main ones.
Option 1 – on logs with expanded clay screed
The floor in a bathhouse made of aerated concrete can have a frame structure. In this case, the floor is based on beams with a square or rectangular cross-section resting on a strip or column foundation. Skull blocks are nailed to their side faces, which serve as support for rough flooring made of boards, cement-bonded particle boards or wood-polymer boards.
Expanded clay is poured between the logs (and 10 centimeters above them), on top of which a concrete screed is then made. If desired, water pipes for underfloor heating are laid in the concrete layer, which can be organized from a boiler installed in the bathhouse (or in the house). Make a screed with a slope towards the drain hole, install a wooden ladder on top with gaps between the boards so that water can drain.
Scheme of laying expanded clay on rough flooring
Option 2 - on logs with a screed on sheet material
In the second case, slab insulation (foam plastic or mineral wool) is laid between the joists, and instead of screed, two layers of cement-bonded particle boards (CPS) are mounted directly over the joists. Then the slope is formed in the same way using a concrete screed placed on top.
Expert opinion Vitaly Kudryashov builder, aspiring author
Ask a Question
Note: Bulk and slab insulation materials are inferior in efficiency to foamed polyurethane, which ensures complete tightness of the structure. But this option will also be the most expensive.

Scheme with slab insulation between the joists
Option 3 - monolithic
In the third case, the floor is laid on the ground. It consists of two inclined planes leading to a small rectangular tank with a sewer pipe connected to it. Brick pillars are installed on top of the concrete screed, on which a wooden ladder can be supported. If necessary, the insulation can be laid under a concrete slab - the same expanded clay or rigid slabs of extruded polystyrene foam.
Ground floor diagram
How to insulate a steam room in a bathhouse made of aerated concrete: walls
After completing the work on forming the floor, but before installing the ladder, the bathhouse is finished from aerated concrete inside the room. Please note that this is done before you begin finishing the exterior.
Most often, the walls and ceiling of the steam room are sheathed with boards with a tongue-and-groove joint - clapboard. This is a hanging material mounted on a sheathing, into which it is very convenient to lay slab insulation. You can use it if polystyrene foam or mineral wool, for example, are left over after building a house.
If you need to buy insulation specifically for a bathhouse, then it is better to give preference to rolled polyethylene foam, which was already mentioned above.
Finishing a bathhouse made of aerated concrete inside with insulation
When using Penofol or its analogues for insulation, finishing a steam room made of aerated concrete will be carried out in the following order:
- The wall is covered with a vapor-waterproofing membrane. On the one hand, it is smooth and does not allow water molecules to pass through, on the other hand, it is rough due to microperforation, through which steam can easily escape. Therefore, it is very important to lay the material on the correct side. The panels are reinforced with an overlap using double-sided tape, from the ceiling to the foundation itself.
- The second layer is polyethylene foam with one-sided foil (lay with a reflective layer inside the room). It is mounted not overlapping, but end-to-end, tightly connecting the edges with aluminum self-adhesive tape. Along the top line, you can use disc-shaped dowels, or the same double-sided tape. There is no need to make unnecessary mechanical fastenings, because both materials will be tightly held due to the sheathing bars mounted on top of them.
- For the frame, bars with a cross section of 30*50 mm are taken. They are sewn horizontally if the lining is mounted “standing”, and vice versa - that is, their relative position should be perpendicular. Before installation, the bars must be treated with an antiseptic.
Expert opinion Vitaly Kudryashov builder, aspiring authorAsk a Question
Note: Alternatively, the lathing can be made from a galvanized ceiling profile - guides PN 28*27 and main profile PP 60*28. In this case, all attention should be paid to the metal sections: they need to be coated with paint so that they do not corrode from high humidity.
- It is necessary to fasten the sheathing elements to aerated concrete using special fasteners designed for porous bases! After installing the sheathing, the inside of the aerated block bathhouse is finished with boards. We will not specify the procedure for installing the lining - if you are interested, you can find a thematic video.
If other options for interior decoration of the bathhouse are provided, it is only in the locker room or rest room, if there is one. Wallpaper can also be used here. Vinyl ones are perfect, but under them you definitely need to apply two layers of deep penetration primer to the walls.
Expert opinion Vitaly Kudryashov builder, aspiring author
Ask a Question
Note: Wall protection is mandatory - and not only in a free-standing bathhouse, but also when it is planned to install a sauna in a house made of aerated concrete.
What thickness of gas block to choose for a bath
Looking at the wall pie, it is impossible not to say what the thickness of the aerated block for a bathhouse should be. Since this room is used only periodically and is well heated, thick walls are not needed here. A block measuring 600*200*300 mm can be installed on an edge, and the thickness of the walls of the bathhouse will be 200 mm.
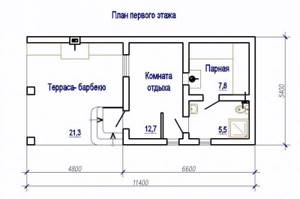
Much depends on what size the bathhouse itself should be. After all, not only a 3*3 m bathhouse with only a steam room and dressing room can be built, but also, for example, a guest house 11*6 m, the size of which in terms of the plan is not inferior to the parameters of a residential building, with a barbecue terrace and a bedroom in the attic.
What size should a steam room made of aerated concrete be?
In this case, the thickness of the walls of aerated concrete bathhouse will be at least 250 mm in the south, 300 mm in the middle zone, and 400 mm in the Urals and Siberia. The main thing is to provide the walls with the most rigid support, the role of which is best played by a monolithic tape or slab.
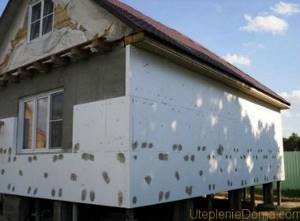
Insulation and finishing outside
Having built a simple small bathhouse, it is unlikely that anyone will want the exterior decoration of the bathhouse to “eat up” half of the budget allocated for it. Therefore, siding is often used to protect the insulation and improve the facade. These are various types of panels with a locking connection, which, like lining, are mounted on a sheathing made of timber or metal profiles.
- The lining itself is also used, most often an imitation of timber or a block house (imitation of a log). But with a board there are more expenses; it has to be covered with a protective compound, and then periodically updated. Siding is much easier.
- The best insulation option - and, perhaps, the only correct one for a bathhouse - would be to use slab mineral wool. For its installation, bars with a rectangular cross-section are used, the height of which should correspond to the thickness of the insulation or be slightly larger.
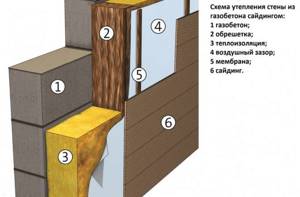
External insulation with mineral wool under siding
- In the first case, to ensure a ventilated gap, you will have to fill the rail with a smaller cross-section. The use of a counter batten entails additional costs, but it is still cheaper than using a main beam of a larger cross-section. A waterproofing membrane is installed on top of the slats, as shown in the photo.
- The principle of its operation is the same as that of the membrane, mounted inside, but it is able to withstand higher wind loads. The packaging of the roll must indicate that the material is façade and not for interior use. The membrane is pressed against the sheathing belts with another batten, on top of which the lining or siding is already mounted.
Expert opinion Vitaly Kudryashov builder, aspiring author
Ask a Question
Note: As an option, you can insulate the facade of a bathhouse with mineral wool using a system of warm plaster facades. For these purposes, slabs of increased rigidity are produced, on top of which a fiberglass mesh is mounted, and then vapor-permeable plaster is applied. In this case, no ventilation gap is needed, since all layers allow steam to pass through well.
Installation of a “pie” of insulation in a steam room
I would like to see the interior surfaces of the bathhouse finished in wood. For almost nothing, I managed to buy a machine for cutting aspen boards 20 mm thick and 125 mm wide. I used it for finishing, having previously smoothed the surfaces with a plane and sander. It turned out to be a good lining!
Despite the good thermal insulation qualities of gas silicate, additional insulation will never hurt. Especially in a steam room, where there are temperature changes and high humidity. Without insulation, streams of condensate will flow through the gas silicate. This is not very good for blocks, but generally disastrous for lining. First it will twist, then it will rot.
Therefore, I decided to equip the steam room with the traditional insulation “pie”: insulation - vapor barrier - lining.
The plan was carried out according to the following scheme.
Stage #1 - stuffing slats on the walls and laying insulation
Paroc mineral wool must be laid over gas silicate, inserting mats between the padded slats.
I attached 50x50 mm slats to the walls vertically using wood screws. It turned out that they are easily screwed into gas silicate and are firmly held in it. A 50 mm thick insulation was laid between the slats. I tried to lay it tightly, squeezing the cotton a little before installing it in the slatted “window”. It is important here to avoid any cracks, otherwise cold bridges will negate all thermal insulation.
Laying insulation between slats packed on the wall
Stage #2 - installation of a vapor barrier layer
For vapor barrier, two materials were used - Metaspan film and foil. First, I shot Metaspan onto the slats with an overlap of about 15-20 cm. Then - foil, with the same overlap. The joints of both layers were taped with foil tape. Such a vapor barrier will not only prevent moisture and steam from accessing the Paroc insulation, but will also serve as a kind of continuation of the insulating layer. The foil vapor barrier Metaspan + aluminum foil will serve as a reflective mirror for thermal infrared rays coming from the steam room. The rays will be sent back, and accordingly the quality of thermal insulation will increase.
Fastening the Metaspan foil vapor barrier on top of the insulation
Stage #3 - making lathing for clapboard cladding
To ensure that condensate flows freely over the foil and is not absorbed into the lining, a ventilation gap was made. To do this, the sheathing had to be “pushed away” from the foil using small, 2cm thick bars nailed in advance.
Bar between foil and sheathing
Thus, first I nailed the bars through the foil (to the slats), and then horizontally fixed the sheathing of boards onto them.
The horizontal lathing for fastening the lining is made of boards
Stage #4 - paneling
The clapboard sheathing on the sheathing was done vertically using small nails.
Internal wall cladding with paired aspen lining
At first I thought that I wouldn’t treat the lining in the steam room with anything. But then I decided to play it safe against all kinds of rot and covered the boards with one layer of oil from Tikkurilla “Supi Saunasuoja”. The oil is colorless, but forms a matte film on the wood.
At this point, the design of the walls of the steam room was completed.
Advantages of using expanded clay concrete blocks
This building material has the following advantages:
- environmental friendliness and absolute non-toxicity;
- insignificant moisture absorption, non-susceptibility to the destructive effects of steam and liquid;
- excellent thermal insulation properties that help retain heat in the room;
- relatively light weight expanded clay concrete blocks.
Thermal protection of a bathhouse, due to the specific use of this building, requires the use of various methods of thermal insulation in each section. For this reason, it is necessary to have knowledge and experience on how to insulate a bathhouse made of expanded clay concrete blocks shown in the photo.
To ensure high-quality thermal protection, you need to take into account the structural features of the structure and the influence of the environment on its various elements. Of course, insulating a bathhouse made of expanded clay concrete blocks from the inside differs from external thermal insulation.
This building material is made from several components using vibrocompression technology. The process consists in the fact that baked and foamed clay (expanded clay is made of it), as well as sand and cement, are thoroughly mixed and compacted under high pressure and vibration loads. The resulting expanded clay concrete block is characterized by lightness and at the same time increased strength.
Is it possible to build a bathhouse from expanded clay concrete blocks?
The technology for making expanded clay blocks, simple and accessible for home-made use, also has a downside. The quality and safety of expanded clay concrete stone depend on the characteristics of the filler. According to the requirements of GOST 6133-99, expanded clay 10-12 mm from clay with a high content of fluorspar should be used. Due to fluorine compounds, expanded clay granules are obtained with a smooth and durable surface.
Despite the high toxicity of fluorine, its salts are in a vitrified state, so they do not pose any danger, especially under a layer of concrete. If the raw materials have passed radiation and environmental control, then any residential premises can be built from such expanded clay concrete blocks.
Sometimes in semi-handicraft production, burnt quarry yellow clay is used instead of scarce expanded clay. After drying and firing, small pieces are obtained, light and porous, like pumice. Since the glass transition of the granules did not occur during the drying process, the heavy metal impurities contained can easily get into the water or onto the walls of the bathhouse. Often manufacturers simply sin by adding blast furnace or furnace slag, whose background radiation is always 60-80% higher than natural.
Advice! If you are not completely confident in the safety of expanded clay concrete blocks purchased cheaply for a bathhouse, then it would be useful to check the surface with a quarry dosimeter.
Well, according to the rules, such material must be tested for the content of lead, chromium, antimony and mercury salts.
Bathhouse made of expanded clay concrete blocks: pros and cons
If we consider the material only as a means for constructing the walls of a bathhouse, then it can be noted that expanded clay concrete is much better than cinder block, foam and aerated concrete.
It is clear that a bathhouse made of expanded clay blocks has its pros and cons. There are much more of the former than the latter.
The obvious advantages of building a bathhouse from expanded clay concrete include four points:
- Low cost of expanded clay concrete blocks. The price of one standard stone ranges from 0.3-1.0 dollars per piece;
- Expanded clay concrete is easy to transport and lay. On average, it will take a maximum of a week of time to assemble a bathhouse box made of expanded clay concrete blocks according to a design of 5x4 m or 6x4 m;
- Excellent fire resistance. The bathhouse box, even when completely engulfed in flames, can stand without destruction or deformation for almost three hours.
To build a bathhouse, the manufacture of a rigid foundation such as MZLF or a monolithic slab is not required.
The only disadvantage that can be noted is the tendency of expanded clay to absorb water. And although most of the moisture is drawn out of the filler by the cement grain, local “wet” areas may remain, through which frost can easily penetrate the walls of the bathhouse.
Advice! You can indirectly confirm the quality of the material using a square and a ruler.
For a commercial block, the dimensions are always the same; for a semi-handicraft stone, the geometry is not all right. Therefore, there is reason to doubt its quality.
Cladding the rest room and attic
For the cladding I used the same aspen paneling as in the steam room. I just sewed it onto the slats horizontally. I did not use any vapor or thermal insulation.
First of all, I attached vertical slats (made of boards) to the gas silicate walls. I nailed the clapboard to them with nails.
Vertical slats are mounted on gas silicate blocks using wood screws
The walls of the rest room were covered with aspen paneling horizontally
Upon completion of the work, I covered the lining with antiseptic impregnation “Drevnokhron oak” (Polifarb) in 2 layers. The second layer was applied after the first had dried, that is, the next day.
Insulation of washroom and rest room walls made of foam blocks
Insulation of other rooms of a bathhouse made of gas blocks can also be done with basalt wool or expanded polystyrene 100 mm thick.
Unlike a steam room, these rooms do not require resistance to high temperatures, so polystyrene foam may be a good choice.
The advantages of insulation made from this material include:
- resistance to getting wet;
- resistance to the spread of mold and fungi;
- high thermal characteristics.
Expanded polystyrene is laid between bars having a thickness equal to the thickness of the insulation, from which a frame is made on the inside of the walls made of foam blocks, on top of which a foil hydro-vapor barrier is spread, the joints of which are carefully sealed with metallized tape.
Instructions on how to insulate a bathhouse from the inside
Visiting a bathhouse is a very pleasant and healthy pastime. In order for this lesson not to be overshadowed by anything, you should carefully think through all the stages of work even in the process of planning the bathhouse project. One of the most important stages of work is the insulation of the bathhouse. If everything is done correctly and efficiently, the bathhouse will heat up quickly, retain heat well, and fuel consumption will be significantly less than when heating an uninsulated bathhouse. You can read the instructions on how to insulate a brick bath here.
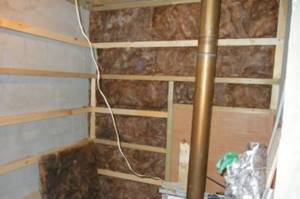
The picture shows the insulation of the bathhouse from the inside in progress
Proper insulation
The microclimate inside the bathhouse depends on what material the bathhouse itself is made of. Accordingly, the design and materials for insulating a bathhouse from the inside also differ depending on the original material of the bathhouse built.
The figure shows a diagram of the insulation of bathhouse walls from the inside
The process of step-by-step insulation of a bathhouse from the inside depends, first of all, on the material from which the walls are made. In any case, there are basic standard insulation works that apply to any bathhouse:
- Waterproofing walls;
- Construction of the sheathing (depending on the type of insulation chosen);
- Vapor barrier;
- Finishing the walls with finishing material.
Types and methods of insulating a bathhouse from the inside
- Insulation of a bathhouse made of blocks from the inside. Block building materials, such as foam blocks and cinder blocks, have a porous surface, due to which they are endowed with excellent thermal insulation properties. And yet, in the cold season, a bathhouse made of blocks will freeze, so it should still be insulated. In this case, it is recommended to use mineral wool, fiberglass or foam, which are then covered with a vapor barrier if we are talking about a steam room. Read the instructions on how to insulate a bathhouse with foam on this page.
- Insulation of aerated concrete baths from the inside. When constructing a frame for thermal insulation, a gap must be provided between the wall and the frame and good ventilation must be ensured. To do this, special openings are left at the top and bottom of the building, which must be closed during bath procedures, and open during drying of the room. Next, the selected thermal insulation material is attached to the frame, a board is placed on top, then a vapor barrier and a finishing board on top of it, preferably made of aspen or cedar. If you follow this design, then the problem of wall freezing simply will not arise.
- Insulation of a frame bath from the inside. The very structure of a frame bath involves laying thermal insulation into its “skeleton”, and the insulating technology of this type is called “Canadian”. In this case, mineral wool is used, which will make the frame bath energy-saving, unlike foam plastic. Thus, insulation boards are placed in each compartment of the frame and are necessarily covered with hydro- and vapor barrier. Afterwards, all that remains is to cover the walls with finishing material, such as wooden lining. Experts also recommend using a mixture of sawdust and wood chips with lime as insulation for a frame bath.
The figure shows a diagram of the insulation of a bathhouse made of timber from the inside
Numbers 1 and 3 indicate hydro- and vapor barrier materials. Number 2 is the thermal insulation material, number 4 is the finishing material of the walls.
The photo shows an example of insulating a brick bathhouse
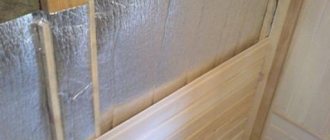
The brick bathhouse is insulated with mineral wool slabs, on top of which foil-foamed polyethylene foam is attached, which enhances the thermal insulation properties of the main insulation and protects it from moisture.
Construction of a frame in a bathhouse from blocks for further fastening of insulation in the photo
It is recommended to insulate a bathhouse made of blocks with mineral wool or fiberglass, which are fixed to a pre-prepared wooden frame.
Insulation from the inside
Mineral wool is very popular among insulation materials; it is produced by processing mineral stones. This material has excellent thermal insulation characteristics, has a high thermal conductivity coefficient, is fire resistant, environmentally friendly and durable.
To insulate the walls with mineral wool, first construct a lath, floor, and wooden lining, which will serve as a finishing material. The lathing is usually attached to metal consoles. That is, first the consoles are attached, then the mineral wool slabs are placed directly on the consoles, and then the sheathing is attached to the console.
Base insulation
Insulation and waterproofing of the basement of the bathhouse is very important. The fact is that the foundation and plinth are located quite close to the cold and often damp soil, and therefore they are destroyed more quickly under the influence of negative factors. To prevent dampness and cold from penetrating into the steam room, the base should be well waterproofed and insulated. In this case, penoplex or polystyrene foam will serve as a good thermal insulation material.
Roof insulation
And it is undesirable to stop at choosing polystyrene foam, since when heated it releases toxic substances. Roof insulation begins with good hydro- and vapor barrier. The ideal option for insulating the roof of a bathhouse would be to place the insulation between the roof rafters, if we are talking about a finished building. A guide to insulating the ceiling in a bathhouse is here: https://banya-gid.ru/oborudovanie-dlya-bani/rukovodstvo-po-utepleniyu-potolka-v-bane.html.
Stages of internal insulation
Regardless of the material from which the bathhouse is assembled, the general vulnerability of the blocks is their high hygroscopicity. In severe frost conditions, moisture-impregnated raw materials are easily destroyed. In winter, after heating, the room cools down, no one monitors the temperature inside, and the frost resistance resource will quickly be exhausted. Therefore, it is important to ensure high-quality insulation inside and outside in order to neutralize the impact of changes and ensure the safety of the building resource.
Regardless of the specifics of the blocks, a single internal cladding technology is used.
Floor
This is the first stage of insulating the bathhouse. General sequence of work:
- The soil base is covered with glass wool, slag or expanded clay. To achieve an optimal level of heat retention, you should create a layer at least 35 cm thick.
- Next, the expanded clay concrete screed with reinforcement is assembled.
- A floorboard is sewn on top or ceramic tiles are mounted.
If you plan to install a concrete floor, the following guidelines for action are relevant:
- the rough concrete pad is equipped with coating or roll-type waterproofing;
- The next layer is to lay the insulation directly - mineral wool, polystyrene foam, expanded clay. The optimal thickness of the bookmark depends on the physical properties of the selected option;
- To create a ventilation gap, plastic screens are introduced and covered with reinforcing mesh on top. The latter should be hidden under a concrete screed.
The final stage here is the laying of ceramic tiles; if desired, you can finish the concrete base with wood material. This method of strengthening the foundation minimizes heat leakage.
For arranging wooden floors, experts recommend:
- create a subfloor by equipping the lower perimeter of the beams with cranial bars;
- fill the top with cheap wood adjusted to size;
- the subfloor must be equipped with vapor-tight waterproofing. The film should cover the entire area with an allowance of 20 cm on the walls. Fixation can be done using a construction stapler; to strengthen the joint area, you will need double-sided tape;
- You need to lay thermal insulation on top and cover it with film or roofing felt.
After filling the finished floor, the perimeter must be equipped with skirting boards. Wood needs additional protection in the form of moisture-repellent, antiseptic, and fire-retardant impregnations.
Walls
The porous structure of the building blocks helps reduce heat leakage, while the assembly of an auxiliary insulating pie will protect the structure from moisture accumulation in the smallest internal cells. In the case of cinder blocks, external insulation is not as important as internal insulation, so special attention should be paid to the design of the walls.
First of all, it is necessary to prepare the surface - clean it from dust and dirt, remove the remnants of any finishing, and plaster it so that a flat area is formed. Next, you can begin building up protective layers according to a specific algorithm:
- Assembling wooden sheathing. Here you can use budget timber, since it is undemanding in installation; it is only important that its thickness is at least 5 cm. The pitch (spacing) between the vertical lines of the frame should be 3-4 cm smaller than the dimensions of the insulating boards. In this case, it will be more convenient to place the insulating material in the cells.
- Basalt panels need to be placed in the resulting niches.
- It is necessary to create a vapor barrier layer on top. The best option is a foil membrane based on kraft paper. During installation, you need to ensure that the reflective layer is directed towards the inside of the room. The canvas is mounted with an overlap of at least 15-20 cm; the joint lines must be taped. The membrane is attached to the frame using a construction stapler.
To insulate the walls of a bathhouse made of blocks, you can use basalt panels.
To maintain the required ventilation gap, you will need to sew a counter-lattice - it is created from beams that are mounted in the transverse direction. This measure facilitates the timely removal of condensate (moisture) from the foil side of the vapor barrier membrane.
At the final stage of work, all attention is paid to finishing the walls. It is recommended to line the steam room with natural wood with a low resin content. Panels or lining must be stuffed horizontally to make it easier to promptly replace the lower segments, which are inevitably destroyed due to frequent contact with water.
The kraft paper membrane can be replaced with foiled polypropylene - its characteristics help protect the “pie” from adverse factors.
Ceiling
The ceiling needs additional strengthening, as it is used in extreme conditions - with significant temperature changes, under the influence of hot steam. In this zone, experts offer two methods of work - open and closed. If the attic of the bathhouse is not equipped with a floor, the second method is relevant.
The ceiling is covered with a waterproofing membrane, and a layer of granulated expanded clay no less than 25 cm thick is poured on top. Next, waterproofing is laid again in the form of a plastic film or roofing felt, and a construction stapler is used to fix the coating.
The old method of strengthening the ceiling structure using an open method is also still practiced. Factory waterproofing film can be replaced with a homemade mixture of sawdust and fatty clay; the substance should be applied in a thick layer - from 4 cm. When the clay has dried, it can be covered with dry soil and oak leaves. In this case, it is necessary to recalculate the resulting load on the ceiling, taking into account the cross-section of the floors, since the weight of the “pie” increases significantly.
Closed technology is relevant for baths, in the design of which the attic has its own floor - such auxiliary rooms can have their own functional significance.
The flooring is assembled directly on the joists, it is supplemented with such components of the cake as vapor barrier in roll form, basalt insulation, roofing felt for waterproofing (in exactly this sequence).
Why do you need to insulate?
In residential buildings, an external insulation method is used to protect walls from premature destruction. But for a block bathhouse, internal insulation is better suited, and there are reasons for this:
- Stone and block buildings heat up more than wooden ones, which increases the likelihood of burns. For this reason, walls made of blocks must be lined from the inside with boards, under which it will be convenient to place an insulating layer;
- The bathhouse is not used constantly, approximately once every seven days. The rest of the time it remains without heating. And the main purpose of insulation material is to keep the room warm. Therefore, the outer insulation layer does not play a special role here and is ineffective.
The thermal insulation properties of expanded clay blocks are better than those of concrete and brick. However, they are significantly inferior to wood. For this reason, a thermal insulation layer should be installed to avoid large heat losses.
Step-by-step instructions for thermal insulation of a block bath
The insulation of a bathhouse made of blocks begins with the work on thermal insulation of the floor, which will help to significantly reduce heat losses. First, an insulating waterproof layer, in the form of slag or expanded clay, about 35 cm high is poured onto the ground. A layer of reinforced concrete screed is laid on top, on top of which, after drying, ceramic tiles are laid.
To insulate the walls of a steam room from the inside, you need to prepare the following materials:
- wooden slats;
- foil material;
- mineral wool slabs;
- dowels;
- bars for counter-lattice;
- construction tape.
Below is a detailed plan on how to properly insulate a bathhouse:
- Installation of vertical wooden sheathing on previously cleaned walls. The frame cells are filled with heat-insulating material.
- A vapor barrier is installed overlapping the insulating material, which is secured with a stapler and the joints are sealed with tape.
- Next, the counter-lattice is installed, which serves as a ventilating layer.
- At the last stage, finishing is carried out, usually using natural wood.
Polymer materials such as polystyrene foam or polyurethane foam are suitable for the dressing room and washing area. A frame is installed on the walls, followed by laying a layer of insulation. Next, the vapor barrier and finishing material are installed.
Insulating a bathhouse from foam blocks from the inside - video with detailed instructions.
Materials for insulating a bath made of foam blocks must meet a number of characteristics, including fire resistance, thermal conductivity, strength, environmental friendliness and sound insulation.
Insulation of facade walls
Even before construction begins, the question of insulating the house is raised.

Often walls made of expanded clay concrete blocks are laid in 2 rows (40 cm), and it is believed that additional insulation is not required.
However, this is a misconception. To save on heating costs, it is necessary to carry out insulation work.
The second reason why it is necessary to insulate walls from the outside is external negative factors, under the influence of which walls made of this material quickly become unusable. To protect the material and give the house an aesthetic appearance, it is faced, and the space between the blocks and the facing material (for example, brick) is filled with insulation.
Should I do it?
Experts recommend insulating external walls in any case to avoid condensation, which negatively affects the integrity and properties of expanded clay concrete blocks. You can neglect this procedure if the premises are not residential, or the country house is visited only in the summer, but again it is worth remembering the negative external factors that will certainly affect the material.
Some people refuse insulation and instead install a heated floor, which ensures a comfortable temperature in the room, but experts say that this is only a half-measure that will not solve the problem entirely.
How to do it correctly?
Correctly insulate the walls from the outside. Firstly, there is no need to waste useful space indoors. Secondly, insulation from the inside can create strong humidity in the house, which can cause rot. This occurs due to the fact that the facade is not heated and goes into a low temperature zone. Because of this, condensation will appear between the wall and the insulation, which has an equally negative effect on both materials.
Method of insulating an expanded clay concrete house from the outside
Expanded clay concrete walls can be insulated with foam plastic using the wet facade method.
Let's consider two options for insulating expanded clay concrete walls from the outside. The first is the installation of thermal insulation with the preliminary construction of a wooden frame. This method is called a ventilated facade. The second is the installation of insulation boards under the plaster. The method is called wet facade.
Insulation of a wall made of expanded clay concrete blocks using the ventilated facade method allows you to reduce the heating of the room in the summer. Thus, the house will have a comfortable temperature all year round. The essence of the method is to leave a ventilated gap between the thermal insulation and the exterior finish, in which air always circulates from bottom to top. It simultaneously cools the façade finishing in summer and carries away steam that escapes from the room through the walls and thermal insulation.
Installation work is carried out in accordance with the following rules:
- there should be no air pockets between the insulation and the wall;
- thermal insulation in slabs or rolls is placed between the sheathing;
- glue is used for fastening to the wall;
- a wind barrier or diffusion membrane is laid on top of the thermal insulation (a vapor barrier cannot be used);
- the counter-lattice is filled with bars with a cross-section of 15 mm or more.
You can attach any finish to the counter-lattice, for example, vinyl siding or blockhouse. There should be gaps at the bottom and top of the finish so that air can penetrate under it. Creating conditions for convection is an important aspect when constructing a ventilated façade.
Thermal insulation boards are attached directly to the wall using universal construction adhesive. During installation, the principle of brickwork must be observed, that is, the seams of adjacent levels should not coincide. The slabs are additionally secured with plastic mushroom dowels, 4-5 pieces per slab. Immediately on top of the insulation, the first layer of plaster is applied, which is reinforced with fiberglass mesh before drying, the ends are closed with corners.
After the first layer of plaster has dried, you can apply the second, finishing layer. It can be made smooth or with indentations, the so-called bark beetle. Finally the finish is primed and painted. In addition to following the technology, you need to calculate the thickness of the insulation for walls made of expanded clay concrete blocks. To do this, the easiest way is to use an online calculator on one of the resources of heat-insulating material manufacturers.
Do-it-yourself bathhouse made of expanded clay concrete blocks
Before you start building the box, you will need to stock up on materials and lay communications. Before the first stone is laid at the base of the bathhouse foundation, it will be necessary to lay sewer pipes or install a septic tank. Water is brought into the bathhouse after the walls have been erected and the ceiling has been laid.
Despite the fact that expanded clay concrete blocks are quite light and do not require special equipment, without water and electricity it will be very difficult to build a bathhouse from expanded clay.
Preparation
Expanded clay concrete blocks are delivered to the site and unloaded on pallets at a distance of no more than 10 m from the foundation. Before starting work, the material is covered with film to prevent the stones from getting stuck. The unloaded blocks are inspected and rejected, those on which expanded clay appears on more than half of the side surface area are removed.
Under the foundation of the bathhouse, they remove the top layer of turf, cut a trench under the foundation strip and fill the inner area with a sand-gravel mixture, as is done when laying paving slabs.
Construction of the foundation
The easiest way to lay a foundation strip involves using discarded expanded clay concrete blocks. As an option, you can even buy an additional batch of discarded expanded clay concrete with slight deviations in geometry for arranging the foundation of the bathhouse. The material has excellent thermal insulation, so it is much better suited for tape than cast concrete or FBS blocks.
The only condition is to ensure good waterproofing of the walls and the base of the foundation. The blocks can be coated with mastic paired with a dense polypropylene film. If the bathhouse box is less than 3x3 m, then the blocks do not even need to be filled with concrete; the joints and cracks are simply covered with a dry mixture of cement and sand. For full-size bathhouse buildings, the tape is filled with concrete, and if there is at least a slight surface slope on the site, then the tape under the expanded clay concrete masonry will need to be reinforced with reinforcing mesh.
If the climate in a given area is quite harsh, with severe frosts in winter, then before laying the blocks it is necessary to insulate the subfloor of the bathhouse, and after assembly, insulate the outer surface of the foundation walls.
What to put the blocks on
The outer surface of the laid tape must be rolled up with roofing felt, the material is tucked, and the edges are attached to the vertical surfaces of the base. The first row of masonry is carried out using a regular cement-sand mortar 1:3 with the obligatory addition of a plasticizer that reduces shrinkage of the joints.
On average, the thickness of the seam should not be more than 3 mm. Despite their good thermal insulation properties, expanded clay concrete blocks laid in the basement row may suffer from excess moisture on the foundation area. Therefore, it is best to lay out the first two or three rows of the plinth from solid red brick.
Wall installation
To build the box, it is best to use hollow expanded clay concrete stones; they are lighter and easier to work with; most of the masonry work can be done independently.
In addition, it is possible to reduce the thickness of the insulation of a bathhouse made of expanded clay concrete blocks.
Every four rows of walls, as well as the upper part of the masonry, corners and joints with internal walls must be reinforced with steel corners, mesh and rod reinforcement. The material is placed in grooved grooves and glued with a masonry mixture with the addition of an acrylic primer.
Exterior cladding
The outer surface of the walls does not require special means of protection, but the cladding must be porous enough to allow water vapor to pass through, and at the same time dense to retain water in a liquid state.
For finishing work, two types of cladding are used - a ventilated version in the form of siding or lining and ordinary cement-sand plaster. The release of water vapor on the outer walls of the bathhouse is considered small, so you can even use decorative plaster.
For expanded clay concrete baths, this type of finishing is rarely used due to the high cost of the material. And the surface of the expanded clay concrete block itself is quite rough, so you have to plaster it with cement mortar, and only then apply a decorative coating.
Insulation technology with cotton wool and polystyrene foam
A bathhouse made of expanded clay concrete blocks, which is properly insulated, even with its smallest dimensions will perfectly retain heat inside.
Insulation of concrete blocks is included in the construction of any bathhouse. Expanded clay concrete blocks can be insulated with mineral wool or polystyrene foam. Both methods are very simple. In the first case, the slabs are first fixed. You can glue foam onto the finished base. To do this, you need glue, which is applied to the plate. The latter are attached with dowels to the wall. The space and voids between the plates must be filled with polyurethane foam. The second stage is reinforcement. Glue for reinforcement is applied to the foam. There are 2 main ways to apply it: two-layer and using a spatula. The first is to apply one layer, press the mesh into it and repeat.
When using a spatula, the glue is spread and distributed more evenly if there are notches on it, then the reinforcing mesh is immersed in it and heated, after which the remains are removed from the surface with an even spatula. Insulating concrete blocks with cotton wool is no worse. In this case, the first thing to do is clean the wall, after which the cotton wool is attached to the glue. The glue is applied to special mats, which are attached to the wall with dowels. Next, the material is reinforced using the technology described above. The insulation of the concrete blocks is ready, and the construction of the bathhouse is completed.