Statistics say that due to poor window insulation, up to 40% of the heat from the room is lost. Such waste in times of rising resource prices is unacceptable, because almost half of the money in this situation goes to useless heating of the street.
Several decades ago, the most popular window insulation was in the form of paper strips. The cracks were first sealed using pieces of cotton wool or scraps of fabric, and paper was glued over this area. However, technology has gone far ahead, so this technique is practically never found in practice. Today, window insulation has become more advanced, easier to apply and visually attractive, which could not be said about ugly paper tapes.
Classification of materials
You can correctly use insulation for wooden windows yourself without outside help. Most materials are designed in such a way that their application requires little or no specialized tools.
There are a lot of options for insulating windows today.
On the shelves of specialized stores there are varieties of materials:
- foam insulation for windows;
- rubber insulation tape for windows;
- polyurethane;
- polyethylene foam;
- insulation for PVC windows (polyvinyl chloride).
Also, finished products are differentiated according to the method of application:
- self-adhesive insulation for windows;
- insulation for windows for the winter, fixed using glue.
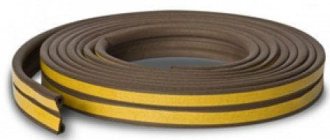
A tubular seal made of rubber is in demand. This material can be used repeatedly if necessary. An additional convenience is the ability to open windows during cold periods, since the material is glued to only one of the mating surfaces, unlike tape or paper.
Rubber tubular seal
And this is how it is fixed in the frame
Necessary conditions for insulation
To ensure the reliability of the work performed, a number of important conditions will need to be met. Before gluing window insulation, it is necessary to thoroughly wash the surface to be treated from dust and dirt. If necessary, replace cracked glass, because cold air can also be blown in through these cracks.
It is advisable to carry out all sealing work at positive temperatures in order to preserve the ductility of the materials used.
If the glass is not securely fixed, then it must be “seated” with silicone sealant. This will have an additional positive effect, since the glass will stop “siphoning”, which is already +5% in terms of heat retention in the house.
VIDEO: Insulation of window frames
Choosing the right material
Those wishing to use self-adhesive insulation for rubber windows must select a softer texture. This material, unlike hard material, will provide better penetration into all crevices, and it also has lower thermal conductivity. In addition, it is more problematic to work with hard materials.
The use of self-adhesive insulation for plastic and wooden windows helps to increase the speed of work. Simply remove the protective layer and apply the sticky side to the desired location.
When using materials without a sticky surface, it is recommended to use silicone insulation (sealant) for windows. It will withstand moisture from condensation and also has a plastic structure.
How to apply silicone sealant
For ease of application, purchase a sealant gun. Such a purchase costs about 200-300 rubles, but it will provide significant help.
Application of thermal insulating film
A practical material is insulating film for windows. It is applied both from the outside and from the inside. Despite the relative high cost of the material, it demonstrates excellent results in terms of energy saving.
As a type - energy-saving window film
Experts recommend installing energy-saving film on the inside of the window to achieve the best effect.
During application of the film, its uniform tension is ensured over the entire surface. A slight sagging of any area can lead to ruptures during a sharp gust of wind. You can get rid of the damage using tape.
More durable brands of films, also used in greenhouse farming, have a yellowish tint. They are able to withstand large temperature changes with virtually no change in their characteristics. They can also be used repeatedly, which will compensate for their increased cost relative to other brands of material.
To attach the film, use the following options:
- using a stapler directly to the frame;
- stuff wooden planks on top of the film with small nails;
- use nails with wide heads or place a strip of roofing felt or leatherette rolled up several times under them;
- fastening is carried out with paper clips.
Instead of film, you can use transparent polyvinyl chloride. The material is environmentally safe and does its job well.
Using a sealant
It is easy to find material for seals in hardware stores. Visually, they look like a tape with an adhesive layer on one side. The base consists of polymer or foam rubber. Polymers make it possible to tear off the sashes without any problems, as well as use water to clean the surface. When water regularly gets on foam rubber, the material quickly deteriorates and cannot withstand use for more than one season. It needs to be replaced by next winter.
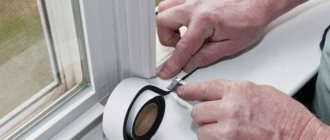
Gluing the tapes is very simple. It is enough to cut the workpiece to the required length and then remove the paper protection from the adhesive side. It is glued both to the window frame and to the stationary part of it. This will provide reliable protection against cracks.
Fighting large cracks on an old frame
Since gluing self-adhesive window insulation in the presence of large cracks will be ineffective, in this situation an additional procedure is carried out to seal the cracks. The cavities are filled with the following materials:
Seal care
All products must be maintained to prolong their service life. The care procedure is simple and not particularly labor-intensive.
It is advisable to clean not only window frames, but also seals twice a year (before the winter season and, accordingly, before the summer season), without using aggressive chemicals. After cleaning, the seals should be wiped dry and then applied with a protective agent that contains silicone. You can also use glycerin or petroleum jelly (except EPDM). This is necessary to maintain the elasticity of the material.
Silicone grease for rubber seals

Seal lubrication
Advice! If dirty renovation work is being carried out in a room, it is better not to open the windows wide so that dust and particles of construction mixtures do not settle on the seals.
Prices for various types of silicone lubricants for rubber seals
Silicone grease for rubber seals
About insulation
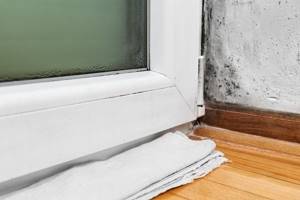
The microclimate of the room depends on the windows. Due to uninsulated windows, the glass fogs up, cracks and fungus appear on the slopes, and there is always a draft and street noise. To effectively insulate windows, it is necessary to determine the reasons for low thermal insulation.
Most often they are the following:
Wooden windows
First of all, insulation is required for old window structures for the following reasons:
- Previously, glass was secured to the frame with special putty. Over time, it dries out and becomes stained;
- the frames dry out, so cracks and gaps appear between the glazing bead and the glass;
- the sashes are deformed and are not held tightly to the frame.
Plastic windows
It is mistakenly believed that such windows are quite airtight and therefore do not need insulation. Unfortunately, after a few years the seal collapses, and insulation is indispensable.
There are other reasons why it is necessary to deal with plastic windows:
- violation of window installation technology;
- distortion of the window structure due to shrinkage of the house;
- factory defect of window design;
- mechanical damage to structural elements.
How do you know if the rubber band needs to be replaced?

It is believed that the minimum service life of a PVC window seal is 5 years. At least, manufacturers claim that wear can be expected after 5-7 years of operation. In reality, a different situation often arises - problems appear much earlier. Sometimes a relatively simple procedure helps to cope with them - adjusting the window fittings. If this operation fails, then this is evidence of wear of the protective elements.
Symptoms of problems with the seal
Any operation with windows is relatively complex, so it is important to know what the main signs of a seal losing its qualities are. These include dust that accumulates on the windowsill during the warm season, as well as:
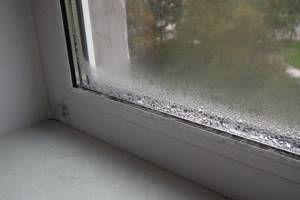
- gum defects - cracks on the surface, dents, stiffness, loss of elasticity;
- condensation that appears on glass during the cold season;
- the formation of ice on the window sill, frame or glass;
- depressurization - drafts, rapid heat loss;
- flaps that refuse to close tightly;
- quite noticeable reduction in sound insulation.
Another “possibly obvious” symptom of problems in a plastic window is the appearance of mold on the windowsill and slopes.
When are the rubber bands not to blame?
Not in all cases, the reason for the ineffective operation of the structure is the seals. Sometimes the problem is caused by completely different “culprits”.
If dust appears on the window sill, ice or condensation is found on the glass, the owners begin to be disturbed by noise and drafts, then we can assume that the glass unit has not been adjusted - seasonal adjustment “winter-autumn”. The second option is to weaken one of the sash hinges. Condensation and ice are also symptoms that may appear for other reasons. An “emergency” can provoke:
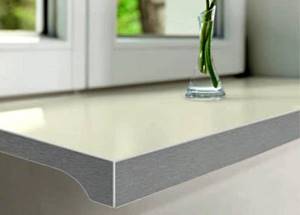
- an incorrectly installed window sill, or an element that is too wide;
- decorative elements hiding radiators that interfere with the heating of windows;
- poor quality, ineffective ventilation system;
- Constantly high humidity in a house or apartment.
Therefore, it is better to consider replacing rubber bands only in one case: when the owners are absolutely sure of their suspicions. You can first try to correct the situation on your own. For example, lubricate the elements, switch the windows to winter mode with maximum sealing. If adjusting the sashes of the structure does not help, the problems remain, despite all the options tried, you need to call a specialist. Or learn how to change the rubber bands on the windows yourself.
Types of insulating tapes
The widespread use of tapes for insulating windows is explained by a number of reasons:
- no annual replacement required;
- insulation is carried out in a short time on our own;
- there is no dirt when pasting, since no water is used;
- no traces of adhesive remain on the frame;
- there is no diffusion of the adhesive layer with the frame paint.
But this method of insulation also has disadvantages:
- after gluing, you cannot open the window sashes;
- Poor-quality or poorly glued tape lags behind the frame in small areas.
Construction stores offer two types of tapes, which differ in the installation method.
Pasting
This type of tape has a wide grip. The adhesive composition is applied during manufacturing (self-adhesive type) or during installation work.
To create self-adhesive tape, polyvinyl chloride, rubber and polyethylene foam (foam rubber) are used.
Due to the plasticity of these materials, the tape is easily compressed to the size of the gap. To ensure that the insulation does not stand out against the background of the window, dyes are added: black, brown, white.
Typically the packaging will indicate the size of the gap that the tape will cover. Popular options with sizes 3 - 7 mm.
Foam rubber tapes were the first to be used. Their popularity is explained by a number of advantages:
- high compression ratio;
- the frame does not collapse in places of insulation;
- low cost;
- high protection efficiency.
Such tapes have negative qualities:
- insufficient efficiency for large gaps;
- short service life. Effective during one winter season;
- in cheap models, the adhesive tape does not stick well;
- low resistance to water.
Important!
It is more convenient to use self-adhesive tapes on foam rubber for insulation.
They stay on the window longer and regulate the degree of pressing of the sashes.
Sealing
Tapes of this type have a hollow tubular shape, which is why heat is retained. The materials chosen are rubber and polyvinyl chloride.
On one side of the tape there is a groove hook or an adhesive coating with paper protection.
It is believed that the groove is more resistant to mechanical stress.
The following qualities are considered advantages:
- gaps up to 0.7 cm are blocked;
- withstands any temperature changes;
- It is possible to choose a color to match the color of the frame;
- the use of the window is not limited;
- affordable price.
But most of the disadvantages relate to adhesive tapes:
- not suitable for all window designs;
- when temperature changes, the adhesive layer is destroyed;
- with frequent deformations, peeling occurs in the glued places;
- The foam tape quickly gets wet and dust sticks to it. For this reason, frequent replacements are carried out.
How to glue insulation - we work without mistakes
The vapor barrier material not only provides protection from moisture, but also has an alternative property when applied correctly - noise absorption. Vapor barrier tape is applied to the seams in one piece; there should be no breaks. Before starting work, measure the length of the surfaces to be processed.
The pasting process has several steps:
- 1. Clean the window opening from dirt, dust and debris.
- 2. Before installation work, remove the PVC window and wipe with a dry cloth.
- 3. Place the structure in place and mark on the frame and wall where the tape is attached.
- 4. The tape is attached to the window frame before applying foam along the seam.
- 5. Remove the structure and apply a vapor barrier to its surface along the perimeter.
- 6. Before installing the window in place, remove any remaining protective film from the adhesive surface.
- 7. When gluing the material, do not allow wrinkles to develop. Such a defect will allow drops of liquid to pass under the vapor barrier, worsening performance characteristics.
In order for the window structure to serve for a very long time, its installation must be carried out in strict compliance with existing technology. External material for steam, heat and water insulation must be glued after the foam for installation work has fully polymerized. We finish the seam under the window sill at the final stage.
If the tape is glued under the plaster layer, then it must have a special layer that guarantees strong adhesion to the building material. The curved joint between the wall surface and the window frame is covered with a flashing, and a vapor barrier is glued to it. The use of building materials for wall decoration is permitted only if the requirements for water permeability are fully met.
If aluminum tape is used for vapor barrier, then additional reinforcement may be required when applied to a rough surface. To enhance the adhesive effect, use self-adhesive tape with one or two strips of glue. In addition, they are used to process vapor barrier joints, eliminating and smoothing out imperfections (places of peeling and wrinkling) formed during work.
Tips for choosing
As a rule, a tape is selected based on three indicators.
By material
- Foam rubber ― has been used for insulation since ancient times. Currently it is included in the tape.
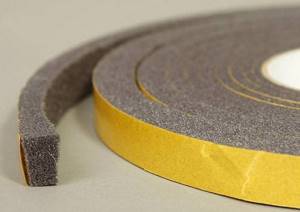
- low cost;
- high elasticity, allowing you to close gaps of different sizes.
There are also disadvantages:
- Due to the porous structure, moisture is quickly absorbed. The drying process takes a very long time;
- low durability. With prolonged use, the material turns yellow and crumbles.
- Polyvinyl chloride (PVC) ― material with high strength and adhesiveness. It is not afraid of humidity and temperature fluctuations. The tapes are fixed on any surface and stretch well.
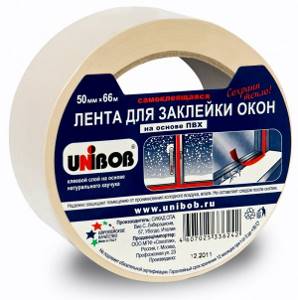
Unfortunately, such tapes are rarely used for window insulation, as they increase the cost of window construction by up to 15%.
- Rubber - used to make two types of tapes: self-adhesive and sealing.
How to install or replace wood windows
A foam or rubber product in wooden structures will serve as insulation. The gasket should be fixed in the grooves using silicone sealants. You can also use self-adhesive materials.
Installation procedure
The gasket installation process consists of several stages:
- The working surface is cleaned of dust and dirt.
- After degreasing, the grooves are dried.
- The sealing material is cut into strips of the required sizes (with a margin of 1-2 cm).
- The gasket fits into the groove. If it has an adhesive base, then you need to press the strip tightly to the base. In all other cases, silicone or rubber sealant is distributed over the groove cavities, after which a gasket is placed there.
Features of preparing windows for insulation
Preparing a window for insulation with tape is almost no different from preparation for other insulation materials. At the same time, there are some peculiarities.
The main stages are as follows:
- Everything is removed from the windowsill. The blinds are removed from the window.
- The frames are washed with soapy water and then dried. The tape requires a dry and grease-free surface.
- The glass is carefully inspected. Wooden windows may have cracked glass. They must be replaced as they are a source of heat loss.
- Grooves are prepared for the sealing tape. They should not contain old tape, dirt or paint.
- Before starting work, they determine the places where cold air comes from the street. They are insulated first. Weak points are the sashes, slopes, and window sills.
Video of the installation process
Main stages of installation of plastic windows
- Preparatory stage of installation;
- Control measurement of window openings;
- Dismantling old window blocks;
- Preparation of new window frames;
- Preparing the window opening;
- Installation of new window structures;
- Installation of window sills and finishing of slopes;
- Taking out the trash.
The PLASTOK company performs high-quality installation using modern tools and materials . Installation teams consist of trained, qualified specialists . The company conducts systematic training courses for employees. PLASTOK is a guarantee of the quality of installation work performed.
Insulation with adhesive tape
The insulation technology is not very complicated. First of all, it is necessary to follow the sequence of work.
Plastic windows
Insulation is carried out in the following sequence:
- pre-removed old insulation is used, firstly, to purchase similar material, and secondly, to pre-cut the old material to size.
- gluing begins from the top of the window. As you progress, the protective layer is removed in small sections, and the tape is pressed tightly.
More details in our video:
1. The pasted tape should not have many tears.
2. In the corners the tape is not cut, but wrapped.
Wooden windows
For these windows, in addition to adhesive tape, thin foam rubber is often used. The work is performed in the following sequence:
- strips of foam rubber are cut along the window opening;
- cut foam rubber is placed between the frames;
- The tape is cut to the size of the window;
- The tape is applied with a sticky layer to the foam rubber and smoothed with a napkin.
This insulation will last up to three years. But it’s better to do it as shown in the video:
Installing a rubber seal on a wooden window
For example, consider the option of installing a self-adhesive rubber seal for windows and doors. Brown profile, 6 meters in a package. Suitable for 2-5mm gaps.
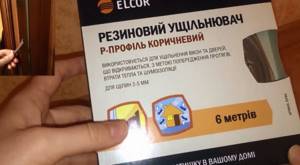
Seal packing
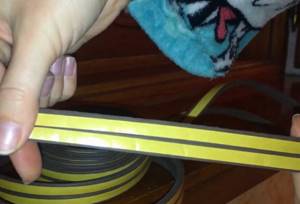
Self-adhesive seal
Step 1.
Preparation for work must be thorough - the sealant will not stick to a dirty and wet surface!
Wash the sash or frame with soapy water and wipe dry. If the window is painted and the paint is peeling off, clean it off with a spatula, then sand the surface, remove dust and wash the surface with a rag.
Step 2.
We unwrap the packaging. Remove the protective film from the seal.
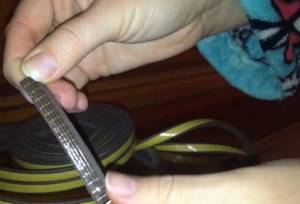
Removing the protective film
Apply the seal to the frame or sash without pulling. We press with our hands to ensure better gluing.
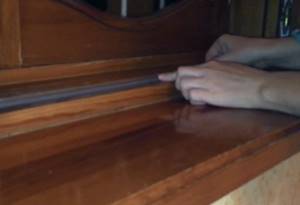
Gluing the seal
Step 3.
We close the sash and make sure that there is no more blowing from the cracks.
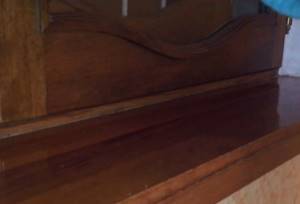
The door closes tightly
We glue the seal without a self-adhesive layer onto sealant or glue. Apply a thin layer of adhesive to a clean and dry surface, then press the profile strip. If excess glue comes out, wipe it off. We wait for it to dry and close the doors.
Insulation with sealing tape
Plastic windows
Typically, plastic windows lose heat for two reasons:
- breakdown of fittings;
- seal wear.
Correct installation of the tape increases the insulating ability of the window. The following sequence of work is recommended:
- before installation, the tape is kept at a positive temperature, since this affects its expansion inside the groove;
- The tape is cut to fit the window. The joints are cut at right angles. For thermal expansion, a reserve is created: for every meter 1 centimeter of material;
- The tape is pressed into the groove with a spatula, and the adhesive strips are removed in small sections.
Important!
1. In the corners of the frame, the tape is connected only end-to-end.
2. To prevent impregnation from leaking out, the tape is not compressed more than the permissible value.
After installing the sealing tape, the locking mechanism is adjusted: the pressure is changed by trunnions, which are located at the end of the sash.
Adjustment is made with a hex wrench. The pressure increases when the trunnion head is installed in a horizontal position.
Signs of seal wear
On average, seals last up to five years. If the following symptoms appear, you should make an urgent replacement:
- the house has become noisier, extraneous sounds from the street are heard more clearly than before;
- Condensation, ice appears on the windows, traces of mold are visible;
- dust on the windowsills began to accumulate in large quantities, it has to be wiped off more often than once every three to five days;
- the room is uncomfortable, there are drafts and you can hear the wind blowing;
- upon visual inspection, cracks and deformation of the material are noticeable;
- the seal has become hard;
- the heterogeneity of the shade of the sealant is noticeable.
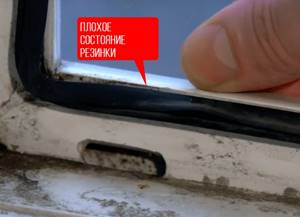
Seal wear
Vapor barrier device
There are three layers:
- From the inside - thermal protection prevents heat loss from the room to the street
- The middle load-bearing insulating layer provides thermal insulation and sound insulation. These problems are solved by polyurethane foam or other porous material. It is rational to include vapor barrier self-adhesive tapes in this inner layer if the window unit is installed in wet rooms - kitchens, baths or showers
- The outer layer waterproofs the joint and protects against the penetration of cold street air
Vapor barrier tapes are available with a one-sided adhesive layer and double-sided. A one-sided sticker is used if the film is mounted on the side surface of the window frame. Double-sided tape gives an advantage in choosing fasteners: on the frame or in the window opening. According to climatic versions, tapes are also produced in two types - for areas with low winter temperatures - a winter version of the tape, and for areas where temperatures do not fall below +5⁰С - a summer version.
The base for the adhesive layers of the tapes is butyl rubber or metal.
Main types of vapor barrier tapes:
- PSUL, or pre-compressed sealing tape, is used for finishing and vapor barrier of external joints, ensuring a tight connection between the window frame and the external wall. The base material is butyl rubber; the thickness and elasticity of the tapes provide good insulation.
- BC - vapor barrier tapes for sealing joints for dry finishing of slopes - made of plastic or plasterboard. sizing with BC tapes reduces the risk of condensation.
- VM - vapor barrier tapes attached to the window frame, with an overlap, in order to improve the thermal insulation of joints.
- GPL is a polyethylene foam tape, laminated on one side, with metal strips and an adhesive layer over the entire width.
In addition to the main layer of non-crosslinked polyethylene foam, which is 2 mm thick and is waterproofing, the GPL tape has a second layer - both vapor barrier and protective. The thickness of the outer layer is only 20 microns, the material is polypropylene.
GPL tapes are used for all types of door and window blocks as universal ones. They combine two tasks - waterproofing and vapor barrier. The structure of foamed polyethylene is elastic and closed-porous, so the material does not absorb moisture and its hygroscopicity is almost zero. The tapes are flexible and suitable for installation on uneven surfaces. Metal lamination and the quality of the main polymer (polypropylene as a protective layer) determine chemical resistance in both acidic and alkaline environments, and as a result, good durability of GPL tapes.
They produce GPL tapes in standard width sizes of window and door units, width 9; 12; 15; and 20 cm, in rolls of 15 m.
Features of installation of vapor barrier tapes
- The minimum temperature for installing tapes is +10⁰С
- The tapes are applied to the prepared surface - complete cleaning of all contaminants, dust removal and degreasing. Preparation is vital for the vapor barrier to work properly.
- Marking lines for attaching vapor barrier tapes. Determine the position of the frame in the opening without fixing, mark the lines for sticking the tapes, then remove the frame and install the tape according to the markings
- Protective paper strips are removed from the tapes immediately before the final installation of the frames
- After gluing the tapes, the joint is filled with foam
- The tapes under the window sills are installed last
- If wet plaster is planned over the vapor barrier tape, then the outer side of the tape must ensure adhesion to the solution. From the range of vapor barrier tapes it is possible to choose a material with the desired properties
- Glue the tapes along the perimeter of the frames without breaks, in continuous stripes. There is no need to overlap or overlap the tapes; at joints, adhesives recommended by the manufacturers or tape are used
The issue of the need for vapor barrier of windows is decided by each owner, based on the specific operating conditions of the windows. Budget options for installing tape are absolutely excluded. But many experts believe that vapor barrier of windows is by no means a reinsurance, but a real opportunity to increase the service life of window systems and improve the indoor microclimate, and saving in this case is not an entirely correct approach.
Self-adhesive insulation: adhesive-based thermal insulation, thermal tape
With the onset of cold weather, owners of apartments and houses have a problem in the form of window frames that allow a lot of heat to pass through. And if 5-10 years ago it was necessary to use old methods - from newspapers, cotton wool to strips of fabric, now you can find simple and effective materials on the market. One of these is window insulation that is self-adhesive . What it is and how to work with it can be found out below.
Sources:
https://otoplen-dom.ru/novosti/kak-pravilno-kleit-uteplitel-na-okna-kak-prikleit-uteplitel-na-okno https://fb.ru/article/349688/samokleyuschiysya-uplotnitel-dlya -okon-i-dverey-kakoy-byivaet-kak-kleit https://resforbuild.ru/paneli/utepliteli/dlya-okon-samokleyushhijsya.html
For entrance doors
The product is presented in the form of a dense tubular profile with a cavity inside. Since it is made of thick material with an internal strip, a tight fit of the panel to the door is created.
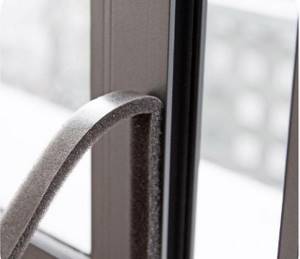
The material itself from which the seals are made is also original. It has porosity, which enhances its thermal insulation function. Manufacturers believe that these products increase heat savings by 10 times or more.
Popular manufacturers
Manufacturers change regularly, their list increases and decreases, but there are still reliable companies that produce high-quality seals. Popular brands include:
- MONTBLANC.
- "Novotex".
- "Rehau".
- CENTURIES.
- KVE.
This is not the entire list of reliable products. Detailed information about products can be found on the official websites of manufacturers. You should not skimp on this purchase. It is better to purchase high-quality seals so that they allow windows and doors to perform their functions.

