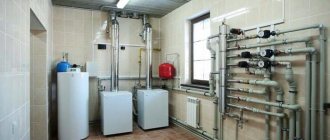
Using a gas boiler as a heat supply source in a private home is the most profitable option in terms of utility costs. Today this is the most popular solution among homeowners. Demand creates supply, and the heating appliance market presents the buyer with models with different technological characteristics and production capabilities to choose from. One of the most worthy modifications is a two-level gas boiler.
Requirements for the room and air exchange
To ensure normal air exchange in the room when the boiler is operating, it will be necessary to equip an effective natural ventilation system that provides 3 times the hourly air exchange of the room.
When calculating the supply ventilation, the volume of air required for the combustion process is added to this indicator, the value of which is taken from the passport data.
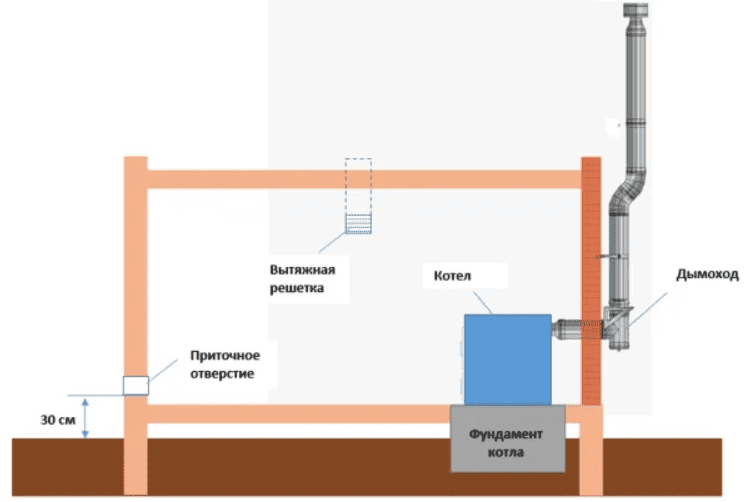
It is important to take care of ventilation in the room with the boiler
Basic requirements for the room where the boiler will be installed:
- The smallest room height is 2.0 m, cubic capacity is 7.5 m3. In the case where two or more boilers are installed, the dimensions change to 2.5 m and 13.5 m3, respectively.
- It is not allowed to install heaters in basements, bathrooms, bathrooms, and corridors, as well as in rooms without windows.
- The walls of the boiler room must be protected with fire-resistant materials or special heat-resistant panels.
- Glazing is carried out according to the ratio per 10 m3 of room - 0.3 m2 of windows.
- The room is equipped with a protective grounding circuit.
- The cross-section of the chimney must correspond to the power of the boiler unit, and the diameter must correspond to the smoke pipe at the outlet of the boiler.
- To service the unit there must be free passages: at the front of the boiler - from 1.25 m, on the sides - from 0.7 m.
- When placing the gas duct, maintain a maximum distance from the vertical flue to the boiler - no more than 3.0 m.
Radiator installation
The main elements of the heating system in the premises of the house are radiators.
Currently, many experts have begun to advise not to purchase traditional cast iron batteries, since they are heavy and have significantly worse properties than products made from a bimetallic alloy. In addition, the latest products look much more aesthetically pleasing and have good heat dissipation. Most often, radiators are installed under windows, making sure that there is free space between them and the window sills. Before this, old pipes and fasteners are dismantled, since they are not suitable for new systems. The wall is marked with a pencil in such a way that at least 10 centimeters remain from the radiator to the floor. Normal heat exchange between the battery and the room is ensured if it moves away from the wall by at least 5 centimeters (
Single-circuit
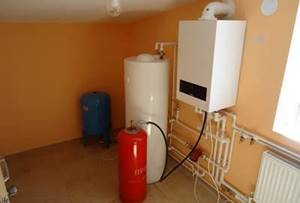
Such a device has one heat exchanger used to heat the coolant.
With its help it is impossible to prepare water for hot water supply (domestic needs). They are intended only for heating living spaces.
The units are divided into wall-mounted and floor-mounted according to the installation principle. The difference is power.
For the first ones it is limited - 100 kW ; for floor-standing ones there is practically no limit.
Wall mounted
- Attachment is made using special brackets.
Important! There must be a gap between the unit and the wall ranging from 30 to 50 cm.
- The presence of draft in the outlet pipe of the unit is checked before connecting to the chimney. The diameter of the inlet hole must correspond to the diameter of the chimney pipe. Connections must be tight.
- To prevent clogging of the heat exchanger, a water softening system is installed on the boiler pipe.
- Before connecting to the heating system, the unit must be pressure tested.
- Using a flexible hose and paronite gaskets, connection to the gas main is made.
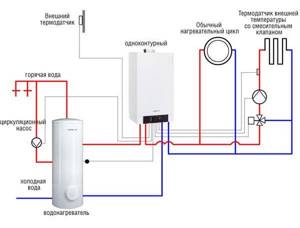
Photo 1. Connection diagram of a single-circuit wall-mounted boiler to a heating system with a circulation pump and water heater.
Floor-standing
- The device is installed in a specially prepared and cleared place.
- A hole is made for the chimney (if there is none) and the diameters of both outlets (both the chimney and the chimney) are checked to match.
- A filter is installed to soften the water.
- The boiler is connected to the heating system and gas mains.
Attention! Due to the possible danger of work, it is recommended to entrust the connection of wall-mounted and floor-mounted units to the gas main to a specialist.
The tightness of connections is important for both types of devices.
Fixing the boiler
Installation of a wall-mounted boiler in a house is carried out as follows:
- Study the manufacturer's recommendations and select the optimal location.
- Fix the mount on the wall, which consists of long dowels and hooks with threads on the longer end.
- In the place where the chimney should cross the wall, make a hole for it.
- Fixing the chimney in the boiler.
- Hang the boiler on a mount fixed in the wall.
Dual-circuit
Dual-circuit devices are distinguished by the presence of 2 lines. The second line is designed to heat water for domestic needs, which eliminates the need for a boiler.
Wall mounted
The connection diagram for wall-mounted double-circuit boilers is not very different from single-circuit boilers. However, here four (and not two) pipes are connected , a couple of which are used to heat water for household needs.
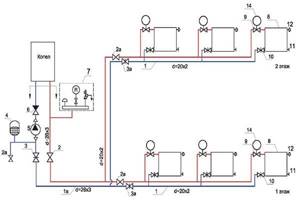
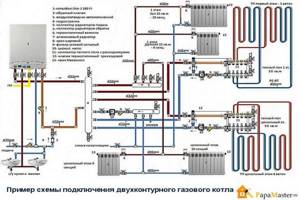
Photo 2. Connection diagram for a wall-mounted double-circuit heating system boiler for a private two-story house.
Floor-standing
The connection of a floor-mounted double-circuit type is similar to a single-circuit one, again taking into account the presence and connection of the second pair of pipes.
Choice
Modern heating equipment can use natural gas, electricity or solid fuel. Installation of heating boilers requires compliance with special requirements for installation and operation.
Gas boilers
Heating systems with gas units are popular for use in a private home. Natural gas is an inexpensive and efficient fuel. Of course, this is only possible for those regions where there are main gas pipelines and supplying gas to the house does not cause any difficulties.
At the same time, we must not forget that gas is a highly dangerous environment due to its explosiveness. When choosing gas installations, you need to remember the following differences:
- manufacturer and price segment;
- power consumption;
- number of circuits - single-circuit and double-circuit models;
- type of installation (floor or wall);
- method of cleaning exhaust gases.
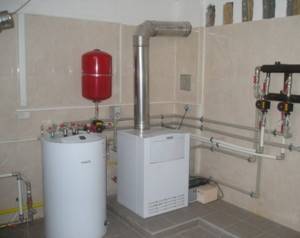
Wall-mounted gas installations are very popular - they are easy to install and small in size.
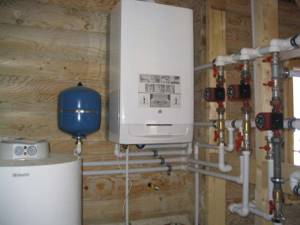
The equipment of such a unit includes a burner, expansion tank, circulation pump (one or more), pressure gauge and thermometer, heat exchanger, exhaust gas removal circuit (natural or forced). For safety, the equipment is equipped with special sensors.
Electric boilers
The main advantage of these compact boilers over units operating on other types of fuel is the complete absence of waste during operation (including the absence of combustion products). It is believed that this is the most environmentally (and aesthetically) clean type of heating in a private home. But, at the same time, perhaps the most expensive. Boilers can be installed on the floor or on the wall. Depending on the type of heating, such settings are:
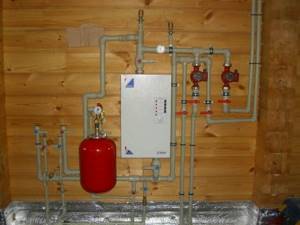
The design of heating element boilers is quite simple. Several heating elements are placed in a container with distilled water or ethylene glycol-based antifreeze liquid. Depending on the set heating temperature, either all heating elements work, or only part of them. This design is very primitive and is partly considered obsolete.
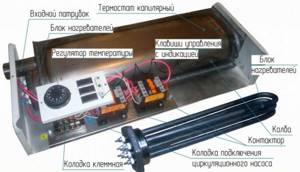
The operating principle of an induction boiler is based on electromagnetic induction. To put it simply, a core is placed in a dielectric pipe, which is heated by the current of an electric coil around the pipe. The core heats the water that flows through the pipe.
The design is simple, and thanks to this, even very powerful installations are small in size.
The principle of operation of the electrode unit uses a law of physics based on the heating of water due to resistance when an electric current is passed through it. The water must have a special concentration of salts. These devices are safer than the previous two, since if water leaks from the heating tank, the unit automatically stops working.
Solid fuel boilers
Now this equipment is used to heat houses where natural gas heating is not possible. Such boilers operate on various types of solid fuel, but the main type is traditionally firewood. Heating equipment of this type is very similar to a stove, but at the same time meets all safety standards and modern quality requirements for similar installations.
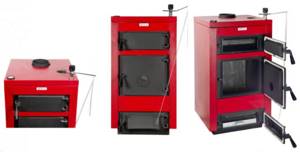
The boilers have in their design a combustion chamber, a heat exchanger, a loading hopper, a chimney, nozzles, a control unit and a hot gas exhaust chamber. Installation of boilers is carried out only on the foundation. They have quite large overall dimensions and weight.
Preparation for installation of gas equipment
Those who are sure that the installation of a gas heating device begins with its purchase are greatly mistaken.
We start with collecting permits. Simultaneously with obtaining the necessary papers, you should begin to select and prepare a site for installing the heating unit, while taking into account the following regulatory requirements:
In order to obtain permission to install heating equipment, you need to go through several stages:
Step No. 1: Obtaining Technical Specifications and Permits.
It is necessary to find out whether it is in principle possible to install a gas boiler in a particular apartment or house. To do this, an application is submitted to the gas service with a request to carry out such a procedure. It must indicate the estimated annual volume of gas consumption.
The document will be reviewed and as a result the applicant will receive permission to install along with the Technical Specifications or a justified refusal.
Step #2: Creating a project for the future installation.
To begin with, it is advisable to decide on the brand of meter and boiler, but you should not purchase them yet. After which an installation project is ordered. It is carried out on the basis of a previously obtained permit for specific equipment.
The document must indicate equipment connection diagrams and the laying of the main line inside the building from the gas communications connection point. Only a licensed company has the right to engage in the project.
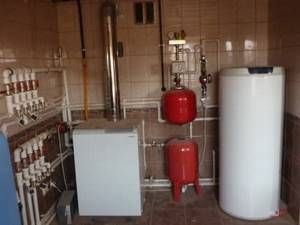
Gas boilers are the most practical and economical option for heating premises. Can be used both in apartments and in private houses
Step No. 3: Obtaining approval from the gas service.
The new project must be agreed upon with the gas service that services the area on which the house is located. The procedure usually takes a maximum of three months and a minimum of a week.
At this stage, you can already purchase gas equipment, because in addition to the project, you must provide the following documents for approval:
- technical passport of the gas boiler;
- certificates of conformity and sanitary-hygienic;
- operating instructions for the heating device;
- expert opinion on the device’s compliance with all technical requirements.
It is very easy to obtain these documents. The manufacturer must include them with its products. At the end of the verification procedure, the applicant receives an approved project, which in this case will be stamped with a special stamp.
Conclusions and useful video on the topic
Some useful tips for installing a gas boiler will help you check the correct installation of the equipment.
With all the perfection of gas equipment, with the presence of automation and serious technological protection, connecting the system requires compliance with established rules and regulations. Without this, it is impossible to guarantee the reliable operation of gas boilers.
Do you have anything to add, or do you have any questions about connecting a double-circuit gas boiler? You can leave comments on the publication and participate in discussions about the material presented. The feedback block is below.
How to connect a gas boiler to water heating in a private house
Let's start looking at examples. In order not to duplicate information, we will consider a diagram for connecting a double-circuit gas boiler to a heating system (we use a turbocharged boiler). Single-circuit modifications are connected in a similar way, only minus the DHW circuit (which only simplifies the task). In our example, we are installing a closed-type heating system without heated floors, additional circuits and boilers.
The heating boiler connection diagram includes the following steps:
- Connection of equipment to the chimney.
- Connection to the gas main.
- Connection to water supply.
The procedure begins with marking the location for installing the boiler. A stable base is made for the floor-standing device, for example, from a concrete screed. Installation on flammable substrates is not permitted. Wall-mounted models are hung on special brackets. The fasteners must be strong enough to support the weight of the boiler.
Connection to the gas main
To connect the heating unit to the gas main, use a flexible hose connected to the gas pipe. You can also “plant” the device on a rigid metal pipe, but this is not so convenient. The circuit must include a filter that prevents the smallest debris from entering the gas units. When using volatile boilers, dielectric insulators are installed here.
Connection to chimney
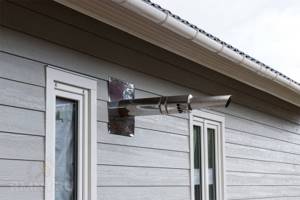
Coaxial chimneys act as air intakes and at the same time ensure the removal of combustion products. Even inexperienced installers can cope with their connection.
The boiler is connected to the home chimney using pipes of a suitable diameter - they are sold in any specialized stores. The easiest way is if the heating system uses turbocharged units (with closed combustion chambers). Their advantage is that they require traditional chimneys. Instead, coaxial chimneys are used here - double, pipe in pipe.
In most cases, these chimneys are led outside the wall on which the boiler itself is mounted. It is also possible to remove them behind any other walls (with extension).
Connection to the water supply system
We continue to connect the gas boiler in a private house to an autonomous heating system. Our next task is to connect both circuits. First, let's look at the hot water supply circuit. Everything is simple here - we install a tap and a coarse filter at the inlet to avoid contamination of the secondary heat exchanger with small mechanical inclusions. We install another tap at the hot water outlet and connect a pipe to it through which water will flow to the water collection points.
This scheme is slightly complicated by multi-stage water filtration systems. Most often, they are installed immediately after the water pipe enters the household. You can do it easier - run hot water without a filter, installing it on a cold water tap. In this case, it is enough to purchase the Aquaphor Trio filtration system (there are many of them, the functionality and cleaning properties depend on the types of cartridges used).
Connection to the heating circuit
Connecting a gas boiler to the heating system with your own hands is as easy as shelling pears. For this we need:
- Two valves with check valve.
- Safety group (if it is not in the boiler).
- Expansion tank (if it is not in the boiler).
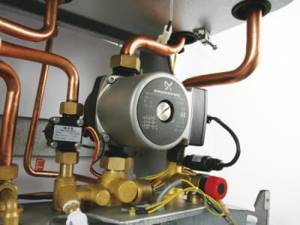
If the unit you are using does not contain a circulation pump, it must be installed on the return pipe to avoid pressure drop in the heat exchanger.
If you have a modern wall-mounted gas boiler, then it will probably have almost all the equipment we need - an automatic air bleeder, a safety valve, a circulation pump and an expansion tank. Sometimes external tanks are added to the standard tank if the heating system has a large volume. Heating units are also equipped with mechanical thermometers or thermomanometers to monitor operating parameters.
How gas boilers are connected
Connecting heating to the boiler can be done in several ways - it all depends on the functionality of the model and the availability of auxiliary equipment. In the simplest case, the heating circuit is connected through shut-off valves to the boiler itself. The coolant circulates naturally, so a traditional expansion tank is installed in the system. Single-circuit units are connected according to this scheme.
With double-circuit devices, everything is more complicated - here a double set of pipes is supplied to the boiler. Coolant flows through one, and hot water flows through the other two. All pipes are connected through shut-off valves. In the case of a closed type system, additional elements are installed next to the heating unit - a safety group, a membrane expansion tank and a circulation pump.
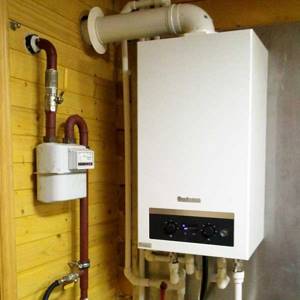
Among other things, it is necessary to connect the equipment to the electrical network and the combustion product removal system (in other words, to the chimney).
The connection diagram of a single-circuit gas boiler to the heating system can be complicated by additional elements:
- Underfloor heating systems - it is necessary to create a separate branch with a circulation pump and a collector.
- Indirect heating boilers - another outlet is made with a circulation pump or three-way valve.
- Additional circuits - in this case, manifolds or hydraulic arrows are installed.
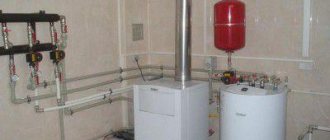
Installation of a floor-standing unit
Stationary double-circuit heat generators burning natural gas are divided into 2 types - non-volatile and requiring power supply. The latter are connected to heating and electricity in the same way as their wall-mounted “brothers”.
A non-volatile floor-standing boiler heats DHW water using a copper or stainless steel coil built into the main heat exchanger. The heater's equipment is minimal - a burner, automatic safety system and a heat exchanger, nothing else. In addition to the cranes listed in the previous section, for installation you will need to buy:
- safety group with a safety valve designed for the operating pressure of the heat generator (indicated in the passport);
- circulation pump;
- expansion tank of calculated volume (10% of the total amount of coolant).
The diagram for connecting a heating unit to a closed-type heating network is shown in the picture.
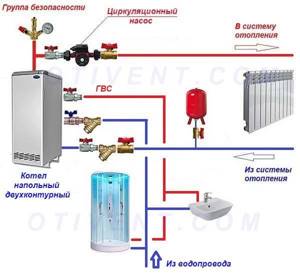
A few words about how to connect a double-circuit floor-standing boiler to a gravity heating system. Here you will need an open expansion tank with an overflow, but a pump and safety group are not needed. Pipe diameters are at least 40 mm, laying is carried out with a slope of 5 mm per 1 linear meter. highways. The heater is the lowest point of the system, and the open tank is placed at the highest. If electricity is available, forced circulation can be organized using a pump installed on the bypass.
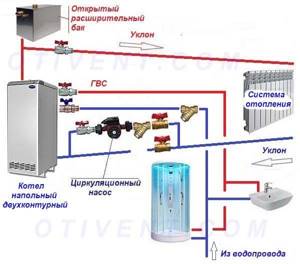
Integration of a dual-circuit heater into a gravity system with the possibility of forced circulation from a pump
Unit connection diagram
The connection diagram of the unit will depend on several factors, the first and most important, of course, is the type of heating system. There are three types of them:
- Those that use natural circulation. The movement of heat is ensured by the difference in water pressure that occurs in the line due to the expansion of coolants due to increased temperature. Installation of such a line is cheaper, but you will not be able to regulate the temperature using a radiator; accordingly, the second type is used on higher-quality automation.
- Forced circulation is carried out by special pumps, so you can freely regulate the amount of heat. Accordingly, the method is the most effective of those on the market, but the connection diagram is much more complicated and installation is more expensive. In addition, the system is completely dependent on electricity, and if it is turned off, the unit simply ceases to perform its functions.
- Hybrid circulation. Nowadays there are practically no devices with this type of heating on the market, but such a device combines the advantages of both of the above. In the event of a power failure, the boiler freely switches to the mode of natural distillation of water through pipes.
Accordingly, the connection diagram is available depending on the type of heating selected by the user.
Double-circuit boiler and indirect heating boiler
This combination began to appear among homeowners who were not satisfied with the performance of the DHW circuit of a gas heat generator. And it is not surprising, because a medium-power unit is capable of producing 10-13 liters of hot water per minute, which is not enough to simultaneously supply two consumers - a kitchen sink and a shower stall.
Another thing is that the purchased indirect heating boiler is connected to a double-circuit boiler in a perverse way, shown in the diagram. An imitation of the flow is created by an additional circulation pump, which is turned on and stopped by a signal from the thermostat.
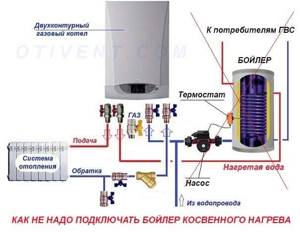
This scheme does not work correctly and here's why:
- The heating unit produces water from the DHW circuit with a maximum temperature of 60 °C. Passing through the boiler coil, it will never be able to heat its contents (which is 150-200 liters) to the same temperature.
- From the boiler heat exchanger, hot water of 50-55 °C flows into the second circuit of the boiler instead of cold. It is instantly heated by the burner, which is switched off by a signal from the temperature sensor. But due to the flow, the switching on occurs again after a few seconds - “clocking” occurs (start-stop mode), which reduces the resource of the heat generator.
- The boiler heats up much longer than expected - from 40 minutes to 2 hours, depending on the power. During this period, the heating is turned off - the unit is occupied by the DHW circuit (this is discussed above in the video). The house is cooling down.
- A harmful bacterium that lives in warm water, Legionella, multiplies in the storage tank. It can be removed by heating the boiler weekly to maximum temperature, which is impossible to achieve.
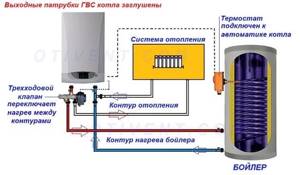
In order for the indirect heating boiler to load in 20-25 minutes, connect it according to the correct diagram to the main heating circuit of the gas boiler. Simply plug the DHW pipes - this will not affect the life of the heat generator in any way. The expert will give more information on the topic in his video:
Connecting the Ariston Egis Plus 24 ff boiler to working systems
Hydraulic connections and safety valve
The figure shows a diagram of connecting water and gas pipelines to the Ariston Egis Plus 24 ff boiler. Make sure that the maximum pressure in the water supply is not higher than 0.6 MPa (6 bar); if higher, it is necessary to install a pressure reducer.
Fig.5. Hydraulic connections
A. Supply pipe to the heating circuit, B. Supply pipe to the DHW circuit, C. Gas supply, D. Cold water supply, E. Return from the heating circuit, F. Safety valve drain pipe, G. Make-up tap, H. Drain tap
To size the heating circuit pipes and heaters, the residual pressure should be calculated as a function of the required water flow, taking into account the characteristics of the circulation pump.
Connect the drain tube (supplied) to the outlet of safety valve F (see Fig. 5).
The drain pipe of the safety valve should be connected to the drain siphon so that you can visually verify the operation of the safety valve.
Flushing the heating circuit
If the Ariston Egis Plus 24 ff boiler is connected to an existing heating circuit, there may be various impurities in the water that can have a harmful effect on the unit, leading to a reduction in its service life.
Before dismantling the old boiler, be sure to thoroughly flush the system to remove any contaminants that could have a harmful effect on the boiler.
Be sure to make sure that the capacity of the expansion tank matches the volume of water in the heating circuit.
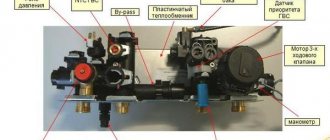
Fig.6. Hydraulic circuit
1. Fan, 2. Primary heat exchanger, 3. Overheating sensor, 4. Water supply temperature sensor to the heating circuit, 5. Burner, 6. Ignition electrodes, 7. Gas valve, 8. Secondary plate heat exchanger, 9. Safety valve 0 ,3 MPa (3 bar), 11. Automatic bypass, 12. Drain tap, 13. Make-up tap, 14. Heating circuit filter, 15. Flow sensor in the DHW circuit, 16. Three-way valve, 17. Pressure gauge, 18. Min. relay . pressure, 19. Circulation pump with automatic air vent, 20. Flame control electrode, 21. Expansion tank, 22. Water temperature sensor on the return line of the heating circuit, 23. Flue gas pressure switch (pressostat)
Air supply and combustion products exhaust
The Ariston Egis Plus 24 ff boiler allows installation of type B (air supply from the room) and type C (air supply from outside).
To prevent combustion products from entering the duct system, carefully install seals in accordance with this manual.
Install the combustion products exhaust system carefully so as not to damage the seals and prevent combustion products from entering the air duct.
Horizontal sections of pipelines must have a slope of at least 3% to prevent condensate accumulation.
Type B installation is permitted in areas with adequate ventilation and air supply, in accordance with applicable codes and regulations.
In areas where there may be corrosive vapors in the air (for example, laundries, hairdressers, electroplating areas, etc.), only type C installations (with air supply from outside the premises) should be used. This protects the boiler from corrosion.
When installing a coaxial (dual) smoke exhaust/air supply system, only original accessories must be used.
The chimney should not come into contact with or pass in close proximity to flammable materials, nor should it pass through building structures made using flammable materials.
The connection must be made in such a way as to ensure protection against condensate entering the boiler.
When replacing an old boiler, the elements of the ventilation and combustion products removal system should also be replaced.
Chimney/air duct connection
– coaxial system (of the “pipe-in-pipe” type), designed to supply air and remove combustion products;
– separate system for exhausting combustion products and supplying air from outside the room;
– single-channel chimney for removing combustion products, air supply is carried out from the room.
When connecting the Ariston Egis Plus 24 ff boiler to the chimney/air duct, only materials and components that are resistant to condensate may be used.
For information on the lengths and orientation of the connecting elements, see the table "Types and lengths of air supply and combustion products removal piping."
Accessory kits for connecting the chimney/air duct are not included in the boiler delivery package and must be ordered for a specific type of connection.
All Ariston Egis Plus 24 ff boilers are designed to supply air and exhaust combustion products through a coaxial system with a diameter of 60/100 mm or a separate system with a diameter of 80/80.
In case of pressure losses in the pipelines, when choosing the dimensions of the chimney/air duct, additional aerodynamic resistance must be taken into account (see the catalog of accessories for chimneys/air ducts).
Make sure that the air supply and combustion products exhaust pipes are free of foreign objects and have no leaks.
To connect a split system, use only one of the two air supply openings. Loosen the screw, remove the plug, install the air intake insert and secure with the supplied screw.
Connecting the Ariston Egis Plus 24 ff gas boiler to the electrical network
To ensure your safety, have all boiler electrical connections carefully checked by a qualified technician.
The manufacturer is not responsible for damage caused by lack of proper grounding or improper parameters of the power supply network.
Make sure that the system is designed for the maximum power consumed by the boiler (see nameplate). Make sure that conductors with a cross-section of at least 0.75 mm2 are used.
Why is it so important to piping the boiler according to all the rules?
Many owners who decide to piping a gas boiler with their own hands underestimate the importance of the rules for its implementation. But a properly made harness can:
- prevent airing;
- get rid of sand, salts and rust;
- do not allow the maximum permissible pressure in the system to be exceeded;
- compensate for excess thermal expansion;
- make it possible to connect several circuits.
Correctly executed piping ensures reliability, good performance and safety of the entire system.
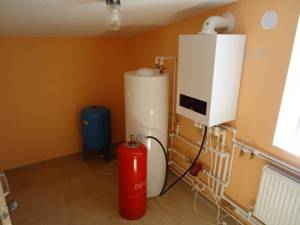
Recommendations for piping a single-circuit gas boiler
To avoid mistakes when piping a single-circuit gas boiler, you should follow certain recommendations:
- When piping a new gas boiler and an old system, you should thoroughly flush the pipes and radiators so that accumulated deposits do not reduce the heating efficiency.
- Filters are usually placed on a horizontal section of pipe in front of the unit. You need to place them so that the drawn arrow coincides with the direction of movement of the coolant. The sump should be located at the bottom so that dirt does not clog the filter itself.
- Connections between pipes and branch pipes should be made using American couplings.
- Shut-off valves and a check valve must be installed in front of the supply pipe entering the boiler, and a circulation pump must be mounted on the return line.
- The main gas supply should be made using a rigid or flexible metal pipe. To seal the connection, use only a paronite gasket.
Note! If there are interruptions in gas and electricity supply in your locality, then an emergency operation mode should be provided. In case of a power outage, it is advisable to have a gasoline generator that can power the heating equipment until the power supply is restored. If there are problems with gas, you can turn on an electric boiler.
Harness
What additional equipment is needed to install the boiler?
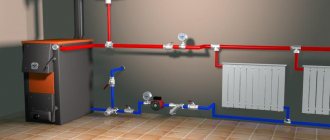
Closed system with forced circulation
A closed heating system is one that does not communicate with the surrounding air and operates at excess pressure. The vast majority of forced circulation circuits are closed.
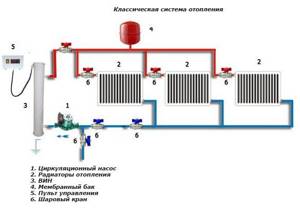
Closed heating system with induction electric boiler and circulation pump.
Elements
In this case, the boiler piping includes:
| Pump . A low-power (100-200 watt) device with a centrifugal impeller, which is installed in the filling gap. | |
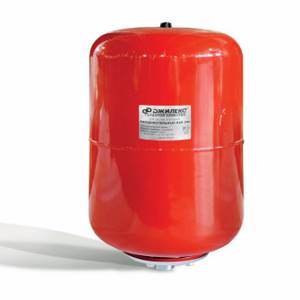
| Diaphragm expansion tank . Its task is to provide the heating coolant with room to expand without a critical increase in pressure in the bottling. |
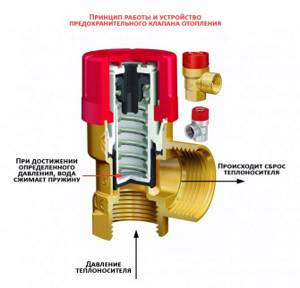
| Safety valve . The valve is responsible for discharging the coolant into the drain if the pressure at the outlet of the boiler heat exchanger nevertheless exceeds dangerous values. |
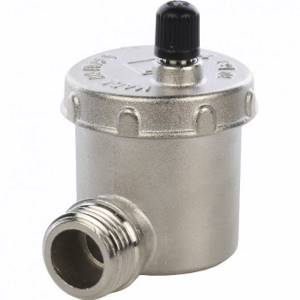
| Automatic air vent . After resetting and refilling the circuit, air will remain in it, preventing circulation and creating noise. The task of the air vent is to release it into the atmosphere without loss of coolant. |
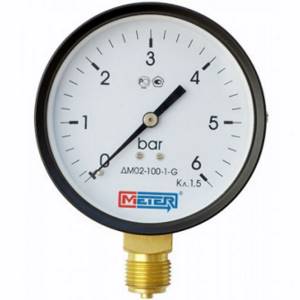
| Pressure gauge . Visual monitoring of the current pressure in the system. |
Optionally, the harness may include:
- A filter for a gas boiler is installed at the inlet of the heat exchanger and protects it from clogging with small debris;
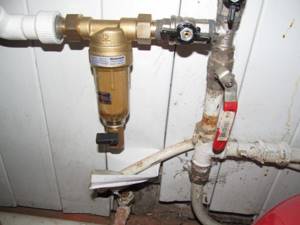
Coarse filter at the coolant inlet to the heat exchanger of a gas boiler. The function of the filter is to retain small debris and prevent it from clogging thin channels.
- A coarse filter is often placed in front of the circulation pump. The goal is to prevent debris from getting into the impeller;
- A heat accumulator is often found in the piping of a solid fuel or electric boiler. We will dwell on it in a little more detail.
What is this - a heat accumulator (or buffer tank)?
This is the name of a volumetric sealed tank with several pipes for connection to heating circuits and external thermal insulation. Its functions are easy to guess by its name: a heat accumulator stores thermal energy.
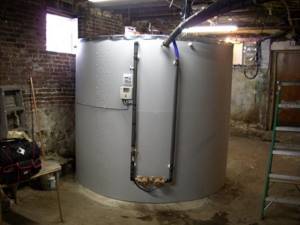
A heat accumulator is a device for storing thermal energy.
By heating 3 tons of water from 40 to 80 degrees, you can store 175 kWh of heat. With this heat, a house with an area of 80 m2 is heated throughout the day.
Why accumulate energy in such quantities?
The heat accumulator in the boiler piping can perform several functions:
- Increase the frequency of firing the solid fuel boiler. A classic boiler has to be heated three to five times a day. If the heating system includes a buffer tank of sufficient volume, kindling is needed only once a day: the water in the tank heats up and gradually releases the accumulated heat to the radiators in the living rooms;
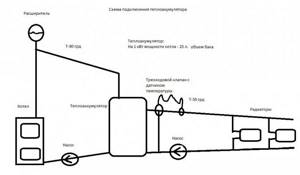
Scheme with a solid fuel boiler and a buffer tank. It will allow you to increase the interval between kindlings to 12-24 hours.
- Make solid fuel heating more economical . A classic boiler, when operating at reduced power, reduces efficiency (efficiency factor) due to incomplete combustion of coal or firewood when the vent is covered:
- Restricted air flow causes your money to literally fly down the drain in the form of volatile hydrocarbons and carbon monoxide;
- The circuit with a buffer tank allows long-term operation of the heating circuit without reducing the boiler power: operating at rated power, it transfers all the heat to the water in the heat accumulator;
- Ensure that the electric boiler operates only at night . The night tariff with two-rate tariffication is 2-4 times lower than the day tariff. During the day, when the price of a kilowatt-hour of electricity is higher, the heat accumulated at night is used to heat the house.
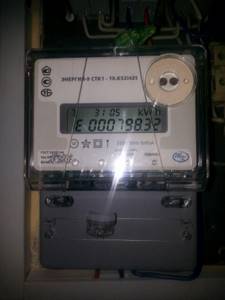
A two-tariff meter complete with a heat accumulator will allow your electric boiler to become more economical.
How to choose and where to install
First, let’s talk about how to select the strapping elements.
The pump is selected depending on:
- Thermal load on the circuit (read - boiler power);
- Differences between supply and return in degrees.
The formula for calculating the minimum performance of the circulation pump is:
Q=0.86R/Dt.
- Q - productivity in cubic meters per hour;
- R—load in kilowatts;
- Dt is the same temperature delta.
So, with a boiler power of 16 kW and heating parameters of 70/50 ºС, the pump should pump 0.86*16/(70-50)=0.688 m3/h.
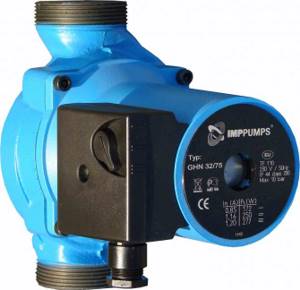
A pump with stepwise power adjustment allows you to select a performance that ensures uniform heating of the radiators in the absence of hydraulic noise.
One more parameter of the circulation pump (pressure) can be safely neglected. Its minimum value is 2 meters; the same difference sets the coolant in motion in the heating circuit of an apartment building with its much higher hydraulic resistance.
The membrane tank is selected by volume. The volume of the tank is usually taken equal to 1/10 of the amount of coolant in the system. The latter, in turn, in a circuit with aluminum or bimetallic batteries is calculated as 15 liters per kilowatt of boiler power.
The tank charging pressure is usually 1.5 kgf/cm2. If necessary, it can be increased by pumping air into the air compartment of the tank through the nipple using a regular bicycle pump.
about the safety group (valve, air vent and pressure gauge):
- The valve must be adjusted to the upper limit of the permissible pressure (usually 2.5 kgf/cm2);
- gauge scale should show a pressure of at least 4 kgf/cm2.
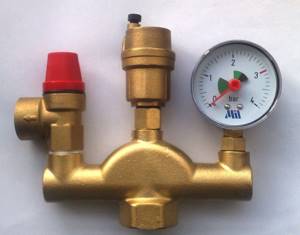
The pressure gauge scale in the boiler safety group must be calibrated to at least 4 atmospheres.
Where are the strapping elements installed?
- The circulation pump is usually placed in front of the combustion chamber or boiler heat exchanger, in the section of the circuit with the lowest temperature;
- The safety group is mounted at the outlet of its heat exchanger - where pressure begins to increase when circulation stops;
- The expansion tank can be connected to any part of the circuit. It cannot be installed only near the pump installation site (2 filling diameters in front of the pump and 8 diameters after the pump). The instructions are due to the fact that turbulence from the impeller will create constant pressure fluctuations in the tank and lead to premature wear of the membrane.
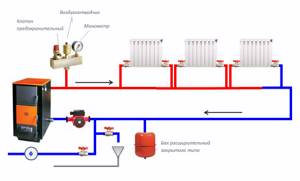
Arrangement of piping elements for a solid fuel boiler in a single-pipe heating system (Leningrad).
A special case
Many modern boilers (electric heating elements, diesel, gas with forced draft) are equipped with an expansion tank, pump and safety group installed in the housing, which turns such a device into a full-fledged mini-boiler room.
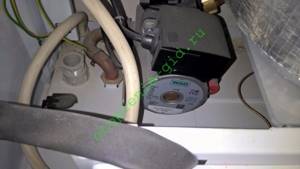
The circulation pump is installed by the manufacturer in the boiler body.
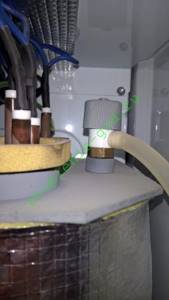
The safety valve is installed directly on the heat exchanger with the heating element block. It will release excess coolant when it boils if the pump stops.
In this case, the piping consists only of a pair of ball valves that shut off the boiler. They allow you to open the device for repair or maintenance with minimal loss of coolant.
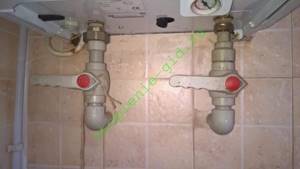
If all the piping elements are located in the boiler body, it is enough to install two ball valves on the inlet and outlet pipes.
Open gravity system
In it, the functions of all piping elements are performed by a single element - an open expansion tank, which:
- Accommodates excess heated coolant;
- Eliminates critical increase in pressure;
- Removes air and (when the circuit boils) water vapor.
The volume of the tank is taken equal to the same 10% of the volume of coolant in the system or a little more. The tank is installed at the top point of the heating circuit, immediately after the accelerating manifold (the vertical filling section after the boiler). From the tank, the filling returns to the heat exchanger with a constant slope, ensuring the removal of air pockets and the movement of water by gravity.
Often a cold water outlet opens into an open expansion tank. It has to be periodically poured into the circuit to compensate for evaporation.
Tables with three-digit codes, descriptions and set values
The values added in the white fields are the values used in my boiler. If there are no corrections, then I have the same values as those printed in the table. To enlarge, click on the photo of the table.
Double-circuit gas appliances make our lives more comfortable and enjoyable. They are quite practical to use, suitable for heating country houses and small apartments. They are used for heating industrial or warehouse buildings with an area of no more than 500 sq.m.
The advantages of Ariston boilers are that in addition to heating buildings in winter, they heat water used in everyday life all year round. This is quite convenient and does not require the installation of additional equipment.
