Potapov's vortex heat generator, or VTP for short, was designed specifically to generate thermal energy using just an electric motor and a pump. This device is used primarily as an economical heat source.
Today we will look at the design features of this device, as well as how to make a vortex heat generator with your own hands.
Principle of operation
The generator works as follows. Water (or any other coolant used) enters the cavitator. The electric motor then spins the cavitator, in which the bubbles collapse - this is cavitation, hence the name of the element. So all the liquid that gets into it begins to heat up.
The electricity required to run a generator is spent on three things:
- For the formation of sound vibrations.
- To overcome the friction force in the device.
- To heat the liquid.
Moreover, as the creators of the device, in particular the Moldovan Potapov himself, claim, renewable energy is used for operation, although it is not entirely clear where it comes from. Be that as it may, no additional radiation is observed, therefore, we can talk about almost one hundred percent efficiency, because almost all the energy is spent on heating the coolant. But this is in theory.
What is it used for?
Let's give a small example. There are a lot of enterprises in the country that, for one reason or another, cannot afford gas heating: either there is no main line nearby, or something else. Then what remains? Heat with electricity, but the tariffs for this kind of heating can be terrifying. This is where Potapov’s miracle device comes to the rescue. When using it, the energy costs will remain the same, the efficiency, of course, too, since it still won’t be more than a hundred, but the efficiency in financial terms will be from 200% to 300%.
It turns out that the efficiency of the vortex generator is 1.2-1.5.
Installing the pump
Next we must choose the “right” water pump. The range of these tools today is so wide that you can find a model of any strength and size. We only need to pay attention to two things:
- Will the engine be able to spin this pump;
- Is it (the pump) centrifugal?
Next, the pump is installed in the same frame; if necessary, additional fasteners are attached.
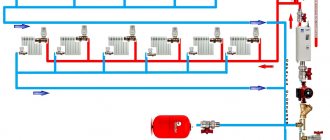
The body of a vortex generator is a cylinder, closed on both sides. There should be through holes on the sides through which the device will be connected to the heating system. But the main feature of the design is inside the body: a nozzle is located immediately near the inlet. The nozzle hole must be selected purely individually.
Note! It is desirable that the nozzle hole be half as large as 1/4 of the total diameter of the cylinder. If the hole is smaller, then water will not be able to pass through it in the required quantity and the pump will begin to heat up. Moreover, internal elements will begin to be destroyed by cavitation.
To make the case we will need the following tools:
- Iron pipe with thick walls with a diameter of about 10 cm;
- Couplings for connection;
- Welding;
- Several electrodes;
- Impeller;
- A pair of pipes with threads;
- Electric drill;
- Drill;
- Adjustable wrench.
Now - directly to the manufacturing process.
- To begin with, we cut off a piece of pipe about 50-60 cm long and make an external groove on its surface about half the thickness, 2-2.5 cm. We cut the thread.
- We take two more pieces of the same pipe, each 5 cm long, and make a couple of rings from them.
- Then we take a metal sheet with the same thickness as the pipe, cut out original covers from it, and weld them where the thread was not made.
- We make two holes in the center of the covers - one of them around the circumference of the pipe, the second around the circumference of the nozzle. Inside the cover next to the jet we drill a chamfer so that we get a nozzle.
- We connect the generator to the heating system. We connect the pipe near the nozzle to the pump, but only to the hole from which water flows under pressure. We connect the second pipe to the entrance to the heating system, but the output must be connected to the pump inlet.
The pump will create pressure, which, acting on the water, will force it to pass through the nozzle of our design. In a special chamber, the water will overheat due to active mixing, after which it is supplied directly to the heating circuit. In order to be able to regulate the temperature, the vortex heat generator must be equipped with a special locking device located next to the pipe. If you slightly cover the constipation, the structure will take longer to move water through the chamber, therefore, the temperature will rise because of this. This is how this kind of heater works.
Read about other alternative heating methods here
Hydrothermal
This method is based on the use of natural water. The necessary thermal energy will be extracted from it. If there is a lake or reservoir within reach of your home, then the task of installing equipment is greatly simplified. But this is rather an exception to the rule; in most cases it is necessary to drill wells to the groundwater level.
Operating principle
The installation can be divided into three components:
- outer contour;
- internal wiring;
- geothermal pump.
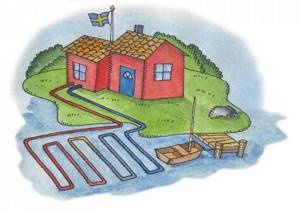
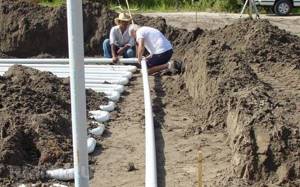
The outer loop is a pipe structure laid underground at the groundwater level. Their depth should be below the freezing depth. The external circuit represents the heating communications of the house.
The operating principle of the installation is as follows. The heat of groundwater is transferred to the coolant of the external circuit. Using a pump, it enters the heat exchanger. After which heat is transferred to the internal wiring. All installation difficulties can be avoided if there is a body of water nearby. The heat exchanger is immersed in water and connected to the heating. The area of the reservoir must be at least 200 m².
Advantages of the device
The design has the following advantages:
- versatility - the system can work not only as heating, but also as cooling;
- low power consumption - it is only needed to power the pump and is about 1 kW per hour;
- fire safety is ensured due to the absence of combustion;
- high efficiency - from 1 kW of electricity the output is 5 kW of heat;
- ease of operation and maintenance.
The disadvantage is the high cost of the heat pump and equipment installation. For a house with an area of 100 m² and a power consumption of 5 kWh, installation of a heating system will cost approximately 440 thousand rubles. This calculation is taken for houses located within a radius of 50 meters from the reservoir into which the heat exchanger will be immersed.
We insulate the VTP
First of all, we put on the casing. To do this, take a sheet of aluminum or stainless steel and cut out a couple of rectangles. It is better to bend them along a pipe that has a larger diameter, so that a cylinder is eventually formed. Next we follow the instructions.
- We fasten the halves together using a special lock used to connect water pipes.
- We make a couple of covers for the casing, but do not forget that there should be holes in them for connection.
- We wrap the device with thermal insulating material.
- Place the generator in the housing and close both covers tightly.

There is another way to increase productivity, but for this you need to know how exactly Popov’s miracle device works, the efficiency of which can exceed (not proven and not explained) 100%. You and I already know how it works, so we can proceed directly to improving the generator.
Vortex damper
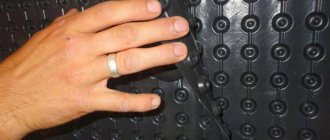
Yes, we will make a device with such a mysterious name - a vortex damper. It will consist of plates arranged lengthwise, placed inside both rings.
Let's see what we need for the job.
- Welding.
- Turbinka.
- Sheet of steel.
- Pipe with thick walls.
The pipe should be smaller than the heat generator. We make two rings out of it, about 5 cm each. We cut several strips of the same size from the sheet. Their length should be 1/4 of the length of the device body, and their width should be such that after assembly there is free space inside.
- We insert the plate into the vice, hang metal rings on one end of it and weld them to the plate.
- We take the plate out of the clamp and turn it the other way. We take the second plate and place it in the rings so that both plates are placed parallel. We fasten all the remaining plates in the same way.
- We assemble the vortex generator with our own hands, and install the resulting structure opposite the nozzle.
Note that the scope for improving the device is almost limitless. For example, instead of the above plates, we can use steel wire, first twisting it into a ball. In addition, we can make holes in plates of various sizes. Of course, none of this is mentioned anywhere, but who says you can't use these improvements?
And as a conclusion, here are some practical tips. Firstly, it is advisable to protect all surfaces by painting. Secondly, all internal parts should be made of thick materials, since it (the parts) will constantly be in a fairly aggressive environment. And thirdly, take care of several spare caps that have different hole sizes. In the future, you will select the required diameter in order to achieve maximum performance of the device.
The cavitation heat generator is characterized by good efficiency and compactness. It is rare that an owner does not try to save on heating or the consumption of other benefits, which become more and more expensive every year. To make the heating system of a residential or industrial premises economical, many people resort to various schemes and methods for generating thermal energy. One of the devices suitable for these purposes is a cavitation heat generator.
What is a vortex heat generator
A cavitation vortex heat generator is a simple device that can effectively heat a room while spending a minimum of money. This occurs due to the heating of water during cavitation - the formation of small steam bubbles in places where the liquid pressure decreases, which occurs either during pump operation or during sound vibrations.
A cavitation heater is capable of converting mechanical energy into thermal energy, which is actively used in industry, where heating elements can fail when working with a liquid that has a large temperature difference. Such a cavitator is an alternative for systems operating on solid fuel.
Advantages of vortex cavitation heaters:
- Economical heating system;
- High heating efficiency;
- Availability;
- Possibility to assemble with your own hands.
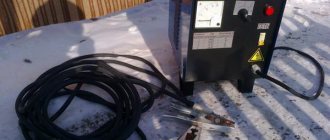
The vortex heat generator should not be located near a living space due to its high noise level
Disadvantages of the device:
- When assembling it yourself, it is quite difficult to find materials to create the device;
- Too much power for a small room;
- Noisy operation;
- Considerable dimensions.
Operating principle
Traditionally, it was believed that cavitation is a parasitic phenomenon characterized by the intense formation of bubbles, which, during collapse, provoke the destruction of surrounding objects.
A typical example of the consequences of cavitation is the destruction of ship propellers or the destruction of the impeller of vane pumps. A vortex type heat generator is a device in which the parasitic phenomenon is beneficial.
Cavitation makes it possible not to give heat to water, but to extract heat from moving water, while heating it to significant temperatures.
Despite the fact that cavitation is a parasitic phenomenon, the structural elements of modern heat generators, unlike the same ship propellers, do not suffer. This is explained by the fact that cavitation processes do not occur around the disk activator, but behind it.
Operating principle of the cavitation converter
| Illustration | Process description |
|
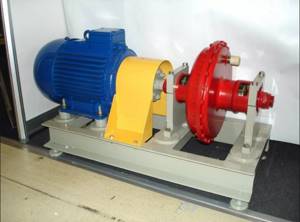
Design and operating features
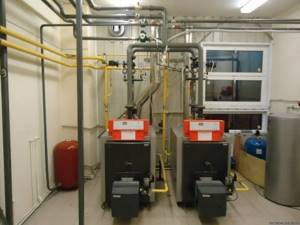
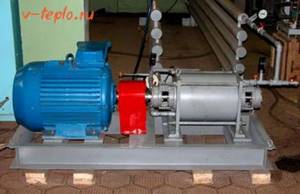
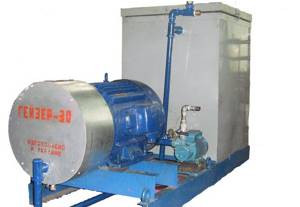
The design of operating samples of vortex heat generators is externally simple. We can see a massive motor, to which is connected a cylindrical snail device.
"Snail" is a modified version of Ranque's trumpet. Due to its characteristic shape, the intensity of cavitation processes in the cavity of the “snail” is much higher in comparison with a vortex tube.
In the cavity of the “snail” there is a disk activator - a disk with special perforation. When the disk rotates, the liquid medium in the “snail” is activated, due to which cavitation processes occur:
- The electric motor turns the disk activator . The disk activator is the most important element in the design of the heat generator, and it is connected to the electric motor by means of a straight shaft or a belt drive. When the device is turned on in operating mode, the engine transmits torque to the activator;
- The activator spins the liquid medium . The activator is designed in such a way that the liquid medium, entering the cavity of the disk, swirls and acquires kinetic energy;
- Conversion of mechanical energy into thermal energy . Leaving the activator, the liquid medium loses acceleration and, as a result of sudden braking, a cavitation effect occurs. As a result, kinetic energy heats the liquid medium to + 95 ° C, and mechanical energy becomes thermal.
Standard design of a heat generator and its operating principle
The process of cavitation is expressed in the formation of vapor bubbles in a liquid, after which the pressure slowly decreases at high flow rates.
What can cause steam formation:
- The occurrence of acoustics caused by sound;
- Radiation of a laser pulse.
The closed air regions mix with water and go to a place with high pressure, where they collapse with the radiation of a shock wave.
Operating principle of the cavitation apparatus:
- The water jet moves through the cavitator, where the pump creates water pressure that enters the working chamber;
- In the chambers, the fluid increases speed and pressure using various tubes of different sizes;
- In the center of the chamber, the flows mix and cavitation appears;
- In this case, the steam cavities remain small and do not interact with the electrodes;
- The liquid moves to the opposite end of the chamber, from where it returns back for the next use;
- Heating occurs due to the movement and expansion of water at the exit of the nozzle.
This is how a vortex cavitation heater works. Its device is simple, but allows you to quickly and efficiently heat the room.
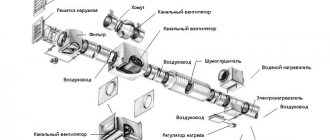
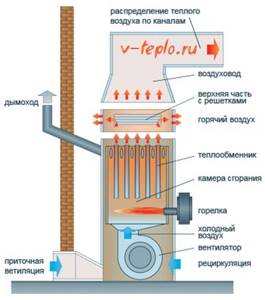
What does a gas heat generator for air heating consist of?
Each of these parts of the system plays a specific and important role, namely:
- the function of a gas burner is to ignite the fuel and ensure its further combustion;
- the purpose of the air fan is to continuously supply fresh air, as well as to eject exhaust air upward from the system;
- Complete combustion of the heat source occurs in the combustion chamber. Provided that the fuel burns completely, the amount of carbon dioxide released by the system is not large;
- a heat exchanger is necessary to ensure that normal heat exchange occurs between the heat generator and the room itself, that is, it prevents overheating of the heating equipment;
- Air ducts are special channels that are necessary to remove hot air to the desired areas of the room.
Economical DIY cavitation heat generator
It is quite possible to create a homemade vortex generator with cavitation if you carefully study the drawings and diagrams of the device, and also understand its operating principle. Potapov’s VTG with an efficiency of 93% is considered the easiest to create independently, the circuit of which is suitable for both home and industrial use.
Before you begin assembling the device, you should choose the right pump, based on its type, power, required thermal energy and pressure value.
Basically, all cavitation generators have a nozzle shape, which is considered the simplest and most convenient for such devices.
What is needed to create a cavitator:
- Pressure gauges;
- Thermometer for measuring temperature;
- Output and inlet pipes with taps;
- Valves for removing air pockets from the heating system;
- Thermometer sleeves.
You also need to monitor the cross-sectional size of the hole between the diffuser and the confuser. It should be approximately 8 - 15 cm, neither narrower nor wider.
Scheme for creating a cavitation generator:
- Selecting a pump - here you need to decide on the necessary parameters. The pump must be able to work with high-temperature liquids, otherwise it will quickly break down. He must also be able to create a working pressure of at least 4 atmospheres.
- Creating a cavitation chamber - the main thing here is to choose the right cross-sectional size of the passage channel. The best option is 8-15 mm.
- Choosing a nozzle configuration - it can be in the form of a cone, a cylinder, or simply be rounded. However, the shape is not as important as the fact that the vortex process begins as soon as the water enters the nozzle.
- Making a water circuit - outwardly it is a curved tube leading from the cavitation chamber. It is connected to two sleeves with a thermometer, two pressure gauges, and an air valve, which is placed between the inlet and outlet.
The body of the cavitation heat generator can be painted in any color
After creating the housing, the heat generator should be tested. To do this, the pump should be connected to electricity and the radiators to the heating system. Next comes connection to the network.
It is especially worth looking at the pressure gauge readings and setting the desired difference between the inlet and outlet of the liquid within 8-12 atmospheres.
Next, water is allowed into the system. If it heats up in 10 minutes by 3-5 degrees per minute, that’s good. In a short time the liquid will warm up to 60 degrees. This is quite enough for work.
How to assemble a heat generator
With all these scientific terms, which can scare a person unfamiliar with physics, it is quite possible to make a VTG at home. Of course, you will have to tinker, but if everything is done correctly and efficiently, you can enjoy the warmth at any time.
And you have to start, as in any other business, by preparing materials and tools. You will need:
- Welding machine.
- Sander.
- Electric drill.
- Set of wrenches.
- Set of drills.
- Metal corner.
- Bolts and nuts.
- Thick metal pipe.
- Two threaded pipes.
- Connecting couplings.
- Electric motor.
- Centrifugal pump.
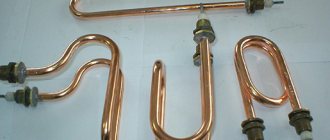
- Jet.
Now you can start working directly.
Installing the engine
An electric motor, selected in accordance with the available voltage, is installed on a frame, welded or assembled with bolts, from a corner. The overall size of the frame is calculated in such a way that it can accommodate not only the engine, but also the pump. It is better to paint the frame to avoid rust. Mark the holes, drill and install the electric motor.
Connecting the pump
The pump should be selected according to two criteria. Firstly, it must be centrifugal. Secondly, the engine power must be enough to spin it up. After the pump is installed on the frame, the action algorithm is as follows:
- In a thick pipe with a diameter of 100 mm and a length of 600 mm, an external groove of 25 mm and half the thickness must be made on both sides. Cut the thread.
- On two pieces of the same pipe, each 50 mm long, cut the internal thread to half the length.
- On the side opposite to the thread, weld metal caps of sufficient thickness.
- Make holes in the center of the lids. One is the size of the nozzle, the second is the size of the pipe. It is necessary to chamfer the inside of the hole for the nozzle using a large-diameter drill so that it looks like a nozzle.
- The nozzle pipe is connected to the pump. To the hole from which water is supplied under pressure.
- The heating system input is connected to the second pipe.
- The outlet from the heating system is connected to the pump input.
The cycle is complete. Water will be supplied under pressure to the nozzle and, due to the vortex formed there and the resulting cavitation effect, will begin to heat up. The temperature can be adjusted by installing a ball valve behind the pipe through which water flows back into the heating system.
Let's improve the heat generator
This may sound strange, but this rather complex design can be improved, further increasing its performance, which will be a definite plus for heating a large private house. This improvement is based on the fact that the pump itself tends to lose heat. This means that you need to make it spend as little as possible.
This can be achieved in two ways. Insulate the pump using any thermal insulation materials suitable for this purpose. Or surround it with a water jacket. The first option is clear and accessible without any explanation. But we should dwell on the second one in more detail.
To build a water jacket for the pump, you will have to place it in a specially designed hermetically sealed container that can withstand the pressure of the entire system. Water will be supplied exactly to this container, and the pump will take it from there. The external water will also heat up, which will allow the pump to work much more efficiently.
Vortex absorber
But it turns out that’s not all. Having thoroughly studied and understood the operating principle of a vortex heat generator, you can equip it with a vortex damper. A stream of water supplied under high pressure hits the opposite wall and swirls. But there can be several of these vortices. One has only to install a structure inside the device that resembles the shank of an aircraft bomb. This is done as follows:
- From a pipe of slightly smaller diameter than the generator itself, you need to cut two rings 4-6 cm wide.
- Weld six metal plates inside the rings, selected in such a way that the entire structure is as long as a quarter of the length of the body of the generator itself.
- When assembling the device, secure this structure inside opposite the nozzle.
There is and cannot be a limit to perfection, and the vortex heat generator is still being improved in our time. Not everyone can do this. But it is quite possible to assemble the device according to the diagram given above.
| Scheme of combination of the rotor ring (3) and the stator (4) . The diagram shows the rotor ring and the stator at the moment of alignment when turning the rotor disk. That is, with each combination of these elements, we see the formation of an effect similar to the action of Ranque's pipe. |
| Rotary displacement of the rotor ring and stator . This diagram shows the position of the structural elements of the “snail” at which a hydraulic shock occurs (collapse of bubbles) and the liquid medium heats up. |
DIY heat generator (video)
A cavitation heater is quite an interesting and economical way to heat a room. It is easily accessible and can be created independently if desired. To do this, you need to purchase the necessary materials and do everything in accordance with the diagrams. And the effectiveness of the device will not take long to show itself.
For heating rooms or heating liquids, classic devices are often used - heating elements, combustion chambers, filaments, etc. But along with them, devices with a fundamentally different type of effect on the coolant are used. Such devices include a cavitation heat generator, the work of which is to form gas bubbles, due to which heat is released.
Types of air heating
There are two fundamentally different schemes for this type of heating
Air heating combined with ventilation
Heated air is transferred using elements of supply and exhaust ventilation. In this case, the operating parameter is not only the room temperature, but also the specified air exchange rate.
Heat is generated using boilers or gas heat generators. A system of air ducts is connected to them, through which warm air is distributed throughout all areas of the heated premises. The system can be supplemented with filtration, a humidifier, and a recuperator.
Design and principle of operation
The principle of operation of a cavitation heat generator is the heating effect due to the conversion of mechanical energy into thermal energy. Now let's take a closer look at the cavitation phenomenon itself. When excess pressure is created in a liquid, turbulence occurs, due to the fact that the pressure of the liquid is greater than that of the gas contained in it, gas molecules are released into separate inclusions - the collapse of bubbles. Due to the pressure difference, water tends to compress the gas bubble, which accumulates a large amount of energy on its surface, and the temperature inside reaches about 1000 - 1200ºС.
When cavitation cavities move into the normal pressure zone, the bubbles are destroyed, and the energy from their destruction is released into the surrounding space. Due to this, thermal energy is released, and the liquid is heated by the vortex flow. The operation of heat generators is based on this principle; then consider the principle of operation of the simplest version of a cavitation heater.
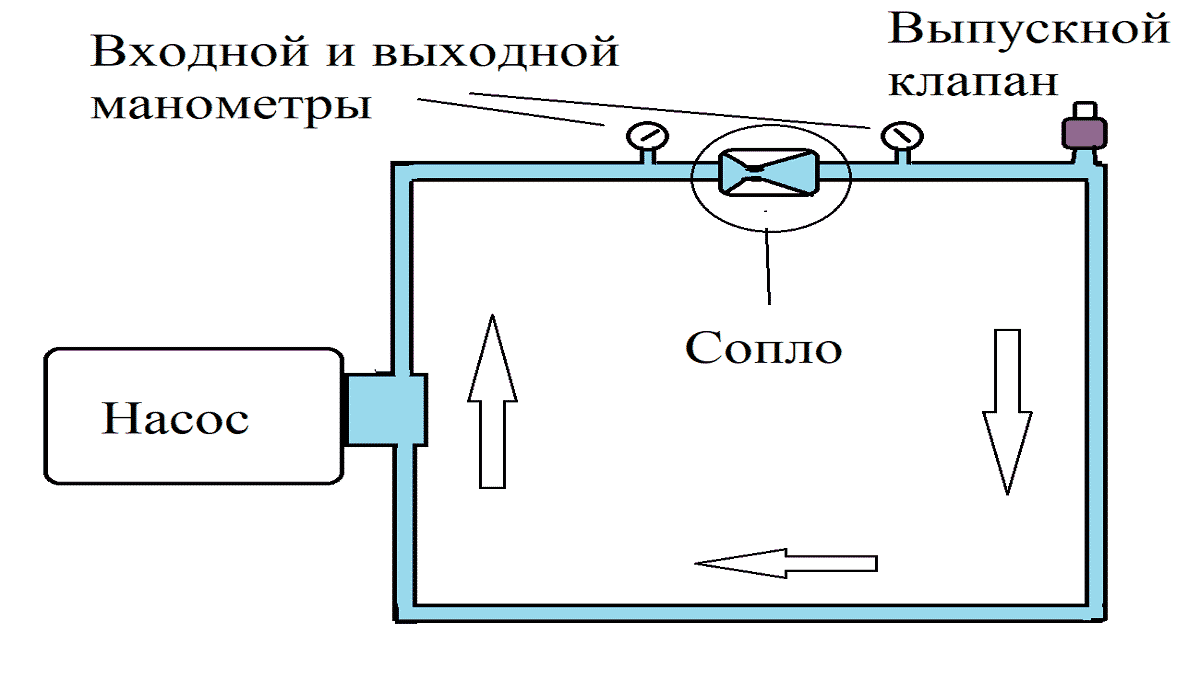
The simplest model
Look at Figure 1, here is a device of the simplest cavitation heat generator, which consists of pumping water to the point where the pipeline narrows. When the water flow reaches the nozzle, the liquid pressure increases significantly and the formation of cavitation bubbles begins. When leaving the nozzle, the bubbles release thermal power, and the pressure after passing the nozzle is significantly reduced. In practice, multiple nozzles or tubes may be installed to increase efficiency.
Potapov's ideal heat generator
The ideal installation option is the Potapov heat generator, which has a rotating disk (1) installed opposite the stationary one (6). Cold water is supplied from the pipe located at the bottom (4) of the cavitation chamber (3), and the already heated water is discharged from the top point (5) of the same chamber. An example of such a device is shown in Figure 2 below:
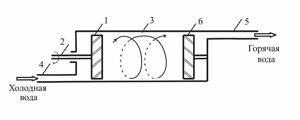
Rice. 2: Potapov cavitation heat generator
But the device was not widely used due to the lack of practical justification for its operation.
The main task of a cavitation heat generator is the formation of gas inclusions, and the quality of heating will depend on their quantity and intensity. In modern industry, there are several types of such heat generators, differing in the principle of producing bubbles in the liquid. The most common are three types:
- Rotary heat generators - the working element rotates due to an electric drive and produces fluid turbulence;
- Tubular - change pressure due to a system of pipes through which water moves;
- Ultrasonic - the heterogeneity of the liquid in such heat generators is created due to low-frequency sound vibrations.
In addition to the above types, there is laser cavitation, but this method has not yet found industrial implementation. Now let's look at each type in more detail.
How to choose an electric water heater: we help you decide on the criteria
A planned shutdown of hot water often takes us by surprise. What can we say about an unscheduled shutdown - when it suddenly turns out that there is no hot water at the most inopportune moment (and, as we know, there are no “suitable” moments for such events in principle).
You can insure yourself against such a nuisance by installing an electric water heater. Also, electric heaters are often used if the quality of hot water leaves much to be desired (for example, the water pressure is not satisfactory or, say, someone in the household has developed skin irritation in response to the composition of the water).
And, of course, you can’t do without electric heaters where there is no hot water at all - for example, in a country house where the water source is a well.
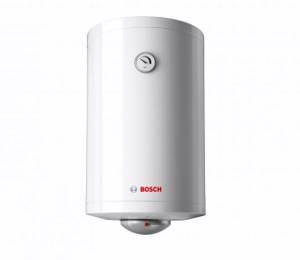
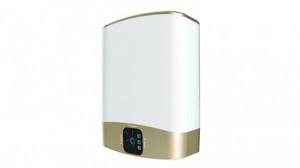
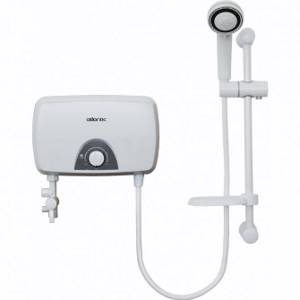
Electric water heater Bosch Tronic 1000T ES 100
Let's take a look at the most common types of electric water heaters and decide how to choose the most suitable model depending on the tasks.
Flow heaters and storage heaters (boilers)
The main difference between instantaneous water heaters and storage (boilers) can be identified already from the name itself: an instantaneous heater heats water “in real time” - while it passes through the heating system. Storage - accumulates water, heats it, and then gives it to the consumer as needed.
Structurally, a storage water heater is a sealed tank into which water is automatically supplied from the water supply. Inside the tank there is a heating element (heating element), which brings cold water to the temperature set using the control panel and maintains it at the same level. When water is used up, new water is added in its place from the water supply.
Instantaneous water heaters look much more compact: they are a box with an electric heater hidden under the lid. This heater does not have a special tank for storing water; the water is heated directly as it passes through the heating element. Such water heaters are often used in small apartments where there is no space to place a boiler, or where installing a boiler is impractical.
Pros and cons of each type of heater
Each type of water heater has its own characteristics, pros and cons. Let's name the most important of them.
Boilers
- Pros: the boiler does not create an increased load on the electrical network, since its power is on average significantly lower than the power of instantaneous water heaters
- a storage heater is capable of “distributing” hot water to the entire apartment (i.e., to several sources of water consumption - several taps)
- the heated water will maintain its temperature for some time, and you can use it even if the electricity is suddenly turned off
- heating of water does not occur instantly: after consuming a significant part of the heated water (or completely emptying the boiler), you will have to wait from several tens of minutes to 1-2 hours until the water received from the water supply heats up again
Flow heaters
- Pros: a flow-through heater will be easier to install and install
- it will also not take up much space: it can be installed literally in any room
- The water will heat up quickly: just open the tap
- the water will not stagnate (it will always be fresh), it will not have to be drained if the heater is not intended to be used for a long time
- the temperature of “hot” water turns out to be limited by the power of the device and depends on the temperature of the water in the water supply system - that is, the colder the water at the inlet, the colder it is at the outlet
Main characteristics of storage heaters (boilers)
As we mentioned above, a boiler is convenient if there is a need to store a large amount of hot water. In addition, such a heater will be the only solution in cases where it is not possible to install a flow-through boiler (for example, due to the fact that the electrical wiring cannot cope with the load).
One of the key characteristics of boilers is volume. The second most important thing is power, and, as a result, the time during which the device can heat the water to the set temperature. All these parameters can be found in the technical documentation for the device, so choosing a boiler solely based on appearance is not the best idea.
For one person who uses water sparingly, a 30-liter boiler will be enough. For two people, it is recommended to pay attention to models from 50 liters, for three - from 80 liters, etc.
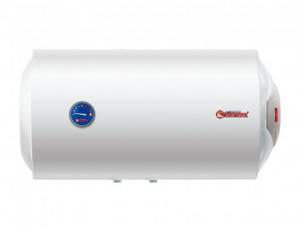
Thermex ERS 80 H Silverheat 80 liters capacity
Find out the price
A storage boiler does not put a large load on the network, consumes less electricity, and most importantly, does not require a special connection if its power is less than 3 kW. In many cases, it can be plugged into a regular outlet without the hassle of installing a separate electrical line (although, of course, if the installation of the boiler is planned during the renovation phase, it is better to provide for the possibility of a safe connection in advance).
Installing a boiler is also simple: it is necessary to provide grounding, in some cases, a reducer to compensate for increased pressure in the water main, and also install a safety valve to protect the water heater from excess pressure in the tank and to drain the water. Please note that all of these elements will most likely have to be purchased separately. If the boiler is not used for a long time, it is recommended to drain the water from it.
The boiler is designed in such a way that cold water enters through the pipe below, after which it is heated in the heating element to a given temperature and “returned” from above. The temperature of the water coming from the tank appears to be stable. A heater of this type turns off automatically when the water is heated to the desired temperature, and turns on again when it cools.
The thermal insulation of the device plays an important role - it determines how quickly the cooled water will need to be heated.
Modern boilers can be controlled mechanically (this is the simplest solution) or electronically - with the ability to “smartly” regulate heating control, automatically turn on and off, etc.
Storage water heater Ariston Velis PW 50 liters
Find out the price
The longevity of the boiler depends on a number of design features. First of all, this is, of course, the material from which the internal container of the heater is made. The simplest boilers are made of metal, others may have a protective enamel coating. Glass ceramics are also used for protection. The “weak” point of many boilers is the weld seam - this is where leaks often occur. Alas, it is hardly possible to make predictions regarding the reliability of this connection element: when choosing a particular model, you have to be guided by personal experience or reviews of users who have already purchased such a boiler previously.
The boiler heater consists of, in fact, a heating element and a thermostat, which is responsible for temperature control. The heating element can be either open (and in direct contact with water) or closed (protected from contact with water). They are also sometimes called "wet" and "dry".
An open heating element will provide a high rate of water heating, will be affordable, and is also often universal and suitable for different models of boilers. But scale forms on it, and therefore it will require periodic cleaning or replacement.
A closed heating element will provide a longer service life and is safer with regard to the potential danger of electric shock (for example, if the boiler leaks). Such a heating element is placed in a special flask filled with quartz sand or oil. A closed heating element has a longer service life, but also significantly increases the cost of the water heater.
The thermostat allows the boiler to turn on and off automatically. On the front panel you can sometimes see a water heating sensor. It can be electronic or mechanical (in the form of an arrow). This way you can always find out what the temperature of the water inside the boiler is.
An important element of the boiler is the magnesium anode - a metal pin coated with a magnesium alloy. This element protects other parts of the boiler, taking on the main “blow” when dealing with low-quality water - it neutralizes water, absorbing salts and converting plaque into soft scale. Otherwise, scale would settle on the heating element.
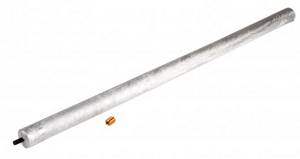
Magnesium anode
When using the boiler for more than 15 months, you should remove the anode and check it for wear. After this period of service, the anode is likely to be sufficiently worn out that it should be replaced. Please note that, as a rule, anodes produced for one boiler model are not suitable for another model. A “wet” copper heating element is something like a boiler; it quickly becomes covered with scale, which reduces its thermal conductivity.
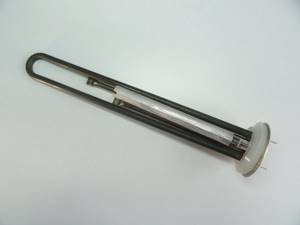
Heating element complete with anode
Finally, let us mention the existence of compact non-pressure boilers of small volume (for example, 5 liters). In most cases, such storage water heaters are needed for systems where water is supplied using pumps as they are turned on (for example, in a country house). That is, the water pressure inside the tank does not exceed external atmospheric pressure. Such a boiler is mounted directly under the sink and can easily provide warm water to one point.
Main characteristics of flow heaters
As we have already said, instantaneous electric heaters are much more compact than boilers, but their power will be significantly higher. And therefore, to install them you need to install a separate electrical line, as well as install a separate machine. Well, in many houses and apartments (where there is not a sufficient supply of input power), installing such a heater does not seem at all advisable: in the worst case, it will “knock out plugs”; in the best case, it can only work in the absence of other load (i.e. e. with kettles and other powerful electrical appliances turned off).
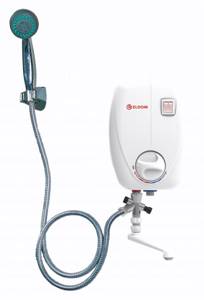
Electric instantaneous water heater Eldom Betta 6.5 kW
The operating principle of instantaneous water heaters comes down to washing the heating element with thin jets, which manage to heat up to the required temperature. Electric instantaneous water heaters produce hot water in an unlimited volume and bring it to a hot state almost immediately after turning it on. Real operating experience shows that to provide hot water to no more than two points (for example, a kitchen and a shower), the flow-type option will be the simplest solution (of course, if there is no goal to save on electricity consumption). However, for normal operation, sufficient pressure is required - at least 0.4 atm. For domestic needs in the kitchen, 3-6 kW of power is enough, and for showers and baths it is better to focus on 8-11 kW.
Unlike storage heaters (boilers), which operate from a conventional single-phase electrical network of 220 V and 230 V, many instantaneous water heaters (especially models with a power exceeding 8 kW) allow connection to 220/380 V networks. If possible, it will be more favorable selection of three-phase voltage, in which the load is evenly distributed over three phases.
The main characteristics of flow-through heaters, therefore, are the power and volume of water that the device is capable of heating per unit of time. This parameter is indicated in the documentation and looks like a parameter like “4 liters per minute”. The second important parameter is the maximum water temperature that the device can produce. This parameter is also indicated in the instructions (as a rule, it does not exceed 60 degrees).
Many heaters are equipped with a flow limiter that does not allow too much water to be supplied (so that the device has time to heat the water). But with low pressure, such a limiter may cause the flow sensor that activates heating to fail to operate. Therefore, when purchasing such a device, it would be useful to check whether the water pressure in the water supply system complies with the established standards. An additional pump may need to be installed.
Electric instantaneous water heater Atlantic Ivory IV202 5.5 kW
Finally, let us mention that instantaneous heaters, like boilers, can be equipped with an electronic control system, which significantly increases the comfort of operating the device and allows much more precise adjustment of the operating parameters of the device.
conclusions
In general, choosing an electric heater for your home or cottage is quite easy. The fact is that the choice is largely limited by such parameters as the method of water supply (central water supply or pump), the pressure (pressure) of water in the pipes and the capabilities of the electrical network. Many devices will not automatically fit certain parameters (they will be too powerful or require labor-intensive preparatory work).
It is not surprising that many opt for the simplest solution, which requires a minimum of effort when connecting - installing a conventional storage heater-boiler of a suitable volume. Flow heaters are much less popular (largely due to the increased load on the electrical network). However, in the case where the installation of a heater is planned at the renovation stage, they may be the optimal solution, since they allow you to get hot water immediately, without any preliminary waiting.
Application
In industry and in everyday life, cavitation heat generators have found implementation in a wide variety of fields of activity. Depending on the tasks assigned, they are used for:
- Heating – inside the installations, mechanical energy is converted into thermal energy, due to which the heated liquid moves through the heating system. It should be noted that cavitation heat generators can heat not only industrial facilities, but also entire villages.
- Heating running water - a cavitation unit is capable of quickly heating liquid, due to which it can easily replace a gas or electric water heater.
- Mixing of liquid substances - due to rarefaction in the layers to obtain small cavities, such units make it possible to achieve the proper quality of mixing of liquids that do not naturally combine due to different densities.
A little history
The vortex thermal generator is considered a promising and innovative development. Meanwhile, the technology is not new, since almost 100 years ago scientists were thinking about how to apply the phenomenon of cavitation.
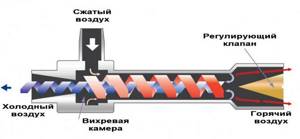
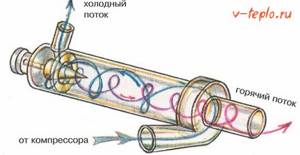
Ranque tube, penetrating into which the gaseous medium is divided into hot and cold air - this phenomenon was discovered at the beginning of the twentieth century, and is used in practice today
The first operational pilot plant, the so-called “vortex tube”, was manufactured and patented by the French engineer Joseph Rank in 1934.
Rank was the first to notice that the temperature of the air at the inlet to the cyclone (air purifier) differs from the temperature of the same air stream at the outlet. However, at the initial stages of bench tests, the vortex tube was tested not for heating efficiency, but, on the contrary, for the cooling efficiency of the air stream.
The principle of operation of the vortex tube shown in the diagram is simple - the flow passes through the swirl chamber, where it is divided into two streams with different temperatures
The technology received new development in the 60s of the twentieth century, when Soviet scientists figured out how to improve the Ranque tube by running liquid into it instead of an air jet.
Due to the higher density of the liquid medium, compared to air, the temperature of the liquid, when passing through the vortex tube, changed more intensively. As a result, it was experimentally established that the liquid medium, passing through the improved Ranque tube, heated up abnormally quickly with an energy conversion coefficient of 100%!
Unfortunately, there was no need for cheap sources of thermal energy at that time, and the technology did not find practical application. The first operating cavitation installations designed to heat a liquid medium appeared only in the mid-90s of the twentieth century.
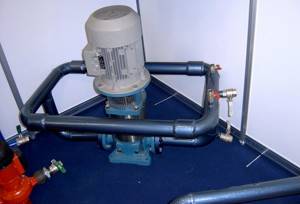
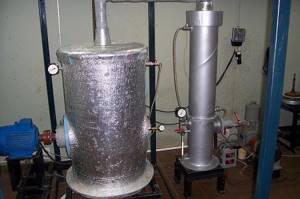
The photo shows a demonstration vortex generator in which water circulates in a closed loop
A series of energy crises and, as a consequence, increasing interest in alternative energy sources served as the reason for resuming work on effective converters of the energy of water jet movement into heat. As a result, today you can buy a unit with the required power and use it in most heating systems.
Advantages and disadvantages
Compared to other heat generators, cavitation units have a number of advantages and disadvantages.
The advantages of such devices include:
- A much more efficient mechanism for generating thermal energy;
- Consumes significantly less resources than fuel generators;
- Can be used for heating both low-power and large consumers;
- Completely environmentally friendly - does not emit harmful substances into the environment during operation.
The disadvantages of cavitation heat generators include:
- Relatively large dimensions - electric and fuel models have much smaller dimensions, which is important when installed in an already used room;
- Great noise due to the operation of the water pump and the cavitation element itself, which makes it difficult to install in domestic premises;
- Ineffective ratio of power and performance for rooms with a small square footage (up to 60 m 2 it is more profitable to use a gas, liquid fuel or equivalent electrical power with a heating element).
DIY CTG
The simplest option for implementation at home is a tubular-type cavitation generator with one or more nozzles for heating water. Therefore, let’s look at an example of manufacturing just such a device; for this you will need:
- Pump – for heating, be sure to choose a heat pump that is not afraid of constant exposure to high temperatures. It should provide a working outlet pressure of 4 - 12 atm.
- 2 pressure gauges and sleeves for their installation - placed on both sides of the nozzle to measure the pressure at the inlet and outlet of the cavitation element.
- Thermometer for measuring the amount of heating of the coolant in the system.
- Valve for removing excess air from a cavitation heat generator. Installed at the highest point of the system.
- Nozzle - must have a bore diameter of 9 to 16 mm; making it smaller is not recommended, since cavitation can already occur in the pump, which will significantly reduce its service life. The shape of the nozzle can be cylindrical, conical or oval; from a practical point of view, any one will suit you.
- Pipes and connecting elements (heating radiators in their absence) are selected in accordance with the task at hand, but the simplest option is plastic pipes for soldering.
- Automatic switching on/off of the cavitation heat generator - as a rule, it is tied to the temperature regime, set to switch off at approximately 80ºC and switch on when it drops below 60ºC. But you can choose the operating mode of the cavitation heat generator yourself.
Rice. 6: cavitation heat generator diagram
Before connecting all the elements, it is advisable to draw a diagram of their location on paper, walls or on the floor. The locations must be placed away from flammable elements or the latter must be removed at a safe distance from the heating system.
Assemble all the elements as shown in the diagram and check for leaks without turning on the generator. Then try the cavitation heat generator in operating mode; the normal increase in liquid temperature is considered to be 3-5ºC in one minute.
Selecting heat generator power
The performance of the heating device must correspond to the heat loss of a particular house on the coldest days of winter. Ideally, it is necessary to make thermal calculations. A simpler way is to choose a boiler such that for every 10 square meters of the building there is 1 kW of power. It should be noted that this formula is suitable for cottages that are well insulated. A reserve of 15-20 percent will not hurt, but heat generators that are too powerful, operating in a clamped mode most of the time, will produce an efficiency below the nominal one and consume excess fuel.
Important! Sometimes in large houses several boilers are installed in a cascade system, which allows the load to be distributed among not very productive units. Thanks to general automation and flexible use of power, it is possible to save energy and improve the controllability of the system.