During the beginning and end of the summer season - namely early spring and late autumn - the temperature outside is hardly above zero. That’s why it’s cold in the country house. This problem is easy to fix - you just need to take care of heating your home. How exactly to do this? Summer residents often use heaters, but these devices require a lot of electricity to operate. Moreover, air heaters do not provide a favorable microclimate in the house; they do not dry out the premises after winter.
Heating a dacha with heated floors
The best option can be considered a warm floor in the country. But which heating system should you choose? Is it necessary to prepare a country house for installation? How exactly is underfloor heating installed? You will find answers to all these questions below.
Which floor heating system to choose?
There must be electricity at the dacha. As a rule, there is no central gas pipeline, and water can only be supplied on certain days of the week. Consequently, liquid heating is used only when there is a solid fuel stove at the dacha.
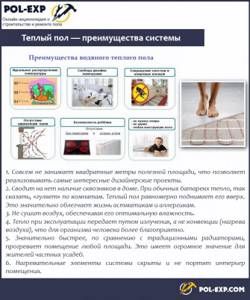
Warm floor - advantages of the system
On a note! It is advisable to equip a water heated floor in a house with a large area or in a two-story cottage. In other cases, it is better to use electric heating elements.
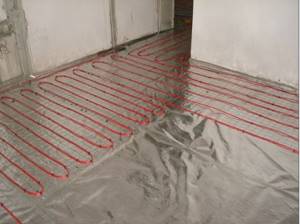
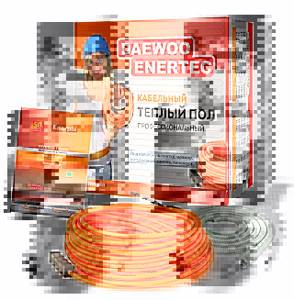
Cabling
Table. Types of electric heated floors.
| Name, photo | Short description |
| Cable | A special conductor is laid on the floor and filled, usually with a cement screed. For optimal efficiency, only ¾ of the floor area can be covered. Cables should not be placed under household appliances and furniture. As for the laying scheme, preference is given to a double “snake” or “snail”, due to which heating efficiency is ensured by the fact that the cold cable is located between the heating coils. |
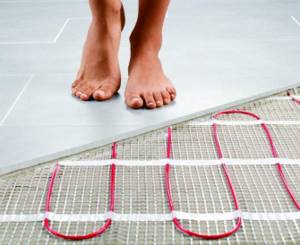
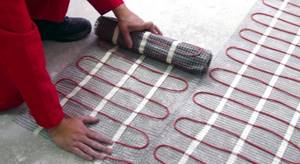
| Mats | The system is easier to install compared to the one described above, since the cable is fixed on a special mesh. However, uneven heating may occur - the further the cable is from the heat source, the lower its temperature will be. |
| Rod | They are special rods assembled into mats. Installation is not complicated at all. To cover the mats, they are filled with tile adhesive or cement screed. |
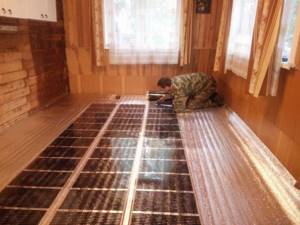
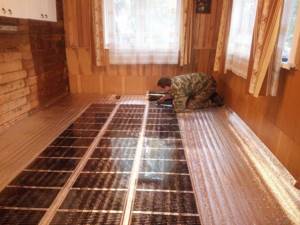
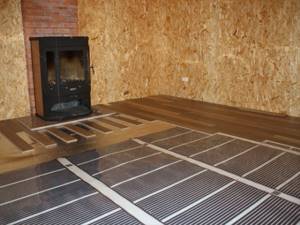
| IR film | Can be laid on any surface. Laminate is laid on top (it can be laid immediately), linoleum (you must first lay sheets of plasterboard), lining or chipboard (in this case, you need to equip logs and make lathing so as not to violate the integrity of the heating elements). |
| Liquid electric | The pipeline containing the heating cable is laid on a pre-prepared base. Next, the pipeline is filled with propylene glycol, which does not circulate, but is heated by an electric cable and releases thermal energy. The cable is connected to the electrical network. |
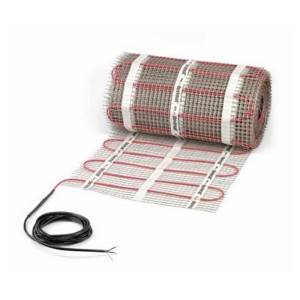
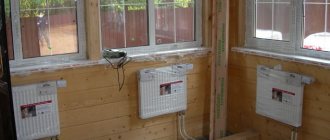
Heating mat
Heating cable
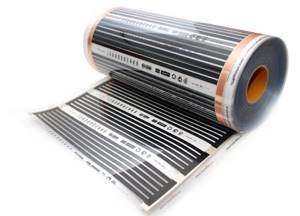
Infrared film
Important! If the country house does not have a solid or liquid fuel stove, then preference is given to electric heating systems. They are more economical than the same air heaters.
Choosing a heated floor system for a summer house
Prices for DEVI heated floors
Warm floors DEVI
If the house is not in use, the heating can be turned off. To achieve an acceptable temperature, it takes about 2 days , and therefore it is better to turn on the warm floor in advance, before your arrival at the site.
On a note! If there are frequent power outages, it is better to equip a liquid circuit from the heating boiler. In this case, the pipes are laid at an angle and the circulation pump is not used in the dacha. The return pipe must be sloping towards the boiler. As a result, the coolant will circulate due to gravity. In addition, preference should be given to long-burning stoves so that the coolant does not heat up too much.
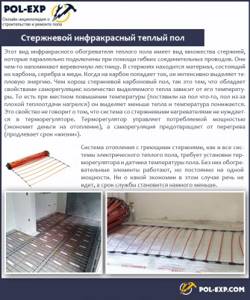
Rod infrared heated floor
"Warm floor" on a concrete base
For the liquid floor line and for the cable sections, it is necessary to provide a fastening system. The best option is reinforced mesh. It is necessary if the system is subsequently covered with screed or tile adhesive.
The floor line to the mesh is reinforced with tapes with reverse teeth. Staples, a stapler, and mounting tapes with locks are used as fastening elements.
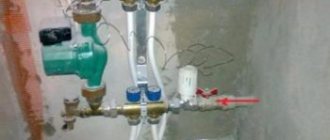
- The ends of the liquid line are connected to the distribution comb. Pipes lead from it to the heat exchanger, which is located in the firebox. The cable is connected to the thermostat.
- No fastenings are needed for cable and carbon mats. They are produced in rolls. The rolls are rolled out over a heated area. If it is necessary to rotate the cable mat, then the mesh is cut. The conductor remains intact. The system can be rotated at any angle. To rotate the carbon mats, the connecting wire is cut. The integrity of the rods is not violated.
- The thermal film is cut along the dotted lines, forming sheets of a certain length. The distance between the sheets should be 1 cm. Secure the tape to the base with tape.
- Mats and sheets of thermal film are connected in a parallel way.
- A temperature sensor is placed on the surface of the electric floor. A niche is being created for him.
- Connect the electrical wires from the “warm floor” and the temperature sensor to the regulator.
Cold areas are left under the furniture. The distance between the turns of the cable section is 10-15 cm. The temperature regulator is installed on the wall, at a height of 40-70 cm. The sensor is placed at a distance of 30 cm from the border of the heated surface.
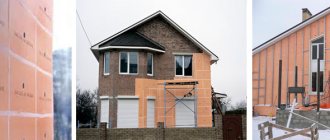
Rules for preparing a country house
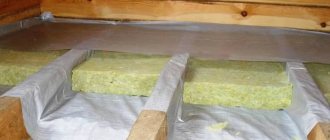
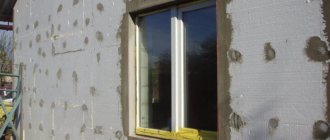
Regardless of the presence or absence of heating, it is advisable to insulate the country house in any case. Moreover, it is necessary to insulate not only the floor, walls, but also the roof. Thanks to this, the house will remain warm in winter and cool in summer.
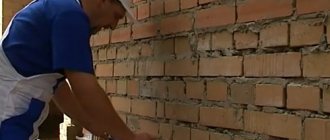
- The rough foundation must be prepared for installation of a heated floor. If the floor is not insulated, it must be opened and covered with crushed stone and expanded clay in a layer of about 30 cm.
- Next, membrane waterproofing is laid and insulation is laid (thickness - 20 cm).
- A 5 cm cement screed is poured.
- A special moisture-repellent impregnation is applied over the screed.
- It is also important to place damper tape around the perimeter of the floor on the walls.
- The underfloor heating cable must be laid on a previously laid reflective screen.
- Next, the heated floor is installed directly.
- At the end, a screed . If the heated floor is liquid, then it is 80 mm thick, and if it is mats or cable, then it is 50 mm. As for IR film, it does not require a screed.

Warm floor on a concrete base
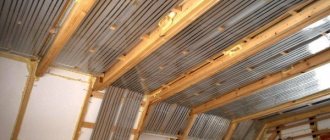
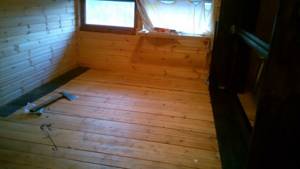
Note! Wooden floors are laid over lathing between the joists. Preparation is carried out in the same way as described above, but instead of screed, the heating elements are covered with cement-fiber boards or plasterboard.
Heating on a wooden floor
The system is mounted on a foil backing, and a wooden sheathing is made on top. Infrared film can be laid directly on a wooden floor.
Prices for heated floors REHAU
Warm floors REHAU
Heating on a wooden floor
When working with wood flooring, you should always remember that the heating elements are located below the floor surface. There are several installation methods:
- the pipeline or cable sections are routed between the lags on the surface of the gypsum plasterboard; to pass the elements through the logs, holes are made; they install corrugated tubes or insulation for pipes;
- if the floor is made of boards, then a contour is drawn on the surface; For this purpose, a wall chaser is used; foil material is placed in the grooves;
- make the contour from plywood or lining; distance between workpieces 50 mm; metal thermal distribution plates are installed in the resulting niches; reflective material is placed in them;
- Thermal film is installed on a wooden floor without preliminary preparation;
- instead of concrete screed, wooden sheathing or sheets of plasterboard are used; the cladding is laid on a clean dry screed; laminate, linoleum; I'll have to give up the tiles.
We recommend: How is the length of a heated floor pipe calculated?
When installing underfloor heating in a country house, it is necessary to provide an optimal source of energy. If possible, use a liquid line. The pipeline is filled with antifreeze. It doesn't freeze. Additionally, a circuit for DHW is output. Electric heating is provided if there are no power outages.
YouTube responded with an error: The request cannot be completed because you have exceeded your quota.
- Related Posts
- How to check a heated floor?
- What is the diagram of a heated floor mixing unit?
- How to lay Ononor heated flooring?
- Features of Legrand heated floors
- How to install electric heated floors under tiles?
- How much does underfloor heating cost?
Basic rules for self-installation of heated floors
If you intend to install an electric heated floor in your dacha yourself, then, in addition to preparation, you should also read the installation instructions (it should be included with the equipment), which contains all the necessary information - both directly about installation and about subsequent operation systems.
Important! If you make the slightest mistake during installation, the system may not function properly because of this. As a result, such problems can be eliminated only after breaking the screed layer. Obviously, after eliminating the defects, the finishing coating will have to be re-arranged.
Here are the basic rules, following which you can avoid these problems .

Range of film products
- The area to be heated is calculated in advance. Based on these calculations, one or another system is rationally selected.
- Heating elements cannot be placed under pieces of furniture that do not have high legs. Moreover, IR film floors are installed exclusively in open spaces where there is no furniture.
- It is important to carefully level the base before installation and then dry it thoroughly.
- It is prohibited to lengthen or shorten the heating cable; it is prohibited to cut it or carry out other manipulations not specified by the manufacturer.
- Finally, the system can be turned on only after the screed has completely dried. As a rule, this requires at least 28 days.
Film placement diagram
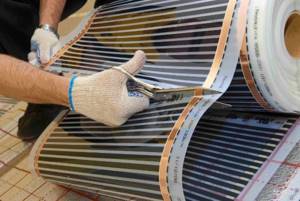
Material cutting
If tiles are used as the finishing coating, then it is better to use a cable heated floor - it is the cheapest and best suited for this situation.
You need to take care in advance about the place where the thermostat will be installed. Make a groove for laying electrical wiring and temperature sensor tubes. The mounting ends will also be output here. Next, you need to level the floor, remove all debris and dust, then apply a layer of primer. However, we have already talked about the main stages of preparation in the previous paragraph of the article.
Here are a few more things to keep in mind.
- Electrical resistance in the network must be checked.
- The cable must be laid with tension, but without significant effort.
- The permissible bending should also be taken into account.
- If you come across straight sections of the highway, then you need to use special couplings on them.
- It is also impossible for the turns to touch or intersect.
At the end, a thermostat is installed and the system is connected to the mains. The temperature sensor is installed using a corrugated tube - for the convenience of further repairs, it is placed between the turns.
After making all the connections, check for damage to the system, measure the resistance in different areas and compare the obtained values with the numbers in the manufacturer's instructions. After the screed has dried, perform a test run of the system.
Prices for heated floors "Teplolux"
Warm floors Teplolux
Video - About film IR warm field in a frame building
Heating mat
Fiberglass heating mats, which are equipped with a heating cable system, are also popular among consumers. The advantage of such products is their ease of installation, because their installation does not require such a labor-intensive procedure as additional pouring of concrete. The system is fixed in a layer of adhesive composition designed to fix the tiles. Thanks to this, the final layer of screed does not exceed three centimeters.

Heating mat
The devices are sold in rolls, which makes installation of the system easier. The technical characteristics of such products are exactly the same as in the case of prefabricated heating cable systems.
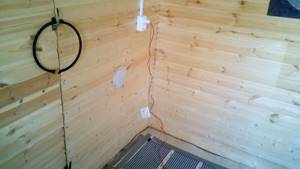
Step-by-step instructions for installing a heated floor system
Let's look at the installation process using the example of laying a Caleo Line heated film floor. The example also uses a 3mm reflective substrate and regular plastic film. In our example, there was nowhere to take the furniture out, so the author had to drag it around the room. Well, let's get straight to the workflow.
Step 1. The author began, as mentioned above, with manipulations with pieces of furniture.
You should start with furniture
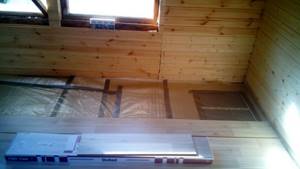
Step 2. Then all debris and dust had to be removed from the floor (otherwise they could push through the film heating elements in the future). You definitely can’t do without a vacuum cleaner here.
The floor needs to be cleared of debris
Step 3. All things were moved to one half of the room, while work was carried out in the other.

All things are moved to one half of the room
Step 4. Next, the tapes of the film floor itself were rolled out. It is recommended to start from the connection side.
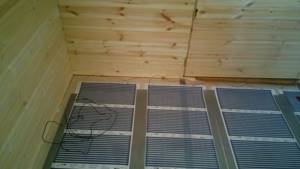
Laying film heated floors
Step 5. The film was attached to the substrate using adhesive tape (regular reinforced tape was used). Also in the photo you can see the already installed thermal sensor.
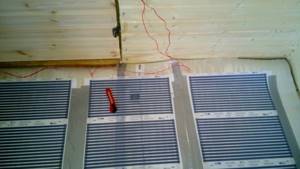
The film is secured with tape
Step 6. The author had to cover the floor with film in parts, as can be seen in the photo.
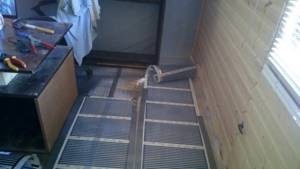
Laying process
Step 7. Another fragment is glued. Care must be taken not to damage the infrared film while working.

Avoid damaging the heating elements
Step 8. After completing the installation of the film, the functionality of the system was checked - the latter was connected for a while.
System health check
Step 8. After this, plastic film was laid, which was also secured with tape.
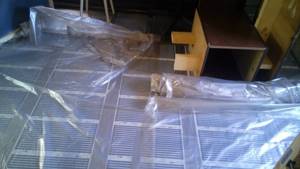
The floor is covered with film
Step 9. Next, the finishing floor covering was laid (in our example, laminate). Here are the first 4 rows of lamellas laid.
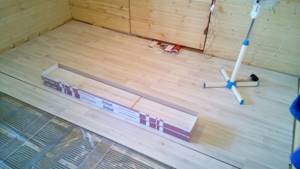
Laying of laminate flooring has begun
Step 10. The installation process continued and now we have smoothly come to the end.
Laminate installation process
Step 11. Last row left. As is usually the case, it had to be cut up.
Last row laid
Step 12. This row was the most difficult, it took a lot of time and effort.

The last row is the hardest
Step 13. As a result, a small insert came out, but it would not have existed if the area of the room had been at least 50 mm larger.
Perhaps this insertion would not have been necessary
The advantage of the system is that the floor warms up evenly and quickly (in an hour the temperature rose by about 15 degrees, but it was warm outside). Also, heat goes from bottom to top, that is, the entire volume of the room is heated.
Calculator for calculating the number of laminate boards per room
Go to calculations
Prices for Tarkett laminate
Tarquette laminate
Real heating with electric floors
The most reasonable option for heating a house with an electric floor is to use a cable electric floor. In this option, you have the opportunity to supply much more electrical power to the heating device and, accordingly, receive greater thermal output.
Naturally, all equipment and controllers in this option must be used with a higher maximum power.