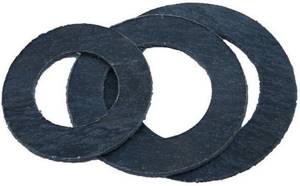
To create reliable sealed joints between sections of heating radiators, various types of gaskets are used. The element must have a number of specific properties that ensure safe service for a certain time.
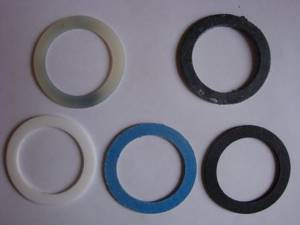
Intersectional seals for batteries are made from different materials.
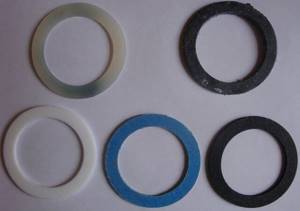
Types of sealing gaskets
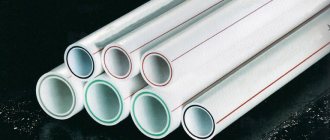
On the modern market you can purchase a gasket for a heating radiator of absolutely any type - made of cast iron, aluminum or bimetal.
Depending on the material of manufacture, the following types of products are distinguished:
- Silicone gaskets
. Such products are resistant to high coolant temperatures and well compensate for the thermal expansion of the metal. Such gaskets are used, as a rule, in autonomous heating systems with low operating pressure. - Paronite products
. They are made from pressed rubber containing asbestos and special powder. Such gaskets are used in radiators connected to a centralized heating system, where the temperature of the coolant can rise to 90-100 ℃. Paronite gaskets are suitable for cast iron heating radiators, as well as for aluminum and bimetallic products. - Fluoroplastic gaskets
. This type of product is made from heat-resistant plastic. They are intended for installation on bimetallic and aluminum radiators, without prior lubrication. They are characterized by high heat resistance, resistance to aggressive factors and pressure changes. - Cardboard gaskets
impregnated with oil paint for durability are used for aluminum and bimetallic radiators in autonomous heating systems. The production of products is regulated by GOST No. 9347-74.
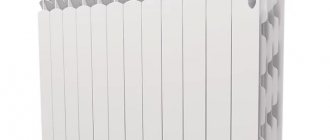
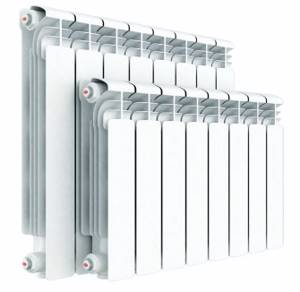
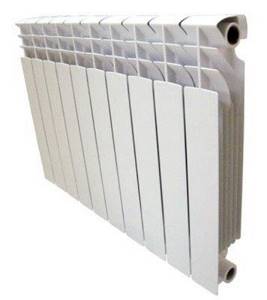
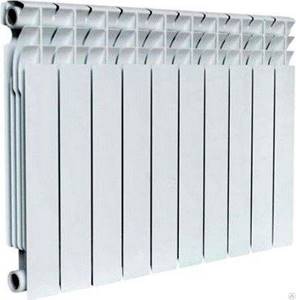
Aluminum radiators Rifar
Aluminum radiators manufactured by Rifar, which have the most advanced performance among their analogues, also have remarkable design features. The structure of the vertical channel and the 2.8 mm thick wall allow them to withstand pressures of up to 20 atmospheres. This is their main difference from other brands of aluminum radiators.
Aluminum radiators Rifar
For free flow of coolant, they have reduced hydraulic resistance. With such radiators, even non-freezing liquids can be used as a coolant. A yellow sticker is placed on such radiators, which lists the main types of coolants suitable for use. The service life of Rifar aluminum radiators ranges from 10 to 25 years.
Radiator gasket selection process
When deciding which gaskets to use for heating, you need to take into account not only the material from which they are made, but also the size.
The size of the product is determined by the following indicators:
- internal section of the gasket (d);
- outer diameter (D);
- product thickness (s).
It is worth noting that the internal cross-section of the intersection gasket for the radiator must completely coincide with the size of the inlet hole on the radiator section. It is also desirable that the edges of the gaskets do not extend beyond the section - otherwise, coolant leakage may occur in these places.
Independent installation of sections
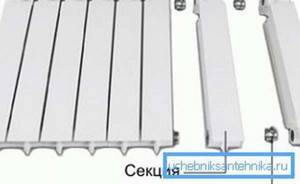
Often there is a need to add or replace some sections in the battery. Mark in advance which specific segments need to be replaced and prepare the tools.
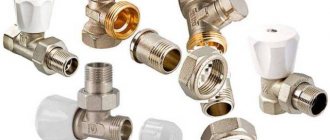
You will need a radiator key, nipples and gaskets (hollow elements with left or right double-sided threads).
- Lay out the sections on a flat surface (preferably on the floor) with the front side facing you.
- Remove the end holes from the plugs.
- Place the gasket on the part of the nipple where there are no threads.
- Carefully screw the nipple two or three turns into the manifold.
- Using light pressure, align the nut with the hole of the attached segment.
- Use a wrench to tighten the nipple. The multi-directional thread will tighten both sections of the battery. When tightened correctly, the gasket will reliably compress at the joint to the required limit.
- The lower and upper nuts must be tightened to the same number of turns in turn. Then you will avoid distortions.
- Before installing the radiator into the heating system, make sure that the joints are tightly sealed by running water from a hose into the radiator. The joints must be dry.
Manufacturing methods
The shape of gaskets for cast iron batteries can be flat or convex. They are used for different types of structures.
In particular, flat sealing elements are made from sheet materials such as plastic, rubber, paronite or leather. In their production, methods such as cutting with a stamp or punching knives, as well as cutting with a laser or circular knives are used.
The convex gasket for cast iron radiators and any other metal types of batteries is produced using thermoforming from polyvinyl chloride, as well as by vulcanizing raw silicone or rubber.
All about aluminum radiators
Advantages of aluminum radiators:
— aluminum radiators have very good heat transfer.
— aluminum radiators have a low weight (the weight of one section without water is about one kg), which makes installation easier.
— aluminum radiators have an attractive design and therefore consumers often choose aluminum radiators.
The most common models of aluminum radiators are with center-to-center (center-to-center) distances of 500 mm and 350 mm (there are also options with center-to-center distances of 200, 400, 600, 700, 800 mm, etc.). The required length of an aluminum radiator and, accordingly, its power is “gained” (added) from individual sections, which allows you to quite accurately select the parameters required for heating a particular room.
To connect aluminum radiators to the heating system, you need an installation kit, which includes: from 2 to 4 brackets, a Mayevsky valve (manual air bleed valve), passage plugs (adapters) of various diameters (1/2 inch or ¾ inch) and directionality (left or right) and blind plugs (plugs).
At the customer’s request, ball valves/valves can be installed on the coolant supply and/or discharge pipes (for dismantling the radiator or for emergency disconnection from the heating system), as well as thermostatic valves with thermal heads (for maintaining the set temperature in the room).
There are two technologies for the production of aluminum radiators:
— cast (each section is cast as a single piece to which the bottom parts are welded).
- extrusion - produced by extrusion. During extrusion, an aluminum alloy is pressed through steel plates with holes of a certain shape and cross-section (extruders), resulting in long profiles of a certain shape. After cooling, the resulting blanks are cut to the size of the radiator, after which the bottom and top parts are welded.
Cutting blanks using the stamping method
In the process of work, special stamps are used, that is, special devices precisely adjusted to the required size and consisting of several elements. In addition, a press is used to cut out blanks, on which a stamp is installed.
Before starting production, it is necessary to take into account the dimensions of future gaskets - for large products you will need a more massive stamp and a powerful press.
It is worth noting that this method of manufacturing sealing gaskets is considered cheap and highly productive. Due to this, it is used for mass production.
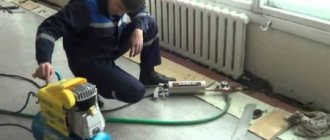
Dismantling the heating radiator
Checking, cleaning and repairing the battery is possible only after removing the product from the wall .
The low weight of aluminum radiators allows even one person to easily, but carefully, disconnect the structure from the pipes and remove it from the brackets . But this needs to be done step by step:
- Stop coolant circulation and relieve pressure.
- During the heating season, wait until the radiator cools down completely. The structure is disconnected from the pipe system by removing the couplings at the inlet and outlet.
- The coupling is moved away from the section along the pipe, and the battery is removed from the holders.
- Completely drain the water remaining inside. The structure is placed on the prepared fabric with the outer side up.
- Take out the filter and wash it with water and soapy water.
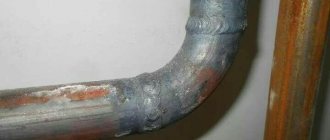
The next stage of installation will be disassembling the radiator into its components . The most important point is the correct disconnection of the nipple. When the part is unscrewed, the section for which it is responsible begins to smoothly move apart.
Often the manufacturer indicates the direction of the thread - D (right side) or S (left side) . You need to start unscrewing it with a key carefully and slowly. If the torsion is too strong and incorrect, it is easy to break the thread not only on the nipple, but also on the battery itself.
Attention! As soon as the nipple has turned half a turn , you need to move to the nut on the other side of the section. Gradual weakening on both sides will protect the section from failure and possible mechanical damage.
After disassembling the sections, you need to remove and wash the metal gaskets . In case of severe damage, it is recommended to purchase spare parts. Silicone gaskets must be changed after disassembling the battery.
Cleaning at home
Clean the radiator from accumulated dirt after the end of the heating season.
Professional cleaning devices are not easy to obtain, and they are expensive.
In the bathtub, the structure is washed as follows:
- Using hot water. From one side, pour water using a funnel, or by unscrewing the nozzle from the shower hose. When the battery is full, shake it. If it is too heavy, then the structure is slowly turned over. Both plugs must be open to allow dirty water to flow out freely. You need to repeat the procedure several times.
- Using a cleaning product. The radiator is filled with a solution from a cleaning agent, after installing the plugs. For the procedure, use citric acid diluted in water. Leave the device for several hours so that the cleaning solution removes all dirt. If there is no citric acid, use a universal cleaner or liquid to remove rust and heavy dirt.
- Final rinse. After 2 - 3 hours, knock on the battery with a plastic or rubber hammer to remove large pieces of rust and other dirt from the inner walls. After this, wash out the cleaning agent until its traces are completely eliminated (if a soap composition is used, wash until any remaining foam disappears).
When choosing a cleaning agent, you should remember that aluminum “does not tolerate” alkaline compounds , but reacts well to acids.
What to do during assembly
The radiator is assembled starting with checking all the parts . Particular attention must be paid to this, since missing one small element can lead to malfunction of the entire structure.
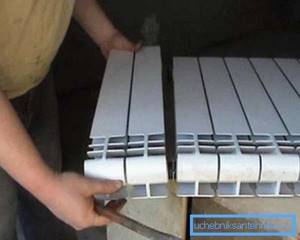
Photo 1. The process of assembling an aluminum radiator. In order to assemble the device, a special key is required.
Exact battery assembly plan:
- First, check the condition of all connecting elements . They should not have chips, cracks or other damage.
- Before assembly, the nipple is screwed in and out several times.
- Checking section joints. If paint is present, remove it with medium-grit sandpaper.
- The glued silicone gaskets are removed with a sharp knife (they become visible after removing the paint).
- Metal gaskets are washed with soapy water.
- Then put the nipple on the section , but without twisting it. After this, tighten the silicone gaskets.
- On the other side of the nipple, attach the next section so that it fits tightly to the junction.
- with a wrench 2 times. Screw the part on the other side in the same way.
- The nipples are tightened using a lever , but without unnecessary effort, so as not to damage the thread.
- Repeat the steps with other sections.
Sometimes during the repair process, leaks are discovered and sealed with a special agent.
Fighting holes: how to seal them
When replacing the gasket, in some cases cracks and holes are found that need to be repaired. For this, epoxy glue is used. The leak area should first be cleared of plaque and paint.
Important! To clean the inside of the pipe in the damaged area, use a metal cable .
Epoxy glue is applied on top of the damaged area and a thin strip of fiberglass is applied. A second layer of material is glued on top. The procedure is completed by installing a metal clamp.
Photo 2. Epoxy adhesive Moment from the manufacturer Henkel. They can be used to seal holes in a heating radiator.
Application of punching knives
The operating principle of this method is similar to die cutting, but in this case a simpler and less expensive tool is used. The production of seals in this way is inexpensive and quite fast. However, the pants are quite short-lived, so this technique is used for the production of small and medium-sized batches of gaskets.
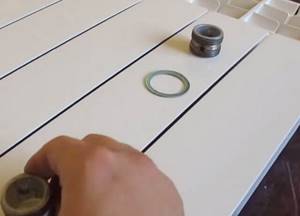
Installation and replacement
Under the traffic jam
How to install a gasket under the radiator cap of an aluminum battery with your own hands?
- Lubricate the end of the section collector and the plane of the plug with any neutral lubricant. Silicone plumbing grease, grease and even liquid soap will do.
- Place the gasket onto the threads of the plug.
- Tighten the plug with an open-end or adjustable wrench. The paronite tightens until the force becomes noticeable (but by no means insurmountable: you risk breaking the pipe threads in the section manifold). The silicone is pulled until the edges are visible squeezing out from under the cork.
Cutting with circular knives
Only large round seals can be produced using this method. In the process of work you will need fairly cheap and high-performance equipment. Cutting is carried out with standard blades. Therefore, the production of gaskets of this type can be carried out independently and in any volume. Radiator leaks are often caused by a damaged gasket. And if you don’t know what to do if the heating battery leaks, first of all you should pay attention to the gaskets.
Accessories for heating radiators. Installation and features
The principle of connecting different types of heating batteries is almost the same, but they differ in the equipment used for this. Accessories for radiators are offered for sale individually, as well as in sets, which contain all the products required to connect one battery.
Popular types of heating radiators
In the vast majority of apartments and houses you can find 4 types of heating batteries:
- Cast iron.
- Aluminum.
- Bimetallic.
- Steel.
There are also plastic and copper radiators, but they are practically not used. Each type of popular battery type has its own specific performance characteristics and connection method. The only exceptions are aluminum and bimetallic radiators, the connection principle of which is identical, as are the components used for this.
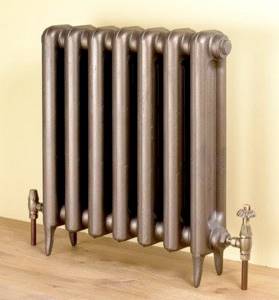
Cast iron batteries
Heating radiators of this type have been widely used in the past due to their high resistance to corrosion and oxidation. Despite their massiveness and high cost, they are still relevant today. The fact is that in central heating systems the circulating coolant is too contaminated, so batteries made of other materials wear out in just a couple of years.
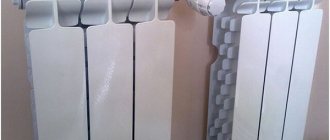
Aluminum radiators
Such batteries have an attractive appearance. Aluminum has high thermal conductivity, which means it heats up the air in the room faster. A huge disadvantage of such batteries is their high sensitivity to the chemical composition of the coolant. In this regard, they are completely unsuitable when connected to a central water supply. They are chosen only when an autonomous heat supply is being installed, since it is possible to control the quality of the fluid circulating in the system.
Bimetallic radiators
Batteries of this type have high heat transfer because they contain aluminum. They are very durable and have a long service life. They have a higher cost, which significantly reduces the popularity of this type of radiator.
Steel radiators
Steel batteries, unlike all previous varieties, are not collapsible. They do not consist of sections that can be removed and added at will. Typically, such radiators are of a panel type. Outwardly they look like a rectangular box. They can often be found in office buildings, as well as in residential buildings and apartments. Since panel systems are not dismountable, manufacturers often install on them all the necessary components for radiators from the factory.
Thermal molding
In this case, you will need an injection molding machine with a mold for casting products. The cost of a molding press is quite high, so in order to make production economically feasible, the production of gaskets using this method must be large-scale or even mass-produced.
The production of products in small batches using this technology is relevant only if they cannot be produced in any other way. It is noteworthy that only PVC seals are produced by thermoforming.
Wise choice of seals
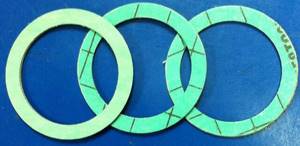
Seals come in different sizes.
To install batteries in a private house or apartment, experts advise purchasing silicone or paronite seals. It is not advisable to make gaskets with your own hands, especially from scrap materials.
This can lead to rapid depressurization of the joints. Spend a tiny amount on finished products, especially since the price will definitely not hurt your wallet.
Products have certain sizes. This is both the thickness and diameter of the outer and inner circle. Make sure that the diameters of the rings and the outlet holes of the pipes match.
Note! A seal with a reserve, whose edges protrude too much, will soon become unusable. Therefore, take strictly according to size. The thickness of the inserts for cast iron batteries is 1.5-2 mm, for bimetallic and aluminum batteries – from 1 to 2 mm.
Video: how to paint a radiator
Sealing the liner on a heating radiator is an issue that is relevant both when installing new equipment and when urgently replacing a connection that has leaked. In order to install the system efficiently and protect your home for the next 20 years, you need to approach the choice of sealant with all responsibility. Let's figure out what the plumbing market offers for heating radiators.
What are we compacting?
A fitting or threaded fitting is a connecting element between the battery and heating pipes. It is the futorka, despite its insignificant appearance, that is the key link in the heating system of a house or apartment. Comfort and comfort will depend on how you seal the threaded connection with the fitting.
A fitting is a nut or bushing with external and external threads for connecting to pipes of different diameters.
When do we compact?
Typically, footers are sold together with gaskets - rubber, paper, paronite, silicone. In theory, the gaskets should help seal the threads and protect against leaks. In fact, they are practically useless. So, only a professional can make a seal with a silicone gasket. When tightened, this material tends to “come out” of the thread and you have to unscrew and reassemble the connection several times. Rubber gaskets work until the first pressure surge; they often tear and, as a result, allow water to pass through.
Our advice is to get rid of the gaskets that come with the footer and replace them with a stronger “product”. Forewarned is forearmed. Make a connection immediately and forever.
What types of radiators are there and how do they differ?
By design, all hydraulic heating devices can be divided into four main types: sectional, panel, tubular (this includes heated towel rails) and convectors.
In most cases, the design of such radiators consists of vertically arranged curved steel tubes connecting the upper and lower collectors. It is worth noting that steel tubular radiators are usually the most expensive type of radiator (in terms of 1 kW).
Convectors (or plate heaters)
A convector, figuratively speaking, is one or several pipes (through which the coolant moves) with metal “ribs-plates” “put on” them. The air passes through the convector from bottom to top, heating up from numerous warm fins.
Such heating pipes are usually made of steel or copper. In some convectors, the amount of heat flow is regulated by a special damper, by opening or closing which you can increase or decrease the flow of moving heated air. The design of the convector can be completely open or closed with a decorative casing (in wall-mounted and baseboard versions). Convectors built into the floor are covered with a decorative grille.