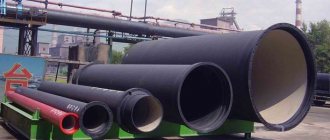
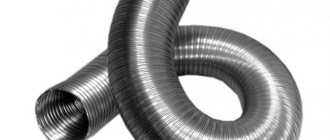
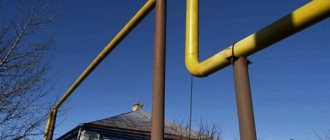
The distance from the house to the gas pipe (gas pipeline) is the distance necessary for the safety of the structure, which is selected, depending on several components, according to the standards. The installation method, the level of safety of the gas pipeline, the delivery system and the pressure under which the liquid fuel is supplied all play a role. Determination of the required distance from a residential building on the site to the gas pipe is provided for in SNiP 42-01-2002 in relation to the pressure of the supplied raw material: low, medium or high. The regulatory document entitled “Gas distribution systems” provides the necessary conditions aimed at various situations.
Near the city
Reasons for moving gas pipes in the kitchen
All work on moving and replacing metal pipes, especially those requiring welding, is carried out by representatives of Gorgaz or another authorized organization. Having received an application from residents, they are always interested in the reasons for the planned transformations.
Most often, it is necessary to change the piping in the kitchen without changing the layout or moving equipment to other rooms.
The reasons may be different:
- replacing old equipment - purchasing a gas water heater, stove or boiler - which requires a little more space;
- major renovation in the kitchen;
- moving the gas stove from the window 0.5-2 m towards the sink;
- changing the installation location of the gas meter;
- moving a horizontal pipe from a great height under a table top, etc.
Often, the relocation of pipes is required in new buildings, where the original location of significant kitchen objects defies logic and explanation: suppose, if in a 15-meter kitchen the gas stove is located near the window, the sink is in the opposite corner, and the hood is on the other side, above the entrance to the kitchen.
We have to correct the design mistakes and move the stove closer to the sink so that food can be cooked in comfortable conditions.
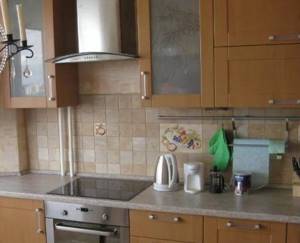
It is strictly forbidden to carry out work to move the gas riser. The only change allowed is to disguise the pipes with easily dismantled structures, for example, wall-mounted kitchen cabinets
The most common reason is the purchase of a new kitchen set with built-in equipment (oven and hob). In this case, the pipes need to be either shortened or lengthened, depending on the planned installation location of the devices.
If you want to find out how best to move a gas pipe in an apartment with redevelopment, we recommend contacting a design organization to draw up a transfer plan.
The fact is that in typical city apartments it is prohibited to reinstall risers, pipes, as well as any gas equipment in living rooms, and even to combine a kitchen and a room, permission is also required.
Gas installation work in the apartment
Features of installation work with gas pipes in an apartment building
The beginning of work will be related to the answer to the question: what equipment will the system service. After this, only specialists have the right to carry out design work taking into account the wishes of the customer and the actual conditions of the apartment layout.
Important! Making changes to the existing gas supply system of an apartment building is spontaneously prohibited at the legislative level.
The customer must provide, in addition to technical documents, the following information:
- what will be connected to the gas pipeline: gas stove, water heater, individual heating system, water heating devices. The quantity is indicated and technical passports are provided;
- hypothetical options for the location of all connected devices;
- information about changes made to the gas pipeline in neighbors’ apartments, the depth of the pipeline;
- wishes about the level of installation and accessibility of all components (protection of access for children, animals).
When planning to install gas pipes in a private apartment, you need to remember that:
- gas pipes are not installed in living rooms;
- It is impossible to decorate the pipeline with any structure that cannot be quickly dismantled. It should always be freely accessible;
- The ventilation system should not be common to the entire apartment. In a room with gas pipes, an autonomous one is provided;
- Where devices are located, it is necessary to provide fire protection measures, for example, covering the wall with non-flammable plaster.
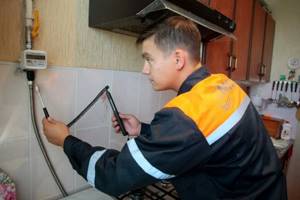
Checking the quality of work
Features and methods of connecting a gas pipeline
Safety requirements for the use of gas equipment for domestic purposes require the installation of only metal gas pipes. Alas, modern technologies for the production of metal-plastic and polypropylene pipes are not yet able to ensure reliable connection of joints. In apartments and private houses, when laying gas pipelines, companies offer only one method of connecting metal pipes - gas welding. But this method has significant drawbacks - the work requires bulky equipment in the form of cylinders and hoses, the work is usually accompanied by a large amount of heat and soot, welding occurs with open gas combustion. Well, in the autumn-winter period, working with cylinders indoors is very dangerous due to the threat of explosion from temperature changes.
An alternative could be called a threaded connection, but it requires a very precise fit of all the parts being connected. So, only connections at the gas meter and tap will fit onto the connections and couplings. So it turns out that welding gas pipes in an apartment is the only permitted method of connecting all sections.
The process itself consists of several separate operations:
- Insertion into the gas pipe of the main pipeline;
- Welding of gas pipes in certain areas;
- Connecting sections of prepared threads and pipelines for connecting devices;
- Connection when increasing the length of the pipeline.
A special feature here is the small pipe diameter of 15-20-25 mm and the need to make the highest quality seam during work, since special requirements are imposed on the joints.
For laying internal gas communications, steel seam and seamless pipes are used. The diameter of the pipes must correspond to the gasification project of the premises. The project also indicates the laying route, indicating the tie-in points into the main pipeline, the installation points of the meter and taps.
For welding metal pipes the following are used:
- Gas welding machines;
- Tig welding machines;
- Inverter or transformer electric welding machines;
- MIG/MAG welding machines.
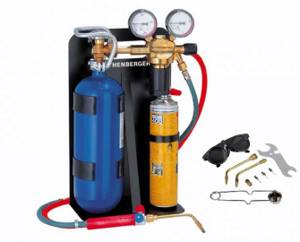
During the work, auxiliary equipment is also used:
- Grinders for cutting metal;
- Vise;
- Threading tool;
- Measuring tool;
- A hammer drill for attaching brackets to walls.
A welder must have a protective mask and a canvas welding suit. Consumables are selected according to the type of tool; it can be welding wire with flux, an argon cylinder, welding electrodes of different brands.
How much it costs to prepare for the work, you can ask companies that provide similar services, where you can also find out how to cut into a gas pipe without welding and whether the company has the opportunity to make such a cut.
Obtaining approval for gas pipeline replacement
Whether a transfer is possible or not can only be decided by authorized bodies, that is, the gas service of your city (district). Only a qualified specialist has the right to carry out any dismantling and installation work. Of course, pipes cannot be moved without approval.
The permit is issued in the following sequence:
- Find out the contact details of the gas service at the place of registration, contact specialists, explain the situation, and consult.
- You draw up an application (using a standard form) that will “launch” the approval process.
- Based on your application, a gas service representative will arrive at your home. The time will be confirmed in advance.
- The specialist performs an inspection, listens to wishes, and answers questions. Often at this stage it is necessary to change plans, since the desired transfer does not meet safety requirements (a preliminary study of the gas pipeline installation standards will eliminate this unpleasant moment).
- Approval of the final transfer scheme, drawing up an estimate. All documents are prepared by the organization providing the services. No work will be carried out without the consent of the property owner.
- If the transfer conditions are met, pay for the service using a receipt and agree on the start time of the work.
The approval procedure usually takes several days; it can drag on for a long period for only one reason: if the property owners and representatives of the gas service have not found a compromise solution.
Any factors that violate the installation standards for gas stoves (boilers, meters, water heaters) may cause refusal to move pipes.
Sink installation
| Name of the type of work | Unit change | Cost, rub. |
| Sink installation | PC. | 650 |
| Installation of a mortise sink | PC. | 650 |
| Installation of a stainless steel sink | PC. | 650 |
| Installation of an overhead sink | PC. | 650 |
| Installation of an artificial stone sink | PC. | 800 |
| Installing a glass sink with mixer tap | PC. | 1950 |
| Dismantling the sink | PC. | 550 |
| Removing the underframe with sink | PC. | 750 |
Question about a private house
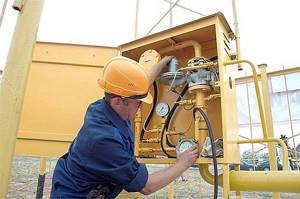
To lay a gas pipe in the kitchen of a private house, you also need to know the standards. To begin with, gasification here begins with notification of the local gas organization and the planned work. It provides a technological condition that determines the algorithm for constructing a gas pipeline. The technical issue is being resolved. A personal development for gasification of a certain area is created. Also, a warrant for the installation of a gas pipeline is issued by the traffic police.
If neighboring houses are already provided with gas, you only need to connect the pipes in a specific area to the main network. The working pressure factor is also important here. Its parameter in the main pipes determines the choice of pipes to pass into the house.
The preferred gas source determines the gas supply technology: centralized or autonomous.
Gas pipelines can also run to private homes underground or above it.
And the standards for installing pipes to the kitchen in a private house are identical to the points in the housing issue.
General standards
First, it’s worth finding out under what circumstances gas pipes are used in the kitchen. The use of blue fuel in such a room most often means installing a stove. It's time to familiarize yourself with the terms of use. So, remember the main postulates:
- gas stoves are allowed to be installed in kitchens with a height of 2.2 meters (if the ceiling in the room is sloped, then to install the stove you should choose a place where it reaches the established norm);
- the kitchen should be equipped with a window with a window so that during the day repair work can be carried out without artificial lighting, ventilating the room (the presence of a functioning ventilation duct is welcome);
- between the slab and the opposite wall there must certainly be a passage with a width of 1 meter;
- ceilings and walls made of materials prone to combustion, according to standards, must be covered with plaster;
- The stove can be used in kitchens separated from the corridor by a secure wall/partition and door;
- The installation of gas pipes in the kitchen should be done so that the distance between the walls and the stove is at least 7 centimeters;
- branching to the slab is allowed only at the level of the connecting fitting;
- the shut-off valve should be installed at a level of 1.5 meters from the floor and at a distance of 20 centimeters from the side of the stove;
- To install the stove, it is permissible to use a special (heat-resistant - from 120 degrees) flexible hose and do not forget to change it, based on the recommendations specified in the product data sheet.
The standards for handling mainly already installed pipes and devices connected to them are indicated. If you plan to change, move, or even cut the gas pipe in the kitchen, then move on.
Which pipes to choose
*
The choice of pipes for gas pipelines in residential buildings of any type is limited by guests and gas tightness and resistance to mechanical damage are taken into account. These can be steel or copper pipes. In some cases, internal wiring between devices is permitted through the use of reinforced vulcanized rubber tubes or certified flexible hoses.
The gas pipeline inside the house belongs to a system with a pressure of up to 0.05 Pa, which is classified as low. Such systems are serviced by general-purpose pipes, classified as straight-seam electric welded pipes. When choosing a pipe, they are guided by the following parameters:
- external and nominal (internal) diameter. This value depends on the specifics of the project, and not on the type of pipe;
- selection of the optimal type of connection, which is considered welded. Both copper and steel pipes are suitable for this. In places where shut-off valves, gas and instrumentation devices are installed, flange, threaded connections, or couplings are allowed;
- copper pipes can be connected using press fittings;
- Copper products are more expensive, but have better anti-corrosion properties than steel ones. They have a more aesthetic appearance even when unpainted.
Important! Installing plastic pipes indoors is not only illegal, but also dangerous: the connection of the elements of the gas pipe system may become leaky when the building shrinks, and the action of ultraviolet radiation destroys the plastic.
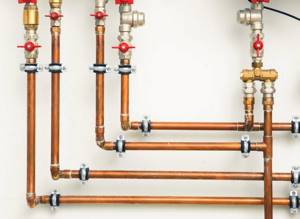
Gas pipes
Pipe diameter
Recommended pipe parameters are presented in the table
| Common name | Designation | External diameter, mm | Internal diameter, mm |
| An inch and a quarter | 1 1/4 | 42,3 | 32 |
| Inch | 1 | 33,5 | 25 |
| Three-quarter | 3/4 | 26,8 | 20 |
| Half-inch | 1/2 | 21,3 | 15 |
These values are suitable for low pressure gas systems, and therefore for installation in a private house and apartment.
For a private house, the pipe diameter is calculated taking into account the following indicators:
- total amount of gas consumption;
- number of devices;
- type of heating system;
- total area of the building.
Distance from the house and the fence: basic standards
SP 62.13330.2011 requires compliance with the following standards:
- a security zone of 2 m on each side from the overhead gas pipeline to any building or house;
- the same 2 m are required when determining the distance from a residential building to a low-pressure substation;
- the average pressure in the pipes provides for a distance from the house of already 4 m;
- a residential building cannot distance itself from structures with high pressure closer than 7 m;
- the pipe for supplying gas to a residential building is located at a distance of 50 cm or more from the entrance;
- From the window and roof of a residential building, gas can be supplied using a pipe located 20 cm away.
Calculation
- How can you find out how much gas can pass through a hole of a known size in a unit of time?
In the simplest possible form, the outflow of gas from a pipe is described by Torricelli’s formula.

The master left us a gift - a simple and easy-to-use formula.
For gas it looks like this:
V=√(2g*Dp)/ λ. In it:
- V is the speed of the outflowing gas in meters per second;
- g—gravitational acceleration (9.8 m/s2);
- Dp is the pressure difference between the gas in demand and the atmosphere in kg/m2 (as a rule, the pressure of household gas exceeds atmospheric pressure by 0.2 kgf/cm2, or 2000 kg/m2);
- λ is the gas density. At room temperature it is approximately equal to 0.72 kg/m3.
For a liquid in an open vessel, the formula is noticeably simplified.
The formula describes the outflow of flow from a container or pipe whose dimensions significantly exceed the size of the hole. The gas flow through the pipe cut will noticeably decrease due to friction of the flow against the walls.
Knowing the flow rate of the outflowing gas and the diameter of the hole, it is easy to calculate the flow rate per second. To do this, you need to multiply the speed in meters per second by the area of the hole in square meters.
The area of a circle is calculated using the formula πr^2, or πd^2/4. r is the radius of the circle, d is the diameter.

Calculation of the area of a hole based on its diameter.
Let's do the calculation for a hole with a diameter of 15 mm.
The flow speed is √(2*9.8*2000)/0.72=275 m/s.
The area of the hole in square meters is 0.015^2*3.1415/4=0.000176709375.
The gas consumption in cubic meters per second will be 0.000176709375*275=0.048595078125. To calculate the consumption per hour, you need to multiply the resulting value by 3600 (the number of seconds in an hour). In our case, 0.048595078125*3600=175 cubic meters of gas will enter the atmosphere in one hour.
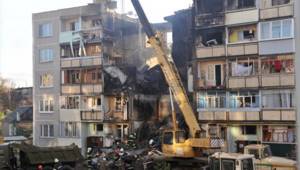
The consequences of such a leak can be very serious.
Installing a gas stove yourself
The installation of a gas stove must be carried out in accordance with standards and safety rules, and the gas stove itself must meet the requirements of GOST 10798-85.
Self-installation of gas or electric stoves is not permitted.
General installation rules
The gas stove must be installed at a distance of no more than 4 m from the rigid gas pipeline.
IMPORTANT!
A dielectric insert must be installed between the gas tap and the hose.
The list of minimum equipment for modern gas stoves includes electric ignition and oven lighting. These elements must be connected to the electrical network by connecting them to a grounded Euro socket.
IMPORTANT!
If there is no grounded socket in the kitchen near the installation site of the stove, it is necessary to install electrical wiring to provide open power to these elements (a 3*1.5 cable will be sufficient). It is also necessary to install a separate 16 A RCD in the electrical panel. The same rules apply in the case of installing a combined gas stove (electric oven instead of gas).
Flexible wiring of gas stoves can be done using the following types of hoses (sleeves):
- rubber-fabric - a soft and flexible sleeve that does not conduct current, but is inferior to other sleeves in terms of mechanical rigidity;
- rubber with metal braiding - one of the best options for making a secure connection;
IMPORTANT!
Unlike the water supply, with which a gas hose can be confused, the latter has yellow marks on the braid, and not red and blue as in the case of a water hose.
- bellows metal hose - the toughest hose, considered the most reliable, but not cheap.
IMPORTANT!
It is the bellows metal hose that is recommended by current regulatory documents.
Regardless of the type of hose you choose for installation, the internal diameter of the hose must be 10 mm or more.
IMPORTANT!
When supplying gas, a thinner hose will not be able to ensure its passage to all burners and the oven.

Figure 1 — Bellows metal hose for gas supply
If you use the last two types of hoses to supply gas to the stove, be sure to install insulating dielectric inserts.
IMPORTANT!
It is better to use a real dielectric insert. When choosing a bellows hose, do not buy a “bare” hose, but one that has dielectric yellow insulation over the metal. Some manufacturers may apply this coating for purely aesthetic reasons (this makes the hose easier to clean). However, the dielectric properties of such a coating prevent current from flowing through the sleeve.
Rules for installing a gas stove
Typical instructions for installing a gas stove:
1. Turn off the gas valve. The faucet handle should be raised all the way perpendicular to the pipe. Disconnect the previously installed stove from the gas pipeline.
2. Remove outdated appliances from the kitchen.
3. Bring the new gas stove to the installation site. It is not recommended to remove the protective production film before installation is complete to avoid mechanical damage to the surface of the slab during installation.
4. Remove the cardboard packaging. Remove all components of the stove - baking sheet, roasting pan, grate, utility box (pallet) and other components.
Price issue
Many people are interested in the question: “How much does it cost to move a gas pipe in a private house or apartment in 2021?”
There is no specific set price; the final cost of the transfer depends on several factors:
- pipe diameter;
- installation height;
- number of joints;
- consulting;
- complexity of the work being carried out;
- gas pipeline length;
- number of connected devices;
- development of design documentation, etc.
If we talk about specific figures, the minimum price for moving a gas pipe is 2 thousand rubles . To find out the exact cost, you need to call the gas service whose services you are going to use and ask them for an estimate for the provision of services. They will quickly carry out calculations and calculate the cost of moving the pipe.
Gasification of the house in stages
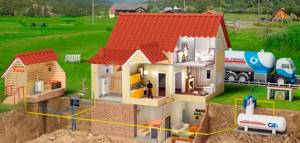
Standards and regulations SNiP 2.04.08-87 SNiP 31-02 approved step-by-step regulations for gasification and norms for gasification of one’s home, deviation from which threatens with administrative punishment.
They begin to gasify the house by drawing up the appropriate specifications, which are issued by the regional gas service department:
- According to the law, you will be provided with this documentation within 10 working days, free of charge, in order of priority;
- Next, it is necessary to draw up a project for gasified premises and buildings, and this work should be left to professionals - design bureaus with the appropriate specifics;
- Having received the specifications from the gas service, the owner of the house enters into an agreement with her to draw up a gas supply project;
- The finished project documentation is agreed upon with the technical department of the regional gas service, then an agreement is concluded for the installation of the pipeline and gas supply to the house.
Advice from experts
- Length of flexible hoses so that they naturally sag and allow gas equipment to be moved if necessary. At the same time, they do not hang down to the floor, are not stretched, and do not intersect with other communications.
- If it is necessary to turn the pipe, it is cut off and a stationary plug is installed. Next, a hole is drilled in the pipe, and a new section is welded into it.
- When replacing a gas stove, the standards of multi-storey buildings for the internal volume of the room are taken into account: for 2 burners - 8 m3, 3 burners - 12 m3, 4 burners - 15 m3. In studio apartments without a dedicated room for a kitchen, these figures increase by 2 times. Therefore, it is impossible to simply exchange one slab for another: this issue requires coordination and approval in the relevant authorities.
- If gas pipes are laid through walls, they must be enclosed in a casing. The entire space between the gas pipeline and the casing is sealed with special insulation.
- Gas pipes can be bent, taking into account that the radius of curvature is at least 2.5 times the diameter of the pipe.
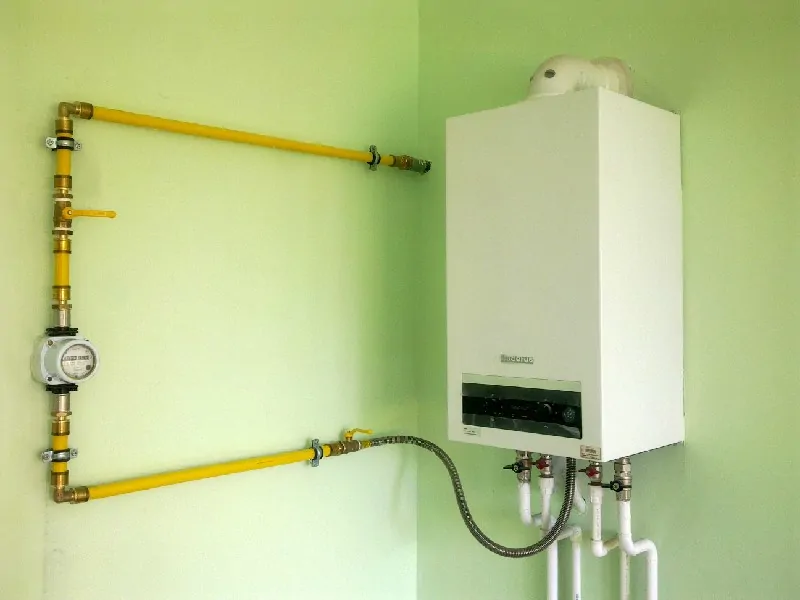
Correct pipe connection
Taking into account the increased danger of carrying out any work on the gas supply system inside the house, the solution to this issue must be left to specialists. They will fulfill the order taking into account all regulatory requirements.
Posting rules

Gas stoves use flammable natural or liquefied gas. This is high-risk equipment. Therefore, SP 402.1325800.2018 defines the requirements not only for the premises, but also for the installation site:
- unplastered wooden walls or structures made of other combustible materials are insulated with non-combustible materials;
- the insulation must protrude beyond the dimensions of the device: on each side - at least 100 mm, above - at least 800 mm;
- the minimum distance between the device and the opposite wall is 1 m;
- Installation in a niche is not allowed.
Non-combustible finishing materials include ceramic and porcelain tiles, screens made of tempered laminated glass (GOST 30698-2014), some types of wall panels with the flammability group NG.

Important! The minimum distance from the gas stove to the adjacent wall, insulated with non-flammable finishing material, is taken in accordance with the installation and operation instructions for the device from the manufacturer. In most cases it is at least 100 mm.
There are requirements for placing a free-standing gas stove next to the kitchen modules. They are indicated in the installation and operating instructions for the equipment:
- the minimum distance between the stove and the adjacent module is 20 mm;
- only on one side of the slab can there be a module whose height exceeds its height;
- the distance from the side edge of the stove to the kitchen module protruding above it is at least 100 mm;
- the vertical distance from the working surface of the device to the wall cabinet is at least 650 mm.
The heat resistance of walls, floors and coatings of kitchen modules must be at least +90°C.
The following requirements apply to the installation of a built-in gas panel:
- The distance from the panel to the adjacent wall or high kitchen module is at least 100 mm.
- The panel is inserted so that at least 70 mm remains from it to the rear wall.
- If the distance between the upper hanging modules, located on both sides of the gas panel, is 600–730 mm, they are hung at a height of at least 530 mm from the tabletop. If it exceeds the width of the panel - at a height of at least 400 mm.
The minimum distance between the working surface of the gas stove and the hood is determined according to the instructions, but is left at least 750 mm.
Pipeline requirements
What to do if the gas pipe in the kitchen is in the way, and you know for sure that you will not calm down until you move it? It’s natural to study the rules outlined below and change the network configuration without breaking the rules.
Installation rules
To remove a gas pipe in the kitchen or move it to another location, you need to know the following:
- Do not lay the pipeline through a door or window;
- It is prohibited to lead the gas system through the ventilation shaft;
- access to the pipes must always be open (you cannot know when an accident will occur or who will repair the breakdown, but this someone must accurately find where the pipeline is);
- the length of flexible network fragments should not exceed 3 meters;
- the distance between the floor and the system should be 2 meters;
- the rigidity of pipe joints is no less important than other standards;
- the pipeline requires painting;
- the places where the network intersects with the walls must have a special “packaging” in the form of a construction case.
Decide clearly what you want, or even better, draw it and show it to the masters
Basic documents for definition
Regardless of the number of floors, purpose and building materials, even the most increased fire safety, the decision at what distance from the gas pipe a house can be built must be made before the start of its construction. Such problems need to be addressed at the design stage of the building.
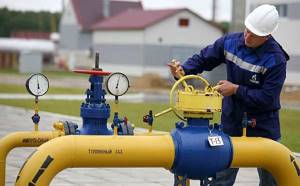
A residential building is no exception. Any citizen of the Russian Federation must agree on the design of his future habitat with the supervisory authorities.
He will not have any obstacles to starting the development of land ownership if the plan is agreed upon and drawn up on the basis of existing and valid regulatory documents - SNiP, Federal laws, building regulations and government regulations.
These documents are registered by Rosstandart and can become guiding documents. The necessary approval and approval of the developed construction plan will have to be obtained from several authorities.
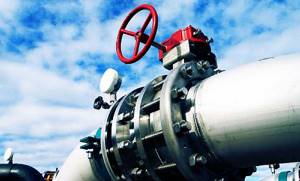
The distance from the gas pipe to the house can be easily calculated using the relevant documents. To do this, you should apply for factual data and permission from the gas distribution station, whose authority extends to the place where the home is being built.
Having actual data on the pressure level in a nearby gas pipeline, you can refer to the following documents when designing:
- SNiP 42-01-2002, which defines the basic technical requirements for the design and reconstruction of consumer systems created for the purpose of providing fuel;
- Federal Law No. 184 and Government Decree No. 858, which obliges compliance with the norms specified in SNiP, building regulations at the legal level;
- SP 62.13330.2011, in which the distance standards of SNiP 42-01-2002, necessary for safe operation, were updated or supplemented.
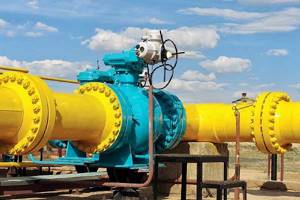
These documents are registered by Rosstandart and can become guiding documents if the developer independently tries to determine the distances for designing a future building with reference to a specific area. However, approval of a project or plan is a necessary measure to obtain a construction permit, which every potential new resident must now have.
The question of camouflage
Is it possible to hide a gas pipe when there is no way to move it? It is possible and necessary. Special boxes are available for sale.
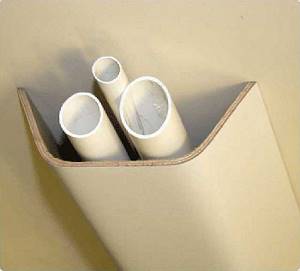
You can come up with your own plan on how to hide the gas pipe, and at the same time the counter in the kitchen.
If you have absolutely no idea how to do this effectively and harmoniously, look at the photo “How to hide gas pipes in the kitchen?”
Checking the entire system for leaks and operability

Leaks are checked using a soap solution
The test is done after installation is completed, leaks and performance are diagnosed. First, the general appearance of the system is inspected, the connections are checked, the fittings are tightened, and compliance with the design diagram is checked. Gas emissions are detected at connections and assemblies.
A soap solution is used to coat the joints of pipes with a hose, the interface between a flexible hose and a stove or oven. If bubbles form, the node requires revision and re-diagnosis. The master draws up a report of completed work describing the features, changes are entered into the technical passport.


