Hedgehog education
A burr, or urchin, is a hollow formation inside a seam or under a layer of spray.
The formation of hedgehogs during pipe welding is a welding defect that has a destructive effect. X-ray illumination detects internal defects, a non-destructive testing method. Most often, burr is formed when welding aluminum. It should be cooked with alternating current, in a jerky method, so that there is no overheating. To avoid the formation of hedgehogs, you should monitor the gases formed in the bathroom; they must have time to escape. If a stop occurs, you should return 20 - 30 mm, clean the surface of slag and continue, starting to walk along the seam.
You can reduce the amount of agrate by thoroughly cleaning the edges, especially on aluminum. Then rust and dirt will not melt in the bath and contaminate the seam.
To remove tarnish colors without removing the layer with an abrasive wheel, you can use a chemical method. Inox Gel or Stain Clean etching paste is applied to the surface of the pipe. The compositions are very poisonous, you should wear a respirator and gloves and apply with a brush.
Description of the pipe welding procedure
Once a constant arc has been achieved, it is possible to begin welding. During welding, move the arc as follows:
- progressively throughout the weld, due to which the arc will be stable;
- longitudinally for a narrow seam with a height depending on the speed of movement of the electrode along the surface;
- transversely in order to ensure the required thickness of the seam, moving the rod with oscillatory movements.
Pipes with small wall thickness and diameter are welded with a constant seam, while pipes with thick walls are welded with an intermittent seam. Welding of joints should be carried out until the joint is completely welded without interruptions. When welding joints with a wall thickness of up to 6 mm, two welded layers are made, with a thickness of up to 7 mm - three layers, and with thicker walls - four.
In most cases, the first layers are welded in stages, starting from the edges of the pipes with fusion, and the subsequent layers are welded evenly in a continuous layer. The stepped option is used for pipes with a thickness of more than 8 mm: the base layer is applied by dividing the surface of the pipes into certain areas with a small area and welding through one area, and later the missing ones are welded. After welding of the first layer is completed, it is inspected for cracks, since the quality level of the entire seam depends on this. If there are any, they are melted down and welded again.
Subsequent layers are welded by turning the pipe or uniformly moving the electrode along the surface of the seam, and the starting point of welding is shifted rather than the end point by about 20–30 mm relative to the previous layer and the direction of movement of the electrode is changed to the opposite. The last seam is made with a smooth transition and a smooth surface to the size of the pipe diameter. If pipes with a square cross-section are welded, their ends must be firmly secured so that the metal does not lead and the pipe does not deform. Upon completion of welding work, the surfaces are cleaned of slag.
Welding pipes using electric welding is a simple process, but important, requiring adherence and care to the sequence of actions performed.
DIY electric welding
In everyday life, arc electrode welding is most often used, since it is the simplest and most accessible method and is used for any pipe arrangement. The source of energy here is the electric arc, and the carrier is the electrode. Household devices used for electric welding are characterized by low power, are not bulky and operate on single-phase wiring.
- Welding transformer – converts alternating current from the mains into direct current for welding. Easy to use, but does not stabilize the arc sufficiently.
- Rectifier – has higher arc stability.
- Inverter – converts alternating current into direct current through an inverter module, is characterized by arc stability and low weight.
Electric welding is carried out using consumable and non-consumable electrodes. The former participate in the process, supplying particles for the formation of a seam. Beginners are recommended to use solid electrodes with a melting coating.
The diameter of the electrode, as well as the type of apparatus used, and the welding method itself depend on the characteristics of the product: material composition, wall thickness, diameter, and so on. When working with heating or water pipes, unless we are talking about main structures, electrodes with a diameter of 3 mm are most often used - for electric welding of products with a wall thickness of up to 5 mm. If the parameter is larger, or it is necessary to form a multilayer seam, then the diameter of the electrode should be 4–5 mm.
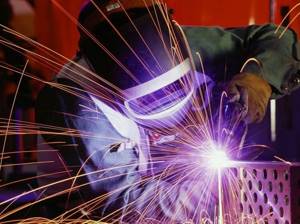
How to cook pipes: technology
Before welding, water pipes are cleaned - especially the inner surface; if the edge is uneven, the ends are straightened or cut off. Then the edges on both the inside and outside are cleaned to a metallic shine. The width of the area is at least 1 cm.
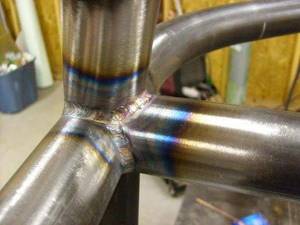
If the diameter or wall thickness is large, it is recommended to perform preheating - the zone is at least 0.75 cm. This prevents the appearance of hardening structures.
- The electrode is inserted into the device holder, the current supply is activated - to do this, you need to strike the metal with a rod. The current strength is determined by the thickness of the product wall.
- After the arc appears, the electrode is held at the junction at a distance of no less than 3 and no more than 5 mm. The most convenient angle of inclination of the electrode to the plane of the area is 70 degrees, as shown in the photo.
- The seam is not applied with a smooth movement, but with an oscillating motion, simulating the distribution of metal through the joint on both edges. The trajectory is different - crescent-shaped, zigzag, but in the end a dense, narrow roller is formed at the junction.
- After cooling, the slag is knocked off with a hammer. If the wall thickness is large, a second and even third seam is applied with the obligatory removal of slag before each subsequent stage.
- If the thickness is more than 8 mm, the first seam should be welded in stages: the circle is divided into sections, the fragments are welded first through one, and at the second stage the remaining ones are welded. Then a continuous suture is placed on top.
Read also: What is a regular hexagon called?
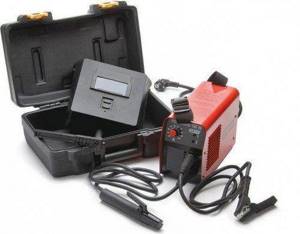
Welding work is dangerous: splashes of hot metal, high temperature of the arc, and its brightness pose a serious danger. Therefore, when boiling water pipes or for heating, you should follow safety precautions: be sure to use a protective shield or mask, canvas gloves, a suit or robe made of thick fabric - a tarpaulin is best. During electric welding, it is necessary to have a bucket of water and a blanket or piece of tarpaulin nearby.
The next step is preparing and setting up the equipment itself. To do this, secure the grounding clamp and check the cable insulation for breakdowns and other defects. Insert the electrode into the holder, adjust its position at the optimal angle, set the operating voltage so that its power is sufficient to ignite the arc.
An important circumstance is the sequence of turning on the welding machine - first setting the current, connecting the ground, replacing working elements and other manipulations, and only lastly turning on the power. When turned off, all operations are performed in reverse order.
Heating pipe welding process
Before electric welding heating pipes, they need to be grabbed together in several places to fix them in the desired position. If the diameter does not exceed 30 cm, four points 5 cm long, arranged crosswise, are sufficient. Larger pipes are tacked at intervals of 25 - 30 cm around the circumference. Tack welding is performed using the same electrodes that will be used to weld the joint.
A continuous seam is applied to the joint, moving the electrode along the joint until the workpieces are completely connected. To deeply heat the metal, it is tilted at an angle of 30 - 60˚ back, forcing the weld pool to move behind it. For surface heating, the position is reversed.
If the wall thickness does not exceed 6 mm, two sutures are applied, one on top of the other. Metal up to 12 mm is welded in three layers. When joining thick-walled heating pipes, four or more seams are applied. Before applying the next layer, you need to wait for the previous one to cool and remove the slag from it.
When welding a rotary joint, when the direction of the pipeline changes, it is useful to use a special rotator. With its help, the workpieces are secured in the desired position, providing free access to the joint from all sides. If there is no such device, two sutures are placed on the accessible part of the circumference. Then the pipe is turned by hand and the remaining sections are welded step by step. Welding of a fixed joint begins from the bottom, moving the electrode upward.
Features of gas welding technology
The fastening of heating pipes by gas welding is carried out according to the following principle: the end parts of the two elements are combined, and then gradually heated in the gas-oxygen mixture to high temperatures.
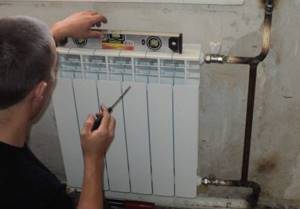
It is best to replace radiators in the warm season, since during the cold season you will have to turn off the general heating of the house for at least several hours, which is unlikely to please the neighbors
For special weld strength, filler material in the form of wire or rod is used. When the hot metal cools, a monolithic joint is formed.
Advantages and disadvantages of joining pipes by welding
One of the main reasons for the popularity of the gas welding method is the specific operation of our heating systems. When the coolant circulates, all structural elements are constantly under pressure, which deforms the joints.
Therefore, a strong weld seam reliably protects against breakthroughs and helps prevent accidents during short pressure surges and even water hammer, which often accompany the startup and shutdown of centralized heating.
Advantages of the gas welding method:
- Durability and reliability of the connection (it is believed that the strength of the seams after gas welding even exceeds the strength of the radiators themselves!).
- Possibility of using parts of any shape and size. The only requirement is that the elements be made of metal with a thickness of no more than 3.5 mm (if this is exceeded, it is more economical to use electric arc welding).
- An aesthetic point - pipes and batteries, welded by gas welding, become a solid monolith, which can be easily repainted in a color that matches the interior.
- You can carry out work without connecting to the electrical network (especially important for a new building).
- Many metals from which pipes are made, such as copper, cast iron, brass and lead, form the strongest joints using gas welding.
The main disadvantage of this installation method is the large heating area. As a result, it is easy to damage furniture and flammable finishing materials, such as parquet, wallpaper, plastic wall panels, chipboard or MDF.
To avoid destruction, it is recommended to remove thermally unstable elements from the work area, and cover immobile elements with asbestos sheeting or other protective material.
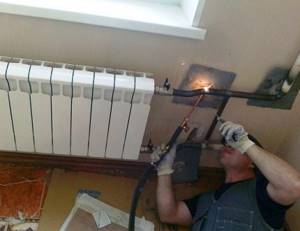
If replacing batteries using gas welding is carried out after finishing finishing work, be sure to use insulating gaskets between the wall and the pipes
In addition, gas welding releases substances into the air that are harmful to health; working without special protective equipment is strictly prohibited. That is why everyone who wants to master a gas welding machine in practice must study the safety rules and obtain permission to work.
Restrictions on working with a gas welding machine
Installation of a heating system using gas welding is permitted only by professional welders who, in addition to special education, have permission to carry out work from the fire service.
Please note that the document is issued only for a certain period, so when hiring a specialist, you should not just look at the “crust”, but also study its validity period.
Other mandatory requirements for welders: the working order of the gas apparatus and mandatory protective equipment - goggles, work gloves, a shield.
It is advisable that the master use filler wire for seams and modern equipment operating on a mixture of oxygen and acetylene. Other flammable gases, such as methane or propane, are acceptable provided that their combustion temperature is twice the melting point of the filler rod.
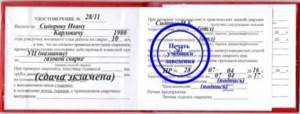
A certificate of this type confirms that the specialist has the appropriate qualifications and has undergone safety training. A mandatory condition for authenticity is a seal
If you are not a professional gas welder, you can contact local heating networks or the organization that manages the house to carry out the work. To do this, the owner of the apartment draws up a statement about the need to replace the batteries and agrees on a date to shut off the flow of coolant in the common building main.
After welding and installing the radiators, the invited craftsman must perform a crimp test and make sure that the system is working properly. It is strictly prohibited to independently stop and start heating in apartment buildings.
Welding technology for plastic heating pipes
The process of welding polypropylene pipes requires significantly less professionalism compared to metal ones. They are connected by diffusion welding. Its essence is as follows: individual elements of the system are heated using a special apparatus (soldering iron) to a temperature that allows them to be joined. It is important to consider that all parts used must have the same characteristics. When using polypropylene, it is quite possible to weld heating pipes with your own hands.
When welding polypropylene pipes, we must not forget about the following nuances, which can negatively affect the quality of work:
- heating the pipes with a soldering iron takes approximately 5 seconds;
- Melting of polypropylene begins at a temperature of about 270 degrees. You can set the required value using a special regulator that is equipped with each device;
- Process parameters sometimes undergo some changes depending on the air temperature at the work site. For example, in the cold season it is necessary either to set a higher melting temperature of the pipes or to increase the heating time;
- the heating time must be increased in proportion to the increase in the diameter of the connected pipes;
- The heated parts are joined within 30 s. If the pipes have a large diameter, this time may be increased.
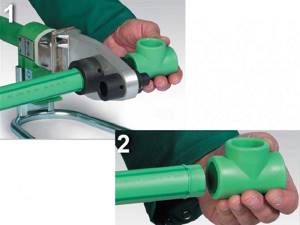
The nozzles with which the soldering iron is equipped simultaneously heat the outer and inner surfaces of the parts being connected (couplings and pipes). During the heating process, flanges are formed at the ends of the parts. The heated parts are removed from the nozzles, after which they are immediately joined together, pressing evenly on both sides. After the elements are connected, it is important to ensure that they do not move, since any movement can lead to disruption of the connecting seam.
To ensure reliable adhesion, the connected parts must be kept together for 30 seconds (or more if the pipes have a large diameter). The edge formed at the junction should be uniform throughout the circle.
If the heating is insufficient, the connection will not be of high quality. However, it is also impossible to overheat the pipes: this can lead to a narrowing of the working clearance. A brown color when heated indicates that the polypropylene is beginning to burn.

The procedure for installing heating systems using electrical fittings is even simpler. It can be performed even by a person who does not have a detailed understanding of how heating pipes are welded. Two sections of pipe are inserted into the coupling from different sides, after which voltage is applied to it from the welding machine. The material is melted, resulting in a very reliable seam.
Specifics of soldering polypropylene pipes
PPR is made from a polymer material. It is thermoplastic, easily melts at temperatures from 149°C, and retains its properties when cooled. Thanks to this, when heated, polypropylene pipes are easily joined, forming monolithic units of a single complex of communication systems. They are widely used in the construction of sewers, drainage systems, and are also suitable for heating and water supply.
General description of technology
Soldering of polypropylene pipes is based on the principle of simultaneous melting, using a welding machine, of the upper part of the pipe and the inside of the coupling. After removing the heated parts from the heater of the soldering machine, they are joined to each other by compression.
At the junction of the heated surfaces of the joined parts, an interpenetrating connection of molten masses occurs, forming a single monolithic unit upon cooling. This method is called a coupling connection.
The method of welding PPR of the same diameter is called direct (butt). It is based on the same principle of melting the edges of pipes, followed by joining them and fixing them in a stationary position until they cool completely. The quality of direct welding depends on the accurate alignment of the axes of the joined PPRs.
The process of soldering polypropylene pipes with your own hands.
Soldering machines for pipe welding
There are many types of soldering machines for PPR welding. Their technical design and dimensions depend on the diameters of the PPRs with which they interact and the availability of auxiliary equipment.
Soldering machines are divided into:
- machine tools (with guides for centering the axis);
- bell-shaped (“Iron”);
- butt.
To carry out welding and installation work during the construction of a pipeline from PPR, you will also need:
- pipe cutter or scissors for polypropylene pipes;
- locksmith corner;
- pencil or marker;
- roulette;
- seamstress;
- trimmer;
- alcohol-based surface cleaner (exclude acetone, solvents and products that leave a greasy, oily residue);
- work gloves.
Complete set for welding polypropylene pipes.
Polypropylene Welding Procedure
When performing PPR welding, it is necessary to observe the heating time of the parts. The wall of the part should not be overheated, but underheating also has a bad effect on the quality of the connections. The table shows the amount of time sufficient to warm up the parts. The recommended soldering temperature is 260°C.
| Pipe cross-section diameter, mm | Welding depth, mm | Heating duration, sec | Fixation, sec | Cooling period, min |
| 20 | 13 | 7 | 8 | 2 |
| 25 | 15 | 10 | 10 | 3 |
| 32 | 18 | 12 | 12 | 4 |
| 40 | 21 | 18 | 20 | 5 |
| 50 | 27 | 24 | 27 | 6 |
To solder pipes you need:
- Install the nozzles on the heater of the soldering machine.
- Install the soldering machine in a place convenient for work, secure it with fasteners (if available), set the temperature regulator to the required level and turn on the power supply.
- Prepare parts for welding.
- Treat the surfaces of the parts to be welded with a cleaning and degreasing agent.
- Measure the welding depth from the edge of the pipe and mark it with a pencil. Then put the parts on the heater nozzles and hold for the time indicated in the table.
When warming up, do not allow the part to rotate around its axis; rotation worsens the tightness of the connection between the welded parts. The heated parts must be removed from the heater and immediately joined by inserting one into the other.
When deepening (introducing) a pipe into a coupling (fitting), you must not turn it along its axis and cross the welding depth level marked with a pencil. The achieved position of the parts should be fixed and not moved during the time required for reverse polymerization.
To achieve the desired position when joining a pipe with a corner elbow, you should mark both parts in advance by drawing a guide with a pencil at the point of their connection. This will allow you to avoid rotation of the bend and achieve the required angle relative to the pipe axis without adjustment.
General recommendations for welding
When welding polyethylene pipes by fusion, it is very important to follow the instructions. Departure from technology can lead to overheating of the material and the appearance of internal influx
This will disrupt the movement of liquids through the pipes.
Also, the seam may turn out crooked and uneven. In any case, such a design will be considered defective and unsuitable for use.
There are a number of recommendations that you need to follow to achieve the desired result.
It is important that the walls do not move more than 10% of their thickness during joining. When the material cools, the connected parts must be securely fixed
The time spent removing the heating plate and joining the two ends of the product should be minimal.
It is not recommended to weld non-pressure polymer sewer pipes using the butt method. A roller forms at the junction, on which solid particles can accumulate, leading to clogging of the line.
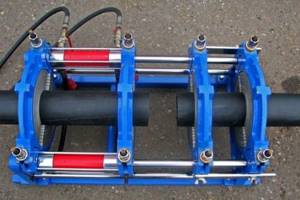
Butt welding of polyethylene pipes is not an easy task. Only by following the instructions and adhering to the recommendations of experienced craftsmen will it be possible to create the necessary reliable design without unnecessary problems and as quickly as possible
When deciding to lay a pipeline and carry out butt welding, it is recommended that you first familiarize yourself with the provisions of the relevant GOSTs. These documents contain rules, requirements for the quality of work, and the product.
When installing water and gas pipelines, you should focus on GOST R 55276. It describes the technology of butt welding of a polyethylene pipeline.
For equipment for connecting products using a similar method, GOST R ISO 12176-1 is applied.
Features of the welding process and small instructions
The first step when connecting two pipes is to secure them. They must be fastened so that during welding they do not diverge in different directions or are not pressed through by the electrode.
The welding seam must be made solid and continuous. To do this, do not tear the electrode off the surface of the material during work. But for pipes with a large diameter, this rule is not applicable, therefore, to connect such products, multilayer welding is used, in which the number of layers must be calculated based on the wall thickness.
Most often, for pipes with a thickness of 6 mm, 2 layers are used, for products with walls from 6 to 12, 3 layers are made, and for larger thicknesses, 4 or more layers are welded. Each subsequent seam must be made only after the previous one has been checked. You should wait until the connection has cooled completely, and then check it for defects.
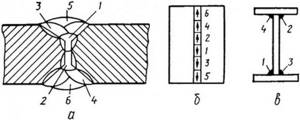
Example of a multilayer welding seamSource yandex.net
If the thickness of the pipe walls is more than 4 mm, then a root weld can be made. Its peculiarity is that during welding the area between the surfaces is completely filled, without leaving a large weld on top of the seam. An analogue is a roller connection, in which a 3 mm roller remains above the surface of the pipe.
Since it is almost impossible to weld a pipe with water using electric welding, you should first turn off the water and drain it from the system. After this, you can begin the connection process. After completion of the work, it is recommended to conduct a test run to check the tightness of the seam.
This video shows how to properly weld a pipe using electric welding.
Steel welding (electric, gas)
Welding heating pipes made of steel is preferable to a threaded connection. This method is based on heating the joint edges to the melting point. In this case, a melting bath with molten metal is formed, into which solder is supplied in the required quantity. Gradually moving forward, molten metal fills the seams. After cooling, a monolithic compound is obtained.
There are a lot of methods for welding steel heating pipes. We will consider only those that can be used when installing heating in houses and apartments. The main criterion is mobility. There are two main approaches.
Electric arc welding
Manual arc welding electrode
The essence of welding heating pipes using electric welding is that voltage is applied to the electrode (usually plus, but not necessarily), and minus is applied to the circuit. The movement of electrons is directed from plus to minus. When there is very little left from the electrode for welding heating pipes to the working surface (the distance is approximately equal to its diameter), an electric arc occurs. It is so powerful that it melts metal. From this moment the differences begin. Feeding of metal wire can be done manually or automatically. Welding heating pipes using electric welding can be:
- manual;
- semi-automatic (argon).
In both cases, the process of melting the wire in the melting bath occurs in a gas, which pushes out oxygen and improves the fusion of the metal. For manual welding, you need electrodes - this is a metal melting rod in a special coating. When the coating burns, gas and slag are released, which protect the cooking bath.
In semi-automatic welding, argon is supplied from a cylinder. The electrode for welding heating pipes consists of tungsten, the melting point of which is 3000 degrees. Welding can be done with direct or alternating current. Aluminum is cooked using alternating heat. When welding, filler wire is used, and an argon rod acts as a heater, similar to gas welding. Also, electric welding of heating pipes can be pulsed or pulseless.
How to cook heating pipes:
- move the electrode from wall to wall, in a herringbone pattern;
- alternate movements forward and backward in a straight line;
- alternate movements forward in a straight line and backward along the outer edge. The edges alternate each time.
An important point is the formation of the root of the seam. The location of the electrode relative to the working surface also matters. The reverse side of the pipe is boiled while looking in a mirror; not everyone can do this. As you can see, the topic is very extensive and the welder must have a certain amount of knowledge and, of course, experience.
Gas welding of metal heating pipes
Cutting torch
The sound when the flame lights up on a gas welding torch cannot be confused with anything else. It's like a small jet taking off. How to weld heating pipes:
- an acitylene-air mixture is supplied to the cutter from a cylinder. It has a very high combustion temperature;
- valves on the cutter regulate the feed;
- the flame torch melts the metal, creating a cooking bath, and the wire is dipped into it by hand;
- Do not let the cooking bath cool down and slowly move it along the seam.
The question remains of how to properly weld heating pipes from the reverse side. With this method, in order to weld the riser from the wall side, you need to perform an additional procedure. On the front side, at the junction, you need to cut a window and weld a seam through it on the inside of the riser. After this, the window is closed with the same cut piece and brewed. Gas welding of heating pipes is preferable when working with small diameters and thin-walled coils.
Useful tips and possible mistakes
To do everything right right away and not redo bad work over time, you need to follow some tips:
- In hard-to-reach places, it is better to use a bent electrode and control the process using a mirror.
- If it is necessary to change the electrode, then the seam must be continued with a covering of 1-2 cm.
- Metal is heated better by electric current using direct polarity rather than reverse polarity.
Most often, defects arise due to the fact that inexperienced craftsmen are inattentive during work. In the case of welding, even a slight deviation of the seam will lead to the fact that it will not be tight and durable. If you change the arc length, voids and unwelded areas will form in the seams. Defects can also occur due to equipment or poor quality pipes.
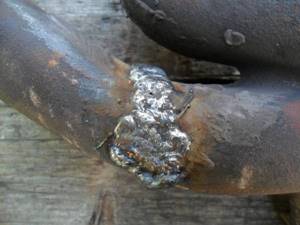
An example of a poor-quality seamSource varim.by
Also, when welding, you must remember safety precautions:
- check the conductors and parts of the device, they must be insulated;
- the equipment housing must be grounded;
- all clothing, gloves and mask must be dry;
- before starting work, you need to put on rubber shoes or lay a rug made of this material under your feet, this will provide additional insulation;
- Be sure to wear a face shield to protect your eyes and face.
If you ignore safety instructions, you can get burns or electric shock.
After the welding work is completed, it is necessary to check the quality of the seam, since welding water pipes requires careful analysis. Externally, you can determine whether there are burns, pores, fistulas or other defects on the seams.
To check the seams for cracks, you must use a compressor. Plugs are installed at the ends, and the seams are coated with soap foam. After this, air must be pumped into the pipe under pressure. Soap bubbles will appear in places where the connection is not strong enough.
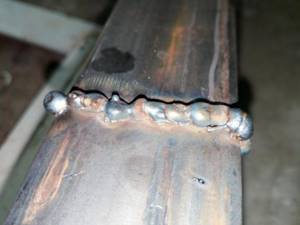
This is what scale looks like on a weld. Source ad-cd.net
Welding of heating and water supply risers
When construction or repair work is carried out in residential and non-residential premises, in particular, heating risers, water supply and sewer risers are replaced or installed for the first time. This process is necessary in order to ensure the normal functioning of various types of communications. Without their uninterrupted operation, coziness and comfort in the apartments of the people living there is impossible. And without these fundamental things normal work and rest are impossible
Currently, there are two methods of installation work for installing and replacing risers. This is a threaded connection and traditional welding. One method or another depends on the circumstances. The choice is influenced by various factors, in particular the dimensions of the room or the pipes used.
The welding method of installing and replacing risers is more reliable. Installation of the riser by welding guarantees its longer operation, in comparison with the riser installed using a threaded connection.
Welding work on the installation of heating and water supply risers can be carried out in premises of any kind. Their technical and operational parameters cannot negatively affect the possibility of welding. Traditionally, water supply risers are replaced more often than sewer risers. Most often, the work of replacing risers is carried out in one apartment. However, it also happens that several apartments or non-residential premises are used at once. In this case, the risers are changed in all of them at the same time. This applies to cases where heating risers are welded. These works can be carried out in residential or non-residential premises.
The welding method of installation and replacement is possible for risers of any kind, no matter what material is used in their manufacture. This applies equally to both cast iron and polyethylene.
The production of modern risers is carried out, in particular, from polyvinyl chloride. PVC in this capacity is becoming popular and in demand. And it is no coincidence, since the product made from this material has significant advantages in comparison with analogues from other raw materials.
Overcooking heating and water supply risers is a complex and critical area when carrying out construction and repair work. In order for this operation to go smoothly, you need to prepare well in advance, for example, take care of the workpiece and place water supply outlets.
Work on welding risers is carried out only with special welding tools. The specialists involved have a high level of qualifications. As a rule, they are on the staff of companies that have permission to conduct such activities. To re-weld risers, or carry out welding work again, workers also need to have the appropriate knowledge and experience.
Today, the production of risers is carried out from high-quality polyethylene. This material is characterized by excellent technical and performance properties that are not inferior to cast iron and copper.
With all this, the price of polyethylene products is lower than this raw material.
The peculiarity of welding heating risers is that it is performed under pressure. Types of welding are divided into electric arc, gas, argon and semi-automatic.
During welding, the edges may or may not be removed. They are not removed in situations where the pipe diameter is three millimeters or less. If this indicator is higher, the edges are cleaned. The seam formed during the process may have different quality. It depends on the purity of the metal, the correctness of the gap, as well as the consumables used.
When replacing risers, it may be advisable to move them to another location in order to install other devices and equipment. This could be water meters or a water heating device.
A similar shuffle is also used when remodeling a room.
Editor: nfydck
masterdv66.ru
Briefly about the main thing
The most important part in preparing for welding is choosing the appropriate electrode. They are different for each type of welding.
For highways, it is better to take one with a cellulose shell; for neat seams, it is advisable to take rutile and rutile-cellulose.
The main group is considered universal, but most often it is taken for use at sub-zero temperatures.
Before welding, you need to clean the surface to a shine, make a chamfer, degrease and check the pipes for defects.
For hard-to-reach places, it is better to use a bent electrode and monitor the process using a mirror. When changing the electrode, the seam should be overlapped by 1-2 cm.
To check the strength of the seam, you need to attach the pipe to the compressor, install plugs on both sides and lubricate the welding points with a soap solution. If there are cracks, bubbles will appear from them.
Features and recommendations before starting work
When preparing for pipeline welding, the following points are studied:
- The choice of polarity depends on the material of manufacture and the wall thickness of the elements being welded, and the type of electrodes. The necessary information can be found in the instructions for using the rods.
- The thickness of the consumable material affects the current strength set when setting up the welding machine. This value is calculated by multiplying the cross-section of the rod by 30-40.
We recommend reading: How to repair a gas tank using welding
There are no strict requirements for welding speed. However, the arc should not be kept at the locking point for a long time. The edges will burn, causing you to have to cut and clean them again.
Before starting work, assemble the pipeline joints.
Why is polypropylene better for welding than metal?
A variety of elbows and fittings, as well as profile and round bends made of polypropylene are deservedly popular because:
- After properly welded, they form monolithic parts that can last more than fifty years.
- During operation they do not reduce their throughput.
- They have very high resistance to various household chemicals.
- The cost of such products is several times lower than the cost of similar products made from metal.
In addition, if the product is selected correctly and the welding is done with high quality, then we can say that polypropylene pipes in many cases are simply an ideal element of the corresponding system, including.
Welding of risers by experienced gas-electric welders Stroy UWC
Tel
Tel
Everything in our life is interconnected. The same as in any job. Including plumbing. Let's take, for example, replacing risers. You are planning to renovate your apartment and you just can’t get around the renovation of the bathroom, which, in turn, will entail a partial or complete replacement of communication pipes - water supply and sewerage risers. Ours offers you to weld the risers even before they form a leak.
| 1 | Welder visit | PC | for free |
| 2 | Budgeting | PC | for free |
| 3 | Material purchase | PC | for free |
| 4 | Welding of heating riser DU 15-35 | PC | 2500 |
| 6 | Welding of heating riser DN 35-50 | PC | 3300 |
| 7 | Welding of cold water supply riser up to DN 35 pcs | PC | 6500 |
| 8 | Welding of DHW water supply riser from DU 35pcs | PC | 7500 |
This work can be done in two ways:
- by welding
- threaded connection.
Let's focus on the first option - welding risers. How to do this work beautifully, reliably and professionally? Success lies in choosing a specialist. Look at what equipment he has - modern, when it was inspected, and whether the technician has a document confirming completion of the course. Once you are convinced of the reliability, you can rely on such a master and be sure that he will do the work with high quality.
There is no need to patch individual holes in the riser. It needs to be changed completely from floor to ceiling. Where does our master begin his work? First of all, it checks for the absence of liquid in the riser, and only after that removes it. In city apartments, risers are usually steel or galvanized. In this case, it is more convenient and reliable to repair in the threaded version. Gas or electric welding of the riser is used when threaded installation is not possible. But at the same time, we must remember that when welding, an inexperienced craftsman burns the galvanization and a leak may appear at the seam after a few years.
What needs to be done to prevent this from happening? Such pipes are connected by electric arc welding. But before starting welding of the riser, it is necessary to clean the zinc coating on the edges of the pipes, check their alignment and the presence of gaps. And in the case of welding polyethylene pipes, contact-press welding is used. The main thing in this complex welding business, no matter what kind of pipe is welded, is to prevent burns. Make sure there are no pores or cuts and be careful not to get metal inside.
Welding heating risers
Let's consider the option of supplying heating to the apartment. In this case, larger diameter pipes are needed to prevent heat loss. When welding a heating riser, it is necessary to carefully measure the center-to-center distance of the radiator connection. Otherwise we will not be able to connect the heating device. First, an emergency valve is welded in so that the water supply can be cut off at any time for urgent repairs. After welding the heating risers, we install the heating batteries and weld the bends to them. It is important to pay attention to the fact that at the end of these bends opposite from welding, a thread was pre-cut for connection to the radiator. The goal is promising: in case of a radiator leak, you can replace it with a new one without welding.
In the heating system, it is important to have valves (Maevsky) in places where air accumulates to bleed it off. They are usually located at the highest points of the entire system. The air takes up the area of the pipes and prevents hot water from reaching the radiators. A tap at the entrance to the system, which was already mentioned in the first paragraph of this article, will not hurt either. This is done for emergency repair of the system during operation.
After completing installation of the heating system, we check for leaks. If it is detected, then we weld the seams again, but with even greater care. It's important not to overdo it here. Trust welding of heating risers only to proven installers of Stroy UWC, because we have extensive experience in this type of installation.
Welding of water supply risers
The whole problem is that in old houses cast iron and steel water supply risers are installed. This type of repair will be the most difficult. Such risers must be removed completely from floor to ceiling. And be sure to replace the tap on the riser to shut off or regulate the pressure in the system. Welding of water supply risers is required for any replacement of worn out or slagged pipes. And first of all, the riser becomes clogged. And delaying time until the winter disaster is simply insane. As luck would have it, it is in winter that water supply systems fail, when repairs are hampered by the danger of pipes freezing.
Welding is necessary when replacing water supply risers. Pipes made of ferrous metal are better suited to gas welding, and those made of non-ferrous metal are better suited to argon welding. In any case, it is best not to risk welding and replacing water supply risers yourself.
www.stroy-ovk.ru
Selecting Electrodes
The preparatory stage includes the selection of the most suitable electrode. The quality of this consumable material determines the tightness of the resulting system, as well as the complexity of welding. Today, electrodes are used, which are represented by a conductive rod with a special coating. Through the use of a special composition, the arc is stabilized and a more attractive, high-quality weld is formed. Additionally, in some cases, the included chemicals reduce the likelihood of metal oxidation.
There are quite a large number of different versions of such consumables on sale. According to the type of core there are:
- With a core that does not melt. In their production, graphite or tungsten, as well as electrical coal, are used.
- With a melting rod. In this case, wire is used in manufacturing, the thickness of which can vary over a wide range. When carrying out electric welding, the thickness of the electrode is the most important parameter that needs to be taken into account.
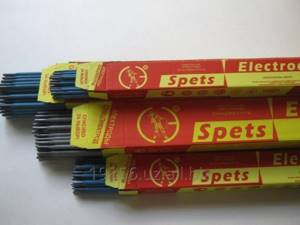
Consumable Rod Electrodes
Classification is also carried out according to what substance is used as a coating. The most widely used versions are:
- Rutile acid is often used to create a heating pipeline system or supply water for domestic purposes. During electric welding, slag can form, which is not difficult to remove.
- Cellulose ones are more suitable for working with products that have a large cross-section. An example is the case of manufacturing a pipeline for supplying gas and water.
- Rutile is used when you need to get a neat seam. Removing slag from the surface is simple and quick. In addition, it is suitable for welding a second or subsequent seam.
- Rutile-cellulose is suitable for welding in almost any plane. This point determines their frequent use when creating a long vertical seam.
- The main coating is considered a universal coating that is suitable for electric welding of a wide variety of parts, including thick-walled products. The resulting fastener is characterized by plasticity and high strength.
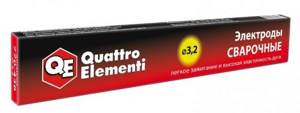
Rutile electrodes
It is recommended to pay attention to products from well-known manufacturers, whose declared performance characteristics will correspond to real ones. In addition, when choosing consumables, you need to pay attention to the shelf life of the product.
General information
Principle of operation
The melting point sometimes reaches 3500 degrees Celsius. To achieve a high-quality connection, you have to fill the joint with molten metal both lengthwise and crosswise. The number of layers is directly related to the thickness of the walls of the product.
The quality of the connection will be made not only by the welding machine, but first of all it depends on the correct selection and preparation of the electrodes.
- With cellulose film - for pipes with large cross-sections
- Rutile coating – for fillet and short tack welds
- Cellulose - rutile - for complex welding.
Also, to carry out arc welding of pipes, you will need a transformer - a rectifier or inverter to create direct current.
It’s good if the welding unit is equipped with several operating modes (with different types of electrodes)
The nuances of arc welding
The device should be turned on only when the electrode touches the product. It is important to monitor the size of the electric arc formed. Welding is performed with smooth movements, which guarantees uniform filling of the seam with molten metal. Smooth movements from side to side control the thickness of the joint. Products with a large cross-section and thick walls are welded from the inside and outside.
Welding options
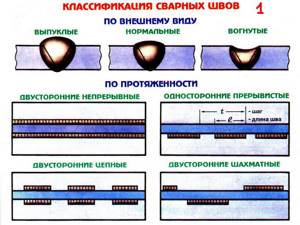
There are many different types of welded joints. In particular, they may be:
- longitudinal butt with one- or two-sided seam;
- transverse butt with or without internal boring, with or without beveled edges;
- contact butt;
- one- or two-sided corner;
- bell-shaped
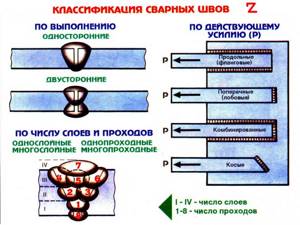
The most widely used when welding pipelines of heating systems is a butt joint with a transverse seam. This is due to its high strength. Welds can be:
- one-sided;
- bilateral;
- single-sided with a backing ring.

Proven pipe welding technology
Single-sided seams are used when welding pipes with an internal diameter of up to 500 mm.
An overlapping socket joint is less durable. It is used for welding plastic pipes. The end of the pipe must be flared.
Also, metal and polypropylene pipes can be connected using couplings.
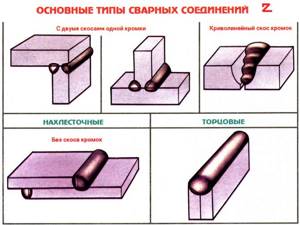
Typical welding of steel pipes
Main stages of installation
Installation of a heating system made of steel pipes does not require special skills. Depending on the material from which the parts are made, you need to prepare a welding machine or gas torch. The main stages of installing heating system pipes:
- Draw a drawing of the location of the heating system according to the building design. The figure shows dimensions, key components, wiring, radiators, control panel, water drainage taps.
- Clear the room of unnecessary objects, groove the walls, make holes for pipes.
- Assemble the system from individual parts, make exits to the radiators. The joining points are welded with an electric arc or gas from the nozzle of the apparatus. The seams are cleaned and treated with anti-corrosion compounds.
Before installing heating pipes, you need to think through the wiring components, control system, and pipeline shutoffs. In addition to this, it is necessary to make a separate tap outside the house through which water can be drained from the system. Temperature and liquid supply regulators must be installed on radiators. The first run should be a trial run to check the integrity of the overall design.
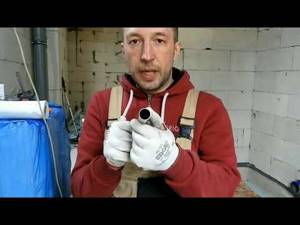
Heating installation in a private house. Part 2. We work with metal pipes.
Types of welds and joints
Welding of steel pipes is carried out using a welding machine using the fusion method. The welding machine creates a constant current from alternating current and, through an electric arc, heats a local area of the product to the desired temperature. The formation of an electric arc occurs on a metal rod (electrode). Where the arc operates, a special atmosphere is formed, which, when melting the metal, does not allow it to oxidize. Thanks to a high-quality weld, leaks are completely eliminated, since the connection is sealed.
There are many ways to apply sutures. Which method to choose depends on the thickness of the pipes and the material from which they are made. Main types of seams:
- to Taurus;
- end-to-end;
- overlap;
- corner.
It is also important to consider the location of the pipes in relation to each other:
- Bottom seam. During welding work, the electrode is placed above the elements to be connected. With this method, the welder can clearly see all the welded areas, so this method is the most convenient.
- Ceiling seam. The electrode is placed under the element to be welded. In this case, the operator raises his hand up and holds it above his head, so this method is used only during repairs or when replacing a deformed section of the pipe. It is not used when setting up a new system.
- Vertical seam. This connection method is used if 2 pipes are located horizontally. The welder moves the electrode up and down and from bottom to top (in the vertical direction).
- Horizontal seam. Often horizontal connections are used to install heating and plumbing systems. In this case, two pipes are in a vertical position.
Welding protocol for polyethylene pipes or couplings
After the certification procedure has been completed and the technological map for welding polyethylene pipes or couplings has been approved by NAKS, you can begin industrial welding of products. In order to monitor the accuracy of compliance with welding parameters and modes, mandatory registration of this data in the form of a protocol is provided.
The welding protocol for polyethylene pipes includes the following information:
- model name or number of the welding machine;
- welding date;
- FULL NAME. welder and/or brand;
- name of the project or object;
- material;
- pipe or coupling size;
- SDR (standard pipe dimensional ratio, i.e. the ratio of the nominal outer diameter to the nominal wall thickness);
- ambient air temperature;
- resistance pressure;
- welding modes: temperature, pressure, time, etc.;
- other additional information: weather conditions, protective measures, seam number, errors, etc.
Each manufacturer of welding machines creates its own unique external design of the protocol and adds as much additional information as possible, which will allow us to accurately analyze the cause of defects.
SPECIFICATIONS
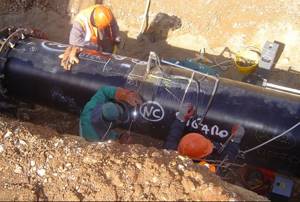
There are differences between manual arc welding on pipelines and welding of flat parts. There is a basic set of parameters that must be followed. And its subtypes - argon and gas - too. They are used on gas and water pipelines.
To calculate the optimal strength of the cooking current, d of the electrode is multiplied by 35. Let’s say you have a 2 mm conductor, which means the current needed is 70 A. Some convention of the example does not exclude the pattern. If you are welding small d pipes with a thickness of up to 5 mm, then 175 A is enough for your eyes.
To hold the arc, the distance separating the conductor from the metal must be maintained at the same level. Its calculation is done taking into account d electrode plus 1. Let’s say the electrode is 5 mm, which means the distance is 6 mm.
Pipe welding kit
If welding of polypropylene products has to be carried out regularly, then it is advisable to purchase a special welding kit, which is immediately sold in an appropriate suitcase. Its average cost is about one hundred dollars, and it consists of:
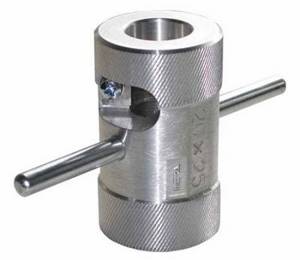
- heating element;
- Teflon nozzles of different sizes;
- scissors for cutting polypropylene pipes;
- bolts that secure the nozzle to the heating element;
- level;
- supports for the heating element;
- hexagon for tightening bolts.
In the case when welding work is carried out occasionally, it is more rational to rent welding equipment.
Installation of steel heating pipelines
The process of installing heating pipes from steel pipes can be carried out in two ways: threaded and welded. Both methods are quite reliable, but quite complex from a technological point of view, and therefore require the involvement of professionals to implement them.
When connecting steel pipes by means of threaded twisting, threads must first be cut into the ends of the joined products, after which they are connected to each other using couplings, fittings, bends and other intermediate products, the quality of which must be given special attention
For ordinary steel pipes, flax is not recommended as a winding material, since constant moisture at the threaded connection can lead to corrosion.
The connection method by welding is even more reliable, however, unlike threaded connections, it is permanent, that is, disassembling the connection if necessary becomes impossible.
The process of welding steel pipes can only be carried out by qualified specialists. This work requires special welding equipment, the operation of which is significant and inaccessible to those who do not have professional skills.
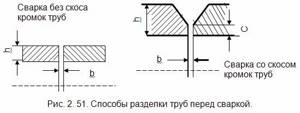
In general, when carrying out welding work, you must adhere to the following important rules:
Installation of heating using steel pipes should begin with the installation of a riser; and then it is from the side of the riser that the pipeline should be laid. However, in most cases, work in residential buildings is not carried out from scratch, but comes down to replacing outdated heating communications.
Therefore, depending on the situation, the welding process may have certain features. Galvanized steel pipes are welded using self-shielding wire with a diameter of about 1 millimeter. In some cases, it is possible to use electrodes with a diameter of up to 3 millimeters, having a rutile or calcium fluoride coating. The connection of non-galvanized steel pipes for heating, which at home usually have a diameter of no more than 25 millimeters, is most often made with an overlap. The assembly of such pipelines by butt welding is carried out only at enterprises. The weld seam when connecting steel pipes must be smooth in relation to the surface of the products being connected, and not have sagging, cracks or other defects and flaws (read: “Options for welding galvanized pipes - advantages and disadvantages ways").
What is necessary?
Successful welding requires two things: equipment and skills. Moreover, the second point is no less important than the first. The only exception is, perhaps, welding using electrical fittings, since the simplicity of the technology allows even a non-professional to make a high-quality connection.
In all other cases, the participation of a specialist is desirable. We must not forget that a violation of the tightness of a weld in a heating system can lead to very unpleasant consequences (damage to property, including someone else’s, burns, etc.).
Tools
The set of tools and equipment required for welding work is determined depending on the type of pipes used to construct the heating system, as well as the selected welding method.
First of all, this is a manual welding machine.
Insulating a balcony requires knowledge, and you can fill it in our article on how to insulate a balcony with polystyrene foam. A detailed diagram of connecting aluminum radiators is here.
We use knowledge and make induction boilers with our own hands using the link below: https://prootoplenie.com/otopitelnoe-oborudovanie/kotlu/indukcionnyjj-kotel-otopleniya.html
A device for connecting polypropylene pipes is also sometimes called a soldering iron. For household needs, a device with a power of 650 W is quite suitable. It can be used to connect plastic pipes with a diameter of up to 60 mm. Nozzles are included with the device.
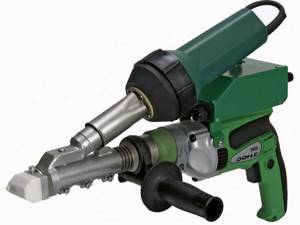
Manual welding machine
When using electrical fittings, a special device is also required to connect them. In addition, during the work process, a roller pipe cutter, a positioner, special devices for removing oxidation and centering pipes, a knife, a hammer, as well as consumables (couplings, electrical fittings, etc.) may be useful.
Welding of metal pipes is carried out using an electric or gas machine. For cutting, a grinder or cutter is used. In addition, you will need the usual welding equipment: mask, canvas suit, gloves, asbestos, hammer, electrodes, wire, etc.
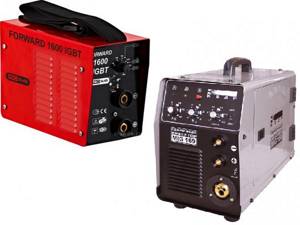
Electric and gas welding machines
Selection of electrodes
Electrodes are the first thing you need to choose before you start welding pipes. The reliability of the seams and how tight the system will be, as well as the process itself, depend on their quality. The better the electrode, the easier the process will be.
An electrode is a thin steel rod, 0.2-0.5 cm thick, on which a special coating is applied to create a stable arc during welding. It also helps form the weld and prevents oxidation.
Electrodes are classified according to the type of core and type of coating.
According to the first point, electrodes are divided into two types:
- With a middle that melts. There is a wire inside, the thickness of which is selected depending on the type of welding.
- With a non-melting center. They are made from graphite, electrical coal or tungsten.
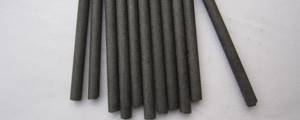
The coating on the electrodes can also be different:
| Shell | Brand | Characteristic |
| Pulp | C | Often used to connect to large cross-section pipes. Most often these are gas or water lines. |
| Rutile acid | R.A. | Used for welding heating or water pipes. When working with such an electrode, slag may appear, which can be removed by tapping on or near it. |
| Rutile | R.R. | These electrodes produce neat seams and a minimum of slag (and the stuck-on ones are easily removed). Most often used for corner joints or when welding subsequent layers. |
| Rutile-cellulose | R.C. | Suitable for any plane, often used to make long vertical seams. |
| Main | B | Universal electrodes are often used to connect thick pipes or parts that will be used at sub-zero temperatures. |
When selecting electrodes, it is important to remember that quality depends on price. If you purchase low-quality material, you may have to spend even more to redo it later.
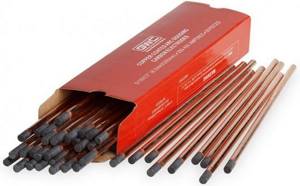
Example of carbon electrodes with copper coatingSource tk-gazmet.ru
Work technology
First you need to prepare the workplace and protective equipment. To figure out how to properly weld heating pipes, you need to practice on a separate piece of metal. To do this, you will need a thick pipe and a universal electrode with a diameter of 3 mm and above, since it is easier to learn how to make seams with it. Work process:
- One welding cable has a holder. An electrode is inserted into it, then the cables are connected.
- The device has 2 cables and 2 current outputs with positive and negative polarity. The end of one cable is equipped with a clamp that connects to the part, the end of the second is a holder for the electrode. Polarity is chosen depending on the type of work. The best heating of the metal occurs with straight polarity.
- There are 2 ways to light an arc. To do this, the tip of the electrode is tapped several times on the part or drawn along the seam (chirping).
- The type of weld on the pipe depends on the inclination of the electrode. The main inclination is 30-60°. To deeply heat the metal, the electrode is tilted at a “backward angle.” In this case, the bath and molten metal flow behind the electrode. If surface heating is required, then the angle of inclination is changed in the opposite direction.
Each material and type of seam has its own electrode movement. For homework, it is enough to master some of them. During work, it is important to monitor the size and condition of the weld pool. To do this, movements are accelerated or slowed down.
How to weld plastic pipes
Welding of plastic pipes takes place using a special technology, because due to the high temperature, sagging often forms inside them. Therefore, welding work must be performed carefully. But if the temperature is too low, the parts will not be fixed. Work order:
- The welding machine is placed on a stand and heated to 260° C.
- The end of a plastic pipe and a fitting of a suitable diameter are inserted into the welding nozzle so that they are located in the same plane.
- If the pipe is thick, then the temperature level is increased. When the parts warm up, they are removed from the device and connected.
When the seam hardens, the pipe is checked for leaks. Products with a large diameter (over 63 mm) are soldered joint-to-joint. The cut of the end pipes is melted and connected, while pressing strongly on each other. For coupling and socket soldering, hand-held instruments are used. They are equipped with a centering element and attachments that hold the workpieces. All pipeline parts are driven into a heated welding machine and soldered. To ensure that the parts are connected, all work is carried out quickly.
Possible errors in the process
The quality of the finished product may be poor due to a defect in the weld. The defect can be located inside or outside the product, and can also be through. The reasons why it occurs during welding of metal heating pipes and other products:
- due to cheap low quality material;
- due to poor quality equipment;
- when the technological process of work is disrupted;
- due to the inexperience of the welder.
Sometimes welders reinforce the seam up to 4 mm. Because of such an error, it becomes fragile. The height of the reinforcement should not exceed 2 mm, then the seam will have maximum strength.
