The use of thermal insulation systems in building structures can significantly reduce heating costs. The use of all kinds of insulation makes it possible to speed up the pace of construction and reduce the budget for building a house. In order for them to cope with their responsibilities, you need to know how to choose them. Do you agree?
We will tell you how to choose the right insulation for the exterior walls of your home. The article we presented describes all types of thermal insulation materials used in practice and their operating features. Independent owners of country estates will find facade insulation technology here.
Materials and step-by-step guide for home insulation
What should you consider when choosing insulation material?
When choosing insulation for your home, you need to pay attention to the following indicators:
- Dew point; Vapor permeability of walls.
The dew point is the temperature at which moisture in the air begins to condense into water.
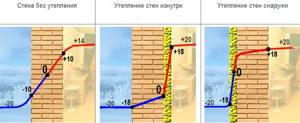
The dew point is located in the wall and can move about it as external and internal temperatures change.
For example, the temperature in the room is 20 degrees (50% humidity), which means the dew point will be 13 degrees (that is, if there is an object in the room with this temperature or lower, condensation will form on it).
The vapor permeability of walls is the function of the material to retain or pass vapor through itself. This helps remove steam (and reduce humidity) from the room.
For maximum effective insulation you need:
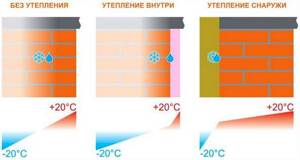
Try to insulate from the outside (if you insulate from the inside, the wall will still remain cold, it just doesn’t let the cold into the room).
And in winter, a wall with internal insulation may completely freeze (especially in the corners).
If you are going to make a “pie” from different insulation materials, then you need to select it in such a way that the vapor permeability increases from the inside to the outside.
Conclusions and useful video on the topic
To avoid common mistakes when choosing materials for insulation, we recommend watching the following videos:
With all the variety of available materials and insulation methods, you can always choose the most suitable one. Despite the fact that some work seems easy to perform, it is still better to entrust it to experienced builders and heating engineers.
Would you like to talk about how you selected insulation for furnishing your own country house? Do you have information that will be useful to site visitors? Please write comments, ask questions on controversial or interesting points, post photos in the block below.
Problems
This method has a number of disadvantages. It is for this reason that the method has many opponents. Insulating walls from the inside can cause the following problems:
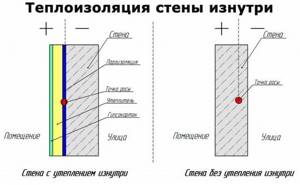
- The walls are not protected from the cold. The supporting structure of the building continues to be in contact with the outside air. This can lead to its gradual destruction. Cracks will begin to appear on the surface. This measure not only does not protect the outer wall from the cold, but also takes away some of the heat from it, because before insulation, part of the heat from the room heated the wall, but now this flow is blocked.
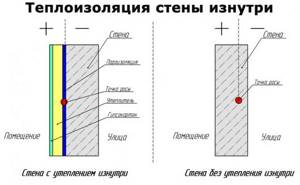
- Condensation. It forms on a cold surface upon contact with warm air. Heating engineers call the place where condensation forms the dew point. The main task of thermal insulation is to move the dew point outside the wall. Insulation “from the inside” ensures that the dew point shifts to the boundary between the wall and the insulation. This process is hidden, so home owners do not notice it. But humidity will be an excellent condition for the proliferation of various microorganisms.
- Reducing the area of premises. Modern types of insulation have good efficiency. But science has not yet come up with such a good material that its thickness is minimal. To insulate a house from the room side, you will need 5 to 10 cm of insulation. This eats up the area quite a lot. This is not so noticeable to the eye, but if you calculate the losses for the entire building, the figure turns out to be significant.
Therefore, before deciding on internal insulation of the walls of the house, we recommend that you carefully think about the listed problems.
In this case, ignorance does not exempt from responsibility, since the result of inattention will make itself felt in the first years of operation.
Advantages of external thermal insulation
Insulation of brick walls, in general, can be done in THREE ways:
- Outside.
- Inside.
- From the inside (well method).
The latter is possible only at the stage of erecting a brick house according to a pre-agreed estimate and building design. The second is less labor-intensive; the materials are not systematically exposed to the external environment, but significantly reduces the usable area in the rooms, exactly by the thickness of the insulation and auxiliary structures.
Advantages of insulating the walls of a house from the outside:
- The brick wall is reliably protected. It is easier to change the insulating layer after 5-15 years than to rebuild the building.
- Possibility of using any finishing material from block house to lining.
- The dew point shifts, so there will be no freezing, which also means there is no condensation or dampness in the rooms.
- More effective thermal insulation.
- If the insulation contains harmful substances, they will not cause any harm to health.
Practice confirms that it is better to insulate a private house from the outside, but this must be done either with the involvement of professional construction teams, or by learning all the aspects of wall insulation with your own hands.
How to insulate walls outside
Preparing the wall surface
Laying expanded polystyrene or polystyrene foam is carried out according to the same principle as for internal insulation.
Preparing the wall surface consists of two stages: cleaning and priming. Wall cleaning is usually used in panel houses in which the surface of the slabs was painted and over time the paint began to peel off. Also, it is recommended to clean the wall if the so-called “fur coat” was applied to it - a decorative insulating layer, which over time began to crack and crumble. When the surface of the wall is cleaned, we prime it and wait for it to dry completely. Please note that insulation work should be carried out in dry and windless weather, at temperatures from +5 to +30 degrees.
Laying insulation
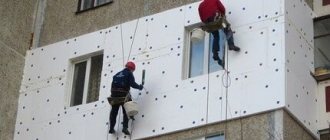
When the wall surface is ready, we proceed to the procedure for installing the thermal insulation material. Laying the insulation begins from the top, in horizontal rows. Fastening of polystyrene foam or expanded polystyrene is also carried out using fungi. Please note that the insulation sheets must extend at least 5 cm beyond the level of the seams of the panel slabs if you live in a panel house - this is necessary in order to insulate the seams. If you live in a brick house, then the insulation should extend beyond the perimeter of your apartment from the outside. At the locations of the windows and at the ends of the rows, we cut the insulation to the required sizes. To attach the insulation, about 5 fungi are used per sheet.
Finishing work
Unlike internal insulation work, for external insulation work, finishing work is carried out somewhat differently. First of all, the seams of the insulation joints are sealed with polyurethane foam; for this, some installers make special grooves in these places in order to seal these seams well. When the mounting foam has dried, cut it off.
Next, using masking tape, we finish the seams; this must be done so that cracks do not form in this area. To do this, apply a thin layer of adhesive mixture and then embed masking tape into it. After finishing the seams, we move on to finishing the entire area of the insulation. To completely finish the surface of the insulation, we need an adhesive mixture and a painting mesh, do not confuse it with masking tape. This procedure is carried out in the same way as for internal insulation: an adhesive mixture is applied to a small area of the insulation, in which the painting mesh is embedded. It is better to apply the mixture in small sections so that it does not dry out while you are busy with the previous section. Next, we install a stainless steel canopy to ensure water drainage. To prevent moisture from remaining on the surface of the insulation, it is advisable to make the canopy at an angle of 45 degrees so that the water flows down.
To give it a beautiful look, it is recommended to paint the surface in any color you like, using paint for exterior use.
We replace insulation
Now we need to dismantle the old siding of the house, if there is any: anyway, nothing can be attached to it, but it can hide invisible defects. Inspect the walls - perhaps mold or rot has appeared somewhere... The affected areas must be cleaned, and then the walls must be treated at least twice with an aseptic solution. Any composition against rotting and fungi will do.
In general, insulation of a frame house occurs in four stages: it is necessary to create a vapor barrier, thermal insulation, a wind-moisture barrier layer and complete everything with decorative finishing.
Reinforced polyethylene is suitable as a vapor barrier. It is imperative to leave air space between it and the wall of the house. Therefore, if the wall is smooth (the house is not log), put thin slats on it, and only then attach the polyethylene. Do not leave gaps; tape the joints to be secure.
Now we need to make a frame for the insulation. Please note: this is where you will attach the façade system. Therefore, choose bars so that they can withstand its weight. Obviously, PVC panels are lighter than a blockhouse or cement particle board. The distance between the bars depends on the type of insulation used. If you choose stone wool, it is better to use it in the form of slabs that are inserted by surprise, without requiring additional fastening. In this case, the distance between the bars should be 1–2 cm less than the width of the miniwool slab. By the way, don’t forget to treat the wooden blocks with an antiseptic!
Installation of insulation
If you prefer ecowool, which is “inflated” using a special installation, then fill the bars at a distance of approximately 60 cm from each other.
10–15 cm of additional insulation will be sufficient.
Now you need to strengthen the wind-moisture-proof membrane on top (preferably a special membrane to avoid moisture accumulation). It is strengthened tightly on top of the insulation onto the existing frame. Thin wooden slats are installed on top of the membrane, onto which the decorative part is then attached. It is better to cover the entire “sandwich” from below with a metal mesh: it will protect against rodents, but will not block air access. All. The insulation is ready. You can start decorating.
Just don’t let it be a surprise to you that after all the insulation work, the thickness of the walls will increase by twenty centimeters. Windows and doors will be recessed deep into the walls. Therefore, at a minimum, you will have to make new slopes and ebbs.
Better yet, replace the windows right away. Believe me, it is completely unreasonable to insulate a house and leave old, dry wooden frames.
If you plan to live at home not only in the summer, then choose at least a five-chamber profile with a thickness of 70 mm and a two-chamber double-glazed window. It is better that the glass is low-emissivity - this will reduce heat loss in your home. And if you are afraid that the house will be stuffy, do not forget to install special ventilation valves. They will allow you to ventilate your home without drafts even in severe frosts.
Proper internal insulation of walls in a house or apartment
There are only two ways to insulate indoor walls from the inside and avoid problems with dampness:
- recreating a multi-layer wall (place a half-brick wall with insulation at some distance);
- Heat the wall and then insulate it.
These options work, but, as you can see, they “eat up” a significant amount of space and cost a lot of money. In each specific case, it is necessary to consider what kind of insulation and how much is needed, but the wall pie remains the same.
Second wall
At some distance from the main wall, a second wall 10-12 cm thick is installed. Between the two walls, a layer of insulation, which is required for these conditions, is attached to the inner one. In this case, there should be a ventilation gap of at least 3 cm to the outer wall. In total, this entire structure will be 20-25 cm away from the main wall. It will “eat up” a considerable area.
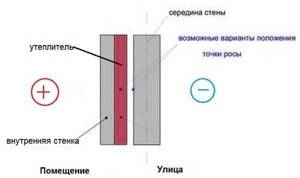
Options for insulating walls from the inside
As you can see, in this case the dew point can be located inside the insulation or on the inner surface of the wall facing the street. To be able to remove the formed moisture, you can make forced ventilation by installing one or two exhaust fans.
Since in this case the insulation will get wet, it is necessary to choose one that is not afraid of moisture. These are polyurethane foam, polystyrene foam, foam glass. You can also use some types of stone wool, but only those that are not afraid of moisture (there are some).
Thermal insulation material must be fastened simultaneously with the construction of the walls. They laid it out to a certain height and secured the thermal insulation. It’s inconvenient to work, but there is no other choice.
Electrical heating
The idea of this method is to move the dew point inside the wall when insulating a concrete or brick wall internally. To do this, it must be heated. The easiest way is to attach an electric heated floor mat. At some distance from it, insulation is installed, on top of which there is a finishing layer.
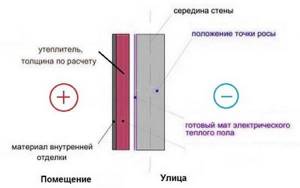
How to insulate a wall in an apartment from the inside
In this case, there are no problems with moisture removal, and much less space is required to install the system: from 8 cm (with a ventilation gap of 3 cm and an insulation thickness of 5 cm).
With this method, the thermal insulation material can be of any kind. To install it, first a sheathing is made, then a counter-lattice, and then a suitable insulation is attached to it.
Recommendations for choosing materials
To choose the right insulation, you need to take into account several more factors that may affect the quality of the work performed.
Condition of walls and foundation. If the house is old, and the foundation or brickwork is already cracked, then it is necessary to abandon heavy insulating structures. In this case, it is best to install lightweight and durable materials. It is better to attach them using special adhesives.
Architectural complexity of the building. Polystyrene foam and mineral wool are well processed and make it possible to provide reliable insulation of walls with recesses, patterns and other decorative elements.
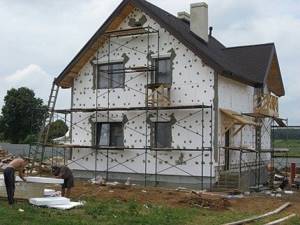
Any type of building can be reliably insulated without extra costs. The main thing is to choose the right materials for insulation and an experienced contractor
Resistance to insects and rodents . Often, small rodents and insects, such as mice or ants, can make nests under a layer of thermal insulation.
If there is such a problem on the site, then it would be advisable to carry out insulation using bulk materials. Expanded clay is good because it does not attract animals.
It is also necessary to take into account other factors, such as the price of insulation, features of its installation, wall material, impact on the environment, fire resistance, etc.
If you plan to install a thermal insulation system from the inside of the house, it is worth reading the following article, which details the materials and methods of their use.
Comparative analysis of insulation inside and outside
High-quality insulation of walls, foundation and ceiling will make it possible to maintain good conditions in the house. You have to choose between two installation methods for thermal insulation materials:
External insulation - installed on the outer part of the building, its advantages include:
- protection of the surface from the influence of atmospheric conditions, extending the service life;
- the dew point remains on the outside of the room and the walls are not covered with condensation;
- heat supply costs are significantly reduced;
- the internal area of the house remains unchanged;
- a large number of thermal insulators create a layer of sound insulation and reduce the level of penetrating noise;
- there is an opportunity to adjust the architectural image of the house to your own taste.
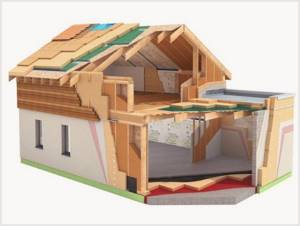
Among the bad qualities:
- high price of materials;
- The thermal insulation process depends on the weather - work cannot be performed at low temperatures or during rain.
Insulation inside - installed inside
Houses.
This option has a lot of negative factors, but it provides a temperature increase in the room by a couple of degrees. Thermal insulation is installed inside
in several cases:
- if access to the surface from the outside is difficult (high-rise buildings);
- you need to preserve the appearance of the house’s exterior, for example, wood decor.
Disadvantages of insulation inside:
- the required area is lost;
- condensation will appear between the wall surface and the heat insulator at the dew point, provoking the growth of fungus and mold;
- the walls are not protected from the influence of the external environment, they freeze and become unusable.
A comparison demonstrates that external insulation is better than internal insulation. It more effectively maintains high temperature and optimal moisture, increases the service life of load-bearing structures. Thermal insulation placed inside
, loses on all counts, not counting the ability to do it whenever you want. But you cannot refuse it; for most owners of living space and houses, this is the only option to reduce heat loss.
Complex theses in clear language: disadvantages of external insulation
Insulating a brick wall from the outside is a relatively simple, effective process. But it is wrong to talk only about its advantages, especially for low-rise construction, an inexpensive, small house built “for oneself.”
“Three pillars” of inconvenient answers:
- A person who builds a brick house “for himself” does not always lose out on costs. According to building standards, such a house will stand without repair for a maximum of 10-20 years, and then will require significant investments. But with mass construction “in a hurry”, the period of maintenance-free operation of the building is even shorter.
- The multilayer insulation systems that the construction market offers are designed just for a home “for yourself.” Manufacturers of insulating materials and hired construction crews are not interested in building a house “for centuries”; the faster the structures deteriorate, the (ultimately) higher their profits. The technology of layer-by-layer wall insulation is designed to use materials with different shelf life. For example, polystyrene foam and mineral wool will last a maximum of 5 years. Then the entire outer “cupcake” will have to be broken and a new one installed.
- The durability of multilayer structures is low. Strong connections and cheap insulation will be required; this is the best balance between strength and cost. Previously, such insulation was clay mixed with sawdust soaked in lime, ash, and slag. This option not only fulfilled its intended purpose, but also stood for centuries.
That is, any technology, any material that modern construction markets offer cannot be considered the best. You have to choose the best from the worst, and this does not fit in with the desire of the owner of a brick house to build “for centuries.”
How and with what to insulate the walls of a house outside
Let's look at external insulation in more detail.
First of all, we inspect our wall, check the finishing layer for strength (ideally, you need to completely remove the finishing).
We completely prepare the wall for insulation (you can follow the advice above). That is, we clean the previous coating, seal the cracks, and prime it.
After this, you need to select and purchase insulation.
The most commonly used material is expanded polystyrene (foam).
Advantages of polystyrene foam:
- Good thermal insulator; Mold and mildew very rarely form on it; Low price; Long service life; Withstands temperature fluctuations well.
Do not forget that before insulation the wall needs to be leveled; large differences greatly spoil the future appearance of the facade.
Installation of insulation
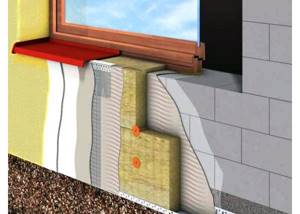
The polystyrene foam has been selected and purchased, now we need to install it (in addition, we bought glue and cement - we will lay insulation on this).
The glue must be diluted with water until the consistency of plaster is obtained and applied to the wall with a spatula.
Along the lower border of the foam sticker we install a bar along which we will line up the panels.
First we spread it on the wall, then we cover the panels with a small layer and apply it to the wall (lightly pressing it against the wall).
After this, we additionally secure the foam sheets with “umbrellas” (you can also secure them with “umbrellas” a few days after gluing).
Then we cover the joints and caps with glue (if the gaps are large, then we first blow them out with construction foam).
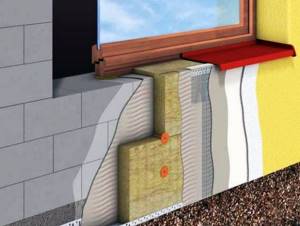
Place a mesh on top, apply a cement mixture to the mesh (try to glue the mesh gradually, in parts).
After the solution has hardened, use a float and sandpaper to sand the surface, removing roughness and unevenness.
After this, we apply the last layer - the finishing mixture. After it dries, we also sand the surface with sandpaper.
Vapor barrier and waterproofing
How to properly insulate a wooden house from the outside? It is important to firmly remember one thing: vapor barrier is laid on the warm air side, and waterproofing on the cold air side. Both external and internal material can be produced in the form of films and membranes. For a wooden building, it is recommended to choose the latter option. The films practically do not allow air to pass through, while the membranes “breathe”.
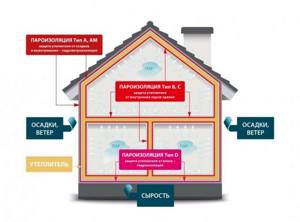
Layout of steam, wind and moisture insulation layers
Before insulating the outside of an old wooden house, it is worth checking the condition of the walls, ceilings and roof, and, if necessary, strengthening them and protecting them from mold and mildew. A set of such measures will extend the service life of the building. Also, the insulated structure must be cleaned of dirt and dust.
External thermal insulation of a residential building includes insulation of walls, roof, door and window openings, as well as foundation and sewer pipes. If insulation is carried out partially, it will not give the expected effect and significant savings. Only a full range of work will allow you to create maximum comfort in your home, even in the most severe frosts. Thanks to modern technologies, it is becoming increasingly easier to insulate a house from the outside with your own hands.
Insulate the outside of the house with your own hands
Contents of step-by-step instructions:
Proper insulation of the house outside and inside
What do you need to know first about home insulation?
At the moment, there are two main types of insulation:
External - installed on the outer part of the wall and is exposed to weather conditions (but does not take up the space of the rooms) and internal - which are attached to the inside of the wall (it is better to use in large rooms, since during installation the insulation eats up about 10-15 cm from all sides).

Of course, there are still debates and discussions about the best type of insulation (insulate the outside, the inside, or both the outside and the inside). A lot has already been said about this; each option has its own advantages and disadvantages.
Possible insulation option
Many future homeowners, at the stage of building a stone house, immediately think about a durable option for wall insulation. Load-bearing walls are built from porous material, and the outer part is lined with brick. A gap is left between them, which will be empty (vent gap) or filled with expanded clay. It was used back in the USSR and was considered an “eternal material.”
Such a “fur coat,” although labor-intensive, requires additional costs and time, but it does not need to be repaired every 3-5 years. A significant disadvantage is low strength, high cost and impracticality.
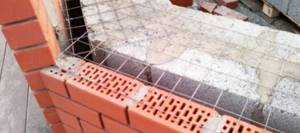
A cheaper option is walls made of double hollow silicate bricks. This is an analogue of a “double wall” (made of 2 bricks), it retains heat well inside the house, is cheaper and more durable than a heterogeneous “fur coat” made from a bunch of “pie” materials.
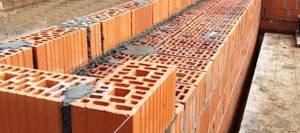
Brick and concrete are heat-intensive materials; you need to try hard to keep them cold with good heating equipment even at minus 40 C.
With normal heating and operating conditions of the house, the payment costs are no higher than in a similar stone house, wrapped in a “multi-layer fur coat” of expensive and short-lived materials. The money for their construction, repair or reconstruction every 5-10 years can be used to pay housing and communal services, and there will still be some left over.
On a note! A house made of aerated concrete blocks with a thickness of at least 45 cm does not need insulation, provided there are no gaps in the walls and roof and a good heating system.
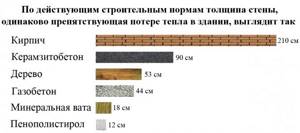
What is the best way to insulate walls inside a house or problems when insulating houses from the inside
Now it’s worth considering possible insulation problems
When insulating from the inside:
It is important to lay the insulation tightly and fit the drywall tightly. If you leave space or unsealed cracks, cold will seep through them with the onset of cold weather. Also make sure that the temperature of the load-bearing walls does not fall below the dew point, otherwise condensation will form, which may subsequently freeze (cracks will appear) Well, moisture is fungus and mold. How to get rid of these problems?
How to get rid of these problems?
Fasten the insulation tightly to the wall (it is better to use insulation with aluminum foil).
It is better to install not one layer of drywall, but several. So, all insulation work can be done with your own hands and this does not require special knowledge or special tools.
Externally, insulation is more beneficial both from the point of view of preserving space and from the point of view of preserving heat.
The question of proper home insulation is always relevant for regions with harsh climatic conditions.
High-quality thermal insulation reduces heating costs in winter and maintains normal room temperature in summer. If the need for insulation is beyond doubt, then when choosing where to place it, difficulties arise. Having studied the pros and cons of external and internal thermal insulation, you can confidently judge their effectiveness.
When can you insulate a house from the inside?
First of all, insulation from the inside is quite possible when you do not live in a country house all the time and do not heat it all winter. Then, internal insulation is more preferable: such a house will warm up faster.
Further, you can insulate from the inside if it is possible to leave a ventilated gap between the wall and the thermal insulation layer. But such a gap significantly reduces the internal volume of the building. Not everyone can afford it.
Finally, there are situations when an insulated room is combined into one with other rooms of the house. For example, you have a dining room and a summer terrace. You insulate the terrace and combine it with the dining room. In this case, excess moisture accumulation will not occur.
If you do not want to insulate, but to “warm” the house, then you can use warm plaster. It differs from the usual one in that it contains some kind of porous material - either polystyrene foam beads, expanded vermiculite or cellulose fibers.
As an insulation material, such plaster is two times “weaker” than mineral wool. The maximum thickness of the coating is 5 cm (mineral wool is usually laid in layers about 10 cm thick), otherwise the plaster will fall off.
Insulation inside, how to avoid condensation
When it is not possible to make thermal insulation from the outside, it is installed inside. The first task is to avoid the occurrence of condensation and moisture harmful to materials. Why do water droplets appear on the surface of the wall? This occurs when cold material comes into contact with warm steam from the room. In order for the wall to remain dry, it must be insulated from steam penetration. To do this you need:
- use a heat insulator with low vapor permeability; it will be better if its value is less than near the wall;
- make high-quality plasterboard cladding that is moisture-resistant;
- apply a waterproofing sheet during installation of the heat insulator;
- reduce indoor humidity using ventilation.
When choosing a thermal insulation material, you need to focus on vapor-resistant products: foamed polymer, extruded polystyrene foam, artificial latex. Possible application min. cotton wool, but its installation will require considerable effort:
- the waterproofing on the wall should be strengthened;
- make a wooden frame from bars impregnated with an antiseptic or a zinc profile;
- put mineral wool, preferably with a layer of foil glued on;
- make a vapor barrier;
- install plaster cladding.
Extruded polystyrene, which consists of polyethylene foam and aluminum-based foil, can be used as a vapor barrier material. The canvases are laid end to end and fixed with brackets; in the connecting places they are coated with glue and foil tape.
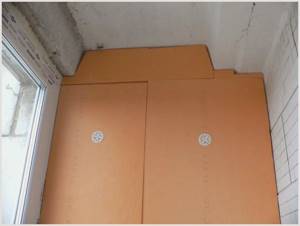
Artificial latex is an artificial two-component composition sprayed onto the wall surface. It is moisture-resistant, steam-resistant, and creates a monolithic surface without cold bridges. The heat insulator is used for any type of surface and resists energy loss well. A layer of material 5 cm thick is considered practical. From the side of the room it is covered with a plasterboard partition. The disadvantage of this method is the high cost of services for applying artificial latex.
Foamed polymer and extruded polystyrene foam are more often used than other thermal insulators for wall thermal insulation inside
. The work is divided into a couple of stages.
- We prepare the surface, including removing outdated finishes, cleaning and priming with an antifungal agent.
- On insulating boards, the adhesive composition is applied over the entire surface, and not pointwise as on the outside.
- To ensure good adhesion of materials to the wall surface, the surface of the foamed polystyrene is pierced with a roller with needles.
- The glue needs to be quite strong to fill in small imperfections. The plates are pressed tightly against the wall. Installation is carried out end-to-end.
- After the glue has dried, after 3-4 days, the fastening is increased with umbrella dowels.
- The joints of the plates are finished with polyurethane foam.
- Using glue, a reinforced mesh
. Plaster is applied on top of the dried layer.
Having compared the two methods, we can safely say that insulation from the outside is more advisable. It significantly reduces heat loss and protects the walls of the house from premature destruction.
Features of the process of insulating a building from the outside
The materials from which the walls of permanent structures are erected can be different: brick, concrete, slag or aerated concrete blocks, wood, sandwich panels - these are just their main types.
Some of them do not require insulation at all: for example, sandwich panels. But other options need it to varying degrees.
Why do you need to insulate from the outside? Many people attribute this to the fact that if an insulating layer is installed inside a building, useful spatial volume is stolen from the interior.
This is partly true, but this is not the main reason. A critical parameter is where the dew falls.
A dew point forms on a surface where there is a temperature difference when pressure changes.
And if you install thermal insulation inside the room, it means that the walls of the building themselves will be cold, since the insulation will save heat inside the space and prevent it from reaching the enclosing structures.
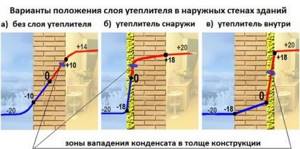
Insulation from the inside is fraught with the fact that the dew point will form inside the building, most likely on the inner surface of the main wall, which is insulated with insulation
Insulation from the inside, how to avoid condensation
When it is not possible to install thermal insulation from the outside, it is installed from the inside. The main task is to avoid the appearance of condensation and moisture that is harmful to materials. Why do water drops appear on the wall?
This occurs when cold material comes into contact with warm steam from the room. In order for the wall to remain dry, it must be insulated from steam penetration. To do this you need:
- use insulation with minimal vapor permeability, it is desirable that its value be lower than that of the wall; perform high-quality finishing from moisture-resistant plasterboard; use waterproofing fabric when installing insulation; reduce the humidity in the room using ventilation.
When choosing a material for thermal insulation, it is worth focusing on vapor-tight products: polystyrene foam, extruded polystyrene foam, polyurethane foam. It is possible to use mineral wool, but its installation will require a lot of effort:
- it is necessary to fix the waterproofing to the wall surface; make a frame from wooden blocks impregnated with an antiseptic, or a galvanized profile; lay mineral wool, preferably with a glued layer of foil; perform a vapor barrier; install plasterboard trim.
Penoplex, consisting of foamed polyethylene and aluminum foil, can be used as a vapor barrier material. The canvases are laid end-to-end and fastened with staples; at the joints they are taped with foil tape.
Polyurethane foam is a synthetic two-component composition sprayed onto the wall. It is moisture-resistant, vapor-tight, and creates a monolithic surface without cold bridges. Insulation is used for any surface and effectively resists energy loss. A layer of material 5 cm thick is considered effective.
From the side of the room it is closed with a plasterboard partition. The disadvantage of this method is the high cost of services for applying polyurethane foam. Polystyrene foam and extruded polystyrene foam are more often used than other insulation materials for thermal insulation of walls from the inside. The work is divided into several stages. Preparation of the surface, including removal of the old finish, cleaning and priming with an antifungal agent. On insulation boards, glue is applied over the entire surface, and not pointwise as on the outside. For better adhesion to the wall, the surface of the polystyrene foam is pierced with a needle roller. There must be enough glue thick to fill small irregularities. The slabs are pressed tightly against the wall.
The installation is carried out end-to-end. After the glue has dried, after 3-4 days, the fastening is reinforced with umbrella dowels. The joints of the plates are treated with polyurethane foam. Using glue, a reinforcing mesh is attached to the surface of the insulation. Plaster is applied over the dried layer. Having compared the two methods, we can confidently say that external insulation is more appropriate. It significantly reduces heat loss and protects the walls of the house from premature destruction.
https://youtube.com/watch?v=6KlLQrO5-IUrel%3D0%26controls%3D0%26showinfo%3D0
- shop.rockwool.ru
- dachnoe-delo.ru
- remontami.ru
Choosing thermal insulation
After constructing the frame of the building and laying the walls, an extremely important stage begins - insulating the housing. By selecting the most effective thermal insulation material, you can create the maximum barrier to useless heat transfer.
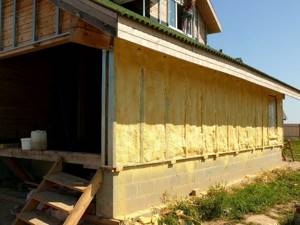
Currently, the most common insulation materials on the Russian market are: mineral wool, polystyrene foam, extruded polystyrene foam, glass wool, expanded clay, ecowool. Let's take a closer look at the features of each heat insulator.
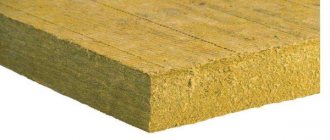
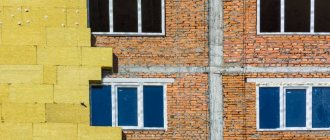
Mineral wool
An extremely popular material that has been successfully used as insulation for many decades.
The advantages of mineral wool are:
- low thermal conductivity coefficient ranging from 0.041 to 0.044 W/m3;
- good compressive density - up to 200 kg/m3;
- high fire safety - withstands exposure to elevated temperatures up to 1000 oC;
- excellent sound insulation.
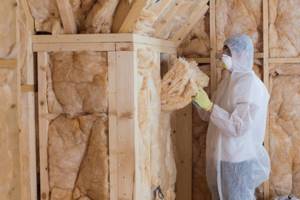
Despite the obvious advantages, the material has a significant drawback - the ability to absorb moisture. Therefore, it is impossible to do without laying an external waterproofing layer during its installation.
In addition, for insulating walls from the inside, mineral wool is unlikely to be the best option, since it takes up too much useful volume.
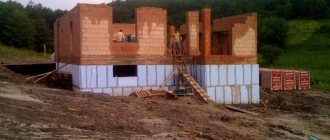
Styrofoam
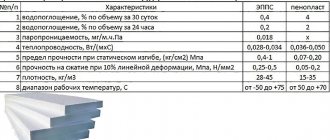
The material is in wide demand in the domestic market on a par with the previous insulation, mainly due to its increased resistance to moisture. The thermal conductivity coefficient of polystyrene foam is an order of magnitude lower compared to mineral wool. However, the density suffers somewhat when compressed. The material does not resist mechanical stress very effectively. Therefore, polystyrene foam boards are easy to damage.
The density of foam plastic ranges from 11 to 35 kg/m3, depending on the brand. The compressive strength of the slabs is 0.05-0.16 MPa. The same bending quality of the material is 0.07-0.25 MPa. Thermal conductivity coefficient is 0.033-0.037 W/m3.
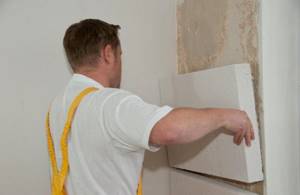
Advantages:
- does not need protection with moisture-repellent coatings;
- has little weight;
- acts as an effective heat and sound insulator;
- is one of the most accessible, relatively inexpensive solutions.
Among the disadvantages, it is worth noting the presence of a danger of fire of the material with the release of caustic, toxic smoke, causing harm to health when used at elevated temperatures.
Glass wool
In the past, the material was the most common basis for home insulation. However, the reason for the popularization of insulation was not so much its characteristics as the lack of more effective insulation materials.
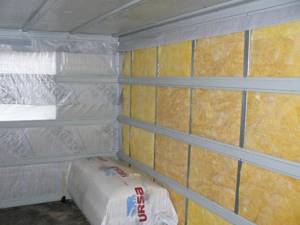
Made from molten glass fibers. Hence the name of the material. It has decent thermal insulation qualities, which are only slightly inferior to mineral wool. Thermal conductivity ranges from 0.03 to 0.052 W/m3. Resistance to elevated temperatures reaches 450 °C.
The advantage of this solution is the absence of toxic fumes during fires. The disadvantages include inconvenient installation, significant shrinkage and increased hygroscopicity.
Ecowool
Belongs to the category of innovative cellulose-based insulation. Suitable for insulating a house inside and out. However, laying the material requires a special unit that combines the substance with water, forming an insulating mass of the required consistency. The dry insulation method does not allow the coatings to be insulated hermetically.
Material qualities:
- specific gravity – 25-75 kg/m3;
- thermal conductivity – 0.037-0.042 W/m3;
- the ability to accumulate moisture and its rapid evaporation without loss of insulating properties;
- effective absorption of sound waves;
- fire and environmental safety.
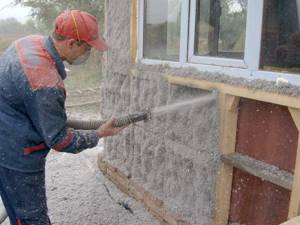
It consists of the smallest wood fibers, so it does not hide potential harm to health. As practice shows, the heat insulator does not emit toxic substances, prevents the development of mold and does not emit unpleasant odors.
The only drawback of insulation is the need to use specialized equipment.
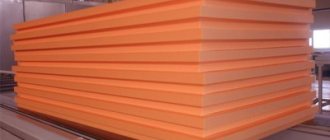
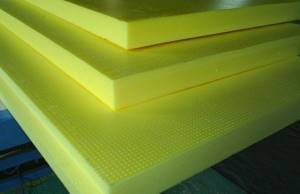
Extruded polystyrene foam
Essentially, the material is an insulating board, the structure of which is formed by small plastic granules. To produce a sheet of extruded insulation, a blowing agent is mixed with granular particles under high pressure and temperatures. The result of production is colored or transparent slabs.
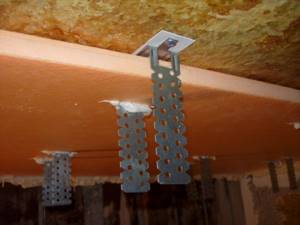
Properties:
- practically complete absence of moisture absorption;
- the lowest thermal conductivity coefficient in comparison with any other common thermal insulators;
- ability to transmit light;
- frost resistance;
- lack of tendency to rot, mold development;
- highest compressive strength;
- It is considered an ideal option for thermal insulation of buildings both from the inside and for external work.
If we talk about the disadvantages of a heat insulator, then, just like ordinary foam plastic, the material suffers somewhat from fragility. Therefore, its installation and operation requires careful handling.
Expanded clay
It is a loose insulation material. It has decent thermal conductivity and vapor barrier properties. Most often used for insulating floor coverings. Although it is ideal for insulating walls using the ring masonry method.
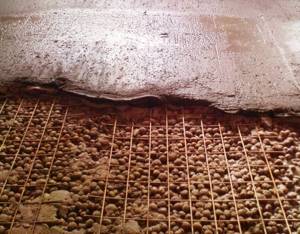
Expanded clay is characterized by moisture absorption at a level of about 8-20%. Due to the presence of a significant proportion of clay in the composition, it has increased sound insulation. Has high frost resistance. The thermal conductivity coefficient is 0.10-0.18 W/m3, which indicates decent thermal insulation qualities of the material.
The disadvantages of expanded clay include its tendency to generate dust, which complicates installation work, and the significant weight of the thermal insulation layer.
How slowly the insulation absorbs moisture, the longer it takes for it to be freed from it. Therefore, when laying expanded clay, it is necessary to provide in advance options for its vapor and moisture protection.
Insulation of the foundation from the inside
Before insulating the base of a building from the inside, you should carefully prepare the insulated surface:
- seal cracks, holes, crevices;
- apply a layer of frost-resistant waterproofing;
- wrap it in a layer of vapor barrier, permeable only from the side of the house.
After the preparation has been completed, you can begin to select the insulating material and installation technology. There are three main types of insulation:
- expanded clay;
- backfill soil;
- foam panels.
The most affordable and easy to implement options are soil and expanded clay. They should be poured into the sinuses of the foundation. The only drawback of this type of insulation is that it will be impossible to inspect or repair the subfloor. It should also be taken into account that the implementation of bulk thermal insulation is possible only in the open base of the building, without a basement.
The panel insulation procedure is performed as follows:
- glue the panels or strengthen them with thermal dowels;
- Fill the resulting seams with foam;
- stretch a reinforcing mesh made of fiberglass onto the panel;
- To increase the fire resistance of the finish, a layer of plaster should be applied over the mesh.
Naturally, this method of insulating the foundation from the inside is quite expensive, but much more effective.
The final stage is ventilation of the subfloor. To do this, it is necessary to leave vents (through holes) located on the same axis in the foundation wall. In winter, the holes must be sealed, and in warm periods they must be opened so that the condensate that has accumulated over the winter comes out of the underground.
General arrangement of external insulation of a wooden house
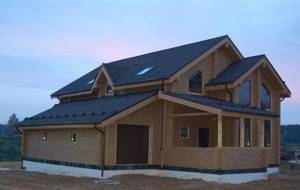
Two-story wooden house
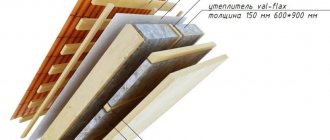
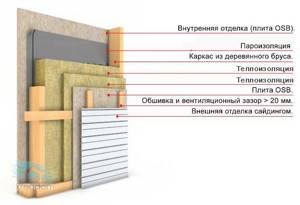
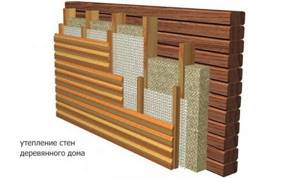
From the point of view of ensuring high-quality thermal insulation and preventing the appearance of dampness/condensation on the wall and in the insulation, the most preferable way to protect a house from the cold is to install a ventilated facade. Regardless of the material used, the design is a “layer cake” consisting of the following elements:
- load-bearing wall of a house made of timber or logs;
- frame for insulation, created from timber or metal profiles;
- a layer of thermal insulation material and fasteners for it;
- windproof membrane film or windproof board;
- lathing for external finishing;
- exterior decoration of the house.
At the same time, a ventilation gap is formed between the insulation and the external finishing of the wooden house due to the sheathing, which ensures effective drainage and reduces the risk of condensation and dampness.
Insulation of a wall made of wooden beams. In the figure you can see all the elements of the ventilated facade - insulation, frame for it, windproof membrane, lathing for finishing and the cladding itself, represented by clapboard
Important! Separately, it is worth paying attention to such an issue as the presence of a vapor barrier film between the wooden wall and the insulation. This film has been the subject of controversy for quite some time. Some craftsmen argue that a vapor barrier between the wall and the insulation is necessary, otherwise the thermal insulation material will quickly become damp due to moisture coming from the house. Others are of the opposite opinion and say that the vapor barrier will disrupt the removal of moisture from the walls of the house, condensation will appear between it and the insulation, and then mold. Taking into account both of these opinions, we can say that it is possible to install a film to protect thermal insulation material from dampness, but only if there is good ventilation in the house and a gap between the vapor barrier and the wooden wall.
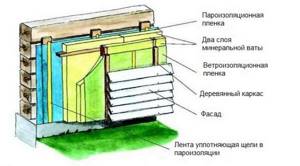
Scheme for insulating a wooden house using a vapor barrier film. You may notice that there is a small gap between it and the wall.
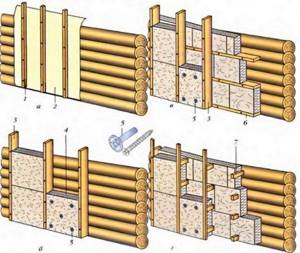
Various methods of attaching insulation to a log wall: a) – roll insulation, fixed using slats; b) – single-layer thermal insulation, fixed to a frame made of timber; c) two-layer thermal insulation fixed on a double sheathing; d) two-layer thermal insulation, fixed to the frame with brackets
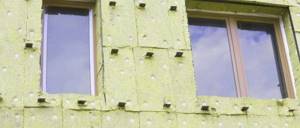
Fastening thermal insulation to metal brackets and disc dowels
External insulation of a wooden house made of timber
Before you begin covering a log house or log house, you should carefully prepare the surface. This is especially true for old log walls, which need to be caulked in order to close all the cracks. For obvious reasons, it is impossible to insulate a wooden house from the outside using a “wet” method, so timber sheathing is attached to the walls. Its width should be equal to the thickness of the insulation. The interval between the beams is also selected depending on the width of the roll or thermal insulation slab.
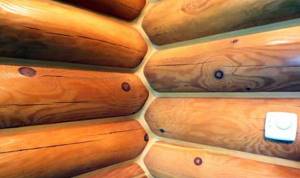
For reference. Sometimes it happens that before insulating the external structures of a log house, it is necessary to cut off the protruding crowns of logs at the corners of the house. Bypassing them with a system of slats and finishing is very problematic.
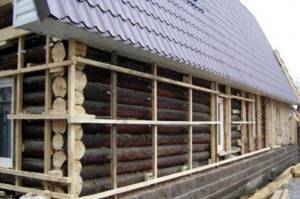
A vapor barrier - a thick polyethylene film - is laid under the beams over the entire area of the wall of the house. At the joints, the film is placed with an overlap of at least 100 mm, after which it is taped along the entire length with construction tape. It’s good when the joint falls under the sheathing beam, then it is additionally pressed against the surface.
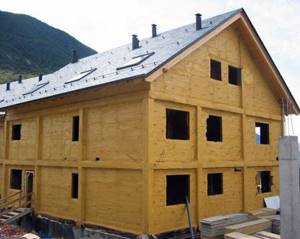
At the next stage, insulation is laid between the slats and fixed in a convenient way, using the same dowel umbrellas, only plastic ones. After which the film is stretched over the entire area again, but not the usual one, but one that allows vapors to pass through. It is called a diffusion membrane and protects the thermal insulation from wind and direct ingress of water (wind-hydrobarrier). In this case, the water vapor formed in the insulation from the appearance of the dew point has the opportunity to escape through the membrane to the outside.
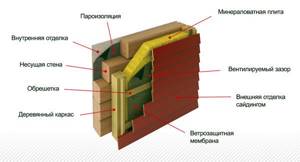
In order to ensure the removal of moisture from the outer part of the membrane, a vent is installed between it and the lining - a ventilated air layer. To do this, the wind barrier film (membrane) is nailed to the sheathing bars with strips 3-5 cm wide, and siding or block house is attached to them. By the way, the walls of the attic are sheathed in a similar way, only on the inside. What a proper insulation pie, installed with your own hands, looks like is shown in the diagram:
Types of insulation - which is better?
For proper internal insulation of a wooden house, insulation materials are used that, while maintaining thermal insulation properties, do not cause an unpleasant odor over time, are fireproof and environmentally friendly.
The most common options for internal insulation are:
- mineral basalt wool . It is the most popular material for wall insulation. The features of this material are: good thermal insulation properties, high level of sound insulation, fire resistance, strength, high hygroscopicity, due to which it is necessary to install piping from vapor barrier films;
- foam boards . Because the material can release styrene, extruded polystyrene foam is used, which requires a containment system. The material has good thermal insulation, has soundproofing properties, however, it is quite fragile;
- glass wool It has greater thermal conductivity than mineral wool, but the price of the material is significantly lower than basalt slabs. The material crumbles a lot, so it should be laid in protective equipment: crumbs of material are harmful to health. In addition, it is necessary to install enclosing structures;
- isoplat . Insulation, which consists of compressed flax fibers and wood board. An ideal thermal insulation material from the point of view of environmental friendliness, and also durable enough that it does not require the installation of fencing systems;
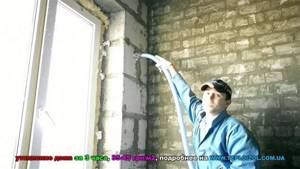
- polyurethane foam , which is installed by spraying it onto the surface, is installed using special equipment. Modern and quite expensive material.
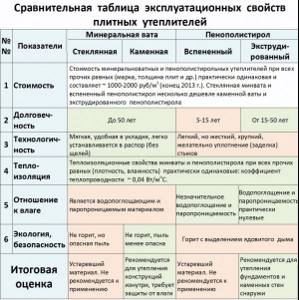
Comparative characteristics of thermal insulation
The type of insulation should be chosen based on the characteristics of the building, climatic conditions, and the purpose of the building.
Do-it-yourself insulation of walls from the inside using polystyrene foam
The installation technique with polystyrene foam is quite simple, and if done correctly, it can provide reliable thermal insulation in the house.
Insulation with expanded polystyrene occurs in several stages:
- if the walls are made of round logs, then they need to be trimmed;
- between the lathing slats, panels of material are placed in a tight fit;
- the slabs can be additionally secured with foam blades;
- eliminate possible gaps using polyurethane foam.
Next, a vapor barrier is attached to the sheathing slats.
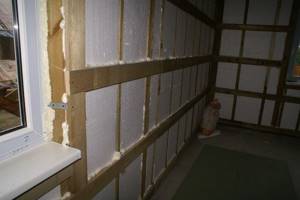
Insulation with polystyrene foam
How to avoid mistakes when insulating walls?
The cause of all errors is a lack of information about the technology and a poor understanding of the meaning of the actions performed. Therefore, you should study the issue as completely as possible, find out all the nuances of vaporization and finding the dew point.
In addition, it is necessary to carefully analyze the technological processes used to insulate walls in given conditions and on a given material, clarify all weak points and find out the most effective ways to eliminate them. Only after this should work begin.
What material is best for wall insulation?
The choice of the most successful insulation largely depends on the general climatic and atmospheric characteristics of the region, as well as on the wall material . The main selection criterion is the ratio of the vapor conductivity of the wall and the insulation, ensuring the unhindered passage of steam from one layer to another without the formation of accumulations or barriers.
Compliance with this condition guarantees high-quality work of the wall pie, durability, and preservation of the properties of wall materials and insulation.
Let's look at the most common wall options:
Foam concrete
This porous material easily conducts steam and absorbs moisture. Such properties determine the choice of insulation that can easily transmit steam - mineral wool . At the same time, it is necessary to provide high-quality external vapor and water protection, ensuring the removal of vapors to the outside and preventing moisture from penetrating inside.
The best choice would be a single-acting waterproof membrane.
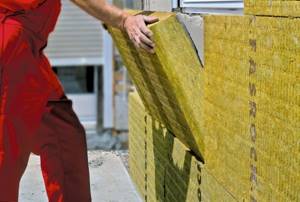
Insulation of foam concrete walls with mineral wool
Wooden
From the point of view of insulation, wood is itself a reliable insulation material . In this case, the risky areas are the joints of logs or beams, connecting planes and corner joints. The meaning of the entire procedure in this case is transferred to the plane of waterproofing and cutting off cracks.
Therefore, both mineral wool and polystyrene foam can be used as insulation , although in any case careful preparation of surfaces and, in particular, sealing of all cracks will be required. Without this, a positive result is not guaranteed.
From time immemorial, Russian huts were saved by the presence of stove heating - the draft carried away excess particles of steam, and the kindling mode contributed to this. Currently, high-quality ventilation of premises is required.
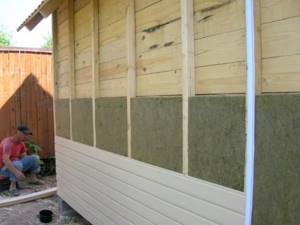
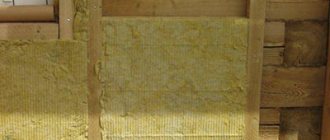
Insulation of wooden walls with mineral wool
Brick
Brick is the most dense material; of these, it is least capable of transmitting water vapor . At the same time, having maximum density, brick has a fairly high thermal conductivity and easily transfers heat to the environment.
Therefore, the most effective thermal insulator is required, capable of retaining heat and protecting the wall from external influences. The recommended material can be mineral wool, polyurethane foam or foam plastic (expanded polystyrene) , moreover, mineral wool will require waterproofing, and polystyrene foam will create a risk of moisture accumulation on the outer wall-insulation boundary.
Some experts do not recommend using PPS for outdoor work at all, explaining this by its impermeability to steam, but in practice there are quite successful options.
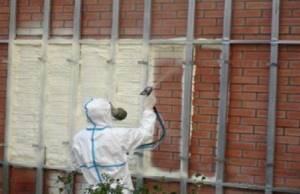
Thermal insulation using polyurethane foam
