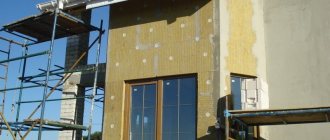
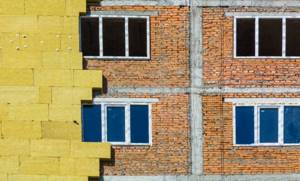
Since the climate in most of our country is clearly not Californian, placing insulation under the plaster is not only practical, but also profitable. How to create a “wet façade” for a homeowner is described in a separate article. Here we will consider which insulation is better to use under facade plaster in various conditions when insulating a house.
Why insulate the facade?
Sometimes several goals can be achieved with one technique.
Placing facade insulation under plaster allows you to achieve:
- effective heat conservation inside the building, and, consequently, saving energy and heating costs, creating comfortable, gentle conditions for residents;
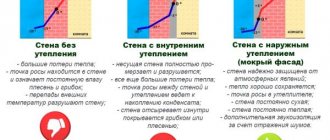
- remove the place of active loss and sedimentation of condensing moisture from inside the wall material beyond their limits, which protects the walls from dampness and destruction, extends the service life of the structure;
- perform decorative design of the “exterior” of the building.
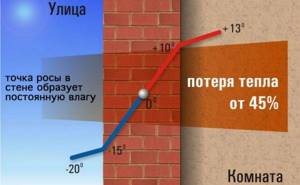
dew point
In accordance with the second task, it is less rational to do plaster on insulation for internal walls than in the case of facade insulation.
However, there are situations when insulation from the inside is the only option (for example, according to local legislation).
Recommended brands of thermal insulation material
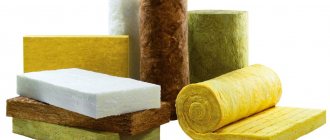
In almost 100% of cases, users choose mineral wool to insulate a ventilated façade. The following material parameters are preferred:
- vapor permeability - from 0.1 to 0.3 mg/m*h*Pa;
- density - 50-100 kg/cubic. m;
- these should be slabs, not rolls.
Why are foam plastic or polystyrene not the best option for a ventilation façade? Its average vapor permeability is 0.3-0.5 mg/m*h*Pa, and its density is much lower than recommended.
A list of some suitable grades of mineral wool is given below:
- "BasWool) Vent Facade";
- "HitRoc) Vent" (basalt material);
- "IsoRoc", series "Isovent" and "Isovent-L";
- "TermoLife (TermoLife) Vent Facade";
- "Izovol B";
- "RockWool) VentiRock";
- “URSA (URSA)”, brands M-25 G, P-30 G, as well as with the number 35, 45, 60, 75 in the name.
How to calculate the thickness of insulation
To perform the calculations you need to know a little theory. Thermal conductivity was mentioned above. To explain in clear language, let’s give an analogy with filters. The throughput of a product is the volume of water seeping through a unit area over a period of time, for example, an hour. If, instead of water, we imagine heat flowing linearly from a room through a wall (of unit thickness) per unit time, we will get an idea of what the thermal conductivity coefficient means.
Knowing the parameters, for example, wall thickness, temperature difference in the house and “outside”, thermal conductivity coefficient (W*m/K), we can calculate heat loss. Or, on the contrary, calculate how thick the wall should be so that the heat loss is not higher than desired. To do this, there is a formula for calculating thermal resistance, which is the inverse of thermal conductivity. The formula takes into account the fact that the wall is like a layer cake, because there are several layers of different thermal conductivity in succession along the heat leakage path, and takes into account the thickness of each layer.
We carry out the calculation using the formulas in the same order.
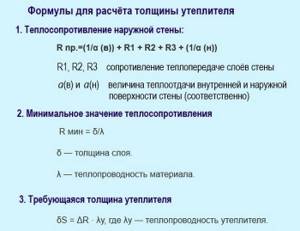
formulas for calculating the thickness of insulation
Having determined the total resistance of all layers (of which there may be more than 3), we calculate R min. Compare R pr and R min. If R min does not exceed R pr, there is no need to insulate the wall. If it is more, then we calculate the difference by subtracting from R min – R pr, obtaining ΔR.
This technique is quite complicated, since you need to find the unit values for the construction region in the standards. Therefore, they usually use online calculators.
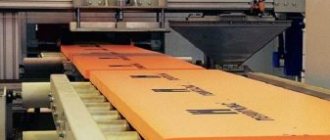
Technical and operational characteristics of basalt wool
The material is produced in production by melting gabbro-basalt rocks at a temperature of 1500 °C. The liquid lava-like mass is pulled into long fibers using special equipment. Next, water-repellent additives and plasticizers are added. The material is polymerized and cut into rolls or slabs.
The result is a material with the following characteristics:
- thermal conductivity coefficient - 0.035-0.039 W/m·C;
- sound insulation level - 0.9-99 dB;
- use temperature range - from -190 °C to +1000 °C;
- the material is not flammable, its fibers are hydrophobic.
The service life of basalt wool can reach 80 years.
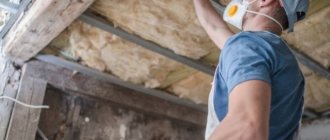
Important! The material is hygroscopic (accumulates moisture between the fibers), therefore, when installing structures using any mineral wool, special attention must be paid to its vapor barrier.
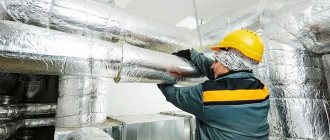
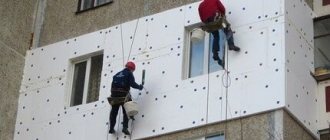
Installation of insulation
Optimal conditions for installation production:
- temperature +5 – +30оС;
- calm;
- lack of precipitation;
- the place is shaded if the side of the house is illuminated by direct sunlight.
Since masters and beginners often use mineral wool or polystyrene foam to plaster facades, we describe their installation.
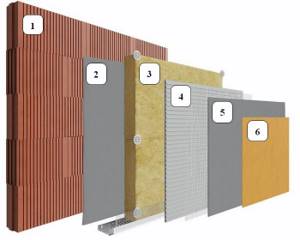
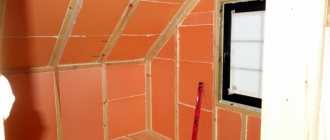
house insulation under plaster layers
Layers of plaster:
- Wall
- Leveling layer of plaster
- Insulation
- Net
- Top layer of plaster
- Decorative finishing
The characteristics of these materials are similar, the installation procedure is the same:
- purchase and prepare the required materials in reserve;
- the walls are being prepared for installation;
- install thermal insulation slabs;
- prepare a solution;
- perform reinforcement;
- prime the reinforced plaster layer;
- perform finishing work.
A detailed description of the technology is presented in the article about “wet plaster”. Here we will outline only the main milestones.
Preparation of materials
We stock up on all the necessary materials in advance.
We purchase:
- adhesive for insulation (corresponding to both the insulation and wall materials);
- primers (for the wall and for the reinforced plaster layer, compositions may be different);
- selected insulation (in the case of exterior finishing of the house, choose polystyrene foam marked F (for facades);
- mesh fabric (fiberglass or metal);
- plaster mixtures (basic for creating a “shell”, decorative for finishing);
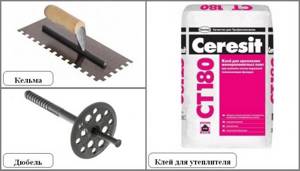
tools and materials for installing insulation
We also stock:
- corners equipped with mesh on the sides;
- base guide profile (U-shaped);
- dowel-fungi (we select the length according to the thickness of the insulation boards).
Immediately before working with adhesive or plaster compositions, prepare the mixture according to the instructions.
Preparing walls for installation of insulation
This stage of work is reminiscent of preparing the walls of a house for plastering:
- the outdated coating of the plaster facade is removed, leaving only what is firmly, firmly held, and the plaster is washed off;
- the surface is inspected;
- cut down nodules and protrusions;
- clean from grease, rust, moldy stains and soot;
- remove excess hardware, hide wiring in grooves;
- grooves, masonry, interblock seams are covered with glue-foam;
- cracks and potholes are repaired;
- remove dust;
- if necessary, level the surface (prime, plaster);
- seal frames and window blocks with film;
- apply a primer;
- dried.
For the above and subsequent works, reliable scaffolding is installed. Organize a place for preparing solutions (glue, plaster), as well as for cutting slabs. Mark the surface. Mount the basement profile at a height of up to 60 cm above the ground surface, but 30 cm lower than the level of the 1st floor floor slab.
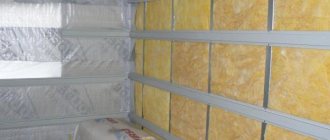
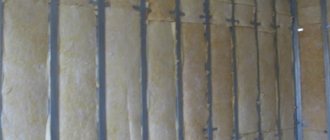
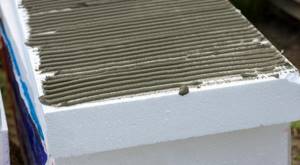
Installation of insulation
We begin to install the insulation for the facade under plaster by applying adhesive mass to the sheets and gluing the sheets of the first row (from the end of the building). We apply the adhesive mass completely (if the wall surface is flat) or in several flat cakes (diameter about 20 cm) and a strip along the perimeter of the sheet with an indentation of 2-3 cm from the edge (if the wall is not flat enough). For continuous spreading, use a notched spatula or trowel.
We place the “lubricated” slab, pressing it to the base so that the glue “sticks”, move the insulation to the side and return it to its place. Then the glue will be evenly distributed in the gap between the wall and the base. We remove the mass of glue that has protruded along the edges with a spatula, smearing the places where there is no glue under the edges of the slab.
We join each next slab with the previous one, pushing it tightly until the ends meet. If gaps form, tightly fill the empty spaces with scraps of insulation. If you cover the gaps with adhesive, cold bridges will form, which should not be allowed.
Sheets in adjacent rows are glued, observing the dressing rules.
The slabs can be moved for some time until the glue has set. This period is used to adjust and correct the position of the insulation so that the surface of the slabs forms a flat plane. Checking and adjustment is carried out with a wooden block or rule.
Having finished covering the facade of the house with sheets of insulation, wait 3 days until the glue hardens. Then each plate is additionally fixed to the wall with dowels so that the sheet is pressed at five points. You can fix the corners of adjacent slabs with one mushroom. The mushroom cap should be “buried” in the slab by 1 mm, and protected from moisture on top with a spread solution.
Reinforcement
A layer of plaster or adhesive mortar is applied with a spatula to the previously primed surface of the insulation (if glue is chosen for the reinforcing layer). Line the surface with a notched spatula and apply a mesh sheet, straightening it out. Using a regular spatula over the mesh, press the reinforced fabric into the solution.
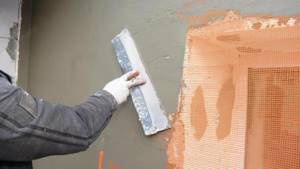
insulation reinforcement
In a mesh “garment”, gaps and end-to-end joining of the sheets are unacceptable. Adjacent pieces of mesh are joined with an overlap of 10 cm. For corners, profile corners are used. Correctly executed reinforcement will create a strong “shell” that holds in such a way that when torn off, the mesh comes off along the insulation, and not at the joint.
Types of plaster for insulation
For the exterior finishing of walls insulated in this way, decorative plastering is most often used. In this case, a plaster is selected for the plaster coating, which should not chemically conflict with the composition of the “shell” and the insulation material. The plastering process is similar to applying mortar to a regular wall prepared for plastering. The applied layer will be (in relation to the insulated layer) external, therefore, in addition to decorative functions, it must perform a protective one.
In order to plaster the insulated surface of external walls, the following mixtures are suitable:
- Mineral (neutral in relation to the listed insulation materials, but corrodes the plastic mesh). To create a “shell”, fiberglass or metal reinforcement is used. Internal stresses arising during shrinkage of cement plaster can lead to damage to the heat-saving “pie”. Therefore, high-strength foam plastic (marked above 35) or penoplex is chosen as insulation for plaster.
- Acrylic is suitable for any mesh. The inconvenience of having to quickly plaster the entire wall without interruption. After any break, color marks will appear on the wall at the junction of the dried and fresh mixtures.
- The only complaint about polymer plaster will be the cost of the mixture.
- Silicone is also not cheap, very elastic, does not fade, and does not conflict. However, compositions with silicone-based stone chips should not be used for weak mineral wool slabs. If you want to try it, make the reinforcement more powerful by taking a fine-mesh metal mesh.
Disadvantages of basalt wool and ways to eliminate them
Like any other building material, stone wool has a number of disadvantages, which can be mitigated if certain installation rules are followed.
The main weak point of basalt wool is its hygroscopicity, i.e. ability to absorb moisture. A material filled with water loses its thermal insulation properties. That is why, when installing basalt wool, significant attention should be paid to the vapor and waterproofing of structures using it.
To improve hydrophobicity, a foil version is often used. However, it is worth considering that foiling using the adhesive method leads to a decrease in fire resistance. Therefore, when using the material in conditions of elevated temperatures, it is recommended to use pierced basalt mats, where the foil is attached to the basalt wool using galvanized wire.
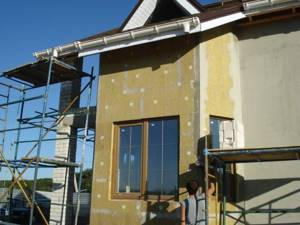
Plastering technology of the selected insulation
The plastering process begins after waiting for the reinforced layer to completely dry. As in the case of preparing walls for plaster, the surface is primed in two passes. The plaster layer is applied with a trowel or spatula, following the technique used to create a decorative coating with the selected effect, for example, for bark beetles, “rolling” filler grains is done.
If you plan to paint the house, then the plaster is leveled and smoothed, or puttied.
You can insulate a house not only by using warm plaster, but also by installing a “wet facade”. Having become familiar with the types of insulation suitable for this scheme, having correctly chosen the desired material, also pay attention to all the work involved in the complex, in its own way, process of insulation. Only in this case will the heat of your hearth be effectively conserved, and the walls will be protected.
Pros and cons of using mineral wool for external thermal insulation of a house
The popularity of insulation is primarily due to:
- low thermal conductivity of the material, and therefore high thermal insulation characteristics;
- excellent sound insulation;
- good level of fire safety (after all, mineral wool does not support combustion);
- vapor permeability (provides “breathing” of the house, which is especially important if the house is not wooden, but stone);
- resistance to fungi and rodents;
- relative environmental friendliness and safety of the material (harmful substances are released only when heated to more than 300 ° C);
- simplicity of installation technology.
Thermal insulation of the facade using mineral wool can be done independently.
As disadvantages, it is worth noting:
- change in the volume of insulation and the appearance of cracks in it (occurs only when there is no reinforcing layer);
- If mineral wool is not treated with a hydrophobic solution, all its thermal insulation characteristics will come to naught, because it almost instantly absorbs moisture.
Briefly about the main thing
Mineral wool is an air-structured fibrous material produced by air centrifuging molten rock, slag and glass. It is widely used for heat and sound insulation of walls, partitions, ceilings, communications, equipment and structures.
Based on the type of mineral wool raw material, there are 3 varieties:
- Stone.
- Slag.
- Glass.
Each of them has its own pros, cons and purpose. The material is produced in the form of slabs and mat-rolls. The main advantages of mineral wool are resistance to fire, dampness and biological factors, and durability. Disadvantages - high cost and possible destruction of the structure over time. When laying, it is necessary to take into account which side the installation is being carried out on - from the inside or outside, where the dew point will be located and what the thickness of the heat-insulating layer should be.
Ratings 0
Dimensions, shape
Modern manufacturers package tepid wool in two main forms:
- Rolls or mats. The length of the product is 7-10 m, width 120 cm, thickness – 50 mm. The density of the material is quite low. This is due to the purpose of the rolls - for finishing floors, roofs, partitions and other non-load-bearing structures.
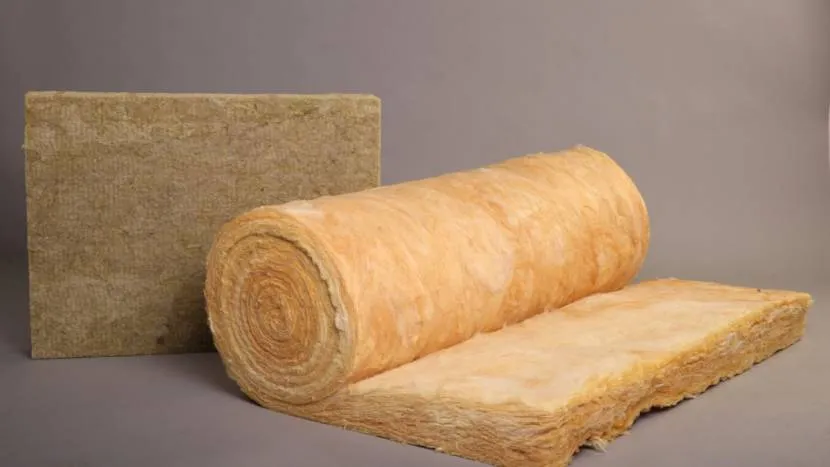
Mineral wool slabs and rolls for thermal insulation of walls Source o-cemente.info
- Plates. Standard dimensions are 120 x 60 cm, width 5-10 cm. Density is medium or high. Designed for installation in hard-to-reach places and structural elements with loads.
Good to know! The main advantage of mineral wool as insulation for wooden walls is the unhindered transmission of water vapor. This allows you to maintain the natural microclimate in the house. However, before laying the material, the wood surface must be treated with antiseptic compounds to avoid the formation of mold and fungi due to possible accumulation of dampness.