Insulation problem
Thus, each person releases on average about 100 grams of water vapor per hour when breathing, which is 2400 grams per day. In addition, steam is generated as a result of everyday activities - washing, drying clothes, cooking, taking water procedures (about 3000 grams in total).
In total, per day of living in a house, a family of 3 releases more than 10 liters of water into the air. If this moisture is not removed outside the house, it can condense on building structures and roofing. Moisture saturation also harms the building’s insulation, reduces its efficiency, increasing thermal conductivity.
Moisture that is not removed from building structures in a timely manner promotes the proliferation of mold fungi and putrefactive bacteria, house dust mites and other pests. Gradually, the walls are destroyed, mold spores are released into the air of the interior space, and the atmosphere in the rooms becomes harmful to health.
How to protect your home from excess moisture?
There are several ways to protect your home from the harmful effects of water vapor. Firstly, ensuring good ventilation, in which moist indoor air will be constantly released into the street, and fresh, drier air will begin to replace it.
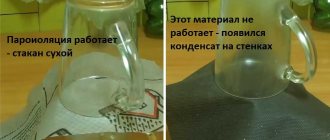
Secondly, the use of water- and vapor-tight barriers that do not allow moisture to pass through, but allow it to slowly evaporate.
With this method of protection, water does not get into the insulation and onto the walls, and the resulting condensate evaporates directly from the protective coating.
What is Izospan?
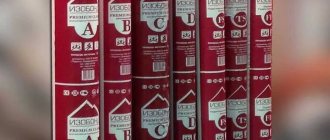
Among the materials presented on the construction market, the leading role is played by the products of Hexa - Nonwoven Materials LLC, produced under the Izospan trademark. The company has its own production base in Russia, not far from Tver, and operates a research laboratory.
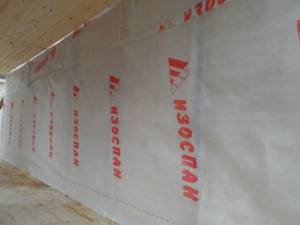
Izospan materials are special films and membranes made using modern polymer materials and having special properties. The thickness and strength of the films, their dimensions are selected in such a way as to make installation simple and convenient. The line of materials under the Izospan brand is represented by the following groups.
Ruler
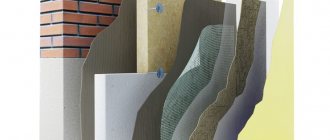
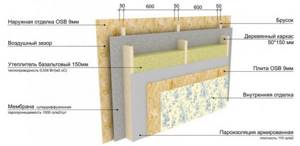
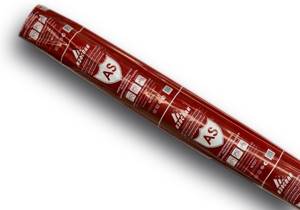
The first group is waterproofing membranes with properties of vapor permeability and resistance to wind loads. They are designed to protect buildings from external wind and rain. The property of vapor permeability allows moisture released by the walls of the house to evaporate into the external environment. Such materials are designated A, AF, AF+, AM, AQ proff, AS, A with OZD.
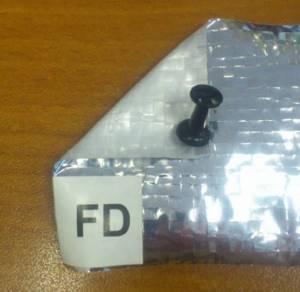
The second group is energy-saving heat, steam, and waterproofing materials. These are airtight films coated with metal foil, which reflects electromagnetic radiation in the infrared part of the spectrum. Due to this effect, more thermal energy remains in the room, and heating costs are reduced. Film designations - FS, FD, FX, FB. Materials of this group can be used for saunas and steam baths.
The third group is waterproof vapor barrier film materials. They perform two main functions: the first is to protect the wall insulation from condensation and the penetration of moisture into it from the rooms of the house, the second is to isolate the interior of the home from harmful emissions of insulation and walls (for example, mineral wool fibers, cement dust from concrete blocks). Their designations are RS, B, C, D, RM, DM.
The fourth group is tape connecting materials. Designed to eliminate leaks at the junctions of films and membranes. Presented under the designations KL, KL+, SL, FL, FL termo, ML proff, SUL.
Recommendations and common mistakes
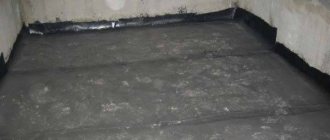
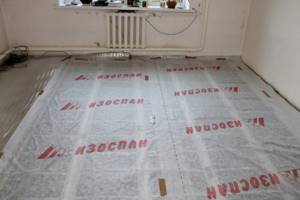
When laid on concrete, isospan acts as a vapor barrier, since almost any screed has good waterproofing characteristics. However, the manufacturer recommends following the accepted rules for installing the canvas.
Advice! In order not to completely get confused with the orientation of the material when laying the floor in a wooden house, lay the canvas with the printed logo facing up.
The biggest mistake is skimping on connecting tape. Instead, they try to lay the canvases with glue or stitch them with a stapler. This cannot be done, since in a wooden house the floor experiences significant loads, and even when poured into the screed, the edges will certainly separate.
Another mistake is the wrong choice of a suitable material; if in doubt, it is best to buy grades D or FD; the strength of the multilayer membrane is sufficient with a margin.
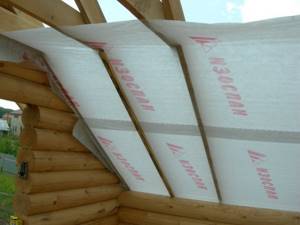
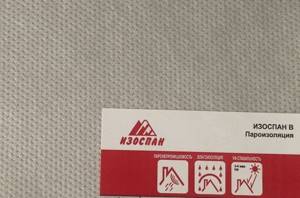
Izospan B: description and application
To prevent moisture and water vapor from entering insulating coatings and walls from the internal volumes of the house, Izospan V is used. Its structure allows you to create a kind of barrier for steam: a surface for collecting and ensuring gradual evaporation of condensate. Another property of Izospan B is the protection of the air in the house from the penetration of particles from insulation and wall materials.
Scope of application are:
- internal surfaces of walls and ceilings in attics and attic floors;
- internal surfaces of living room walls made of any material;
- surfaces of interfloor and basement floors.
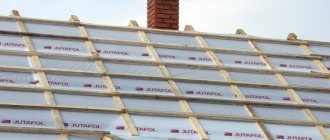
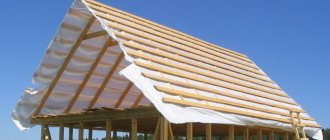
Installation of isospan when installing roof coverings
This situation differs from the previous one in that above the coating there is an external environment with all the accompanying factors - wind, rain, snow, etc. In addition, when choosing the type of isospan in this case, you should also take into account the roof structure, which can be flat or sloped.
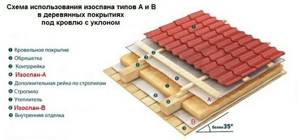
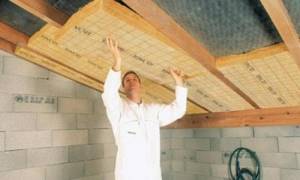
Vapor protection of a wooden ceiling under a roof with a slope
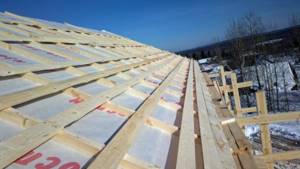
Wooden slats with a cross-section of approximately 3x6 cm are placed across the roof rafters from below in increments of 0.5 m, on which soft insulation is laid on top. An additional sheathing of slats is placed on top of the insulation in order to lay a vapor barrier made of isospan-A on it. A-class isospan is designed to protect insulation and roof structures from wind, snow and rain, but its smooth surface is not laminated, as it is intended for use on roofs with a slope of more than 35 degrees, at which water drops roll down. Additional sheathing is performed to ensure this slope angle, so that such a film does not sag over time and does not let water through into the insulation.
It is spread over the sheathing and isospan-A is attached to it according to the method described above. Next, counter battens are sewn along the rafters, on top of which the sheathing for the outer roof covering is mounted.
On the inside of the covering, an isospan-B vapor barrier is spread and stapled onto transverse slats with a cross-section of 3x6 cm, on top of which the interior siding trim is mounted in the direction perpendicular to the location of the bars.
Thus, the soft insulation is insulated on both sides with different types of isospan, also providing a double-sided ventilation gap:
- Izospan-A protects insulation and structures from wind, sub-roof condensation, rain and snow, without preventing moisture from escaping in the opposite direction from the insulation and structural materials;
- Izospan-B insulates soft thermal insulation from moisture contained in the room air.
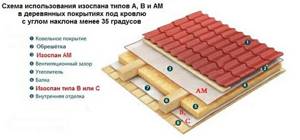
Vapor protection of a wooden ceiling under a flat roof
The design of the vapor barrier on the ceilings of this roof structure is somewhat different from the vapor barrier device of the previous type of coating. Since the smooth surface of isospan-AM is laminated, its strength and waterproofing characteristics are much higher than type A vapor barrier, therefore AM vapor barrier can be used when the roof slope is less than 35 degrees and even on flat bases. In this case, there is no need to install additional sheathing on top of the insulation - the strength of isospan-AM itself is sufficient, but for this it must be correctly laid, fastened and joined.
Structure and parameters
Structurally, Izospan B is a polypropylene film with one smooth side and the other covered with a thin rough layer of fibers of the same material.
The smooth sealed surface of the film creates an impenetrable barrier to steam and water, and the fibrous coating is an excellent collector of condensation, which will remain on the film and will not get into the insulation of walls and ceilings.
The effectiveness of this protective coating depends on which side of the film is adjacent to the building structures or insulation.
Izospan B has excellent performance characteristics:
- vapor permeability not less than 7 mg/(m•h•Pa);
- water resistance is not less than 1000 mm. aq. pillar;
- tensile strength of at least 25 N/cm;
- operating temperature range from -60 °C to +80 °C.

The film does not lose its properties from exposure to direct solar ultraviolet radiation for 4 months. Izospan B is produced in rolls, strips 1.4 and 1.6 meters wide and with a total area of 35 m2 and 70 m2. What width and area to choose the material depends on the geometric dimensions of the protected surfaces.
Tools and materials
To select the appropriate option, many film parameters are evaluated. The stronger it is, the longer it will last, and the more difficult areas it will protect. The higher the vapor permeability, the faster the moisture trapped in it will be removed from the insulation.
| Material | Density, g/sq. m | Vapor permeability, g/sq. m/day | Water resistance, mm. Water st | Temperature range, C |
| Izospan A | 70 | 22,4 | 330 | -60– 80 |
| Izospan B | 90 | 18,4 | 1000 | -60– 80 |
| Izospan C | 105 | 3,7 | 1000 | -60– 80 |
Adhesive tape for mounting Izospan
To install Izospan you will need the following tools and materials:
- Vapor barrier film in an amount corresponding to the area of the surface to be covered with a margin for overlap of the fabric.
- Stapler or flat slats for fixing the film.
- Nails and hammer.
- Mounting tape or metallized tape for processing joints.
General principles of application
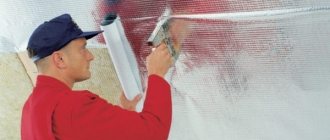
The film is laid from bottom to top with the strips overlapping each other by 10-15 cm. The joints of the strips are glued with tapes such as Izospan KL, KL+. Izospan B is always mounted with the smooth side facing the insulation. The places of contact between the sheets and laths of the sheathing, and the counter laths of the air gap are sealed with a special sealing tape. The tape is pressed with the self-adhesive side simultaneously against Izospan B and the abutment surfaces.
Areas connecting to windows, niches and openings for utilities (ventilation, sewerage, water supply) are sealed with Izospan ML proff tape material. The same tape is used to finish joints with concrete and wooden structural elements.
Installation plan
Installation of Izospan B has features depending on which element of the structure needs to be protected.
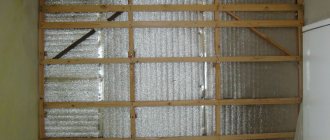
For attics and attic floors
The installation diagram is shown in Figure 1.
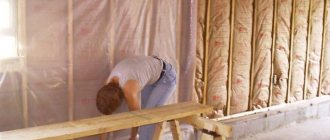
First you need to unroll the roll and cut the ribbons to size. To determine which size of panels is most convenient and economical for installation, it is necessary to measure and mark the walls and ceilings. Then you need to apply the first tape to the internal insulation of the attic or attic (from the ceiling side) with the smooth side and secure it.
The fastening method is chosen which is more convenient for the owner: it can be fastened with a construction stapler or on nails. The first tape in attics must be laid from below, parallel to the floor. For convenience, the tapes can be rolled into tubes with the desired side inward and unfolded as they are secured.
Next, you need to secure the following tapes in the same way, overlapping the previous one with an overlap of about 15 cm. Seal the joints with a special tape such as Izospan KL, KL+ and mount the lathing for cladding or finishing material on the coating. For ventilation and evaporation of possible condensation, the gap between Izospan B and the cladding should be 50 mm.
For interfloor ceilings
The installation diagram is shown in Figure 2:
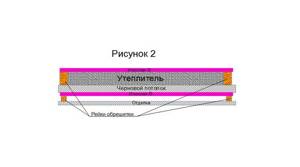
Installation proceeds as follows:
- Unroll the roll and cut the ribbons to size;
- secure the first tape with the rough side to the rough ceiling (floor) using a stapler or nails;
- fasten the remaining tapes parallel to the first, with an overlap of 150 mm;
- seal the joints for sealing with the appropriate tape of the Izospan family;
- install the sheathing and lay insulation.
Next, you will need to lay another layer of Izospan B with the smooth side facing the insulation, secure it to the sheathing and seal the joints.
On top of the insulation, it is necessary to provide a ventilation air gap (gap) of 50 mm using counter slats on which the finishing cladding can be installed.
Common technologies for vapor barrier of ceilings with isospan
Vapor barrier of the ceiling base is carried out using one or a combination of several types of this vapor barrier, and the installation of any isospan on the ceiling can be done independently. The individual characteristics of the varieties of this vapor barrier material are indicated on the packaging, which makes it easier to select the protection of the desired class. When selecting the right brand of isospan, it is necessary to take into account the functionality of the ceiling (basement, interfloor or attic), its material, type of insulation and operating conditions of the room. The location of the vapor barrier shell relative to the base and insulation is also of great importance, since a correctly executed vapor barrier is also based on the orientation of the material used.
How to lay isospan on a concrete ceiling
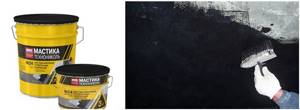
When repairing the ceiling, an intermediate operation, performed after leveling with cement mixtures and before insulating the base from the inside, is waterproofing - in case of leakage from above, if there are highways or plumbing fixtures on the floor above. A layer of waterproofing applied to the ceiling from the room side using a coating method (deep penetration composition or bitumen-based) will simultaneously perform the function of vapor barrier, which is mandatory when using soft insulation. The coating method of waterproofing, which is not difficult to implement, eliminates the need to lay a layer of isospan-A on the ceiling, the waterproofing properties of which are also lower.
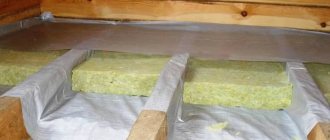
When installing thermal protection made of rigid insulation (polyurethane foam, expanded polystyrene) over waterproofing, there is no need to install a vapor barrier. But if mineral wool is used for insulation, especially when laid in a frameless manner (plastic fungi), then a vapor barrier is required - this insulation is hygroscopic and, in addition to reducing its thermal insulation qualities, will also “please” it by reducing its thermal insulation qualities.
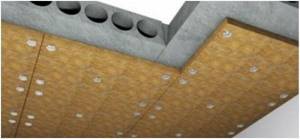
Soft insulation is mounted on a waterproofed ceiling using plastic mushrooms in such a way that the fastener caps press the thermal insulation layer along with a vapor barrier made of isospan-B to the concrete base. Izospan is laid in strips with an overlap of 15 cm over each other, and on the ceiling - 5-10 cm down, with the smooth side towards the insulation. The edges of the overlaps are glued longitudinally with self-adhesive Izospan tape of FL or SL brands.
On the ceiling, the location of insulation sheets with fungi is first marked so that the longitudinal rows of fasteners are arranged in even parallel rows with the same spacing. Wooden slats treated with a hydrophobic compound are installed along the longitudinal rows of fungi, attaching them to plastic caps using self-tapping screws. Decorative plastic panels or siding can be laid across longitudinally mounted slats.